After years of running workshops and selling my own work, I’ve learned one simple truth about crafting. Getting good isn’t about chasing a thousand trendy projects. It’s about truly understanding a few core materials—how they work, what they want to do, and what they resist. When you get that, you can make almost anything.
People always ask for the secrets or the quick tips. But honestly, the real secret is just a little patience and a bit of inside knowledge. So, this guide isn’t just a list of cute things to make. It’s a focused dive into three foundational projects that I teach to get beginners comfortable and confident. We’ll explore a yarn bowl, a polymer clay dish, and a ridiculously fluffy pom-pom rug.
Each one is designed to teach you something essential about the material itself. We’ll get our hands dirty, and I’ll share the same pro techniques and troubleshooting tricks I give my own students. Let’s do this the right way.
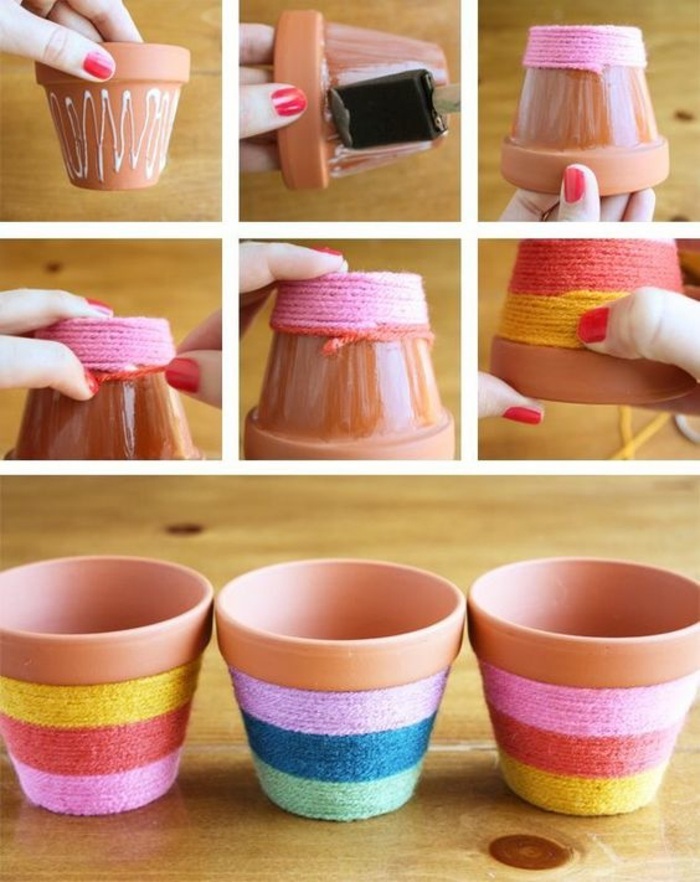
Project 1: The Stiffened Yarn Bowl
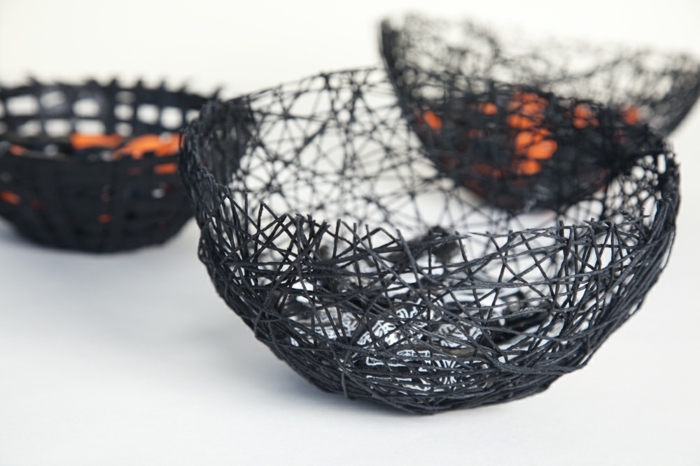
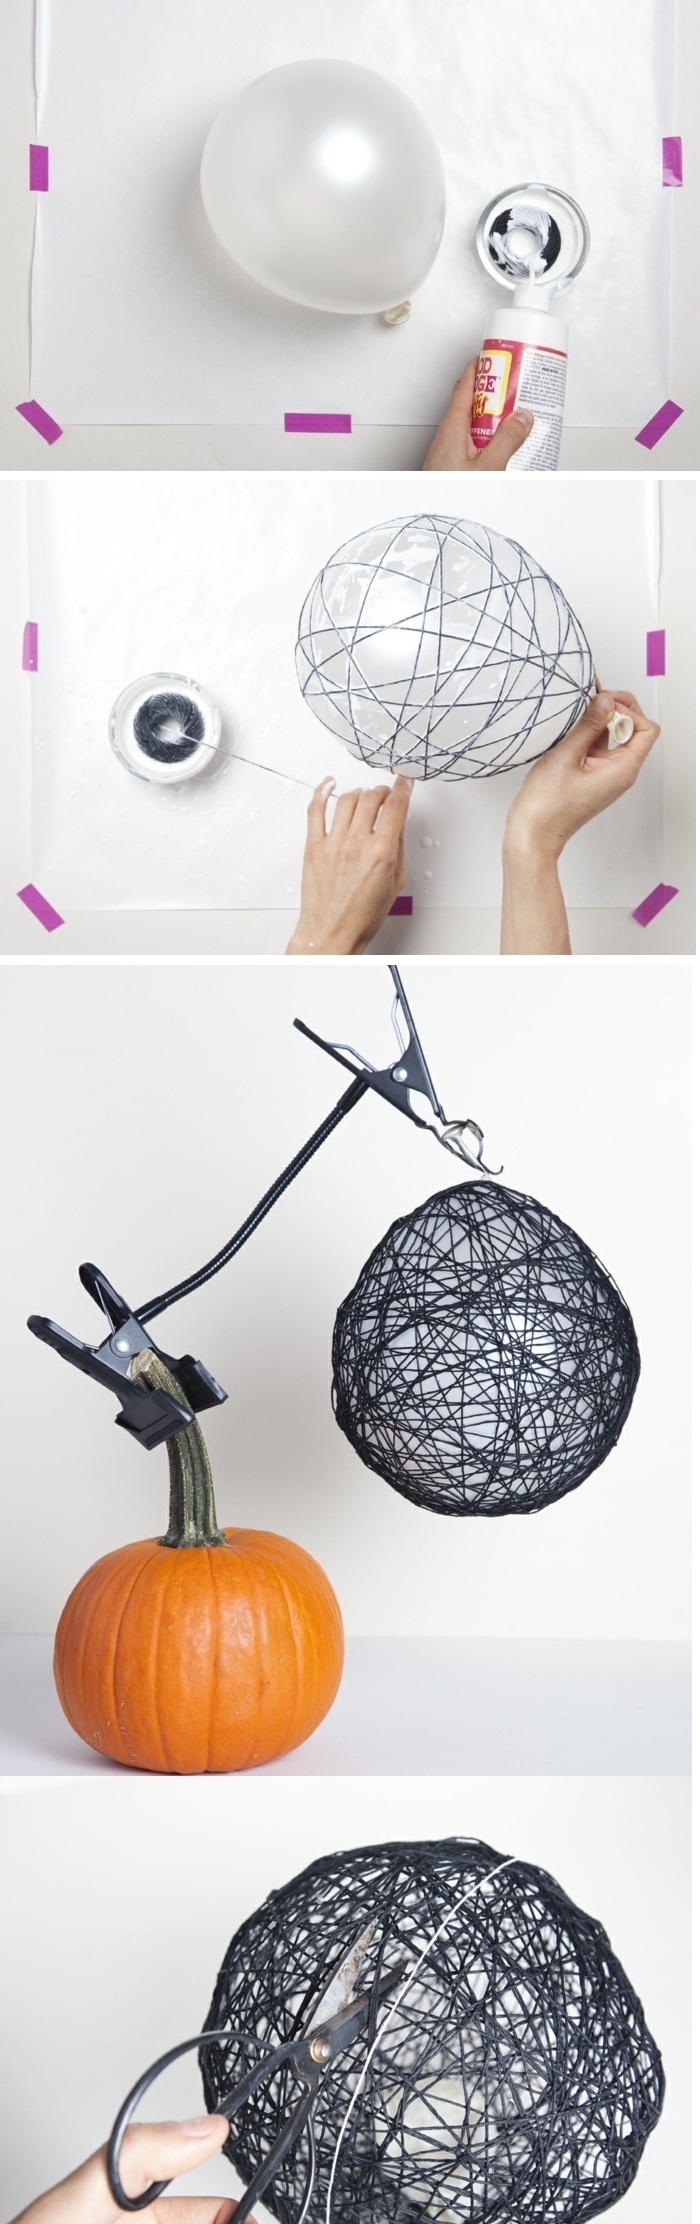
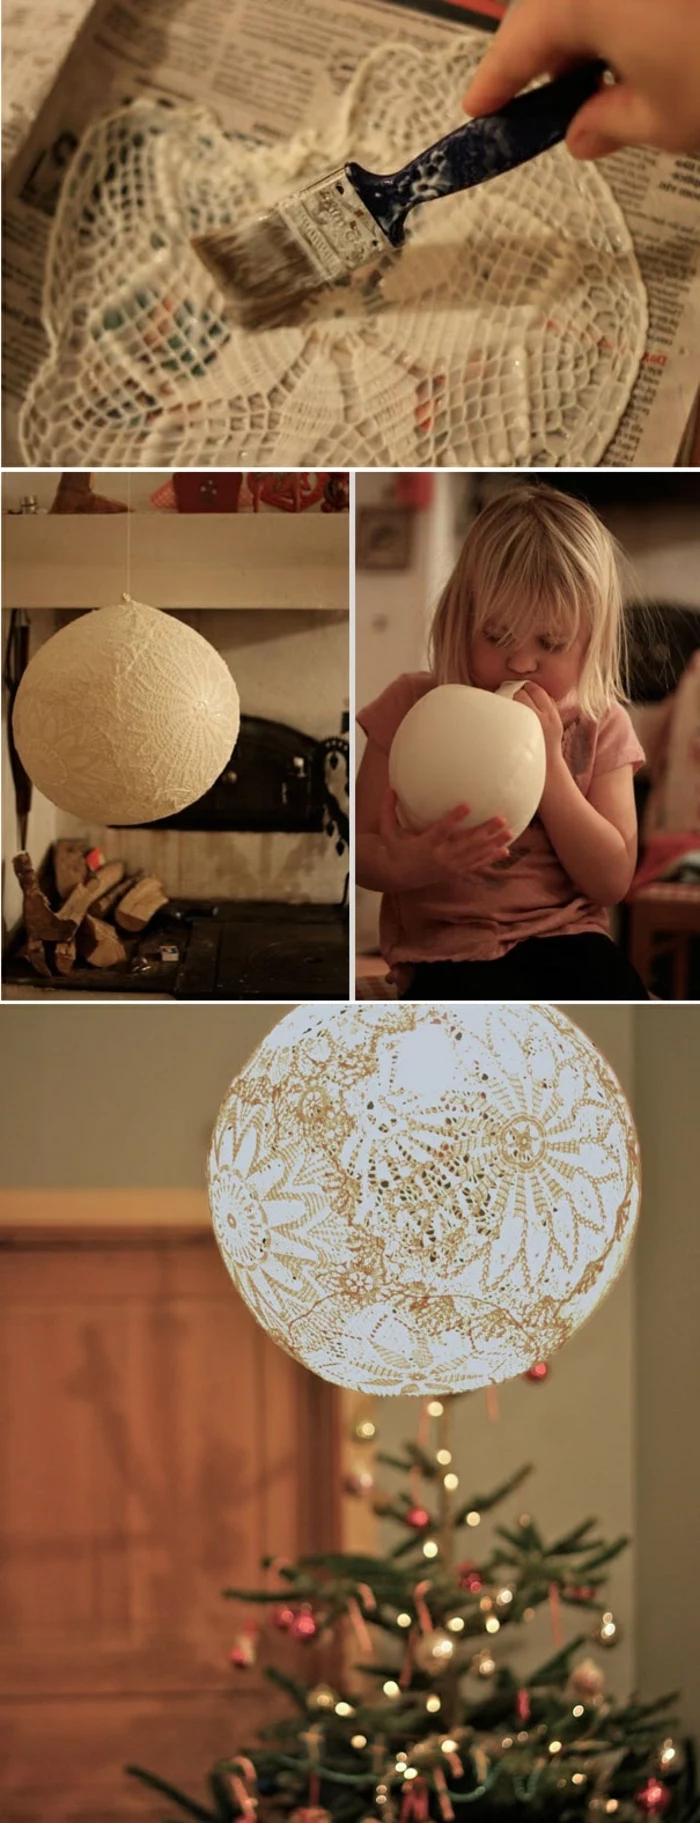
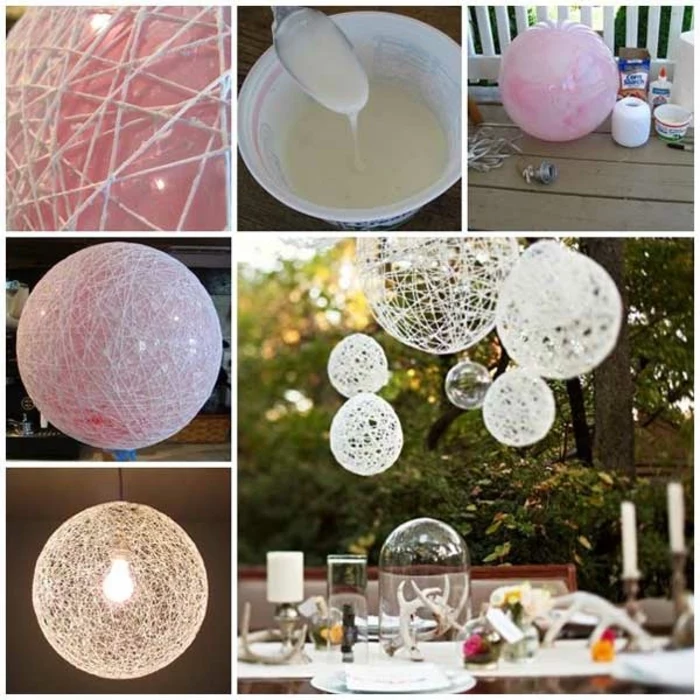
My first attempt at one of these involved a balloon and a fan to speed things up… I ended up with a shrunken, sticky web instead of a bowl. That’s how I learned patience is key and a solid form is non-negotiable! This project is a classic for a reason: it perfectly shows how a simple binder can turn soft yarn into a solid, structural piece.
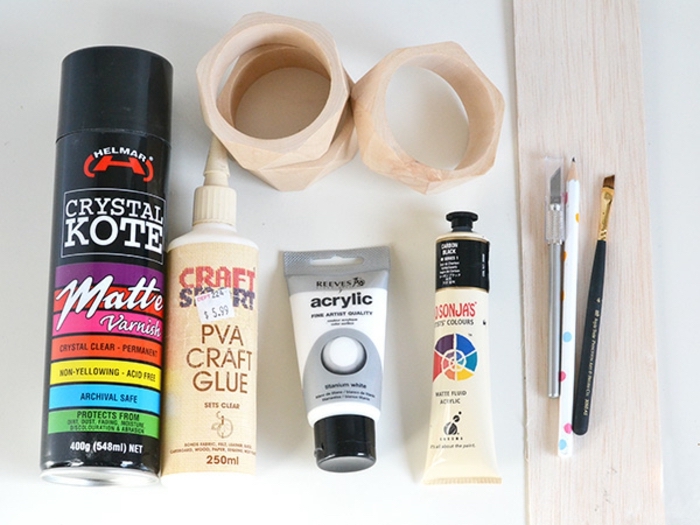
Yarn Bowl Shopping List (Est. Total Cost: $15 – $20)
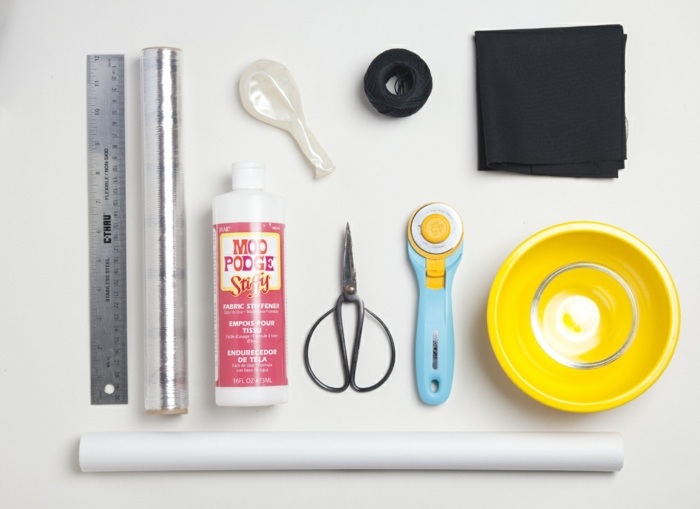
The Mold: A smooth ceramic or glass bowl, around 6-8 inches. Check a thrift store! You can usually find one for a couple of bucks.
Yarn: One skein of 100% cotton yarn. Look for a worsted weight with at least 150-200 yards. A basic brand like Lily Sugar’n Cream works perfectly and costs about $5-$8.
Glue: A good quality PVA glue like Aleene’s Tacky Glue or Elmer’s Glue-All. A medium bottle will run you about $4-$6.
Other Stuff: You’ll also need plastic wrap, scissors, a cheap paintbrush, and a cookie cooling rack for drying.
How It Works: The Magic of Glue
So, what’s happening here? Basic white glue is a water-based polymer. When you mix it into cotton yarn, the porous fibers soak it all up. As the water evaporates, those polymer molecules link together, hardening into a rigid, plastic-like grid with the yarn acting as a scaffold. This is why 100% cotton is great—it’s super absorbent. You can use acrylic yarn, but since it’s basically plastic, the glue just coats the outside and might peel later.
Step-by-Step to a Flawless Bowl
The hands-on part here will probably only take you about 30-45 minutes, but the drying is where patience comes in. Let’s move beyond the messy ‘dip and wrap’ you see online.
Prep Your Form: Turn your ceramic bowl upside down and cover the outside with two layers of plastic wrap. Pull it TIGHT. Every wrinkle you leave in the plastic will show up as an indent in your finished bowl. This is the #1 mistake I see people make.
Mix the Glue: In a small bowl, mix about 3 parts glue to 1 part water. You’re aiming for the consistency of heavy cream or pancake batter, not watery milk. Too much water makes the final bowl flimsy.
Saturate the Yarn: Cut your yarn into manageable pieces, maybe 4-5 feet long. Trying to dunk the whole skein at once is a recipe for a tangled, gluey disaster. Dip a piece of yarn in the glue, using your fingers to work it in until it’s fully saturated. Then, pull it between two fingers to squeegee off the excess. You want it wet, not dripping.
Wrap the Bowl: Start at the very top of your inverted bowl with a small, tight coil. This is your anchor. Now, wrap the yarn around and around, overlapping each layer slightly. Keep the tension snug but not so tight that you’re stretching the yarn.
Add Strength (Pro Tip!): For a sturdier bowl, I always add a second, cross-hatched layer. After your spiral is done, run new strands of yarn vertically from the lip, over the top, and down the other side. This creates a grid that adds a ton of structural integrity.
The Drying Game: Place the whole thing on a cooling rack so air can circulate on all sides. Let it dry naturally for at least 24 hours. If you live somewhere humid, it might take 48 hours. Don’t point a fan at it or put it near a heater—that can cause cracking. It’s ready when it’s totally hard and no longer cool to the touch.
The Big Reveal: Gently pry the edges of the yarn bowl away from the plastic wrap. It should pop right off! Peel the plastic wrap out from the inside, and let the inside air out for a few more hours. Snip any fuzzy bits with sharp scissors, and you’re done.
Quick Fixes & Next Steps
If your bowl feels a bit flimsy, don’t worry! You can usually save it. Just paint on another coat of your glue mixture and let it dry completely again. If you’re feeling ambitious, you can use this exact technique to make a cool lampshade. Just be sure to use an LED bulb that produces almost no heat. A hot incandescent bulb is a serious fire hazard here.
Project 2: The Marbled Polymer Clay Dish
Polymer clay is an amazing gateway to sculpture because it’s so forgiving. But understanding how to bake (or
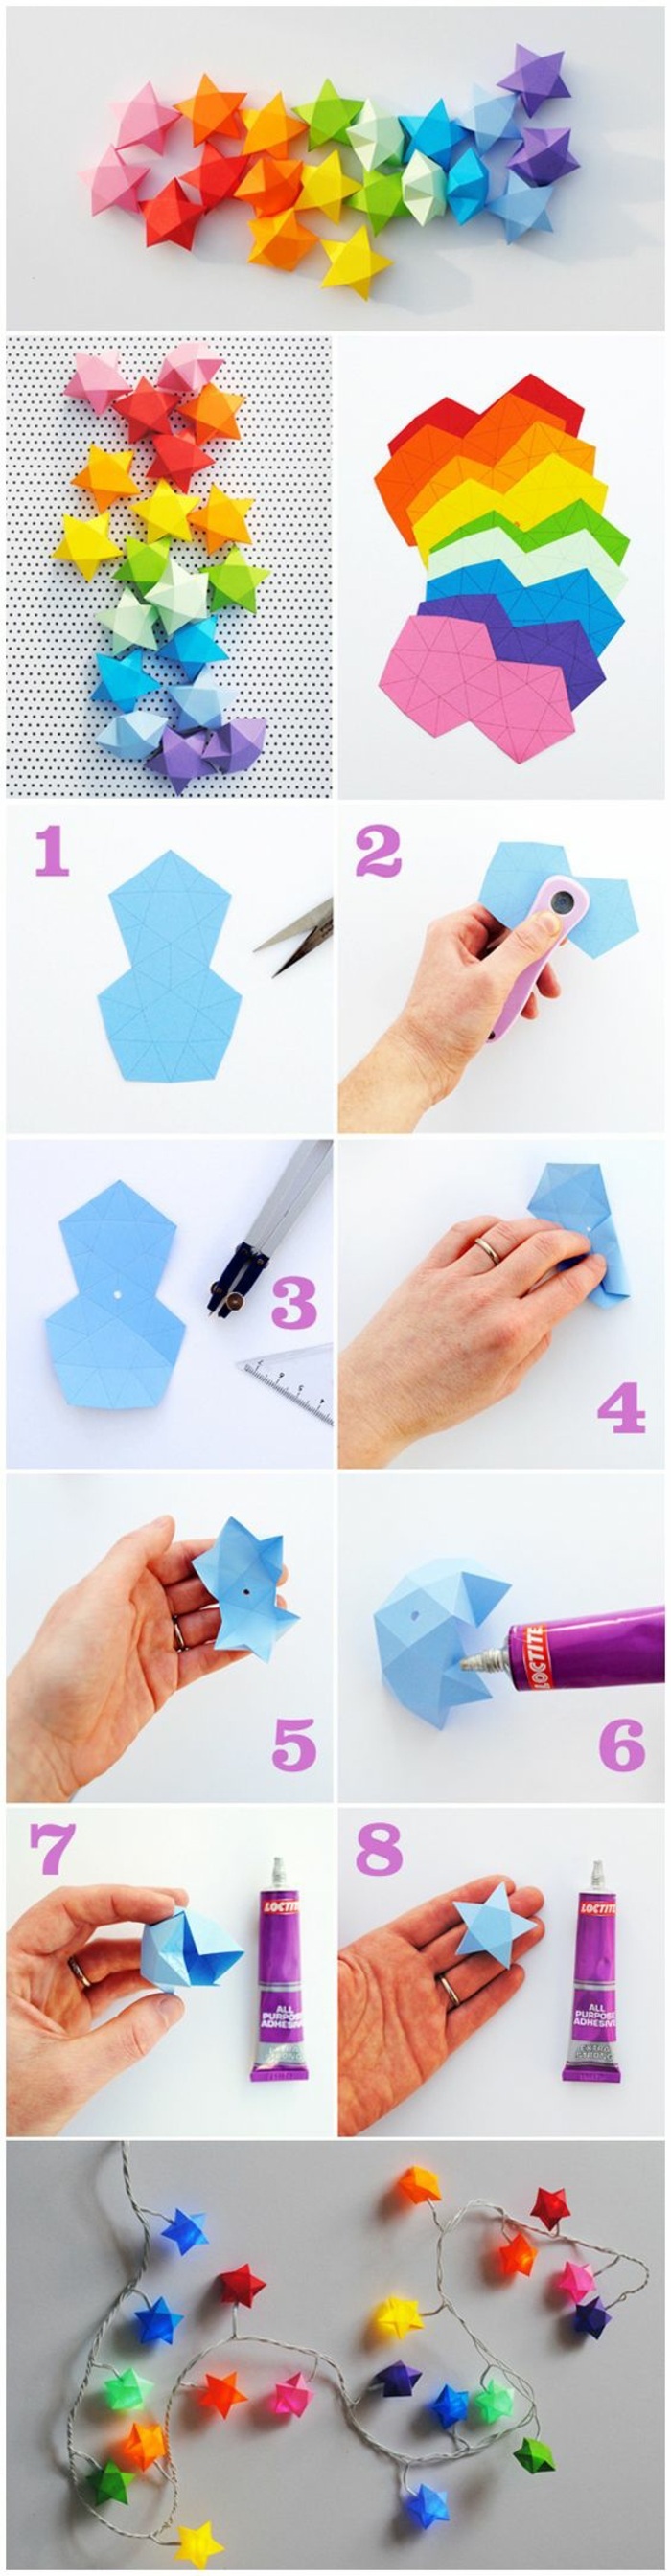
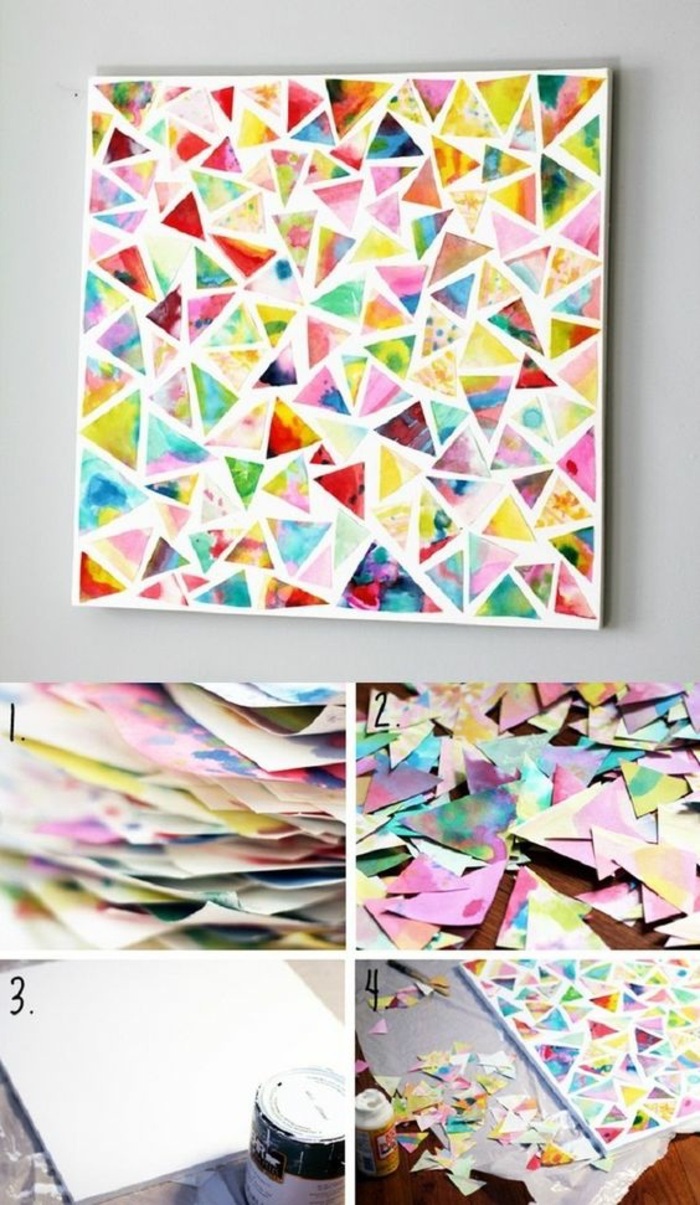
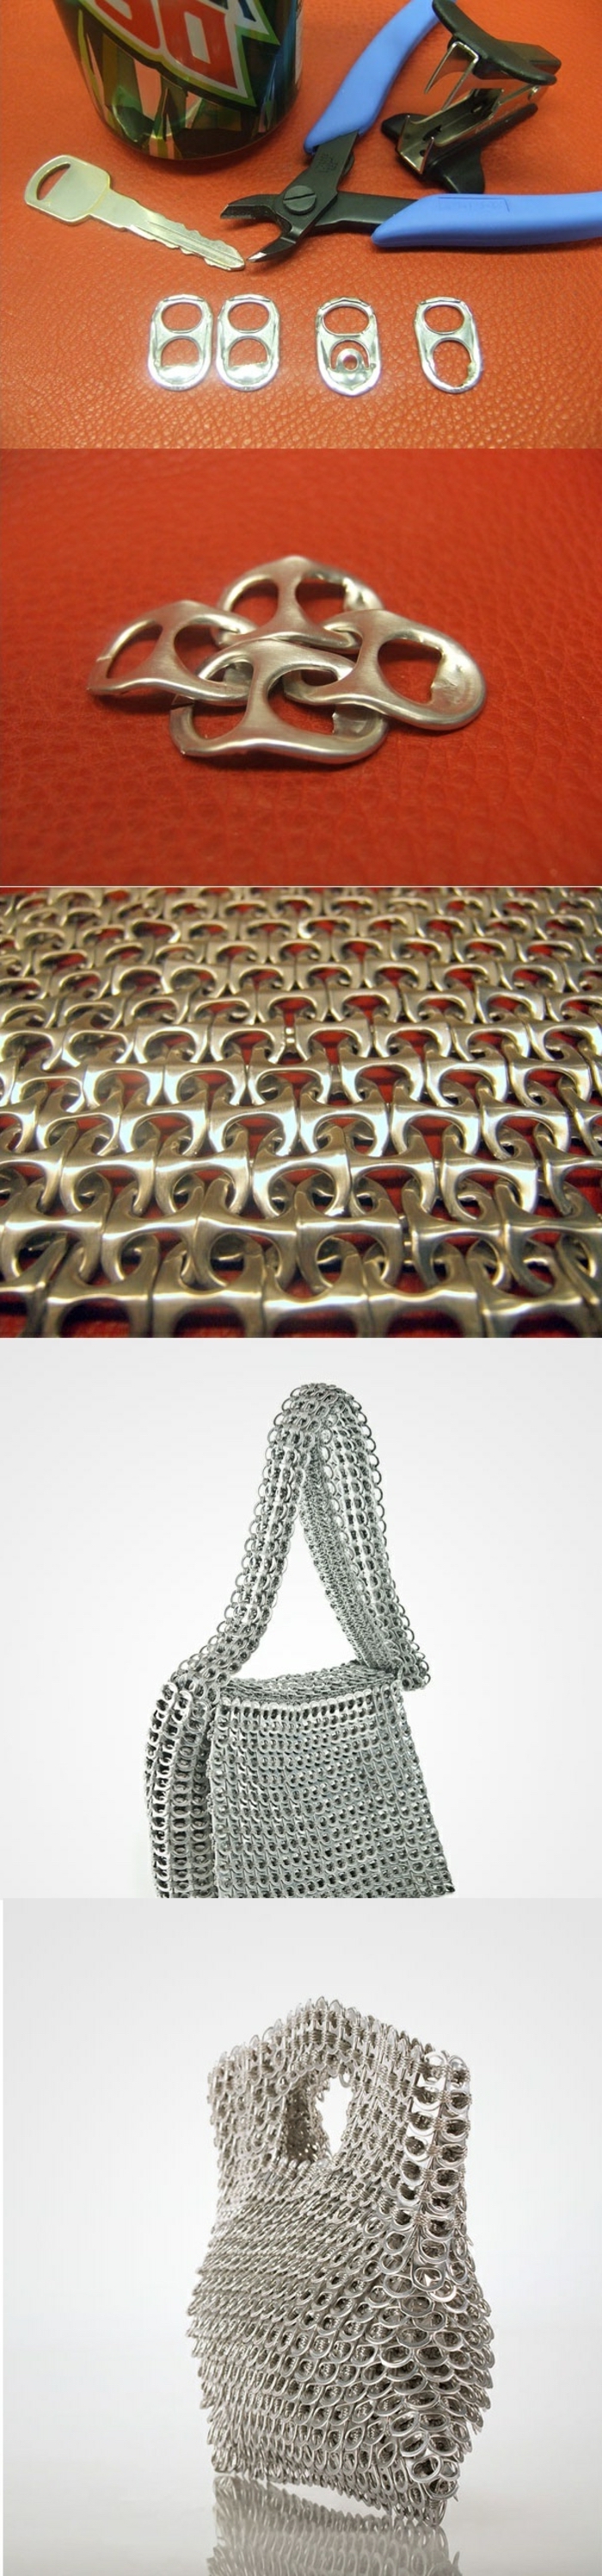
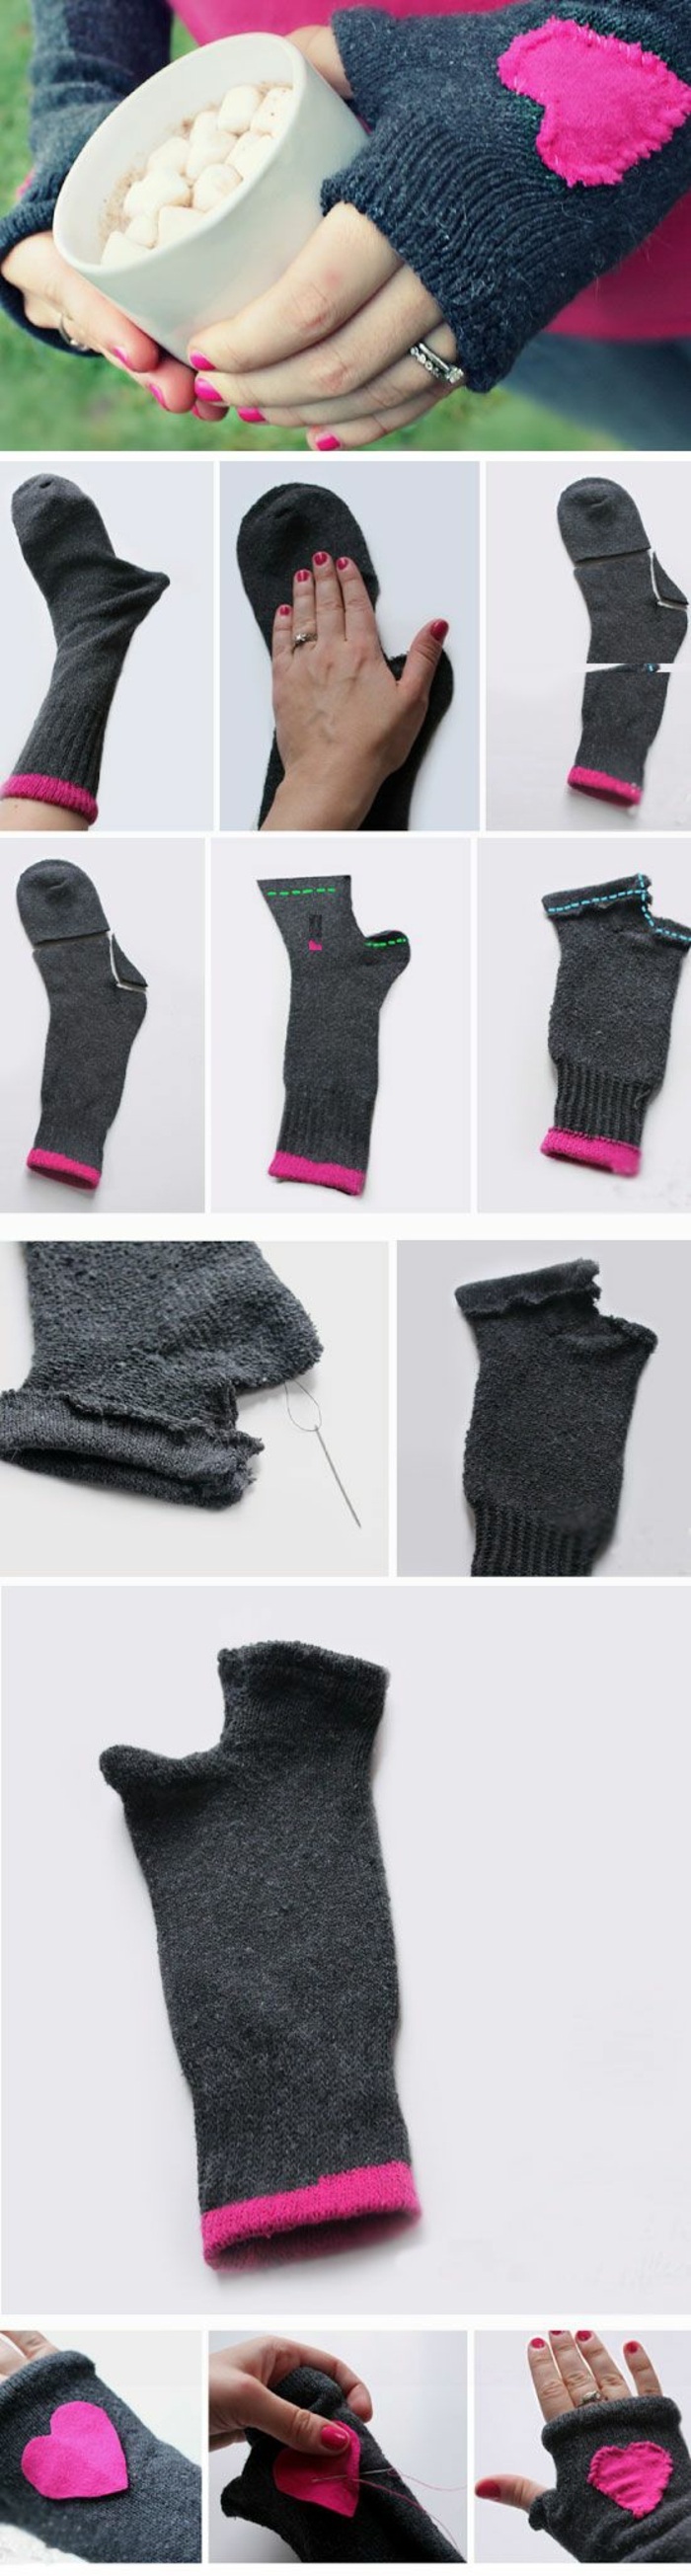
Inspiration Gallery
Before you even think about shaping it, your polymer clay needs a good warm-up. This process, called conditioning, makes the clay softer, stronger, and easier to work with. Knead it, roll it, and run it through a pasta machine (a dedicated craft one!) until it’s pliable and has a uniform, smooth consistency. Skipping this is the #1 cause of brittle, cracked projects later on.
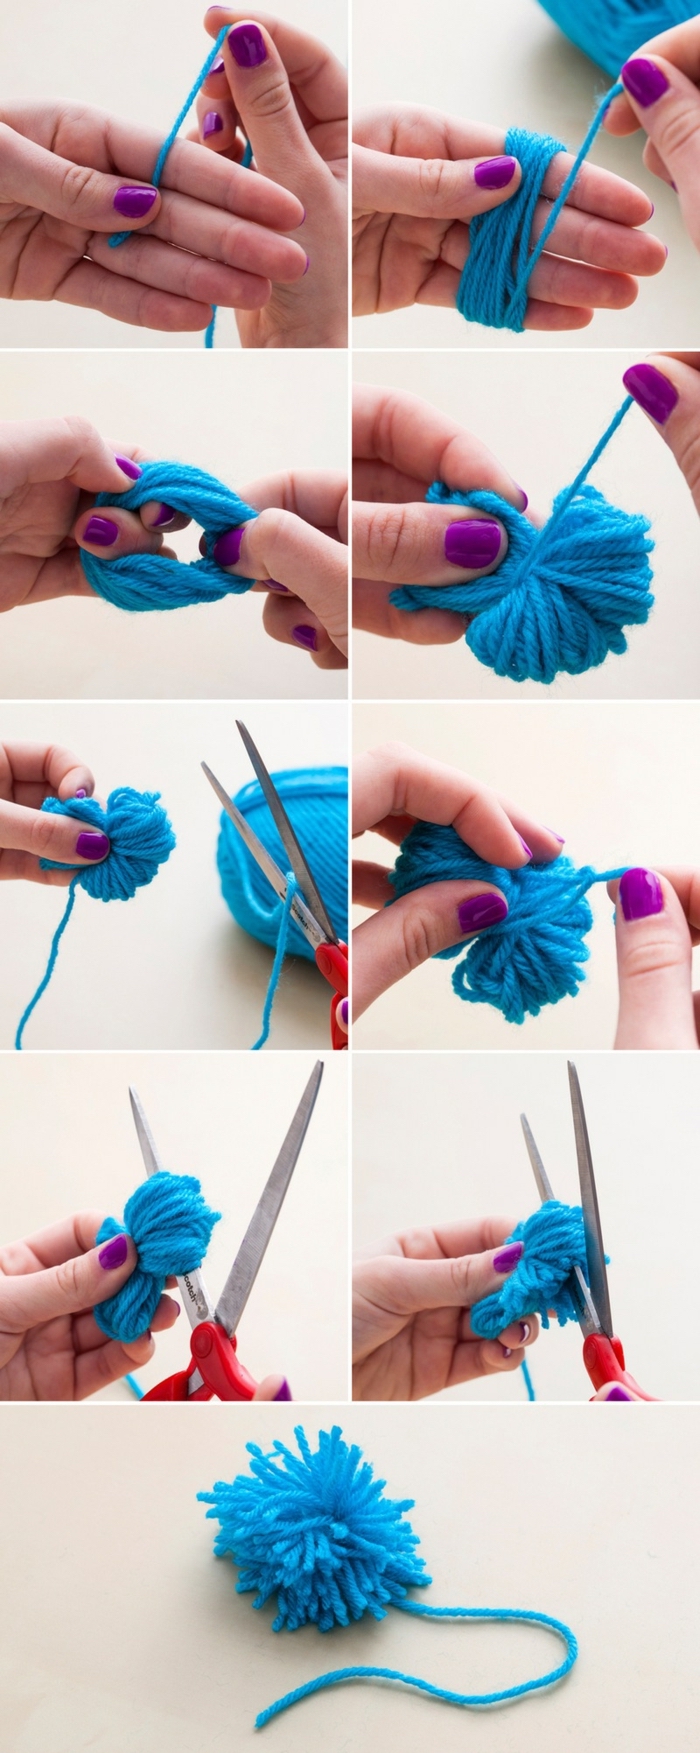
Wrap the yarn tightly and densely around your pom-pom maker. Don’t be shy—the more yarn, the fluffier the result.
When you tie the center string, pull it as tight as you possibly can. Use a thin, strong yarn or embroidery floss for this.
Give it a good haircut! Trimming is the secret to turning a shaggy blob into a perfect, plush sphere.
Is Mod Podge the same as regular glue? Not quite. While both are PVA-based, Mod Podge contains additional sealers and finishers. For the yarn bowl, a quality PVA like Aleene’s Tacky Glue is perfect for its thick consistency and strong bond. Mod Podge is a great all-in-one option if you want a built-in glossy or matte top coat, but it can sometimes feel stickier during application.
Studies in occupational therapy have shown that working with materials like clay and yarn can reduce stress and improve focus. The repetitive motions and sensory input create a state of
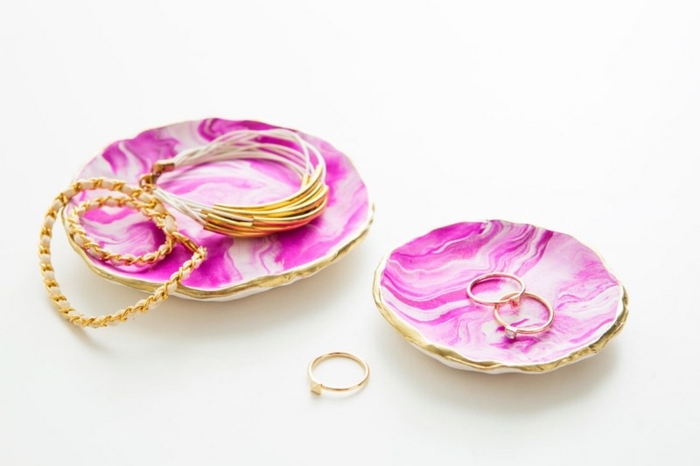
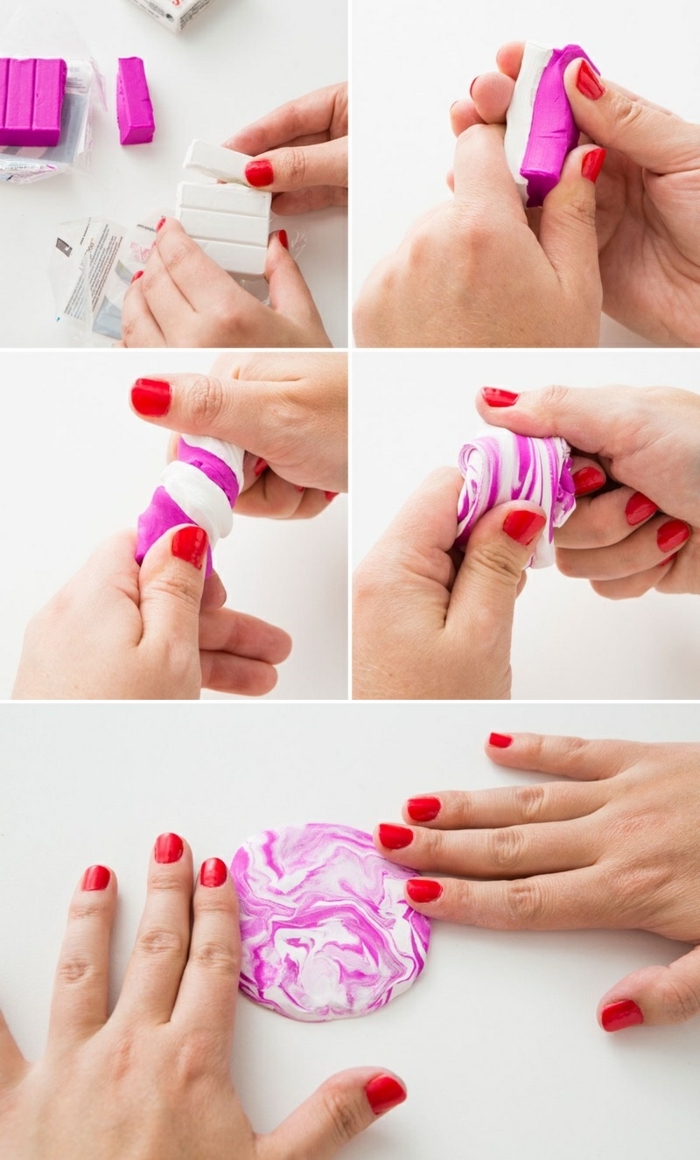
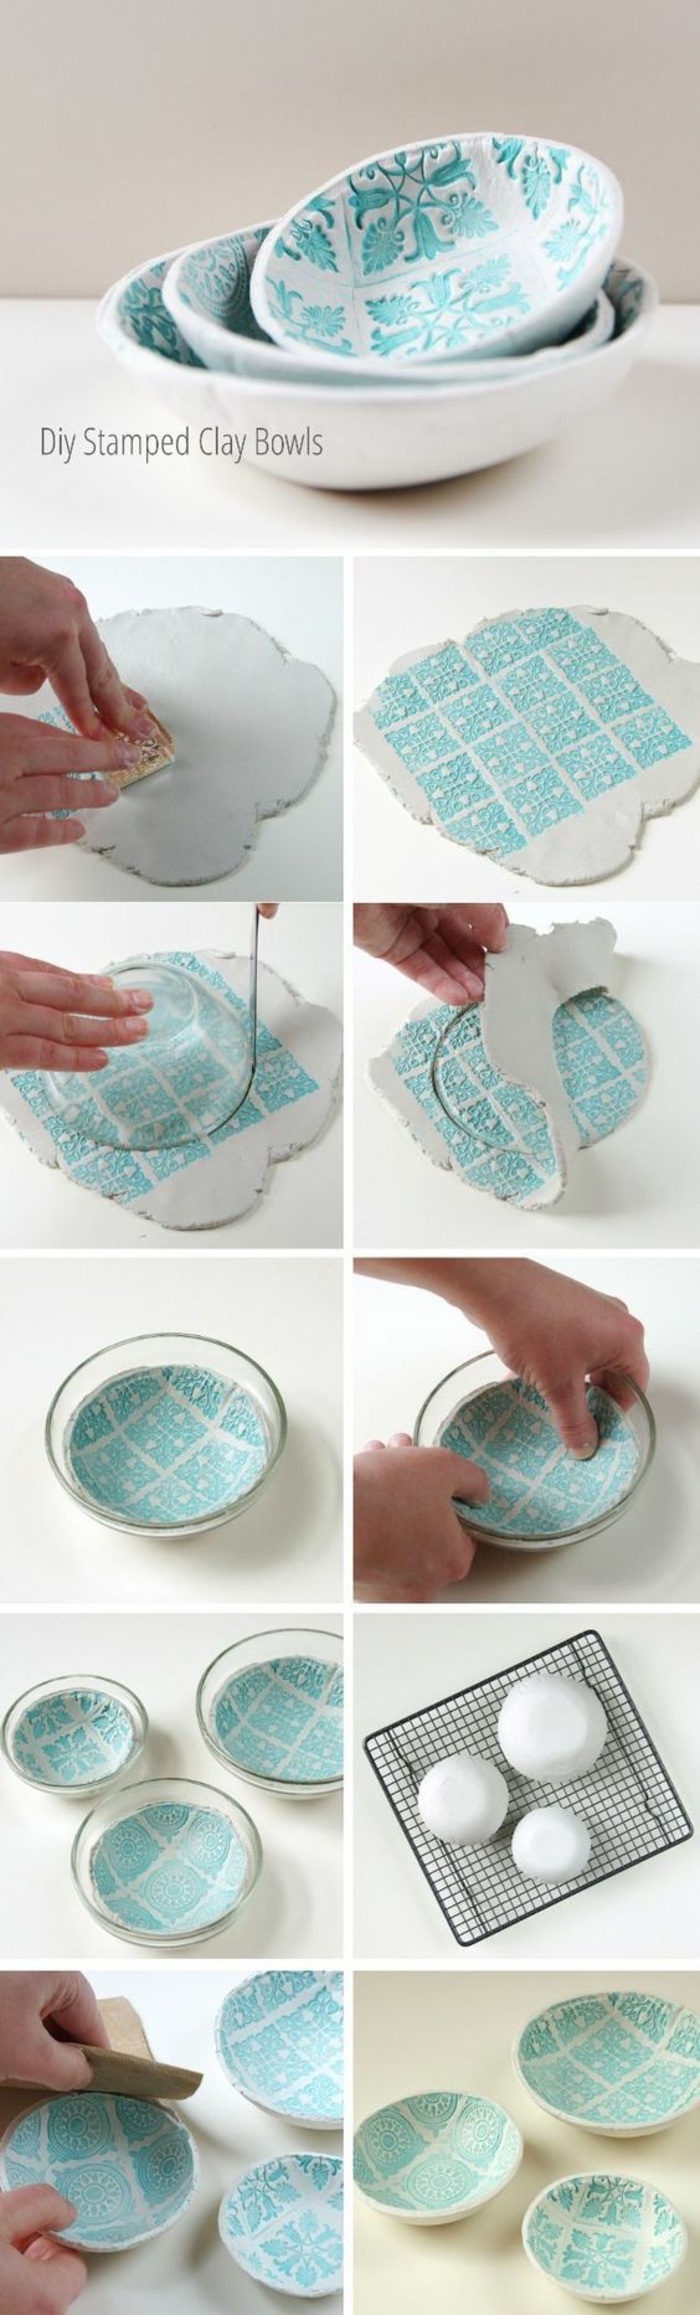
That gorgeous marbled effect you see in high-end homewares is surprisingly easy to achieve with polymer clay. Here’s the basic idea:
Choose two or three colors (like the pink and white in the photos).
Roll each color into a thin snake.
Twist the snakes together, fold the twisted log in half, and twist again.
Repeat the twist-and-fold process a few times, but stop before the colors blend completely. Then, roll it flat or form your shape!
Help! My yarn bowl collapsed while drying. What went wrong?
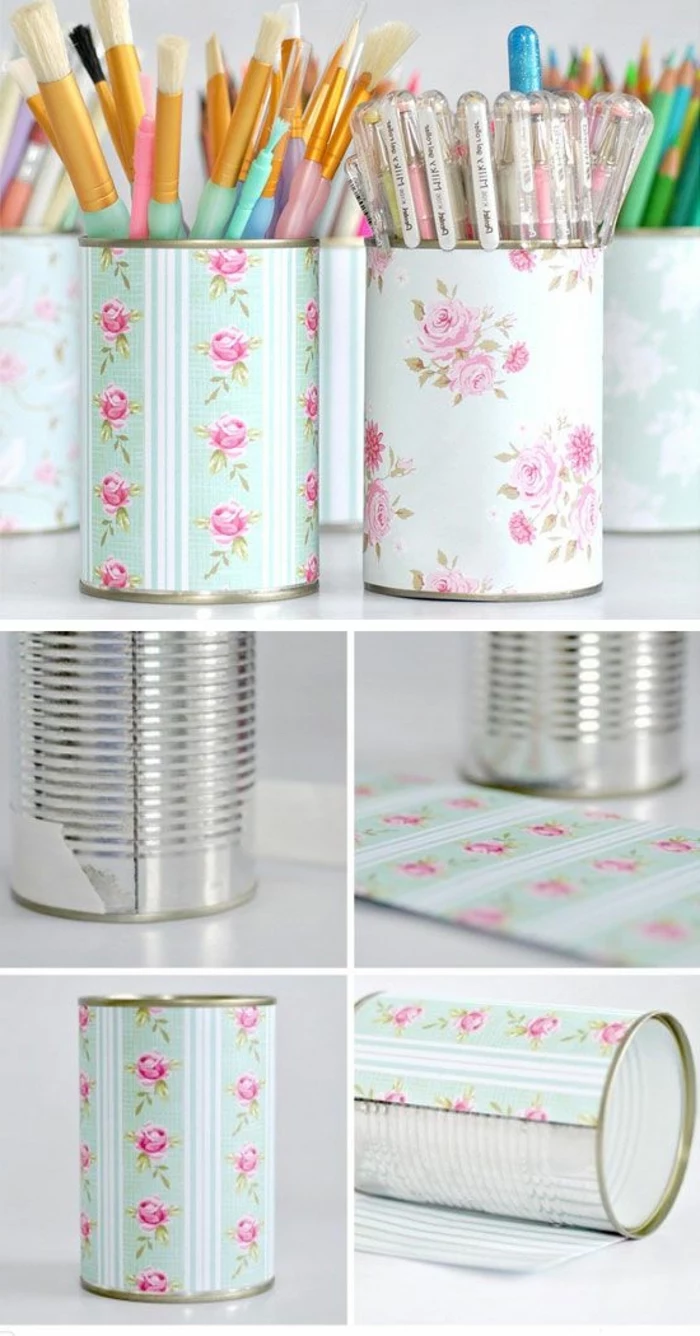
This usually comes down to two things: glue saturation or yarn choice. Make sure every single strand of yarn is completely soaked in the glue mixture. Apply it liberally with a brush. Secondly, 100% cotton yarn (like the recommended Lily Sugar’n Cream) is key because its natural fibers absorb the glue and stiffen beautifully. Synthetic yarns like acrylic can resist the glue and stay too flexible.
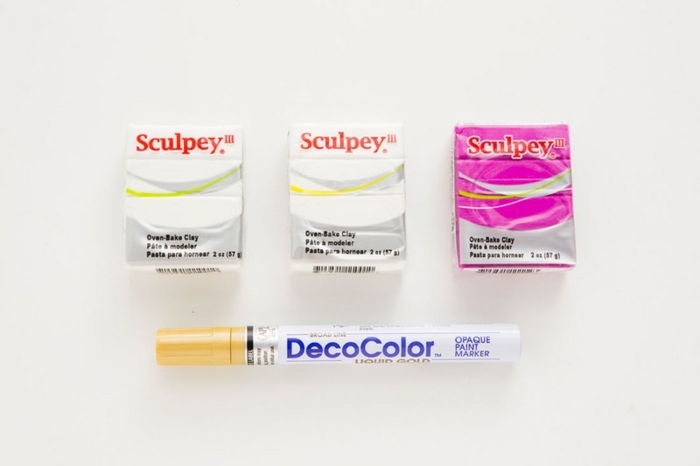
Fimo Soft: As the name suggests, it’s very soft and easy to condition right out of the package, making it great for beginners and those with sensitive hands. It holds detail well.
Sculpey Premo: A bit firmer, this clay is a favorite among artists for its strength and flexibility after baking. It’s excellent for jewelry or items that will be handled often.
For the trinket dish, either works, but Premo will give you a slightly more durable result.
Eliminates tiny cracks and bumps for a professional look.
Prevents fingerprints from being baked into your final piece.
Creates a perfectly smooth surface for painting or glazing.
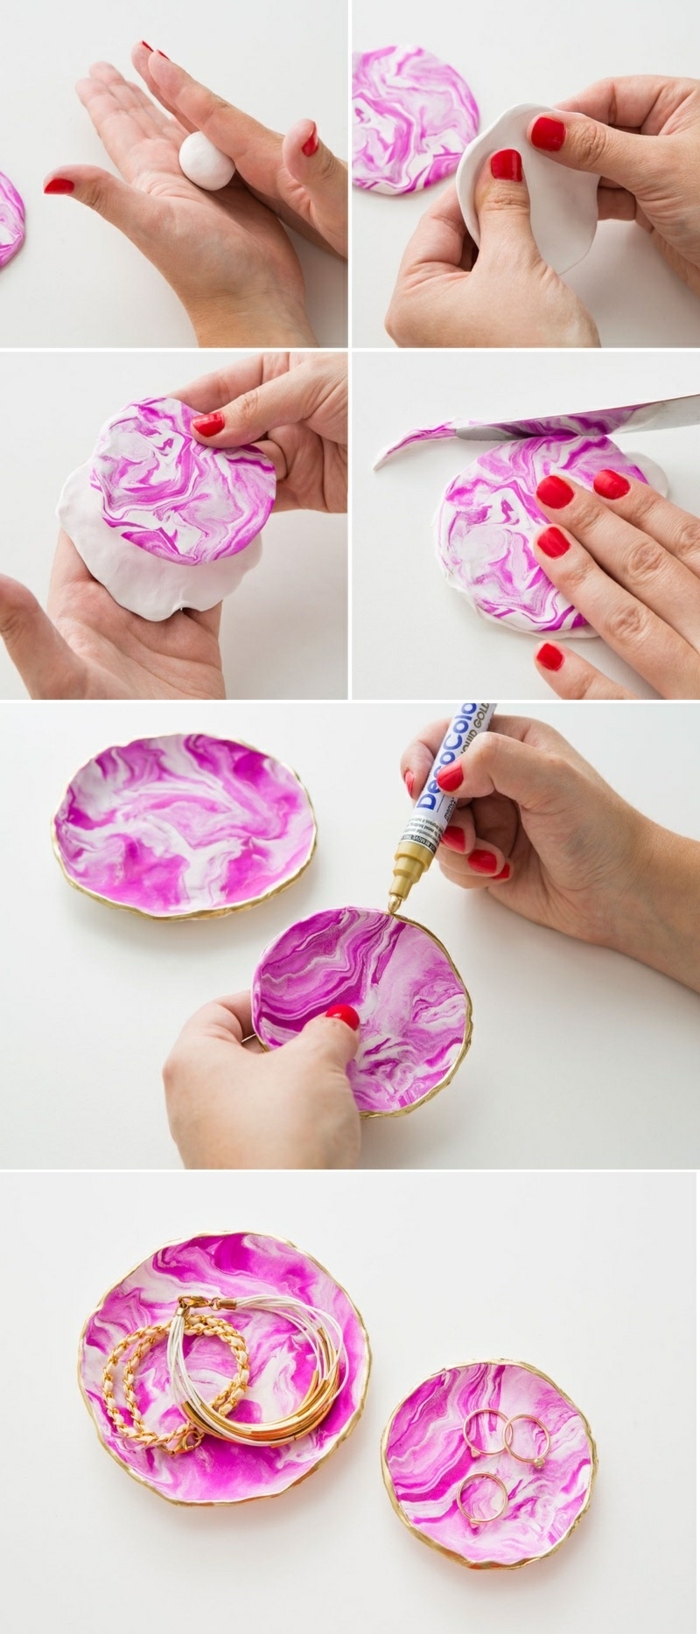
The secret? After shaping but before baking, gently wipe the surface of your polymer clay piece with a bit of rubbing alcohol on a cotton swab. It magically smooths away imperfections.
To get that chic gold-rimmed effect on a polymer clay dish, you have two great options. For a sharp, clean line, a gold leafing pen like the Krylon Leafing Pen is your best friend. For a more rustic, painted look, apply a small amount of liquid gold leaf (like Mona Lisa brand) with a fine-tipped brush. Apply after the clay has been baked and cooled completely.
A small glass prep bowl from your kitchen.
The bottom of a sturdy, smooth-surfaced soda bottle.
A ceramic ramekin or even a lightbulb (handle with care!).
An old metal or plastic kids’ ball, cut in half.
How do I know for sure that my polymer clay is fully cured?
Properly cured polymer clay should be hard, but not rock-solid—it will have a slight, almost unnoticeable flex to it. If you press a fingernail into an inconspicuous spot (like the bottom), it shouldn’t leave a deep indent. If the piece is brittle and snaps easily after cooling, it was likely under-baked. Always follow the temperature and time instructions on the clay packaging precisely.
Important point: The project calls for 100% cotton yarn for a reason. Cotton fibers are highly absorbent, meaning they will drink up the PVA glue mixture. When the water in the glue evaporates, the stiff glue residue left behind inside and around the cotton fibers creates a rigid, lightweight structure. It’s a simple but effective bit of material science!
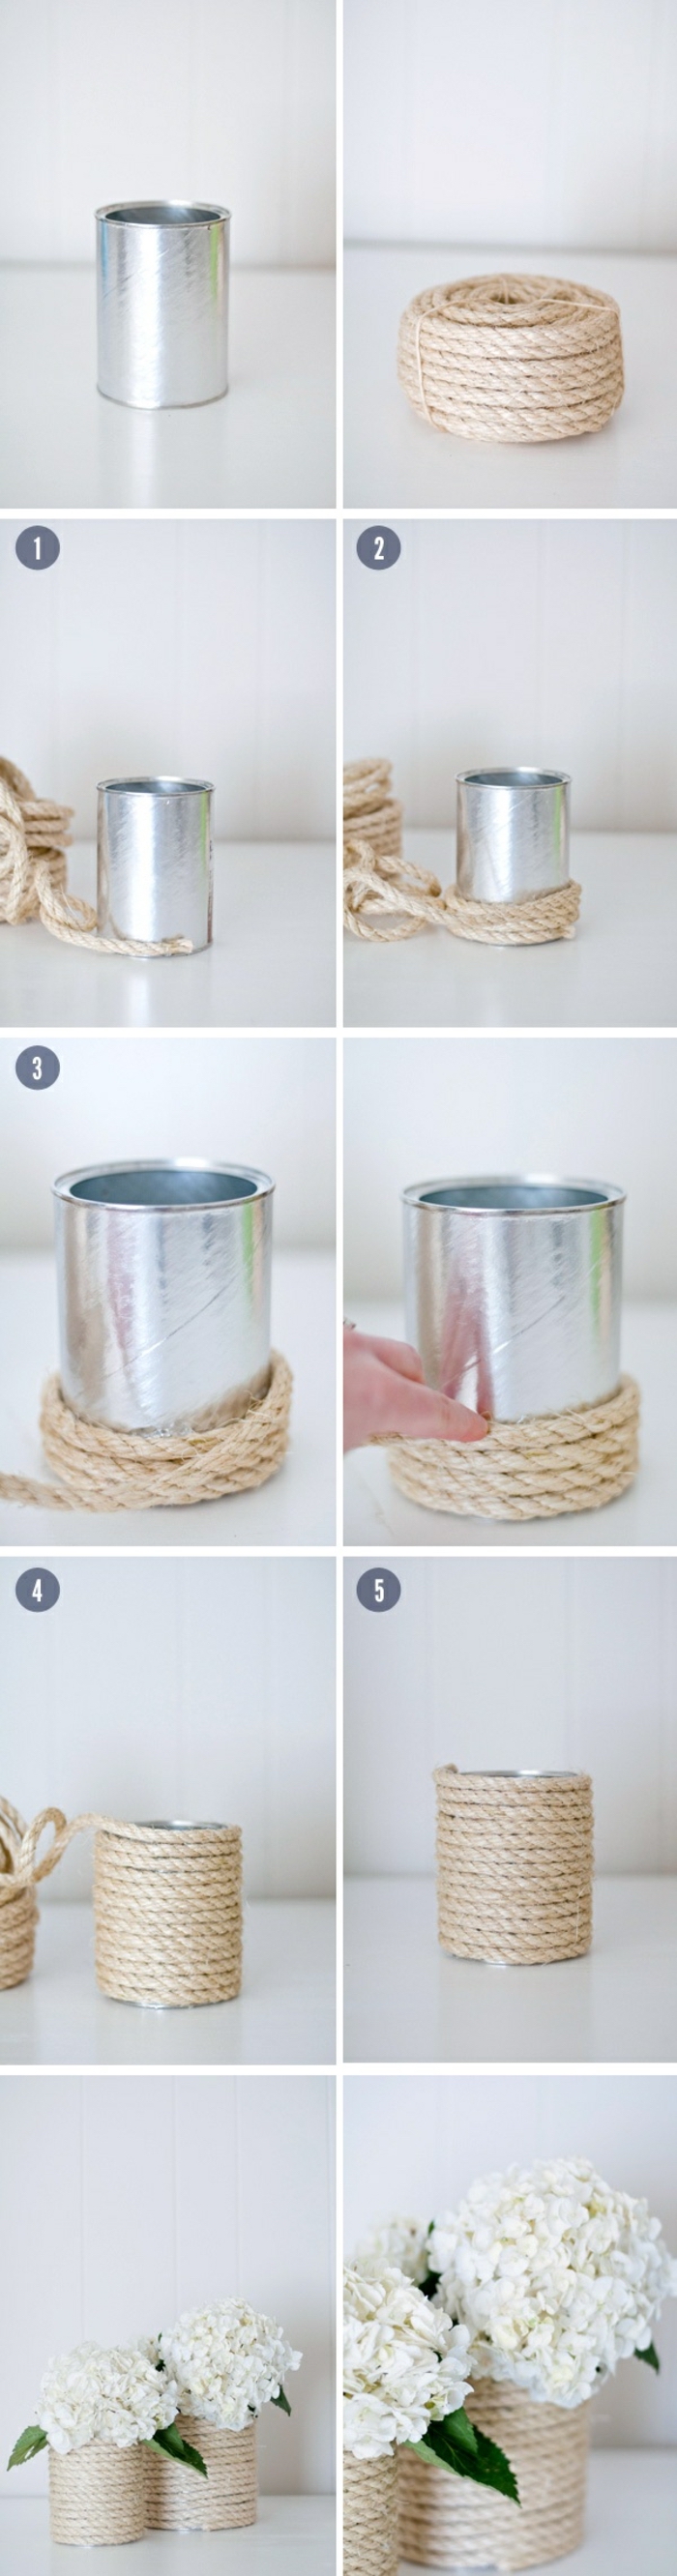
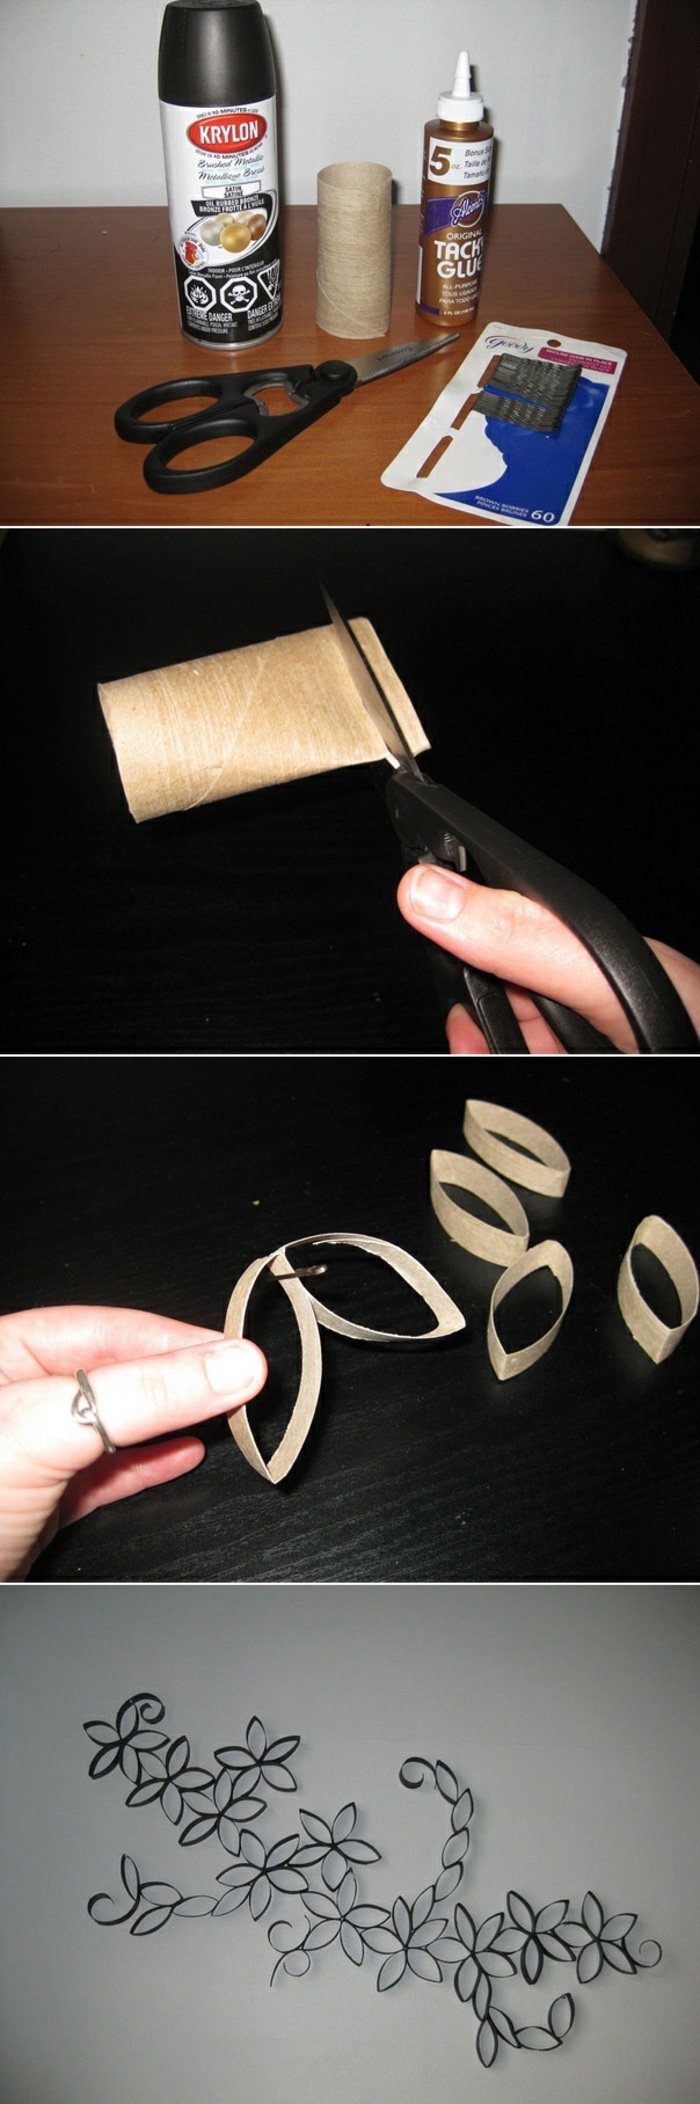
Cardboard Donuts: The classic, free method. It works perfectly well but can be slower, and the cardboard can bend or break after a few uses.
Plastic Pom-Pom Makers: A tool like those from Clover is a game-changer. It makes the wrapping process faster and the tying and cutting steps much neater, resulting in more consistent pom-poms every time. A worthy investment if you plan to make a whole rug!
Once your polymer clay dish is baked and cooled, adding a sealant can protect the surface and give it a finished look. For a shiny, glass-like finish, use a water-based glaze like Sculpey Gloss Glaze or Triple Thick. For a more natural, satin effect that won’t show fingerprints as easily, a matte varnish like DuraClear Matte Varnish is an excellent choice.
A limited color palette can make your projects look more intentional and
According to manufacturers like Polyform (makers of Sculpey), polymer clay is certified non-toxic.
However, it’s plastic (PVC), so you should never bake it on surfaces you use for food. Use a dedicated baking tile or a tray lined with foil or parchment paper. While fumes aren’t toxic, they can be irritating, so always bake in a well-ventilated area.
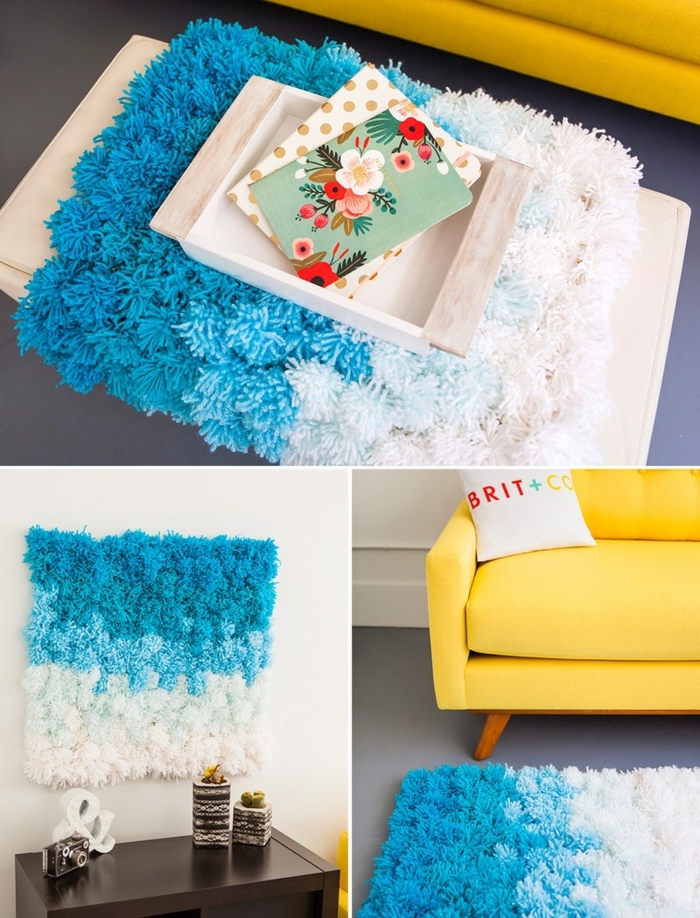
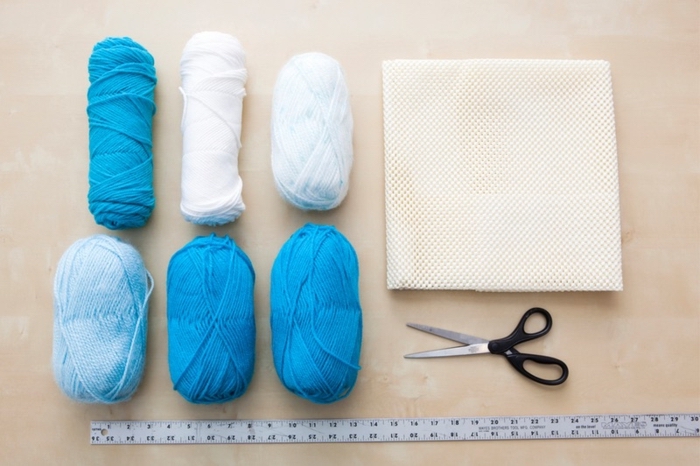
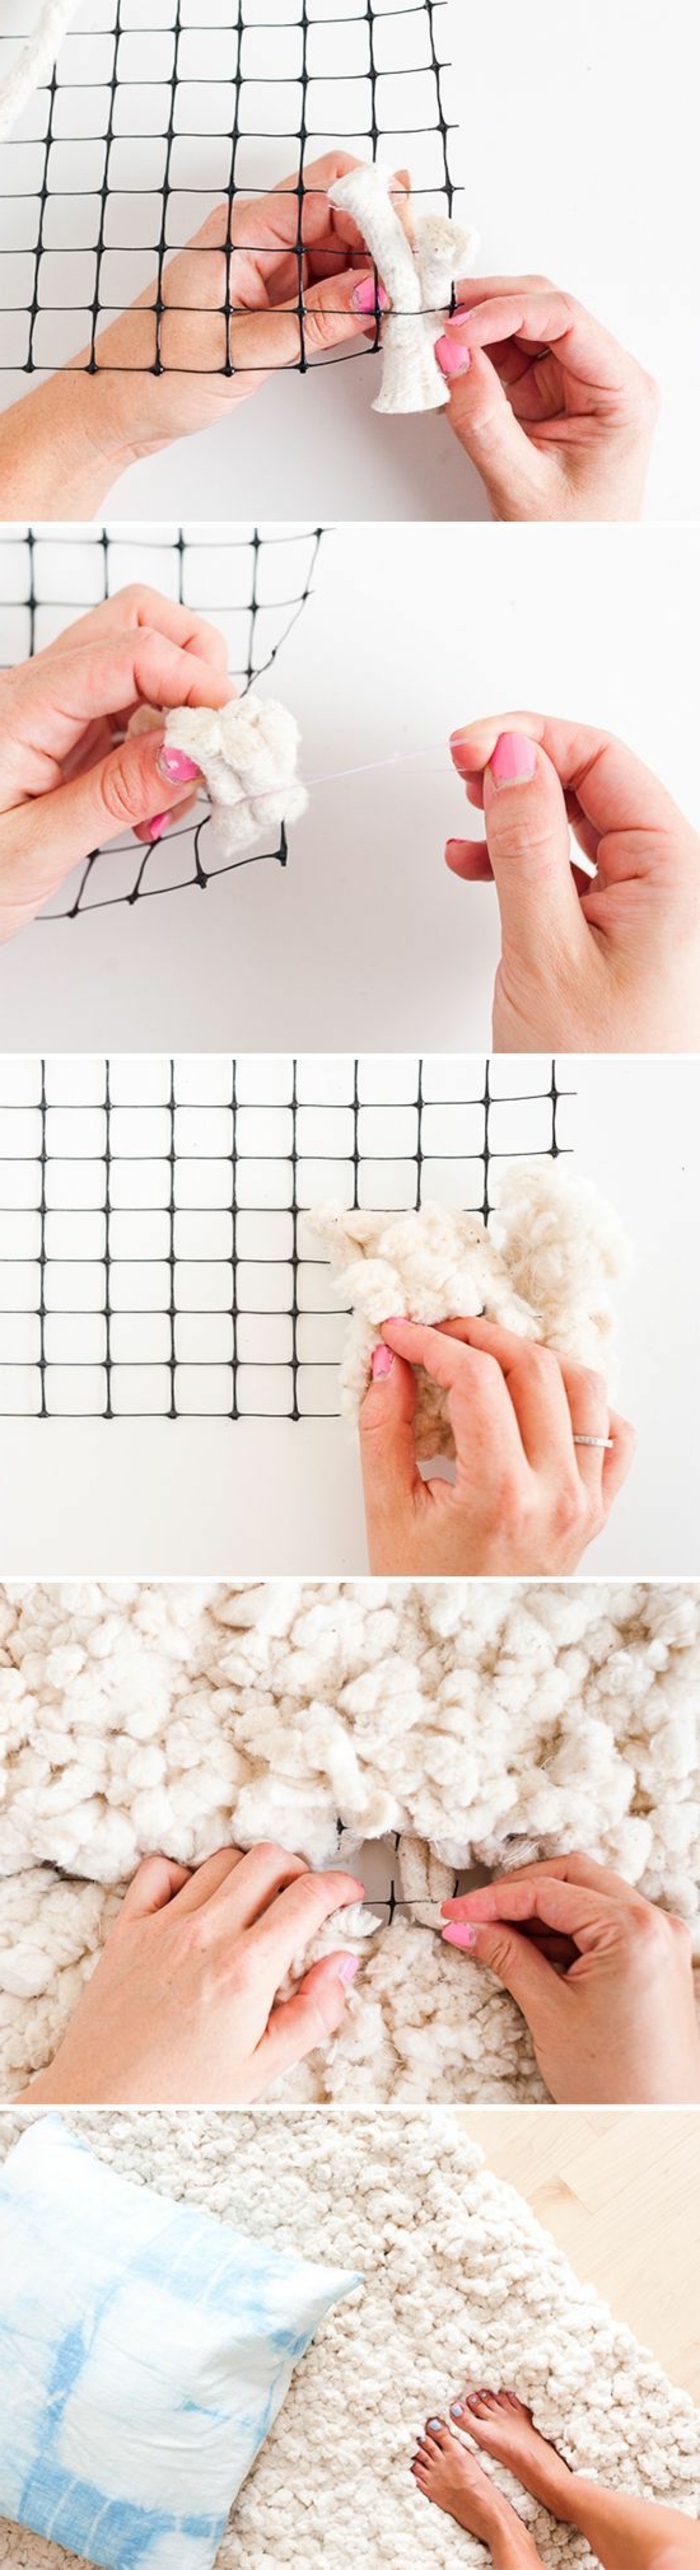
A wonderfully plush and soft texture underfoot.
A dense, high-end look with no gaps showing.
A sturdy rug that holds together for years.
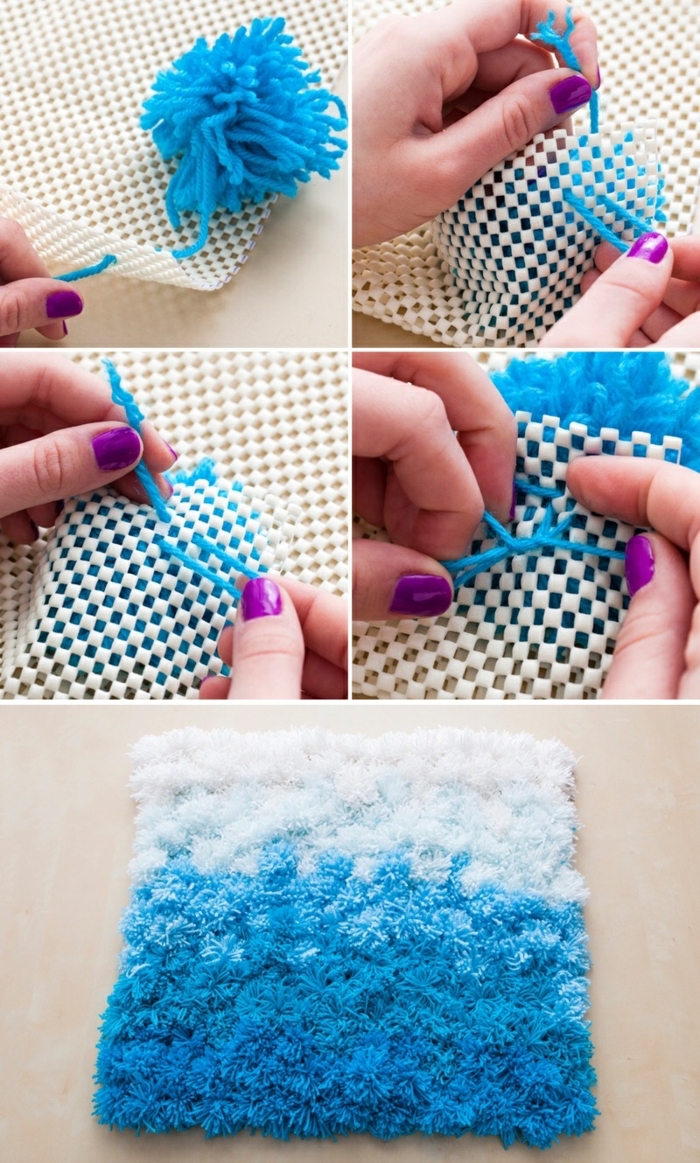
The secret? A non-slip plastic rug canvas. This grid-like mat gives you the perfect structure to tie your pom-poms onto, ensuring they are evenly spaced and securely attached. You can find it at most large craft stores.
What happens if I use acrylic yarn instead of cotton for the yarn bowl?
You can, but the result will be different. Acrylic yarn is essentially plastic and doesn’t absorb glue the way cotton does. The glue will mostly just coat the outside of the strands. This means the final bowl will be much more flexible and less rigid. It might be too flimsy to hold its shape, so stick with cotton for a truly structural bowl.
A self-healing cutting mat to protect your table.
A good craft knife (like an X-Acto) for precise cuts.
A dedicated clay roller, which can be as simple as a piece of PVC pipe or a purpose-made acrylic roller.
A set of sharp, small scissors reserved just for yarn and fabric.
Feeling uninspired? Don’t force it. Instead of staring at your supplies, go on a
Wet Sanding: Use waterproof sandpaper (from 400 up to 2000 grit) and a small bowl of soapy water. This method prevents dust and gives a buttery-smooth, almost polished finish. It’s the pro-level choice.
Dry Sanding: Quicker and less messy, but it creates fine dust (wear a mask!). It’s good for removing bigger imperfections but won’t achieve the same level of polish as wet sanding.
For a trinket dish, wet sanding the edges can take it from
A crucial reminder for the yarn bowl: Be patient. It needs to be 100% bone dry before you try to remove it from the mold. This can take 24-48 hours depending on humidity. Rushing it is the #1 mistake and results in a warped, sticky mess. Place it on a wire rack to allow air to circulate underneath for even drying.
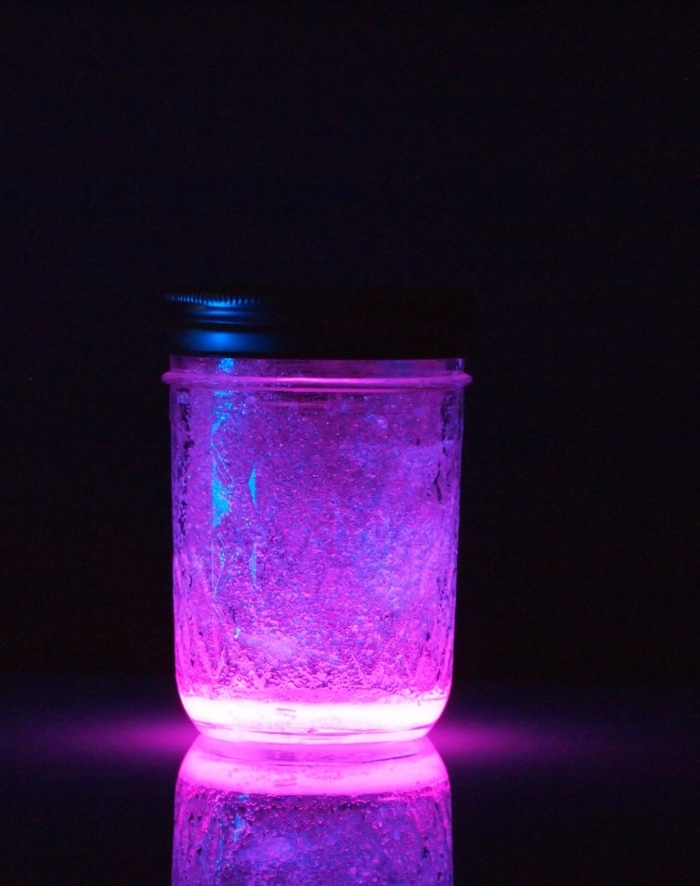
Did you know that the textile industry is one of the largest polluters? Even small crafting scraps add up.
Don’t throw away the yarn trimmings from your pom-pom project! Collect them in a jar. These colorful bits, known as
John combines 12 years of experience in event planning, interior styling, and lifestyle curation. With a degree in Visual Arts from California Institute of the Arts and certifications in event design, he has styled luxury weddings, corporate events, and celebrity celebrations. John believes in creating memorable experiences through innovative design and attention to detail.
To provide the best experiences, we use technologies like cookies to store and/or access device information. Consenting to these technologies will allow us to process data such as browsing behavior or unique IDs on this site. Not consenting or withdrawing consent, may adversely affect certain features and functions.
Functional
Always active
The technical storage or access is strictly necessary for the legitimate purpose of enabling the use of a specific service explicitly requested by the subscriber or user, or for the sole purpose of carrying out the transmission of a communication over an electronic communications network.
Preferences
The technical storage or access is necessary for the legitimate purpose of storing preferences that are not requested by the subscriber or user.
Statistics
The technical storage or access that is used exclusively for statistical purposes.The technical storage or access that is used exclusively for anonymous statistical purposes. Without a subpoena, voluntary compliance on the part of your Internet Service Provider, or additional records from a third party, information stored or retrieved for this purpose alone cannot usually be used to identify you.
Marketing
The technical storage or access is required to create user profiles to send advertising, or to track the user on a website or across several websites for similar marketing purposes.