Forget Cheap DIY: How to Make Gifts People Will Actually Cherish
My first-ever handmade sale was at a little local market, more years ago than I care to count. It was a simple leather wallet, and if I’m being honest, the stitching was all over the place. But the person who bought it didn’t care. They loved that a real person made it. Since then, I’ve made hundreds of gifts for the people I care about, and I’ve learned one crucial thing: a truly great handmade gift isn’t about being fast or easy. It’s about pouring your thought, time, and skill into an object that tells a story. No store-bought item can ever compete with that.
In this article
So many online tutorials seem to push quick projects with cheap materials. The result? A gift that feels flimsy and doesn’t last. That’s not what we’re doing here. I believe a handmade gift should be beautiful, useful, and durable. It should feel special. This means using quality materials and techniques that have stood the test of time. It might take longer, but the result is something your friend will treasure for years, not just a few weeks.
In this guide, I’m going to walk you through three different projects. These aren’t your average five-minute crafts. They require a bit of patience and a willingness to learn a real skill. But don’t worry, I’ll share the exact techniques I use in my own workshop. We’ll cover a hand-stitched leather pouch, a classic Coptic stitch journal, and a perfectly made scented soy candle. And I’ll be totally upfront about the challenges, the time commitment, and the costs involved. Let’s make something you’ll be genuinely proud to give.
Here’s a quick rundown to help you choose:
- The Leather Pouch: This is a fantastic starting point. For a beginner, expect it to take about 3-4 hours. The initial tool investment is around $30-$50 for a starter kit, but after that, each pouch is very affordable. Difficulty: Beginner-Friendly.
- The Coptic Stitch Journal: This one is a true test of patience and precision. Set aside a full weekend, maybe 8-10 hours for your first one. Tool kits run about $40. It’s more about time than money. Difficulty: Intermediate.
- The Scented Soy Candle: This project is all about science and accuracy, but it’s very rewarding. The actual making process is quick (1-2 hours), but you MUST let it cure for two weeks. A good starter kit costs about $50-$75 and will let you make several candles. Difficulty: Requires Precision.
The Philosophy: It All Starts with the Materials
The foundation of any project worth doing is the material. This is where so many DIY projects fall flat right from the get-go. Using the right stuff from the beginning saves you a world of frustration and guarantees a quality result. A gift made with care deserves materials that reflect that effort.
Just think about the difference between a piece of flimsy craft foam and a slice of real vegetable-tanned leather. The leather has weight, a distinct smell, and a texture that gets better with age. It develops character. The same goes for paper. A cheap notepad will turn yellow and brittle, but acid-free, archival paper will preserve someone’s thoughts for a lifetime. This choice is the very first step in making something meaningful.
And let’s be clear: quality materials aren’t always cheap. A good piece of leather or premium candle wax can easily cost more than a finished product from a big-box store. The value isn’t in saving money; it’s in the process and the uniquely personal object you create. I’ve learned to find good suppliers online, like Tandy Leather for leather goods or CandleScience for candle-making supplies. Knowing where to get the good stuff is part of the craft.

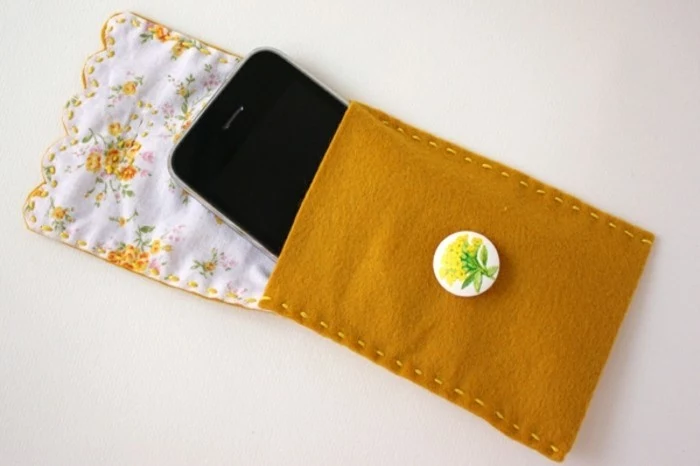
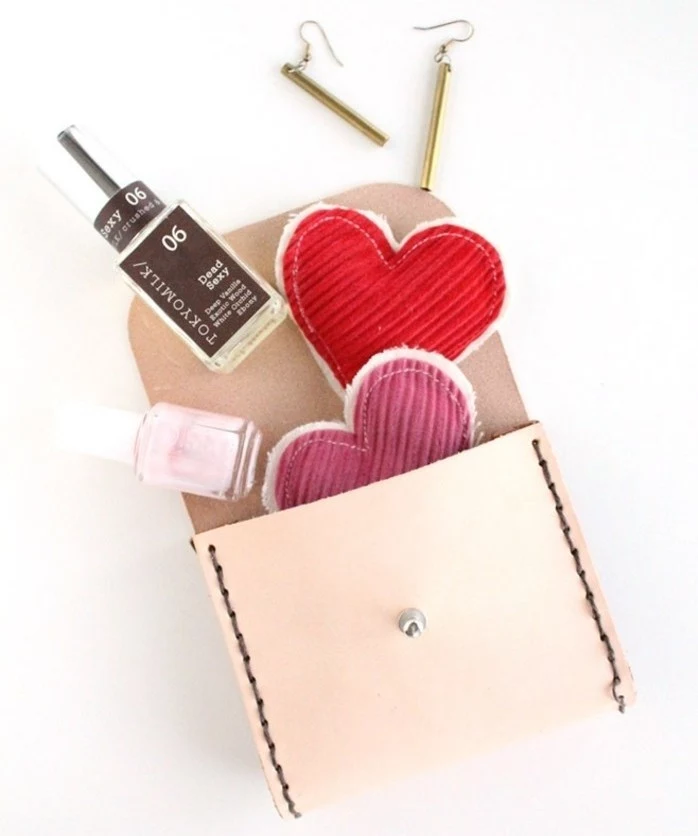
Project 1: The Hand-Stitched Leather Pouch
A small leather pouch is a phenomenal gift. It’s perfect for holding coins, earbuds, or other little treasures. Making one teaches you the absolute fundamentals of leatherworking, and when you do it right, it feels incredibly sturdy and looks timeless.
The Tools and Materials
We’ll be using vegetable-tanned leather, or ‘veg-tan.’ It’s tanned with natural plant matter, which gives it a firm body that’s perfect for shaping and tooling. For a small pouch, a 3 to 4-ounce leather is ideal—that’s about 1.6 mm thick, giving you durability without too much bulk. You’ll also need waxed thread (0.8 mm is a great all-purpose size) which helps protect the stitches and locks them in place.
Okay, let’s talk tools. Here’s a breakdown of what you truly need versus what’s just nice to have.
- Must-Haves: You can’t do this without a sharp craft knife, a metal ruler, a cutting mat, a set of diamond-shaped stitching chisels (4mm spacing is good), a mallet, and two leather stitching needles. You can find starter kits with all of this on Amazon or at a place like Tandy Leather for about $30 to $50.
- Nice-to-Haves: A wing divider is a compass-like tool that scribes a perfect stitch line. A stitching pony is a wooden clamp that holds your leather for you, acting like a third hand. You can start without these, but they make your life a LOT easier and your work much neater.
The Pro Technique: Step-by-Step
- Cutting the Leather: Measure and cut a single rectangle, maybe 4 inches by 9 inches for a simple pouch. Here’s a tip: don’t try to cut through the leather in one pass. Use your ruler as a guide and make three or four shallow passes with your knife. This gives you way more control and a much cleaner edge.
- Marking the Stitch Line: Fold the leather in half. Use your wing divider (or a ruler and a blunt tool) to mark a line about 1/8 inch (3-4 mm) from the edge. This is your guide for the stitching holes and the secret to a straight seam.
- Punching the Holes: Place the leather on a cutting mat. Position your stitching chisel on the line and give it a firm, confident strike with your mallet. The goal is to punch cleanly through both layers. To keep your spacing even, overlap the last tooth of the chisel in the last hole you punched on each subsequent strike.
- The Saddle Stitch: This is the classic, bomb-proof stitch. Cut a piece of thread about four times the length of the seam. Thread a needle on each end. Push one needle through the first hole and even out the thread. Now, take the left needle and pass it through the second hole. Then, take the right needle and pass it through that exact same hole, making sure it goes in above the other thread. Pull both ends tight. That’s one stitch. Repeat, keeping your tension consistent.
- Finishing the Stitch: Don’t just snip the thread at the end! To lock your work, you need to backstitch. Go backward two or three holes, stitching over your last few stitches. Pull tight, then use your craft knife to snip the threads as close to the leather as you can. If you used a synthetic thread, you can very quickly pass a lighter flame over the nub to melt it into a permanent dot. Be careful!
- Finishing the Edges: This is the step that separates amateur work from pro-level stuff. Use an edge beveler to slightly round the sharp edges. Then, dampen the edge with a bit of water (or a product called gum tragacanth) and rub it vigorously with a wood slicker or a scrap of canvas. The friction creates heat and burnishes the fibers into a smooth, dark, professional-looking edge.
Heads Up! When Things Go Wrong: If your stitches look crooked or messy, it’s probably inconsistent tension. Try to pull with the same force each time. If you get to the end and realize a stitch is totally wrong, you can (carefully!) cut the thread and pull it out, but it’s a pain. Better to go slow and get it right the first time.
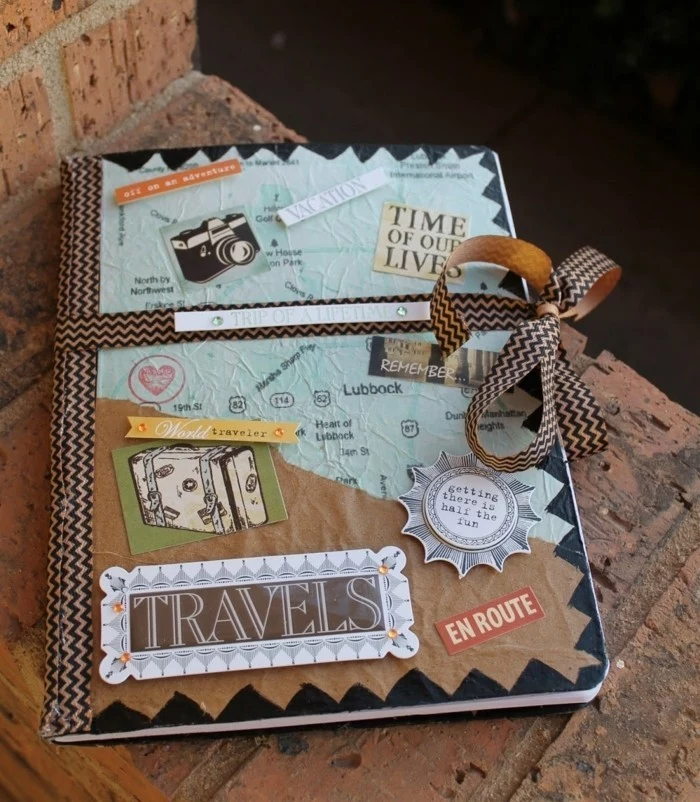
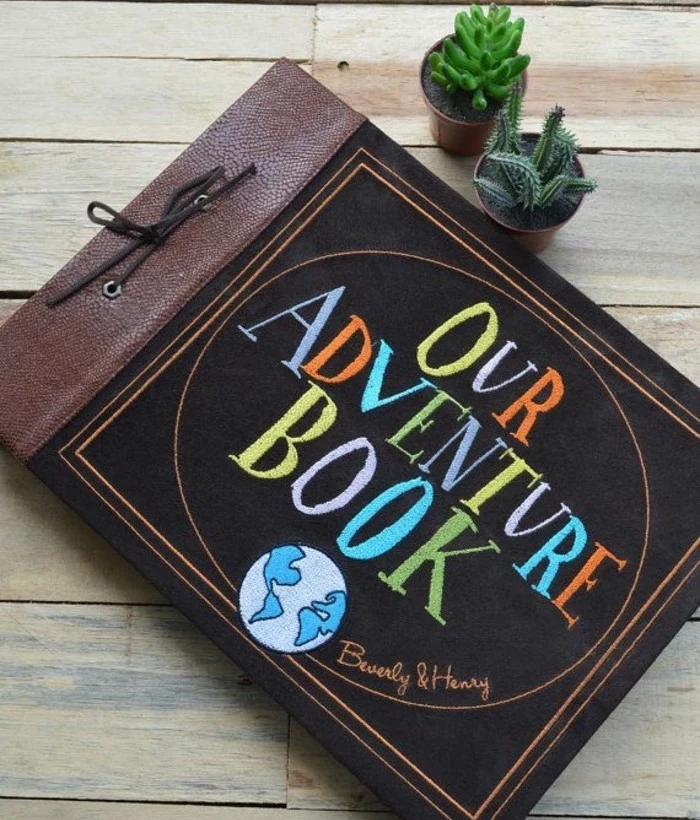
Project 2: The Coptic Stitch Journal
A handmade journal is a deeply personal gift. The Coptic stitch binding is my favorite because it allows the book to lie completely flat when open, which is amazing for writing or drawing. Plus, the exposed stitching on the spine looks incredible. I’m not going to lie, this project is more complex and requires a good dose of precision.
The Science and Materials
The most important thing here is paper grain. Like wood, all paper has a grain direction. For a book to open properly, the grain MUST run parallel to the spine. To find it, gently bend a sheet of paper one way, then the other. It will bend much more easily in one direction—that’s the grain. Bind against the grain, and the pages will fight you forever.
You’ll need text-weight paper for the pages, heavy book board for the covers, cool decorative paper, archival PVA glue, waxed linen thread, a pointed awl, and a bone folder. Using acid-free paper and archival glue is critical if you want this to last. You can find these supplies at specialty online stores like Talas or Hollander’s. A beginner bookbinding kit usually runs about $40 and is a great way to start.
The Advanced Technique: The Coptic Stitch
- Prepare Signatures: A ‘signature’ is just a group of pages folded together. Take 4-5 sheets, fold them perfectly in half, and use a bone folder to make the crease super sharp. Make 8-10 of these signatures.
- Prepare Covers: Cut two pieces of book board slightly larger than your folded pages. Glue your decorative paper to them, wrapping the corners neatly like a present. Now, this is important: press the covers under a stack of heavy books for at least a few hours, preferably overnight. If you rush this, they will warp. I promise.
- Punch Holes: You need to punch stitching holes through the crease of each signature and along the edge of each cover. A V-shaped jig called a punching cradle is super helpful here. Mark your holes evenly, maybe an inch apart, and use your awl to pierce them.
- The Stitching: Okay, let’s be honest. Explaining the Coptic stitch in text is like trying to teach someone to dance through email. It’s a repeating pattern of loops that create a beautiful chain. My best advice is to go online and search for a video tutorial of the “Coptic stitch with a kettle stitch.” The kettle stitch is the little knot at the top and bottom that locks everything together. Practice on some scrap paper first. Your first attempt might be a bit loose, and that’s totally fine. Skill takes practice.
A Dose of Reality: This is not a one-afternoon project. Plan for a full weekend for your first book. Be patient with yourself. The reward is a stunningly beautiful and functional piece of art you made from scratch.
Project 3: The Perfectly Scented Soy Candle
A handmade candle seems so simple, right? Wrong. There’s a surprising amount of science behind making a good one. A great candle burns cleanly and smells amazing. A bad one tunnels down the middle, covers your jar in soot, or has no scent at all. It all comes down to controlling your temperatures and using precise measurements.
The Science of a Clean Burn
We’ll use soy wax because it’s a natural, renewable resource that burns cleaner than paraffin. The most critical part is the wick. If the wick is too big, it burns too hot and fast. Too small, and it won’t melt the wax to the edge, causing that dreaded ‘tunneling’ that wastes most of the candle. Reputable suppliers like CandleScience have wick selection guides on their websites—use them! They’ll tell you which wick (like a CD-18 or ECO-10) works best for the diameter of your jar.
Fragrance oil is the other key. It has a ‘flashpoint,’ a temperature where it can vaporize. You need to add it when the wax is hot enough to bond with the oil, but not so hot that it burns off all the lovely scent notes. This is why a candy thermometer is NOT optional. It’s essential.
My Go-To Method for an 8-Ounce Jar
- Prep: Clean your jars. Use a wick sticker or a dab of hot glue to secure the wick base to the dead center of the jar. Use a clothespin laid across the top to keep the wick perfectly straight.
- Melt: Using a kitchen scale, weigh out about 7 ounces of soy wax. Put it in a pouring pot inside a larger pot with a few inches of simmering water (a double boiler). Never melt wax directly on the heat! Heat the wax slowly to 185°F (85°C).
- Scent: Remove the wax from the heat once it hits 185°F. Add your fragrance oil (usually about 1 oz of oil per pound of wax, but check your oil’s specific recommendations). Stir gently but thoroughly for two full minutes. This is critical for getting the scent to ‘bind’ to the wax.
- Pour: Let the wax cool to about 135°F (57°C). Pouring cooler helps prevent pits and ugly tops. Pour slowly and steadily.
- Cure: This is the most overlooked step. You must let the candle cure at room temperature for at least one week, but two is even better. This allows the wax and fragrance to fully bond. If you burn it too soon, the scent will be weak.
Heads Up! When Things Go Wrong: If your cooled candle has a lumpy top, don’t worry! It’s a common soy wax issue. A quick pass with a heat gun or even a hairdryer on high will melt the top layer into a smooth, glossy finish. If your candle doesn’t smell strong when lit, you likely didn’t let it cure long enough. Patience is everything in candle making!
A Quick Safety Warning: I once knew someone who walked away from wax melting directly on a stove. It ignited, and it was a serious fire. Always use a double boiler, and never leave melting wax unattended. And keep a lid nearby to smother any potential flames—never use water on a wax fire.
The Final Touch: Presenting Your Gift
You’ve just spent hours crafting something with care. Don’t just toss it in a generic gift bag! The wrapping is the final part of the story. I love using simple brown kraft paper with natural twine. A small hand-stamped cotton bag is perfect for a candle.
Always include a small, handwritten card. Explain the materials you used and how to care for the item. For the leather, mention that it will develop a beautiful, unique patina with use. For the candle, include instructions to trim the wick to 1/4 inch before each burn. A tiny imperfection isn’t a failure; it’s the mark of the human hand. It’s what makes your gift real. Your friend won’t be judging your stitch lines; they’ll be feeling the love and time you poured into creating something just for them. And that is a gift that can never be bought.
Inspiration Gallery
Vegetable-Tanned Leather: This is the classic choice for tooling and stamping. It’s stiff at first but develops a beautiful, rich patina over time, telling the story of its use. Perfect for a project you want to personalize with initials.
Chrome-Tanned Leather: Softer, more pliable, and available in a huge range of colors from the start. It’s often used for upholstery and fashion. A great choice for a pouch that needs to be soft and flexible from day one. For the pouch project in this article, a 2-3 oz veg-tan is a fantastic, versatile starting point.
The desire to make is a deep-seated human instinct. When we create, we are not just making things; we are making meaning.
When it comes to personalizing a gift, scent is one of the most powerful tools. It’s directly linked to memory and emotion. Instead of a generic vanilla, try creating a signature blend that reflects your friend.
- For the Book Lover: A mix of sandalwood, cedarwood, and a touch of vanilla for a ‘cozy library’ feel.
- For the Nature Enthusiast: Pine, eucalyptus, and a hint of mint to evoke a walk in the forest.
- For the Urbanite: A sophisticated blend of amber, tobacco, and black pepper for a warm, modern vibe.
A common pitfall: Rushing the final steps. After spending hours stitching a journal or pouring the perfect candle, it’s tempting to wrap it up quickly. Resist! The presentation is the final layer of care. A simple kraft paper wrap, tied with natural twine and finished with a real wax seal, elevates the entire experience before the gift is even opened.

How can I make my gift truly unique?
Look for the ‘story’ inside the object. For a Coptic stitch journal, consider using a piece of a map of a meaningful place as the cover paper. For a leather pouch, you could stitch a tiny, secret symbol on the inside flap that only you and the recipient understand. It’s these hidden details that transform a well-made object into a personal treasure.
- A professional, clean edge that won’t fray.
- A satisfying, tactile finish.
- Enhanced durability for an item meant to last.
The secret? A simple, inexpensive tool called a wood slicker or burnisher. After trimming your leather edge, dampen it slightly and rub the slicker vigorously back and forth. The friction and heat will compress and polish the fibers into a beautiful, sealed edge.
The Japanese have a term, ‘wabi-sabi,’ which celebrates the beauty of imperfection and transience. In a handmade object, a slightly uneven stitch or a unique mark in the leather isn’t a flaw—it’s the signature of the maker. It’s proof that the gift was made by a real person, with care, not by a machine. Embrace these small details; they give your work its soul.
A study by the Journal of Marketing found that gift recipients perceive handmade items as being made with more ‘love’ than machine-made ones.
This isn’t just a feeling; it’s a measurable perception. The time and effort you invest are communicated directly through the object itself. When someone holds your gift, they’re not just holding a pouch or a candle; they’re holding the hours of thought and care you poured into it.

Think beyond basic craft store supplies. For truly cherished gifts, the quality of the raw materials is paramount.
- Paper: For journals, skip standard copy paper. Invest in something like Tomoe River 52gsm paper, famous for its smoothness and ability to handle fountain pen ink without bleeding.
- Wicks: For candles, the right wick is crucial. Brands like The Wooden Wick Co. offer crackling wood wicks that add a whole other sensory dimension to your creation.
- Thread: For leather, use a waxed thread like Ritza 25 Tiger Thread. It’s incredibly strong, durable, and makes the stitching process smoother.
Important point: You don’t need a dedicated workshop to start. A great creative space can be a small corner of your desk. The key is organization. A good quality self-healing cutting mat protects your table, a simple desktop organizer can hold your tools, and excellent task lighting (like a flexible LED lamp) will save your eyes and improve your accuracy. Keep it tidy, and it will always be an inviting place to create.
My scented candle top isn’t smooth! Why?
This is a common issue with natural soy wax. It’s often caused by the wax cooling too quickly or unevenly. To fix it, try pre-warming your glass container slightly before pouring. You can also save a little wax from your initial pour and, once the candle has set, do a very thin ‘second pour’ on top to smooth it over. For a flawless finish every time, a heat gun waved gently over the surface will melt away imperfections.

Did you know? Coptic stitch binding dates back as early as the 2nd century AD in Egypt. It’s one of the oldest forms of bookbinding and is prized because it allows a book to open completely flat.
To keep your handmade leather goods looking their best, a little care goes a long way. After a few months of use, or if it looks dry, apply a small amount of a dedicated leather conditioner like Smith’s Leather Balm. Use a soft, lint-free cloth, apply a thin layer in a circular motion, and let it absorb for an hour before buffing off any excess. This will nourish the leather and protect it from the elements.
Fragrance Oils: These are synthetic blends designed to be stable in candles and soaps. They offer a huge variety of complex scents (like ‘Old Books’ or ‘Sea Salt and Orchid’) that are difficult to achieve with natural oils. Choose high-quality, phthalate-free oils from suppliers like CandleScience for the best results.
Essential Oils: These are natural, plant-derived oils. While wonderful for aromatherapy, they can be volatile in hot wax, and the scent ‘throw’ (how much it fills a room) can be weaker. They are a great choice for a subtle, all-natural product.

Building a quality toolset doesn’t have to happen all at once. Instead of buying a cheap, 50-piece kit where most tools are subpar, invest in one excellent tool at a time. Start with a truly sharp blade, like an Olfa craft knife or a Japanese leather knife. The precision and ease of use will dramatically improve your work and make the process far more enjoyable.
- It can be personalized with a monogram.
- The color can be chosen to match their style.
- The size can be tailored to their specific needs.
The key is an initial conversation. Casually ask them what they carry every day. Do they need space for a phone, just cards, or also a lip balm? This small bit of ‘research’ ensures your beautiful creation is also perfectly useful.
Creating high-quality gifts is a journey. Once you’ve mastered the projects in this guide, consider expanding your skills into new areas. Block printing on tote bags or tea towels allows for infinite design possibilities. Simple metal stamping on brass or pewter blanks can create beautiful, personalized keychains or pendants. Each new skill you learn adds another layer to your gift-giving repertoire.
Globally, the craft sector is a significant economic force, second only to agriculture in rural employment in many developing countries. By supporting small-scale material suppliers, you’re part of a larger ecosystem.
When you choose to buy your leather from a small Etsy seller, your paper from an independent mill, or your beeswax from a local apiary, you’re not just getting better materials. You’re supporting another maker’s passion and contributing to a more sustainable, human-scale economy.

What if I make a mistake I can’t fix?
Every crafter has a ‘boneyard’ of failed projects. Don’t throw them out! A leather pouch with crooked stitching can be deconstructed and used for smaller projects like key fobs or cord keepers. A journal with a scuffed cover can become your own personal sketchbook. See these ‘failures’ as part of the material cost of learning. It’s practice, not waste.
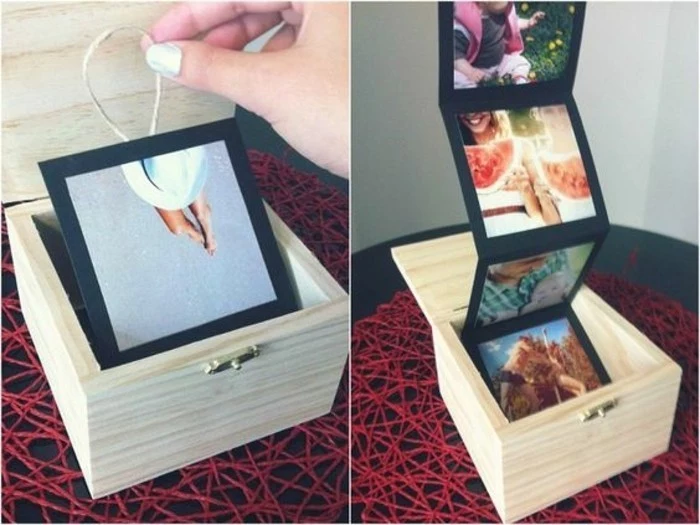
The gift of a skill: For a truly unique present, why not assemble a kit for one of these projects? Package the raw materials—the leather, thread, and needles for the pouch, or the wax, wick, and fragrance for a candle—in a beautiful box. Include a printout of the instructions or a link to a favorite tutorial. You’re not just giving an object; you’re giving the gift of a creative experience.

For a truly professional look on your leather projects, mastering your stitching is key. Don’t just punch holes and sew. Use a stitching chisel or pricking iron to create angled slots, not round holes. Then, learn the ‘saddle stitch’ using two needles. This creates a strong, interlocking stitch that is far more durable and beautiful than a simple running stitch from a machine.
- It adds a luxurious, sensory element.
- It provides a soft, warm glow.
- It can be a fun, fast, and highly customizable project.
The secret to a great candle? Precision. Weigh your wax and fragrance oil meticulously using a digital kitchen scale. Monitor your temperatures with a candy or digital thermometer. Candle making is as much a science as it is an art.

A thing of beauty is a joy for ever: Its loveliness increases; it will never pass into nothingness. – John Keats
Important consideration: The ‘cure’ time for a soy candle is non-negotiable. After you pour it, you must let it sit untouched for at least 7 to 14 days before lighting. This allows the fragrance oil to fully bind with the wax crystals. If you light it too soon, you’ll get a weak scent ‘throw’. Patience is the final, and most crucial, ingredient.
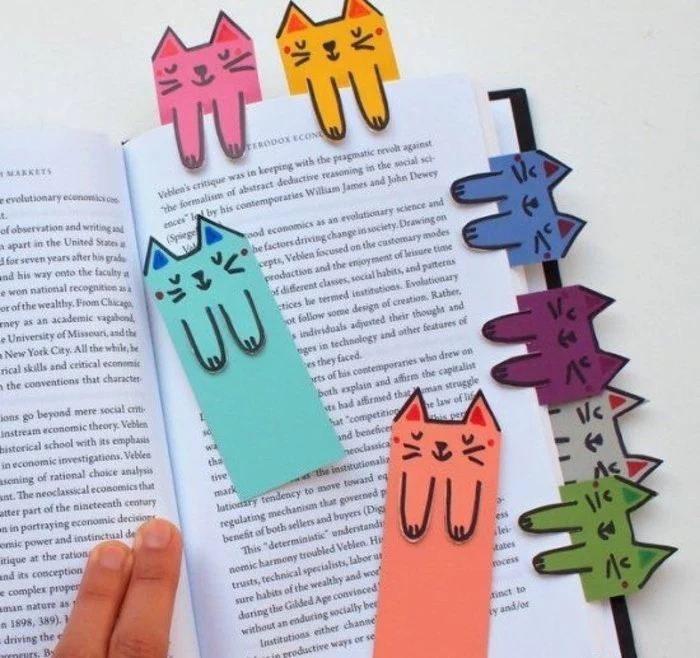
Don’t just think about the main gift; consider creating a small, complementary item from the offcuts. The leftover leather from the pouch project is perfect for making a matching bookmark or a stylish cable tidy. The extra paper from the journal can be used to make a set of beautiful, high-quality gift tags. This approach is not only sustainable but also adds another layer of thoughtfulness to your present.


