My Go-To Playbook for At-Home Fun That Actually Works (And Doesn’t Break the Bank)
I’ve spent more than two decades with my hands covered in paint, dough, and glue—first as a young parent and later as an early childhood educator. I’ll never forget one rainy afternoon trying to make one of those elaborate papier-mâché volcanoes from an online tutorial. It promised an epic, lava-spewing eruption. What I got instead was a soggy, grey lump and a very, very frustrated four-year-old.
In this article
That day taught me a lesson that has saved me countless times since: The best activities are almost never the most complicated. They’re simple, they’re purposeful, and they tap right into a kid’s natural desire to figure things out.
So, this isn’t just another list of crafts to kill an hour. This is my personal playbook of activities I’ve tested, tweaked, and relied on for years. These are the real-deal tools that support healthy development, from building strong hands for writing to helping a kid navigate those huge, overwhelming emotions. We’re going to focus on sensory play that builds brain connections, engineering projects that teach real problem-solving, and big games that build physical confidence. I’ll share what works, why it works, and just as importantly, what to watch out for. Think of this as a chat with a friend who’s already made all the messes for you and found the stuff that’s actually worth the cleanup.
Part 1: The Foundation – Sensory Play That Genuinely Helps
Before we start mixing, let’s get one thing straight. When a child is squishing dough or pouring a goopy liquid, they’re not just making a mess. They are doing a seriously complex neurological workout. This hands-on input builds brand new pathways in the brain, helping with everything from fine motor skills to emotional regulation. Honestly, a kid who is feeling overwhelmed can often find a sense of calm just by focusing on the physical sensation of kneading dough. It’s foundational stuff.
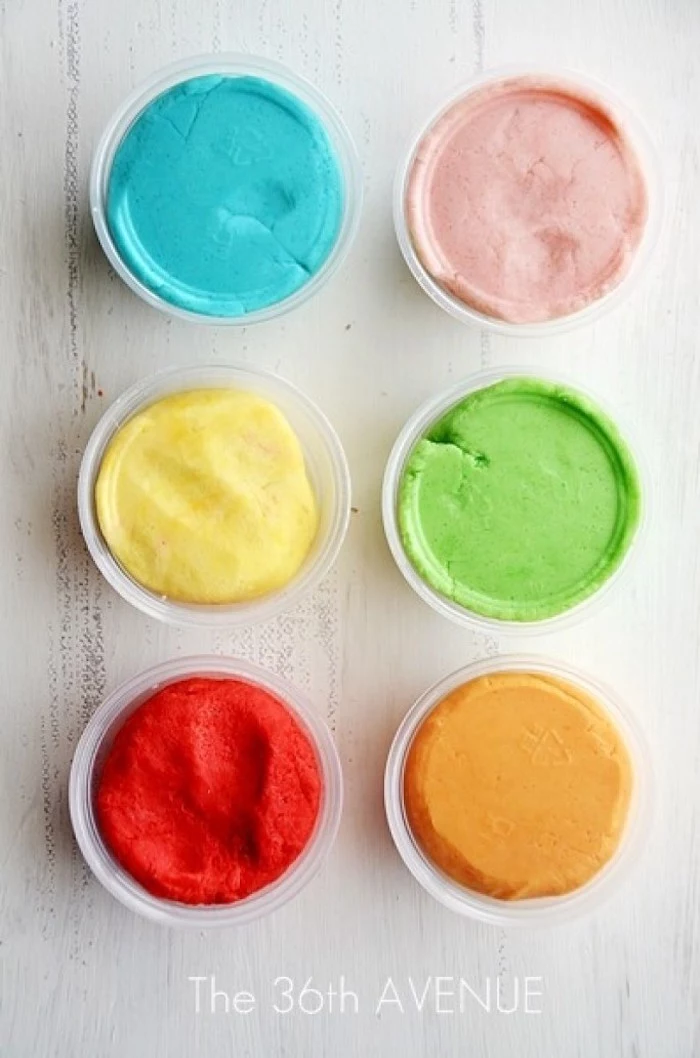
Activity 1: The Perfect Homemade Play-Dough
Forget the store-bought tubs that get crusty in a day. The best play-dough is homemade, period. I have tried dozens of recipes over the years, from no-cook versions to bizarre ones using hair conditioner. This cooked recipe is the one I give to every new teacher and parent who asks. It’s nearly foolproof, has a wonderfully smooth and satisfying texture, and lasts for ages.
Good to know: This one is fantastic for ages 2 and up (with supervision, of course).
So, why bother making it? Let’s compare. Store-bought dough can cost $5-$10 for a few small tubs, and it dries out if you look at it wrong. My homemade version costs less than a dollar per batch, stays soft for over a month, and you know exactly what’s in it. The most “expensive” ingredient is the cream of tartar, which you can get for about $3-$4 a jar at any grocery store, and that one jar will last you for dozens of batches. It’s a no-brainer.
The magic is in the cooking. The heat activates the starch in the flour, which gives the dough its structure. The cream of tartar isn’t optional—it’s what makes the dough super elastic and helps preserve it. The salt also acts as a preservative and, frankly, discourages any curious nibbling.
My Go-To Play-Dough Recipe:
- 1 cup all-purpose flour
- 1/2 cup salt
- 2 teaspoons cream of tartar
- 1 cup cool water
- 1 tablespoon vegetable or melted coconut oil
- Food coloring (gel gives the most amazing, vibrant colors)
The Foolproof Method:
- In a medium, non-stick saucepan, whisk together the flour, salt, and cream of tartar. Getting the lumps out now is the key.
- In a separate bowl, mix your water, oil, and a few drops of food coloring.
- Pour the wet stuff into the saucepan with the dry ingredients. Whisk it all together until it’s mostly smooth. Don’t stress about a few small lumps.
- Put the pan over medium-low heat and stir constantly with a silicone spatula. At first, it’ll look like sad, pasty soup. Have faith.
- After 2-3 minutes, you’ll see it start to thicken. Keep stirring! Scrape the bottom and sides of the pan.
- Suddenly, it will pull together into one big ball of dough. That’s your moment. Once it forms a ball and isn’t sticky anymore, take it off the heat.
- Let the ball of dough cool on the counter for a few minutes until you can handle it. Then, knead the warm dough for about 3-5 minutes. This last step is what makes the texture absolutely perfect.
Quick Tip: If it feels sticky, you probably just undercooked it. Pop it back on the heat for another 30-60 seconds. If it’s a bit crumbly, you might have overcooked it—just knead in a tiny bit of water or oil. Store it in an airtight container or Ziploc bag in the fridge, and it’ll honestly stay soft for a month or more.
Heads up! While the ingredients are non-toxic for humans, the high salt content is very dangerous for pets, especially dogs. Always supervise playtime and store it where they absolutely can’t get to it.
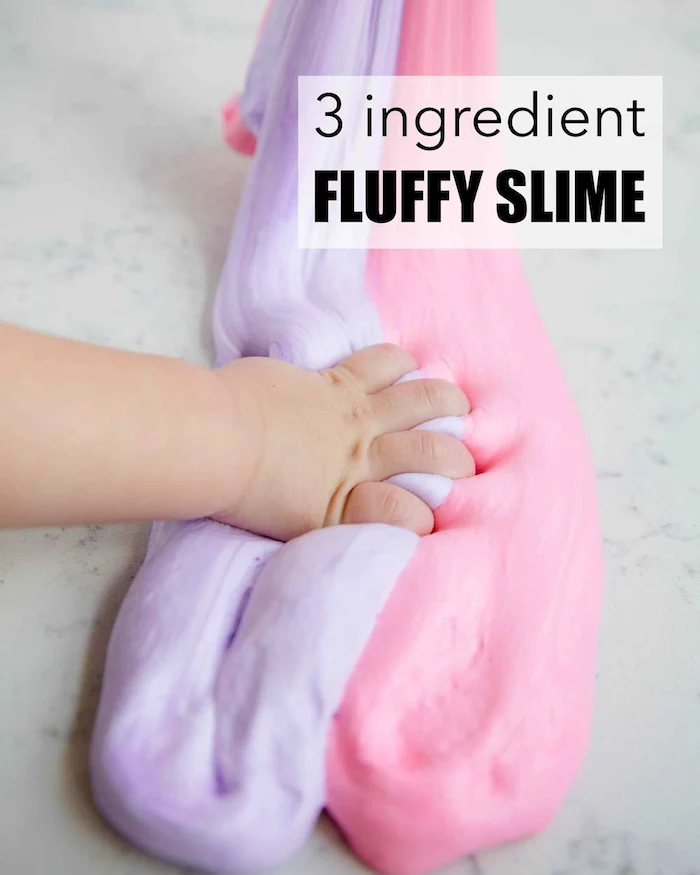
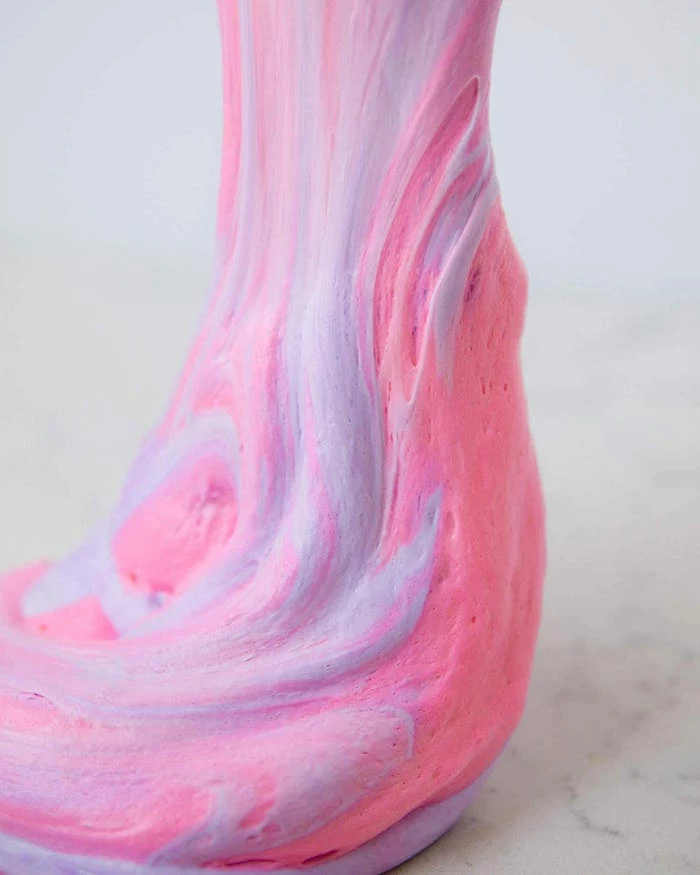
Activity 2: A Better, More Interesting Slime (That’s Taste-Safe!)
So many slime recipes out there use borax, laundry detergent, or contact lens solution. As an educator, I’m just not a fan of these for young kids. I once saw a student get a mild chemical burn from a friend’s homemade borax slime, so I steer clear. Instead, I use a fascinating substance that’s completely taste-safe and secretly a super cool science lesson.
The Alternative: Oobleck (A Non-Newtonian Fluid)
Named after a substance from a classic children’s book, this stuff is pure magic. It’s a perfect example of a non-Newtonian fluid, which is a fancy way of saying it acts like both a liquid and a solid. It’s mind-blowing for kids and, let’s be honest, for adults too.
Best for ages: 3 and up. It’s messy fun, so be prepared!
The Easiest Recipe Ever:
- 2 cups cornstarch (about $2 at the grocery store)
- 1 cup water
- Food coloring (optional)
The Method:
- Put the cornstarch in a big bowl or a 9×13 inch baking dish. The dish is great for containing the mess.
- If you’re using food coloring, mix it into the water first for even color.
- Slowly pour the water into the cornstarch while mixing with your hands. This is the best part! Encourage your child to get in there.
- Keep mixing until all the powder is wet. You’ll know it’s right when it drips from your hand like a liquid but feels solid when you tap it firmly.
My Pro Cleanup Trick: This is where Oobleck is the undisputed champion. It looks like a disaster, but cleanup is surprisingly easy. DO NOT pour it down the drain; it can clog your pipes. Instead, let any spills or the contents of the bowl dry out completely. They’ll turn back into a powder you can sweep or vacuum up. For the bowl, let it dry, scrape the solid chunks into the trash, then wipe out the dusty residue with a paper towel before rinsing it in the sink. Trust me on this.
Part 2: Building Small Worlds and Strong Hands
Every time a child fastens a button or holds a crayon, they’re using fine motor skills—those small, precise movements in their hands and fingers. Developing these muscles is crucial for school and for life. These activities are designed to build that strength through play, not boring drills.
Activity 3: The Recycled Engineering Zone
Forget fancy building block sets. The best engineering happens with a pile of interesting “junk.” I call this found-object engineering, and it’s a powerhouse for development.
Why it’s so great: Giving a kid a kit with instructions teaches them to follow directions. Giving them a pile of recycled materials teaches them to innovate, solve problems, and be resilient when a tower inevitably collapses. This is where real creativity is born.
Best for ages: 4 and up, as it requires a bit more imagination and dexterity.
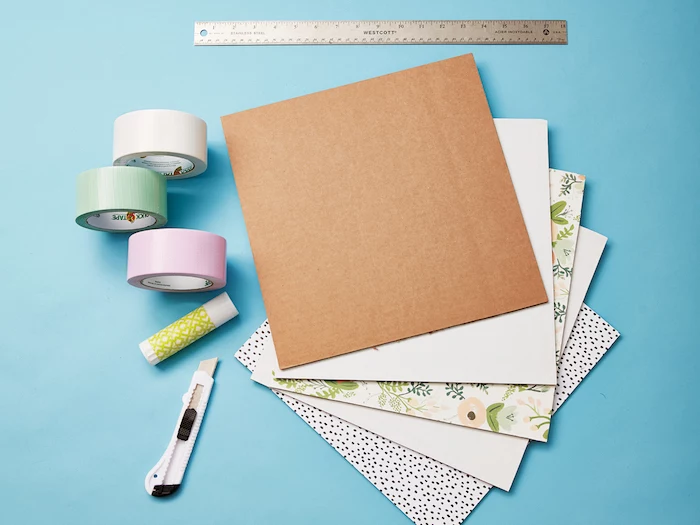
My Curated Material List (Cost: Basically Free!):
- Structures: Cardboard boxes of all sizes (cereal, shoe, shipping boxes), paper towel tubes, egg cartons.
- Connectors: Masking tape is perfect because kids can tear it themselves. Also, binder clips, paper clips, and rubber bands. A low-temp glue gun can be used with strict adult supervision.
- Details: Bottle caps for wheels, fabric scraps for rugs, yogurt lids for windows, yarn for ropes… you get the idea.
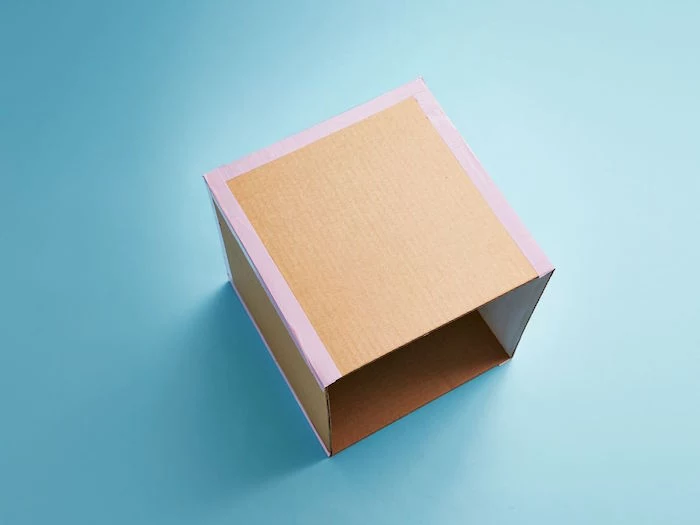
My Role as “Construction Foreman”: If your kid just stares at the pile and feels overwhelmed, give them a simple starting point. Ask something like, “Hey, what if we build a garage for your favorite truck? It just needs four walls and a roof to get started.” My job isn’t to be the architect. I ask questions to prompt critical thinking: “Hmm, that tower keeps falling. What could make the base stronger?” or “How could you build a ramp for your car to get to the second floor?”
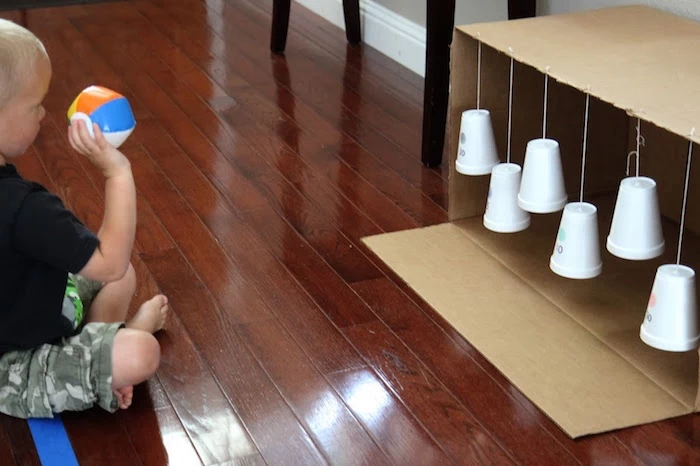
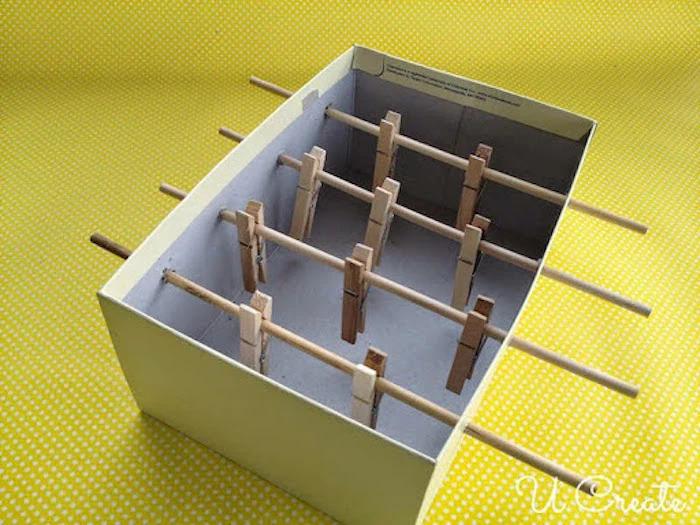
Activity 4: The Shoebox Foosball Table
This is a classic project that combines building with a super fun game. It’s excellent for hand-eye coordination and is a stealthy lesson in simple mechanics.
Best for ages: 5 and up. It involves more coordination, and an adult will need to do the prep work.
Time commitment: Plan for about 20 minutes of adult prep (mostly cutting the holes) and then another 30 minutes for kid decorating and assembly.
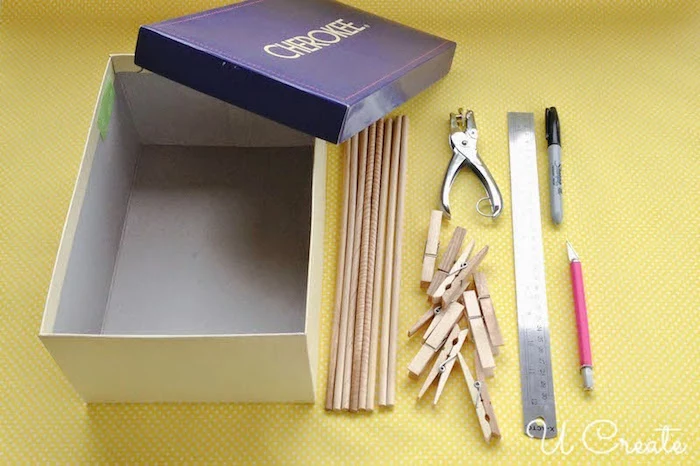
What You’ll Need:
- A sturdy shoebox
- 4 wooden dowels (around 1/4 inch thick), a bit longer than the box is wide. You can find these at craft stores or a hardware store for a couple of bucks.
- 10-12 wooden clothespins
- Wood glue (this is important!)
- A ping pong ball or other small, lightweight ball
- Craft knife (adult use only)
The Pro Method:
- An adult uses the craft knife to cut a goal on each short end of the box.
- Lay the dowels across the box to plan their positions. Mark where the holes should go. Make sure they’re high enough for the clothespin “players” to spin without hitting the bottom.
- Carefully poke holes for the dowels. A little trick: glue a small metal washer over each hole to reinforce it. This stops the cardboard from tearing during an intense game.
- Slide the dowels through. Clip the clothespin players on.
- Here’s the key: Use wood glue, not hot glue, to secure the clothespins. Hot glue gets brittle and will snap off. Wood glue creates a much stronger bond. Let it dry completely.
- Let the kids paint the clothespins in team colors while the glue sets!
Part 3: Big Fun for Whole-Body Movement
Kids need to move their bodies. Running, jumping, and climbing aren’t just about burning off energy; they’re vital for developing coordination, body awareness, and physical confidence. This stuff is just as important as learning letters and numbers.
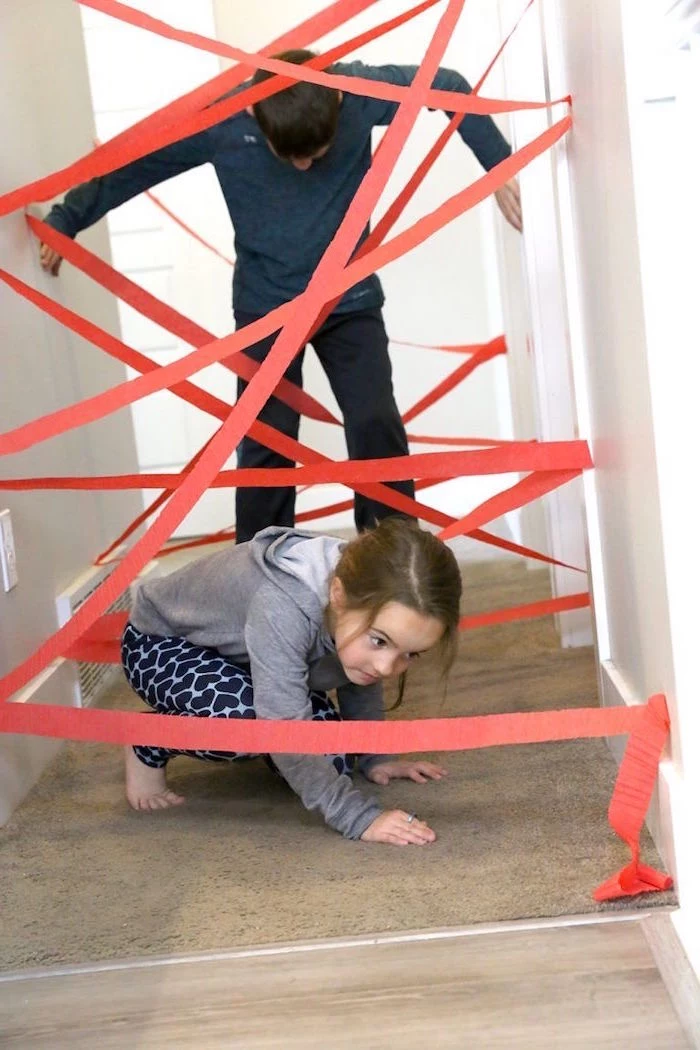
Activity 5: The “Laser Maze” Hallway
This is an all-time favorite because it turns a boring hallway into a spy mission with almost no supplies. It’s a full-body workout that hones balance, core strength, and motor planning.
Best for ages: 4 to 10. Even older kids get a kick out of this!
What You’ll Need:
- A roll of crepe paper streamers or yarn ($1-$2 at a party or craft store)
- Painter’s tape (the blue kind—an absolute must!)
My Pro Setup:
- Use a hallway or the space between two couches.
- Stretch the yarn or streamers across the hall at different heights and angles. Don’t just do it randomly; be strategic.
- Create high lines that force them to crawl under.
- Create low lines that require a high, careful step over.
- Make some crisscross patterns that make them twist and turn.
- Use the painter’s tape to secure the ends. I learned the hard way: regular tape will peel your paint right off. Don’t do it!
Level it up: Give them a mission. “You’re a spy! You have to carry this ‘treasure’ (a beanbag) to the other side without touching the lasers!” It adds a whole new layer of fun.
Part 4: Quiet Time That Creates Lasting Memories
Just as vital as active play is quiet, focused time. These activities are perfect for winding down and developing a child’s attention span.
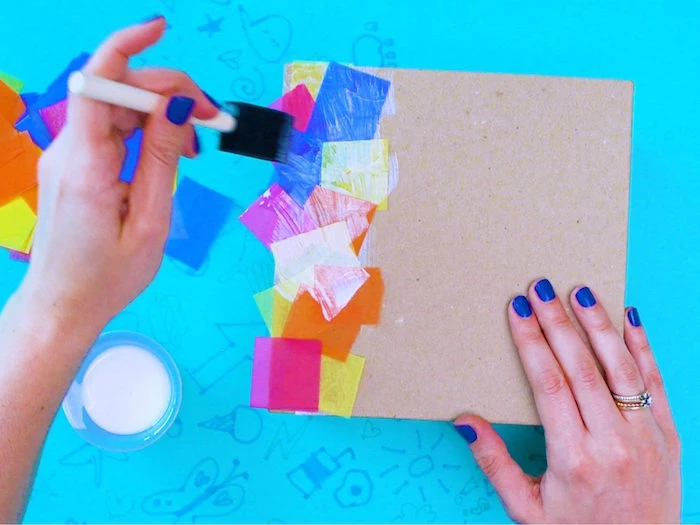
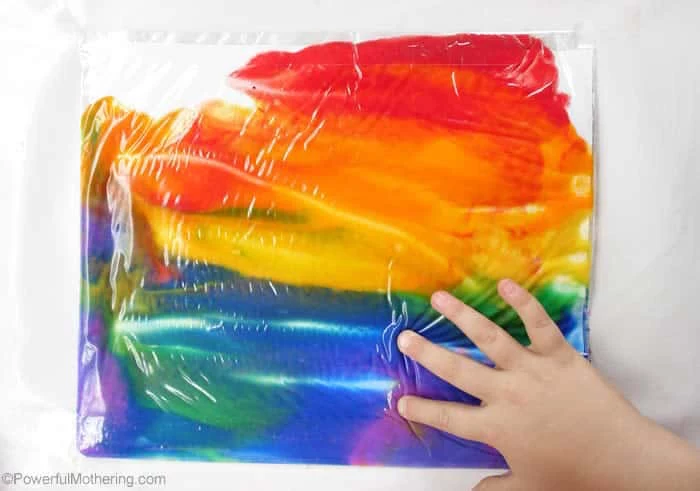
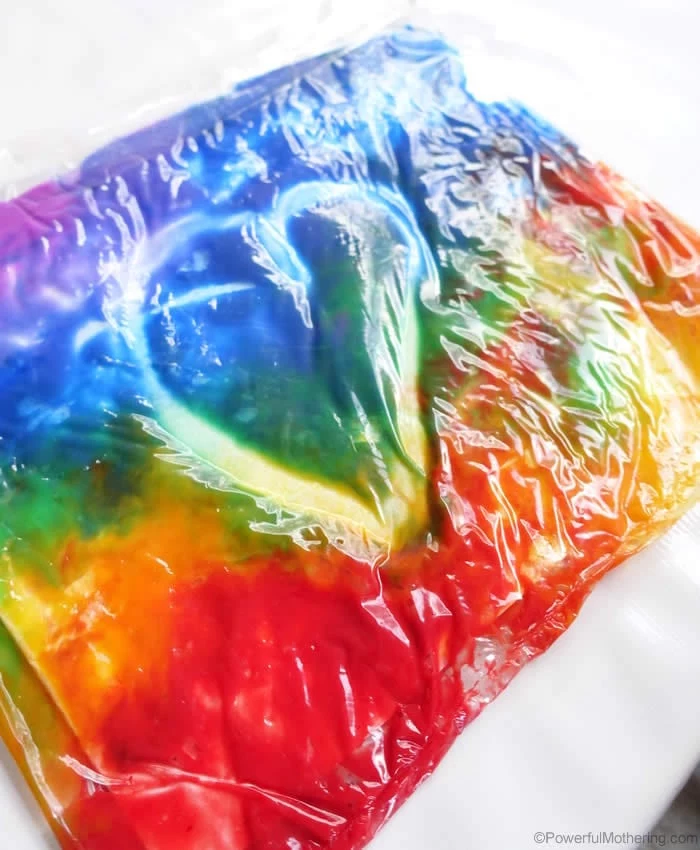
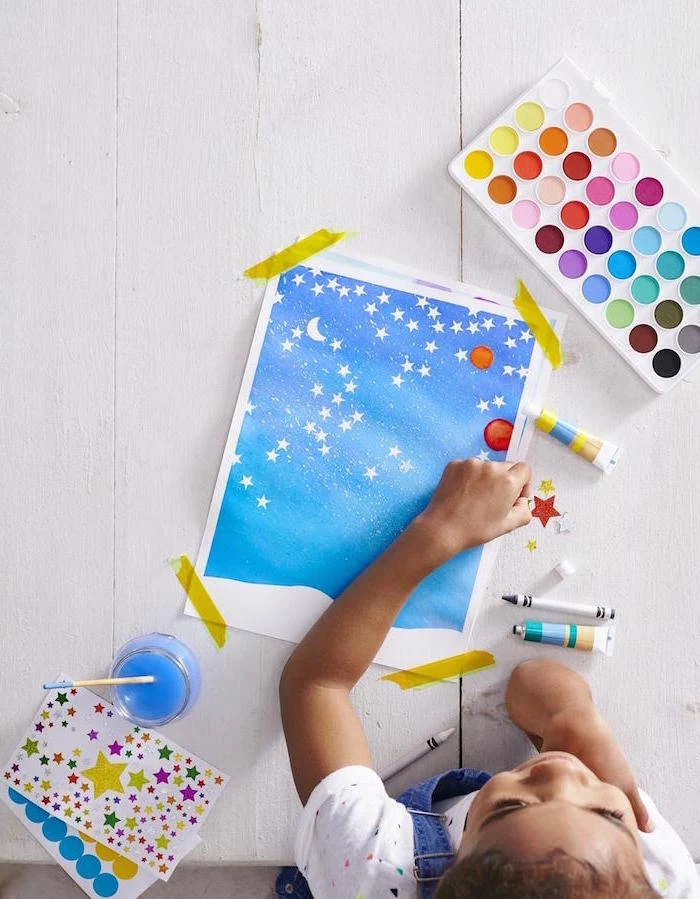
Activity 6: The Truly No-Mess Finger Painting
This is my secret weapon for toddlers or for days when I just can’t face a big cleanup. It gives the full sensory joy of finger painting with zero mess.
Best for ages: 1 to 4. It’s a lifesaver for the little ones.
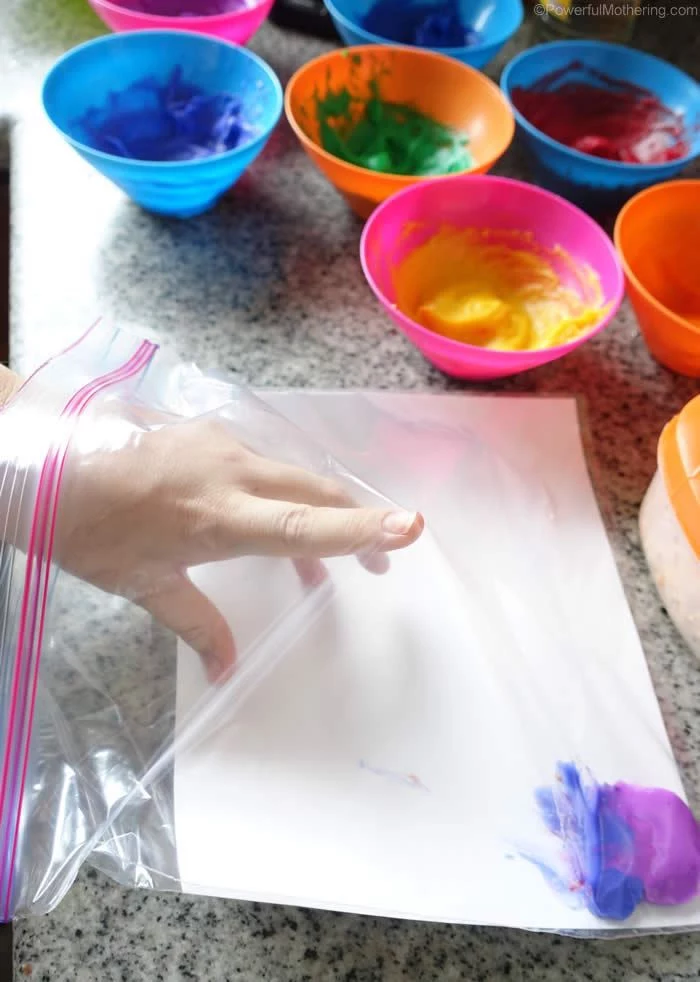
The Setup:
- A large, heavy-duty freezer bag (zipper style). Don’t use a flimsy sandwich bag—it’ll pop.
- A piece of white cardstock, cut to fit inside.
- A few small blobs of washable paint.
- Tape.
The Method:
- Put the cardstock inside the bag.
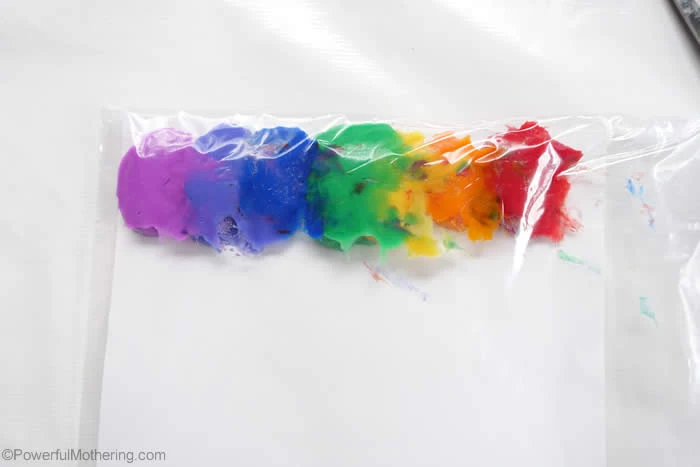
- Add small drops of different colored paint onto the paper inside the bag.
- Squeeze out most of the air and seal the bag. A quick tip: I fold the zipped end over and tape it shut. I learned that after a very determined toddler squeezed one open.
- Tape the whole bag to a highchair tray or a window and let them squish, swirl, and mix the colors through the plastic. When they’re done, you can carefully pull out the paper and let it dry. Beautiful, abstract art with zero cleanup!
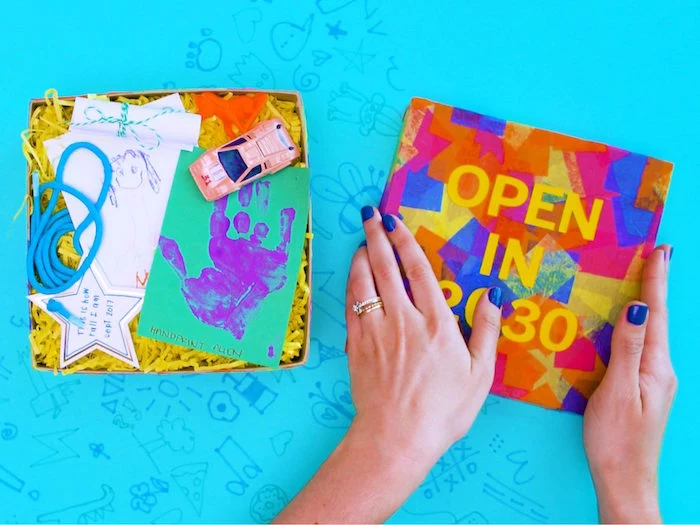
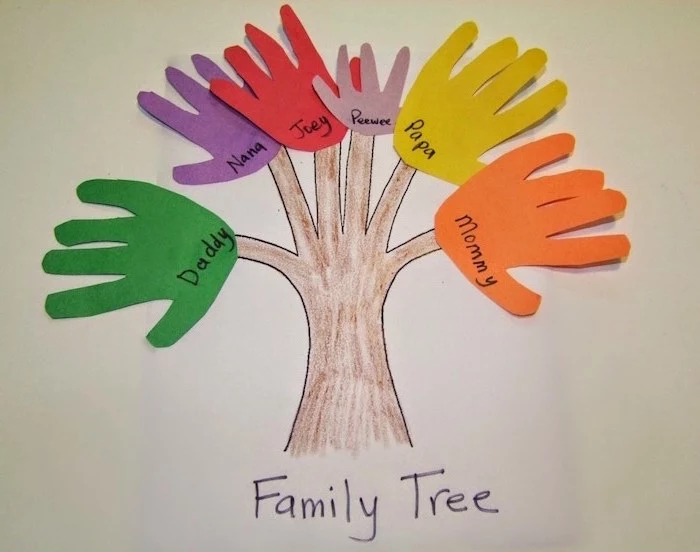
Activity 7: The Meaningful Time Capsule
A time capsule can be so much more than a craft. It can become a powerful family tradition that shows a child, in a very real way, how much they’ve grown.
Best for ages: 4 and up, with more independence as they get older.
My family started this when my oldest was five. Every year on their birthday, we make a new one. When they turned ten, we opened the first five. It was an incredibly moving experience, full of laughter and a few happy tears. It was more powerful than any photo album.
The key is to go beyond just gathering random trinkets. I guide the process with specific prompts. We always include:
- An “All About Me” sheet: I made a simple printable with prompts like “My favorite food is…”, “My best friend is…”, “When I grow up, I want to be…”, and a spot to measure their height. It’s amazing to look back on. I’ve put together the exact sheet I use, and you can grab it for free right here to print out.
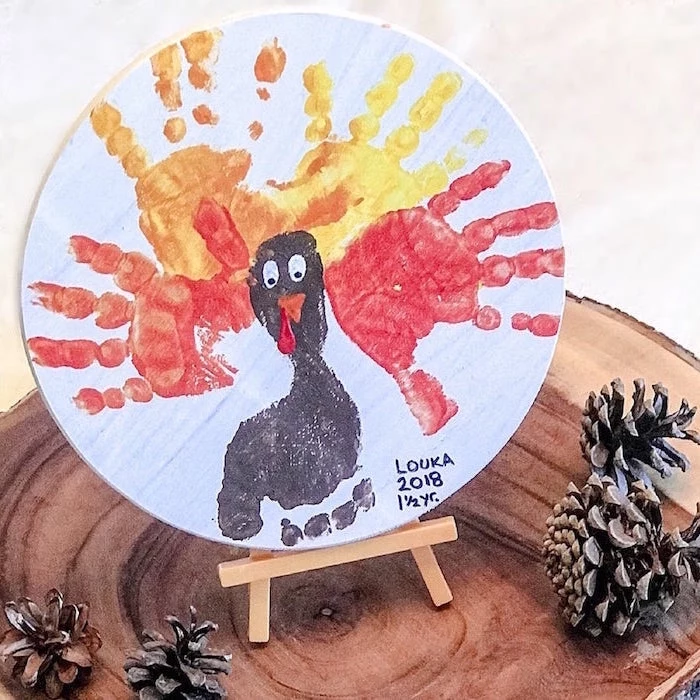
- A Handprint: We trace their hand on paper. This is one of the most powerful things to see years later.
- A Drawing: I ask them to draw our family. It’s a precious snapshot of how they see the world.
- A Letter to Their Future Self: For older kids, they write it themselves. For younger kids, I interview them and write down their answers exactly as they say them.
Practical tip: Store the box somewhere cool and dry, like a high closet shelf. Attics and basements can ruin the contents. And put a reminder in your phone calendar for the opening date, because life gets busy!
My Final Two Cents
Think of this playbook as a starting point. The real magic happens when you adapt these ideas to your own kid’s personality. Remember, the goal is always the process, not a perfect final product. A lopsided tower they designed themselves is worth a thousand times more than a perfect craft you told them exactly how to make.
And please, be kind to yourself. Some days, the only activity that works is a cartoon and a cuddle on the couch. That isn’t a failure; that’s just real life. These are tools in your toolkit, not a standard you have to meet every single day.
Finally, a crucial safety note from my years of experience: always, always supervise your child, especially with new materials or small parts. You know your child best. If an activity feels unsafe for them, it is. Trust your gut above all else. Now go have some fun and make a few good messes.
Inspirational Gallery
My child gets bored after five minutes. What am I doing wrong?
Probably nothing! The key is shifting from a “product” mindset (making a perfect craft) to a “process” one. Instead of a single goal, offer an open-ended invitation. A tray with play-dough, a few cookie cutters, and some beads is more engaging long-term than a step-by-step tutorial because the child directs the play. If they just want to squish the dough for 20 minutes, that’s a win!

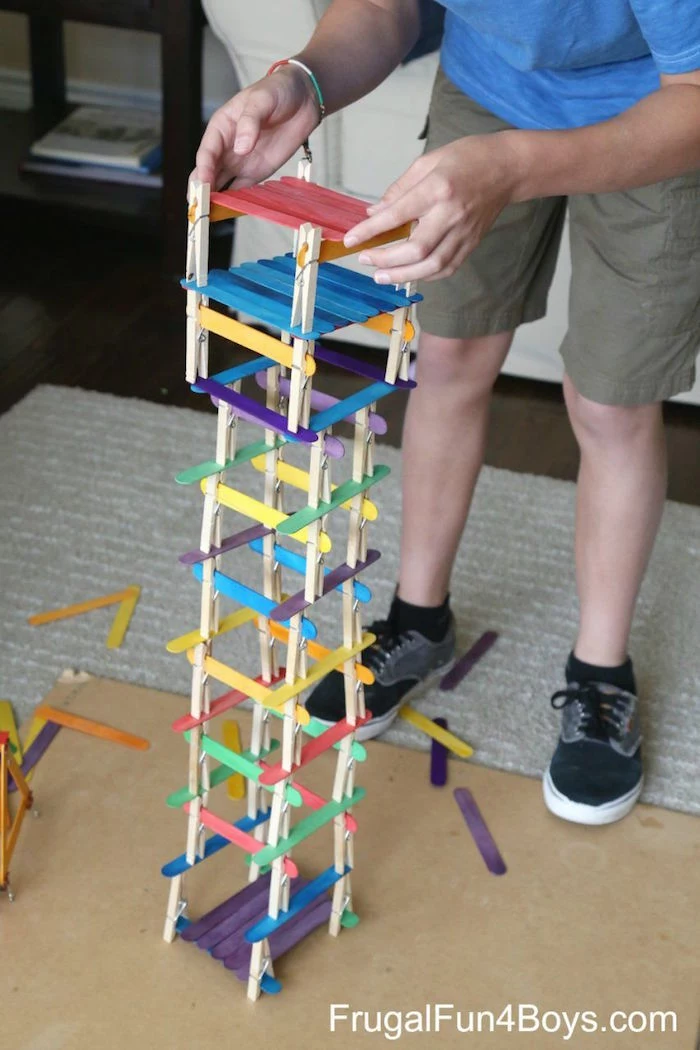
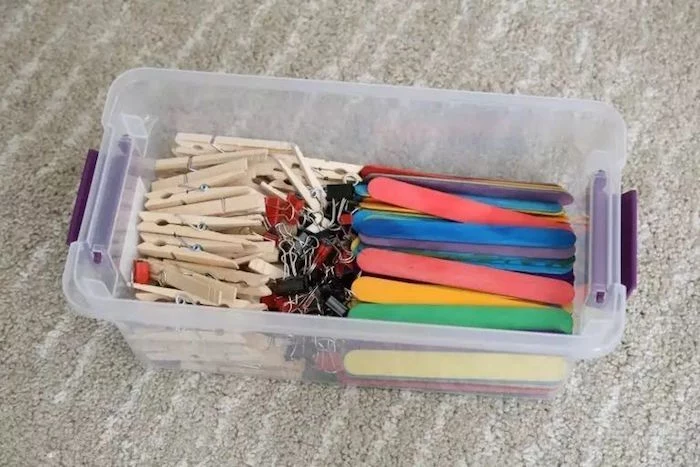
- Create a secure base for towers and bridges.
- Act as perfect “people” or characters in a small world.
- Serve as a simple tool for stamping patterns into play-dough.
The secret? A handful of classic wooden clothespins. They are one of the most versatile and budget-friendly additions to any building kit, promoting pincer grasp strength needed for writing.
Important point: Supervise what goes in the mouth. A fantastic rule of thumb for little ones is the “toilet paper tube test.” If a toy or craft component (like a large bead or pom-pom) can fit entirely inside an empty toilet paper roll, it’s a potential choking hazard for children under three.
Over 60% of what we throw away could be recycled.
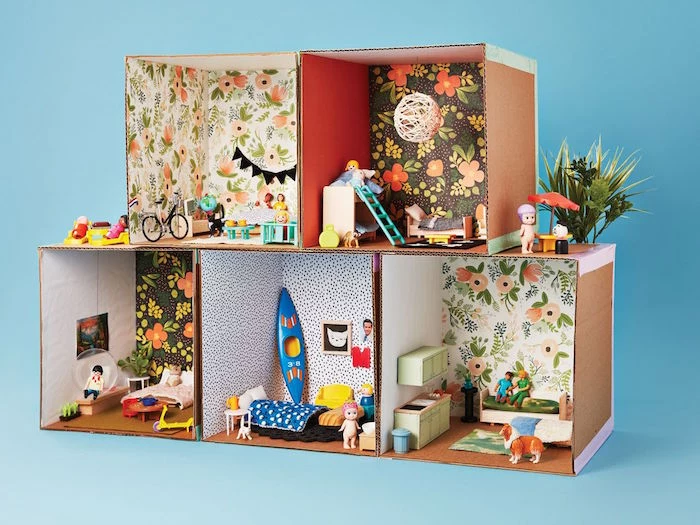
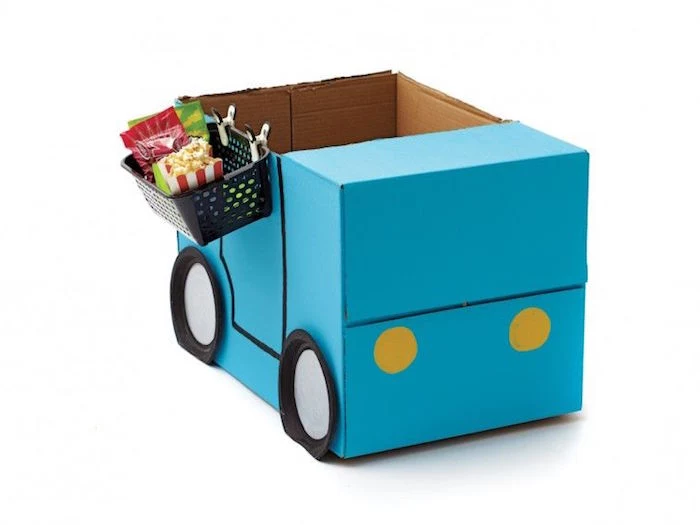
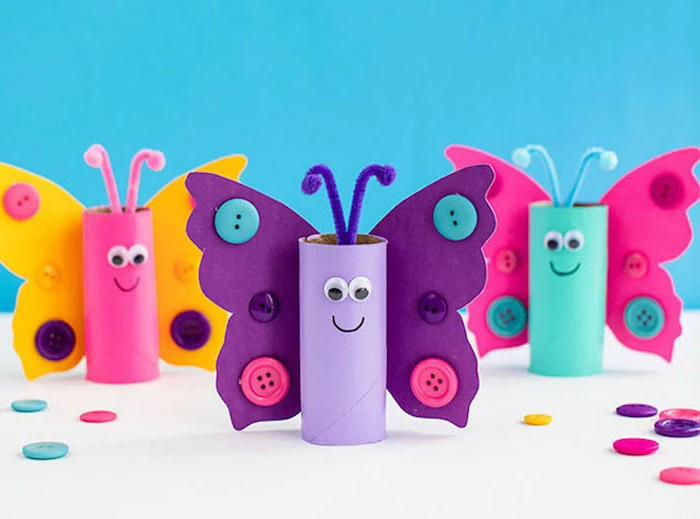
Before you toss that cardboard box or plastic bottle, see it through a child’s eyes. A large box from a new appliance is not trash; it’s a spaceship, a fort, or a secret clubhouse. Give them some washable markers or paint sticks (Kwik Stix are brilliant for mess-free color) and let their imagination take over for an afternoon.
When it comes to sensory bases, dyed rice is a classic for a reason. It’s incredibly cheap, provides a wonderful sound and texture, and is easy to make. Just add a cup of plain white rice to a Ziploc bag, pour in a teaspoon of vinegar and a few drops of food coloring, then shake vigorously until the color is even. Spread it on a baking sheet to dry for an hour.
- They don’t require sharpening and rarely break.
- The plastic casing keeps hands clean.
- The vibrant, smooth application is instantly satisfying.
Thinking of crayons? Consider Crayola Twistables. They bridge the gap between crayons and markers, making them a durable and less frustrating choice for toddlers who are still developing pressure control.
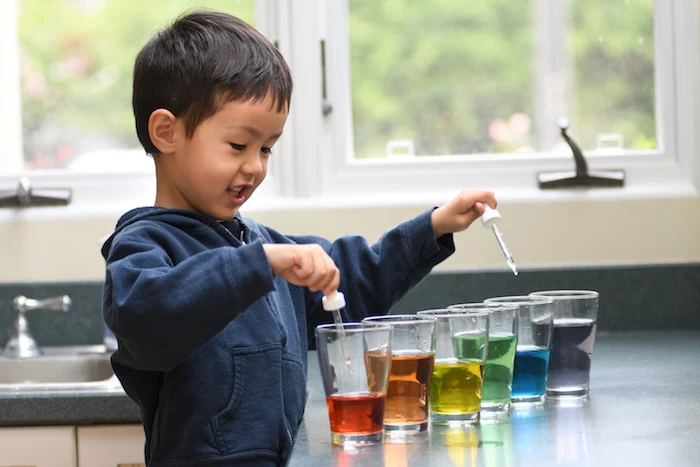
Liquid Watercolors: Offer vibrant, transparent hues perfect for science experiments (like walking water) or art on coffee filters. Brands like Sargent Art provide excellent quality.
Food Coloring: More concentrated and great for coloring sensory materials like dough, slime, or rice. Gel-based food coloring from Wilton gives you intense color without adding too much liquid.
For pure art projects, watercolors win. For DIY play materials, stick with food coloring.
“Play is often talked about as if it were a relief from serious learning. But for children, play is serious learning.” – Fred Rogers

Want to contain the inevitable mess? An old fitted sheet is your best friend. Hook the elastic corners over the legs of a small kids’ table. It creates a ‘catch-all’ basin that contains stray rice, dough crumbs, or paint splatters. When playtime is over, just unhook, carry it outside, and shake it out.
Introduce your child to the magic of non-Newtonian fluids with Oobleck. It’s a mind-bending substance that acts like a liquid when you’re gentle, but a solid when you apply pressure. All you need are two simple pantry staples!
- About 2 cups of cornstarch
- 1 cup of water
- A few drops of food coloring (optional)
Just mix slowly in a shallow tray and watch the science unfold in their hands.

A parent’s secret weapon: The hole punch. It might seem mundane, but for a preschooler, it’s a super-tool. The act of squeezing a hole punch is a fantastic workout for building hand strength, a crucial pre-writing skill. Give them scrap paper, junk mail, or even large leaves from the garden and let them go to town.
According to the American Academy of Pediatrics, play is essential to development because it contributes to the cognitive, physical, social, and emotional well-being of children.
This means that when your child is building a lopsided tower or making ‘soup’ out of mud and leaves, they are actively doing the ‘work’ of childhood. It’s not a distraction from learning; it’s the main event.
A simple way to elevate any dough-based activity is to add scent. A few drops of lavender or chamomile essential oil can make play-dough a wonderfully calming pre-nap activity. Around the holidays, a sprinkle of cinnamon or pumpkin pie spice into the dough mixture creates a warm, festive sensory experience.

- It can be a canvas for finger painting (add a few drops of food coloring).
- It’s a perfect environment for hiding and finding small, waterproof toys.
- It cleans up in a wipe.
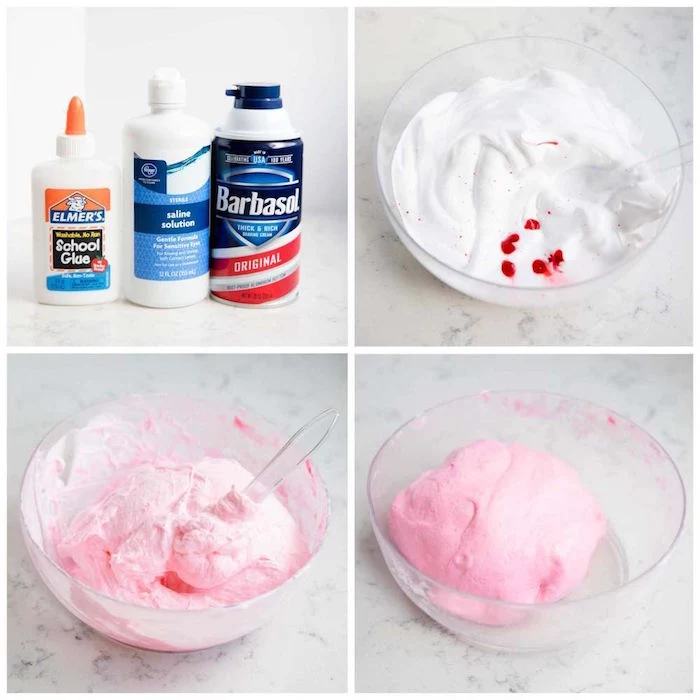
The material? Basic shaving foam. A can of Barbasol or Gillette Foam on a baking sheet or straight onto a high-chair tray provides a fantastic, low-cost sensory experience that engages touch and smell.
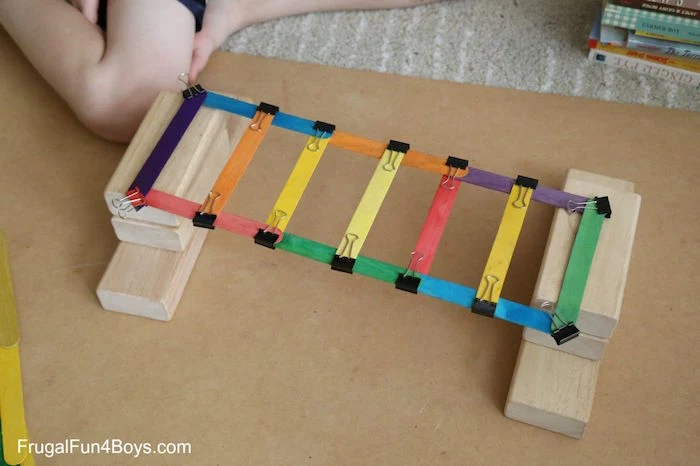
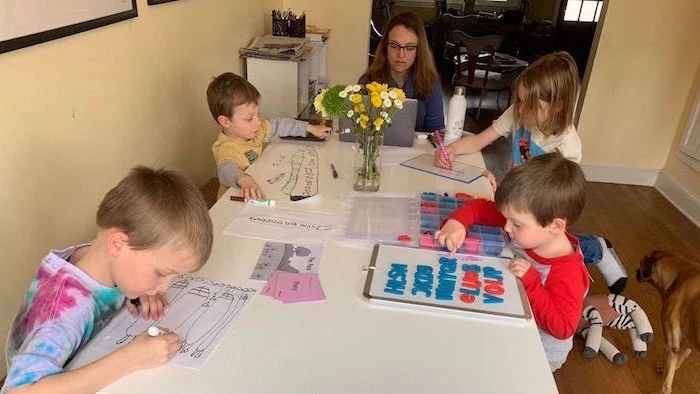
How do I manage an activity with a toddler and an eight-year-old?
Set up parallel play “stations.” The core material can be the same, but the challenge is different. For example, give both children a supply of popsicle sticks. The toddler’s station might also have play-dough for simply sticking them in. The older child’s station could have a bottle of Elmer’s glue and a challenge: “Can you build a bridge that can hold the weight of this apple?”
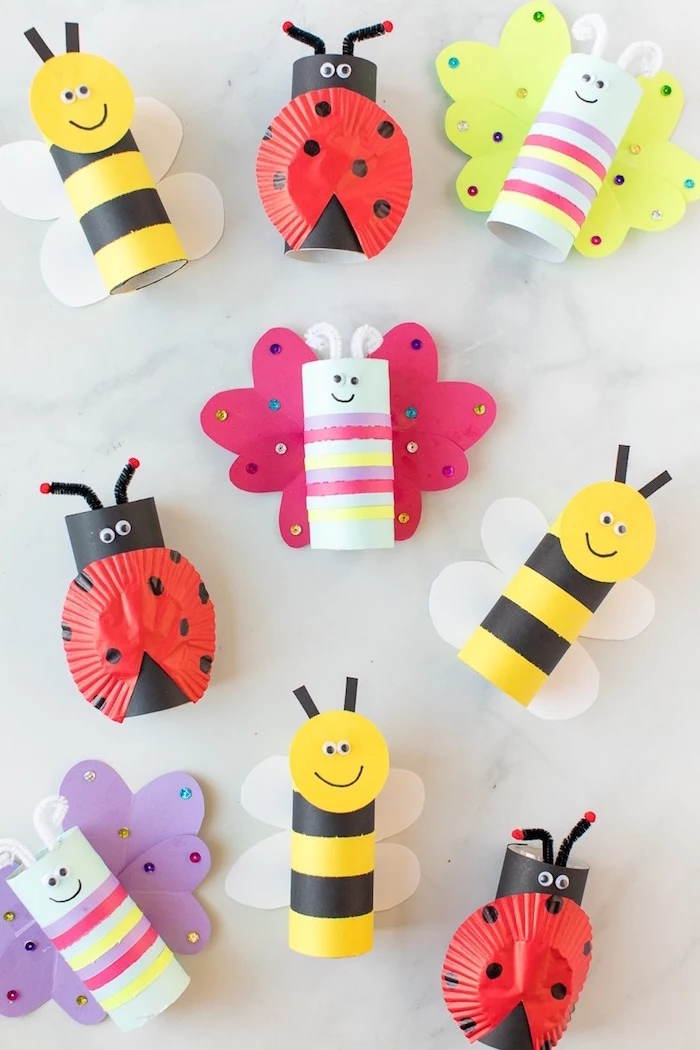
Don’t throw out that empty egg carton! It’s one of the most versatile items in your recycling bin.
- It’s a perfect paint palette for portioning out different colors.
- Flip it over, and the bumps become bodies for caterpillars or other bug crafts.
- Fill the cups with soil and plant seeds for a mini indoor garden.
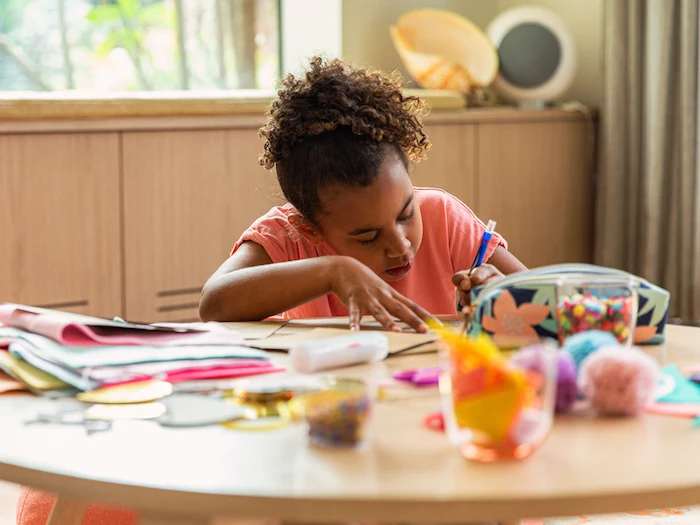
Embrace “process art,” where the experience of creating is more important than the final product. It’s about exploration. Let them mix red and blue to see what happens, even if it ends in a brownish blob. This approach builds confidence and curiosity, whereas forcing them to color within the lines can create anxiety and a fear of making mistakes.

“The work of the child is to play.” – Maria Montessori
Loose Parts Play: This is an early childhood education concept that involves giving children a collection of unconnected, open-ended items. Think bowls of buttons, smooth stones, bottle caps, scraps of fabric, and sticks.
Why it works: Unlike a toy car, which is always a car, a bottle cap can be a coin, a wheel, a magic potion, or a spaceship window. It forces creativity, problem-solving, and symbolic thinking.
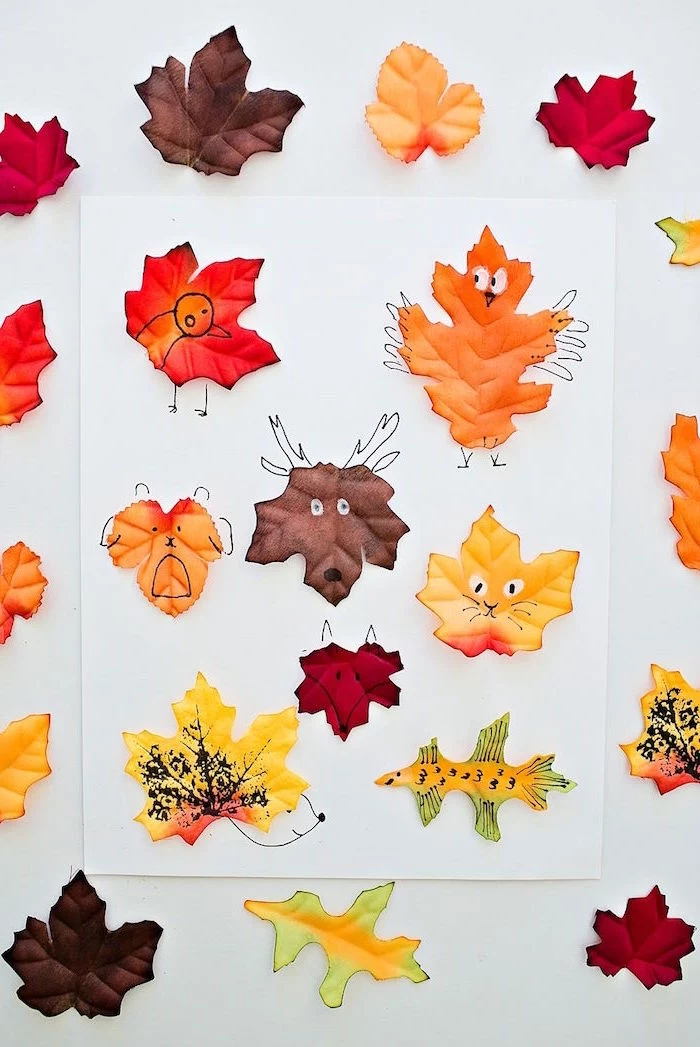
For a simple, quiet-time activity, try making leaf rubbings. Place a textured leaf (oak or maple work well) under a thin piece of paper. Peel the paper off a classic Crayola crayon and rub the side of it over the leaf’s location. The intricate pattern of veins will magically appear. It’s a great way to talk about nature and seasons.
- Improved emotional regulation.
- A moment of focused calm.
- Visual sensory input without the mess.
The project? A DIY sensory bottle. Use a clean plastic bottle (Voss brand bottles are popular for their sleek, cylindrical shape), fill it 3/4 with water and a bit of clear glue or mineral oil, then add glitter and small sequins. Superglue the lid shut for safety.
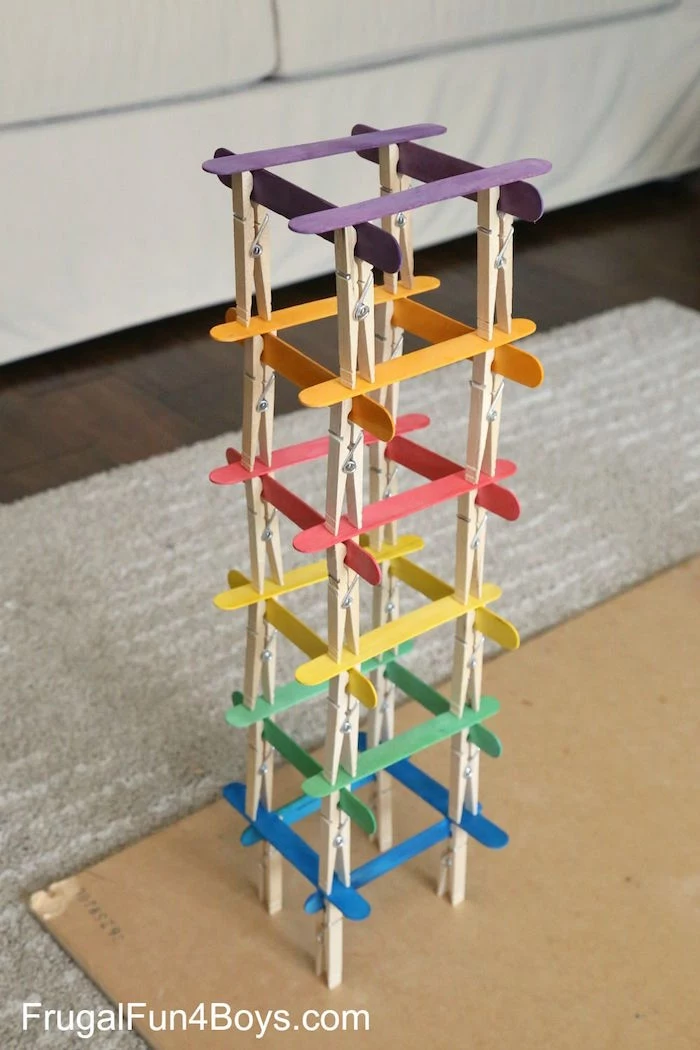
A 2014 Purdue University study confirmed that early puzzle play significantly improves spatial transformation skills.
This isn’t just about jigsaws. Building with blocks, LEGOs, or even those popsicle stick structures teaches children how to mentally rotate shapes and understand how parts form a whole. You’re not just killing time; you’re building the foundations for future math and science understanding.
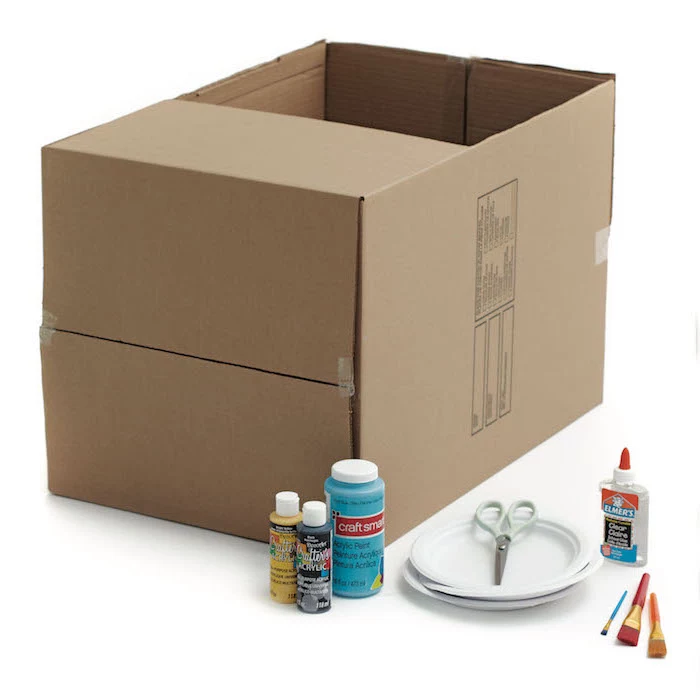
Tempera Paint: Your go-to for most kid crafts. It’s affordable, comes in bright colors, and most importantly, it’s washable. Brands like Crayola or Prang are staples in every classroom.
Acrylic Paint: Use this for projects you want to last, like painted rocks or wooden ornaments. It’s permanent once dry, so it requires more supervision and a good smock!
Bring stories to life with a simple shadow puppet theater. Cut a large rectangular screen out of the side of a cardboard box and tape a piece of parchment paper over the opening. Cut simple character shapes out of black cardstock and tape them to sticks or straws. Use a flashlight in a dark room to project the shadows onto the screen.
A key tip for engagement: Narrate their play. You don’t need to instruct, just describe. Saying “Wow, you’re making long, flat snakes with the green dough” or “I see you’re carefully pouring the rice from the big cup to the small one” validates their work, builds their vocabulary, and helps them connect words to actions without the pressure of direct questions.


