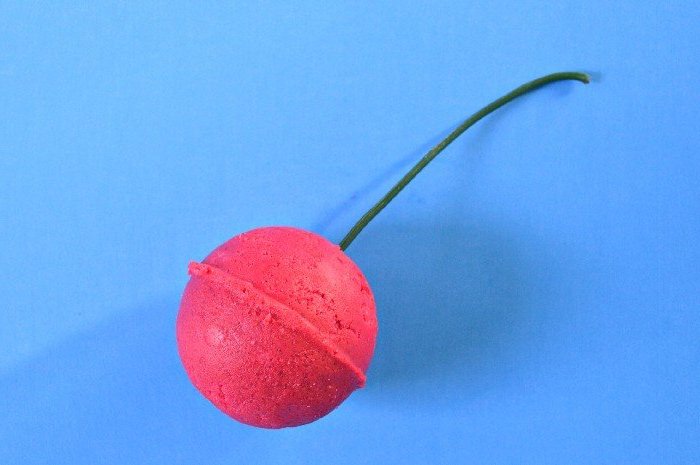
Sick of Sad, Crumbly Bath Bombs? Here’s How to Make Them Like a Pro
I’ll never forget my first attempt at making bath bombs. I’d seen those perfect, fizzy spheres in stores and confidently thought, “I can totally do that.” I followed some random recipe, packed my little molds, and went to bed dreaming of a luxurious bath. The next morning? I found a tray of sad, warty blobs that had basically exploded overnight. It was a mess.
In this article
That failure taught me a huge lesson: making genuinely great bath bombs isn’t about cute molds and fancy colors. It’s a craft of precision, and it’s all about understanding the simple science behind the fizz. After years of making thousands of these things for boutiques and workshops, I’ve learned what works, what absolutely doesn’t, and why. This isn’t just another recipe—it’s everything I’ve learned, packed into one guide to help you skip the “warty blob” phase and get right to making amazing, reliable bath bombs.
The “Why” Behind the Fizz
A bath bomb seems like pure magic, but it’s really just a simple chemical reaction waiting to happen. Once you get this, you’ll know how to tweak your recipe and fix problems on the fly. The whole show boils down to an acid and a base having a party in your tub.
- The Base: This is good ol’ sodium bicarbonate, or baking soda. It’s the main ingredient and provides most of the fizzing power.
- The Acid: This is citric acid. When it’s dry, it can hang out with baking soda all day long with no issues.
The moment they hit water, they dissolve and react, creating carbon dioxide gas—those are your fizzing bubbles! The key here is the ratio. The pros stick to a 2:1 ratio by weight. So, for every two parts of baking soda, you need one part of citric acid. This ensures everything gets used up in the reaction, so nothing goes to waste.
Building a Better Bomb: The Supporting Cast
While baking soda and citric acid create the fizz, a few other ingredients are essential for giving your bomb structure, skin-loving properties, and stability.
Fillers and Hardeners: These are powders that help make your bath bombs rock-hard and control how fast they dissolve. Cornstarch is a popular choice; it’s cheap and makes the bathwater feel incredibly silky. Another great option is kaolin clay, which creates a really smooth, dense bomb and is fantastic for sensitive skin. Some people use cream of tartar as a hardener, but honestly, I’d use it sparingly. A little too much can make your mixture react way too quickly.
Salts: Epsom salt is common in recipes, and it’s said to help with sore muscles. While that’s a nice idea, its actual therapeutic benefit in a tub full of water is up for debate. From a practical standpoint, it can be a pain. Epsom salt loves to pull moisture from the air, which can make your bombs go soft and expand in humid weather. It also doesn’t dissolve as fast, sometimes leaving a gritty feeling at the bottom of the tub. I usually opt for fine-ground sea salt instead—it adds hardness without the humidity issues.
Oils and Butters: These are your moisturizers and binders. When it comes to oils, you have tons of options. Sweet almond oil is a great all-arounder—it’s affordable and feels lovely on the skin. On the other hand, fractionated coconut oil is incredibly light, less greasy, and performs a bit better in humid climates. For a super luxurious and hard bomb, you can use butters like cocoa or shea butter, but you’ll have to melt them down first. A huge heads-up here: any oil or butter will make the tub slippery. This is a serious safety thing we’ll talk more about later!
Liquid Binders: To get your mixture to stick together, you need a tiny bit of liquid. But here’s the catch: if you use water, you’ll set off the fizzing reaction way too early. The solution is to use a liquid that evaporates quickly. High-proof rubbing alcohol (91% or higher) or witch hazel in a spray bottle are your best friends. You can spritz the mixture lightly, giving you total control over the moisture without activating the bomb.
Your Bath Bomb Toolkit (And Where to Get It)
You don’t need a fancy lab, but having the right tools will make your life so much easier and your results way more consistent. Before you buy anything, here’s a rough idea of your startup costs.
A Beginner’s Shopping List:
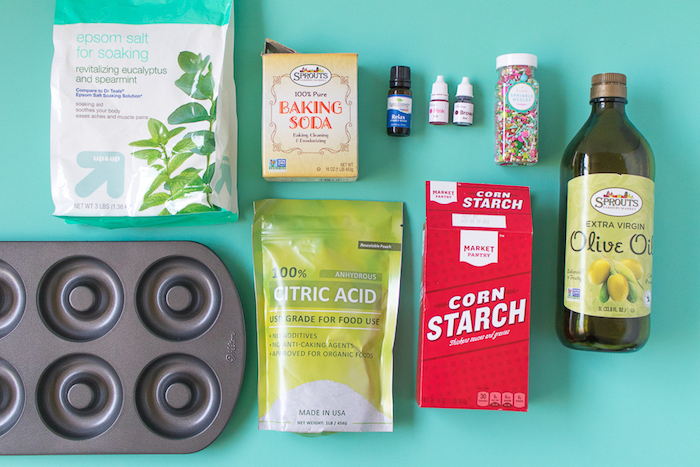
- Digital Kitchen Scale: Around $20 on Amazon or at Target. This is non-negotiable!
- Citric Acid (2 lbs): About $15 online.
- Baking Soda: A few bucks at any grocery store.
- Carrier Oil (e.g., Sweet Almond): $10-$15 for a decent-sized bottle.
- Witch Hazel or Alcohol: Around $5 at a pharmacy.
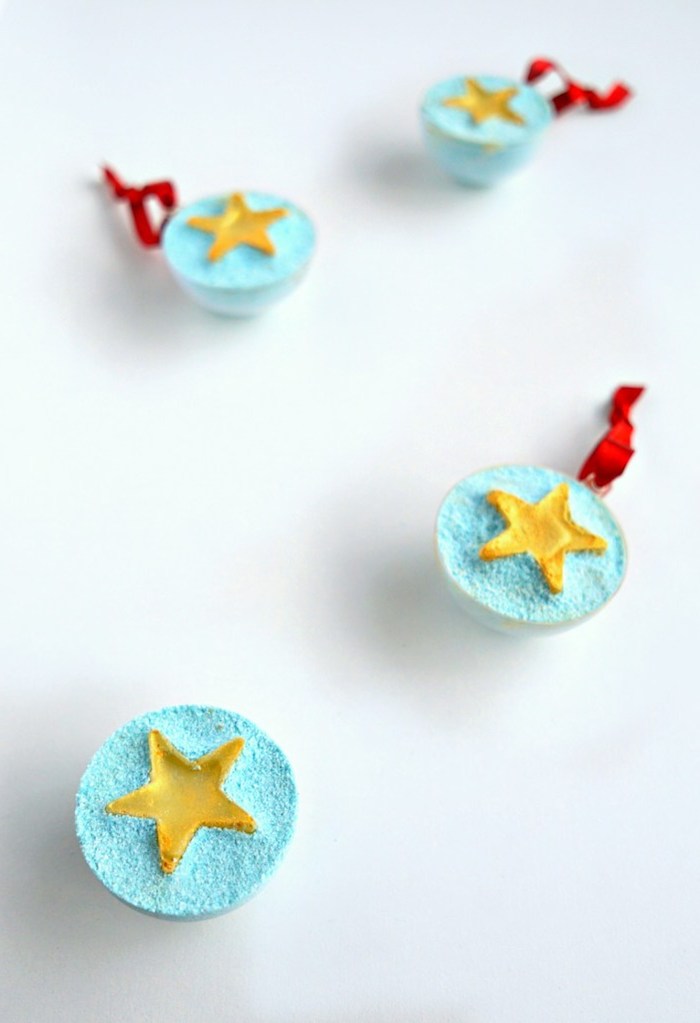
- Molds: Start with plastic ornament-style molds for about $5-10.
All in, you can get started for around $60, and you’ll have enough material to make dozens of bath bombs. Once you have the supplies, each bath bomb will likely cost you only $1 to $2 to make—way cheaper than the $8+ you’d pay in a store!
For sourcing, while you can get baking soda at the grocery store, you’ll want to find a better source for your other ingredients. Look for cosmetic-grade materials from reputable soap-making suppliers online. Bramble Berry and Nurture Soap are two fantastic places for beginners to look. They test their products for skin safety, which gives you peace of mind.
The Go-To Recipe That Just Works
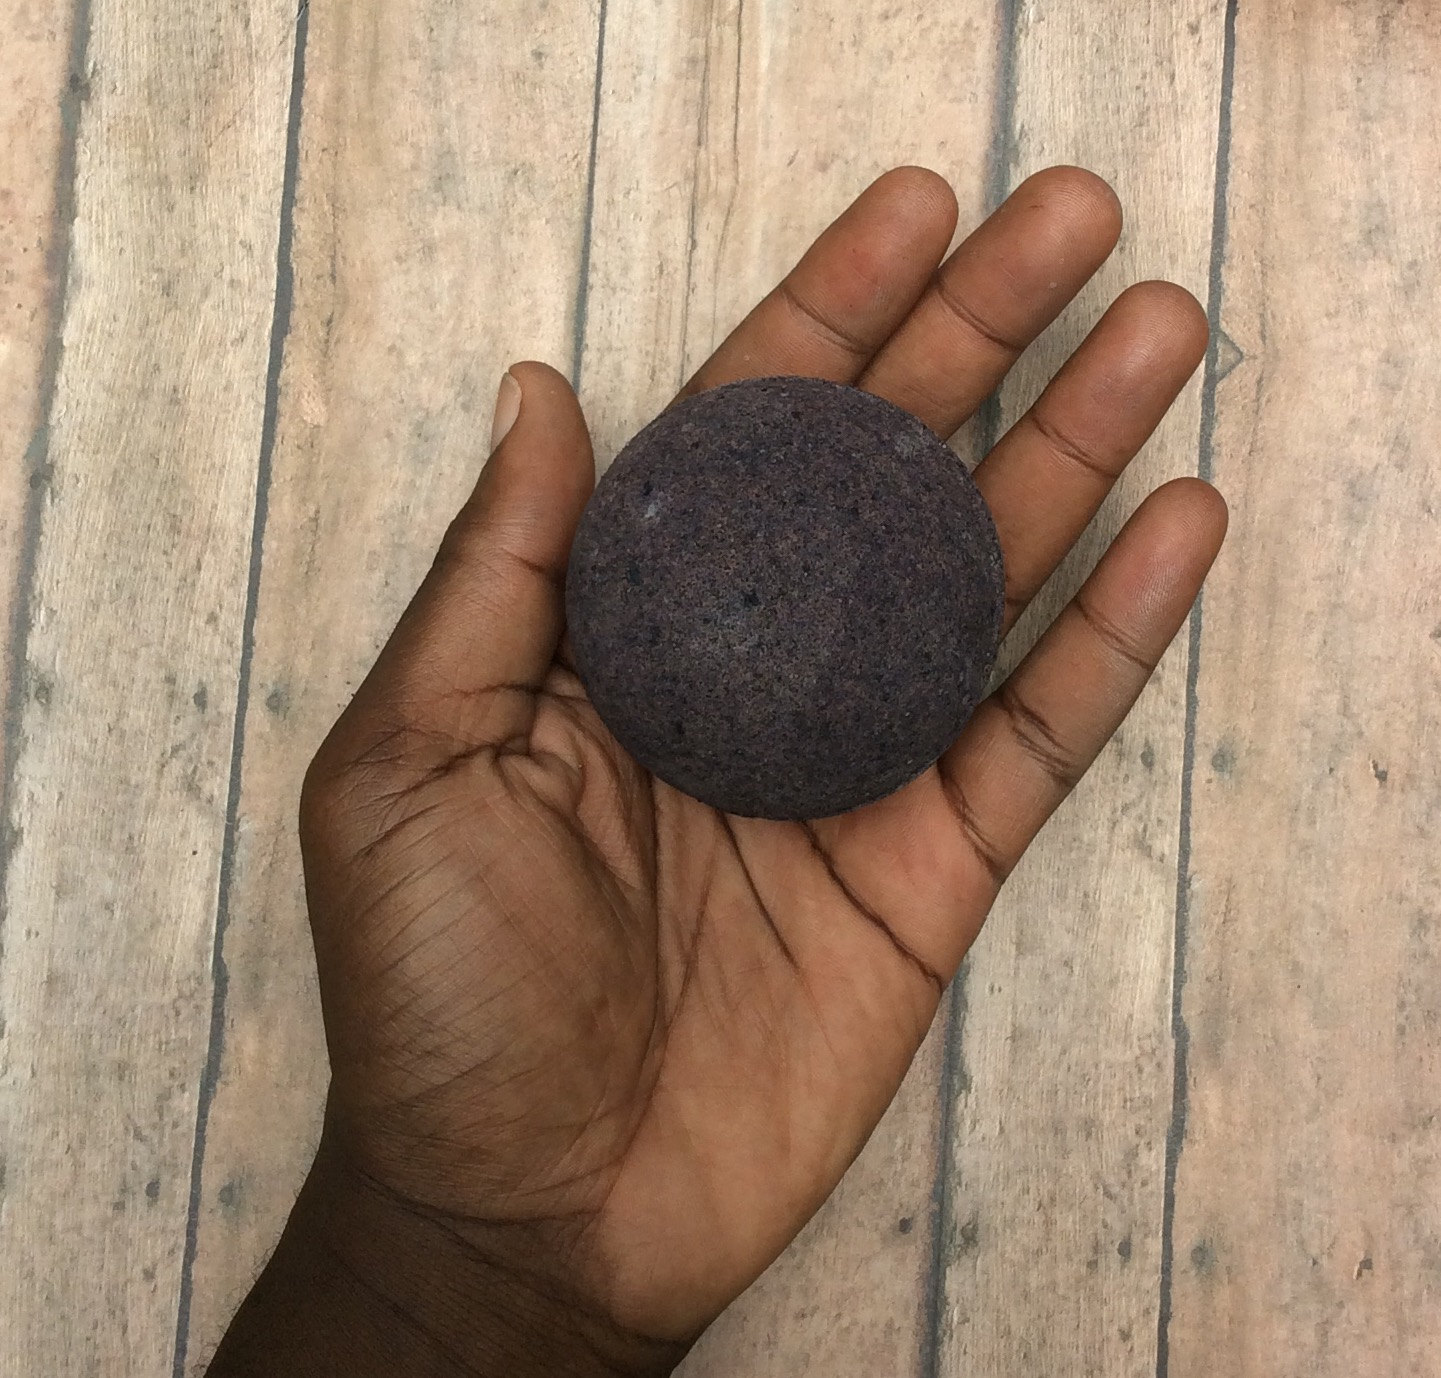
This is my tried-and-true foundational recipe. Once you nail this, you can start experimenting. I always suggest making a small test batch first. Oh, and a quick note: this recipe will make about 5 large, 2.5-inch sphere bombs, so you can plan accordingly.
Ingredients (by weight, always!):
- Baking Soda: 500g (17.6 oz)
- Citric Acid: 250g (8.8 oz)
- Cornstarch or Kaolin Clay: 40g (1.4 oz)
- Sweet Almond Oil: 20g (0.7 oz)
- Essential or Fragrance Oil: 10g (0.35 oz)
- Witch Hazel or 91%+ Rubbing Alcohol: In a spray bottle
Step-by-Step Guide:
1. Prep Your Station. Lay down some newspaper, and please, put on your gloves, a dust mask, and safety glasses. Citric acid dust is no joke if you breathe it in.
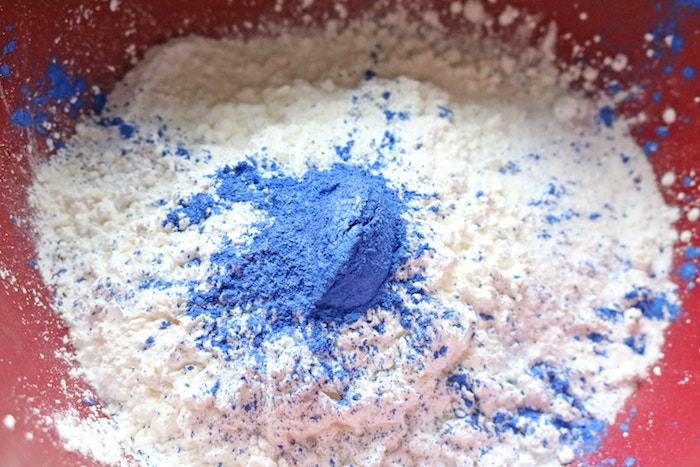
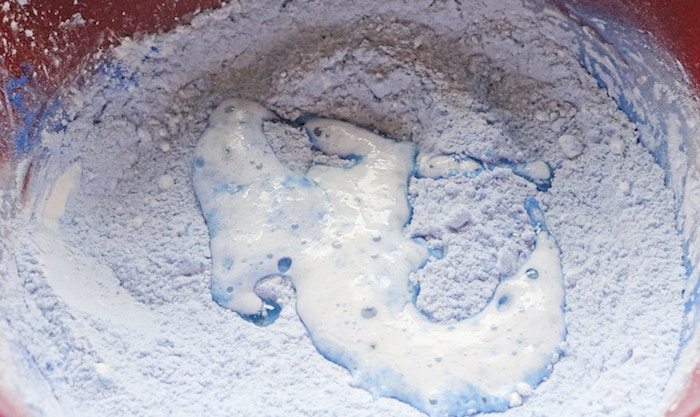
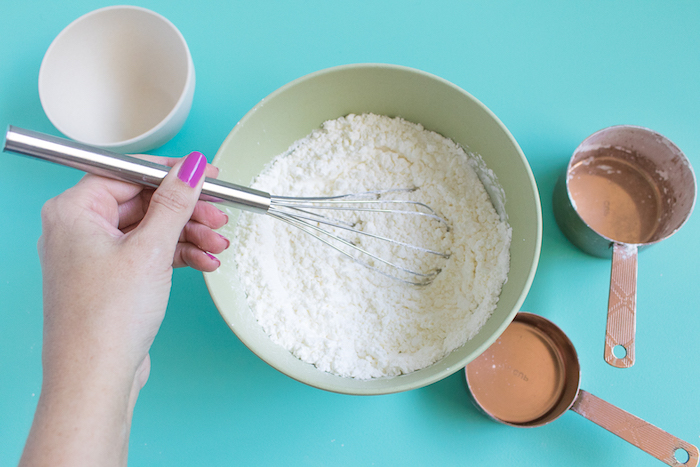
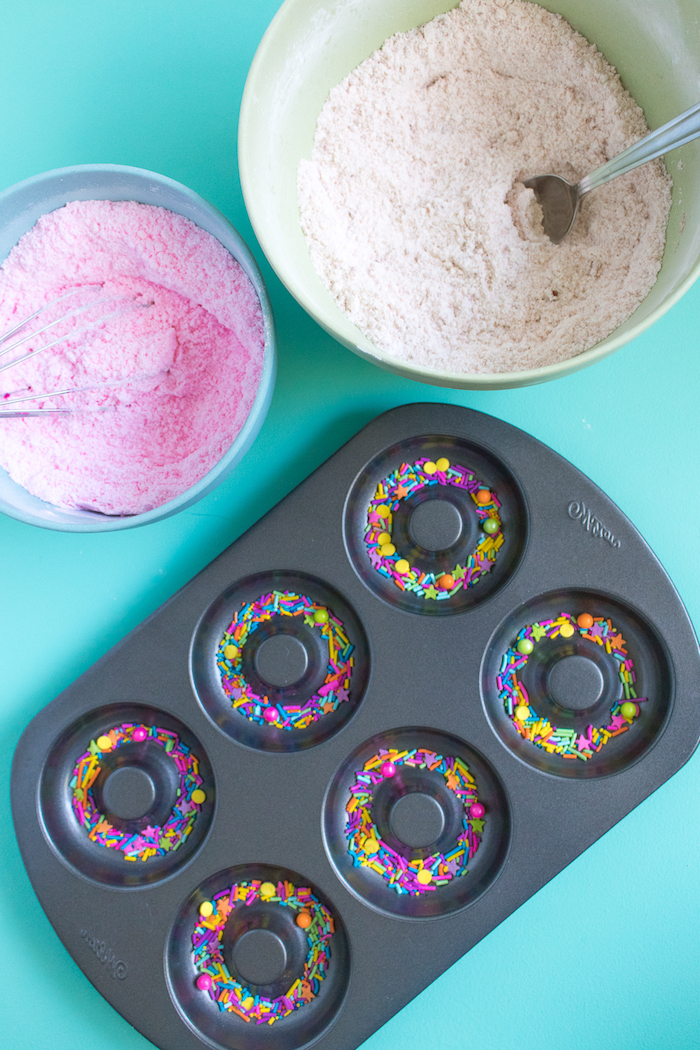
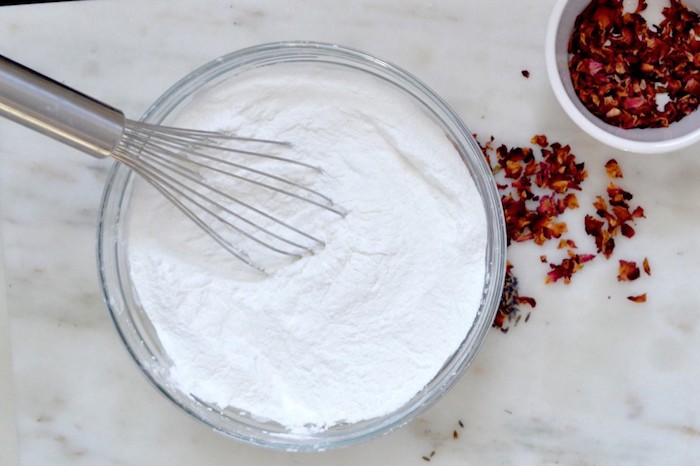
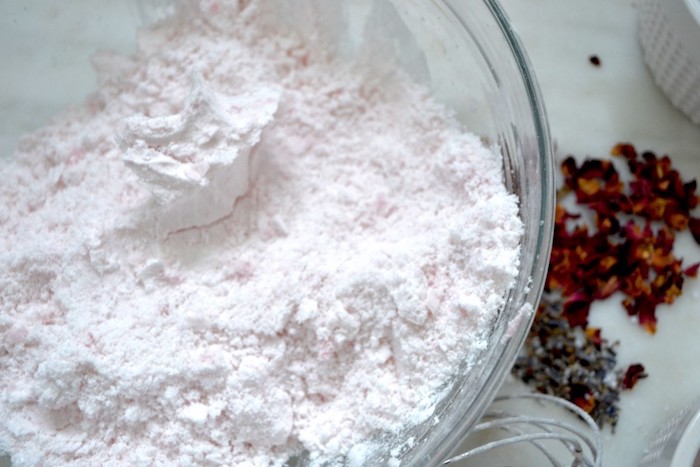
2. Mix the Dry Stuff. In a large bowl, add your baking soda, citric acid, and cornstarch. Quick tip: The absolute best way to prevent clumps is to sift all your dry ingredients together through a fine-mesh sieve. It ensures a perfectly smooth mix and prevents splotchy color later on!
3. Mix the Wet Stuff. In a separate small bowl, combine your sweet almond oil and fragrance oil. Stir them together. This helps the scent distribute evenly.
4. Combine. Very, very slowly drizzle the oil mixture into the dry ingredients while constantly mixing with your other hand. Don’t just dump it in! The goal is to coat all the dry particles evenly.
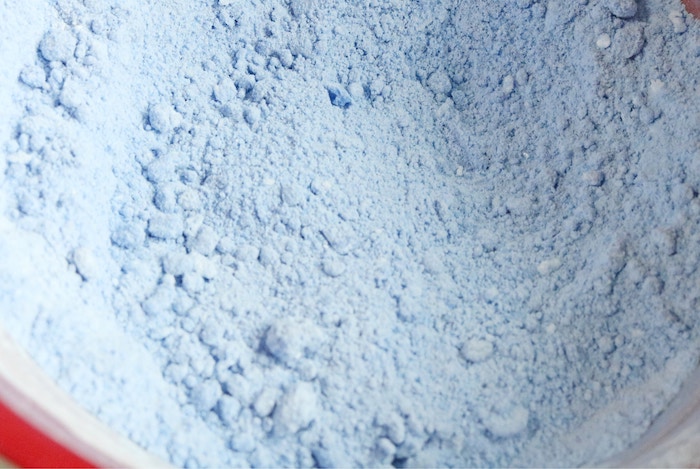
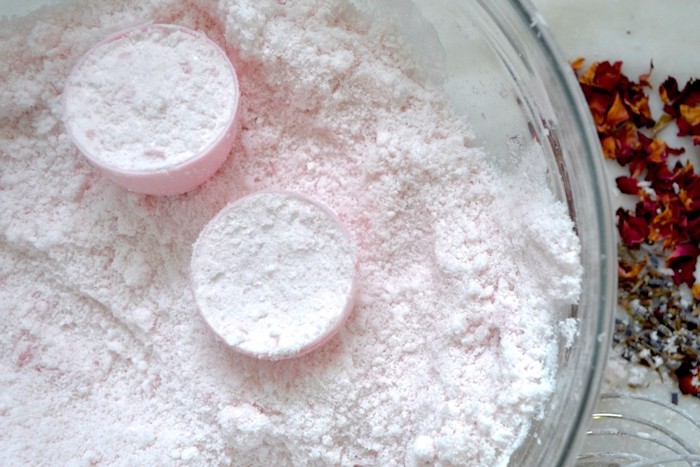
5. Get the Right Texture. This is the make-or-break moment. You’re aiming for the consistency of damp sand. It should hold its shape when you squeeze a handful but still crumble if you poke it. If it shatters the second you open your hand, it’s too dry. This is where your spray bottle comes in. Lightly spritz the mixture with witch hazel, mixing well after every single spray, until you get there. Patience is key.
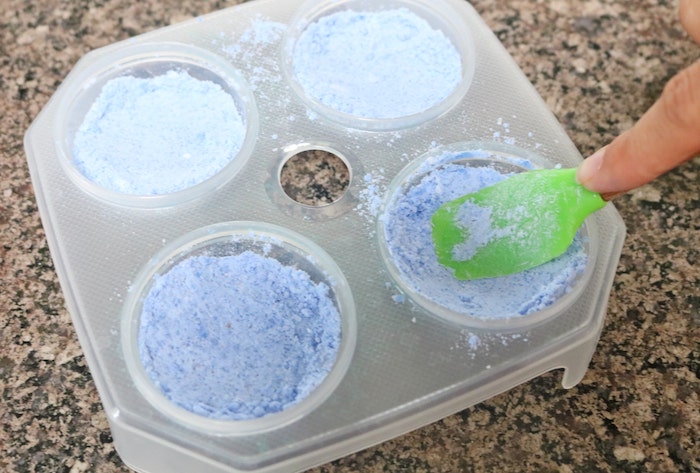
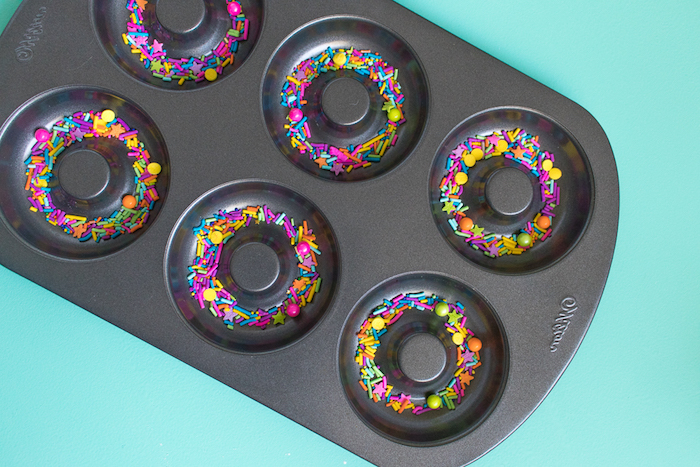
6. Mold the Bombs. The actual mixing and molding part should only take you about 30-45 minutes. Loosely overfill both halves of your mold. Don’t pack it down. Now press the halves together firmly with a slight twist. Scrape off the excess that oozes out the middle. A common mistake is packing the mold too tightly, which can cause cracks later.
7. Let Them Dry. Carefully unmold the bomb onto a soft surface like a towel or foam tray. Let them air dry in a cool, low-humidity room for at least 24 hours—48 is even better. Air circulation is critical here, so don’t put them in a sealed container or a humid bathroom to dry.
Troubleshooting: When Good Bombs Go Bad
Even after years, I still get a bad batch sometimes, especially when the weather changes. It happens! Here’s how to fix the most common issues.
- Problem: They’re cracking!
This usually means your mixture was too dry. Next time, add just a few more spritzes of your binder. It could also mean you packed the mold with the force of a hydraulic press. Be firm, but gentle. - Problem: They’re expanding or growing “warts.”
The classic sign of too much moisture. Either your mix was too wet, or the room is too humid. I run a dehumidifier in my workshop during the summer, and it was a total game-changer. - Problem: They’re soft and crumbly after drying.
Could be a few things: not enough oil, not enough pressure when molding, or you got impatient and didn’t let them dry long enough. Give them the full 48 hours! - Problem: They’re stuck in the mold.
Your mixture was probably too wet and got sticky. With metal molds, unmold them right after pressing. If one is really stuck, pop it in the freezer for 10-15 minutes. The cold should make it contract and release.
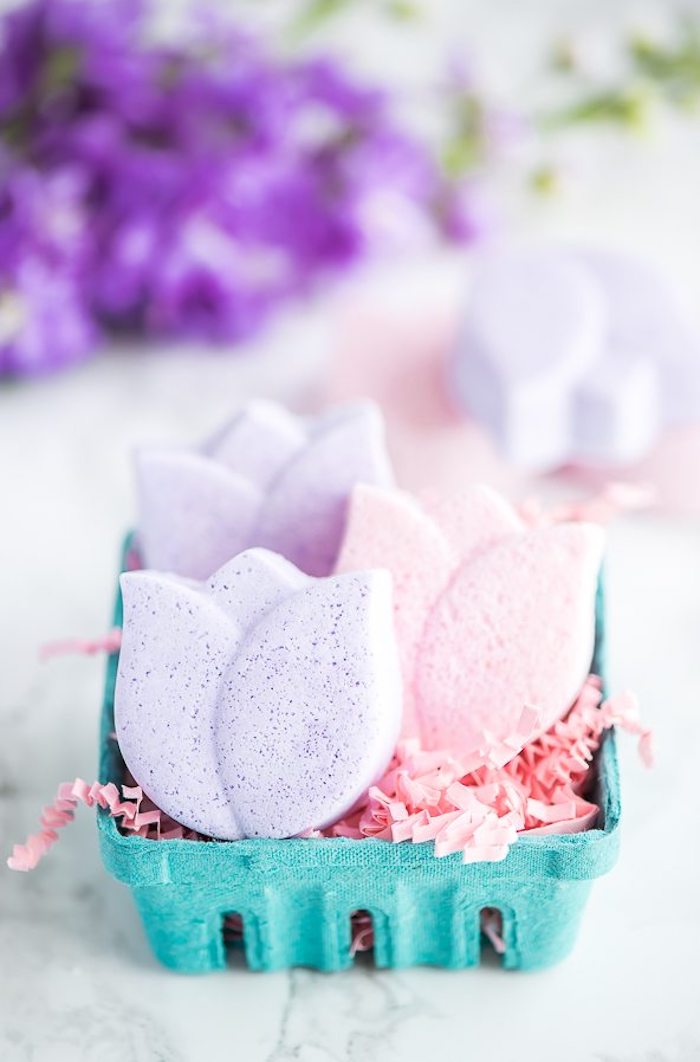
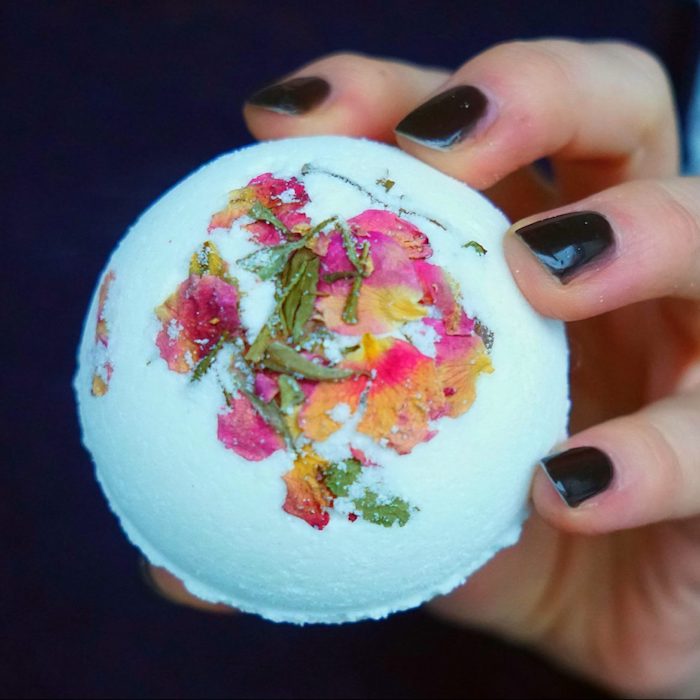
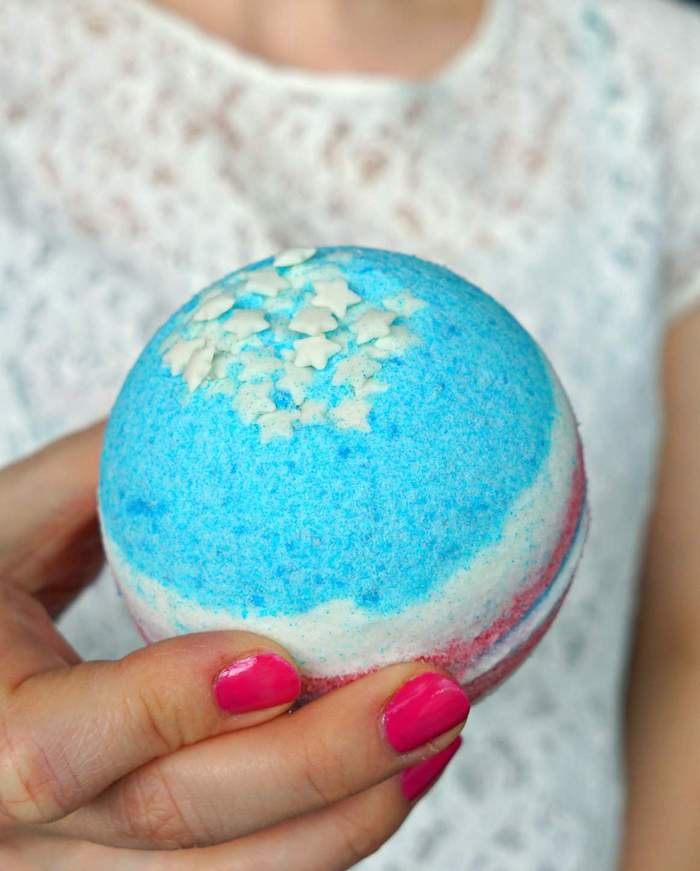
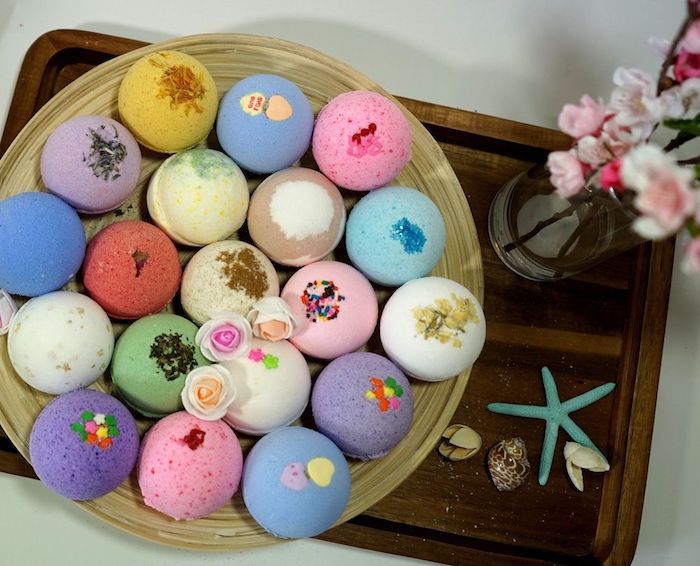
Making Them Pretty (Without Staining Your Tub)
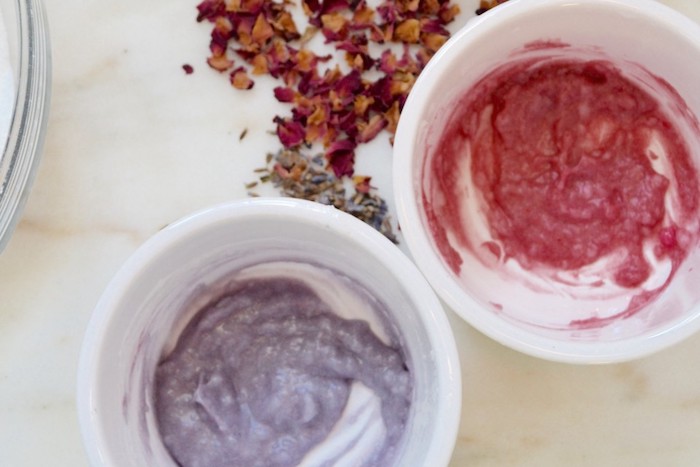
Adding color and scent is the fun part, but it’s also where people make a mess. First rule: Do not use liquid food coloring. It’s water-based, so it can activate your bombs, and it’s notorious for staining skin and tubs.
Instead, use skin-safe cosmetic colorants. Dyes and Lakes are powders that color the bathwater beautifully. Micas are powders that add gorgeous shimmer, but they don’t dissolve. To keep mica from leaving a nasty ring around the tub, you need an emulsifier.
This leads me to the pro’s secret weapon: Polysorbate 80. This is a skin-safe emulsifier that helps oils and micas mix into the water instead of floating on top. It dramatically reduces the tub ring and makes the tub less of a slip-and-slide. To use it, just add the Polysorbate 80 directly into your bowl of wet ingredients (your carrier and fragrance oils) and whisk it all together before drizzling it into the dry stuff. I use it at about the same amount as my fragrance oil (1-2% of the total recipe weight).
The Important Stuff: Safety & Storage
Last but not least, let’s talk safety. It’s not the most exciting topic, but it’s critical.
- Wear Your Gear. I know I said it before, but seriously: gloves, mask, eye protection. Always.
- The Slippery Tub Warning. The risk of slipping from the oils is real. Using Polysorbate 80 helps a lot, but you should still be cautious. By the way, if you’re giving these as gifts, it’s a lovely touch to add a small tag that says something like, “Enjoy! Made with oils that might make your tub slippery, so please be careful getting in and out.”
- Patch Test. If you have sensitive skin, always test a new fragrance on a small patch of skin before using it in a full bath.
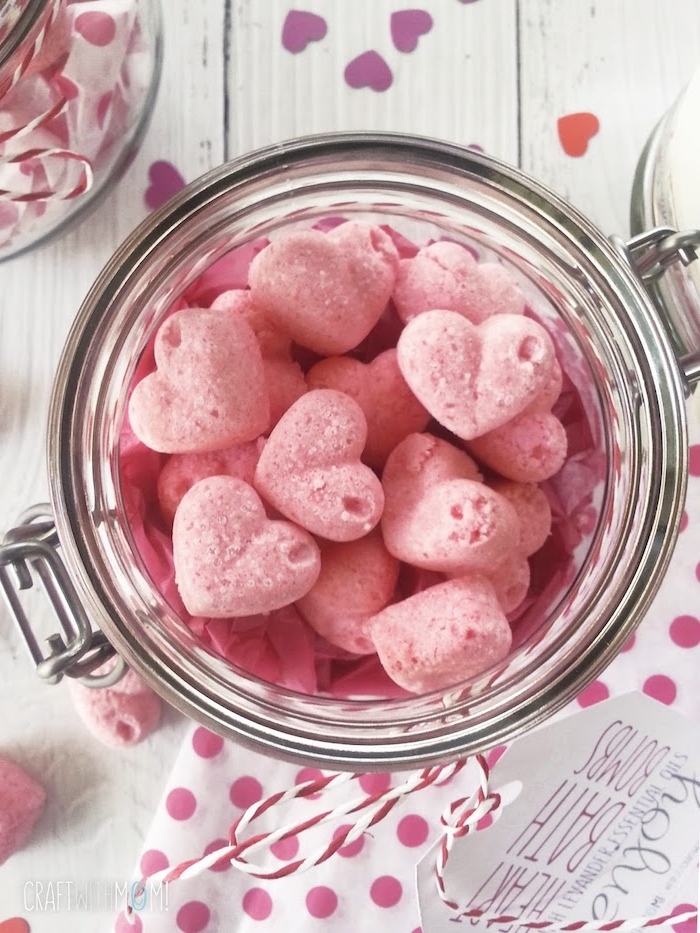
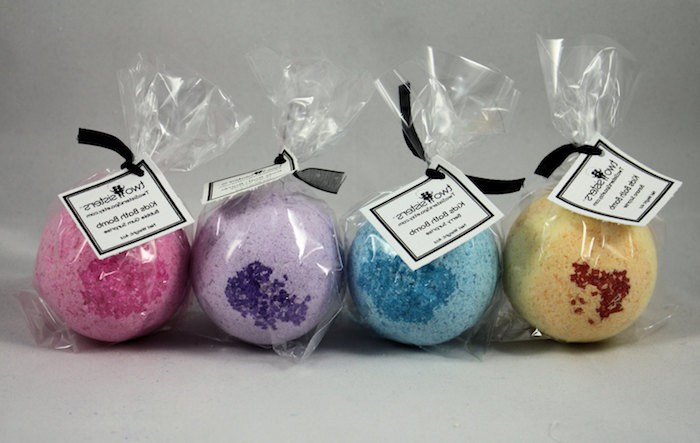
Once your bombs are bone-dry, you have to protect them from humidity. I shrink-wrap mine, but an airtight jar also works perfectly. Stored properly in a cool, dry place, they’ll stay fresh and fizzy for a good 6-12 months.
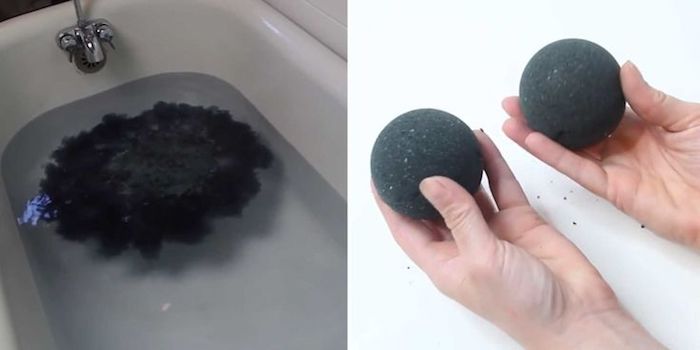
And that’s it! The satisfaction of watching a bath bomb you made with your own hands fizz away is amazing. It just takes a little practice and respect for the process. Happy crafting!
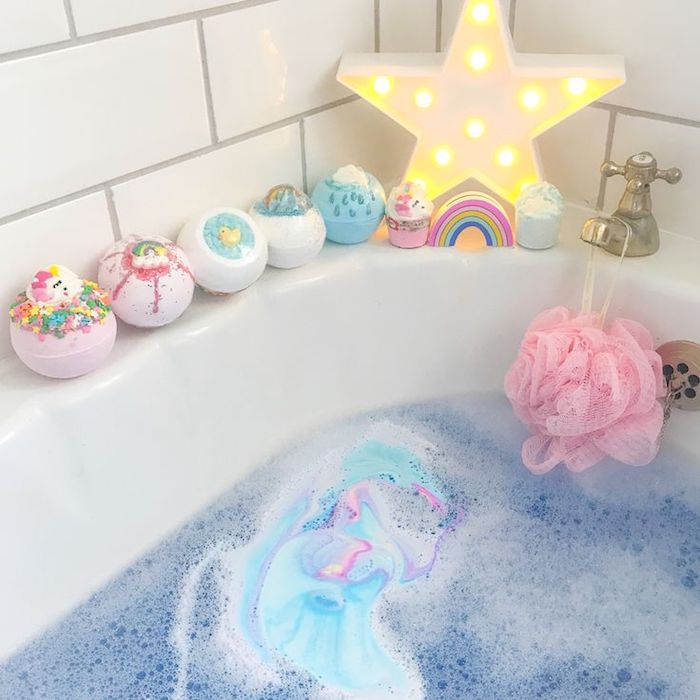
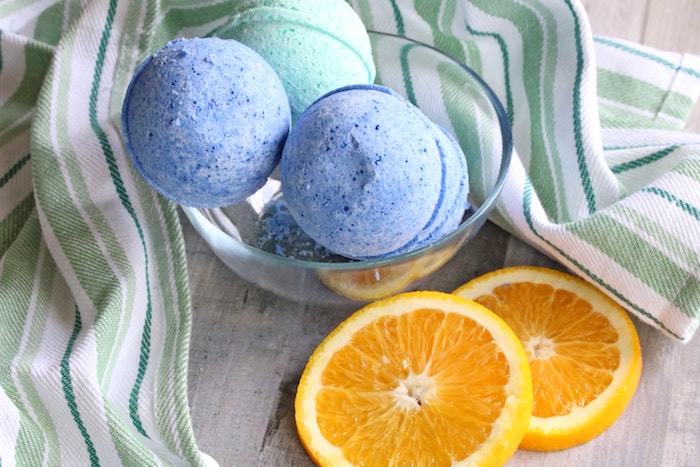
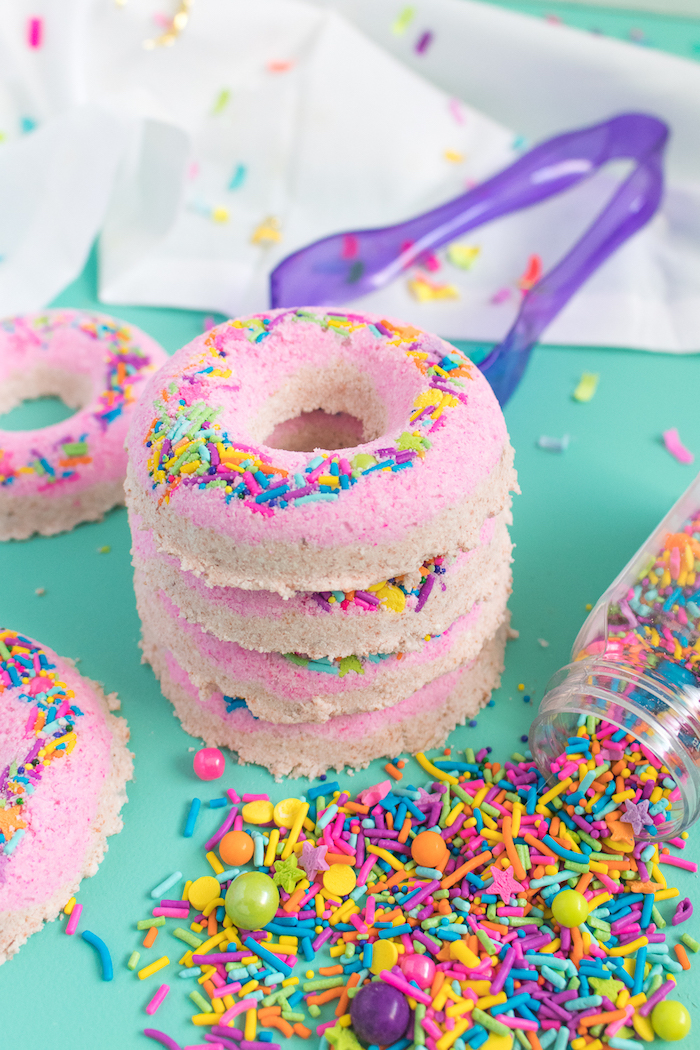
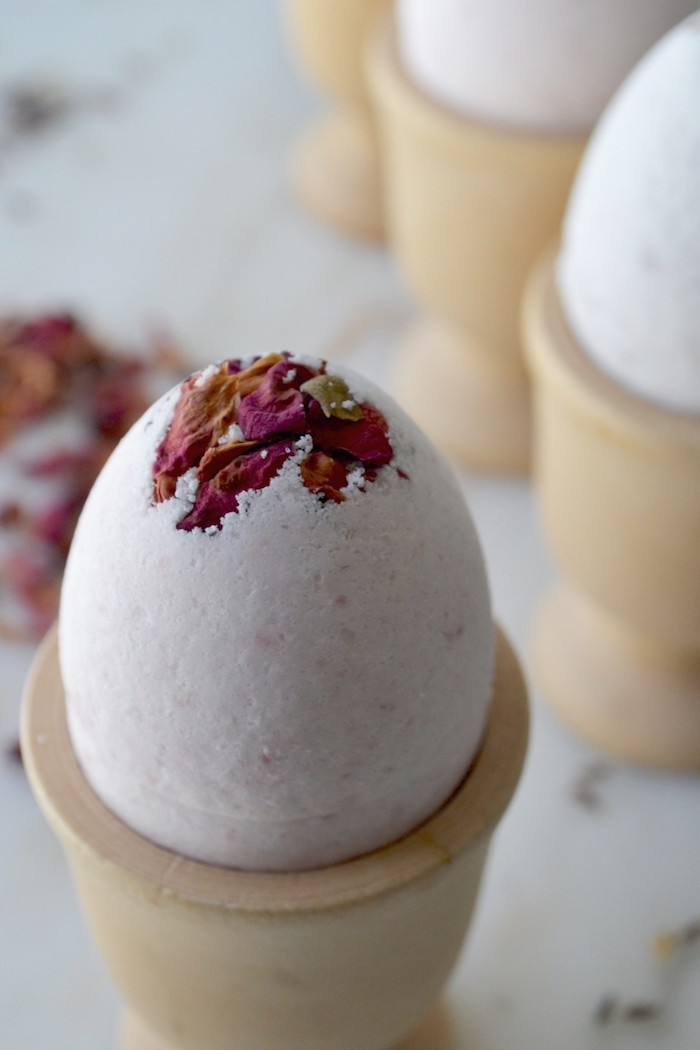
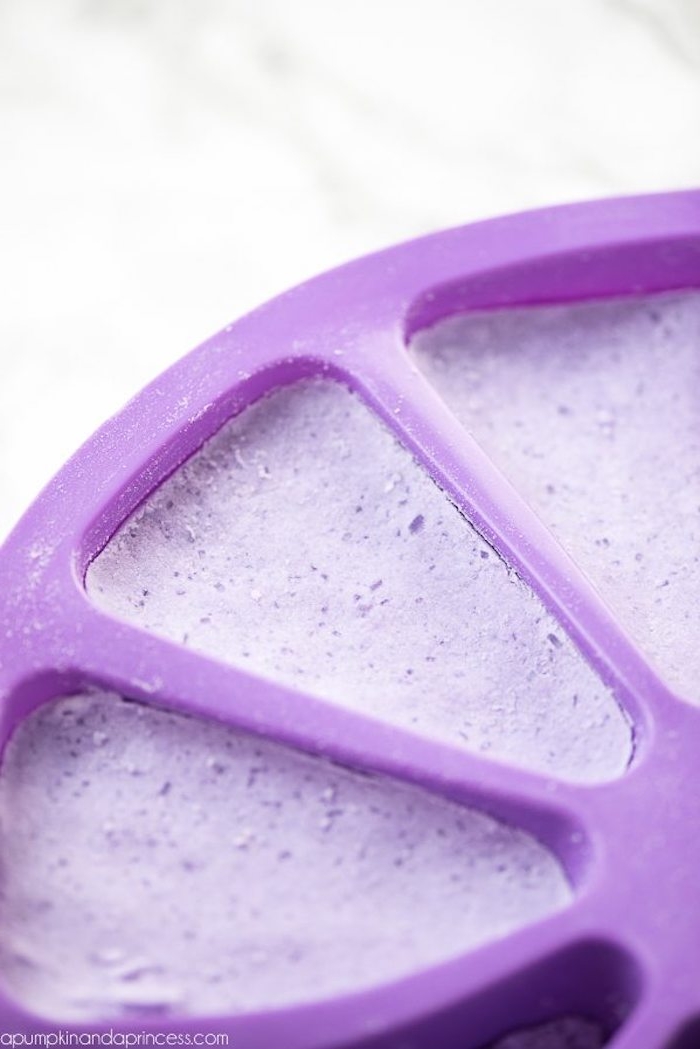
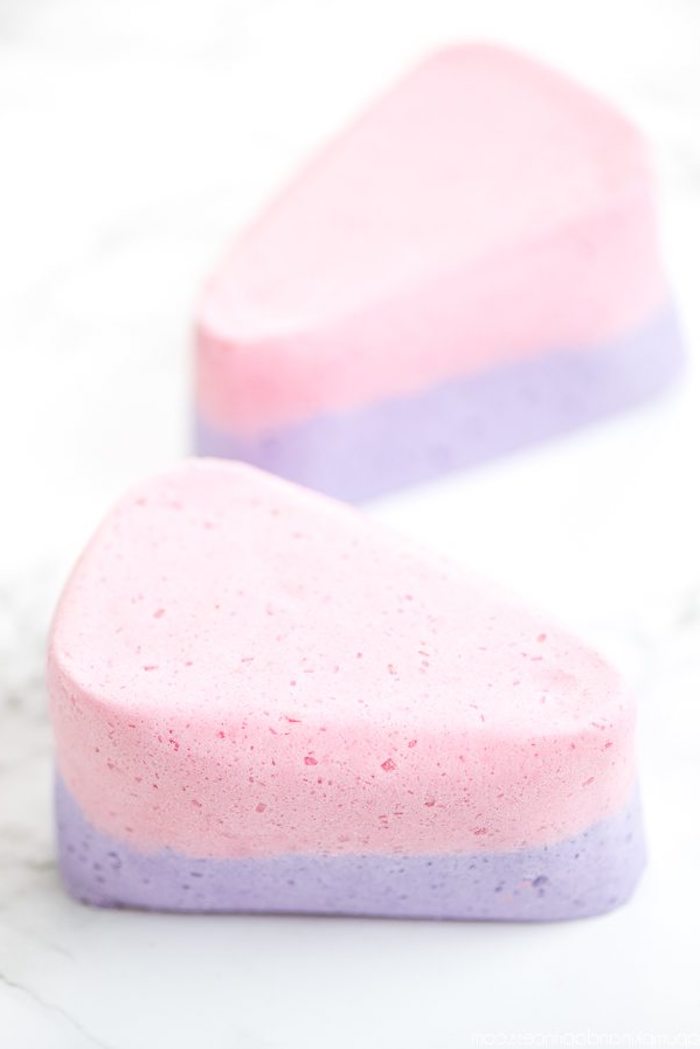
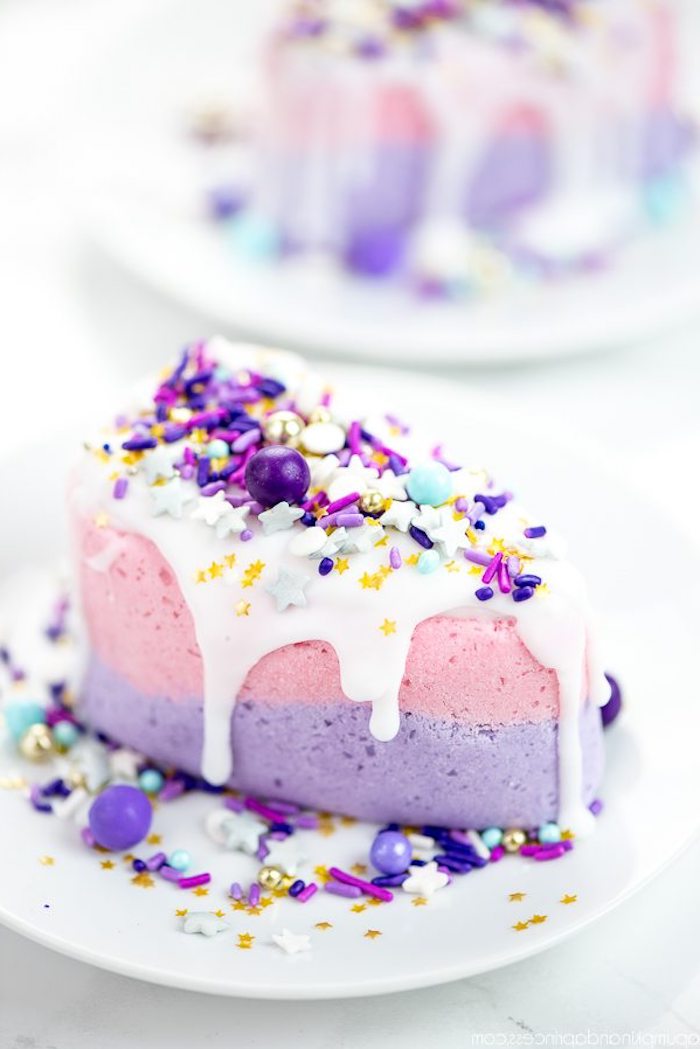
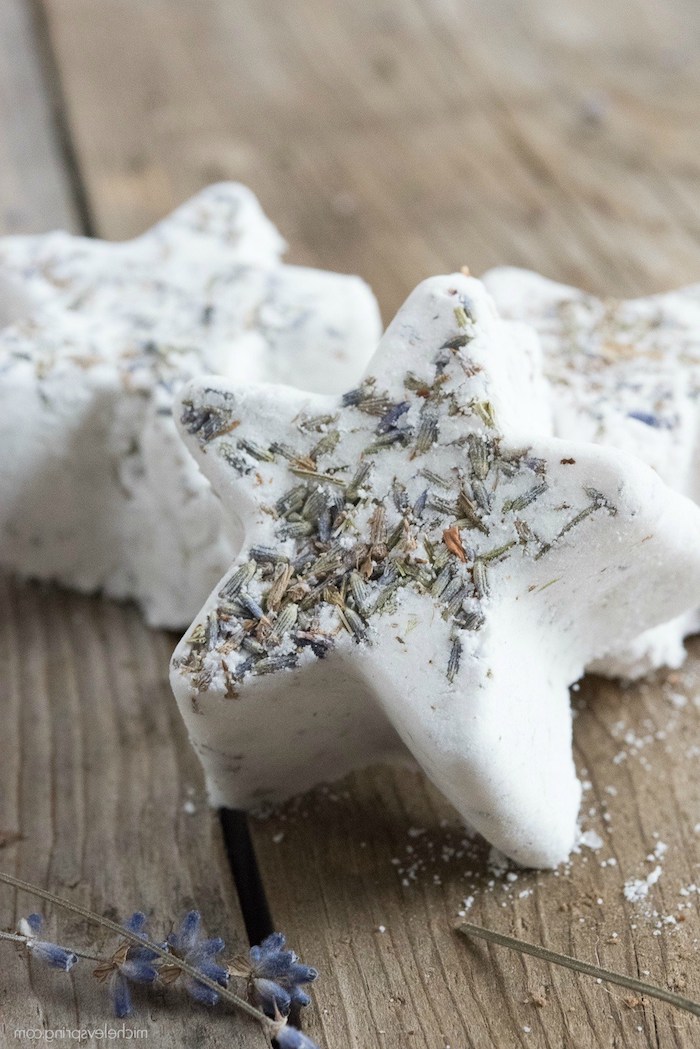
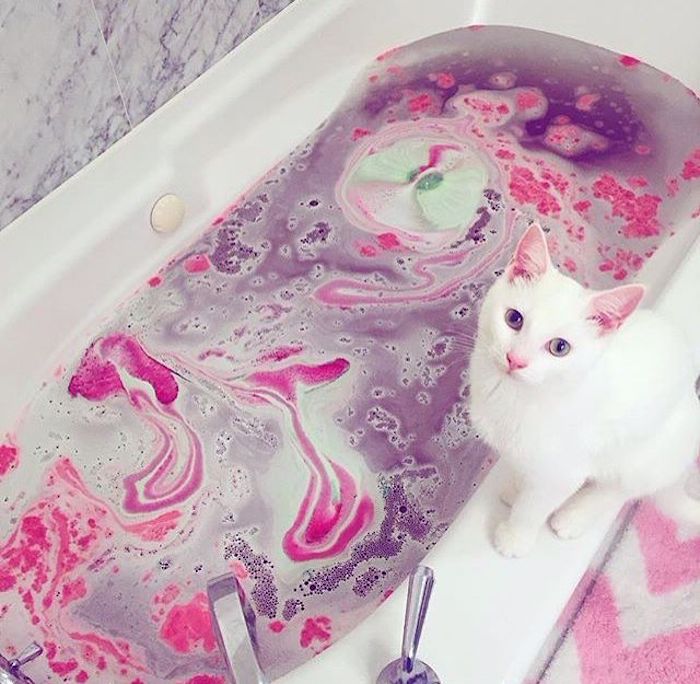
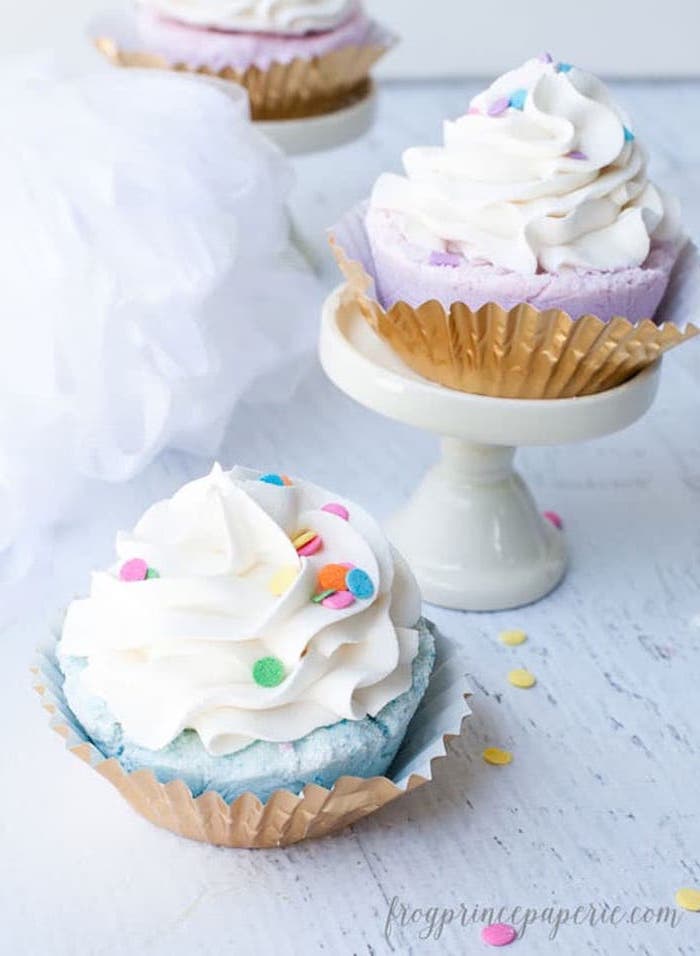
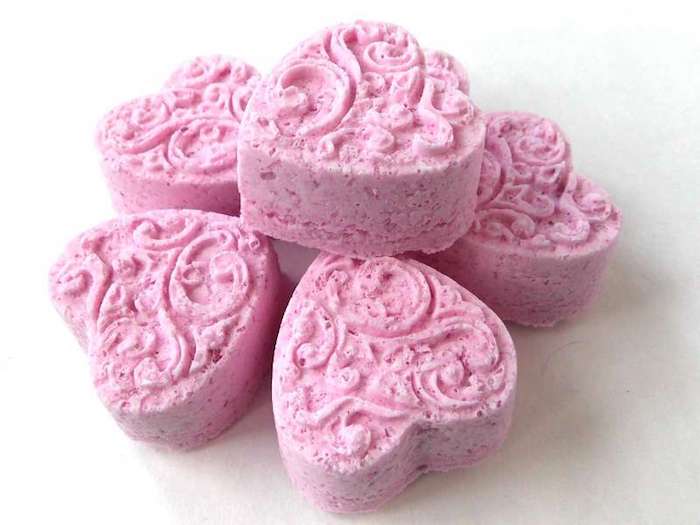
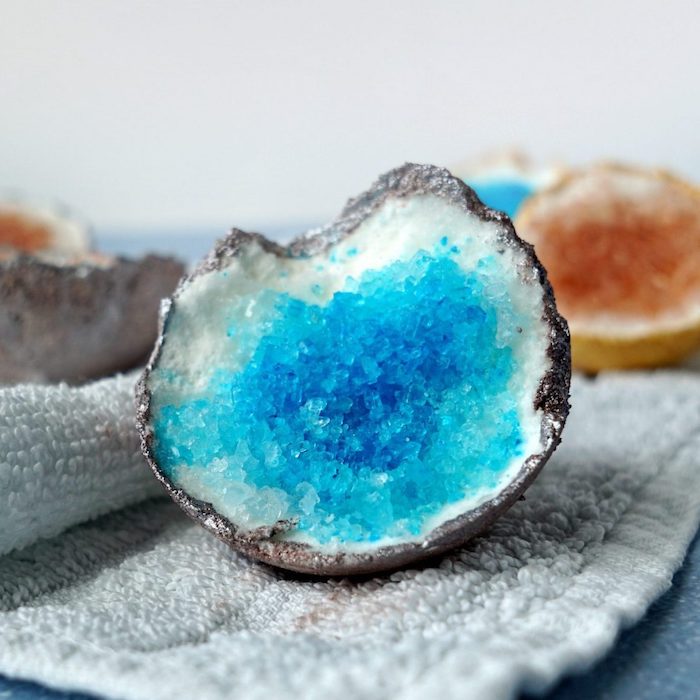
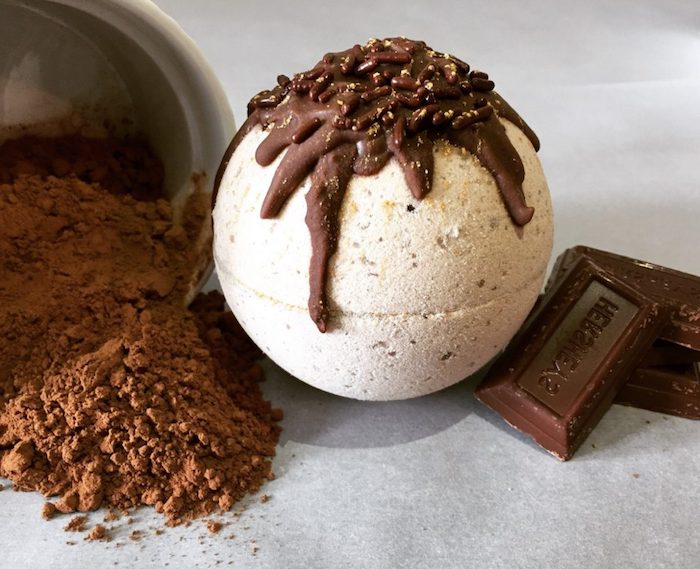
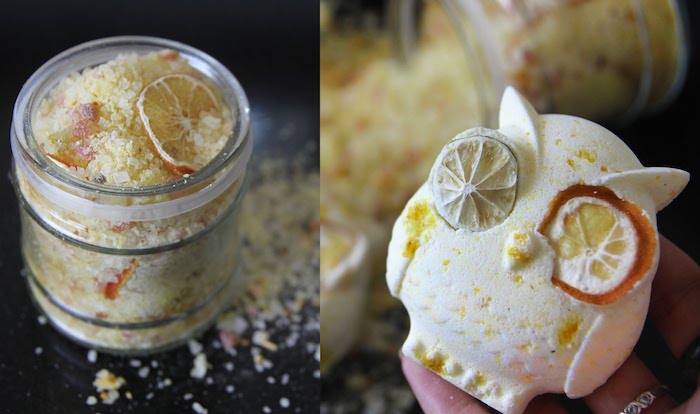
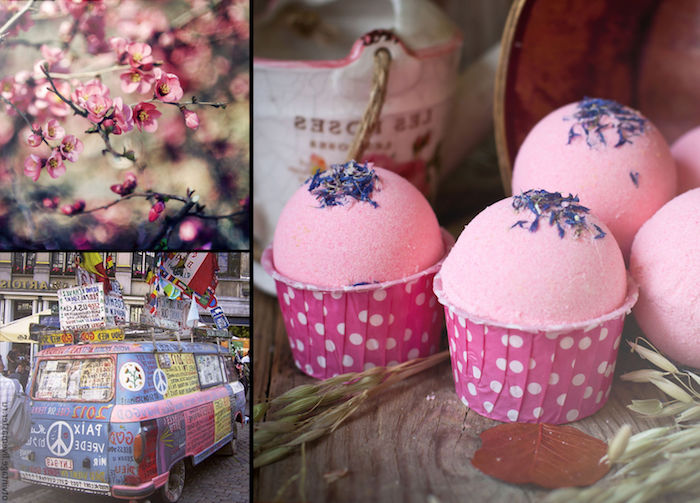
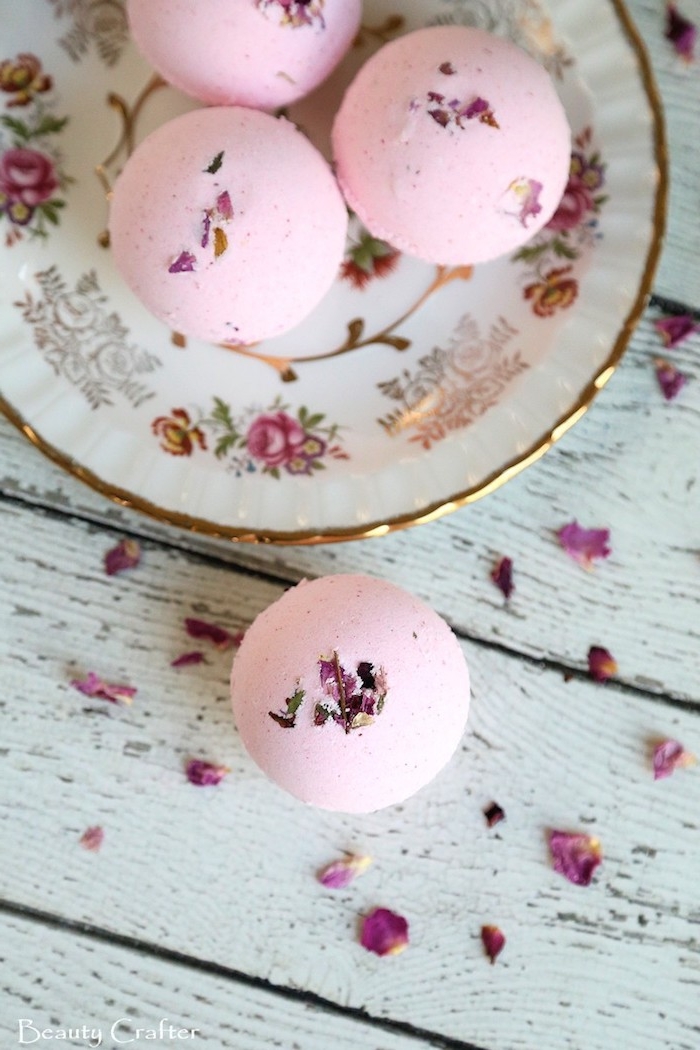
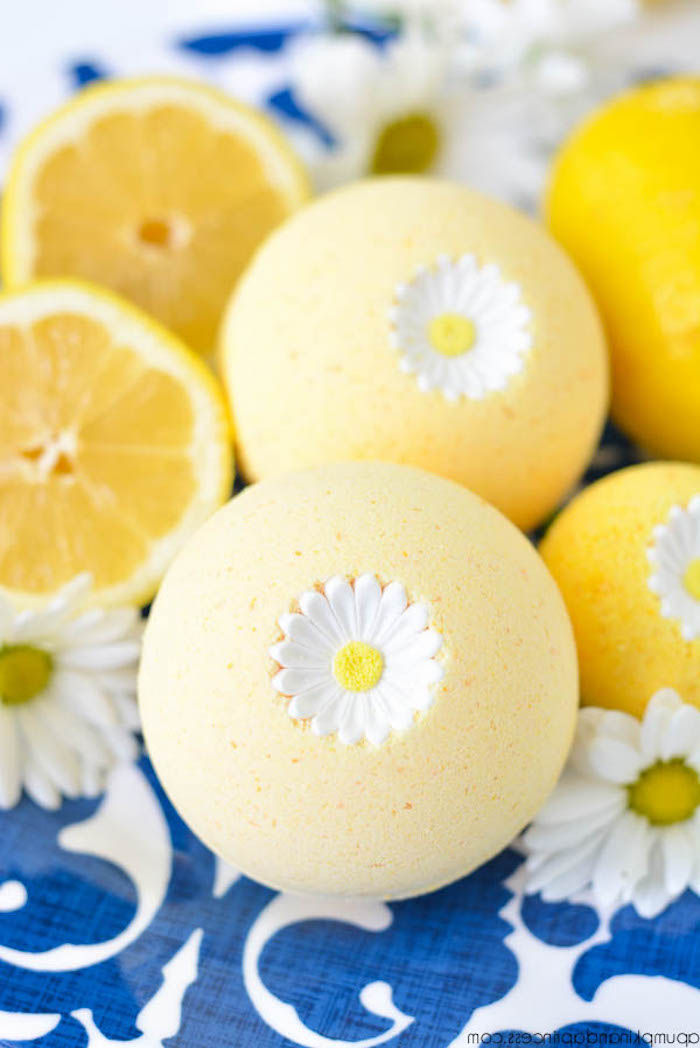
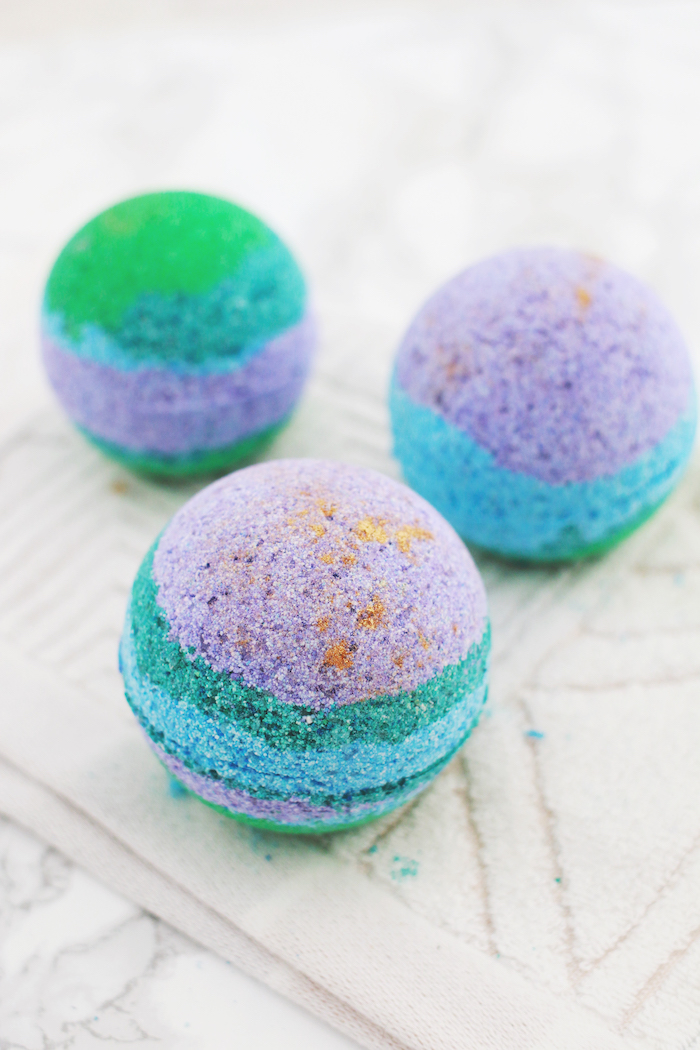
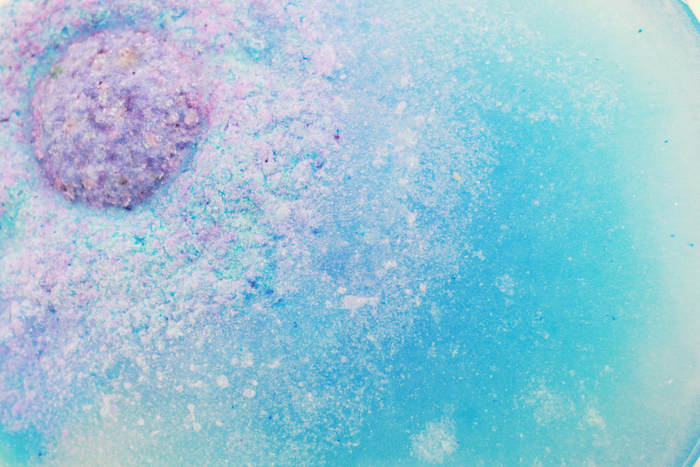
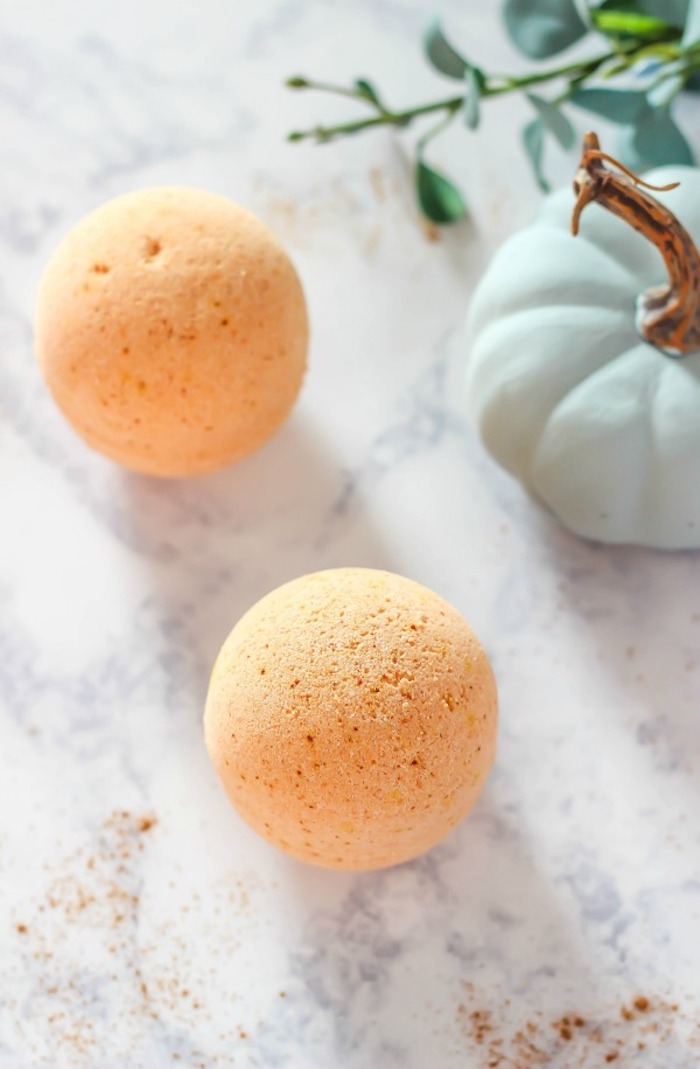
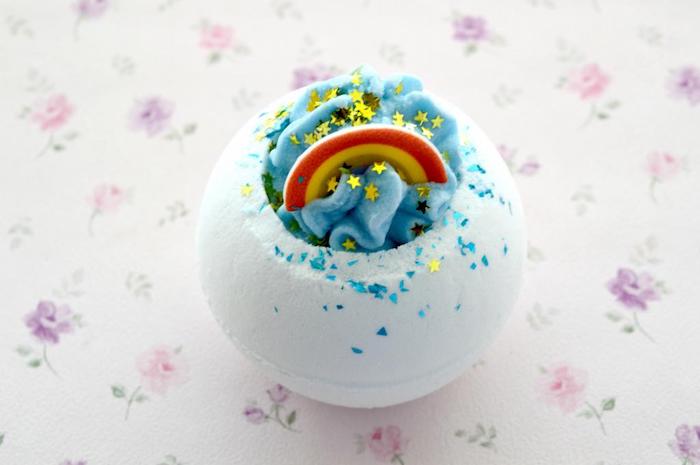
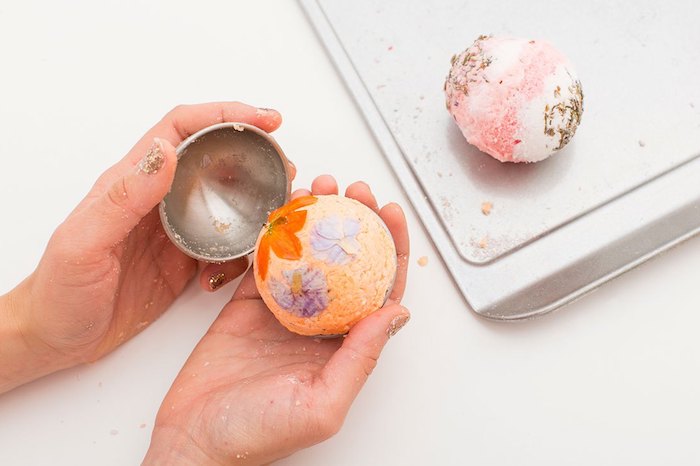
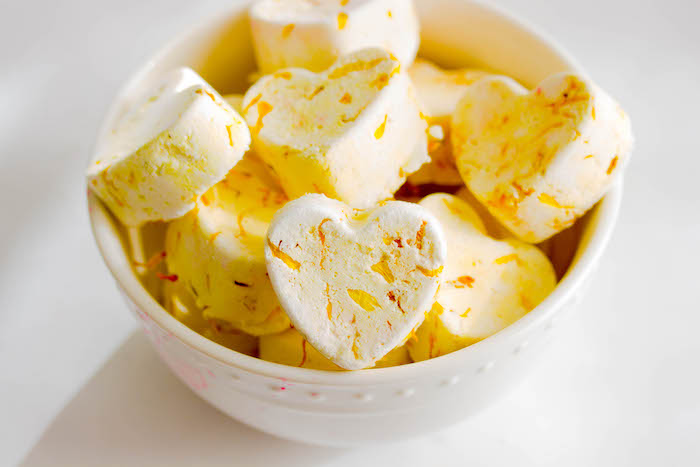
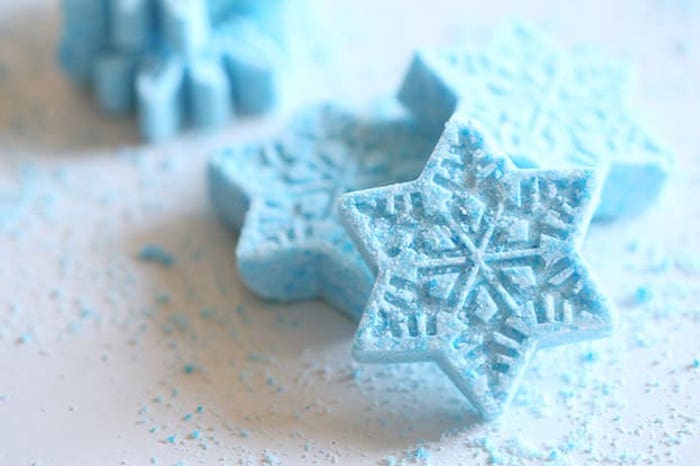
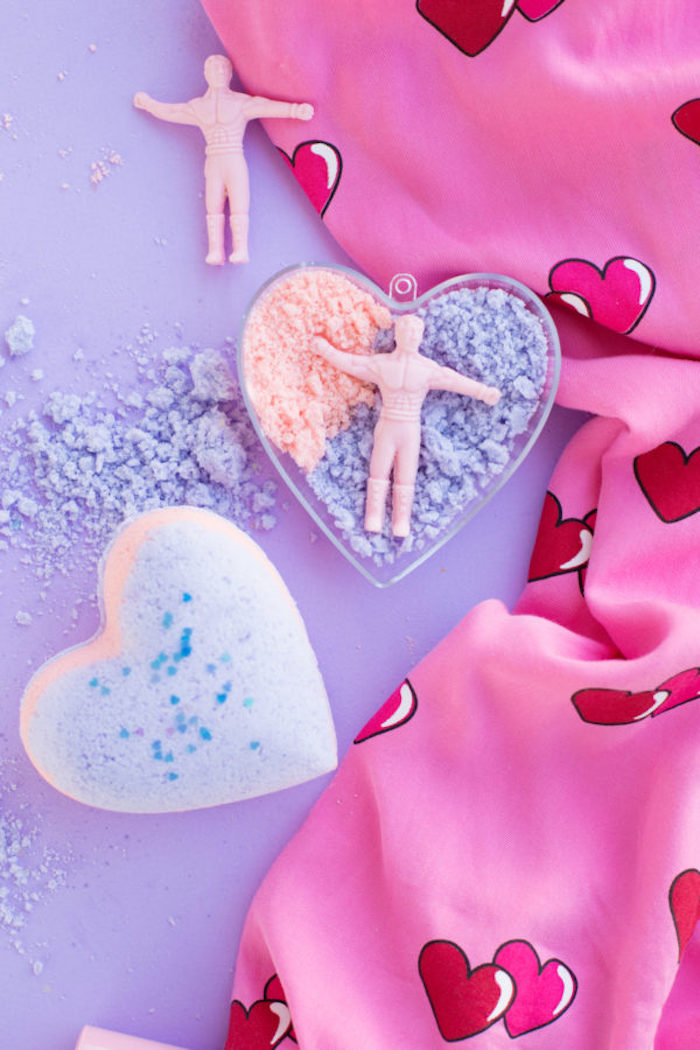
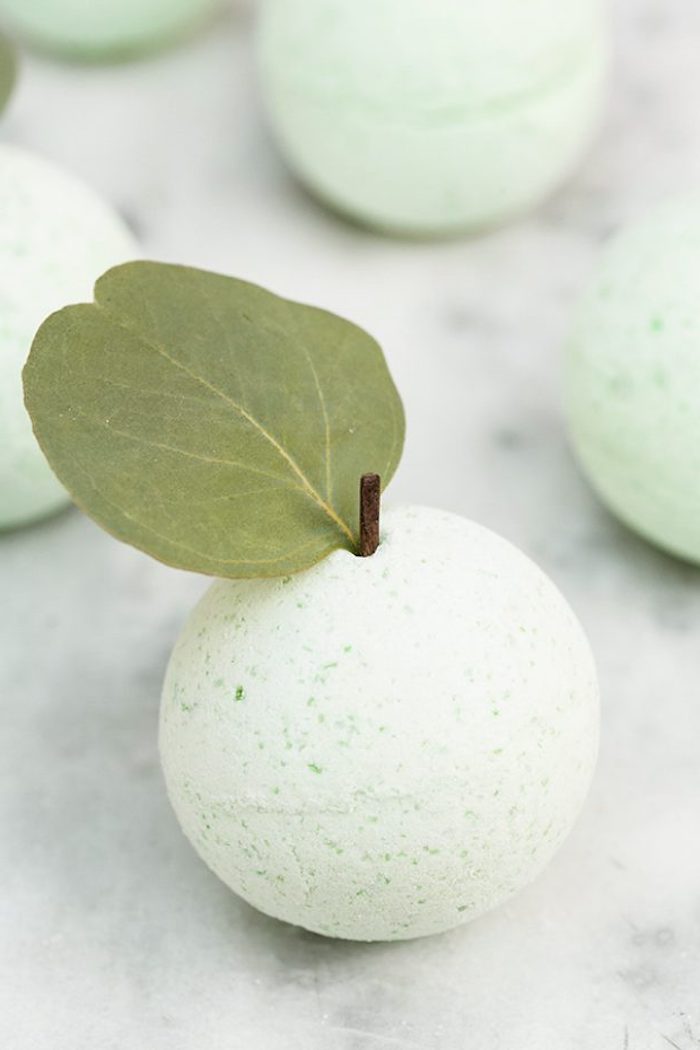
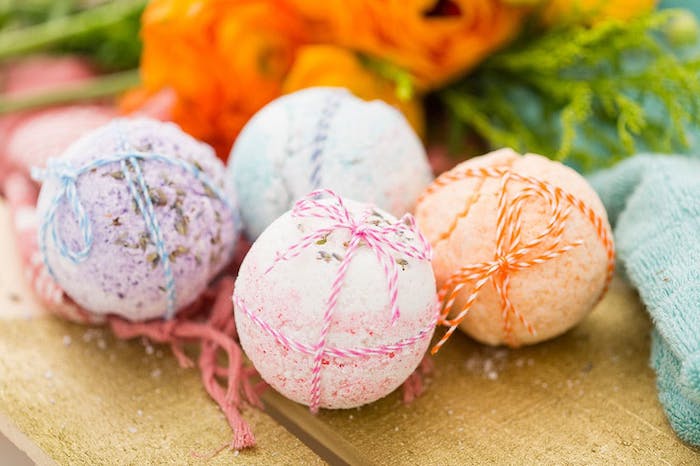
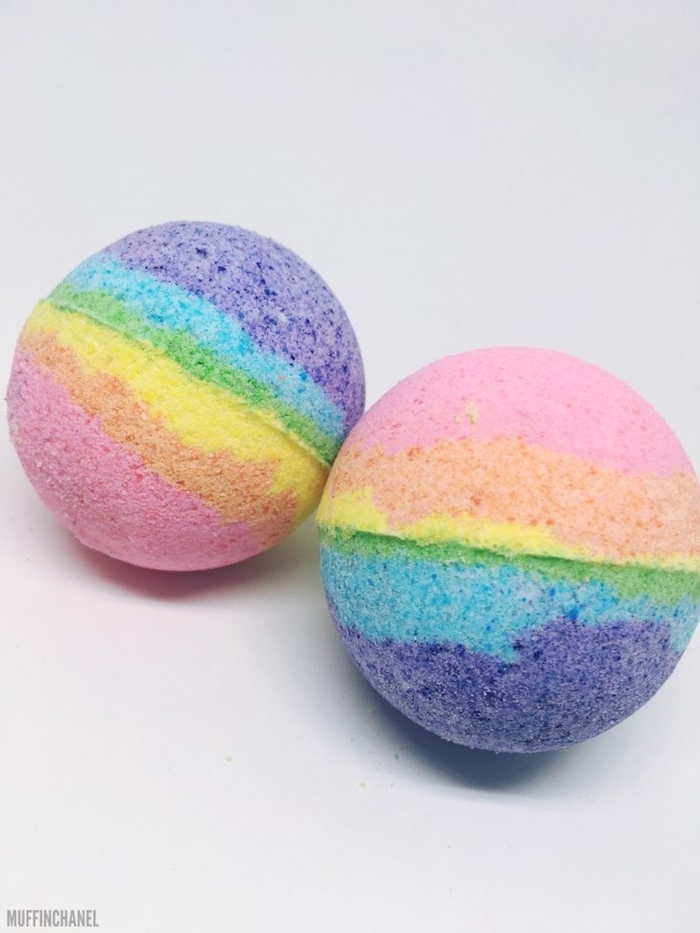
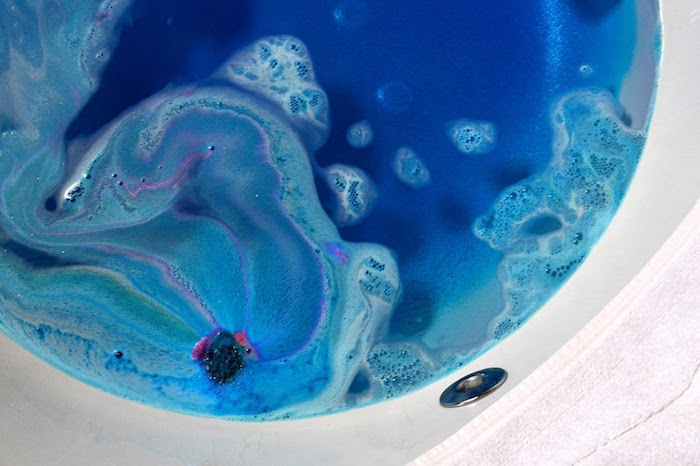
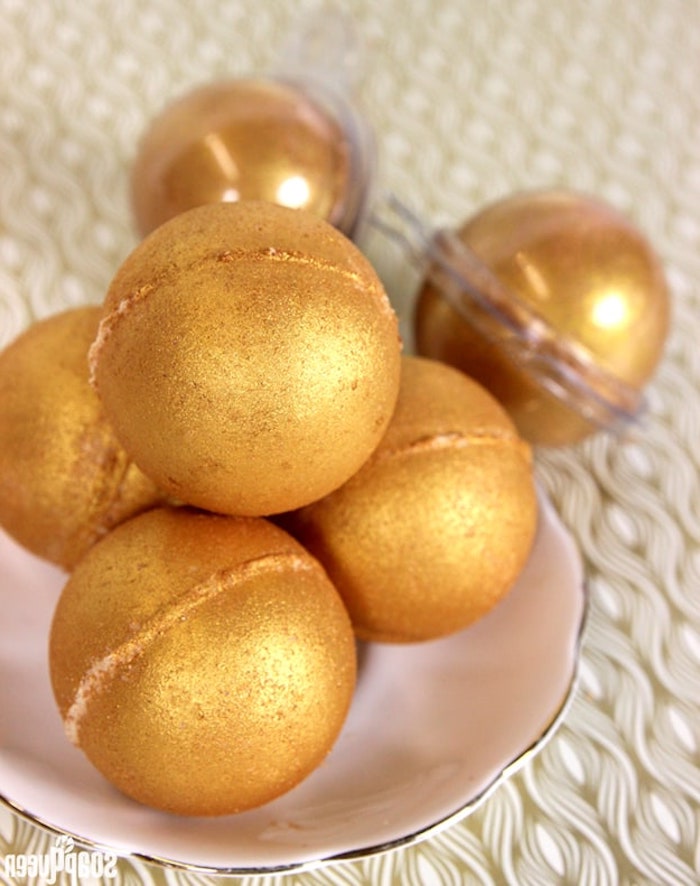
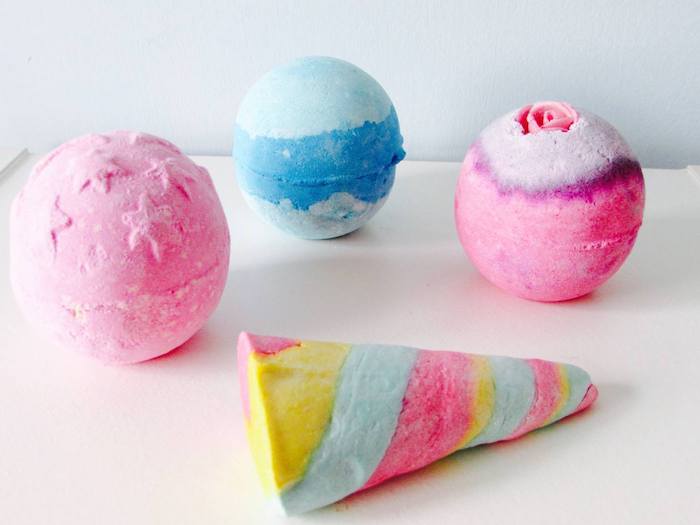
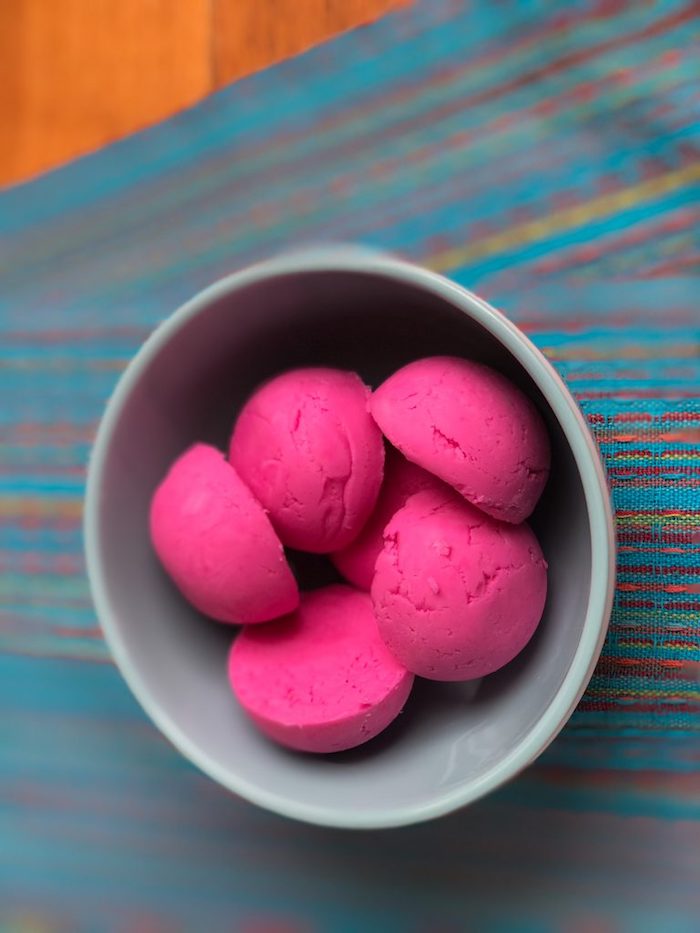
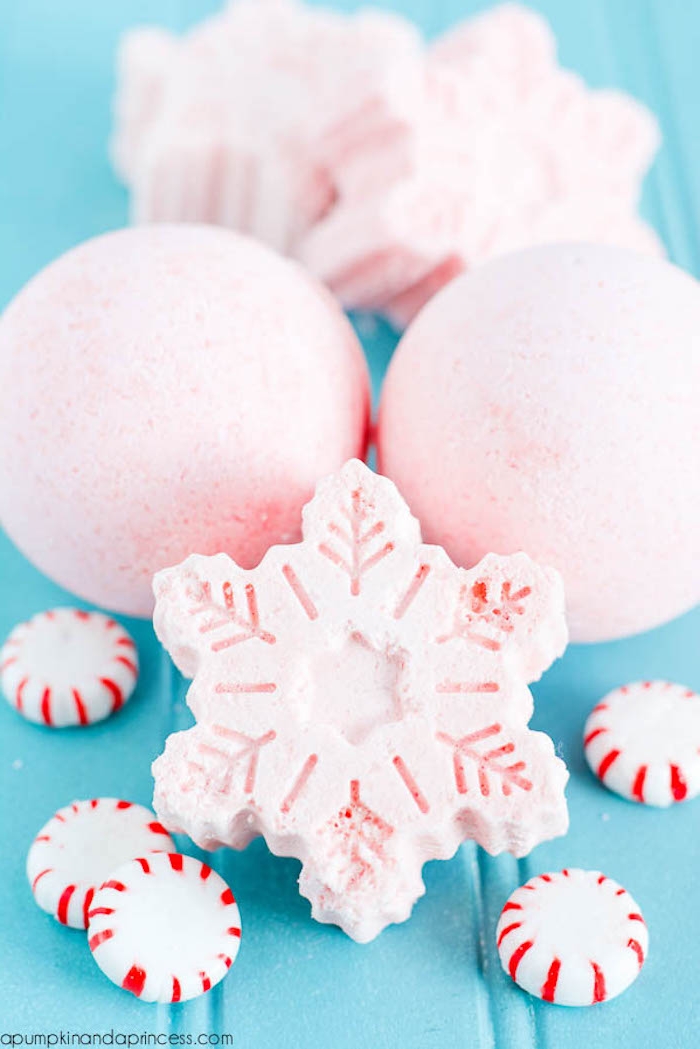
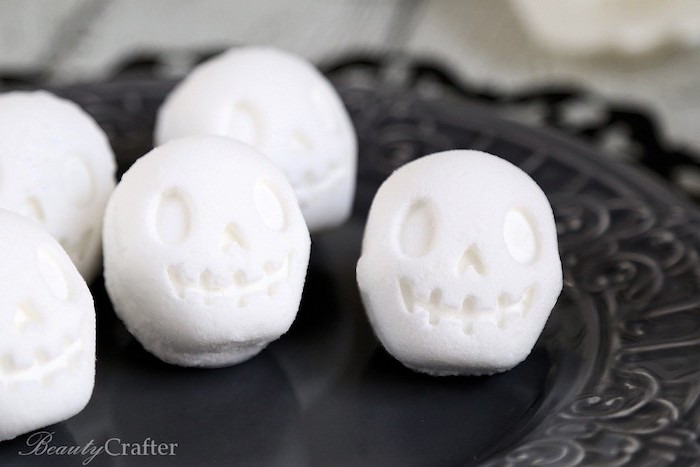
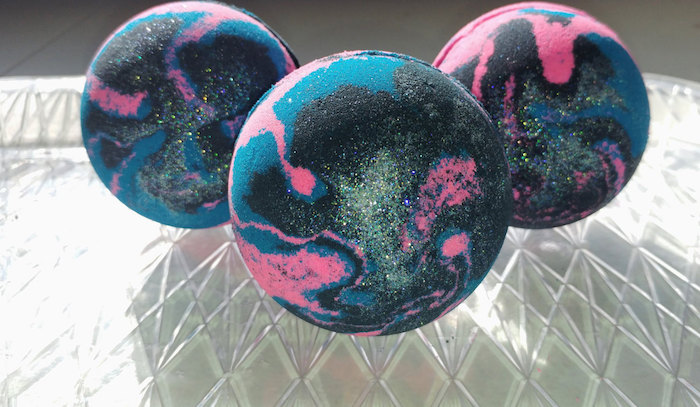
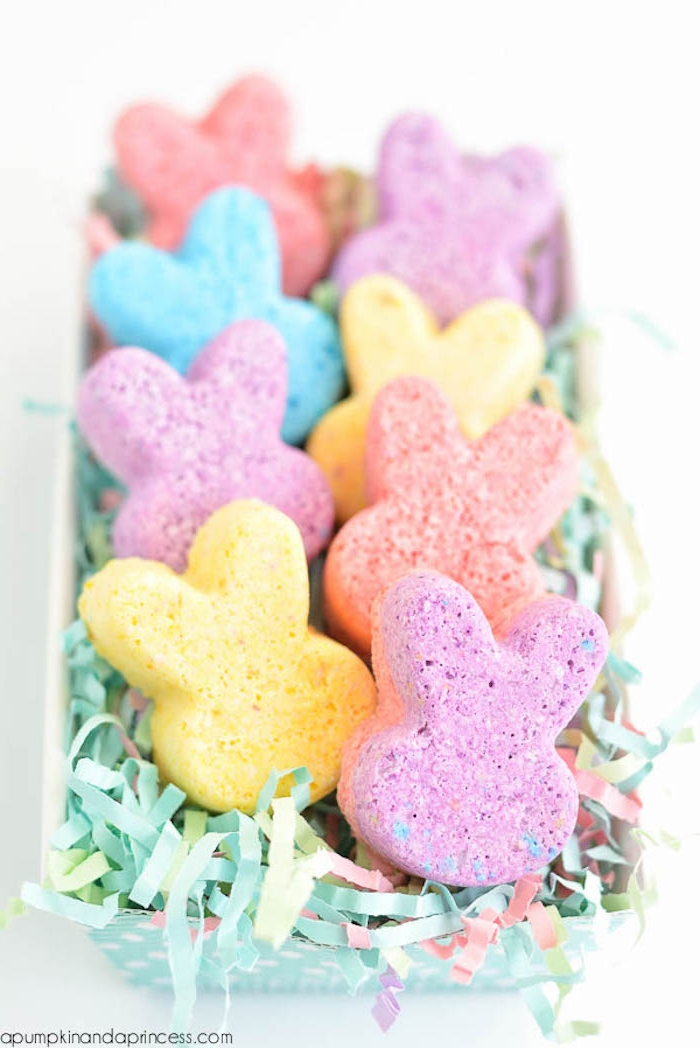
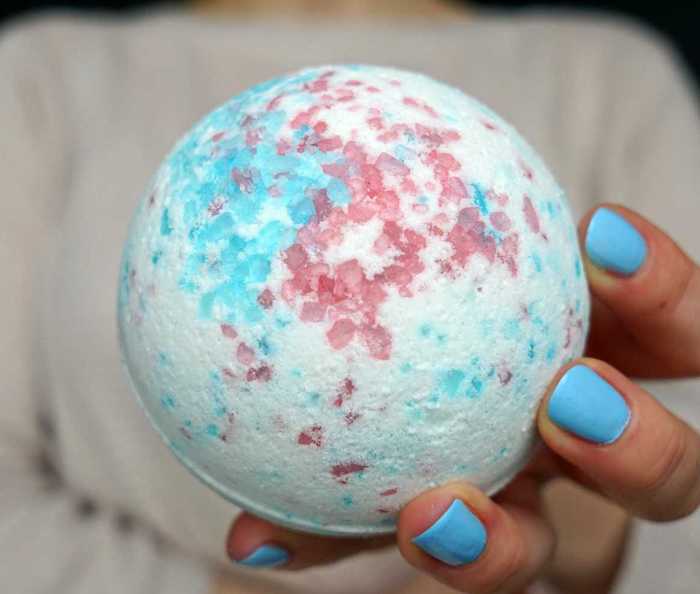
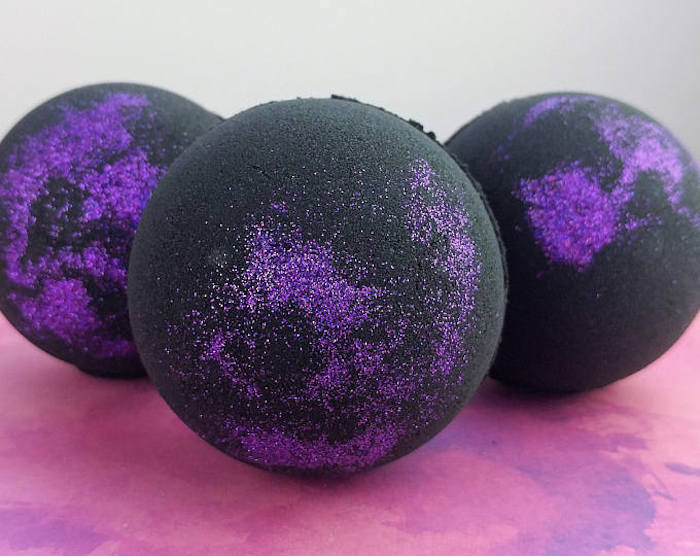
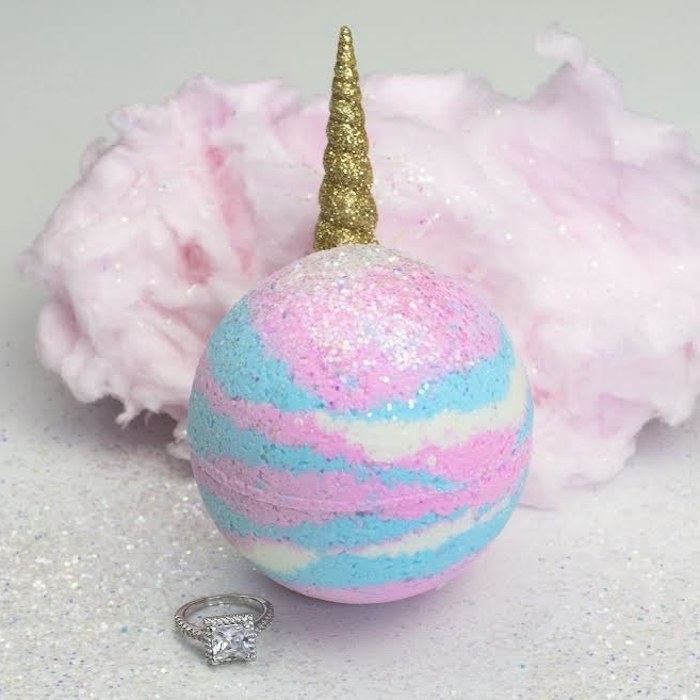
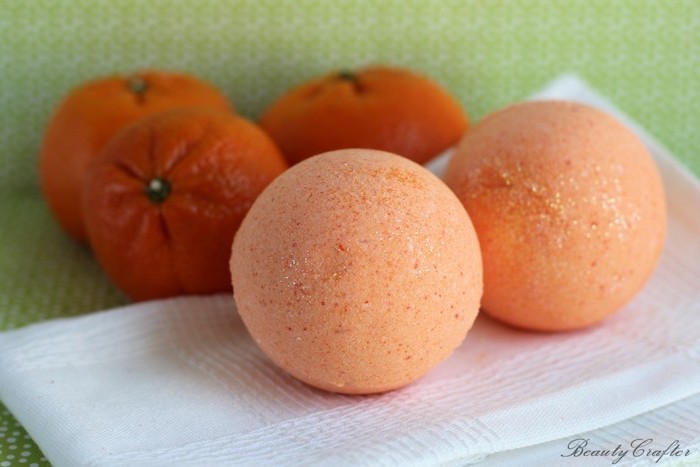
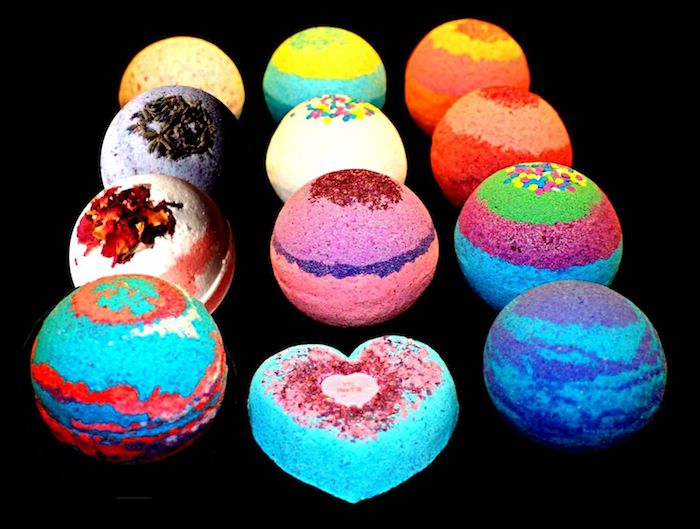
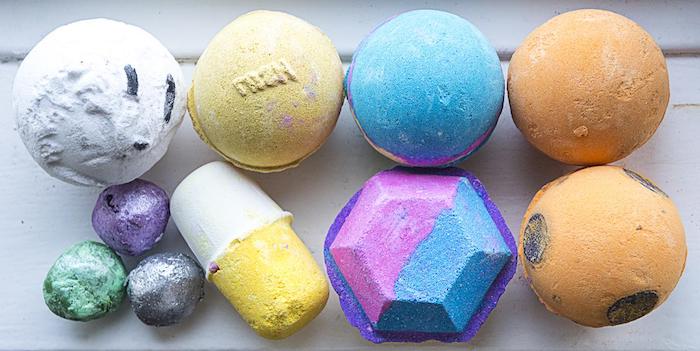
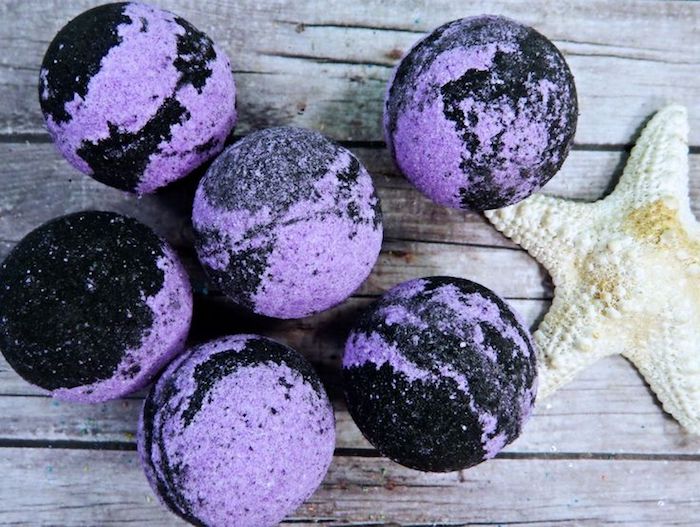
Inspiration Gallery
Polysorbate 80: The Unsung Hero. You might see this ingredient in pro recipes and wonder if it’s necessary. YES! It’s an emulsifier that helps the oils and butters in your bomb disperse in the bathwater instead of creating a slick, hazardous film on the surface. It also prevents colorants, especially micas, from leaving a stubborn ring around your tub. A little goes a long way—start with about 1-2% of your total recipe weight.

- They crack while drying.
- They feel soft or crumbly.
- They don’t fizz enthusiastically.
The culprit is almost always moisture. Whether it’s too much binder (witch hazel or alcohol) or high humidity in your room, getting the texture of wet sand—and letting them dry in a cool, dry place for at least 24 hours—is the key to a solid, fizzy bomb.
Did you know? The global bath bomb market is projected to reach over $500 million by 2028. This boom is driven by a desire for at-home spa experiences and natural ingredients.
My bath bombs are sticking to the mold! What’s the trick?
A common frustration! The secret is often a light dusting of a dry ingredient inside the mold before packing. A tiny bit of cornstarch or even baking soda works wonders. For intricate silicone molds, some makers swear by a quick, light spritz of mold release spray or even a very thin layer of coconut oil, wiped almost completely clean, to help the bomb pop out perfectly.
Give your bath bombs a luxurious boost with skin-loving butters. While oils are great, butters like cocoa butter or shea butter add hardness to the final product and an incredible moisturizing feel to the water. Melt a small amount (about 1 tablespoon per 2 cups of dry mix) and incorporate it with your wet ingredients for a truly decadent bath experience.
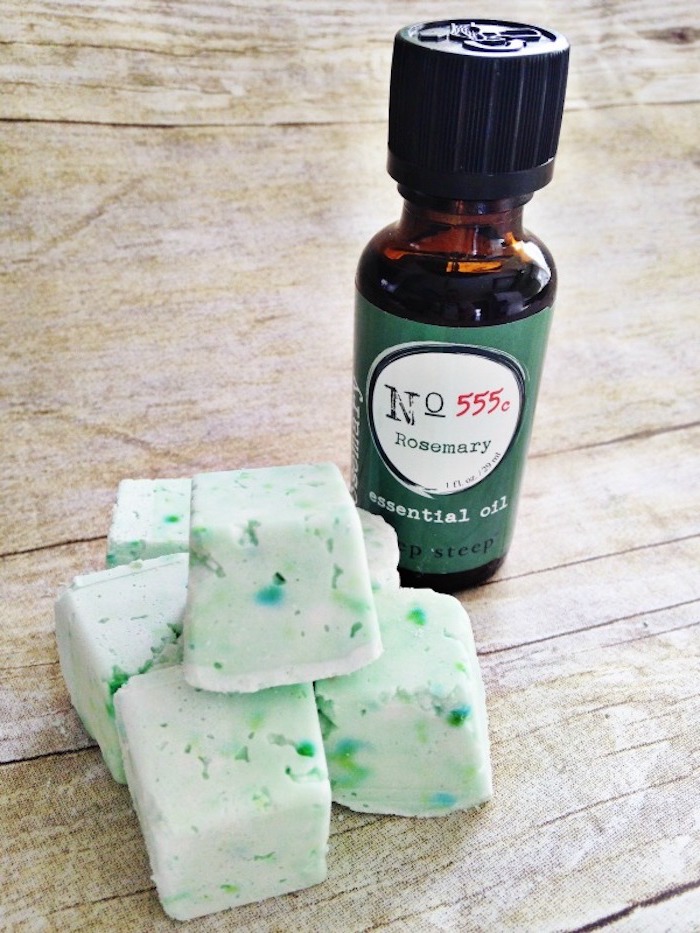
Essential Oils: Pure plant extracts, offering true aromatherapy benefits. They can be volatile, so the scent may fade faster. Great for targeted effects like relaxation (lavender) or energy (peppermint).
Fragrance Oils: Synthetic aromatic compounds, offering a huge range of creative scents (like ‘cotton candy’ or ‘ocean breeze’) that are often stronger and more stable in the high-pH environment of a bath bomb. Choose skin-safe, phthalate-free options from reputable suppliers.
For beginners, fragrance oils are often easier to work with and provide a more predictable result.
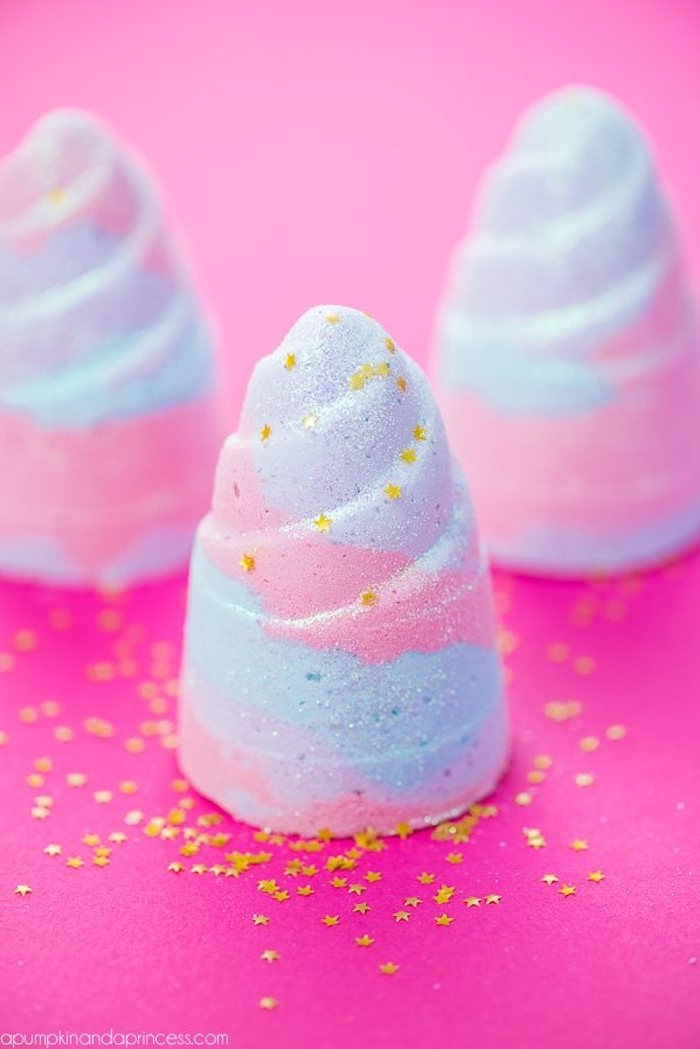
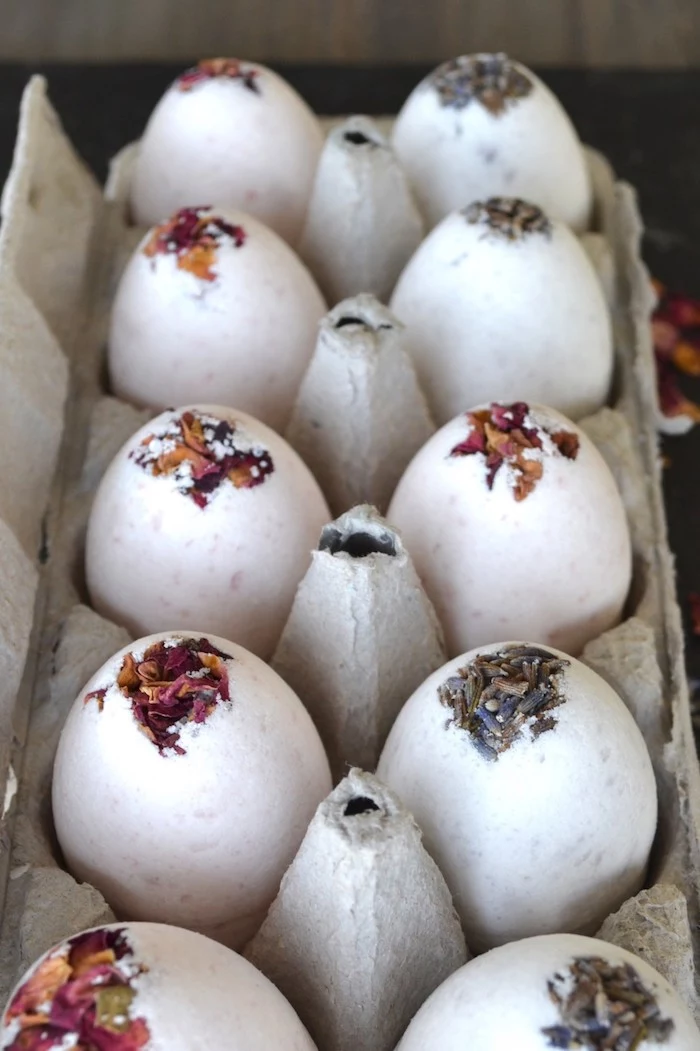
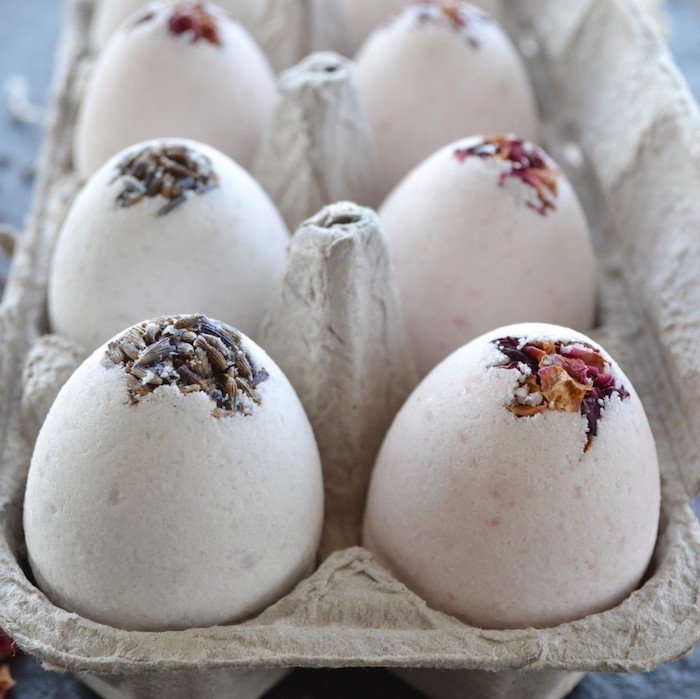
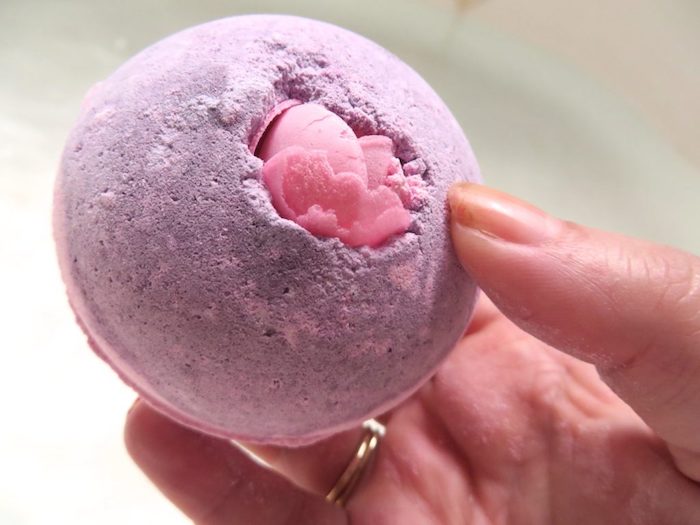
Elevate your design with a surprise inside! Hiding color embeds is a classic pro technique. Use a portion of your bath bomb mix colored with a highly concentrated lake dye or mica, press it into a small shape (a teaspoon works well), and let it dry completely. When you pack your main bomb, place this little color nugget in the center. As the bomb fizzes, it will release a dramatic burst of hidden color.
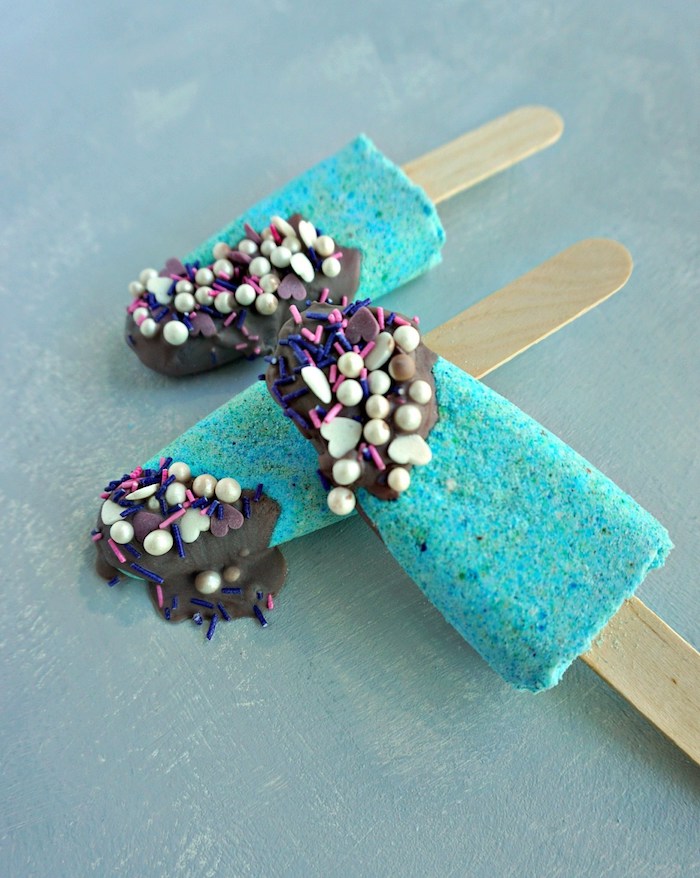
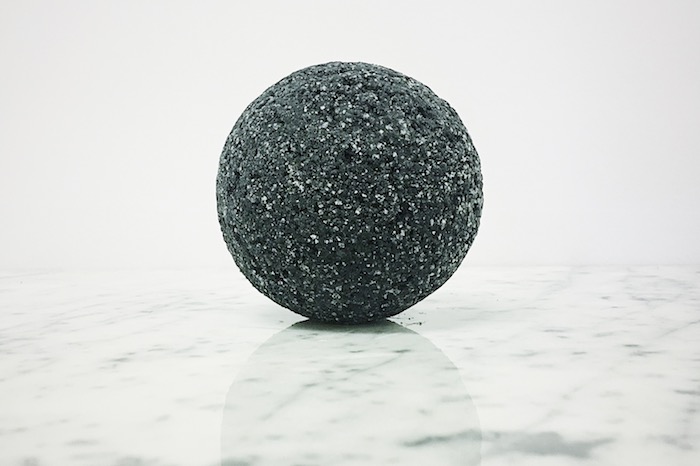
- Use biodegradable glitter. Regular craft glitter is a microplastic. Brands like The Good Glitter offer stunning, plant-based alternatives.
- Package them in glassine bags, which are recyclable and biodegradable.
- Opt for recyclable cardboard boxes or shredded paper for cushioning instead of bubble wrap.
Many bath bomb colorants, particularly some micas and dyes, can ‘bloom’ or ‘morph’ in the high pH of the raw mixture, appearing as a completely different color than what you’ll see in the water. Always test your colorants in a small batch first!
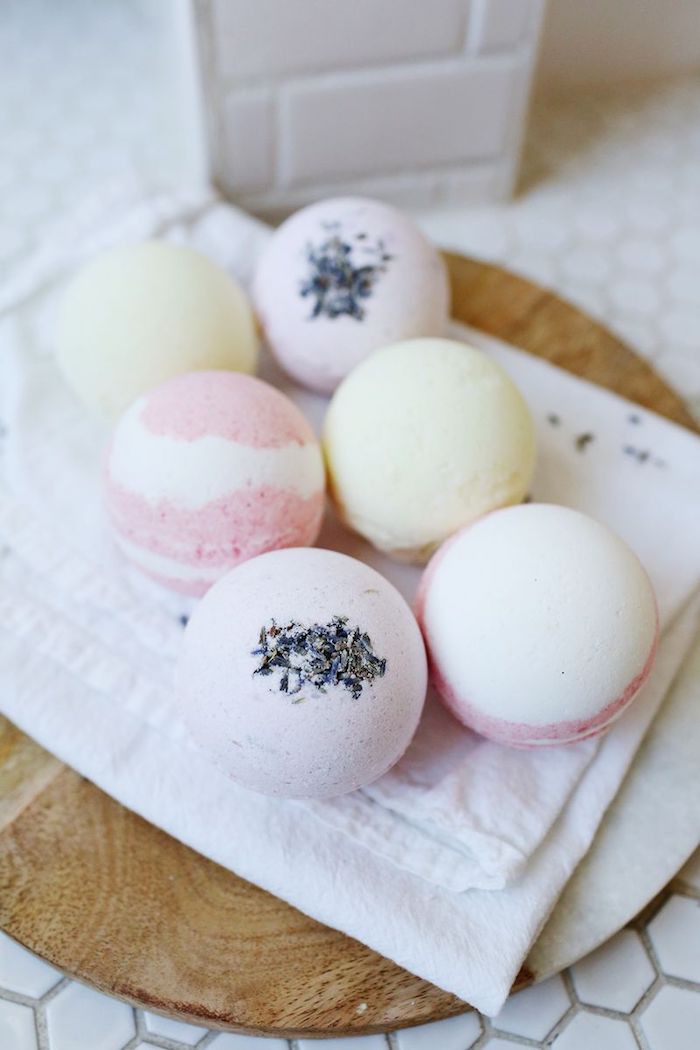
While cornstarch is a great filler, don’t overlook clays! They add structure and have amazing skin benefits.
- Kaolin Clay: A gentle, white clay suitable for all skin types. It helps harden the bomb and adds a silky feel to the water. It’s a reliable, go-to choice.
- Bentonite Clay: Known for its detoxifying properties, this clay can be more absorbent. Use it sparingly, as too much can weigh your bomb down and reduce fizz.
A common mistake: Using standard liquid food coloring from the grocery store. Because it’s water-based, it can set off the fizzing reaction prematurely, causing your mix to expand and become unusable. Stick to colorants specifically designed for cosmetics, like micas, lake dyes, or clay powders, which won’t activate the mixture.
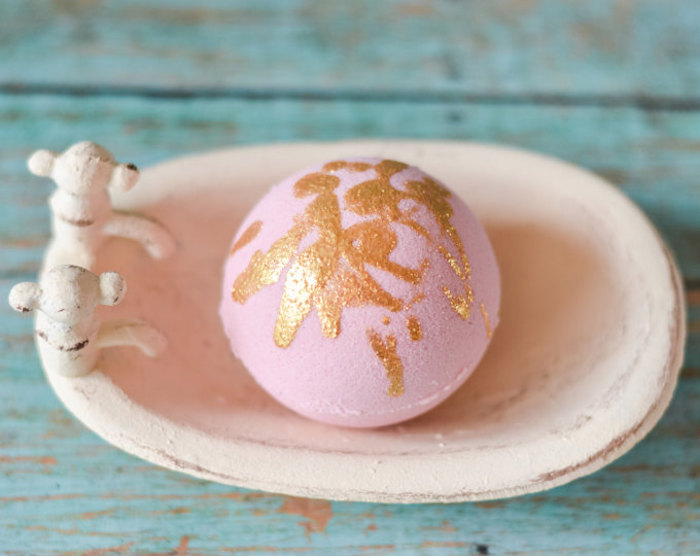
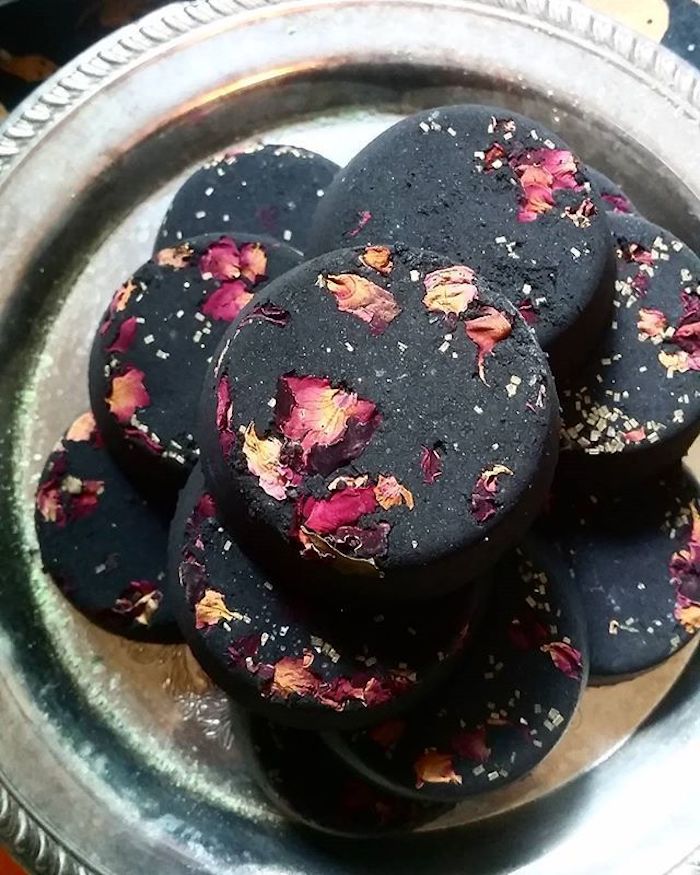
Take inspiration from the ‘geode’ trend. After packing your mold, gently press coarse sea salt or large sugar crystals into one half of the bomb. Once unmolded, paint the edges of the salt-crusted area with a cosmetic-grade gold or silver mica mixed with a little rubbing alcohol. The result is a stunning, crystal-like bath bomb that looks like a luxury item.
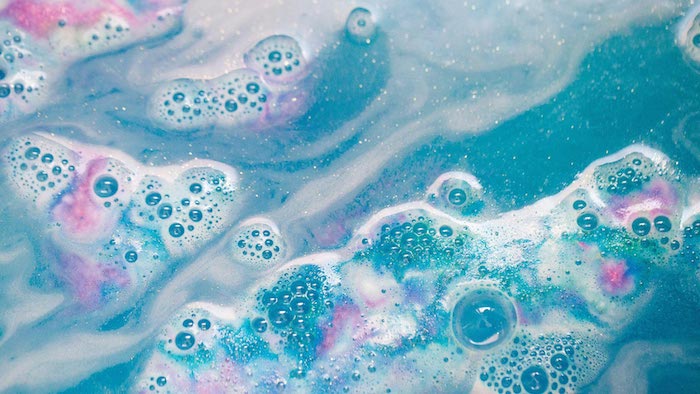
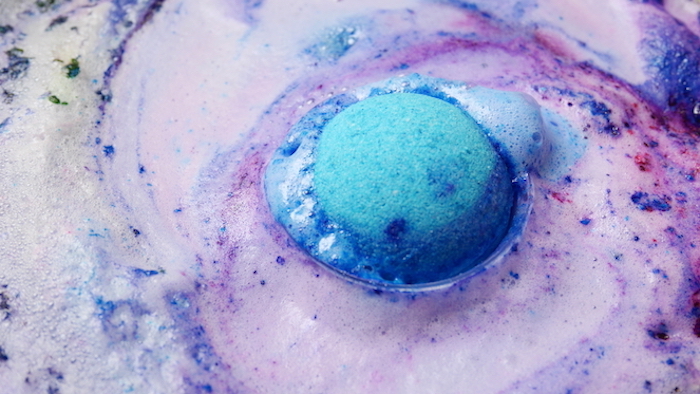
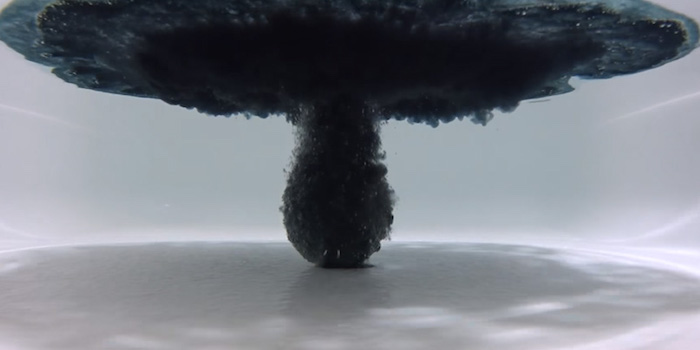
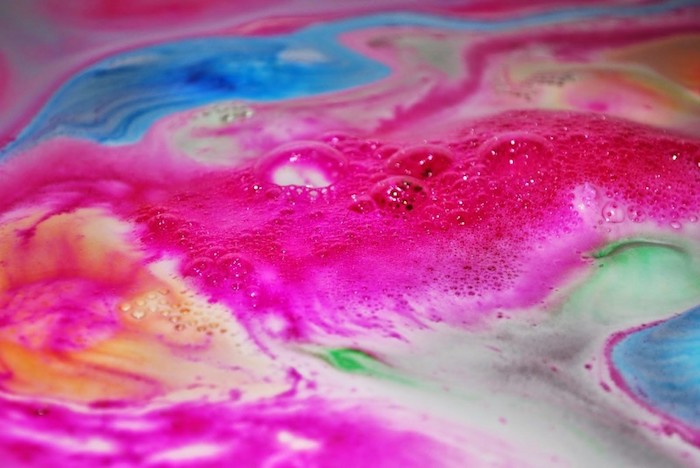
- Creates incredibly vibrant, non-staining colors in the water.
- Produces spectacular ‘bath art’ with streaks and foam.
- Doesn’t leave a residue or ring around the tub.
The secret is using water-soluble dyes, often sold as ‘Lakes’ (like Blue 1 Lake or Yellow 5 Lake). Unlike micas that float, these dyes dissolve completely, coloring the water itself for a much more dramatic effect.
“The first rule of making bath bombs is to respect the humidity. Your perfect recipe on a dry winter day can be a complete failure on a humid summer afternoon without adjusting your liquids.” – A widely shared sentiment among professional soap and bath bomb makers.
An inexpensive hygrometer (a device that measures humidity) can be your best friend. If the humidity in your workspace is over 40%, you’ll need to be extremely sparing with your binder spray.
For an extra sensory kick, try adding popping candy! Mix in a teaspoon of uncolored, unflavored popping candy right at the very end, just before molding. When the bomb hits the water, you’ll get the satisfying fizz combined with a fun, crackling sound. It’s a simple addition that kids and adults love.
How long can I store my homemade bath bombs?
When stored correctly, their fizzing power is best within the first 3-4 months. To maximize their life, shrink-wrap them or place them in an airtight container as soon as they are fully cured (after 24-48 hours). This protects them from moisture, which is the primary fizz-killer, and helps preserve the scent of the essential or fragrance oils.
Not all baking soda is created equal for this craft. Look for pure sodium bicarbonate without any added anti-caking agents, which can sometimes affect the texture. Brands like Arm & Hammer are reliable and widely available. For citric acid, ensure you’re buying ‘anhydrous’ (water-free) food-grade quality for the most potent reaction.
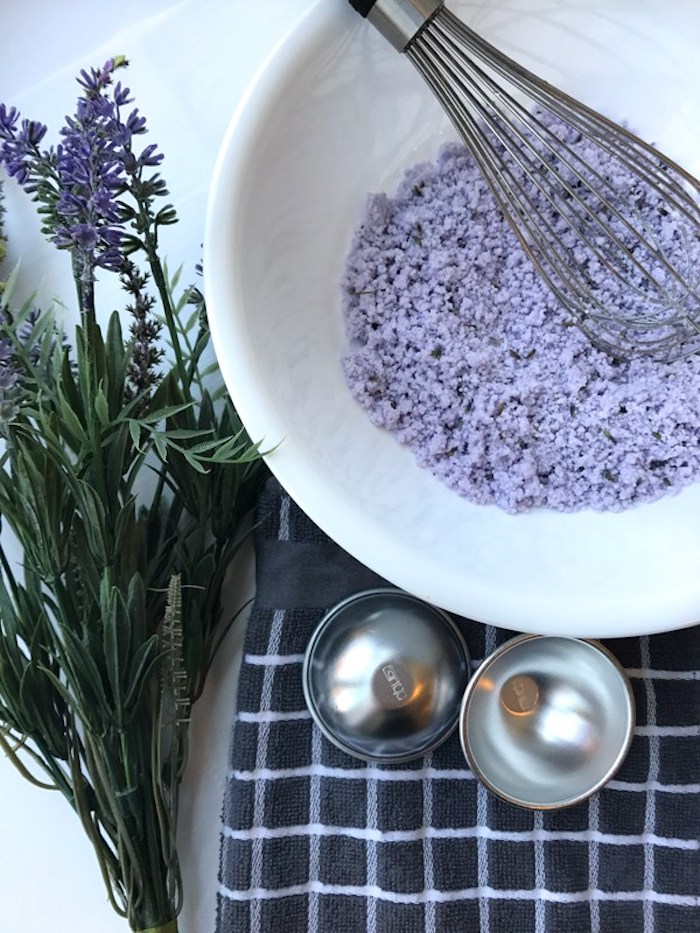
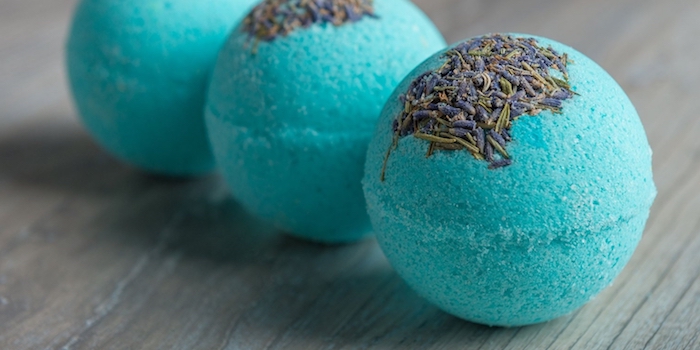
- For Deep Relaxation: 3 parts Lavender, 1 part Roman Chamomile, 1 part Vetiver.
- For an Uplifting Mood: 2 parts Sweet Orange, 2 parts Bergamot, 1 part Ylang-Ylang.
- For a Sore Muscle Soak: 2 parts Eucalyptus, 2 parts Peppermint, 1 part Rosemary.
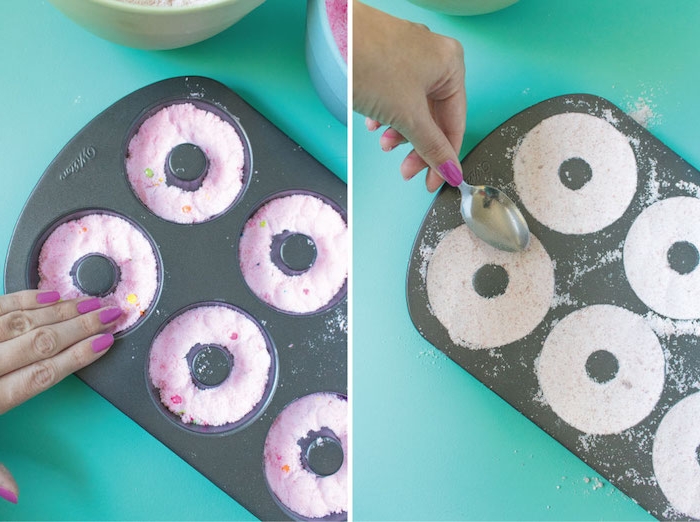
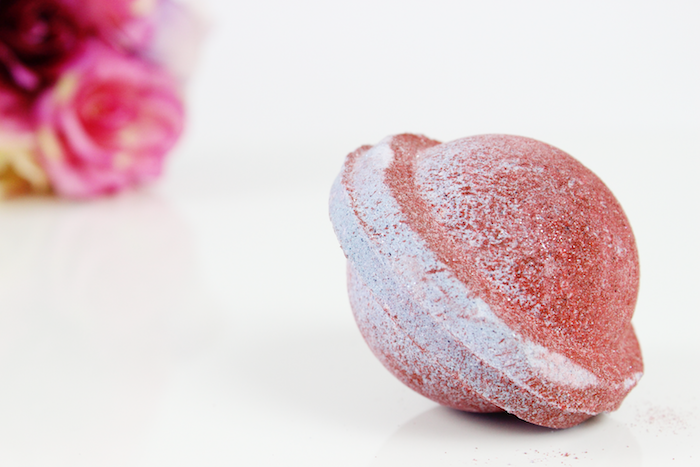
Struggling with ‘Saturn rings’ on two-part spherical bombs? This happens when the two halves don’t join perfectly, creating a raised edge. The solution is technique. Overfill both halves of your mold slightly, creating a small mound on each. Then, press them together firmly and evenly, allowing the excess to crumble away. Don’t twist! A firm, direct press creates a much cleaner seam.


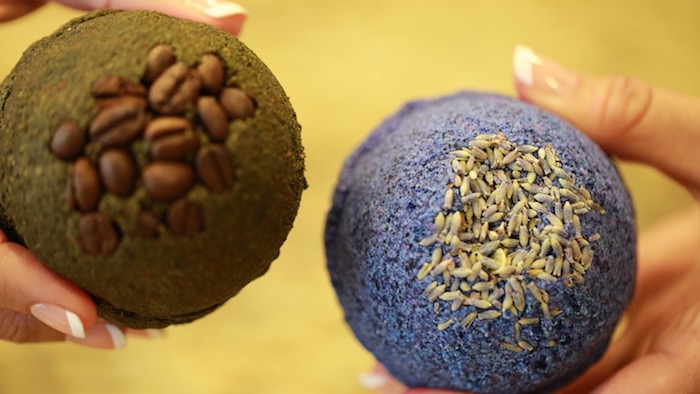
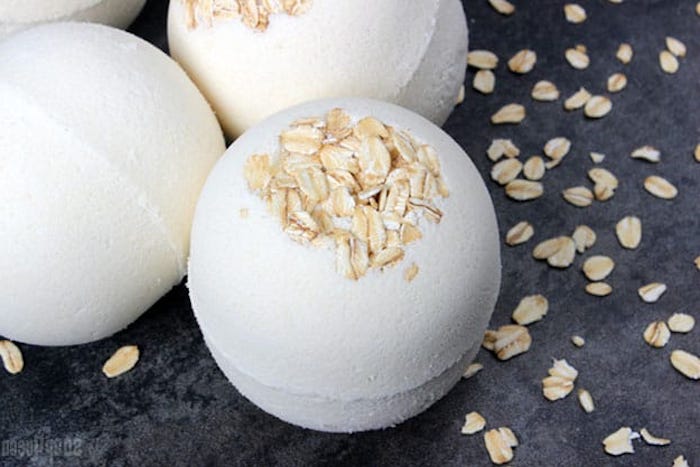
For a creamy, soothing bath perfect for sensitive or irritated skin, add a tablespoon of colloidal oatmeal to your dry ingredients. It’s an ultra-fine powder that dissolves easily, helping to soothe dry, itchy skin and giving the water a comforting, milky quality. It’s a fantastic functional ingredient that pairs beautifully with gentle scents like chamomile or honey.
A 2017 study published in ‘Nutrients’ suggested that transdermal absorption of magnesium (absorbing it through the skin) can be an effective way to supplement levels.
This gives scientific weight to the classic Epsom salt bath! Adding magnesium-rich Epsom salts to your bath bombs doesn’t just add bulk; it can genuinely contribute to muscle relaxation and well-being.
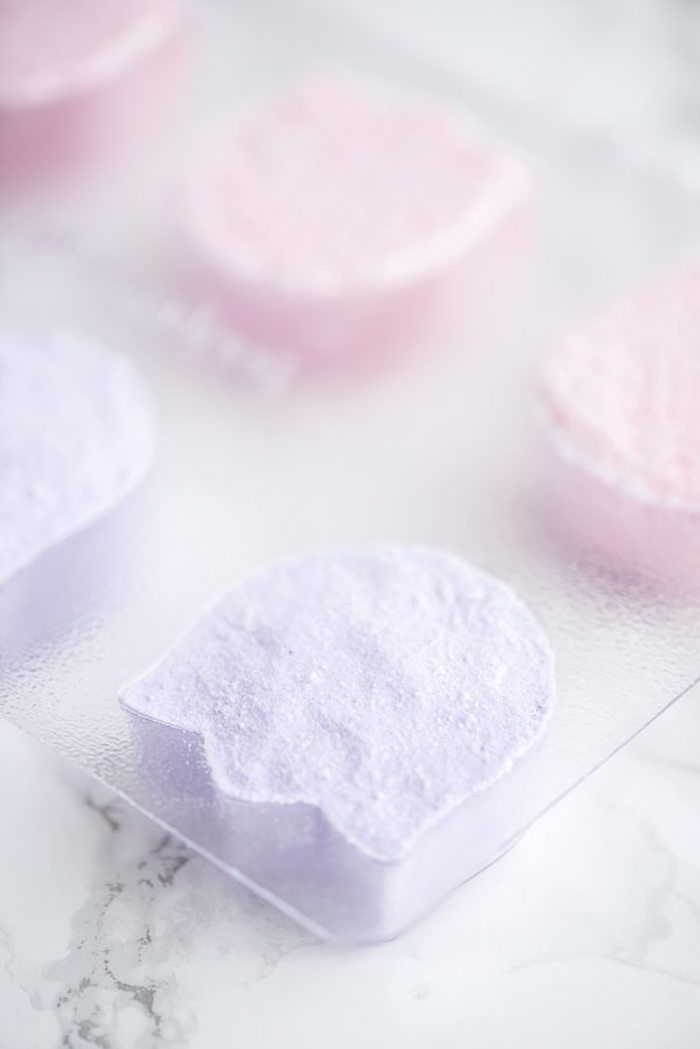
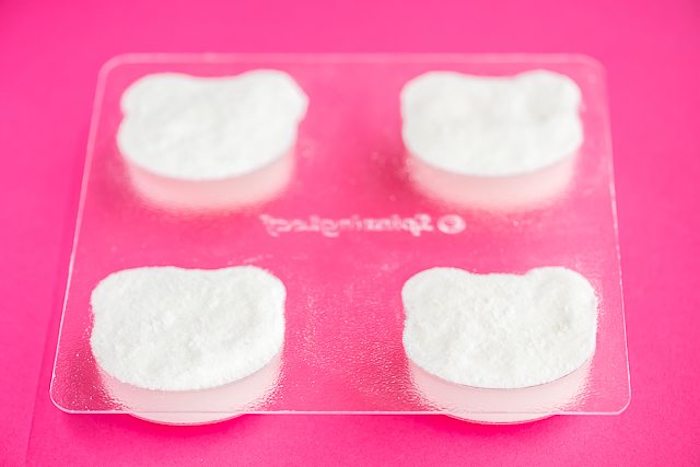
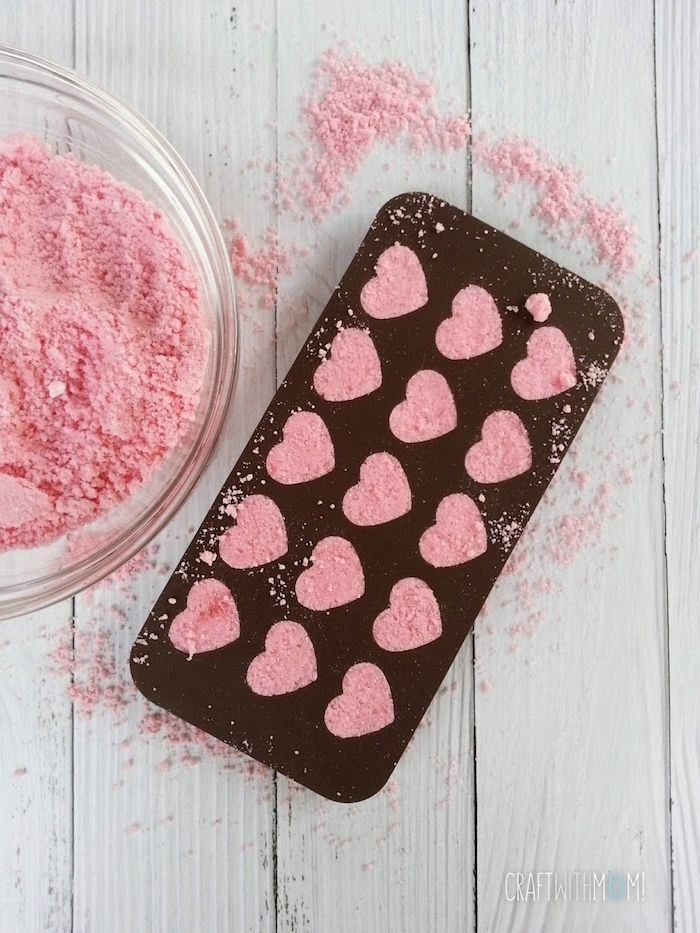
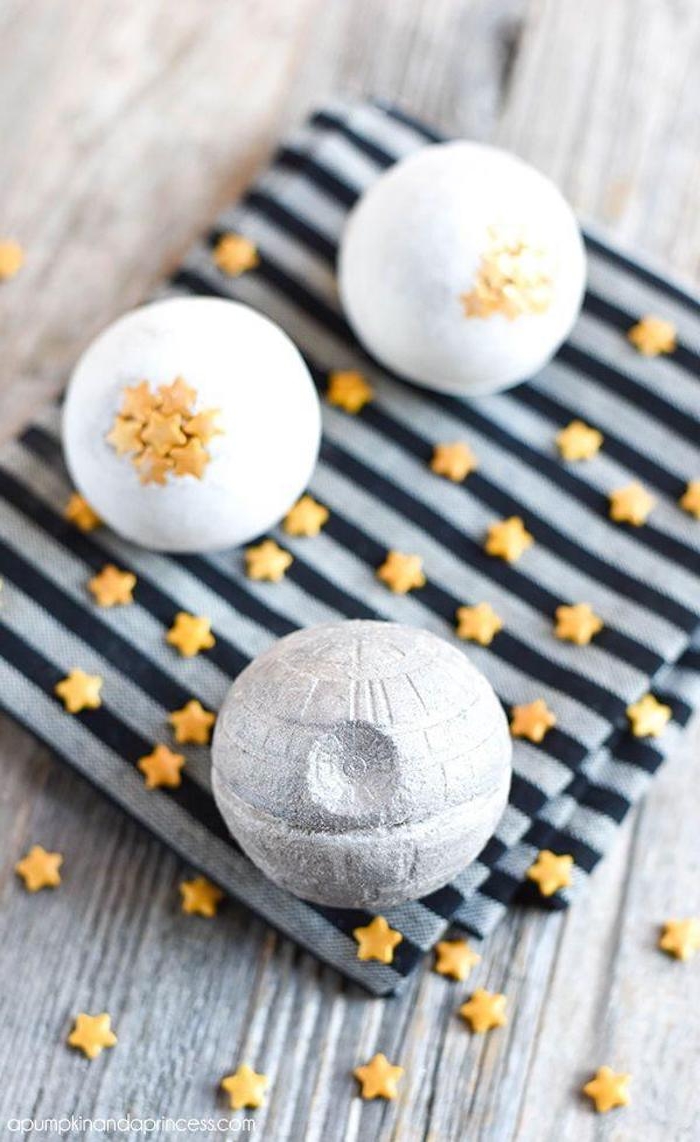
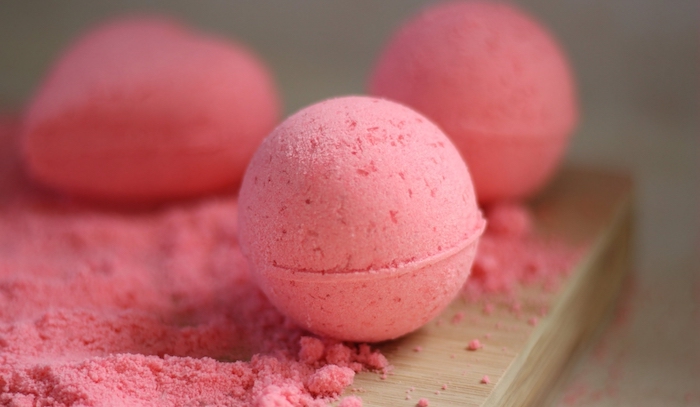
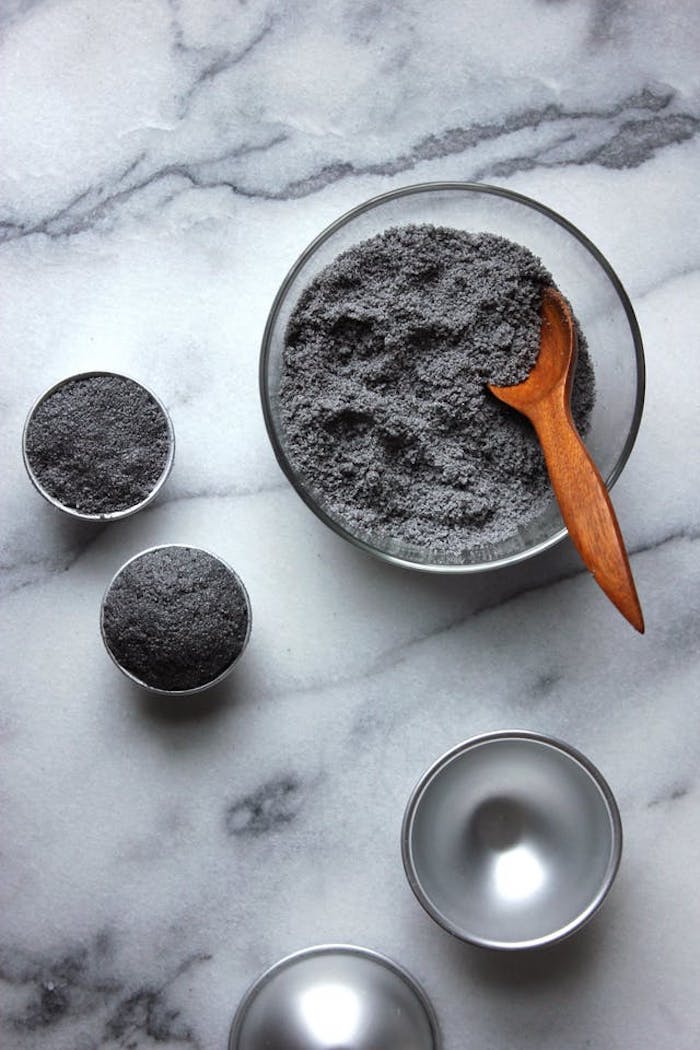
Metal Sphere Molds: The professional standard. They create that classic, satisfyingly round shape and, with practice, are very fast to use. They require a good packing technique to avoid rings or cracks.
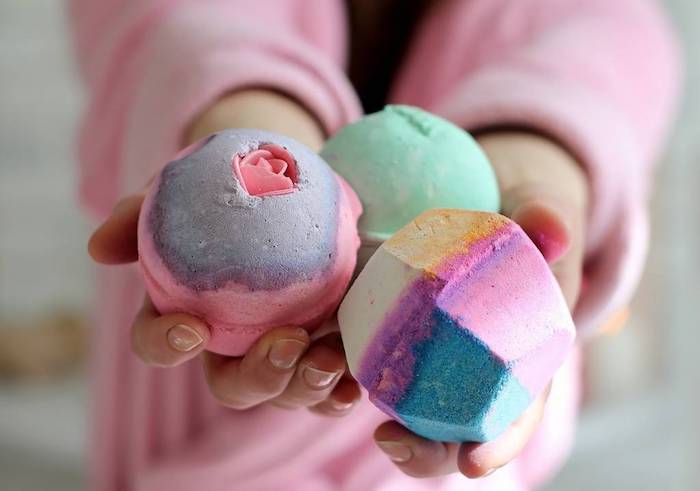
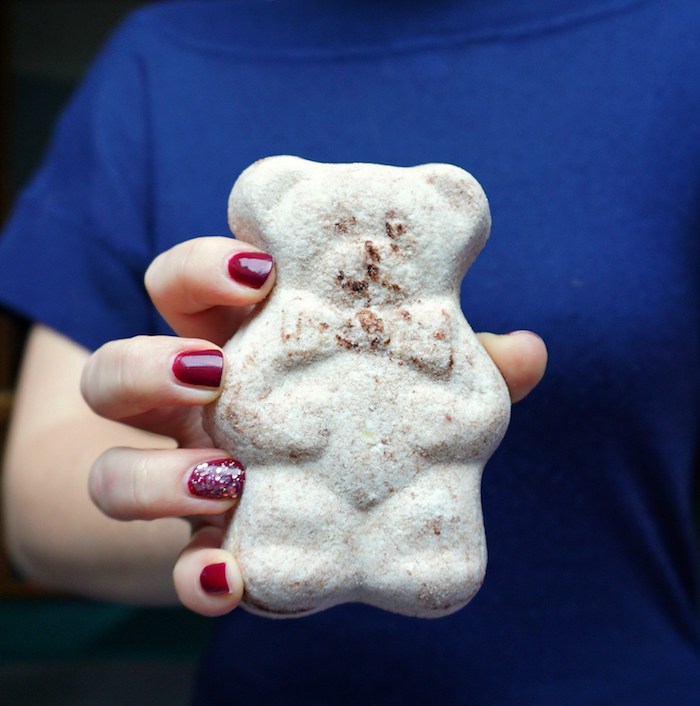
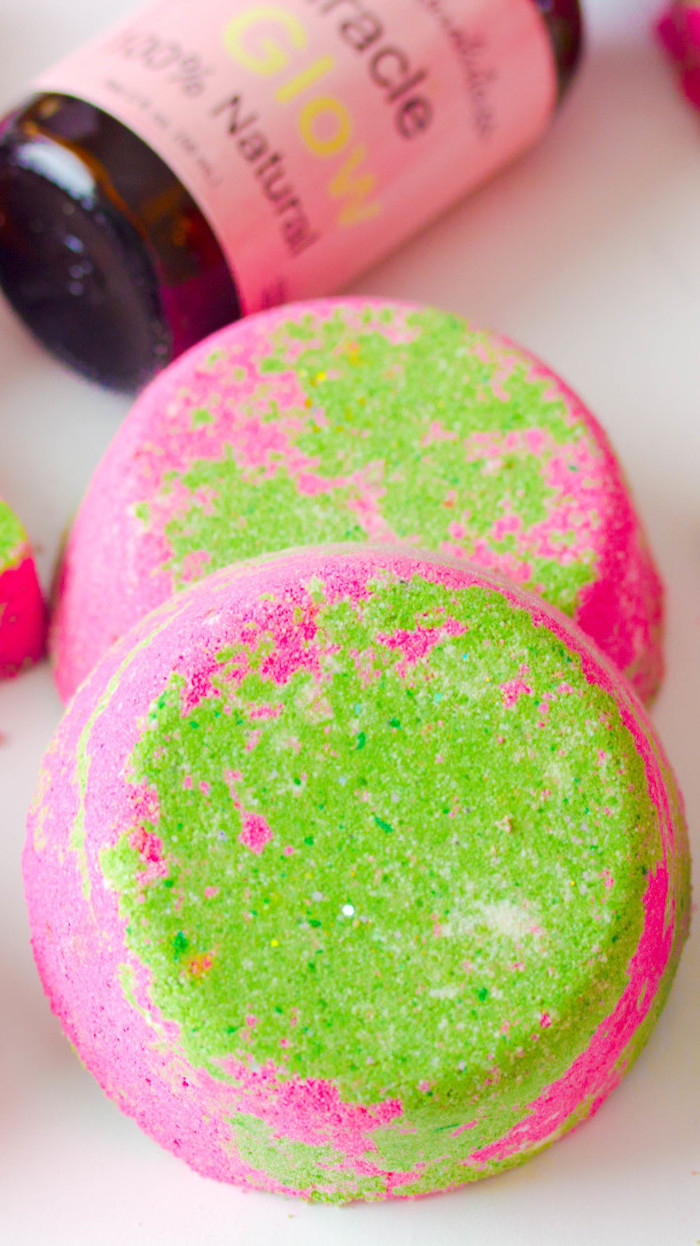
Silicone Molds: Perfect for beginners and for creating fun, intricate shapes (like the donuts or flowers in the photos). They are more forgiving but the bath bombs must be left to dry in the mold for several hours before they can be safely removed.
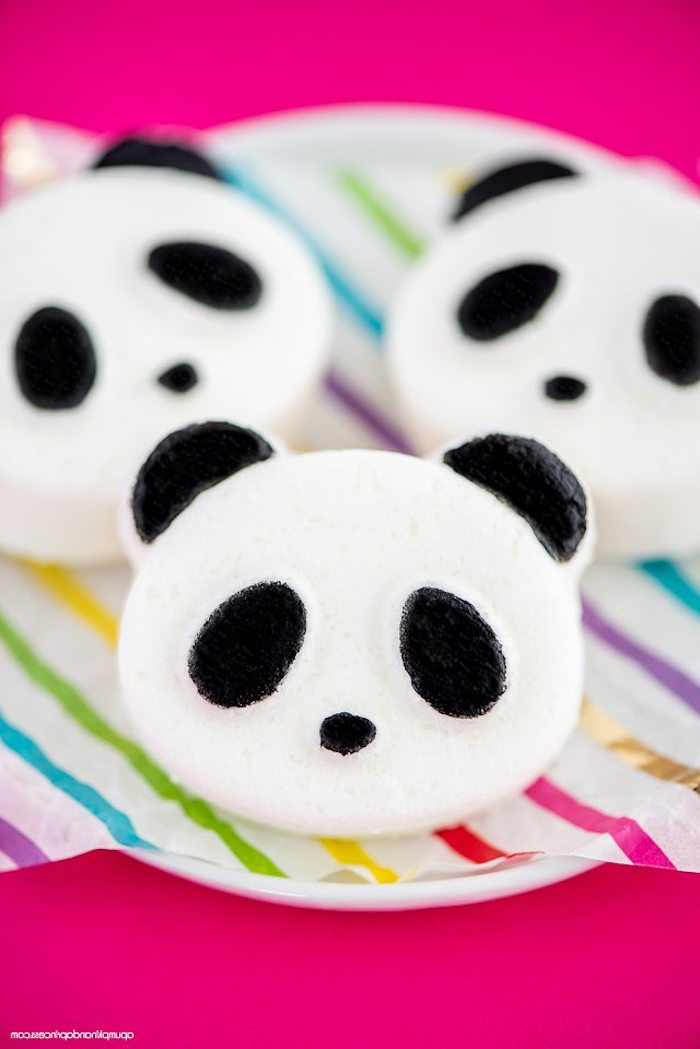
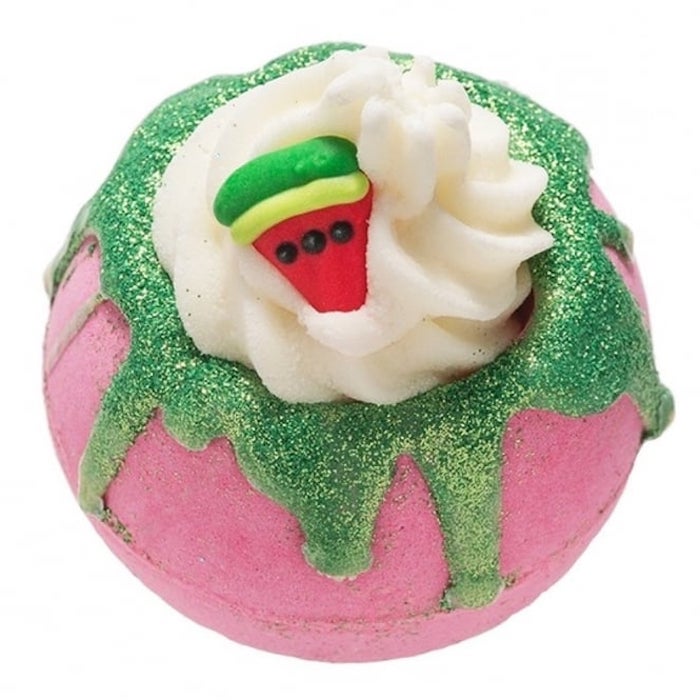
Want to paint fine details on your finished bombs, like the veins on a leaf or the seeds on a strawberry? Create a ‘paint’ by mixing a vibrant mica colorant, such as those from Mad Micas or Nurture Soap, with a few drops of 99% isopropyl alcohol. Use a fine-tipped art brush to apply. The alcohol evaporates quickly, leaving the pigment bonded to the surface.
Forget bowls and whisks for a moment. Some high-volume makers get their perfect ‘wet sand’ consistency by using a stand mixer with the paddle attachment. It incorporates the liquid binder more evenly and quickly than by hand, reducing the risk of accidentally activating the mix. Just be sure to keep it on the lowest speed!
Witch Hazel: A gentle binder, often preferred for its skin-soothing properties. It contains some water, so it must be spritzed very sparingly to avoid setting off the reaction.
99% Isopropyl Alcohol: The pro choice. It contains very little water, so it wets the mixture for molding without causing fizzing. It evaporates extremely quickly, leading to a faster drying and curing time.


