Stop Building Flimsy Sheds: A Pro’s Guide to a Backyard Fortress
I’ve spent the better part of my life building things out of wood, and let me tell you, I’ve seen it all. From tiny garden sheds to massive workshops, I’ve learned that a good outdoor structure is way more than just a box to hide your lawnmower. It’s a mini-building, and it has to fight off rain, snow, and blistering sun for years. It drives me crazy when I see people drop a few hundred bucks on a flimsy metal or plastic kit that goes up in a day and falls apart in a few seasons. Or worse, the weekend project that starts with big dreams and ends with a leaky roof and a door that won’t close.
In this article
This guide is different. It’s built on decades of real-world experience—the kind you get from making mistakes and fixing them. I want to walk you through the way the pros do it, so you can build a storage structure that’s sturdy, bone-dry, and genuinely useful. We’re going to cover everything from the ground up, because a solid building starts with a smart plan and a rock-solid foundation.
What Tools Do You ACTUALLY Need?
Before we even talk about wood, let’s talk tools. Walking into a hardware store can be overwhelming, and you don’t need a pro-grade workshop to build a great shed. Here’s the real-deal breakdown.
The Bare Essentials (You can’t do the job without these):
- A good circular saw. This will be your workhorse for cutting everything.
- A tape measure, speed square, and chalk line. Measurement is everything. The speed square is your best friend for making fast, accurate 90 and 45-degree marks.
- A hammer. A 20-22 oz framing hammer will save your arm.
- A drill/driver. For screws, hardware, and maybe some pilot holes.
- A 4-foot level. Absolutely critical for making sure everything is plumb and level.
Nice-to-Haves (These make life a LOT easier):
- A framing nailer. Honestly, this turns a multi-day framing job into a single afternoon. You can often rent one for a weekend for about $50-$75.
- A miter saw (or ‘chop saw’). Perfect for making fast, repetitive, and super-accurate cuts for studs and rafters.
- A laser level. A fantastic tool for setting foundations, but you can get by with a string level and a long, straight board.
Everything Starts with the Foundation
Before you buy a single 2×4, you need to figure out where this shed is going to live. This is, without a doubt, the most common and costly mistake I see. People slap a shed on bare dirt or a few wobbly pavers, and it’s a recipe for disaster. The ground holds moisture, which rots wood, and uneven ground twists the frame, making doors and windows jam forever.
Heads up! Your first real step is a phone call. Call your local town or county building department. Just ask, “What are the rules for a storage shed? Do I need a permit for something like a 10×12?” They’ll tell you about size limits (often 100 to 200 square feet is the cut-off for needing a permit) and setback requirements—how far it needs to be from property lines. Getting this sorted out first is a huge win and prevents the nightmare of having to tear down your finished project.
Once you’ve got the rules, it’s time to choose your base. You have a few great options:
- On-Grade Skid Foundation: This is your simplest and most budget-friendly choice, perfect for smaller sheds (under 100 sq. ft.) on relatively level ground. You start by digging out a shallow area and filling it with 4-6 inches of compacted gravel. This is key for drainage! On top of the gravel, you lay a couple of big, pressure-treated timbers (called skids), and then build your floor right on them. The whole material cost here might just be $100-$200.
- Concrete Piers: Stepping it up a notch in both stability and effort, concrete piers are fantastic for larger sheds or any kind of sloped ground. This means digging holes below your local frost line (the depth the ground freezes in winter) so the shed doesn’t heave up and down with the seasons. You pop in a cardboard tube form, fill it with concrete, and set a metal anchor in the top. It’s more work, but it gets your shed completely off the ground and away from moisture.
- Concrete Slab: This is the heavyweight champion of foundations. It’s the most durable, most expensive, and most labor-intensive option. A slab is perfect if you’re building a serious workshop and need a perfectly flat, solid floor for heavy tools or even a small vehicle. You’re looking at building forms, adding a gravel base, and pouring a 4-inch slab. For anything bigger than about 8×8, don’t even think about mixing the concrete yourself. A ready-mix truck delivery might cost $400-$800, but it saves your back and gives a way better result.
No matter which you choose, get it perfectly level and square. To check for square, measure the diagonals. If they match, you’re golden. Time spent here is never wasted.
Choosing Your Lumber (And a Pro Tip for Straighter Walls)
Walking into a lumberyard can be intimidating. Let’s demystify it. For a shed, you really only need to know about a few types of wood.
First up is Pressure-Treated (PT) Lumber. This is the wood with a greenish tint that’s been chemically treated to resist rot and bugs. Building code is very clear: any wood touching concrete or the ground must be pressure-treated. This means your foundation skids and the bottom plate of your walls on a slab. By the way, always wear gloves and a mask when cutting PT wood—the sawdust is not something you want to breathe.
Next is your standard Framing Lumber, usually Spruce-Pine-Fir (SPF) 2x4s or 2x6s. This is for the parts that stay dry: wall studs and roof rafters. It’s cheaper and lighter than PT wood. Here’s a crucial tip: when you pick your boards, look down the narrow edge. Almost every board has a slight curve or “crown.” This is normal! The pro trick is to frame your walls with all the crowns facing the same direction (usually out). This creates a much flatter, stronger wall when the sheathing pulls it all together.
Finally, there’s Sheathing, which is the skin that covers the frame. The two big players are Plywood and Oriented Strand Board (OSB). Plywood is tougher against water, while OSB is a bit cheaper (maybe saving you $5-$10 a sheet). Honestly, OSB is fine for a shed, but if its edges get soaked before you get the roof on, they can swell up like a sponge. If you use OSB, keep a tarp handy.
Framing: Where Your Shed Takes Shape
With a square foundation and good materials, framing can be a lot of fun. The secret is to build the walls flat on the shed floor and then lift them into place. It’s safer, easier, and way more accurate.
We always follow a simple process. Cut the top and bottom plates of a wall to length, lay them together, and mark your stud locations—usually 16 inches from the center of one stud to the next. This is the standard for a reason: it lines up perfectly with the edges of your 4-foot-wide sheathing panels.
Oh yeah, and what about doors and windows? You can’t just leave a gap. You have to build a structural header to carry the weight from the roof down around the opening. It’s not as complicated as it sounds. For a basic doorway, this means you have:
- King Studs: These are the full-height studs that run from the bottom plate to the top plate on the outer edges of the opening.
- Jack Studs (or Trimmers): These are shorter studs that sit inside the king studs. They support the header.
- Header: This is a small beam (often two 2x6s nailed together with a plywood spacer) that sits on top of the jack studs. It’s the powerhouse that prevents the wall from sagging.
Once you have your wall framed—studs, headers, and all—nail the sheathing on before you lift it. This locks the whole thing square and makes it incredibly rigid. Then, grab a friend (seriously, don’t do this alone), tilt the walls up, brace them, and nail the corners together. Suddenly, you have a building!
Finishing Touches That Actually Last
Once the box is built and the roof is on, it’s time for the fun part. This is where you can add character and long-term durability.
For siding, you have tons of options. T1-11 plywood siding is a classic, affordable choice. My personal favorite for a shed is an engineered wood siding product. It looks great, holds paint forever, and is treated to resist everything nature throws at it.
For the roof, standard asphalt shingles are a great, budget-friendly option. A bundle of shingles might cost you $30-$40, and you’ll probably need 3-4 bundles for a small shed. For a step up, consider metal roofing. It costs more upfront—maybe $300-$500 for that same shed—but it will likely outlive you and is fantastic in snowy or rainy climates.
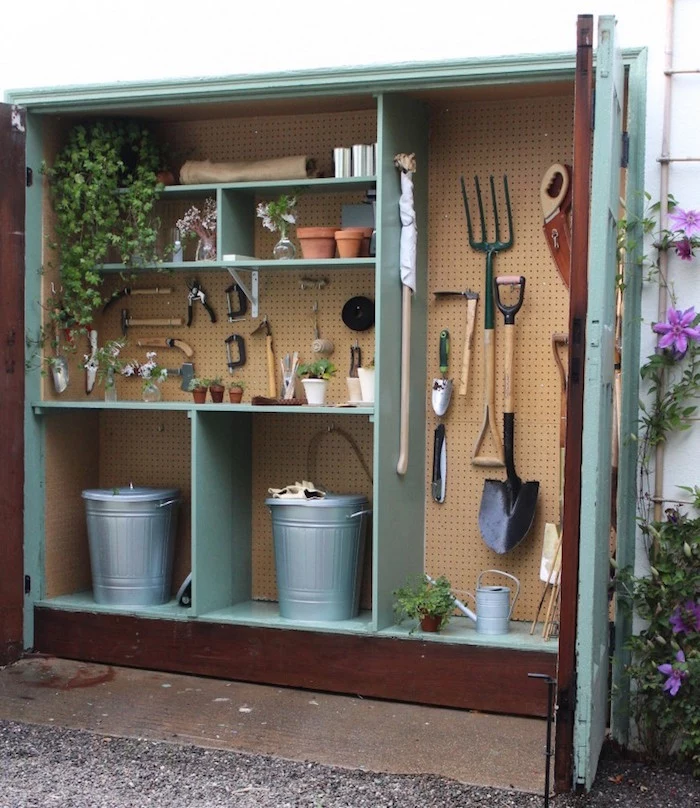
Inside, skip the wobbly metal shelves. You built a strong shed, so give it strong storage! One of my all-time favorite solutions is a French cleat system. It’s basically just a sturdy board mounted on the wall with a 45-degree angle cut along the top edge. You then add a matching cleat to the back of cabinets, tool holders, and shelves. It allows you to lift and move heavy things anywhere along the wall, no new holes required. It’s the ultimate in flexible organization.
When to Swallow Your Pride and Call a Pro
Thinking about adding lights and outlets? A small utility sink? This is where you need to be honest with yourself. I’m a carpenter, not an electrician. Running power to an outbuilding is a job for a licensed pro, period. They know the codes, they can pull the right permits, and they can do it without creating a serious fire hazard. The same goes for plumbing. The cost of hiring a pro for a day is nothing compared to the cost of a fire or a major flood.
A Quick Word on Safety
I’ve seen my share of job site injuries, and almost all of them were preventable. Please, take this stuff seriously.
- Wear your safety glasses. Always. Sawdust and flying debris can blind you in an instant.
- Respect the saw. Know where the blade is, and keep your hands far away from it.
- Ladder safety is no joke. A fall from a one-story roof can change your life. If you’re working up high, especially on a steep roof, use proper safety gear.
- Listen to your body. Trust me on this one. Most of the dumb mistakes I’ve seen—and made—happen after 3 PM when you’re tired and just want to get one more thing done. Your power saw doesn’t care if you’re tired. Know when to pack it in and call it a day.
Building your own shed is an incredibly rewarding project. It takes more time and money than a kit—plan on a few weekends and a material budget of anywhere from $1,500 to $4,000 depending on size and finishes—but the result is something you can be genuinely proud of. You’ll have a structure that not only holds your stuff but holds its own against the elements for decades to come.
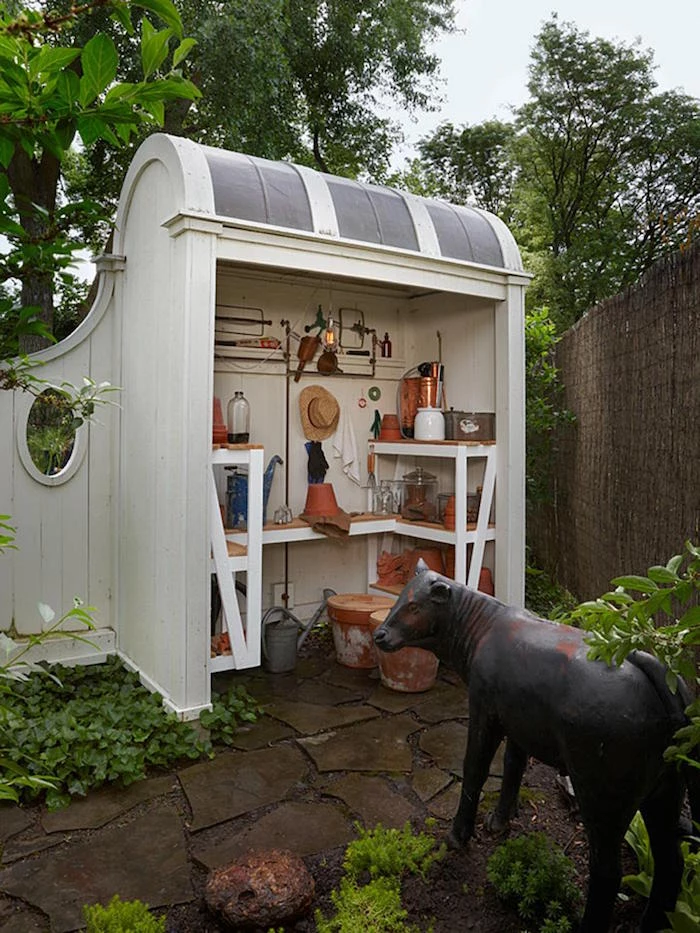
Inspirational Gallery
The average backyard shed must withstand over 1,500 hours of direct UV exposure and nearly 40 inches of precipitation annually in a temperate climate.
This relentless assault by the elements is precisely why material choice is non-negotiable. Flimsy vinyl panels will warp and crack under the sun, while untreated wood invites rot and insects. Investing in pressure-treated lumber for your base frame and quality siding isn’t just an upgrade; it’s the fundamental difference between a 5-year disposable box and a 30-year backyard structure.
Thinking about the foundation? Is a full concrete slab always the best choice?
Not necessarily. While a slab is the undisputed king for stability, it’s also the most expensive and labor-intensive option. For most sheds under 120 sq. ft., a gravel pad foundation is a fantastic, pro-level alternative. It involves excavating 4-6 inches, laying down landscape fabric, and filling it with compacted crushed stone. This provides excellent drainage, preventing the rot that plagues sheds built directly on the ground, and offers a stable base for a wood-framed floor on pressure-treated skids.
LP SmartSide Siding: An engineered wood product treated with zinc borate and bonded with resins. It’s incredibly resistant to rot, termites, and impact. It comes pre-primed, holds paint exceptionally well, and offers the look of real wood without the high maintenance.
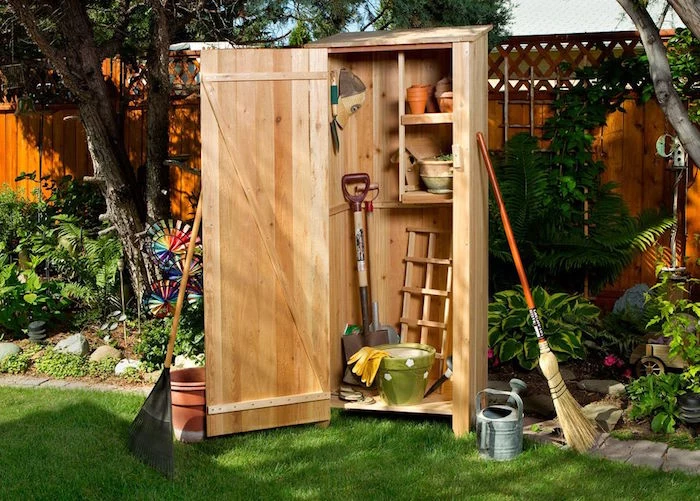
Natural Cedar Siding: Prized for its natural beauty and inherent resistance to decay and insects. It’s lighter than most woods but requires regular sealing or staining to maintain its color and prevent weathering to a silver-gray. More expensive upfront and demands more upkeep.
For a ‘build-it-and-forget-it’ fortress, engineered siding often wins on durability and long-term cost.
Don’t let your fortress become a sweatbox. A shed without proper ventilation traps moisture, leading to mold, mildew, and warped wood. The solution is simple and effective:
- Install gable-end vents near the roof’s peak to allow hot, moist air to escape.
- Consider adding soffit vents under the eaves to draw in cooler, drier air, creating a natural convection current.
- For sheds storing chemicals or gasoline, a turbine vent is a great addition for active air exchange.
The hardware you use is the skeleton’s connective tissue. Using the wrong fasteners is a rookie mistake with serious consequences. Crucial point: Always use hot-dip galvanized or stainless steel nails, screws, and connectors for any exterior application. Standard electro-plated hardware will corrode within a few years, leaving ugly rust streaks on your siding and, more critically, compromising the structural integrity of your shed. Spending a few extra dollars on Simpson Strong-Tie connectors and coated deck screws is cheap insurance for your investment.
- It prevents water from wicking up into the wall framing.
- It stops drafts and keeps pests out.
- It provides a clean, finished look to the base of your shed.
The secret? A simple piece of Z-flashing. This small, inexpensive metal strip should be installed over the top edge of your foundation or floor deck, tucked behind the weather-resistant barrier, and overlapping the front. It’s a tiny detail that makes a huge difference in preventing long-term water damage.
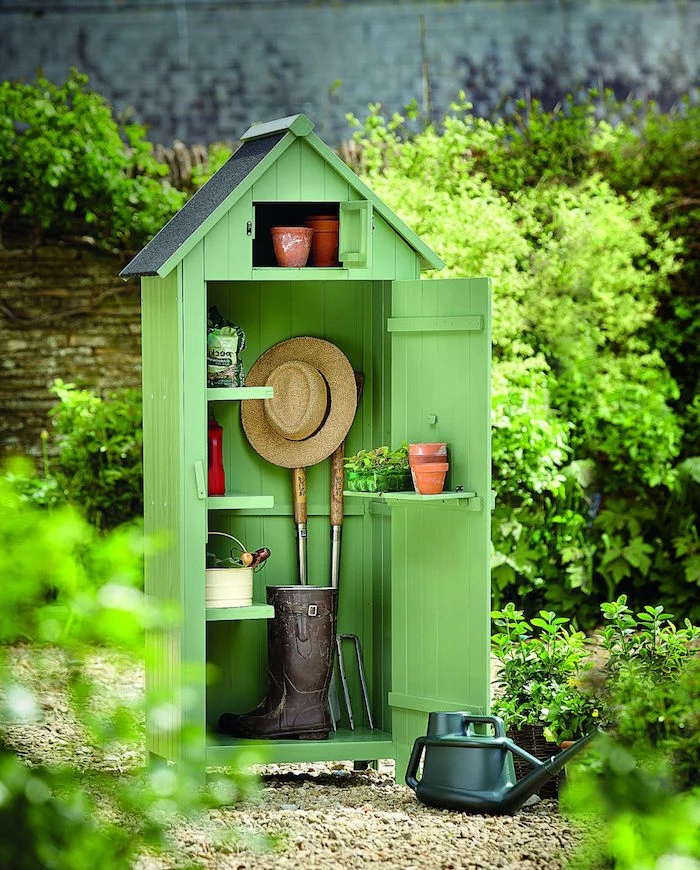
A well-built shed shouldn’t be an eyesore to be hidden behind a tree. Integrate it into your landscape. Choose a paint color that complements your main house or the natural tones of your garden. Adding a wider trim around the door and windows, perhaps in a contrasting color, instantly elevates the look from a mere utility box to a charming outbuilding. A simple window box or flanking shrubs can complete the transformation.
Before hammering a single nail, check with your local municipality. Many jurisdictions require a permit for any accessory structure over a certain size, often as small as 100 square feet.
The roof does more than just keep the rain out; it’s the structure’s primary defense. While standard asphalt shingles are a solid choice, consider standing-seam metal roofing. Once reserved for high-end homes, it’s become more accessible for smaller projects. A metal roof sheds snow and debris effortlessly, is virtually impervious to wind damage, and has a lifespan of 50 years or more. Brands like Classic Metal Roofing Systems offer kits that are surprisingly manageable for a DIYer with a bit of patience.


