The Only Guide You Need for Cooking Perfect Shrimp, Every Time
I’ve spent countless hours in bustling professional kitchens, and let me tell you, few things separate the pros from the novices faster than shrimp. I’ve seen beautiful, pricey prawns turn into rubbery little erasers in less than a minute. But I’ve also seen how a few simple tricks can make this humble ingredient taste absolutely incredible. The difference, honestly, is measured in seconds.
In this article
A lot of home cooks I talk to are genuinely scared of cooking shrimp. They’re worried about serving it undercooked, but even more worried about that dreaded, chewy, overcooked texture. My goal here is to completely demystify it for you. We’re going to walk through how a chef thinks about shrimp, from picking them out at the store to that final, perfect toss in the pan.
This isn’t about some fancy, complicated recipe. It’s about getting the fundamentals right. Once you know the ‘why’ behind the method, you’ll be able to nail it every single time.
First Things First: Buying the Right Shrimp
Your finished dish is only ever as good as what you start with. That’s a rule we live by in the kitchen. When it comes to shrimp, a little bit of knowledge at the fish counter makes all the difference in the world.
Fresh vs. Frozen: The Real Scoop
You’d think ‘fresh’ is always better, right? Well, with shrimp, that’s usually not the case. Unless you live on the coast and are buying shrimp directly off the boat, the “fresh” shrimp you see laid out on ice were almost certainly frozen and then thawed by the store. The big problem is, you have no idea how long they’ve been sitting there, slowly losing their texture.
Because of this, I almost always buy frozen shrimp. Look for bags labeled ‘IQF,’ which means ‘Individually Quick Frozen.’ This process freezes each shrimp solid, right on the boat or in the processing plant, locking in that fresh-caught flavor and texture. This way, you control the thawing process at home, ensuring they’re at their absolute best the moment you cook them.
Oh, and a quick heads up! A common beginner mistake is grabbing the wrong bag. If the shrimp in the bag are already pink and curled, they’re pre-cooked. Those are fine for a quick shrimp cocktail, but they will turn to rubber if you try to sauté them. For actual cooking, you need the raw, gray-colored shrimp.
Decoding Shrimp Sizes (No Secret Handshake Needed)
Ever see those numbers like 16/20 or 31/35 on a bag and wonder what’s going on? It’s just a simple way of telling you how many shrimp are in a pound. The smaller the number, the bigger the shrimp.
Let’s break it down in simple terms:
- U/15 or 16/20: These are your Jumbo or Colossal shrimp. They’re big, meaty, and fantastic for grilling, broiling, or as the star of a shrimp cocktail.
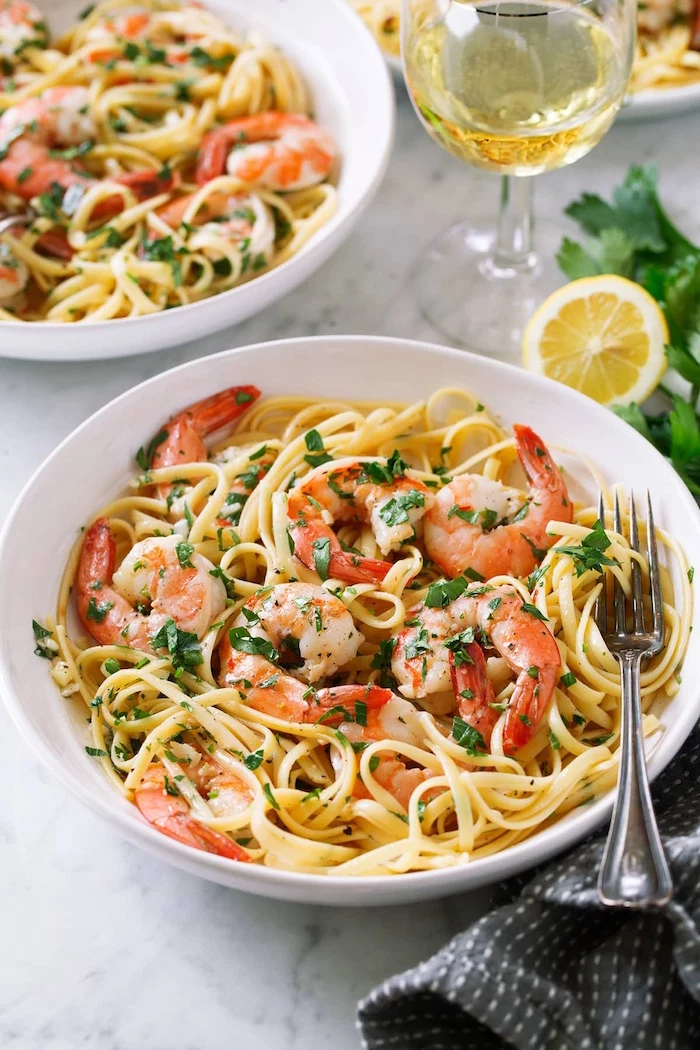
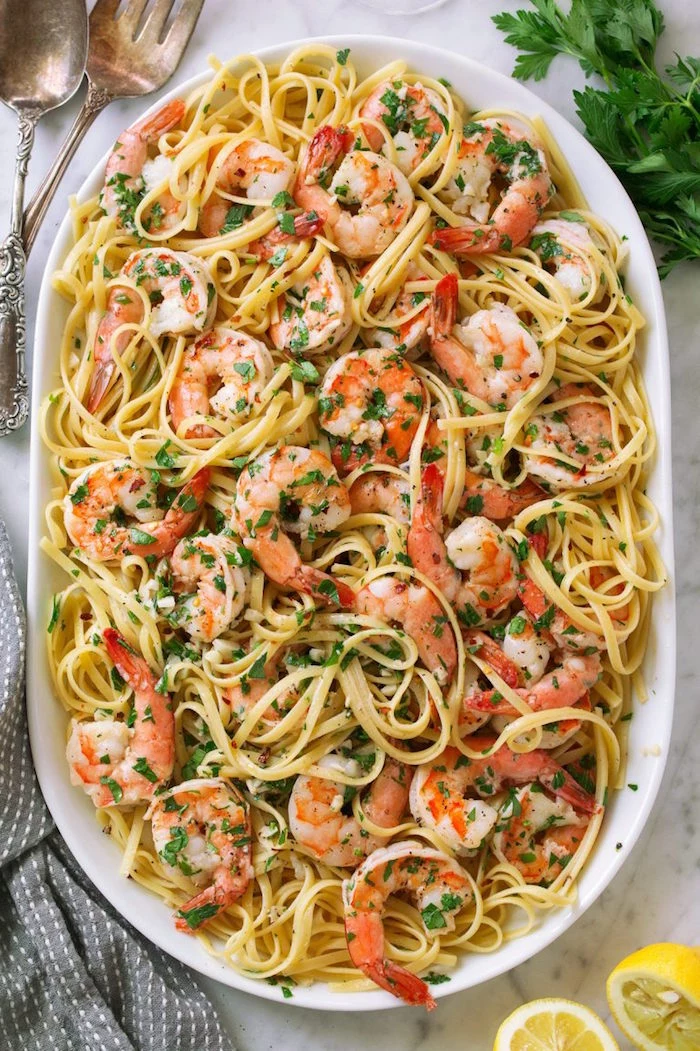
- 21/25 or 26/30: This is a great all-purpose Large shrimp. Perfect for things like shrimp scampi where you want a substantial bite.
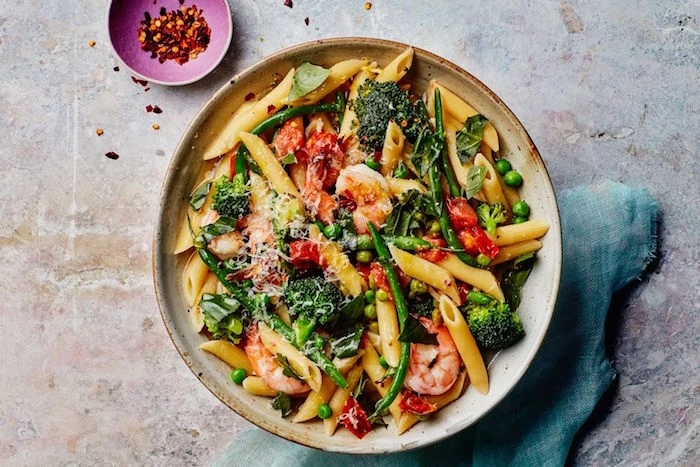
- 31/35 or 36/40: Now we’re in Medium territory. This is my personal go-to for adding to pastas, stir-fries, or curries.
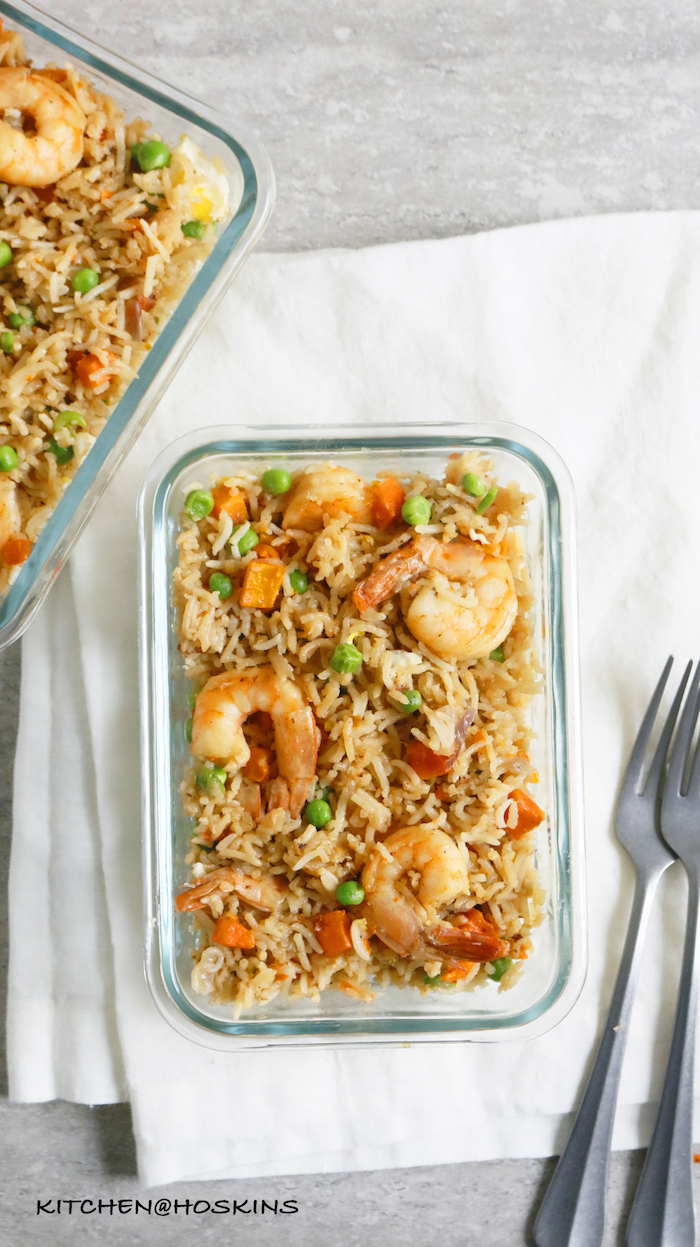
- 41/50 and up: These are Small shrimp, and they’re best for things like fried rice, shrimp salad, or filling out a soup, where they act more as a team player.
Just remember, the size completely changes the cooking time, so a jumbo shrimp will need more time on the heat than a small one.
Wild-Caught vs. Farm-Raised: Does It Matter?
This is a big one, but the basics are pretty straightforward. Wild-caught shrimp tend to have a more complex, ‘shrimpy’ flavor from their natural diet. Farm-raised shrimp, grown in controlled ponds, can be a bit milder.
You’ll definitely notice a price difference here. Depending on where you live, wild-caught shrimp might run you $16-$25 a pound, whereas quality farm-raised is often more in the $11-$18 range. To make a good choice, I just look for sustainability logos on the packaging. There are a few different ones, but they all signal that the shrimp were harvested or raised responsibly.
Shell-On or Peeled?
That bag of peeled and deveined (P&D) shrimp looks mighty convenient, I know. But that convenience comes at a cost, and not just the extra $2 to $4 a pound you’ll pay for it. The shell does two critical things: it protects the delicate meat from the harsh heat of the pan, acting as an insurance policy against overcooking. And second, those shells are packed with flavor. For the best result, buy shell-on. If you have an extra 10-15 minutes, it’s so worth it.
The Prep Work That Makes All the Difference
Rushing the prep is where most shrimp dishes go wrong. Take your time here, and the actual cooking part becomes a breeze.
How to Thaw Shrimp the Right Way
You’ve got two solid options. The best method, if you have the time, is to put the frozen shrimp in a colander with a bowl underneath, cover it, and let them thaw in the fridge overnight. It’s a gentle thaw that keeps the texture perfect.
In a hurry? Put the frozen shrimp in a colander in the sink and run cool (not warm or hot!) water over them. Toss them around every few minutes, and they should be ready in about 10-15 minutes. Please, whatever you do, do not use the microwave. It’s a one-way ticket to rubbery disaster.
Peeling and Deveining Like a Pro
If you bought shell-on, you’ve got to peel them. I’ve probably peeled over twenty thousand shrimp in my career. My advice? Put on a podcast, get in the zone, and think of it as kitchen meditation. You’ll get surprisingly fast at it.
Just pull off the little legs from the underside, then crack the shell open along the back and peel it away. You can leave the tail on for looks or pinch it off. To devein, make a shallow slice down the back with a paring knife to expose that dark line (it’s the digestive tract). It’s not harmful, but it can be gritty. Use the tip of your knife to lift it out and discard.
Pro Tip: Don’t you dare throw those shells away! Toss them in a zip-top bag and throw them in the freezer. They are pure gold for making seafood stock later.
The Restaurant Secret for Snappy Shrimp: A Quick Brine
Here’s a little trick that makes a massive difference. A quick 15-minute brine helps the shrimp stay moist and gives them a wonderful, snappy bite. It sounds fancy, but it’s dead simple.
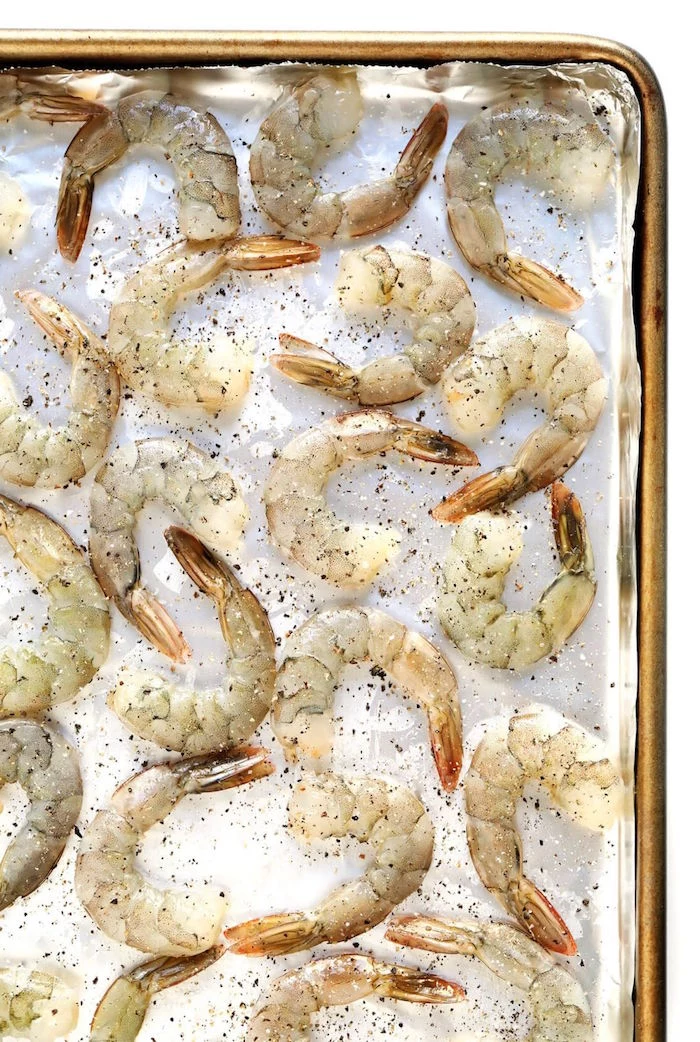
Just dissolve a tablespoon of kosher salt and a tablespoon of sugar in about 4 cups of cold water. Add your peeled shrimp and let them hang out for 15 to 30 minutes, tops. After that, rinse them well and—this is critical—pat them completely dry with paper towels. Dry shrimp get a beautiful sear; wet shrimp just steam.
Good to know: If you only have table salt, use about half the amount, as it’s much finer and saltier by volume. And this is all about ratios, so if you’re only making a half-pound of shrimp, just use half a tablespoon of salt/sugar in 2 cups of water.
Mastering the Heat: How to Cook Shrimp Perfectly
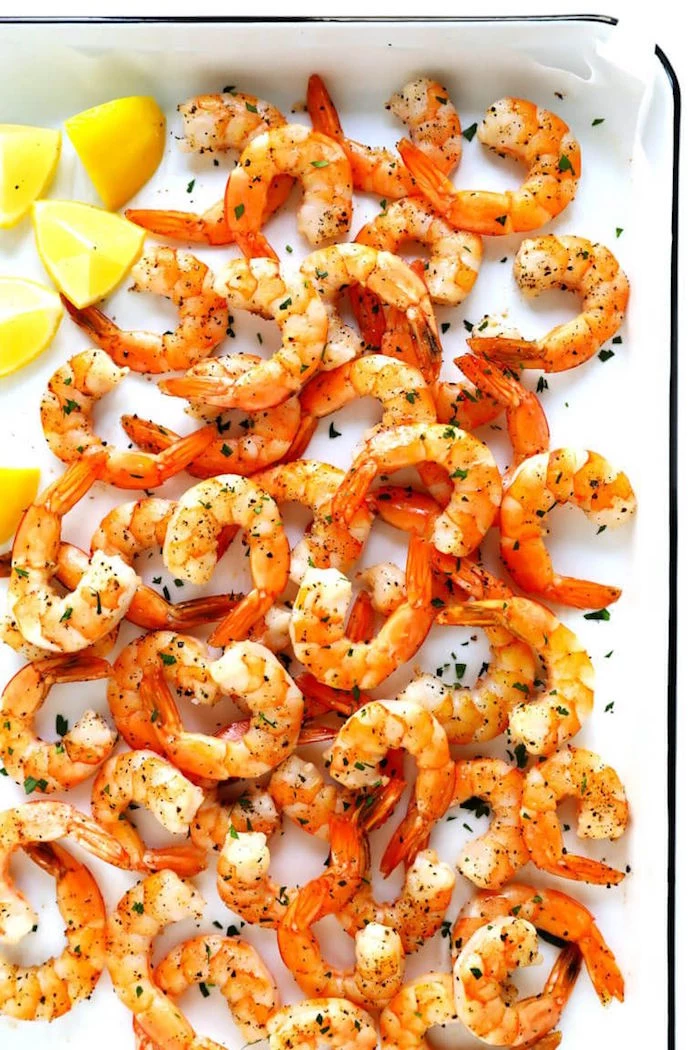
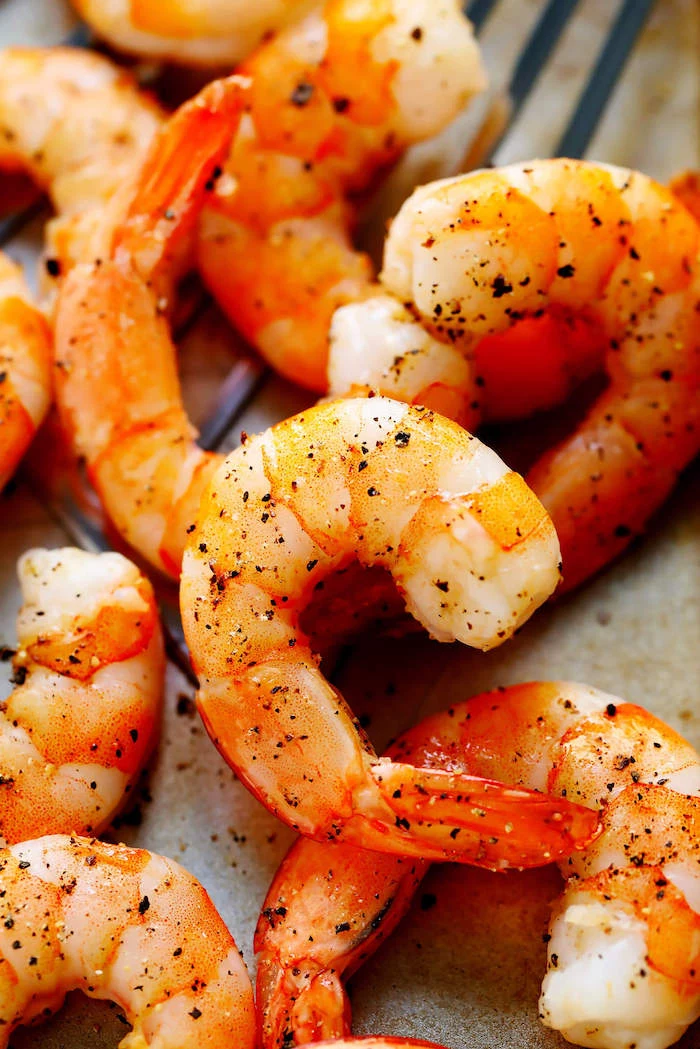
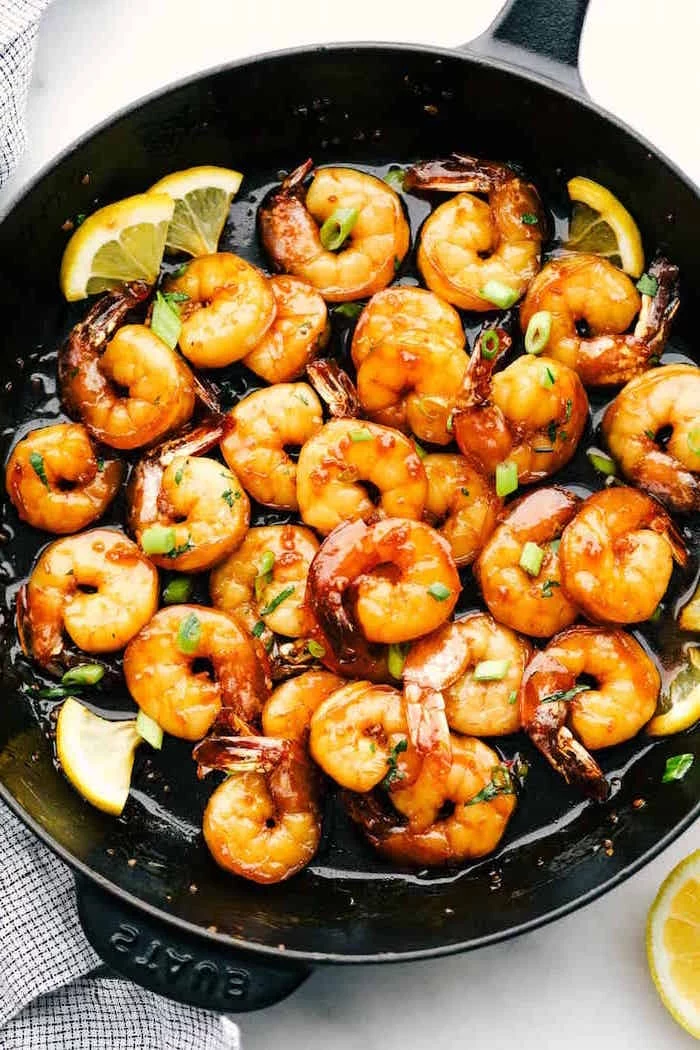
Shrimp cook ridiculously fast. The moment they turn from translucent gray to opaque pink, they’re done. A perfectly cooked shrimp forms a nice ‘C’ shape. If it curls up into a tight ‘O,’ you’ve gone too far. It’s overcooked.
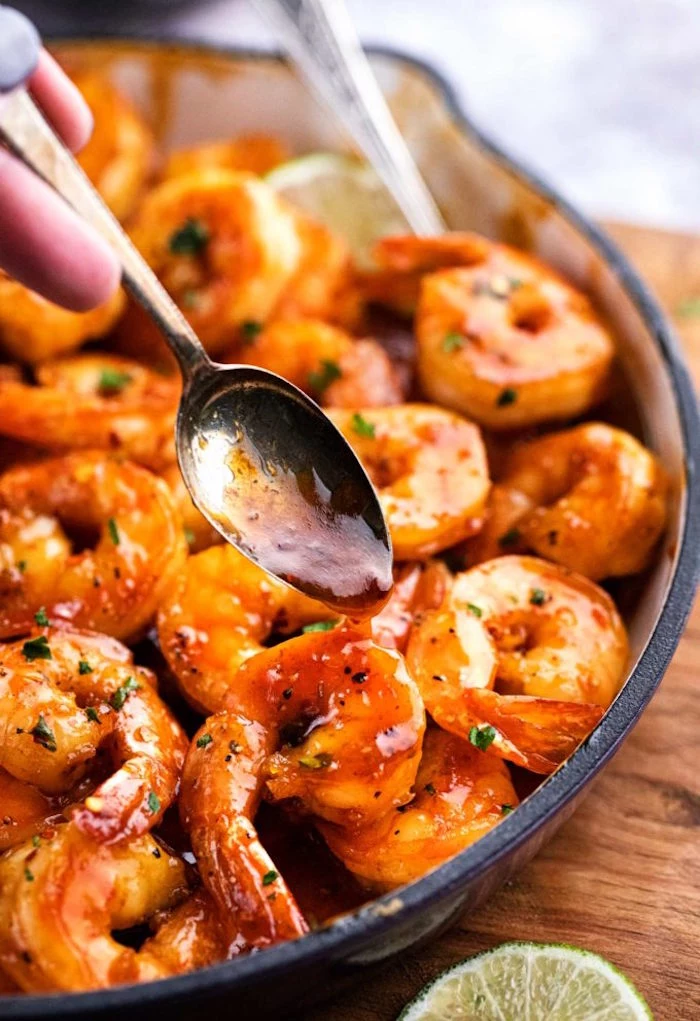
Method 1: The Perfect Pan-Sear
This is the fastest method and gives you that delicious golden-brown crust. A non-stick pan will work in a pinch, but a good cast iron or stainless steel skillet is your best friend here. Why? They hold heat like a champion. That steady, high heat is what gives you a gorgeous brown crust instead of a pan full of sad, steamy shrimp.
Get the pan hot over medium-high, add your fat (olive oil and a pat of butter is a killer combo), and let it get shimmering. Add your dry shrimp in a single layer, making sure not to crowd the pan. Cook in batches if needed! For medium shrimp, we’re talking 60-90 seconds per side. That’s it. Once they’re pink and opaque, get them out of the pan immediately.
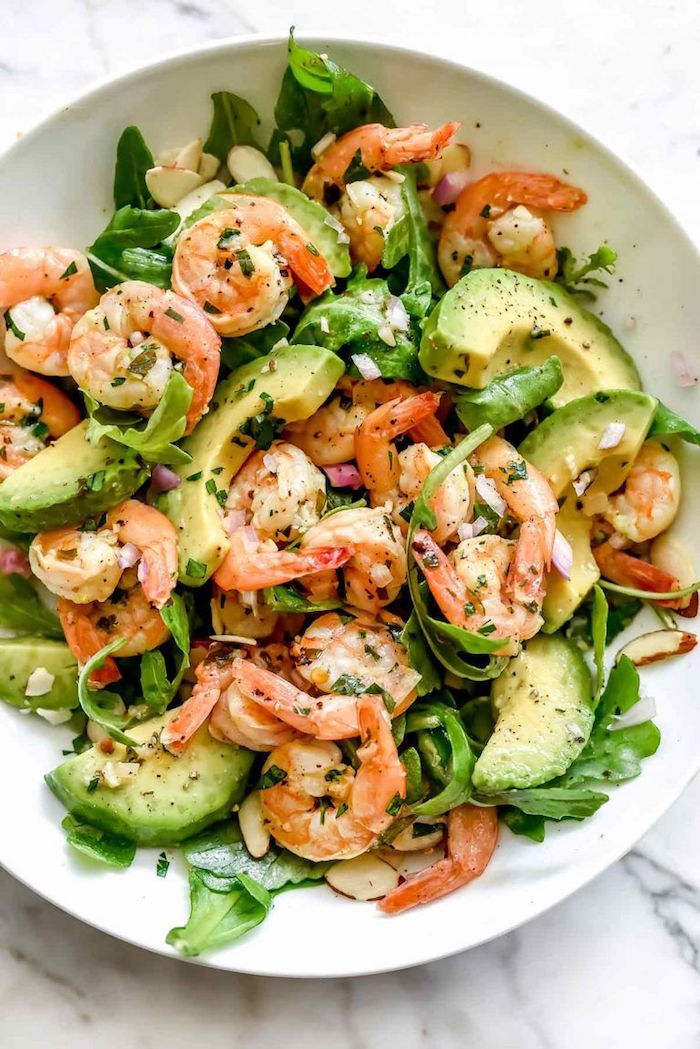
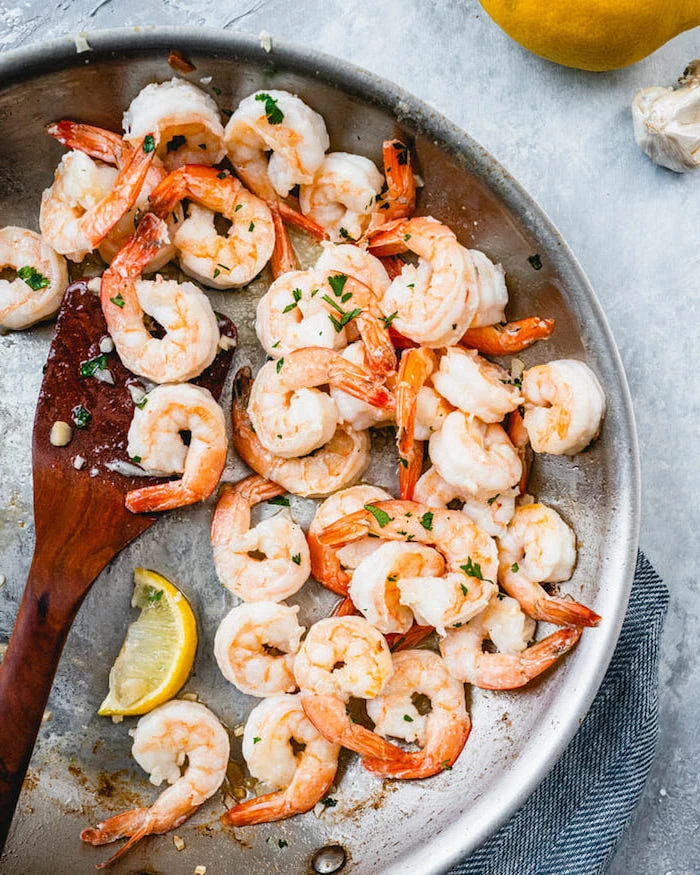
Method 2: Gentle Poaching
This gives you incredibly tender, delicate shrimp. It’s my go-to for shrimp cocktail or a high-end shrimp salad. The trick is to flavor your poaching liquid. Don’t just use water! Simmer some water with a sliced lemon, a bay leaf, some peppercorns, and a big pinch of salt. Bring it to a simmer, then reduce the heat to low. Add the shrimp, turn off the heat, and let them steep for 2-4 minutes depending on their size. Then, scoop them out and plunge them into an ice bath to stop the cooking cold. The result is perfectly tender shrimp.
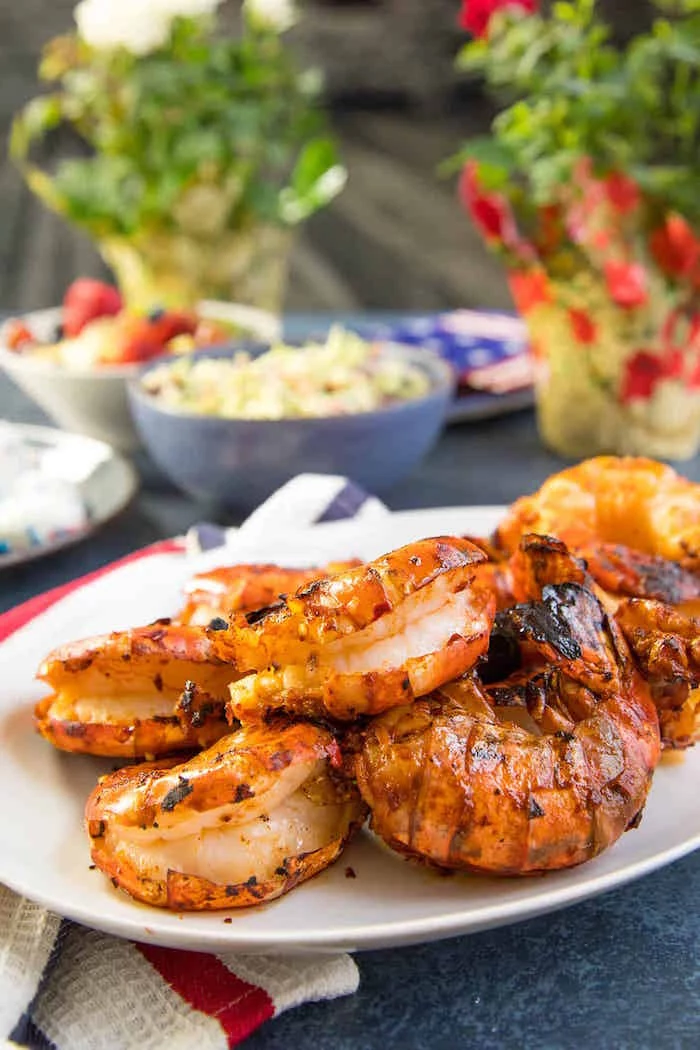
Method 3: High-Heat Grilling or Broiling
This is all about adding char and smoky flavor. It’s best for larger shrimp that won’t fall through the grates. If you’re using wooden skewers, soak them in water for 30 minutes first. Thread the shrimp on, brush them with oil (always oil the food, not the grates!), and season them well. On a hot grill or under a broiler, they’ll need just 2-3 minutes per side. Don’t walk away—this happens fast!
Flavor Ideas to Get You Started
Once you’ve got the techniques down, the possibilities are endless. Think about flavor profiles.
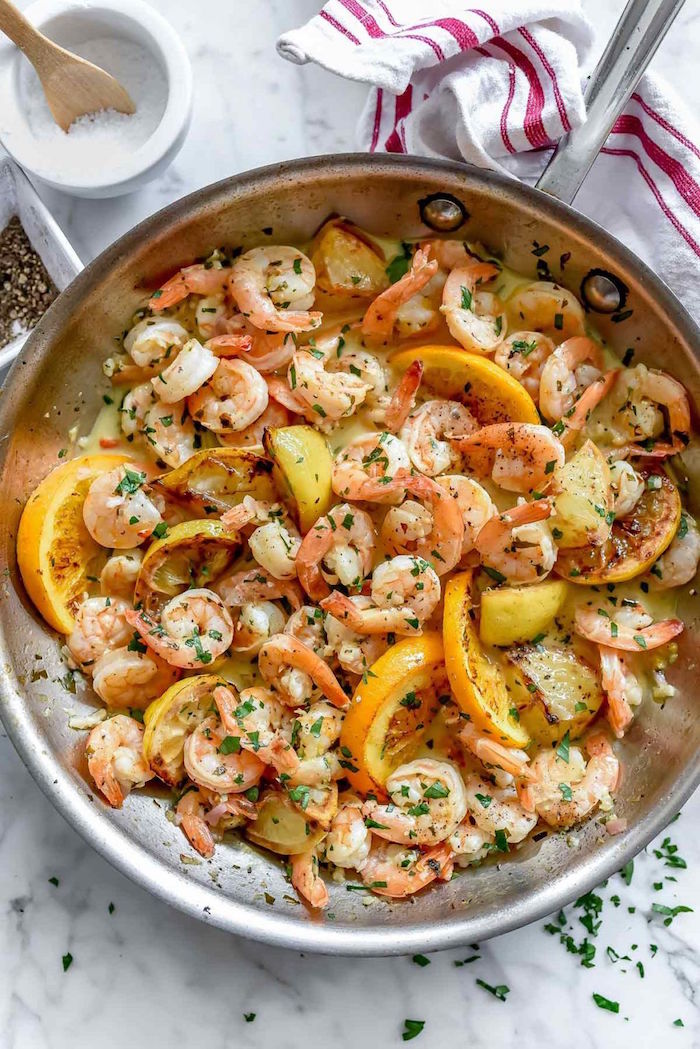
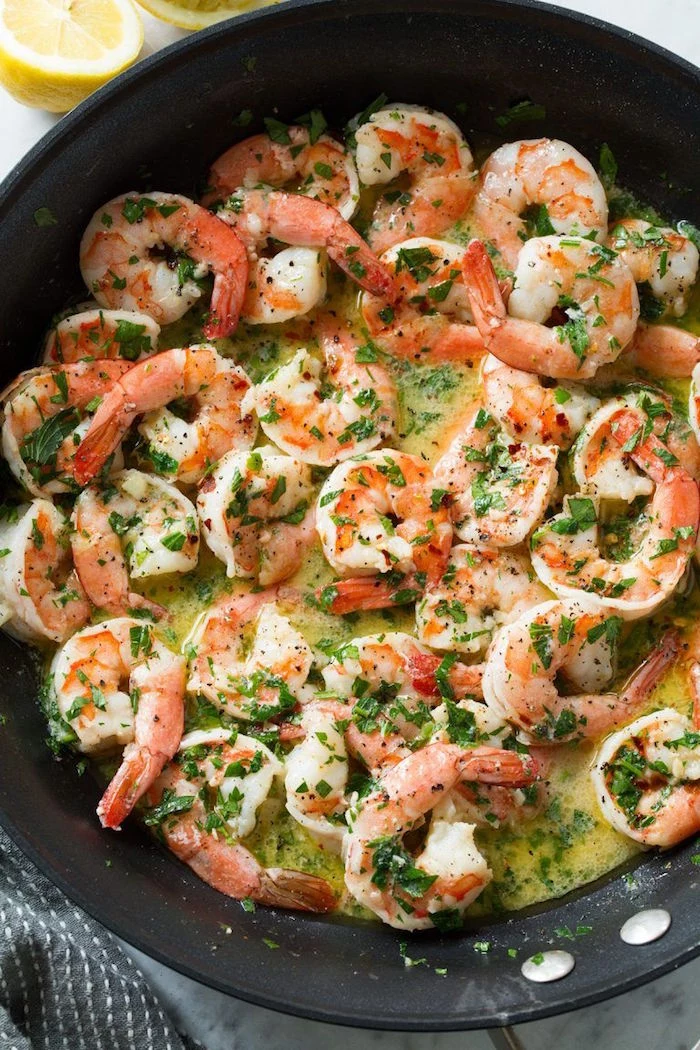
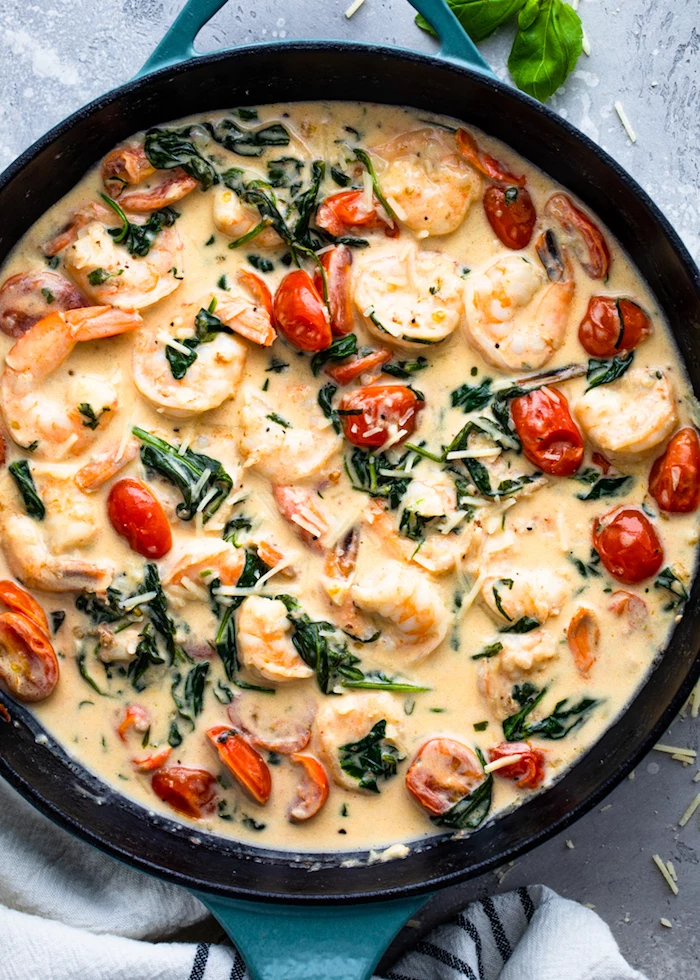
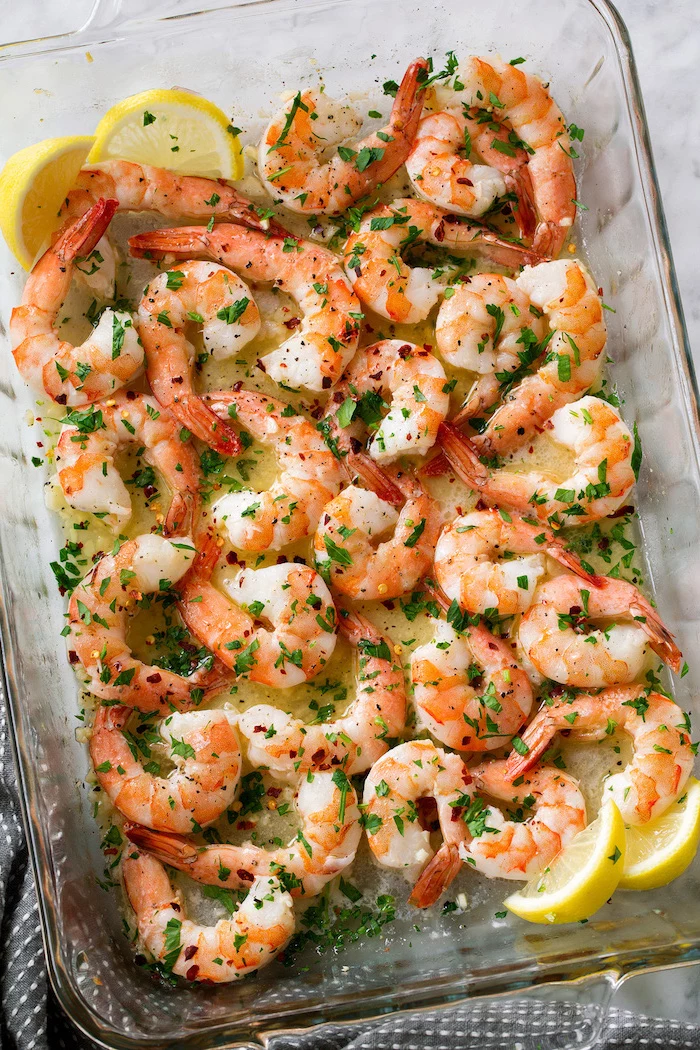
- The Mediterranean Way: Keep it simple and fresh with good olive oil, tons of fresh garlic, a splash of white wine, and a big handful of parsley and lemon juice. Classic, bright, and always a winner.
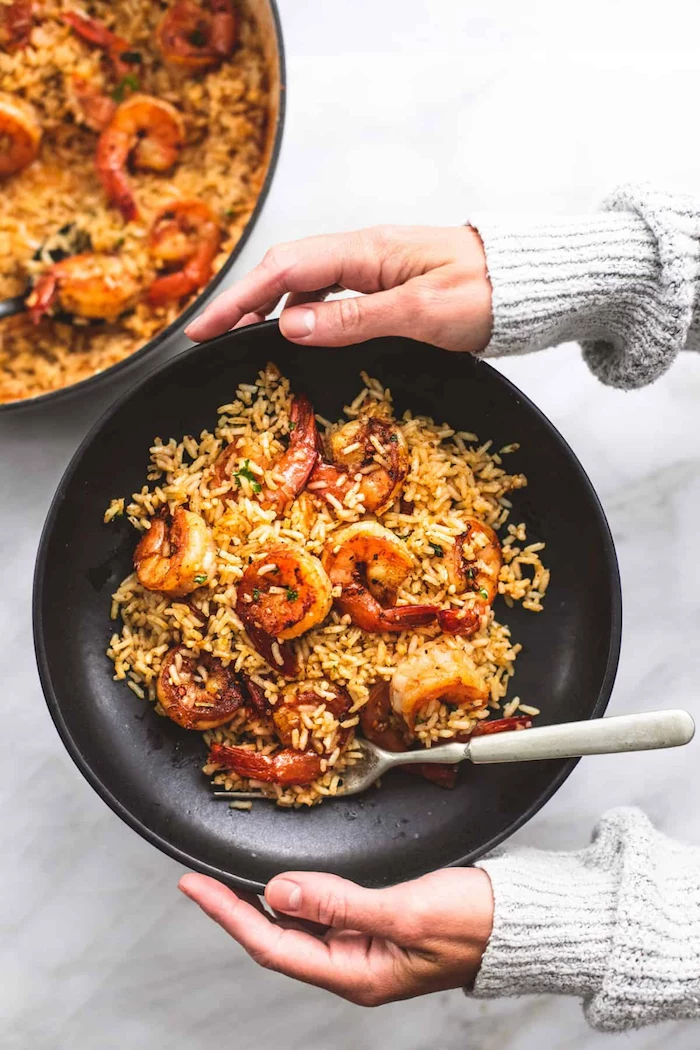
- Bold and Spicy Southern Style: This approach is all about deep, complex flavor. Start with a base of diced onion, celery, and bell pepper, then hit it with a good Cajun or Creole spice blend full of paprika, cayenne, and garlic powder. Amazing over creamy grits.
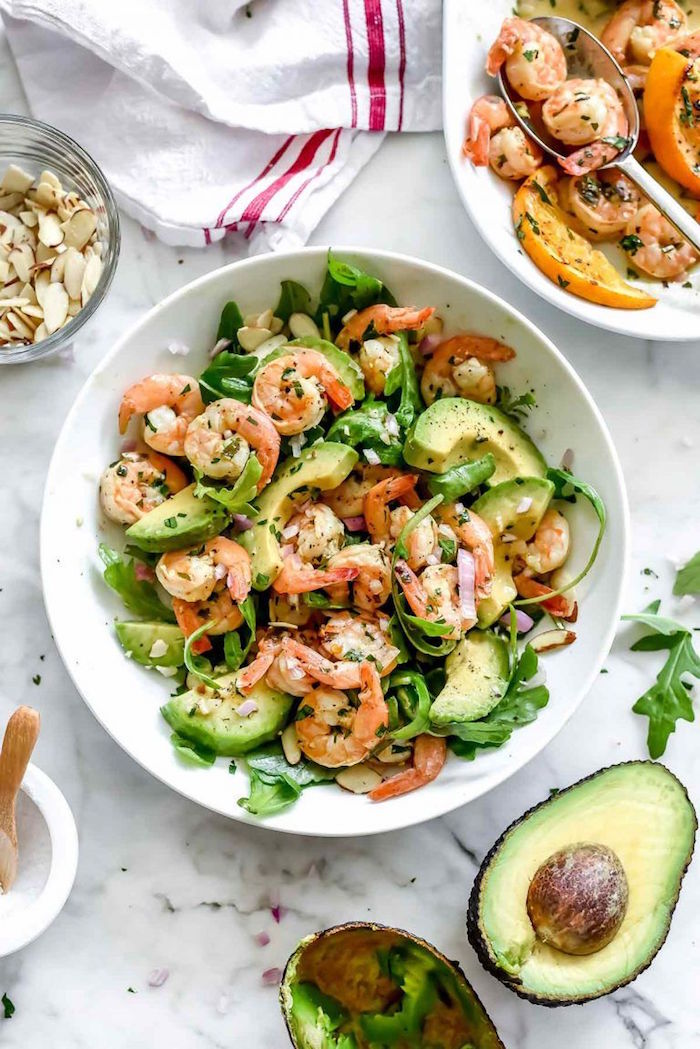
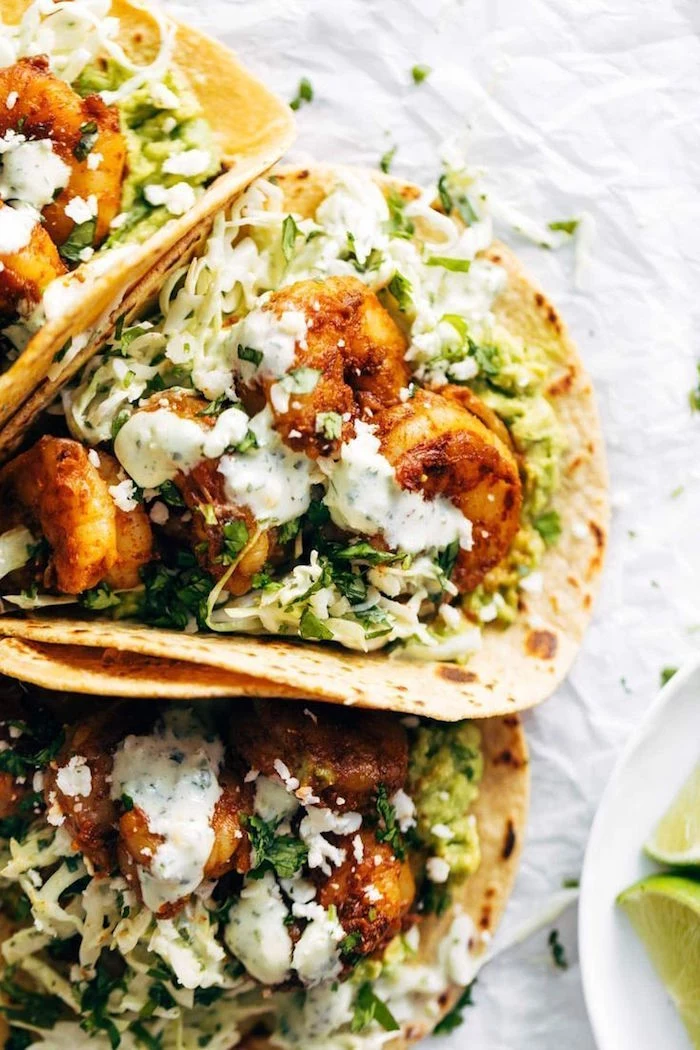
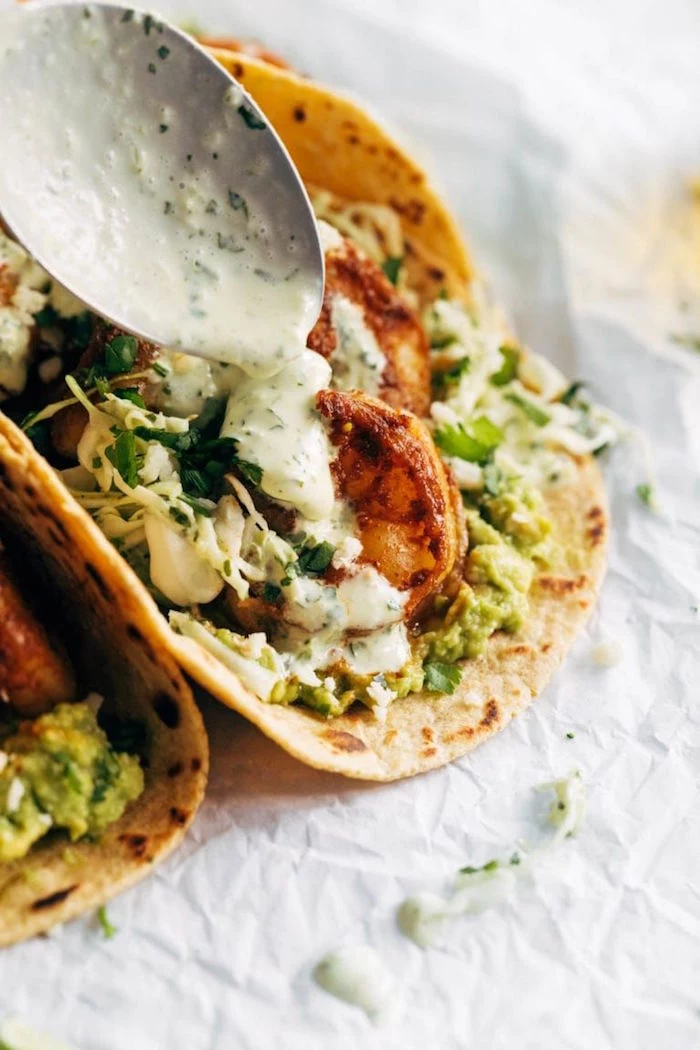
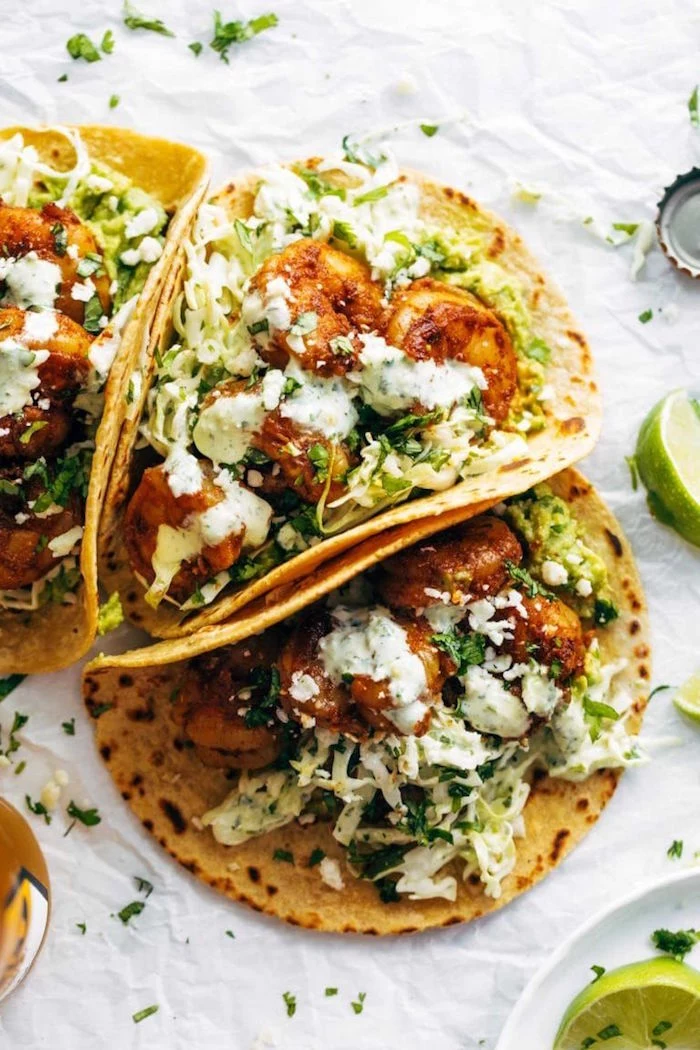
- Bright and Zesty Latin American Flavors: Think shrimp tacos. The shrimp get a quick sear with spices like cumin and chili powder, then they’re balanced with cool, fresh toppings—creamy avocado, crunchy slaw, fresh cilantro, and a big squeeze of lime. It’s all about that contrast.
Ready for the Next Level?
Feeling confident? Let’s talk about a couple of things that will really elevate your cooking.
Making a Rich, Flavorful Shrimp Stock
Remember those shells in your freezer? It’s their time to shine. Sauté the shells in a pot with a little oil until they turn bright pink and smell toasty. Add some chopped onion, carrot, and celery and cook for a few minutes. Cover with cold water, add a bay leaf, and let it simmer GENTLY for about 45 minutes. Any longer and it can get bitter. Strain it, and you have a liquid gold that will make any seafood bisque, risotto, or paella taste like it came from a five-star restaurant.
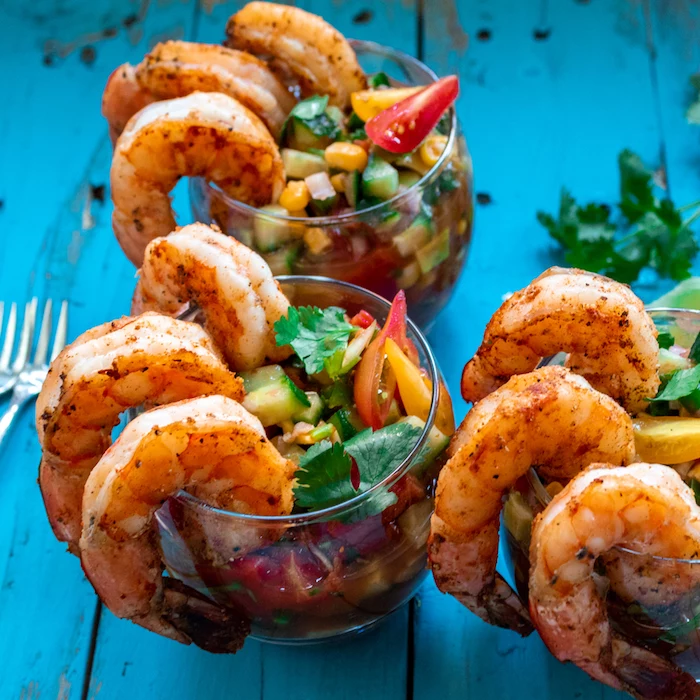
A Note on Ceviche: ‘Cooking’ Without Heat
Ceviche is a brilliant technique where citrus acid ‘cooks’ the shrimp. The result is firm, fresh, and delicious.
But a critical safety warning: This method does NOT kill all potential bacteria. You must use the absolute highest-quality shrimp you can find. The term ‘sushi-grade’ can be vague, so be direct: ask your fishmonger at a dedicated seafood counter if it’s safe for raw consumption. If you have any doubt at all, simply poach the shrimp for 60 seconds before marinating them. It’s the pro move for staying safe while still getting that classic ceviche texture.
Your Quick Shopping List
Ready to hit the store? Here’s a basic list to get you started on a classic garlic-butter sauté.
- Raw, Shell-on, IQF Shrimp: Plan on about 1/2 pound per person. ($11-$18/lb for good quality farm-raised)
- Kosher Salt: A box costs about $3 and will last you forever.
- Unsalted Butter: A kitchen staple.
- A good head of Garlic: Can’t have too much.
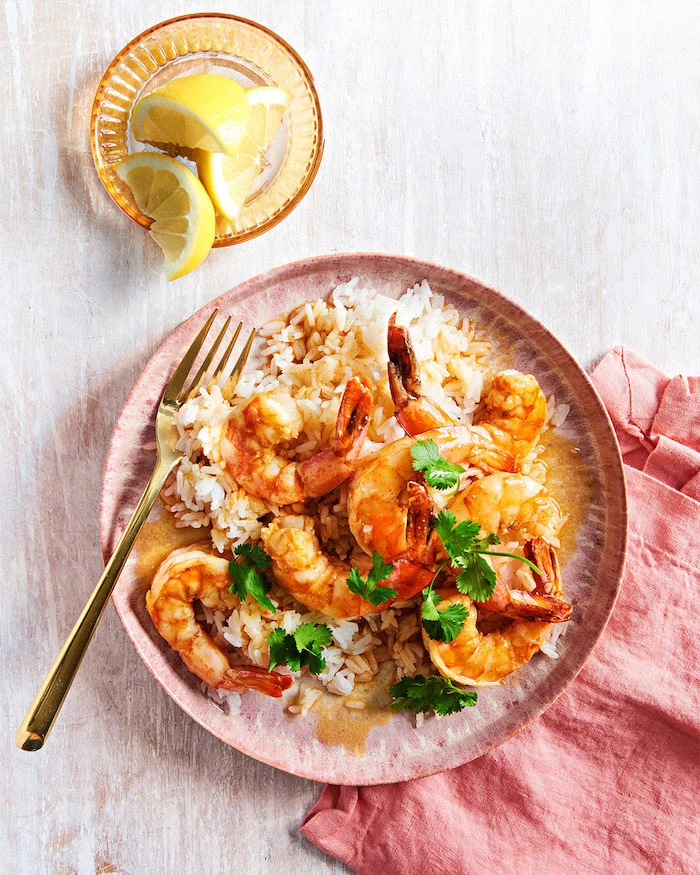
- One Lemon: For that essential bright finish.
- Fresh Parsley: Adds freshness and color.
Cooking great shrimp isn’t some secret art. It’s a craft. It’s about buying a good product, prepping it with care, and, most importantly, paying attention when you apply heat. Stop worrying about making rubbery shrimp and start looking forward to that perfectly snappy, sweet, and delicious bite. You’ve got this.
Inspirational Gallery
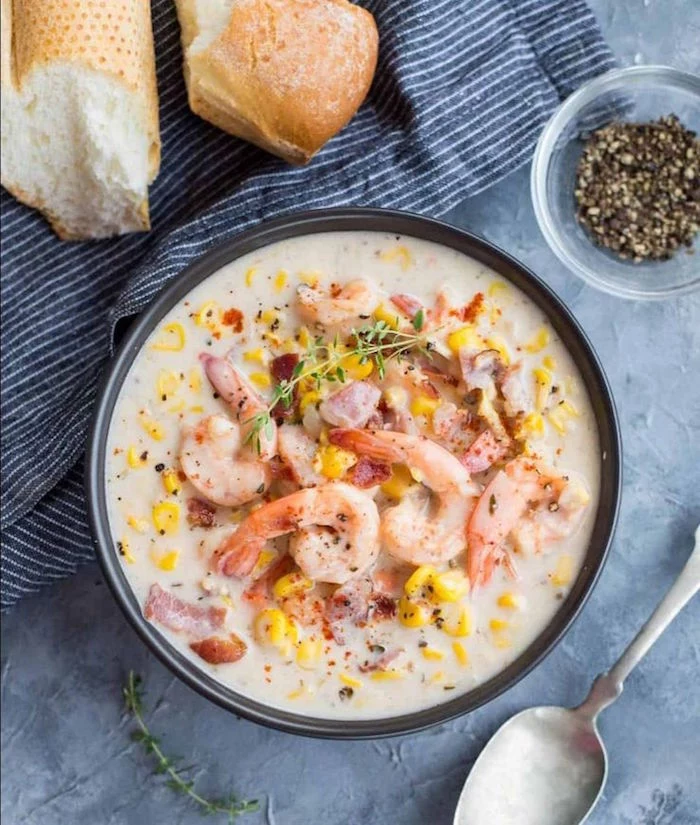
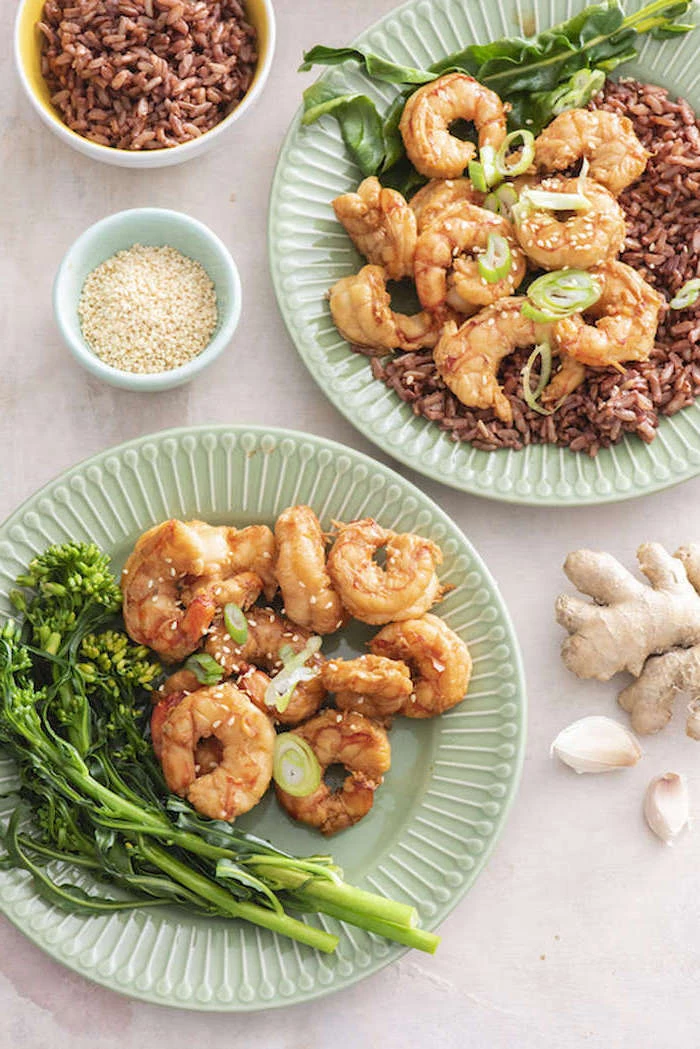
Don’t throw away those shells! They are packed with flavor. Simmer them for 20-30 minutes with some onion, celery, and a bay leaf to create a rich, savory shrimp stock. It’s the perfect base for risottos, bisques, or for deglazing your pan after sautéing.
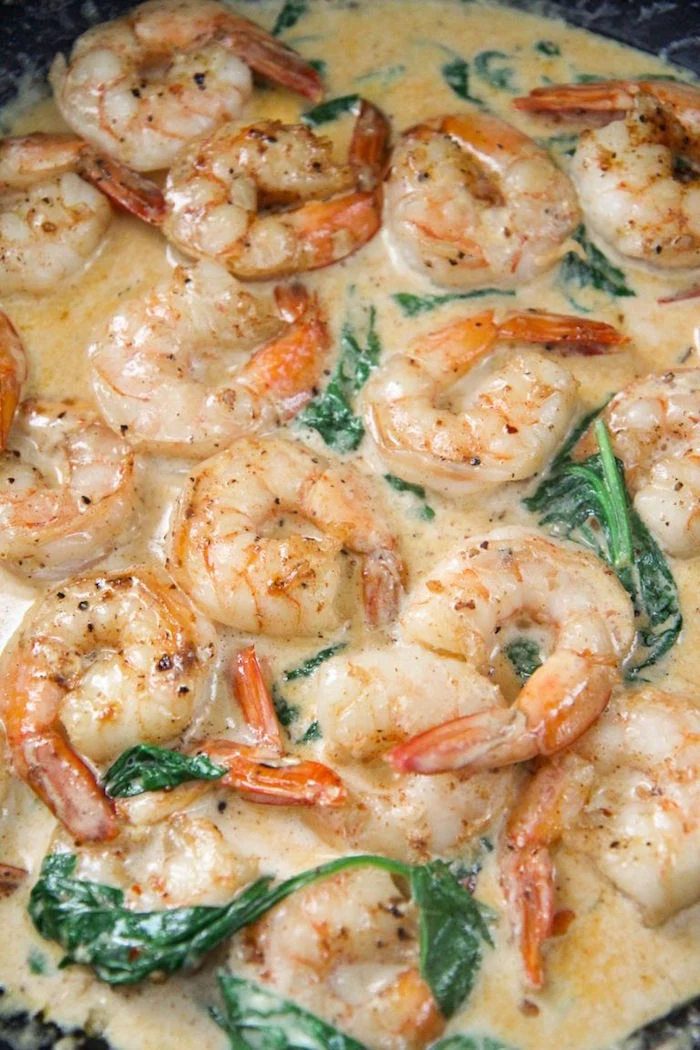
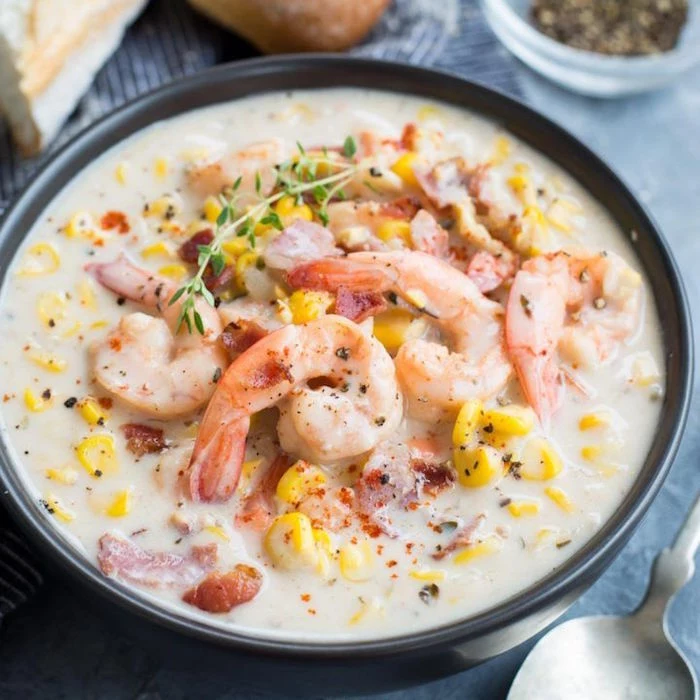
- A perfectly cooked shrimp curls into a gentle ‘C’ shape.
- An overcooked shrimp curls into a tight ‘O’ shape.
It’s a simple visual cue that works every time, taking the guesswork out of timing.
More than 90% of the shrimp consumed in the United States is imported.
This is why understanding packaging labels is so crucial. Look for certifications like the Marine Stewardship Council (MSC) for wild-caught or the Aquaculture Stewardship Council (ASC) for farmed to make a more sustainable choice at the grocery store.
What’s the secret to plump, juicy shrimp that snap when you bite into them?
A quick brine. Before cooking, let your peeled shrimp sit for 15-30 minutes in a simple solution of 1 quart of water, 1/4 cup of kosher salt, and 1/4 cup of sugar. This process, known as osmosis, helps the shrimp retain moisture during cooking, preventing a dry or mealy texture.
For a perfect sear: A screaming hot cast-iron skillet, like a classic Lodge, is your best friend. It retains heat incredibly well, giving you that beautiful Maillard reaction crust.
For a delicate sauce: A stainless-steel pan, such as one from All-Clad, gives you more control over the temperature and allows you to see the color of your fond (the browned bits) developing, which is key for building a great pan sauce.
Don’t have a deveining tool? No problem. After peeling the shrimp, use a sharp paring knife to make a shallow cut along the back. This will expose the vein, which you can then easily lift out with the tip of your knife or rinse away. For a less invasive method, a simple wooden toothpick can be inserted under the vein to pull it out without splitting the shrimp’s back.
A single serving of shrimp provides more than 75% of the daily value of selenium, a key antioxidant for heart and immune health.
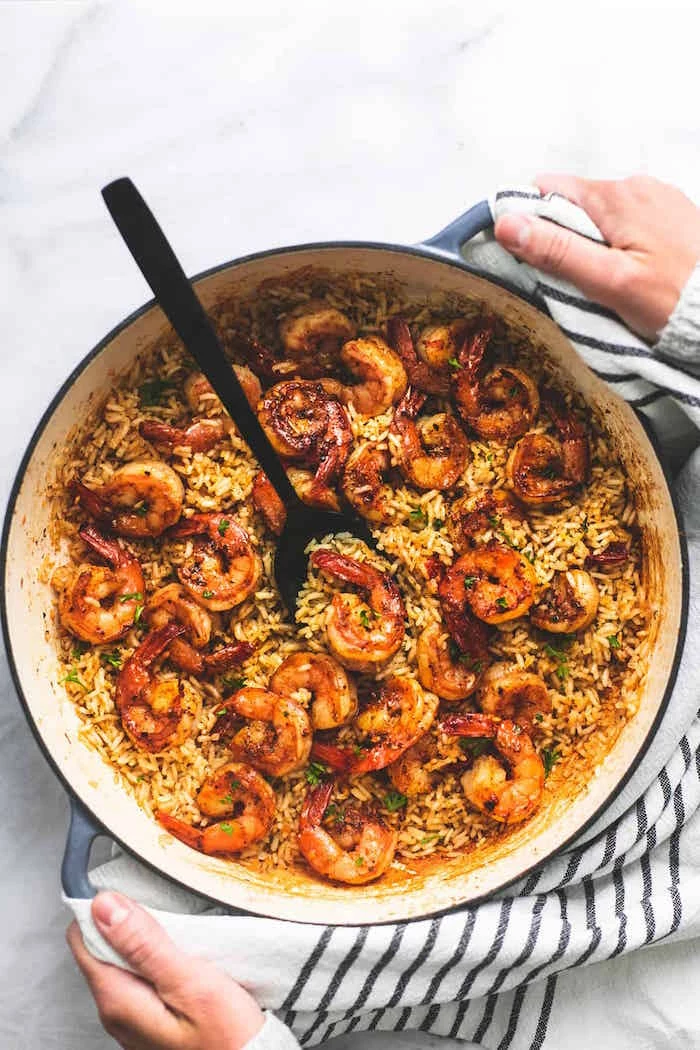
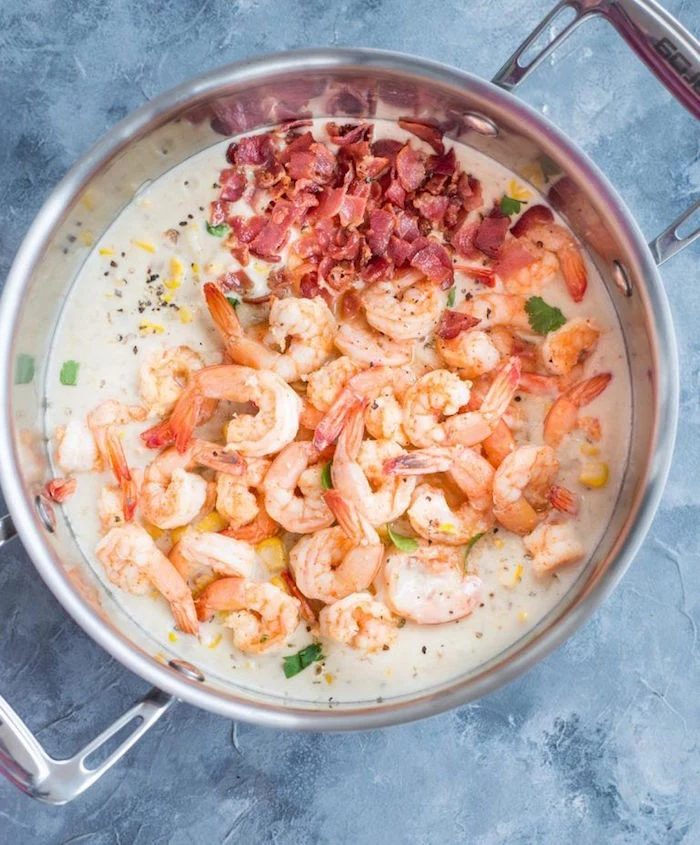
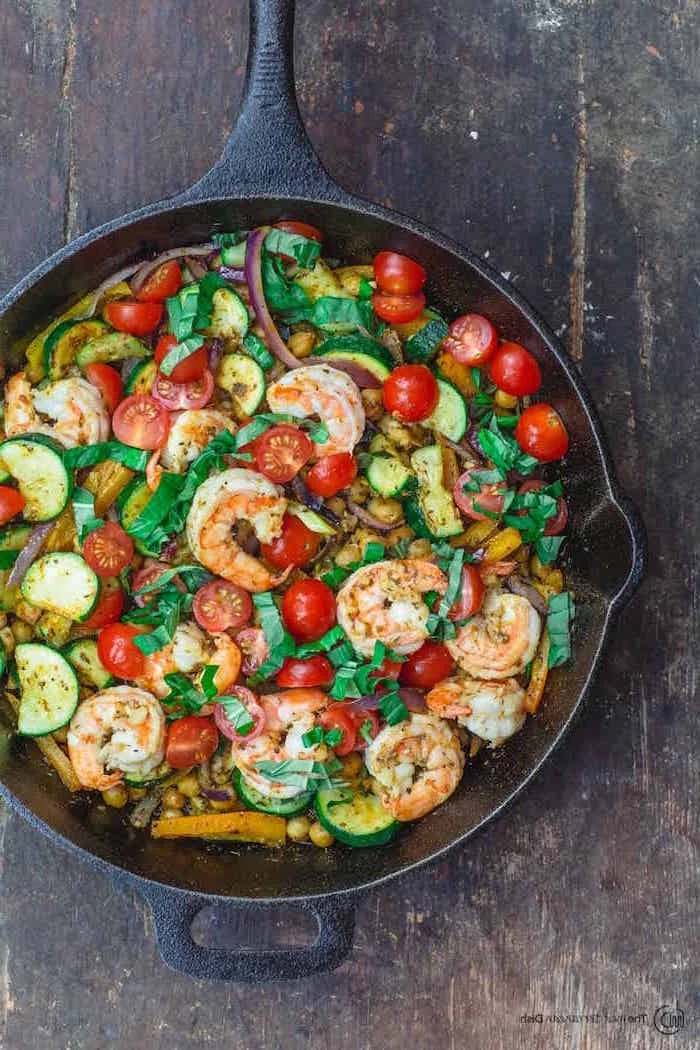
The single biggest mistake: Overcrowding the pan. Tossing too many shrimp into the pan at once drops the temperature, causing them to steam in their own juices instead of searing. Cook in batches if necessary, ensuring each shrimp has space to sizzle.
Ever notice the numbers on a bag of shrimp, like 21/25 or U/15? This isn’t a random code; it’s the size count, indicating how many shrimp are in a pound.
- 21/25: You’ll get between 21 and 25 shrimp per pound. Great for scampi or pasta dishes.
- U/15: The ‘U’ stands for ‘under,’ so you get fewer than 15 jumbo shrimp per pound. Perfect for grilling or shrimp cocktail.
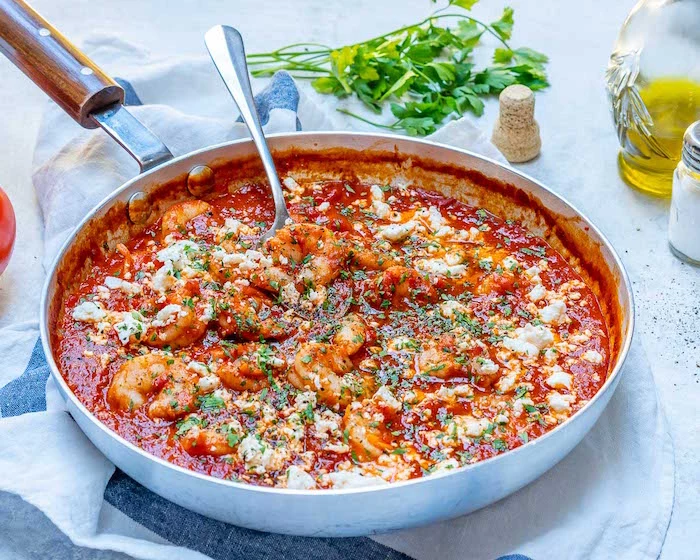
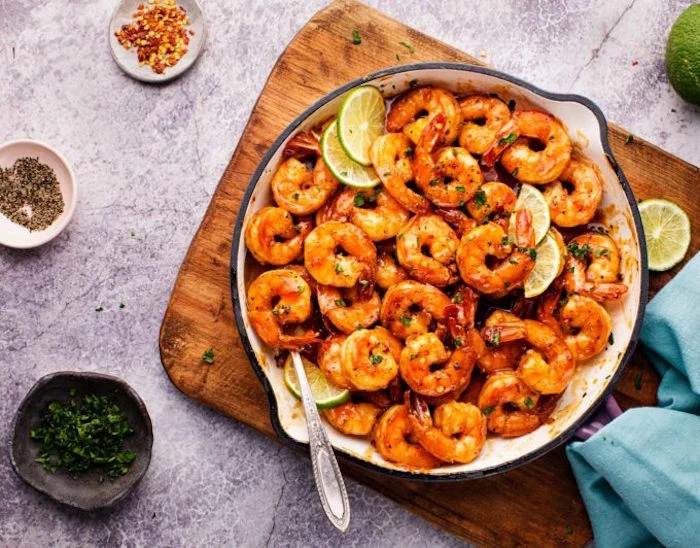
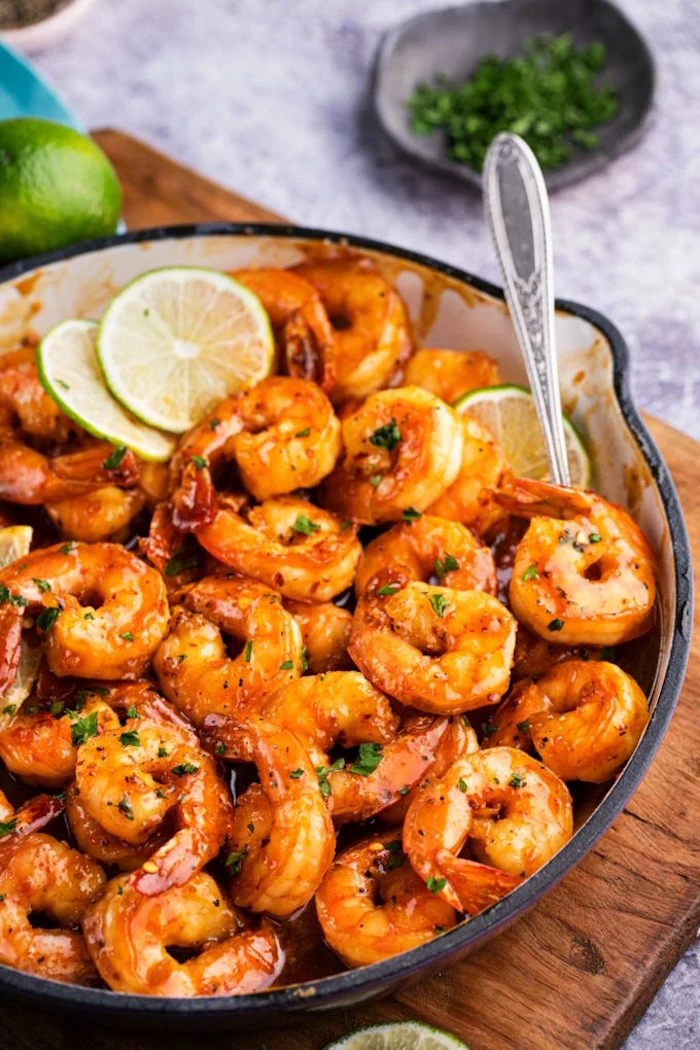
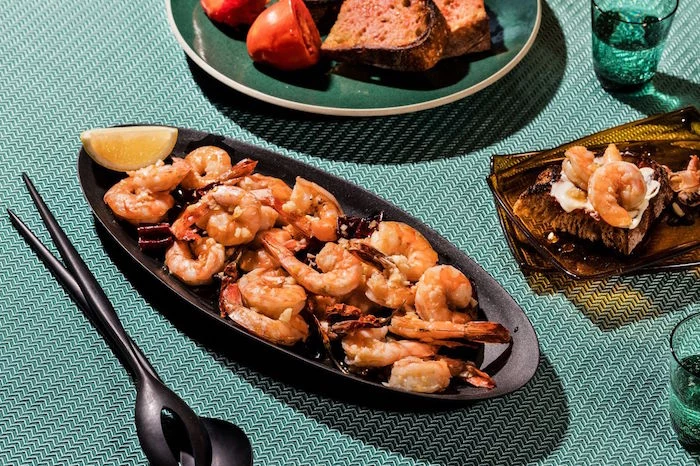
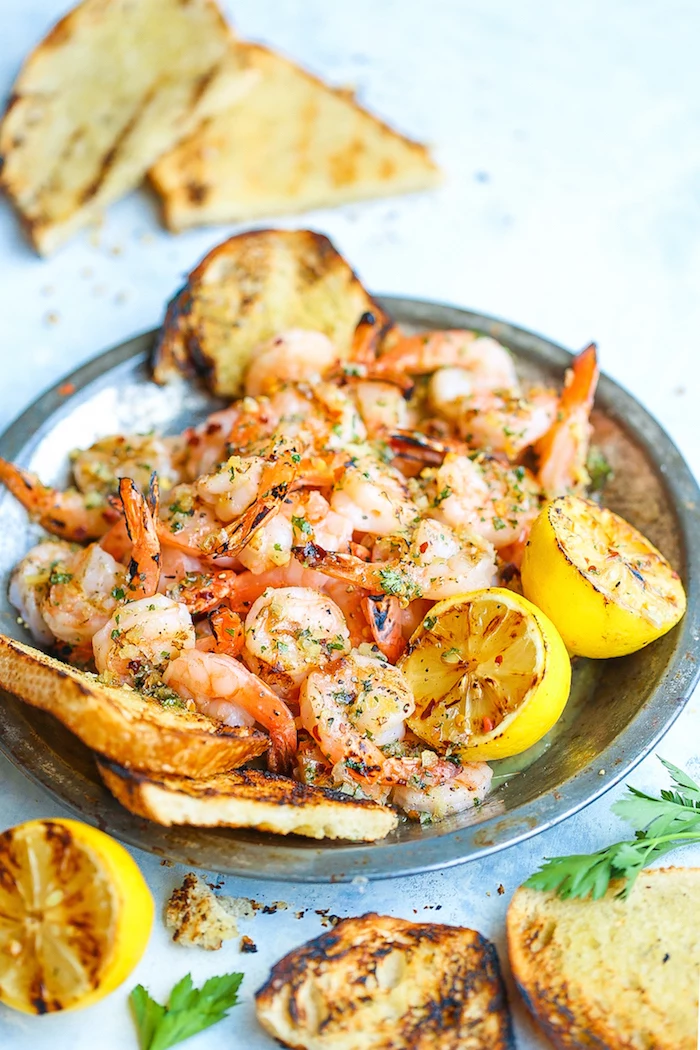
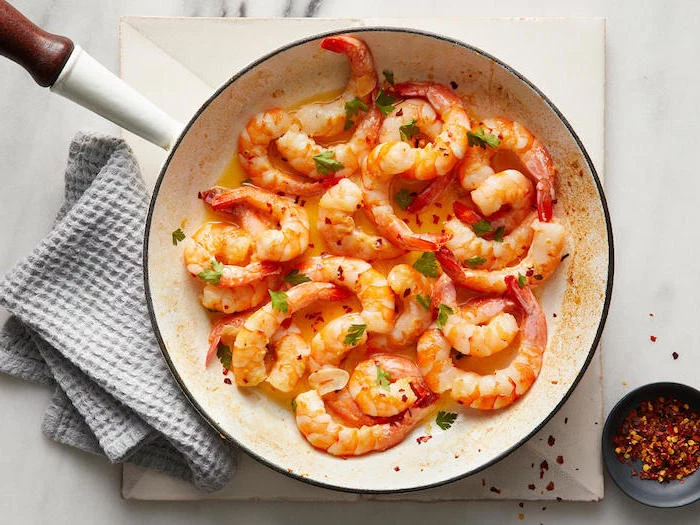
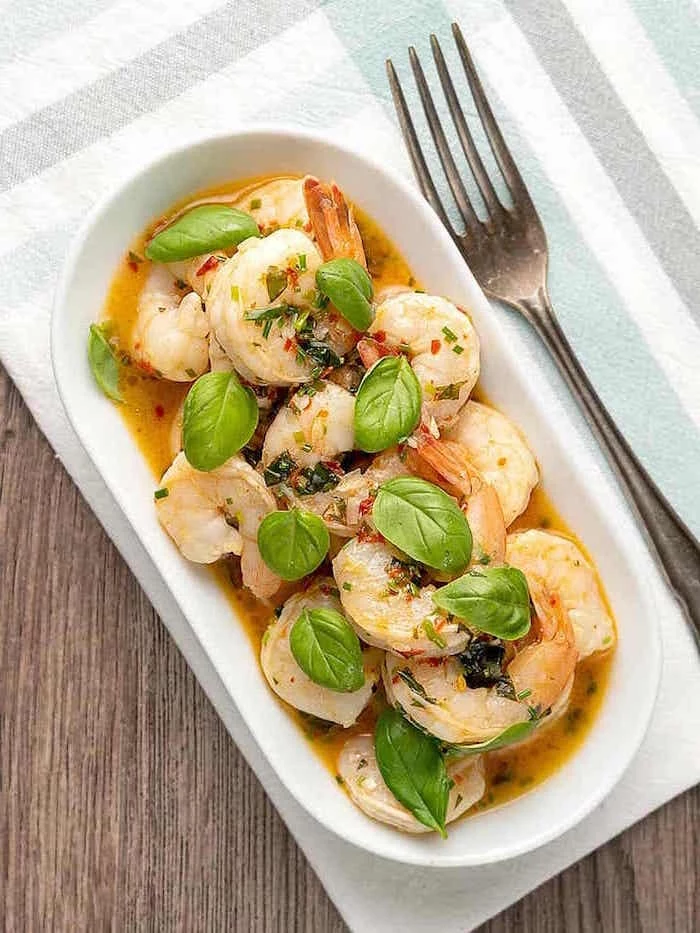
For an authentic Spanish tapas night, you can’t beat Gambas al Ajillo. It’s deceptively simple: shrimp sizzled in a terracotta cazuela with an almost shocking amount of garlic, olive oil, and a pinch of chili flakes. The real magic happens when you use crusty bread to mop up every last drop of the infused oil.
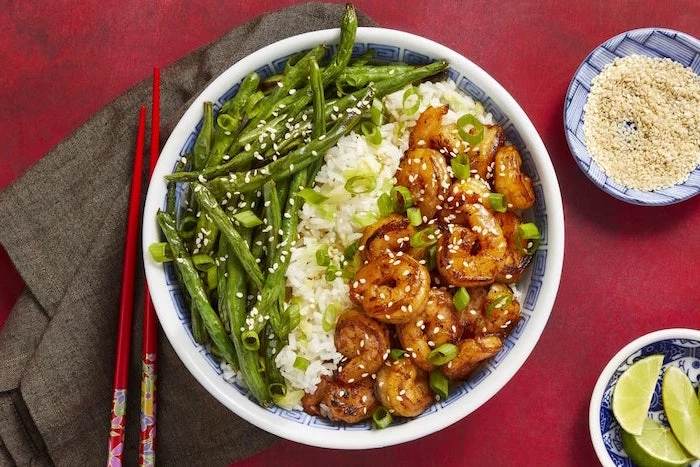
- They cook much faster than other varieties.
- They have a naturally sweet, rich flavor.
- Their texture is often compared to lobster.
The secret? You’re likely cooking with Argentinian Red Shrimp. Their distinctive pink color when raw and quick-cooking nature set them apart. Reduce your cooking time by about 30% to avoid overdoing them.
Should I cook shrimp with the shell on or off?
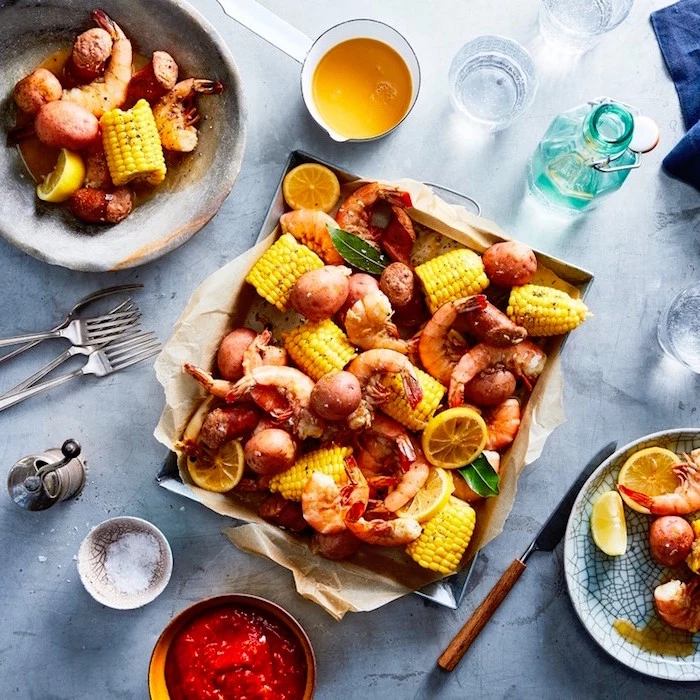
For maximum flavor, cook with the shell on, especially when grilling or boiling. The shells act like a protective jacket, preventing the delicate meat from overcooking too quickly, and they impart a deeper, more complex flavor into the dish. It’s a bit more work for the diner, but the payoff is immense.
To achieve a truly crisp, golden-brown sear, your shrimp must be completely dry. After thawing and peeling, lay them on a plate lined with paper towels and pat the tops dry as well. Moisture is the enemy of a good crust; it creates steam, which will poach your shrimp instead of searing them.

Acidic Marinades: Be careful with citrus and vinegar! While great for flavor, acids start to ‘cook’ the shrimp chemically, like in a ceviche. Don’t marinate for more than 15-20 minutes, or the texture will turn mushy.
Oil-Based Marinades: Herb and garlic-infused oils are much safer. You can let shrimp sit in these for several hours in the fridge to absorb all the delicious flavors without compromising texture.
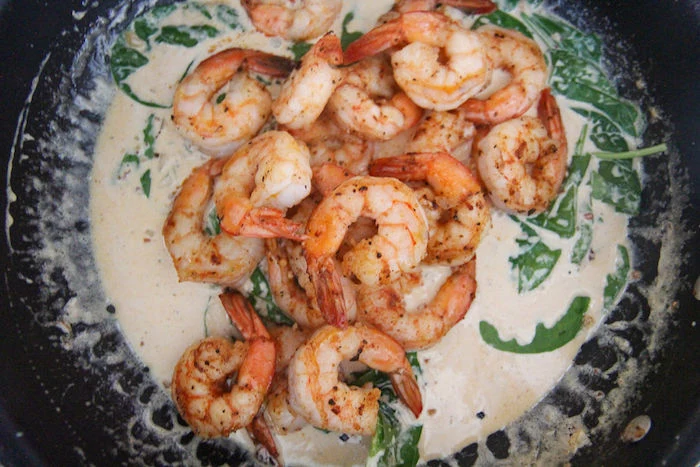
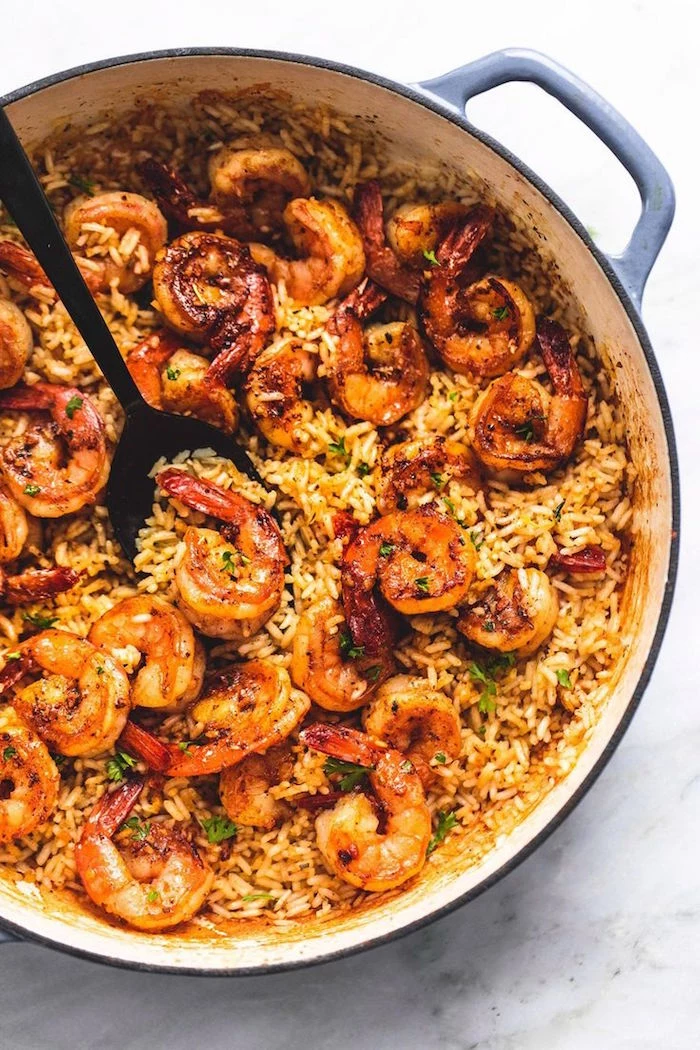
The sound of shrimp hitting a hot, buttered pan is the start of a five-minute journey to a perfect meal. That initial sizzle isn’t just noise; it’s the sound of flavor being born.
For an absolutely foolproof result, consider cooking shrimp sous vide. By sealing them in a bag and cooking in a precise water bath (an Anova or Joule circulator works wonders) at around 140°F (60°C) for 15 minutes, you get perfectly tender, translucent shrimp every single time. A quick 30-second sear in a hot pan afterwards adds color and texture.
Don’t be afraid of high heat. Whether you’re using a wok, a grill, or a cast-iron pan, getting the surface ripping hot before the shrimp go in is essential. The goal is to cook them hard and fast, searing the outside before the inside has a chance to turn rubbery. This method usually takes only 60-90 seconds per side.
When skewering shrimp for the grill, thread two parallel skewers through them. This clever trick serves two purposes:
- It prevents the individual shrimp from spinning around when you try to flip the skewer.
- It creates a ‘raft’ that is less likely to fall through the grill grates.
Can you really tell the difference between wild-caught and farm-raised shrimp?
Often, yes. Wild-caught shrimp tend to have a more complex, briny flavor profile that reflects their diet in the open ocean. Farm-raised shrimp, on the other hand, usually have a milder taste. In terms of texture, wild shrimp can sometimes be firmer, a result of their more active life.
When plating, think in odd numbers. A cluster of three or five shrimp is more visually appealing to the eye than an even-numbered group. Arrange them with the tails curving in the same direction to create a sense of movement and elegance on the plate.
Important: Let your thawed shrimp sit at room temperature for about 15 minutes before cooking. Adding ice-cold shrimp directly from the fridge to a hot pan will immediately lower the cooking temperature, sabotaging your efforts to get a good, quick sear.
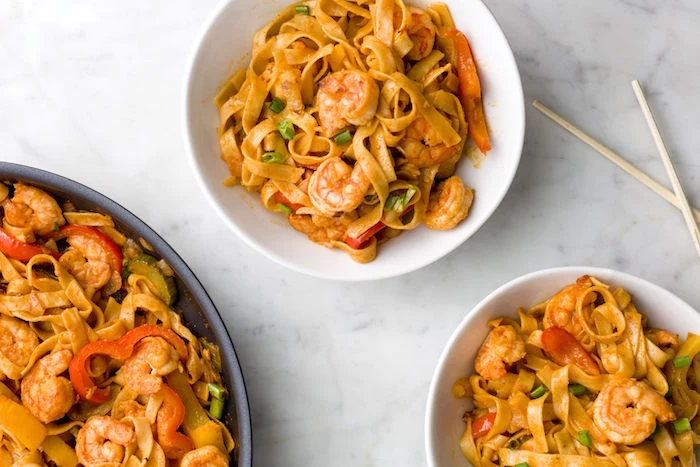
To save money without sacrificing flavor, use smaller, more affordable shrimp (like a 51/60 count) for dishes where they aren’t the solo star. They are perfect for mixing into fried rice, creamy pastas, or hearty shrimp salads, providing that essential flavor and texture without breaking the bank.
Fact: The ‘sand vein’ in a shrimp isn’t a vein at all. It’s the shrimp’s digestive tract. While it’s harmless to eat, it can have a gritty texture, which is why most chefs recommend removing it.
The smaller, darker ‘vein’ sometimes visible on the underside is the nerve cord, which is perfectly fine to leave in.
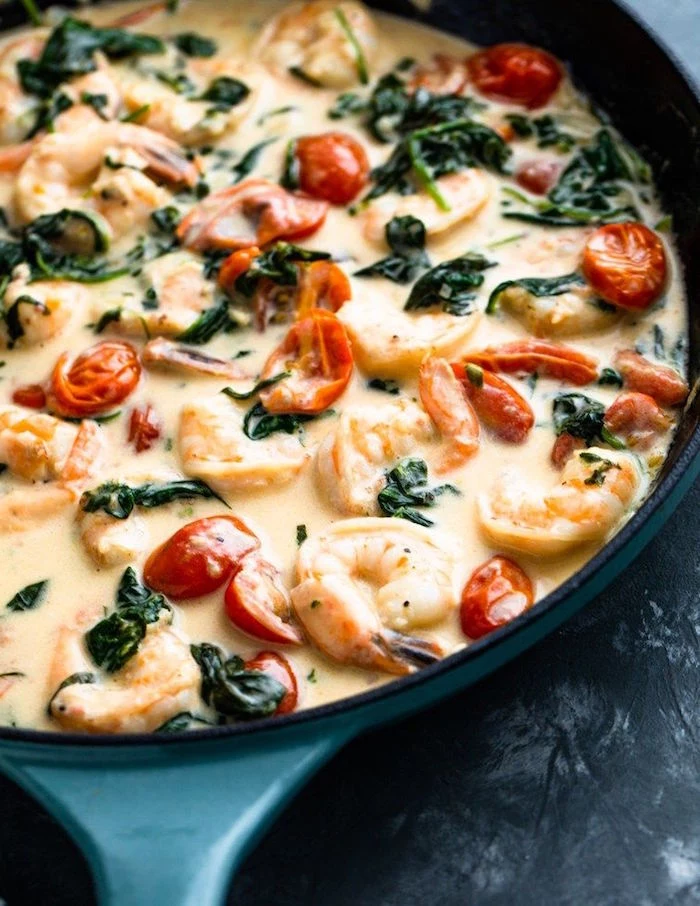
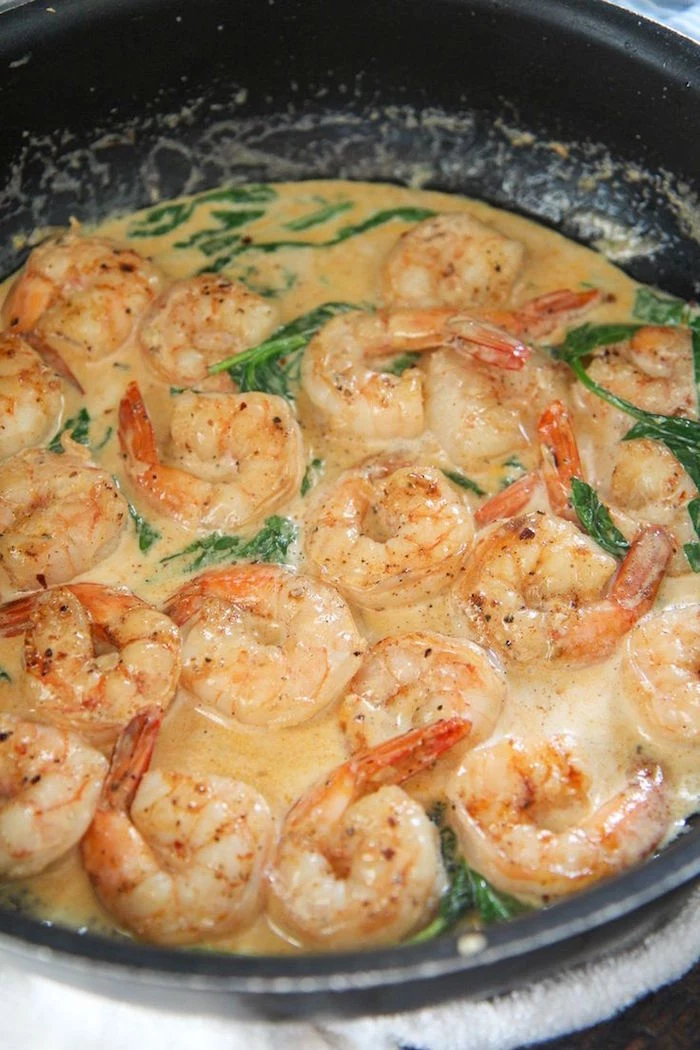
For dishes with creamy or buttery sauces, a touch of acidity is non-negotiable. A final squeeze of fresh lemon juice or a splash of dry white wine at the end of cooking will cut through the richness, brighten all the other flavors, and make the entire dish feel lighter and more balanced.
Curious about plant-based options? The market is evolving. Brands like New Wave Foods use seaweed and plant proteins to create a surprisingly convincing shrimp alternative. While the texture isn’t an exact match, they sauté well and can be a fun substitute in stir-fries or tacos for those with shellfish allergies or dietary restrictions.


