Beyond Pumpkin Spice: A Pro’s Secrets to Flawless Fall Nails at Home
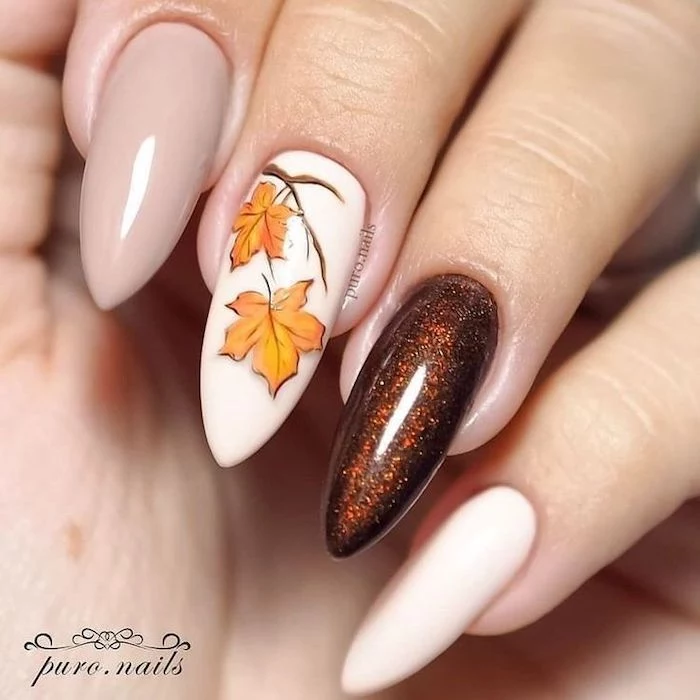
I can still feel the excitement of my first autumn as a newly minted nail tech. That crispness in the air wasn’t just about switching to cozier sweaters; it was about a whole new mood at my nail desk. Suddenly, the vibrant corals and summery whites were pushed to the back, and clients started asking for colors with real depth and soul. My job was to translate that feeling—a walk through colorful woods, the warmth of a spiced latte—onto their fingertips. Now, after years in the business, that seasonal shift is still my absolute favorite part of the job. It’s so much more than just picking a dark color; it’s about understanding light, your own skin, and even the polish itself.
In this article
So, this isn’t just another list of trendy colors you’ll forget by next year. Think of this as a peek behind the curtain at how a pro approaches the entire autumn season. We’re going to get into why certain colors just work, how to apply them so they look impossibly smooth, and the tricks to make them actually last. We’re building foundational skills here, so you can rock any fall shade with total confidence, whether you’re at a salon or cozied up on your own couch.
The “Why” Behind a Perfect Autumn Mani
Before we even think about unscrewing a bottle of polish, let’s talk about the “why.” The reason salon manicures can look so stunning isn’t magic; it’s a little bit of science. Honestly, getting these principles down is what separates a pretty good manicure from one that makes you stare at your hands all day.
Color Theory and Your Skin’s Undertone
The single most important key to unlocking your best colors is your skin’s undertone. It’s the subtle hue just beneath the surface, and in the fall, when summer tans start to fade, it really comes out to play. Generally, we fall into one of three camps: cool (with pink or blueish hints), warm (with yellow or golden hints), or neutral (a happy mix of both).
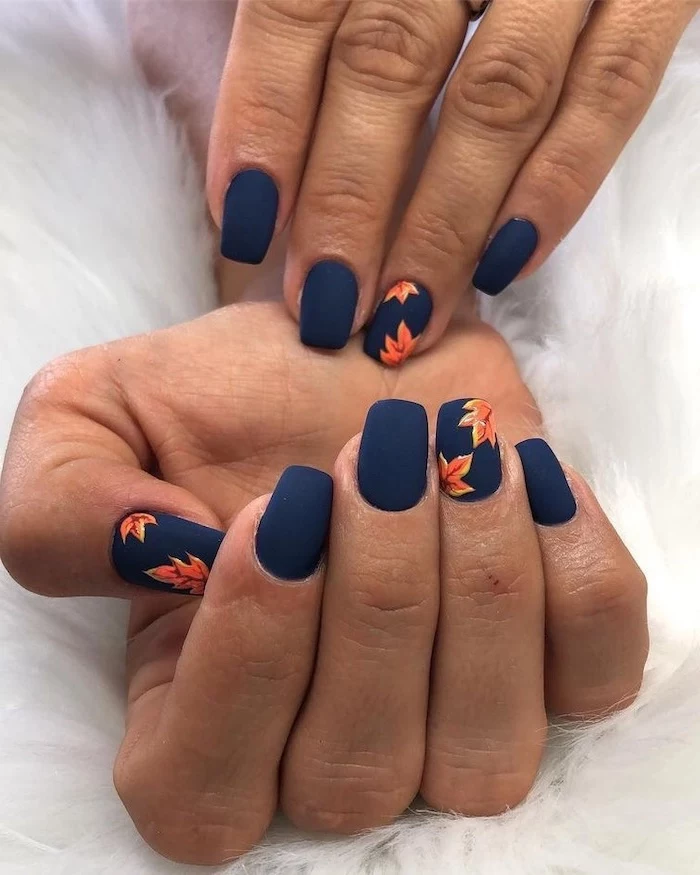
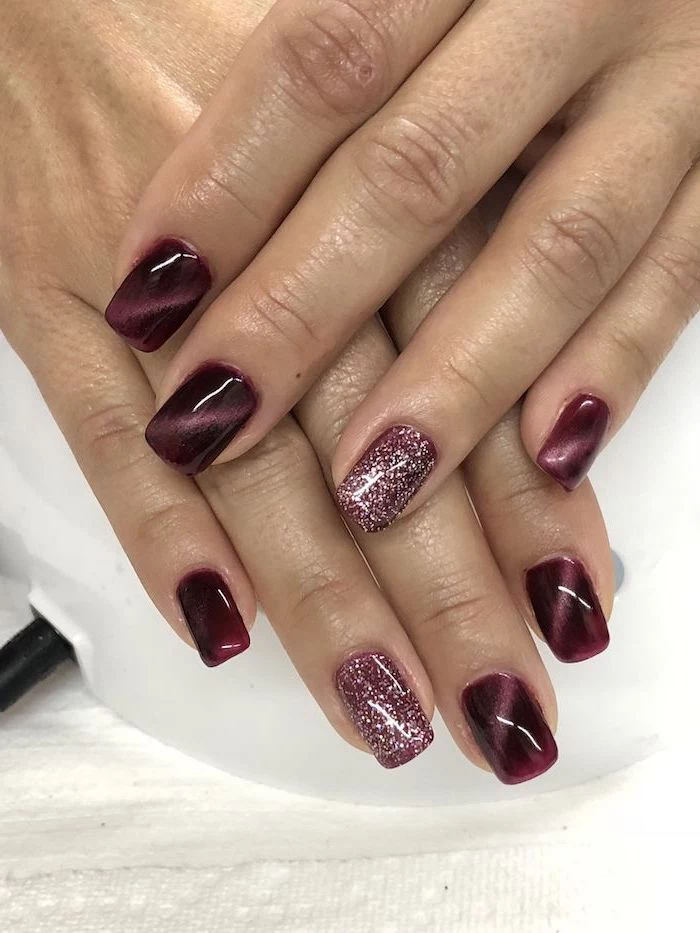
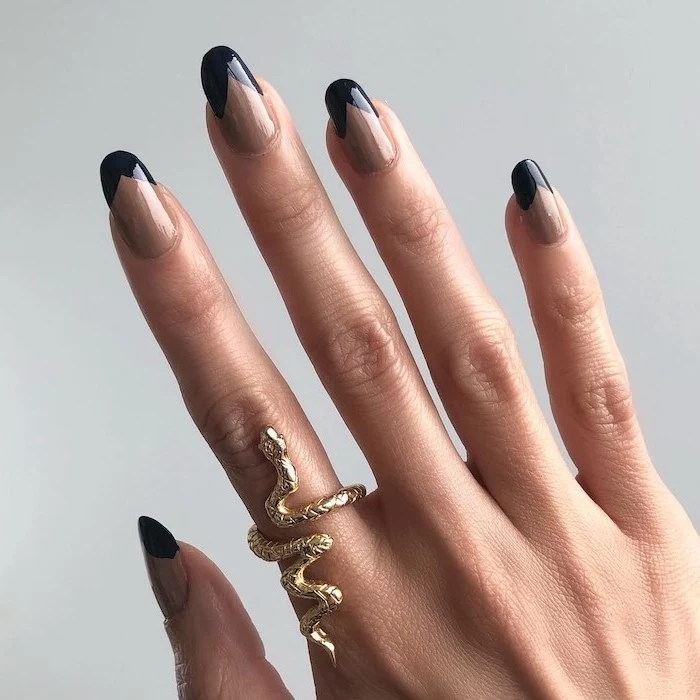
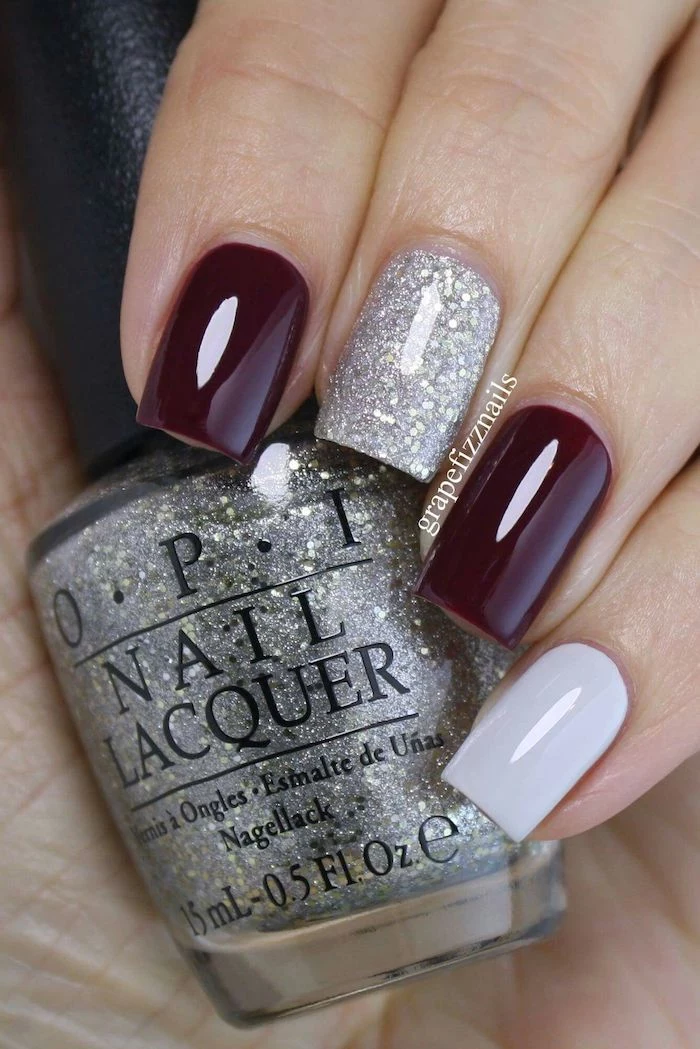
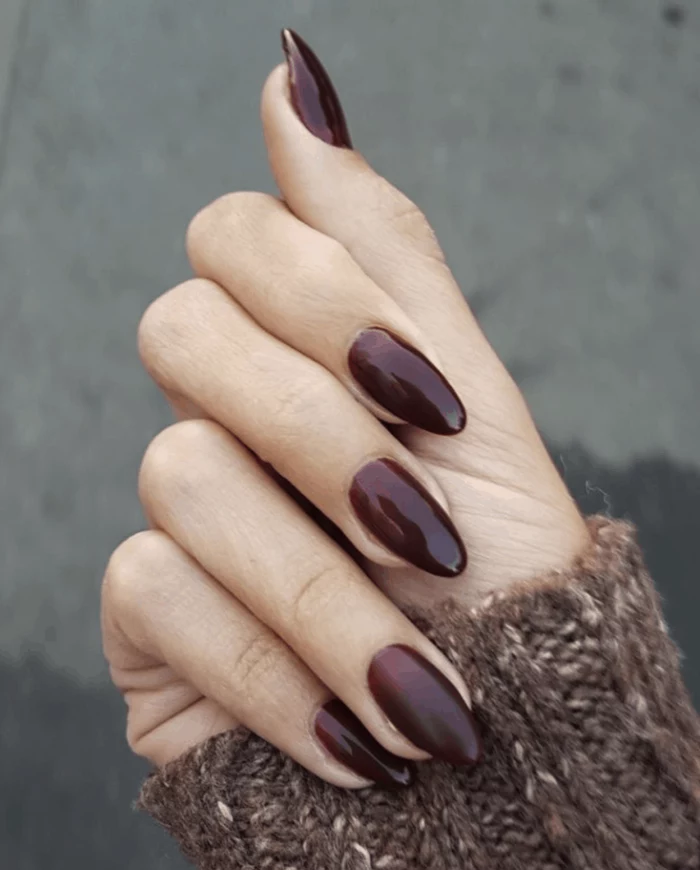
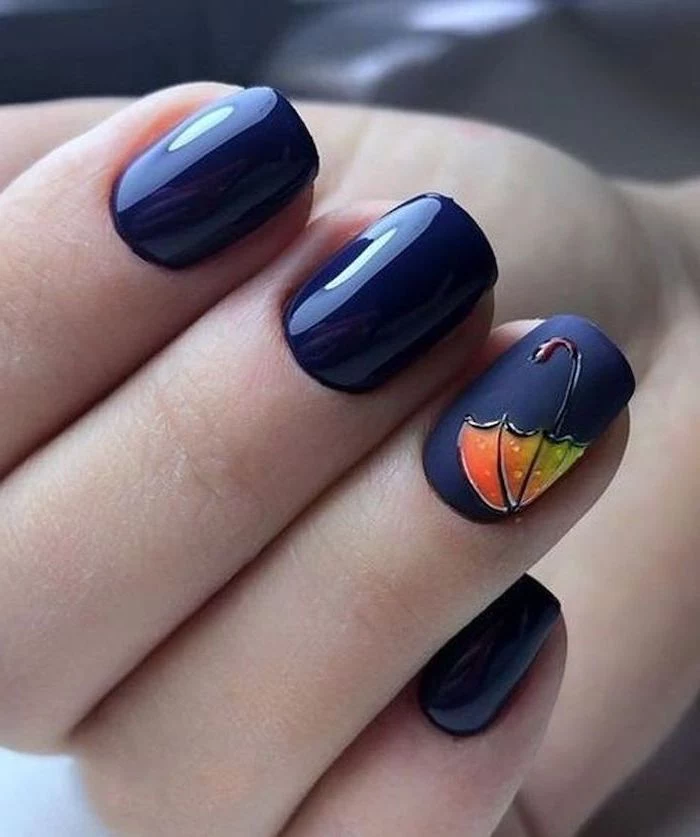
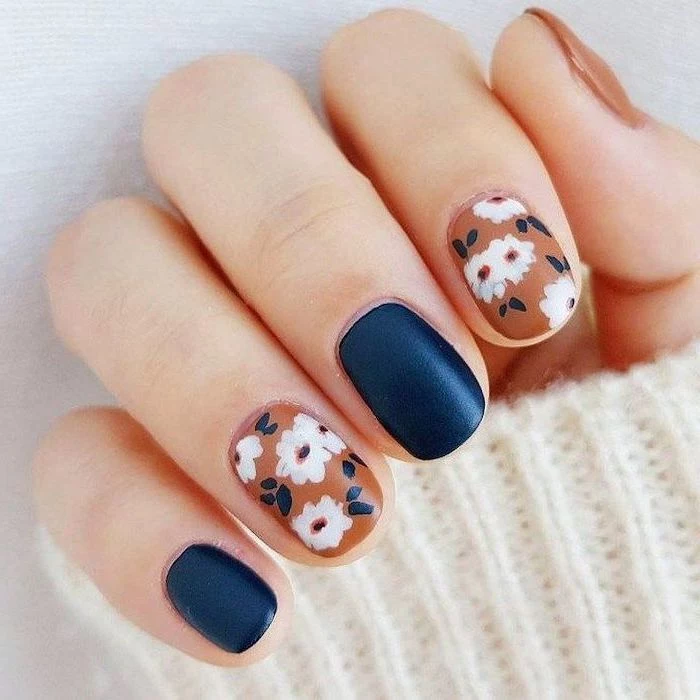
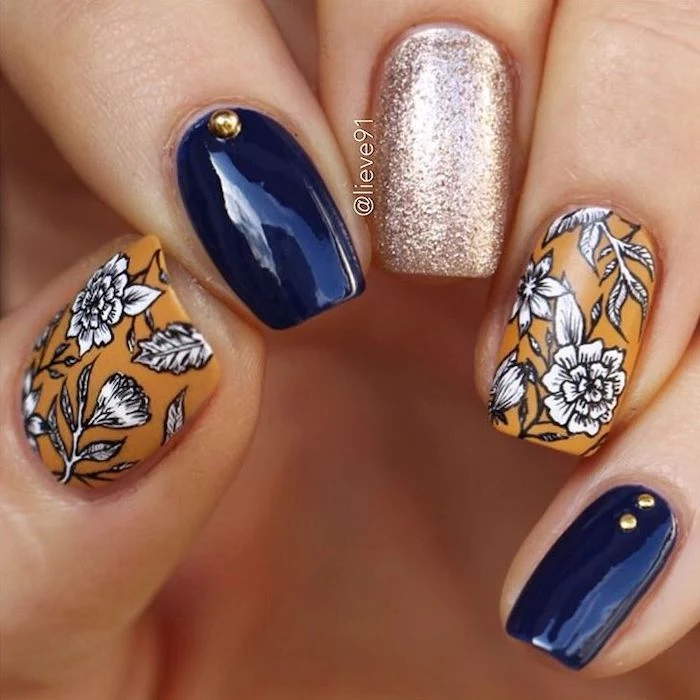
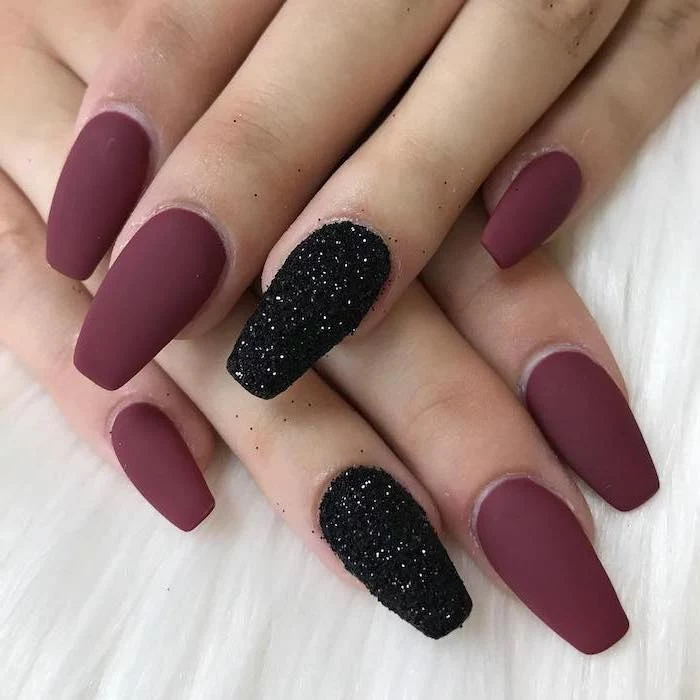
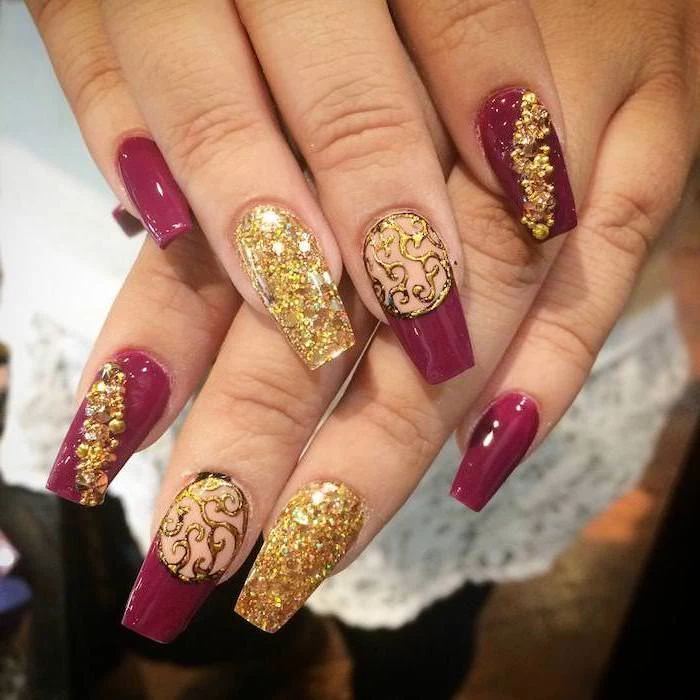
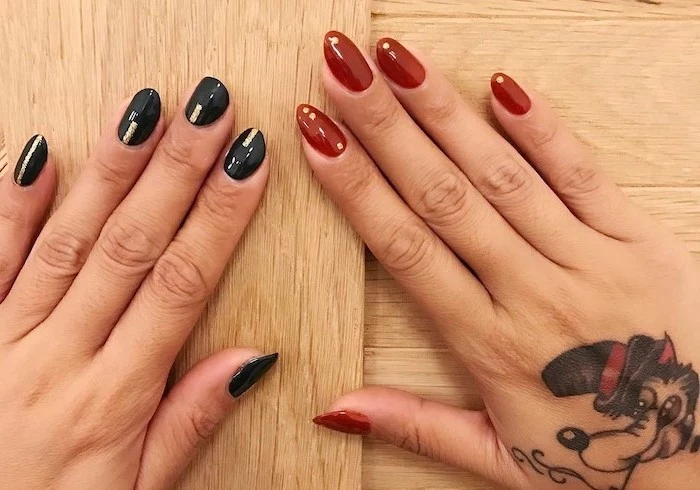
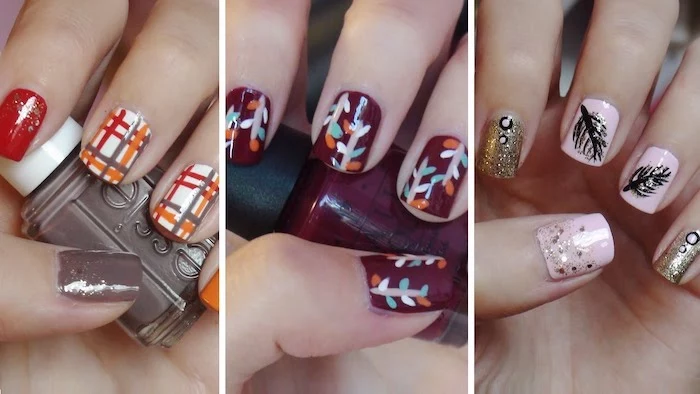
- If you have Cool Undertones: You’ll look amazing in colors that have a blue base. So instead of a rusty, fiery orange, reach for a deep, dramatic burgundy or a classic blood red. When you’re eyeing greens, a rich forest or emerald green will pop beautifully against your skin, way more than a mossy, yellow-toned one. Oh, and navy blues and slate grays? Absolutely gorgeous on you.
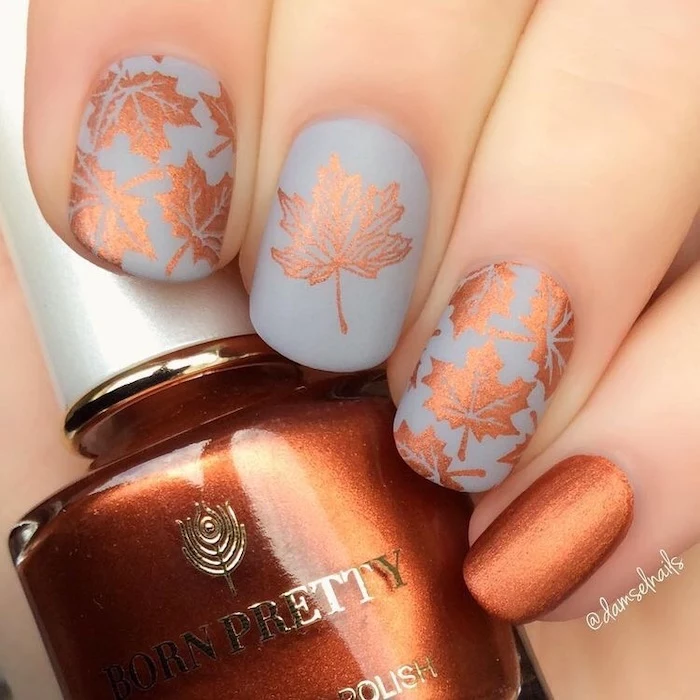
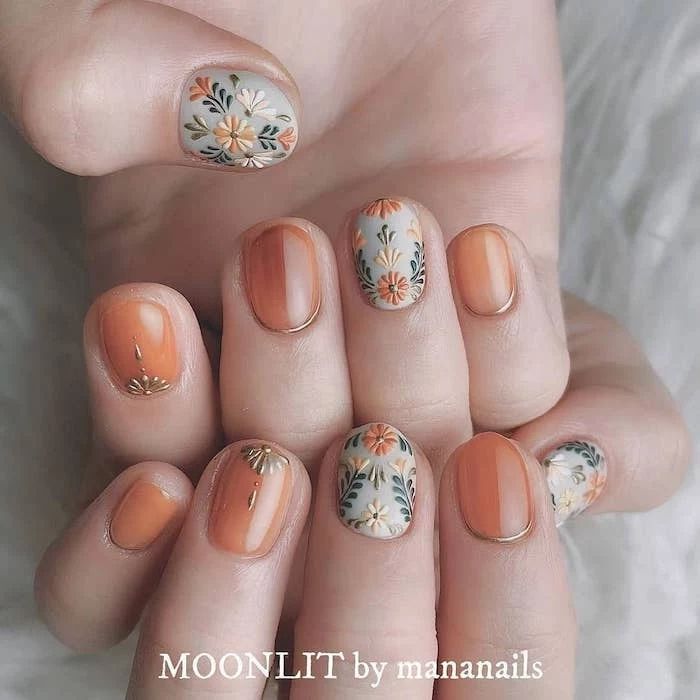
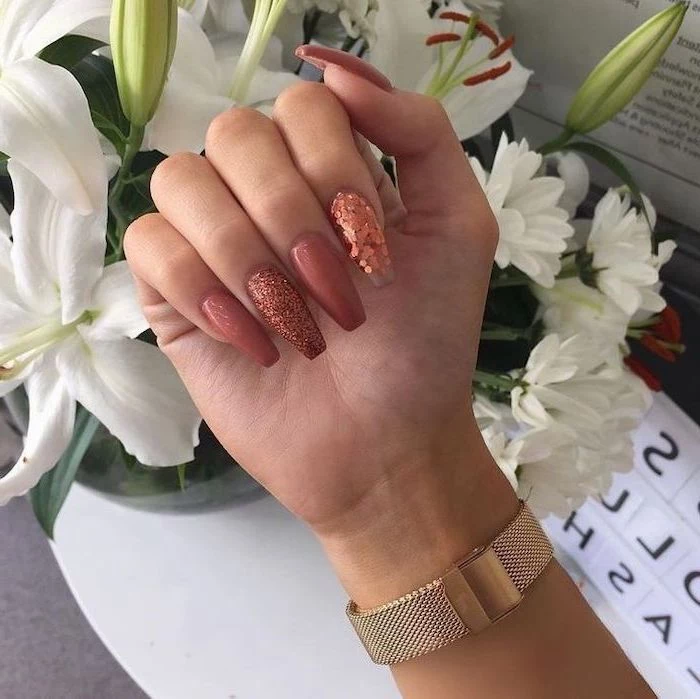
- If you have Warm Undertones: Lean right into those earthy, golden-based shades. This is your time to shine with terracotta, pumpkin spice, and rich chocolate browns. Olive and khaki greens look incredible, as do creamy, warm beiges. For reds, pick one with a little bit of orange in it, like a brick red—it’ll make your skin glow.
- If you have Neutral Undertones: Lucky you! You get to play in every sandbox. Most autumn shades will look great, so it really just comes down to what you’re in the mood for. You can pull off a cool-toned navy just as easily as a warm terracotta. A great test color if you’re unsure is a muted mauve, which has a perfect balance of warm and cool tones.
Quick tip: Go grab a navy blue t-shirt and an olive green one from your closet. Seriously, do it now. Drape each one over the back of your hand and see which one makes your skin look brighter and more alive. The one that wins is a huge clue to your undertone!
How Autumn Light Changes Everything
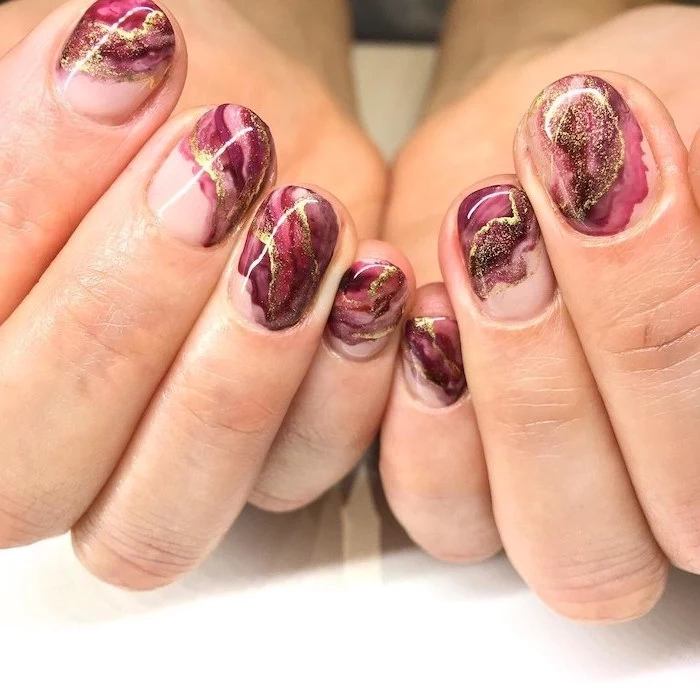
Have you ever noticed how the light in autumn just feels different? It’s softer, warmer, and more golden, especially in the late afternoon. This isn’t just in your head; it completely changes how nail colors appear on your hands. Those super-bright neons that looked so fun in the harsh summer sun can suddenly seem a bit jarring. But the deep, complex colors that felt too heavy in July? They absolutely come alive now. A deep plum, for instance, might reveal stunning red or blue shimmers in that golden hour light that you’d completely miss under an office fluorescent. This is why the autumn palette is so full of rich jewel tones and earthy shades—they have a depth that sings in harmony with the season’s light.
Let’s Talk Polish Formulas
Heads up: not all polishes are created equal, especially the dark ones. The beautiful richness of a fall color comes from a heavy dose of pigments, but those same pigments (especially in reds and blues) are notorious for staining your natural nail. This is why a good base coat isn’t just a suggestion; it’s non-negotiable. It creates a protective shield between the polish and your nail. Think of it as primer for your wall—you just wouldn’t skip it.
For you gel polish fans out there, fall formulas are often denser. This is great for getting full coverage in one coat, but it means you have to be extra careful with curing. Under-curing a dark, pigmented gel is a common cause of skin allergies because the uncured gel can touch the skin. Always, always follow the recommended curing time for your specific lamp and gel system. It’s a critical safety step!
Pro Techniques for Those Classic Autumn Shades
Okay, let’s get our hands dirty (or, well, perfectly polished). Applying these rich colors can be intimidating, but a few pro techniques make all the difference.
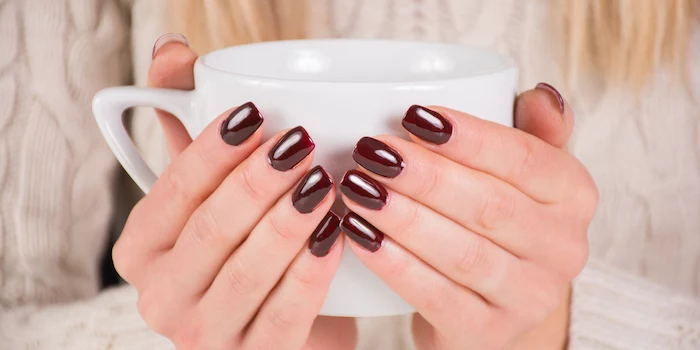
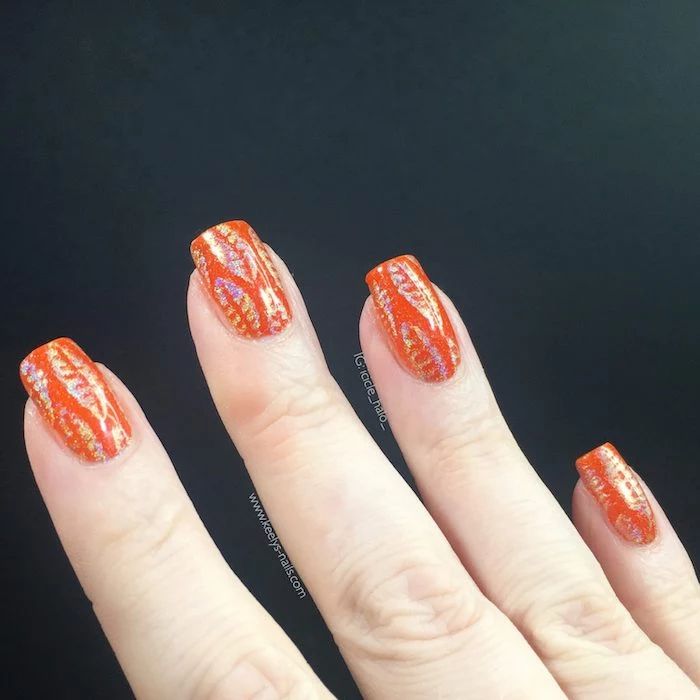
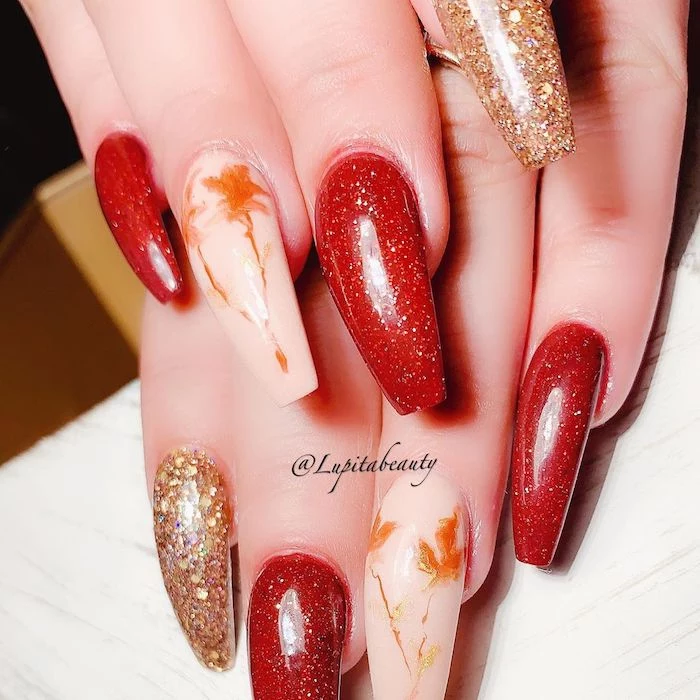
The Reds & Burgundies: Oxblood, Merlot, and Garnet
A classic dark red is timeless, but boy, is it unforgiving. Every little wobble shows. The secret here is patience and control. Expect a perfect dark manicure to take at least 45-60 minutes, including drying time. Rushing is your enemy!
- Master the Three-Stroke Rule: After dipping your brush, wipe one side clean on the bottle’s neck. Place the bead of polish in the center of your nail, a little bit away from your cuticle. Gently push the brush toward the cuticle line (leave a hairline gap!), then pull straight down the center to the tip. Then, return to the base and pull a stroke down the left side, and another down the right. It feels weird at first, but it prevents that dreaded polish-flooded-cuticle situation.
- Two Thin Coats are a MUST: Your first coat will probably look streaky. Don’t panic! That’s normal. It’s just the foundation. Let it dry for a solid two to three minutes before going in with the second thin coat. This is how you get that rich, even color from the bottle. One thick, goopy coat will just create a mess that never truly hardens.
- Your Secret Weapon: A Clean-Up Brush. No pro works without one. Grab a tiny, flat artist’s brush (you can get one for a couple of bucks at any craft store), dip it in acetone, and use it to carve out a perfectly clean, sharp line around your cuticle. This is the trick to that flawless, salon-fresh look.
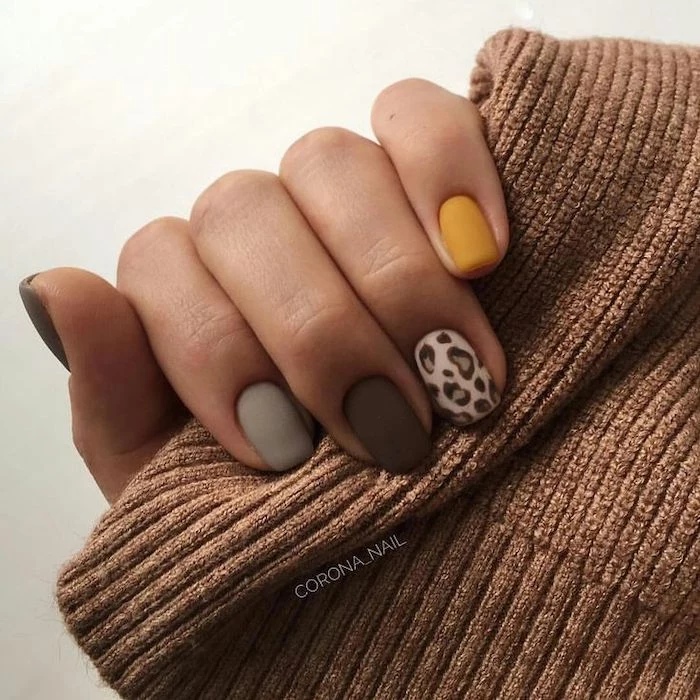
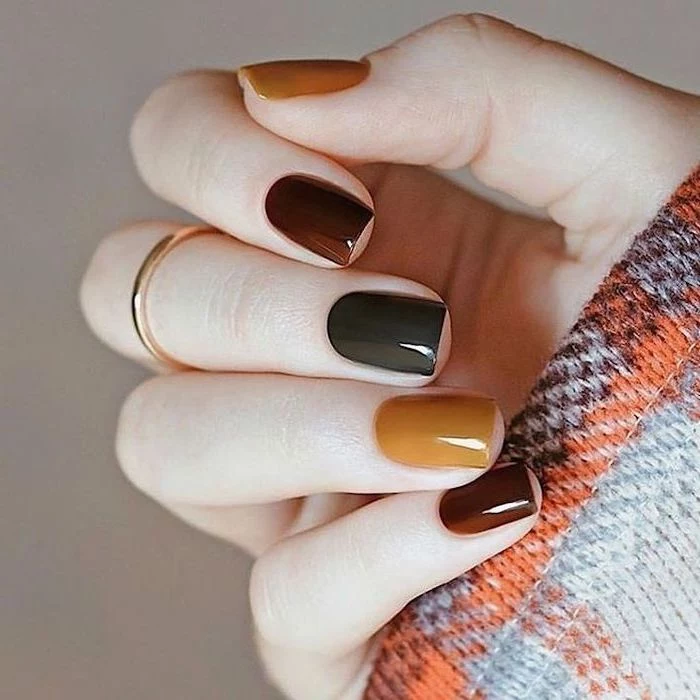
The Earthy Browns: From Taupe to Espresso
Browns are so versatile, but the lighter taupes and creamy nudes can be prone to streaking. The trick? Float the brush! Instead of pressing down hard, use a lighter touch and let the polish level itself out.
By the way, a common mistake with nudes is picking one that’s too close to your skin tone, which can result in what we call “mannequin hands.” I had a client once who was terrified of this, so we tried a rosy-brown that was two shades darker than her skin, and it instantly became her go-to power color. The goal is contrast, not camouflage!
Here’s a fun trick: take that deep chocolate brown and try it with a matte top coat. It completely transforms from a high-gloss classic to a sophisticated, modern velvet. It’s such an easy way to elevate your look. A good matte top coat from a brand like OPI or Essie will run you about $10 and is totally worth it.
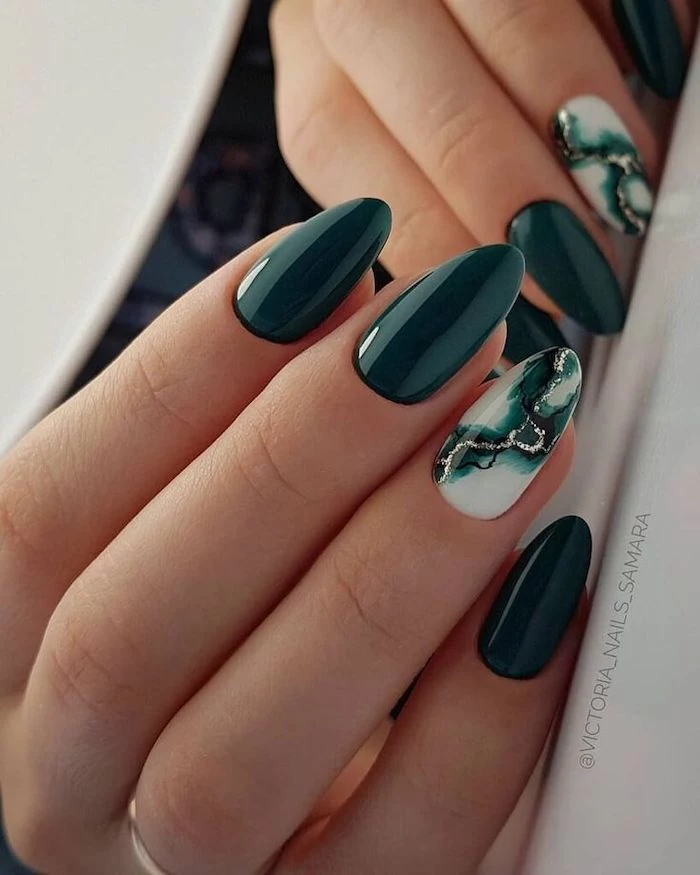
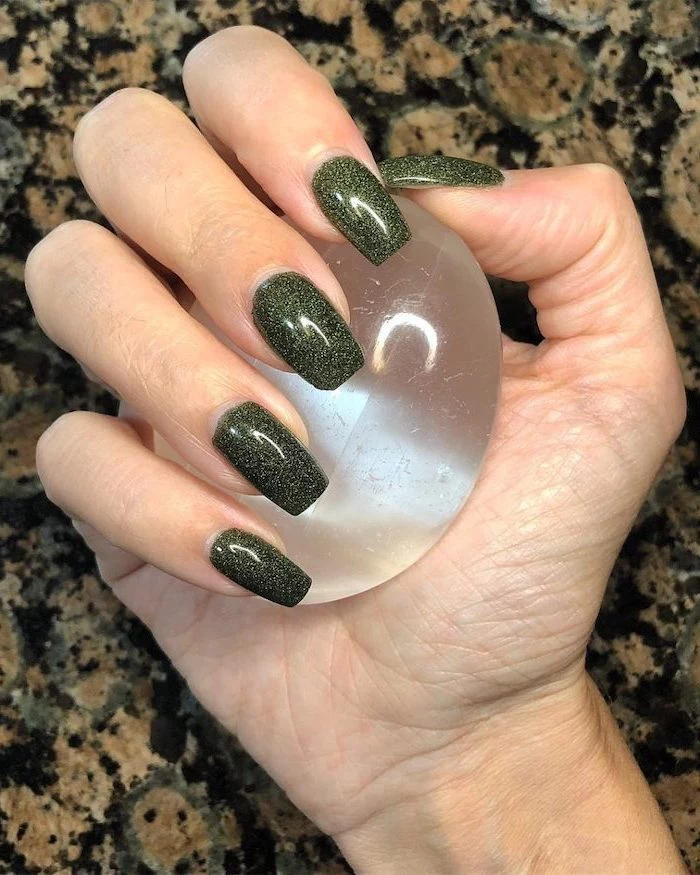
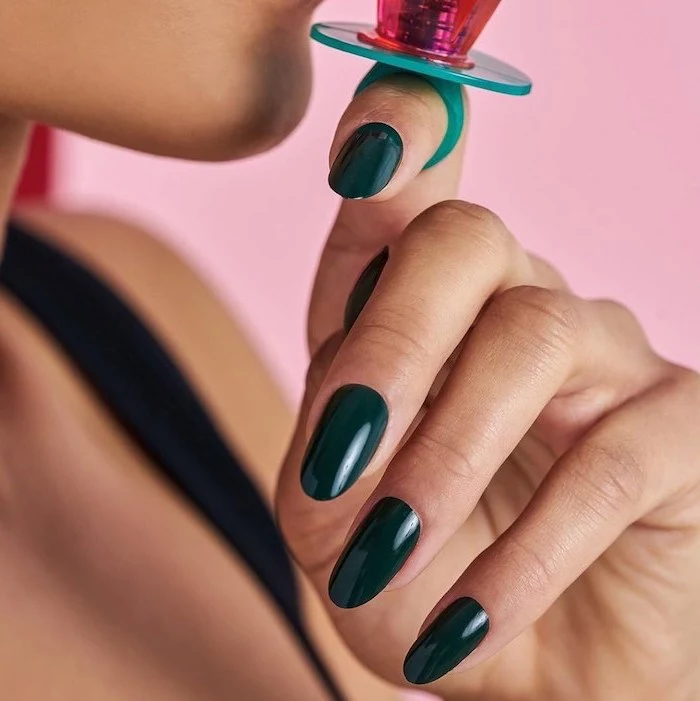
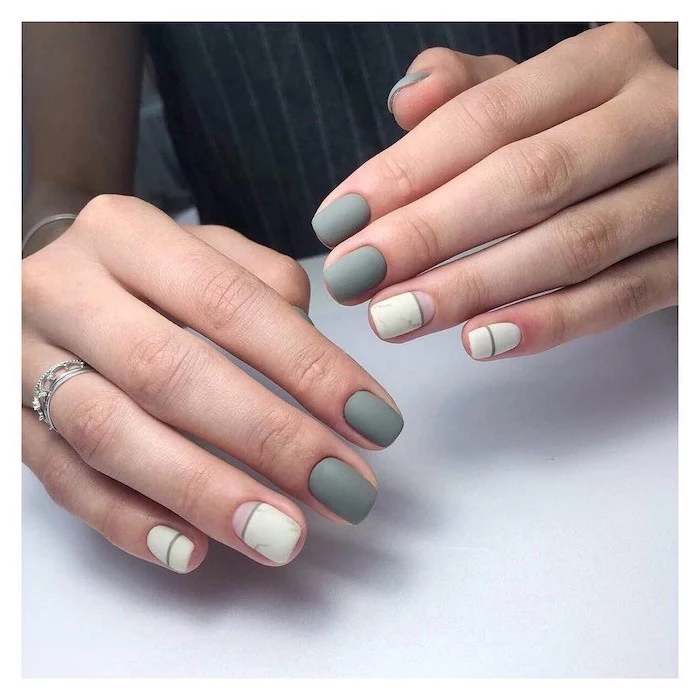
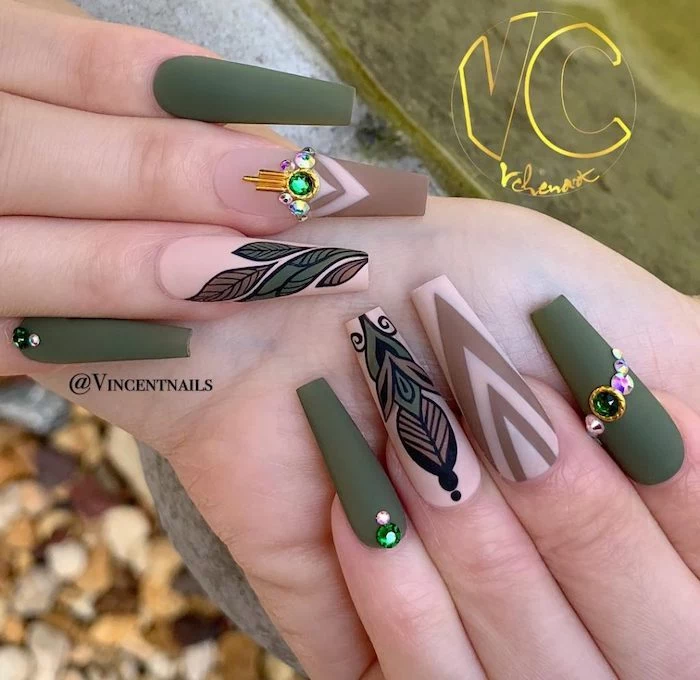
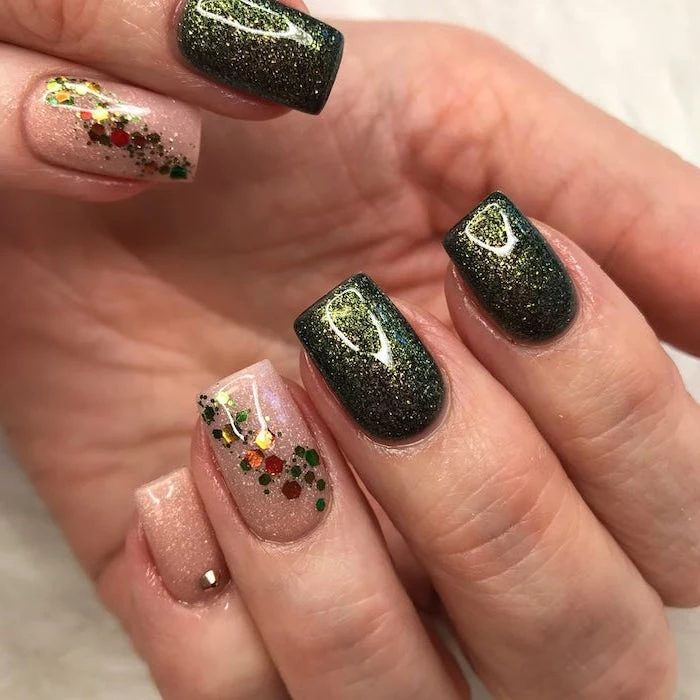
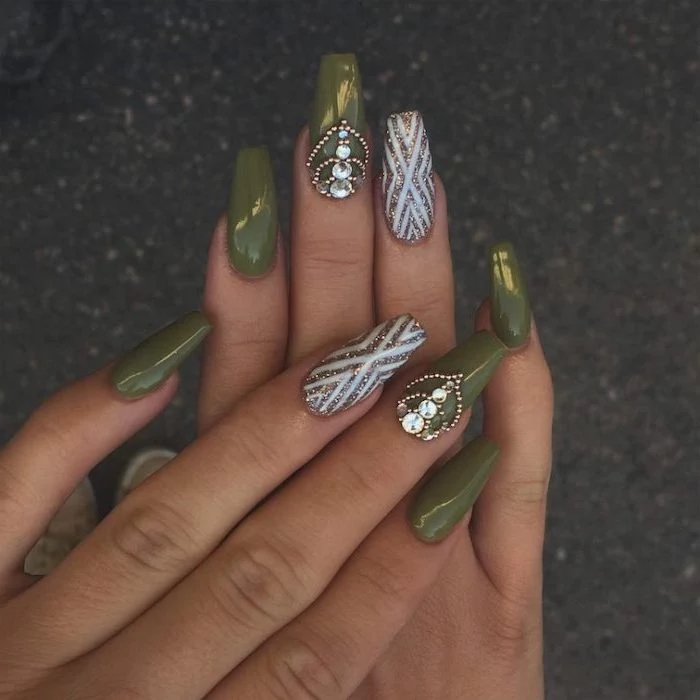
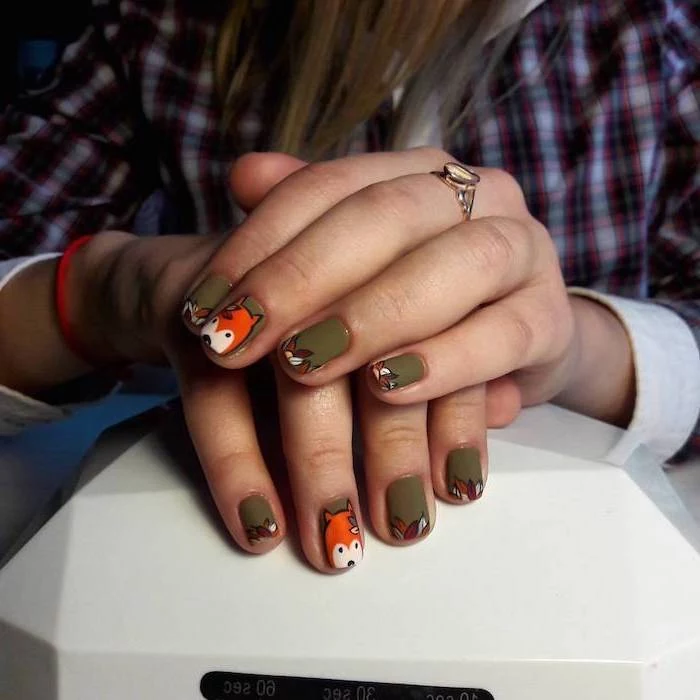
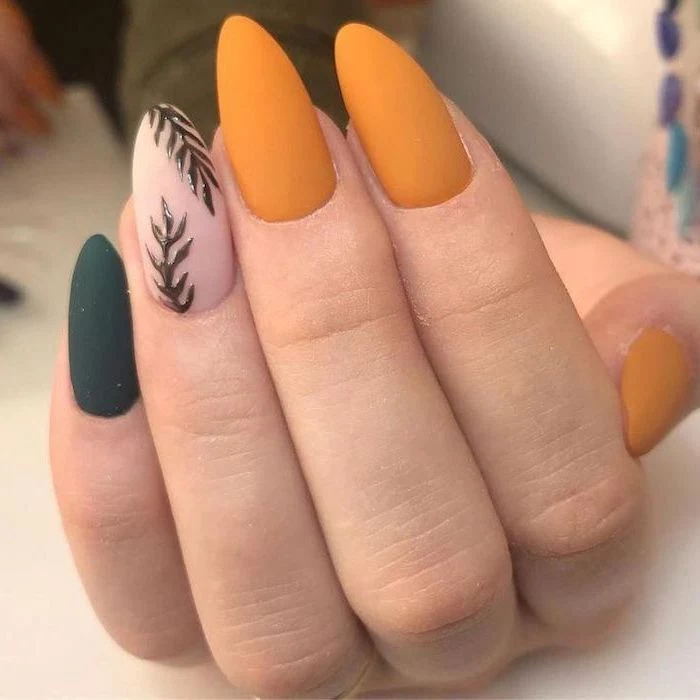
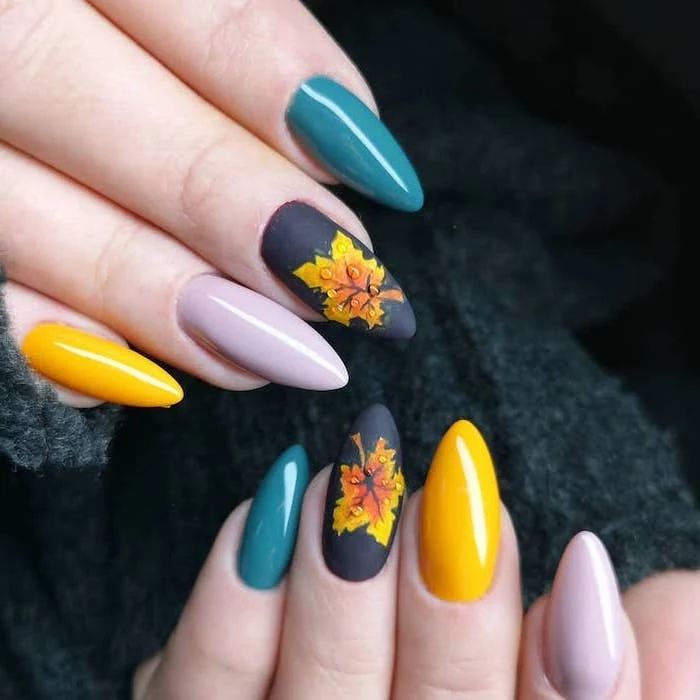
The Greens & Olives: Sage, Moss, and Forest
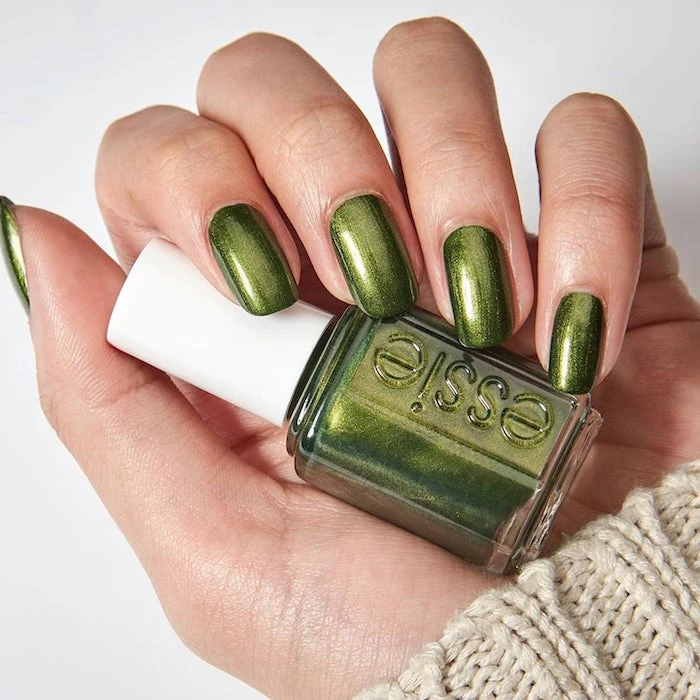
Autumn greens are wonderfully chic and earthy. As we covered, warm-toned olives and khakis are amazing on warm skin. If you have cooler skin and find that olive green brings out redness, pivot to a deep forest green or a teal with a strong blue undertone. They provide a beautiful contrast without highlighting any pinkness. Be patient with these; many of them, like the popular Essie shade ‘Force of Nature’, might need three thin coats to build up that perfect, creamy opacity.
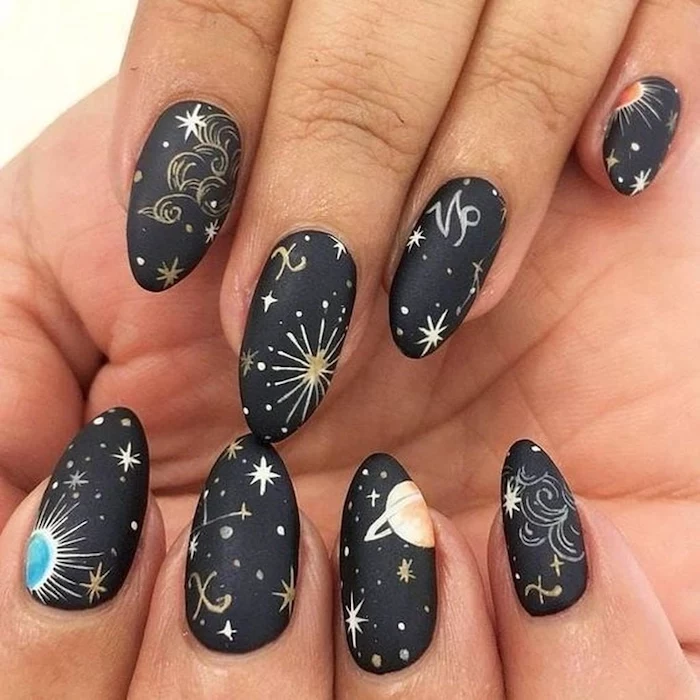
Level Up: Playing with Finishes and Art
Once you’ve got solid colors down, it’s time to play with texture. Think of your nails like an accessory to your fall wardrobe—you want them to have the texture of cashmere, leather, or silk.
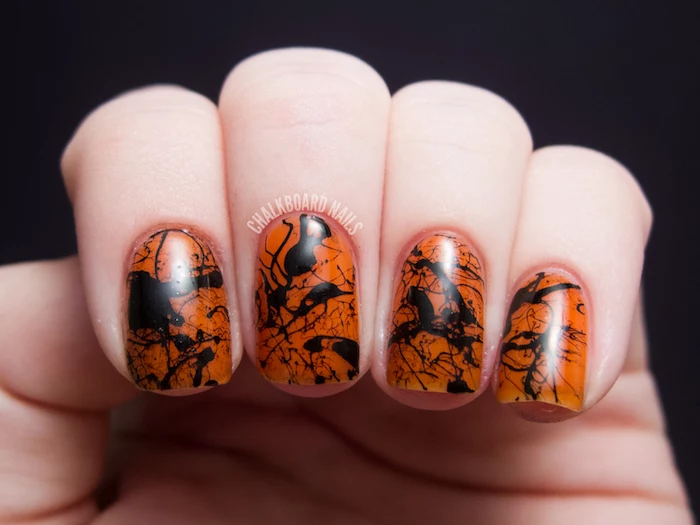
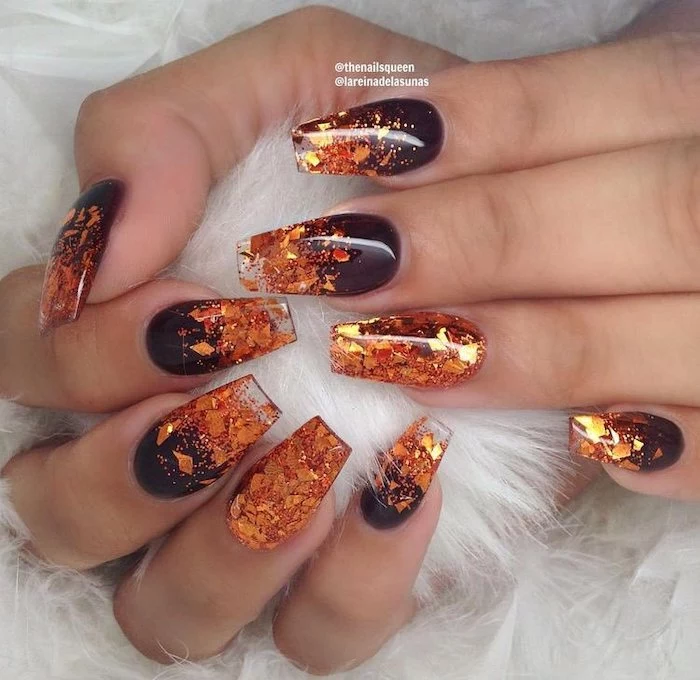
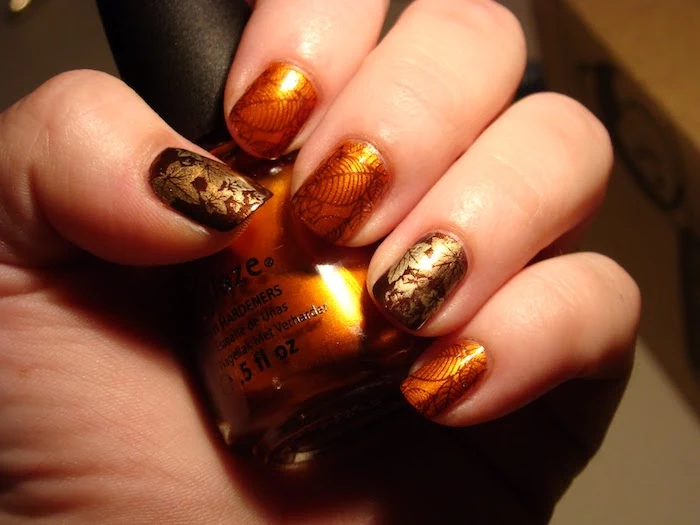
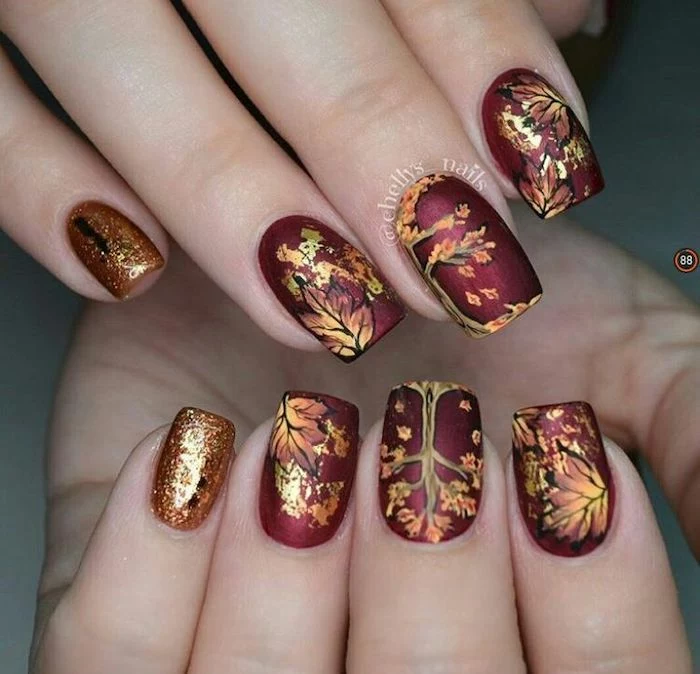
Tortoiseshell Nails at Home
This is my all-time favorite autumn nail art. It looks incredibly complex, but it’s really all about layering sheer colors. Set aside about an hour for this, especially your first time. Don’t rush it!
- Start with one coat of a warm, caramel-y base color.
- Now, you need a sheer amber or brown polish. You can find ready-made ones (look for something like Cirque Colors’ ‘Hatch’) or make your own by mixing a few drops of a regular brown polish into a clear top coat. Use this to paint random, blob-like shapes on your nail. Don’t cover the whole thing.
- Take a dark brown or black polish and, using a dotting tool or just the tip of your brush, add smaller, darker spots over and around the sheer brown blobs.
- Here’s the magic step: Apply another full coat of your sheer amber/brown polish over the entire nail. This is what melts all the layers together and creates that beautiful, glassy depth.
- Finish with a super high-gloss top coat to get that authentic, shiny tortoiseshell look.
Your At-Home Toolkit for Salon-Worthy Results
You don’t need a pro license for a beautiful manicure, but investing in a few key tools will change your life. You can build a fantastic starter kit for around $40-$50, and these items will last you for ages.

- A Glass or Crystal Nail File: Ditch the cheap emery boards! A glass file (around $8-$15 at Ulta or on Amazon) seals the edge of your nail as it files, which seriously helps prevent peeling and snagging.
- A Gentle Cuticle Pusher: Please don’t use a metal pusher at home—it’s too easy to damage your nail bed. A simple wooden stick or a rubber-tipped pusher is much safer. Gently push back your cuticles right after a shower when your skin is softest.
- Nail Dehydrator/Cleanser: The most crucial step for a long-lasting mani is a squeaky-clean nail plate. Before your base coat, just wipe each nail with a lint-free pad soaked in plain old rubbing alcohol. It removes oils and ensures your polish can grip on tight.
- A Quality Base & Top Coat: This is not the place to skimp. A great duo, like the Orly Bonder Base Coat and Seche Vite Top Coat, will cost you between $15-$20 and is the single best investment you can make for your manicure’s longevity.
Help! A Quick Troubleshooting Guide
Even pros mess up sometimes. Here’s how to fix the most common nail fails.
- “I smudged my almost-dry nail!” Don’t swipe it! The oldest trick in the book works: lick the tip of your finger (yes, really, your saliva is a mild solvent) and gently pat the smudge. It will often smooth the polish right out. Then, once it’s fully dry, add another layer of top coat.
- “My favorite dark polish got thick and goopy.” Whatever you do, don’t add acetone to the bottle! Acetone eats polish and will ruin it. You need a bottle of nail polish thinner. A few drops will restore your polish to its original consistency without damaging the formula.
- “My matte top coat looks stained and dirty.” This is a common issue since matte finishes are more porous. Just take a cotton pad with some rubbing alcohol and give the nails a quick wipe. It will lift the surface stains and bring back that velvety finish.
A Quick But Important Safety Chat
As a pro, my first priority is always health and safety. Keep these things in mind.
Allergy Awareness
Gel polish allergies are on the rise, mostly thanks to at-home kits where uncured gel gets on the skin. An allergy can pop up at any time and is permanent. If you’re doing gels at home, be meticulous. Clean up any gel that touches your skin with alcohol before you cure it. If you ever get an itchy, red, or blistering rash around your nails, stop using the product immediately and see a doctor.
When to See a Doctor, Not a Nail Tech
We are not doctors. If you have a nail that’s lifting, looks unusually thick, is discolored (yellow, green, or brown), or is painful, please don’t cover it with polish. These can be signs of an infection or another medical issue that needs a doctor’s attention. Covering it up can trap moisture and make things worse. Your health always comes first.
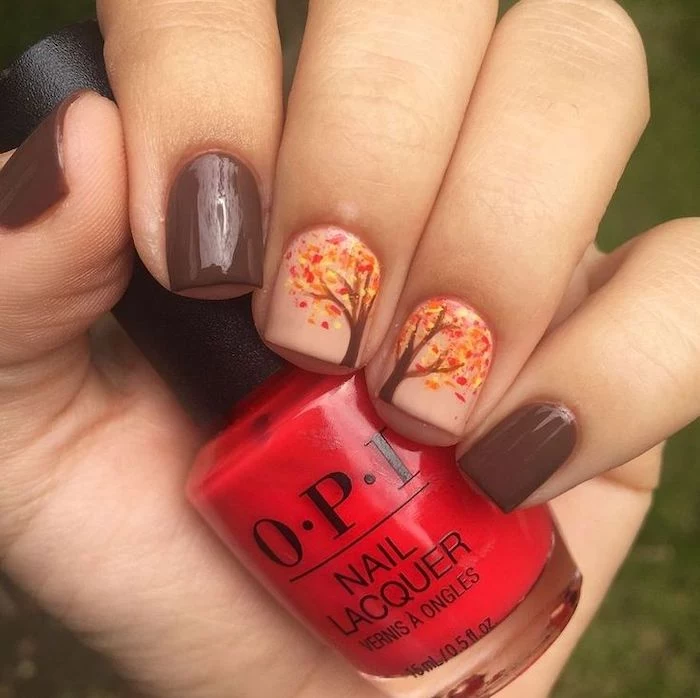
Ultimately, picking your autumn nail color should be fun. By understanding a little about color, light, and technique, you can make choices that feel authentic to you. So whether you’re going for a moody, classic red or a modern, earthy green, wear it with the confidence that comes from knowing the craft behind the color. You’ve got this.
Inspiration Gallery
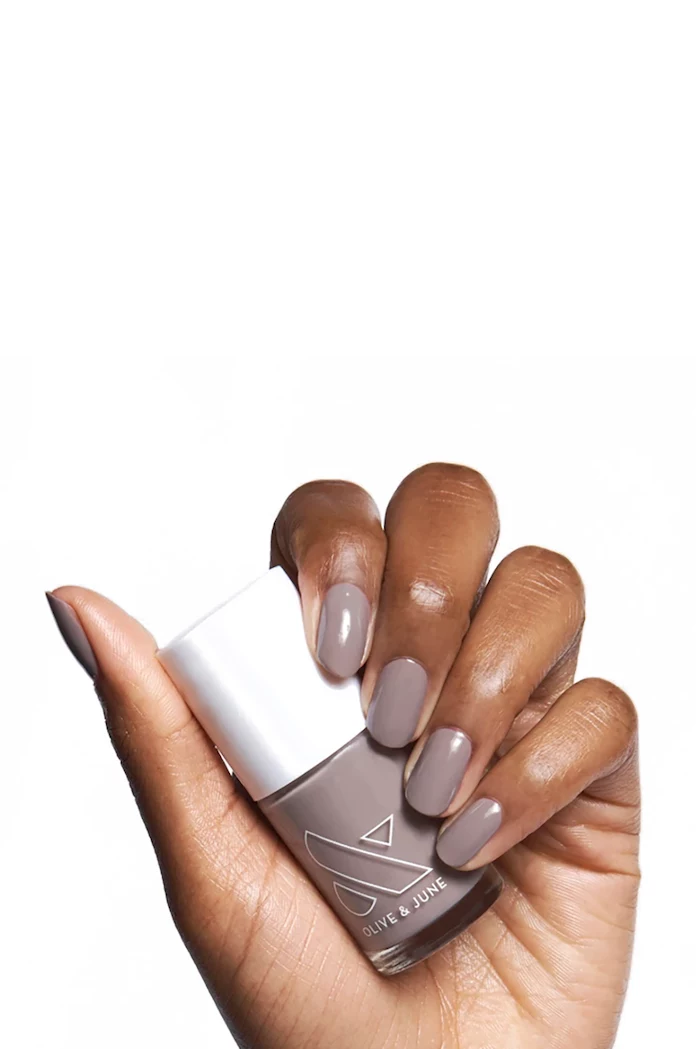
Don’t underestimate the power of your base coat. It’s not just a barrier against staining; it’s the foundation of your entire manicure. For fall’s creamy, opaque polishes, consider a ridge-filling base coat, like the one from Orly. It creates an impeccably smooth canvas, ensuring that deep colors like navy or chocolate brown don’t highlight any natural imperfections in the nail.
- Prevents tiny, frustrating air bubbles.
- Ensures an even, streak-free color application.
- Helps your manicure last days longer.
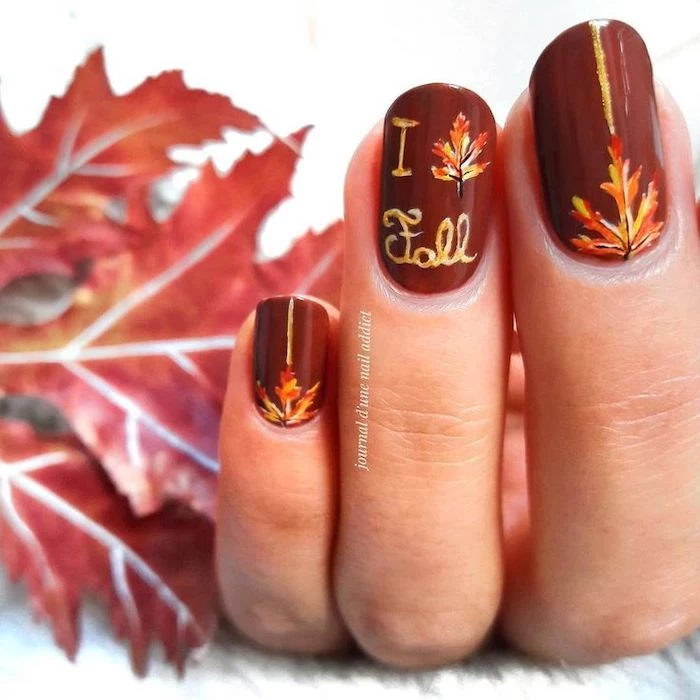
The secret? The three-stroke rule. Start with one stroke down the center of the nail, then one on each side. This technique loads the perfect amount of polish without flooding the nail bed.
More than 70% of a polish’s hardness is achieved in the first few hours, but it can take a full 24 to 48 hours for it to completely cure and become fully chip-resistant.
This means being gentle with your hands for a day after your manicure is key. Avoid hot water, tight gloves, or intense chores. Patience is the ultimate top coat!
How do I clean up messy edges for that sharp, salon-perfect line?
Forget cotton swabs, which leave behind fuzzy fibers. The professional’s tool is a small, flat, or angled art brush (an old eyeliner brush works wonders!) dipped in pure acetone. It gives you precise control to wipe away any polish that has flooded your cuticles, creating a flawless border around your color.
The secret to making your manicure last: Capping the free edge. After your final color coat and your top coat, take the very tip of the brush and gently swipe it along the front edge of your nail. This simple action seals the polish and dramatically reduces the likelihood of chipping from typing or daily tasks.

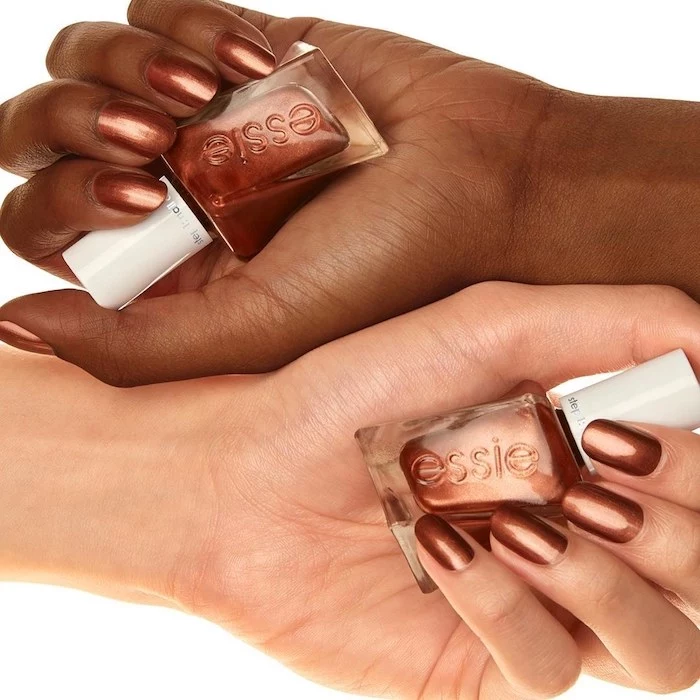
This season, the inspiration comes straight from your coffee cup. The
Glass File: Gently seals the keratin layers at the nail’s edge as it files, preventing peeling and snagging. It’s a long-term investment for nail health.
Emery Board: More aggressive and can cause micro-tears if used too forcefully. Best for major reshaping or for artificial nails.
For maintaining your natural nails this fall, a glass file is the gentler, superior choice.
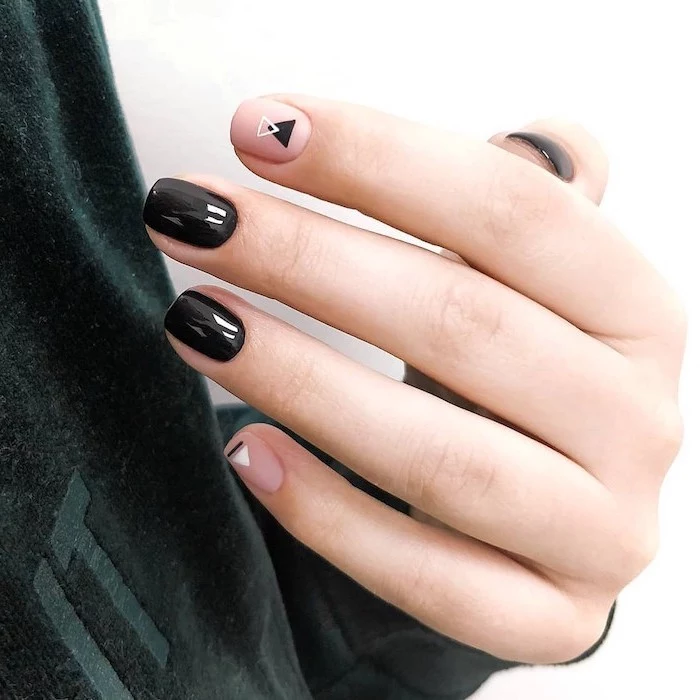
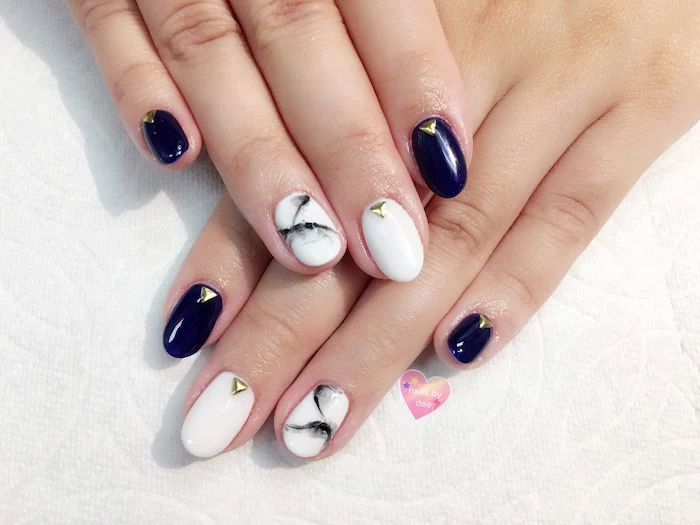
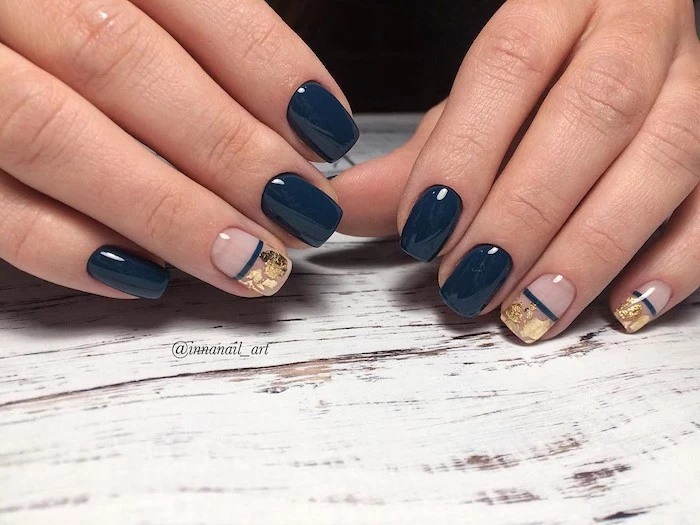
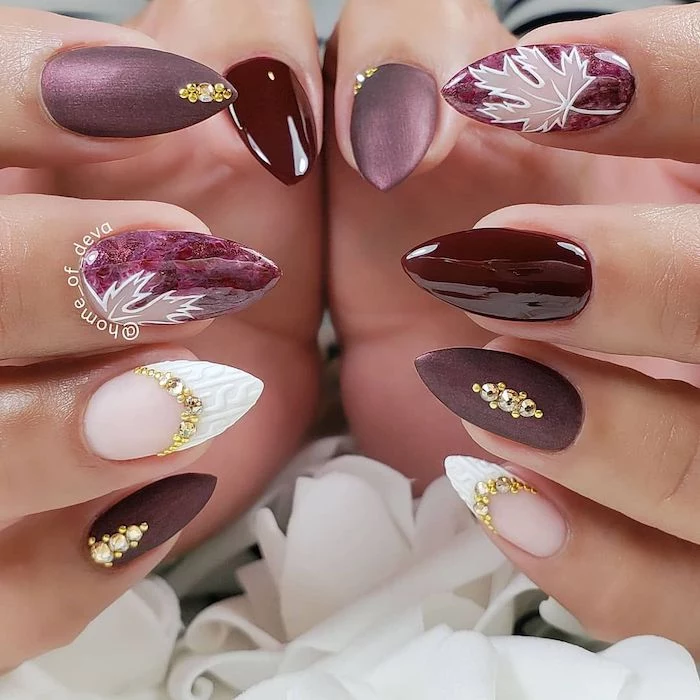
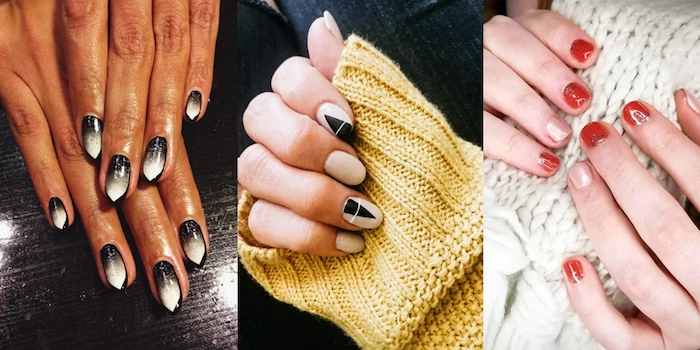
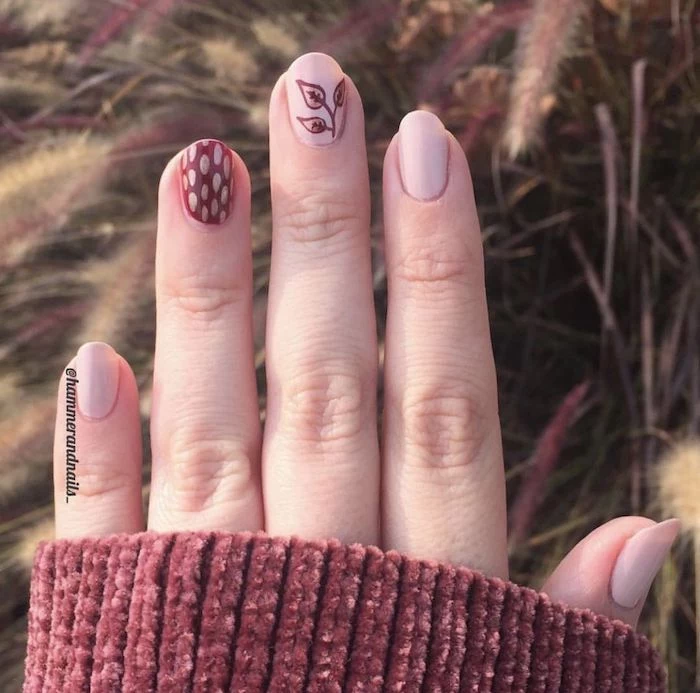
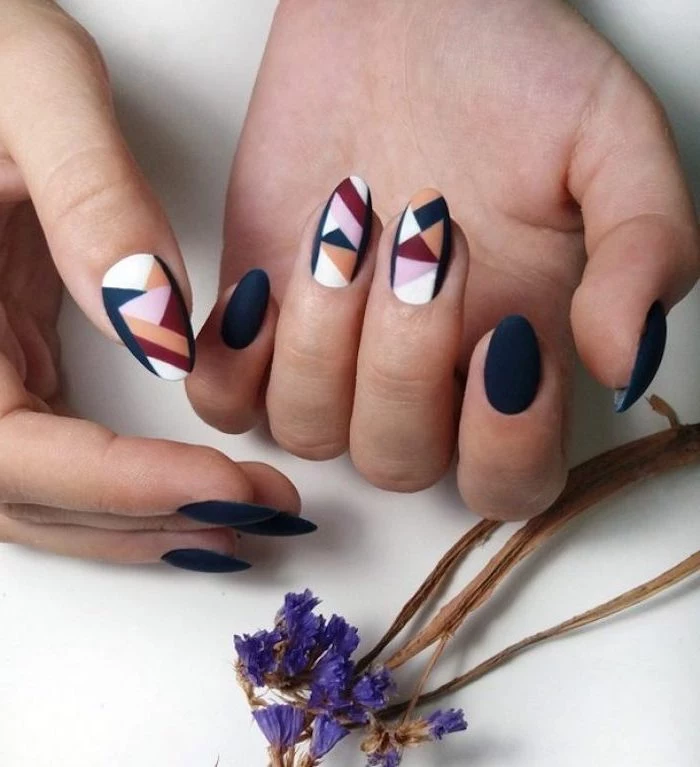
Give your autumn manicure a touch of unexpected elegance with a negative space design. Instead of painting the whole nail, use striping tape to block off a geometric section or a half-moon near the cuticle. Paint your fall color over it, and remove the tape while the polish is still wet. It’s a modern, minimalist take that looks incredibly chic with deep tones like forest green or merlot.

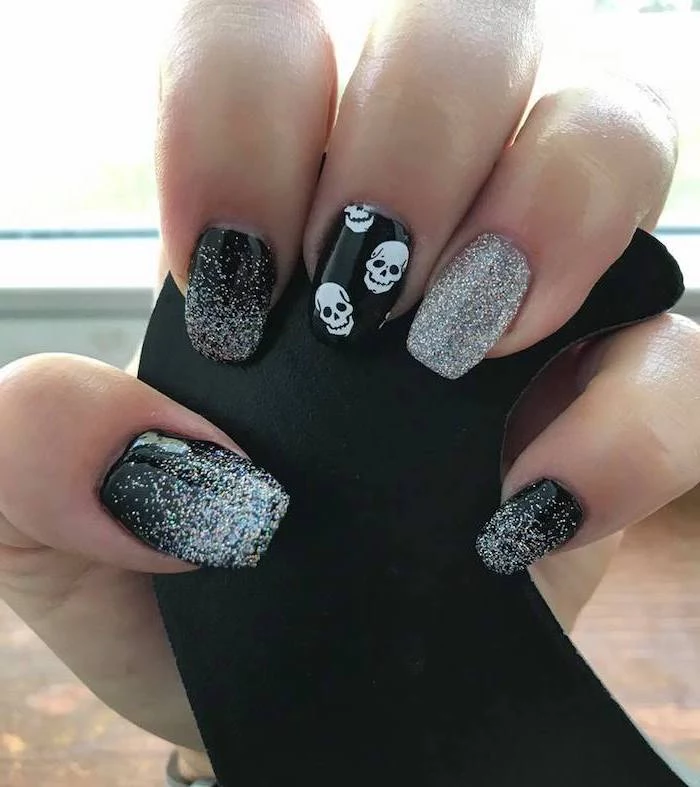
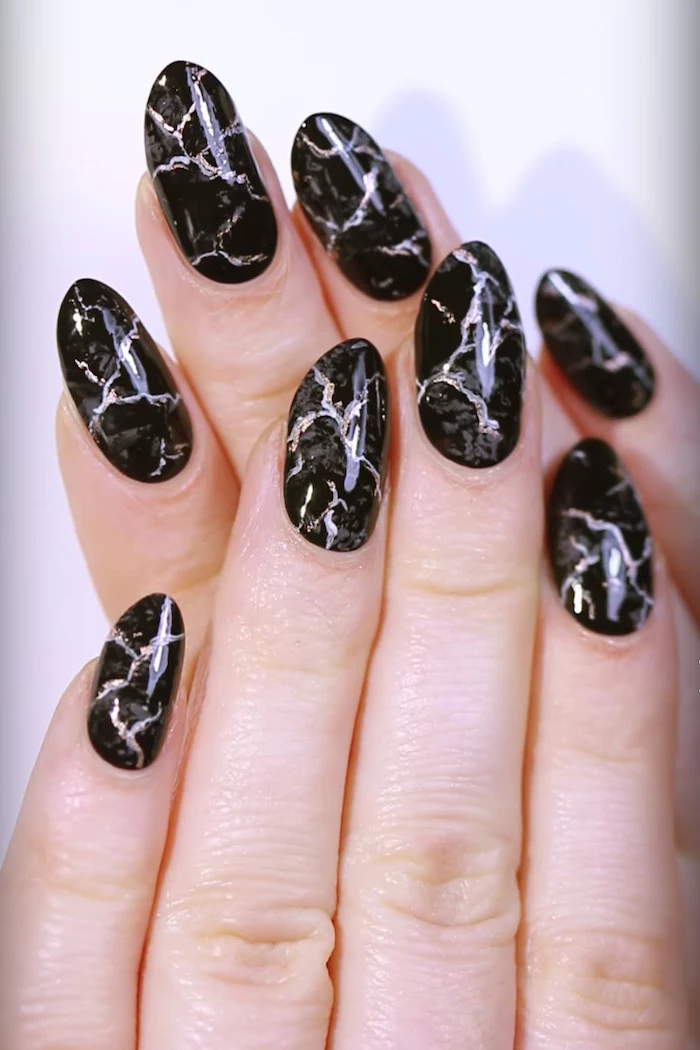
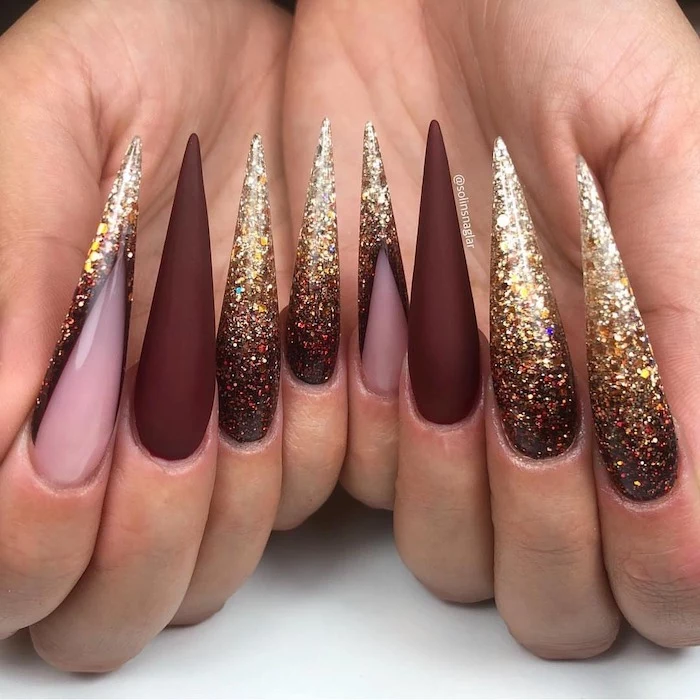
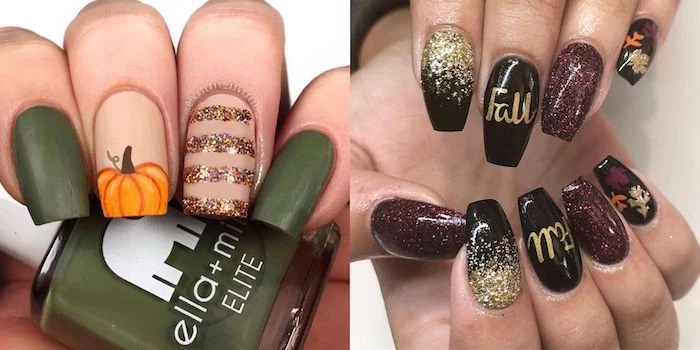
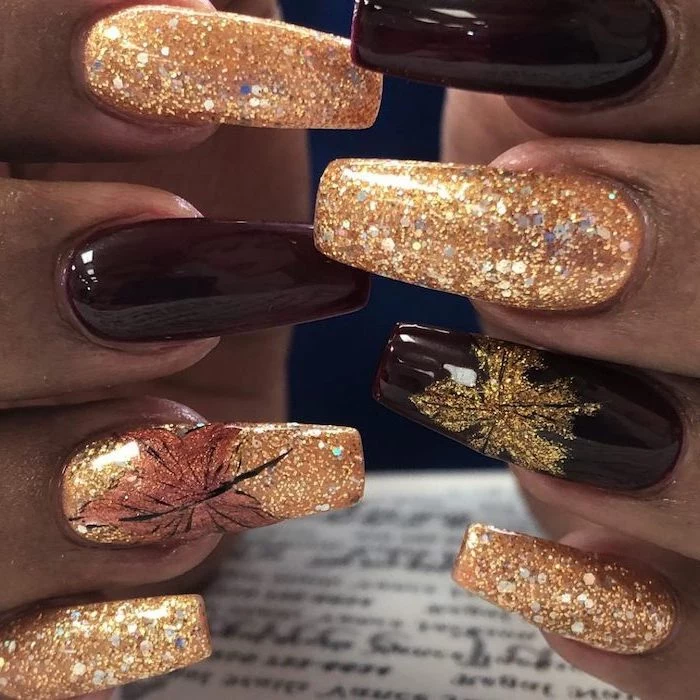
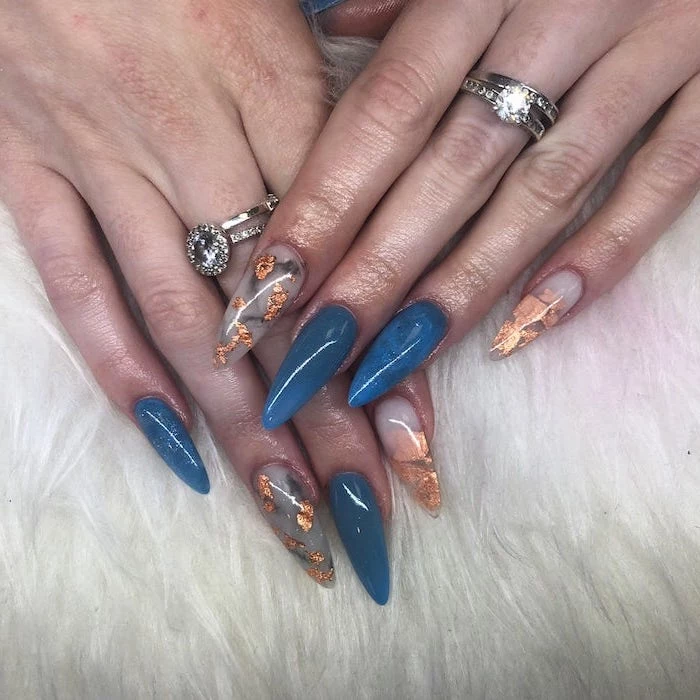
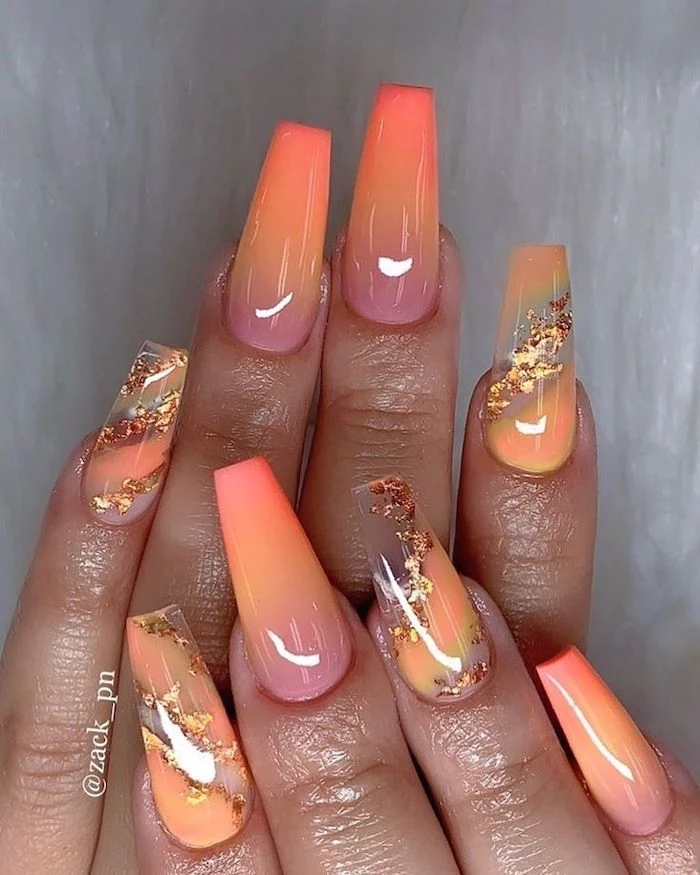
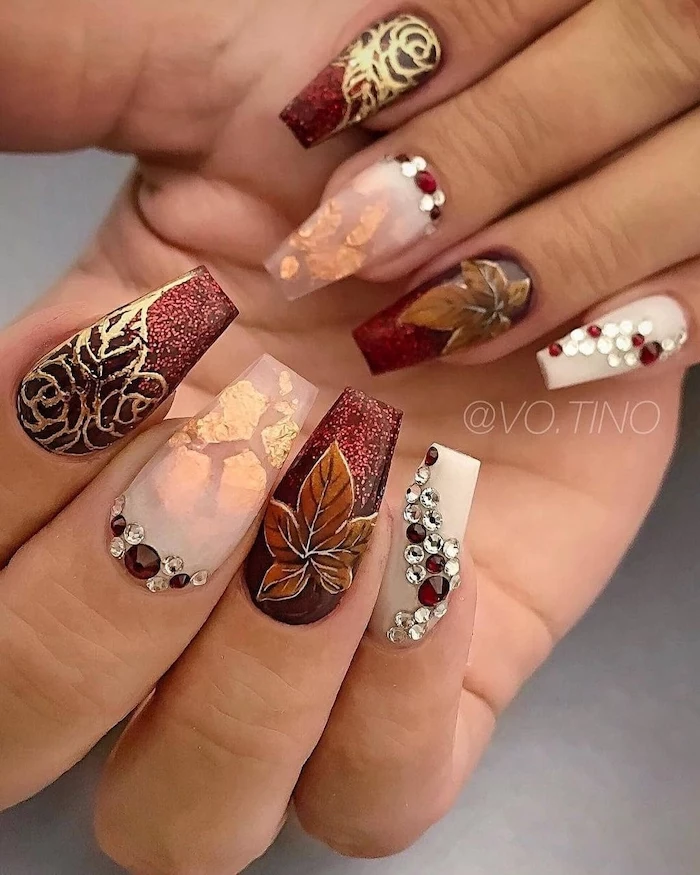
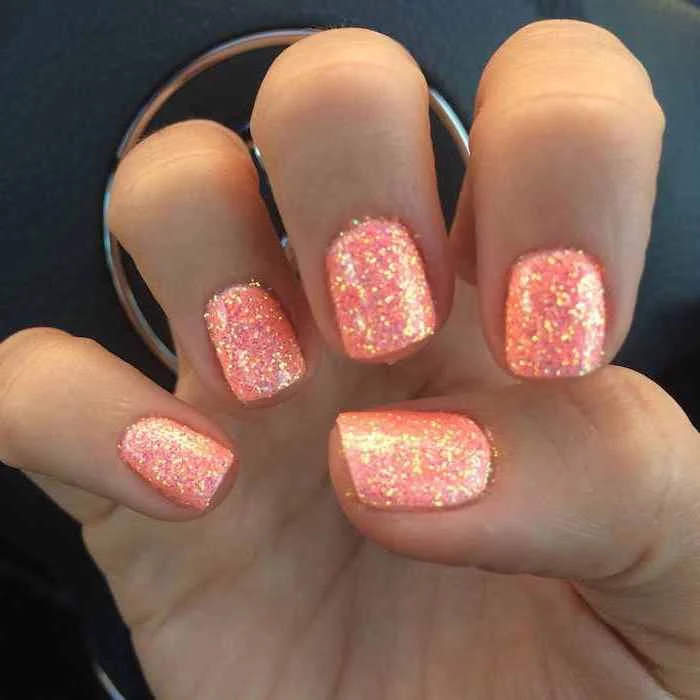
- A single nail painted with a complementary glitter polish, like a gold glitter with a burgundy mani.
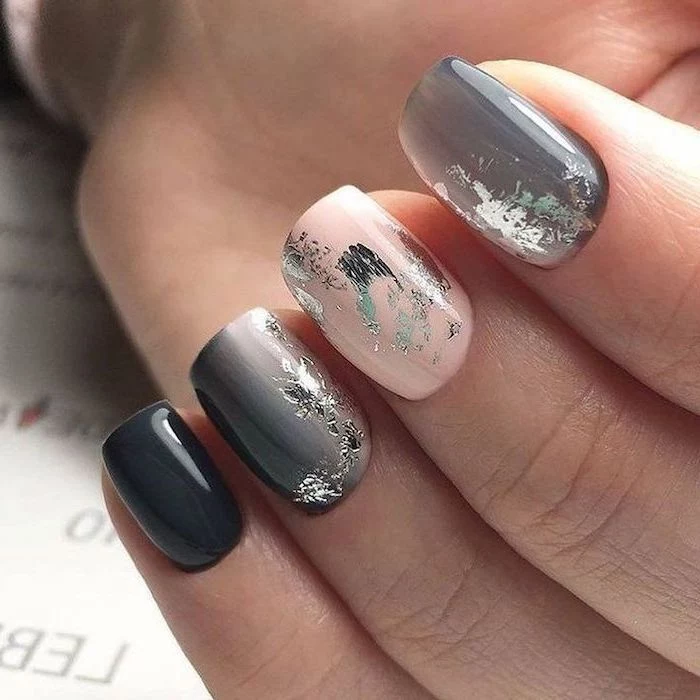
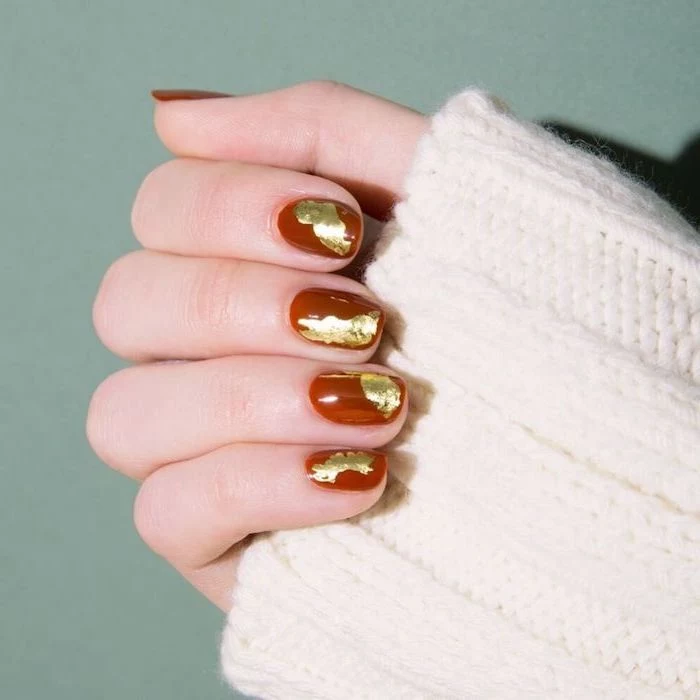
- Using tweezers to place a tiny flake of gold leaf onto a still-tacky top coat before sealing it in.
- A simple, contrasting dot at the base of the nail using a toothpick or dotting tool.

Common mistake: Vigorously shaking your polish bottle right before application. This is the number one cause of those tiny, annoying air bubbles that ruin a smooth finish. Instead, gently roll the bottle between your palms for about 30 seconds. This mixes the pigment perfectly without incorporating air.
As the air gets drier, your cuticles need extra love. Daily care is what separates a good manicure from a great one.
- Apply a nourishing cuticle oil every night before bed. CND’s SolarOil is a cult classic for a reason.
- Gently push back cuticles with a rubber-tipped pusher after a shower when they are soft.
- Avoid cutting your cuticles at home, as this can lead to irritation and infection.

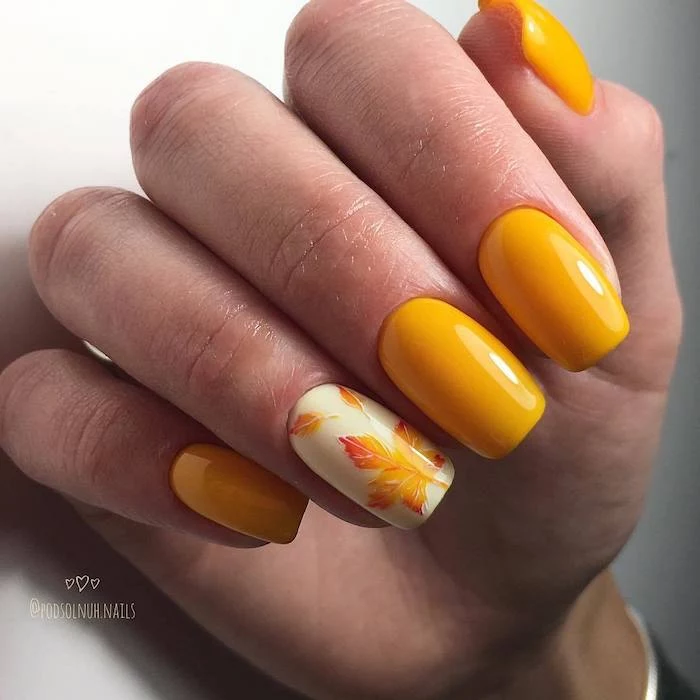
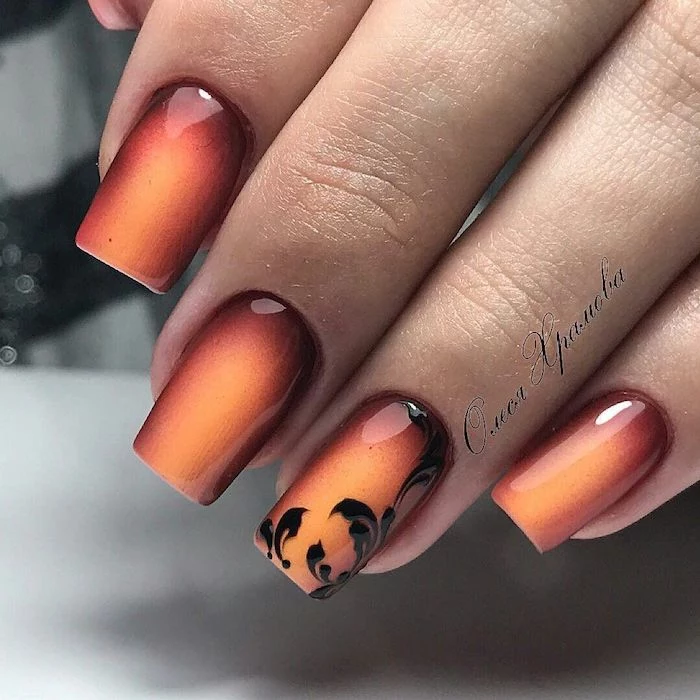
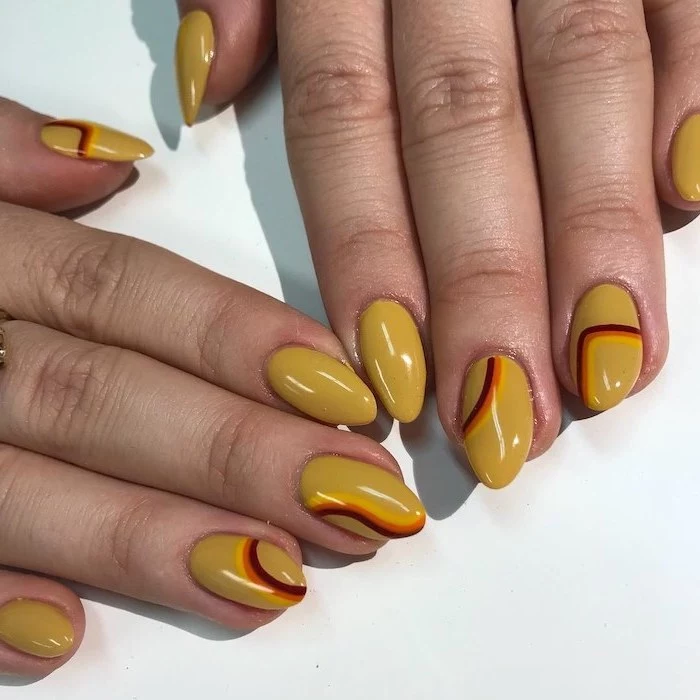
Can I still wear vibrant shades in autumn?
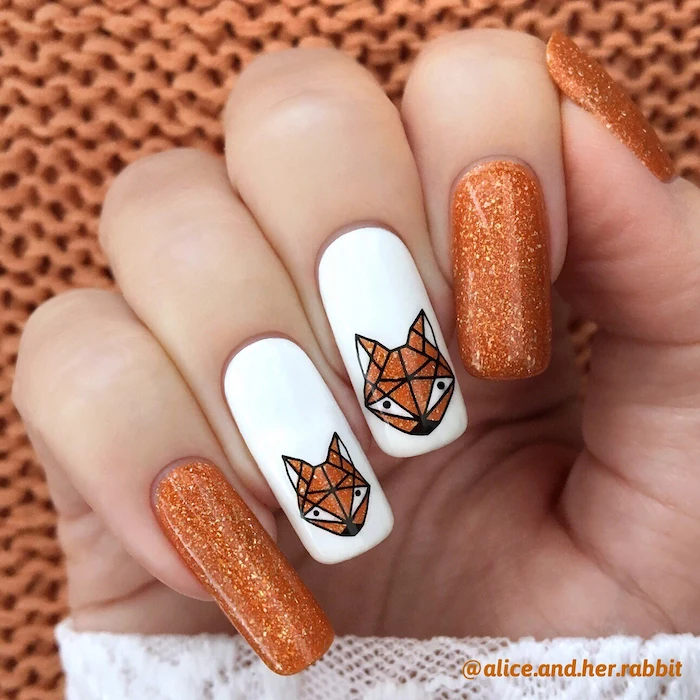
Absolutely! The key is to shift the tone. Swap a summer’s bright, grassy green for a deep, mysterious emerald or forest green. Instead of a neon coral, opt for a rich, spicy terracotta or burnt sienna. It’s not about abandoning color, but choosing a version with more depth and saturation to match the season’s mood.
Your nails are porous. When you shower or wash dishes, they absorb water and expand slightly. If you polish them immediately after, the polish can chip and flake as the nails dry and contract back to their normal size.
For a longer-lasting manicure, wait at least 30-60 minutes after significant water exposure before you start painting.

Go beyond a simple glossy finish and explore fall’s textural playground. A matte top coat, like the one from Essie, can instantly transform a deep navy or plum into a velvety, sophisticated statement. It’s a simple swap that completely changes the character of your chosen color.
- They’re easier to apply with a clean finish.
- The color appears richer and more even.
- Your polish bottle lasts longer without getting thick and goopy.
The secret? Proper storage. Keep your polishes upright in a cool, dark place (like a dresser drawer, not your steamy bathroom) to preserve the formula’s consistency and pigment integrity.

Seche Vite Top Coat: The industry standard for a rock-hard, glossy finish that dries in minutes. Its formula penetrates through the polish to the base coat, creating a single solid coating.
OPI Plumping Top Coat: Gives a gel-like volume and high-gloss shine without a UV lamp. It makes colors appear richer and adds a cushiony, protective layer.
Choose Seche Vite for speed, or the OPI Plumping for a more luxurious, voluminous look.
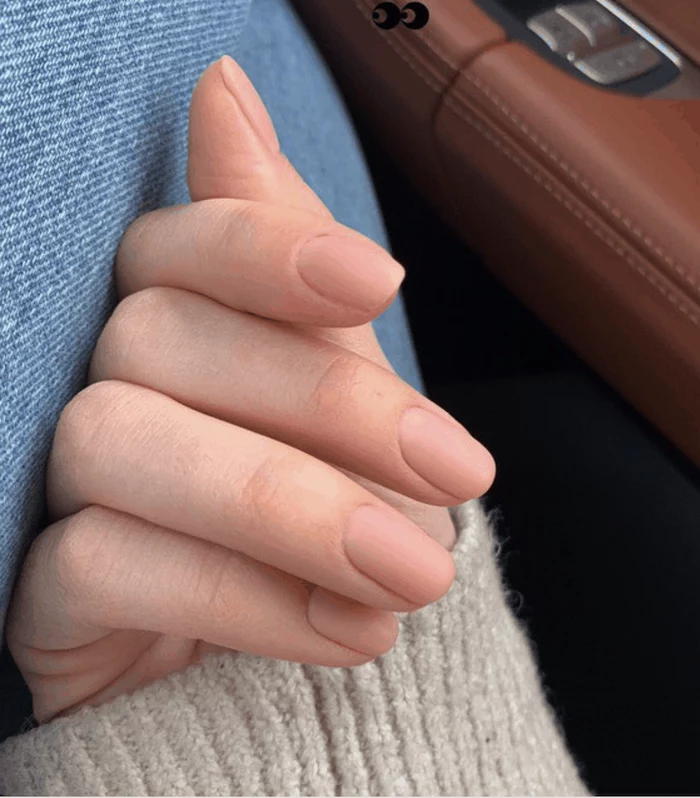
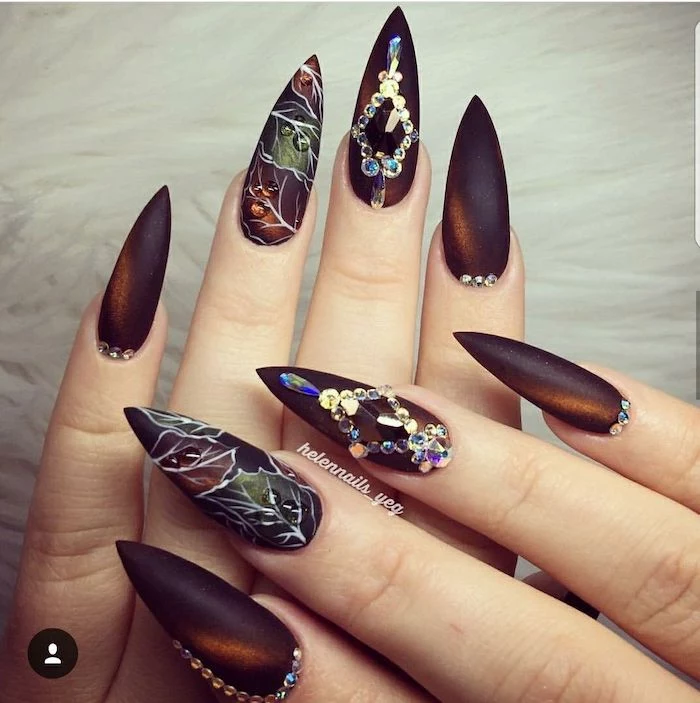
For a look that’s both cozy and chic, consider the shape of your nails. While sharp stilettos are always dramatic, softer shapes like ‘squoval’ (square-oval) or almond are particularly well-suited for fall. They are less likely to snag on your favorite chunky sweaters and cardigans, making your manicure both beautiful and practical.
Found a yellow tinge on your nails after removing that dark polish? Don’t panic. It’s often just surface staining, especially if you skipped your base coat.
A quick fix is to gently buff the nail surface with a fine-grit buffer. For tougher stains, you can create a paste with lemon juice and baking soda, let it sit on your nails for a few minutes, and then gently scrub with a soft nail brush.
Important note: Apply your polish in thin, even coats. It’s a common temptation to apply one thick coat to get opaque color faster, but this is a recipe for disaster. Thick coats take much longer to dry, are prone to smudging, and are more likely to peel off in sheets. Two to three thin coats will always look better and last longer than one thick one.
Want to try the chrome or
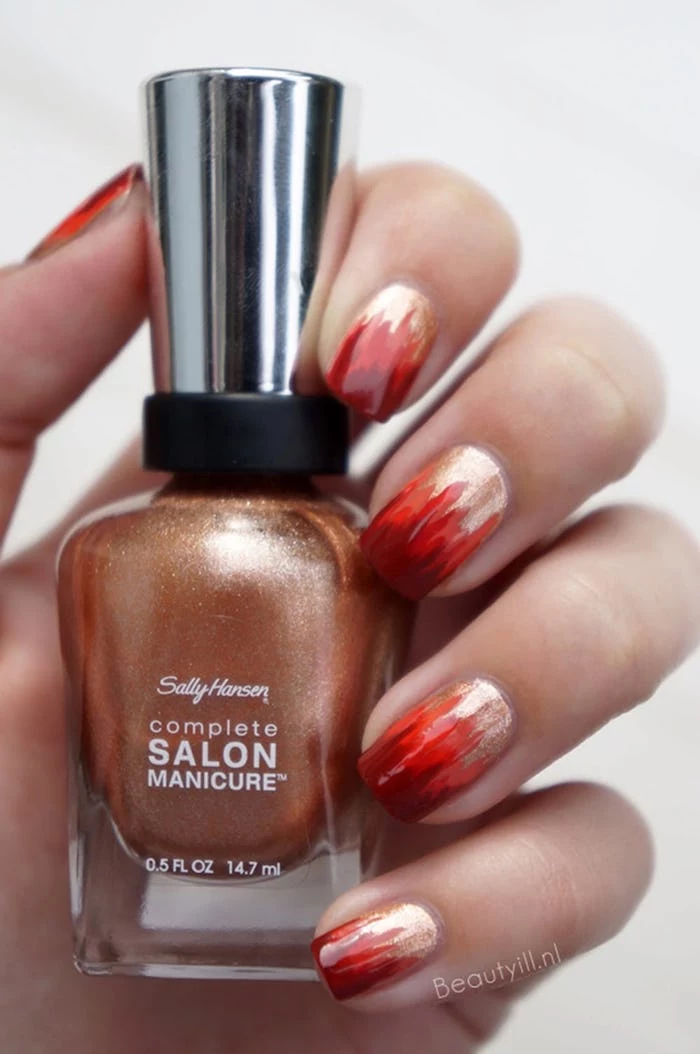
Can drugstore polishes really compete with salon brands for fall?
Yes, especially when you know where to look. Brands like Sally Hansen, specifically the Color Therapy line, offer fantastic fall shades infused with argan oil that are surprisingly nourishing. Similarly, the Expressie line by Essie features a quick-dry formula and an angled brush, perfect for an impeccable autumn manicure on the go without the high price tag.

- A flawless, even color application.
- A manicure that looks perfect for over a week.
- Reduced risk of chipping and peeling.
The key? A mid-week refresh. Around day 3 or 4, simply apply a fresh layer of your favorite fast-drying top coat. This adds a new layer of protection and shine, reviving your manicure and helping it withstand daily wear and tear.
Create a mini-sanctuary for your at-home manicure. Light a spiced candle (think cinnamon or clove), put on a relaxing playlist, and pour yourself a warm drink. The ritual is just as important as the result. Turning your manicure into a mindful, cozy experience makes it feel less like a chore and more like a luxurious act of self-care perfectly suited for the autumn season.
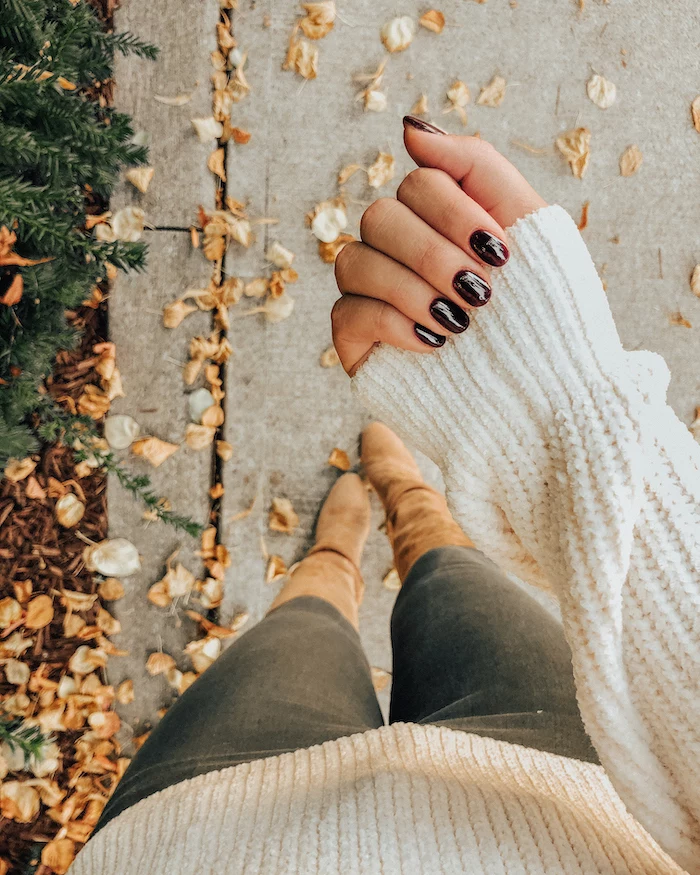
A study on color psychology found that deep, earthy tones like brown, dark green, and burgundy can evoke feelings of stability, comfort, and grounding.
So, that cozy, secure feeling you get when you look at your freshly painted oxblood nails isn’t just in your head—it’s a subconscious response to colors that echo the stability of the earth and the harvest season.


