Want to Draw Lifelike Butterflies? Here’s the Secret.
I’ve filled more sketchbooks than I can count over the years, trying to capture the little details of the natural world. I’ve drawn towering trees and the tiny mosses growing on their bark. But honestly, nothing has fascinated me more than butterflies. I still remember the first time I tried to get one right. I was sitting in a field, trying to sketch a little blue butterfly that just wouldn’t stay still. My drawings were… well, they were awful. Stiff, clumsy, and totally missing the delicate energy of the real thing. It was so frustrating.
In this article
But that frustration taught me the most important lesson of all: to draw a butterfly well, you have to actually understand it first. It’s not just about copying pretty wing patterns. It’s about knowing how the body is built, where the wings connect, and why they flash with color. It’s about appreciating the engineering of this tiny, living machine.
This guide is everything I’ve learned from all that trial and error. We’re going to skip the basic, follow-the-numbers stuff and get into what really makes a butterfly drawing look convincing and alive. We’ll look at their anatomy, the best tools for the job (including budget-friendly options!), and how to give your art that spark of life. This isn’t about one single method—it’s about giving you the knowledge to find your own style.
First Things First: Understanding Your Subject
Before you even think about picking up a pencil, let’s talk about what you’re drawing. So many beginners just focus on the wings, and their drawing ends up looking like a flat sticker. A truly great butterfly drawing feels three-dimensional, and that all starts with its basic body structure. Seriously, every artist I’ve ever taught starts here. It’s the difference between an amateur sketch and believable art.
The Three-Part Body
A butterfly’s body is split into three simple sections. Getting these proportions right is your foundation.
- The Head: Think of this as the command center. It holds two big compound eyes, which you can just suggest with two hemispheres on either side of the head—no need to draw every tiny lens! It also has the proboscis, that long, straw-like tongue it uses to drink nectar. If it’s resting, the proboscis is usually coiled up tight like a spring. Oh, and don’t forget the antennae! Butterfly antennae have a little club or knob at the very tip, which is a key way to tell them apart from moths, whose antennae are often feathery.
- The Thorax: This is the powerhouse, the sturdy middle section where all the magic happens. It’s often a bit fuzzy and robust. Here’s a super common mistake to avoid: the wings and legs connect to the thorax, NOT the abdomen. Getting this right instantly makes your drawing look more structurally sound. Think of it as the anchor point for everything else.
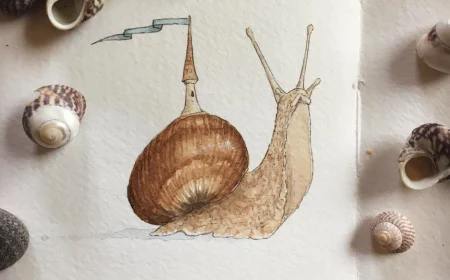
- The Abdomen: This is the long, segmented tail end. It’s usually more slender than the thorax and tapers toward the end. The position of the abdomen can add a surprising amount of life to your drawing. If it’s straight, the butterfly might look like it’s resting. But if you give it a slight curve, it suddenly feels like it’s in motion or balancing on a flower.
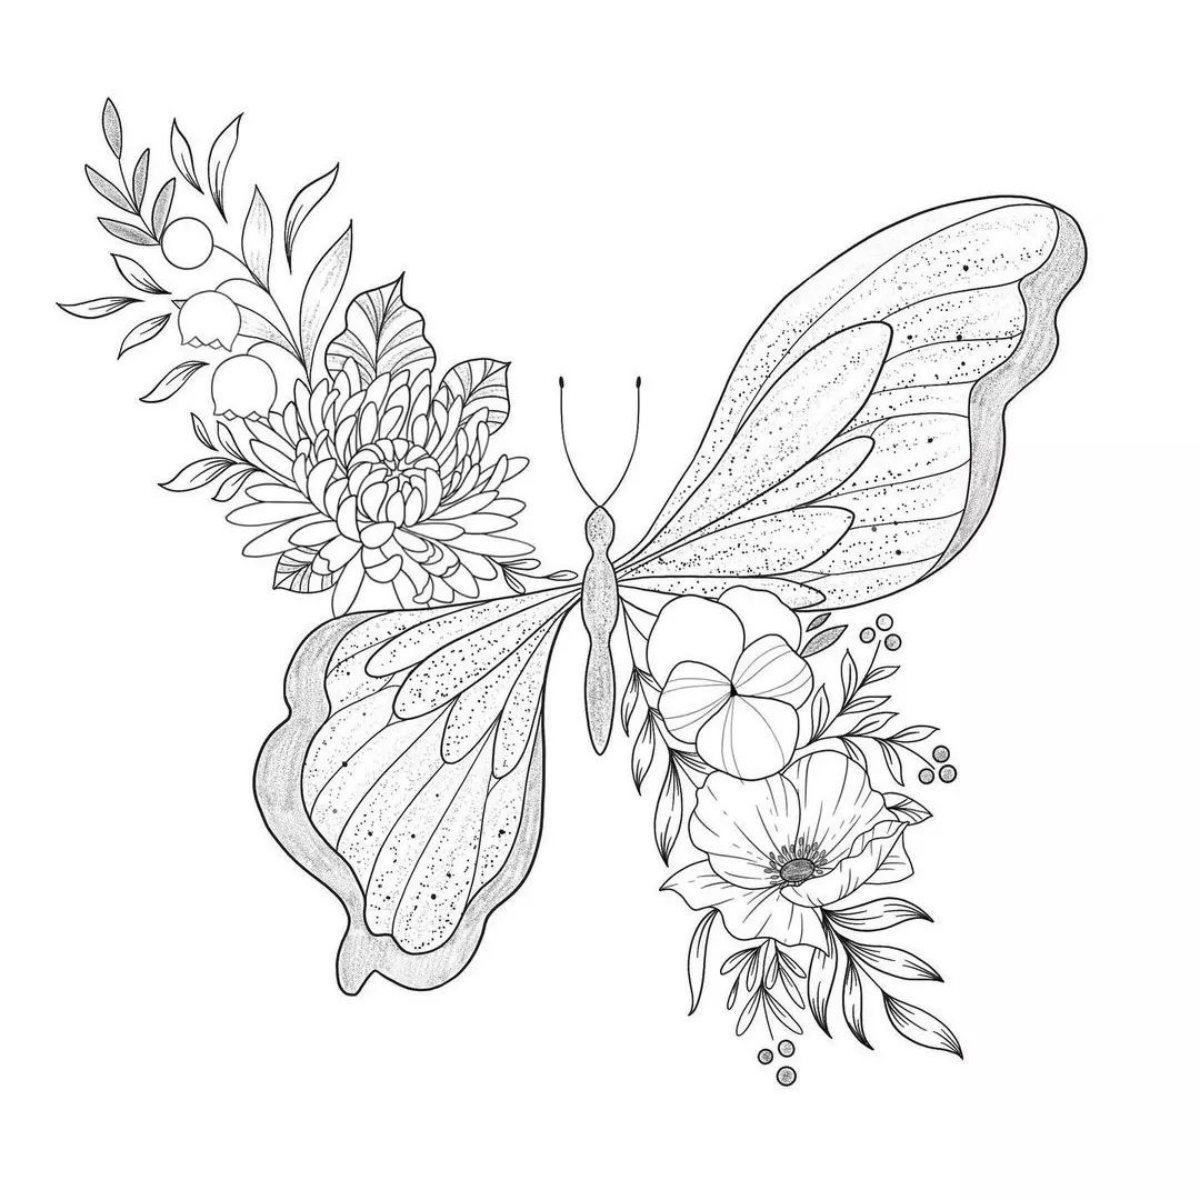
The Architecture of the Wings
Butterfly wings aren’t just flat shapes; they’re complex, beautiful structures. They are made of a thin membrane stretched over a framework of veins, kind of like a kite. The stunning colors? Those are created by thousands of microscopic, overlapping scales. Understanding this helps you draw them with more depth.
- Forewings & Hindwings: Every butterfly has four wings: two upper forewings and two lower hindwings. The forewings are typically larger and more triangular, while the hindwings are rounder. When a butterfly is resting, you’ll often see the hindwings tucked just slightly underneath the forewings.
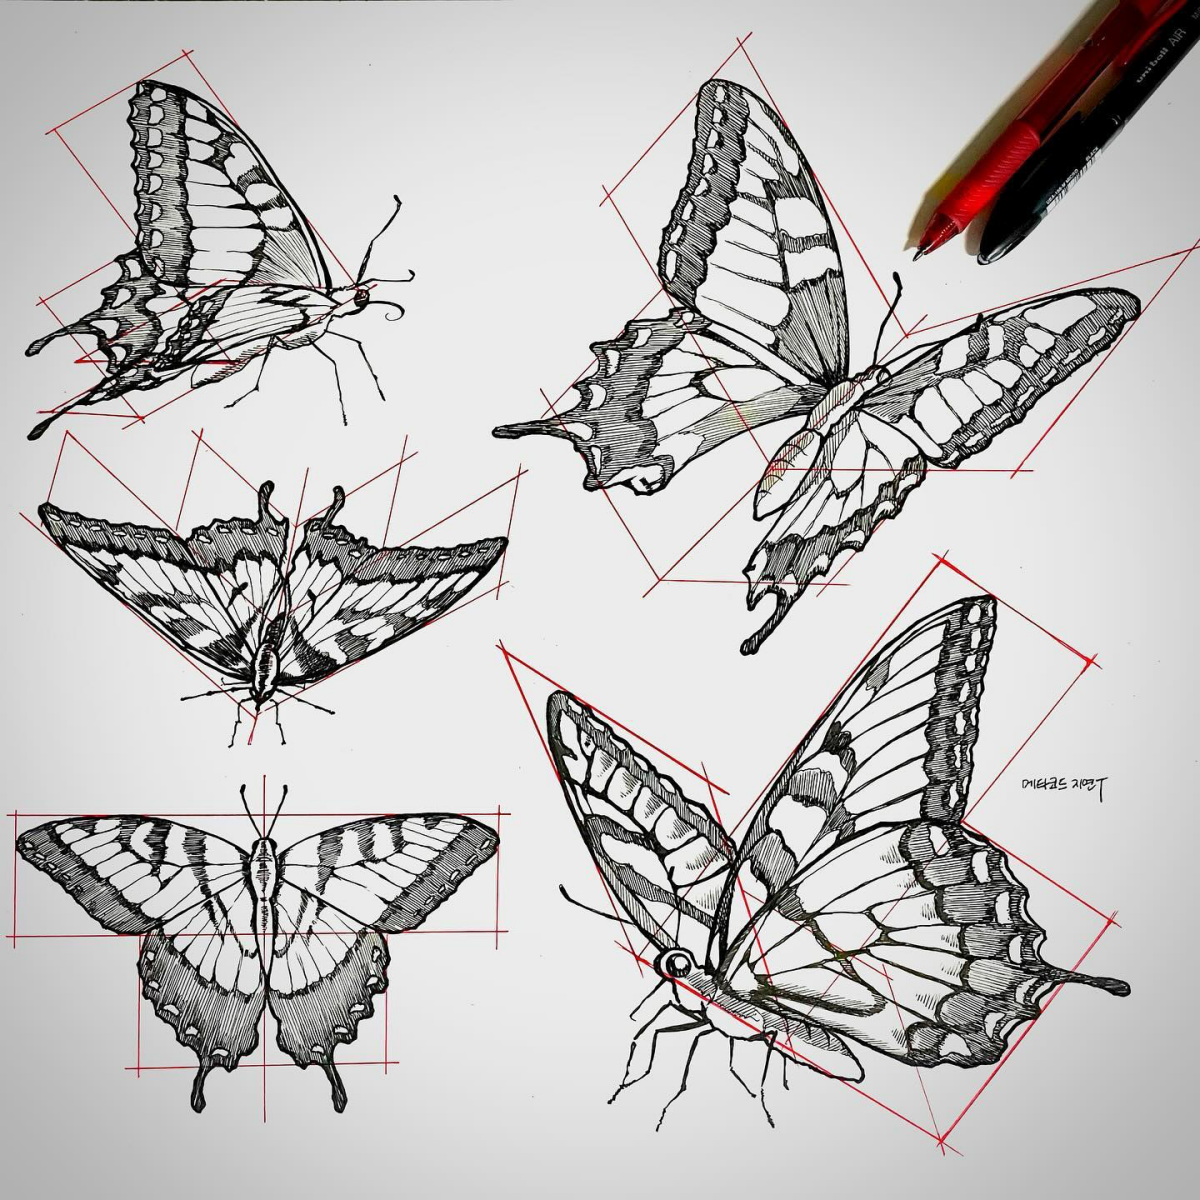
- The Symmetry Challenge: Butterfly wings are almost perfectly symmetrical, which is a huge challenge when you’re drawing freehand. For beginners, the easiest trick is to lightly fold your paper in half, draw one side, and then use a sunny window or a lightbox to trace it onto the other side. Don’t want a crease in your nice paper? No problem. Use a ruler and make tiny tick marks. Measure from the center line of the body to the top tip of the left wing, then make a matching tick mark on the right side. Do this for the widest and lowest points, and you’ll have a balanced guide to work from.
- Veins and Cells: You don’t need to draw every single vein, but suggesting the main ones branching out from the thorax will give your wings a sense of realism. Notice how the spots and patterns on a wing often follow the structure of these veins. Once you see it, you can’t unsee it, and your drawings will improve immediately.
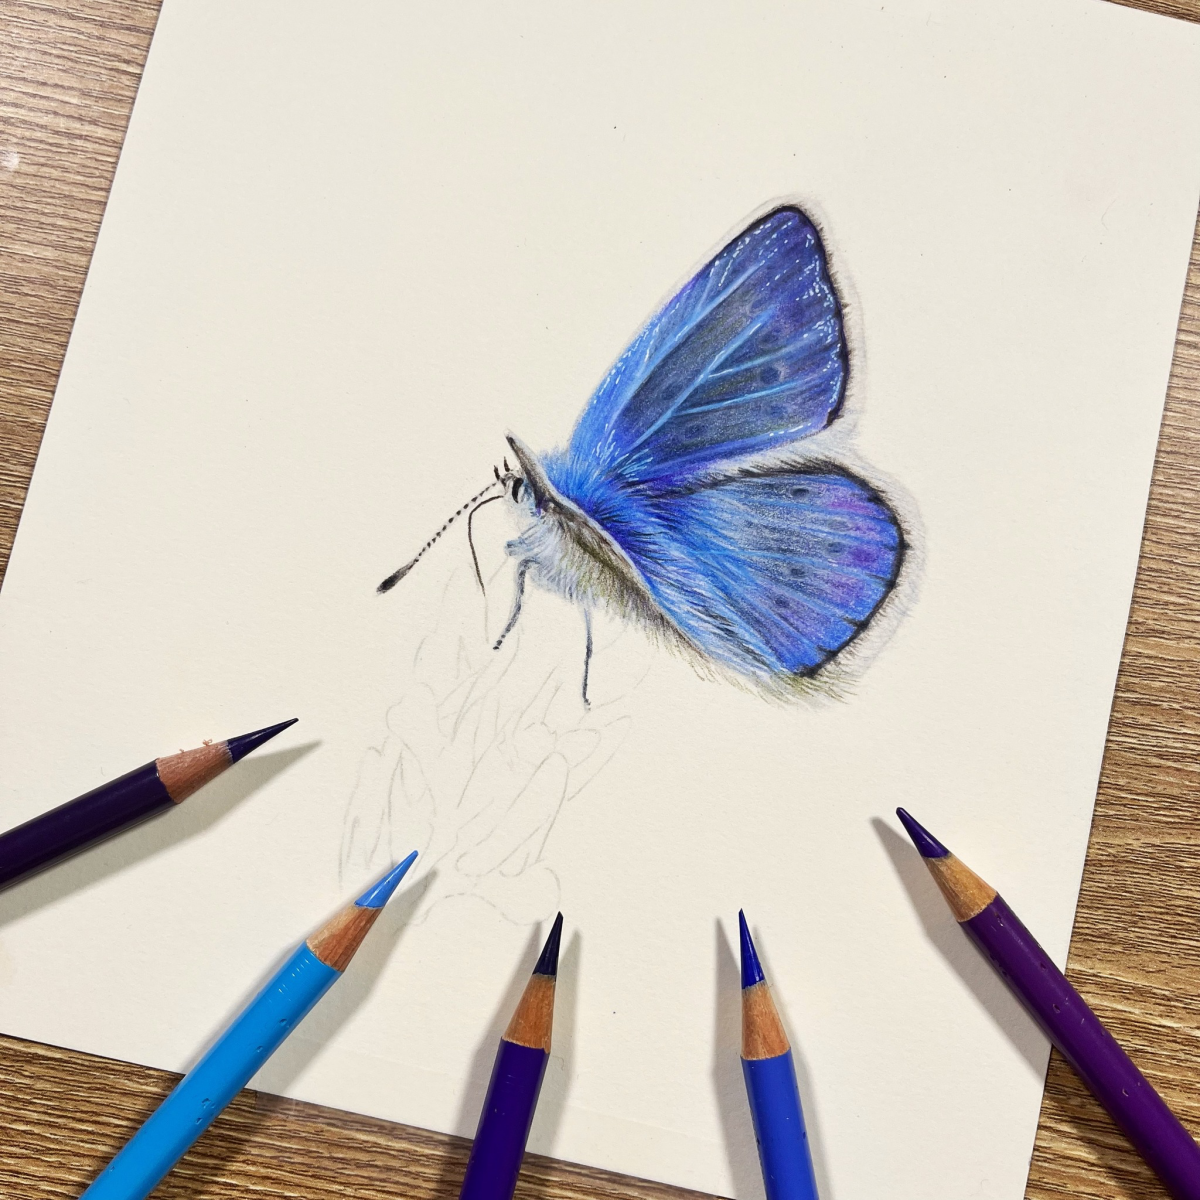
- The Magic of Iridescence: Some butterflies have that shimmery, color-shifting quality. That’s because the color isn’t a pigment, but light reflecting off the complex structure of the scales. Trying to capture this is an advanced skill, but it’s fun to try. With colored pencils, you can do it by lightly layering unexpected colors—like blues, purples, and even a hint of green. With watercolor, you can add a touch of pearlescent paint or drop different colors into a wet area and let them mingle.
The Artist’s Toolkit: Materials That Work
The right tool can make all the difference, but you don’t have to break the bank to get started. I’ve worked with just about everything, and each medium offers a unique feel. Here’s a breakdown of my favorites, from budget-friendly to pro-level.
For Foundation and Study: Graphite Pencils
Every artist needs to be comfortable with graphite. It’s perfect for planning and detailed black-and-white studies. I’d suggest having a couple of different pencils. A hard pencil, like a 2H, is great for light initial sketches that are easy to erase. A softer pencil, like a 2B or 4B, is what you’ll use for shading and dark details.
Beginner’s Shopping List: You can get a fantastic starter kit for under $15. Just grab a 2H pencil, a 2B pencil, a kneaded eraser (the kind that feels like putty), and a basic sketchbook from any art supply store like Michael’s or online.
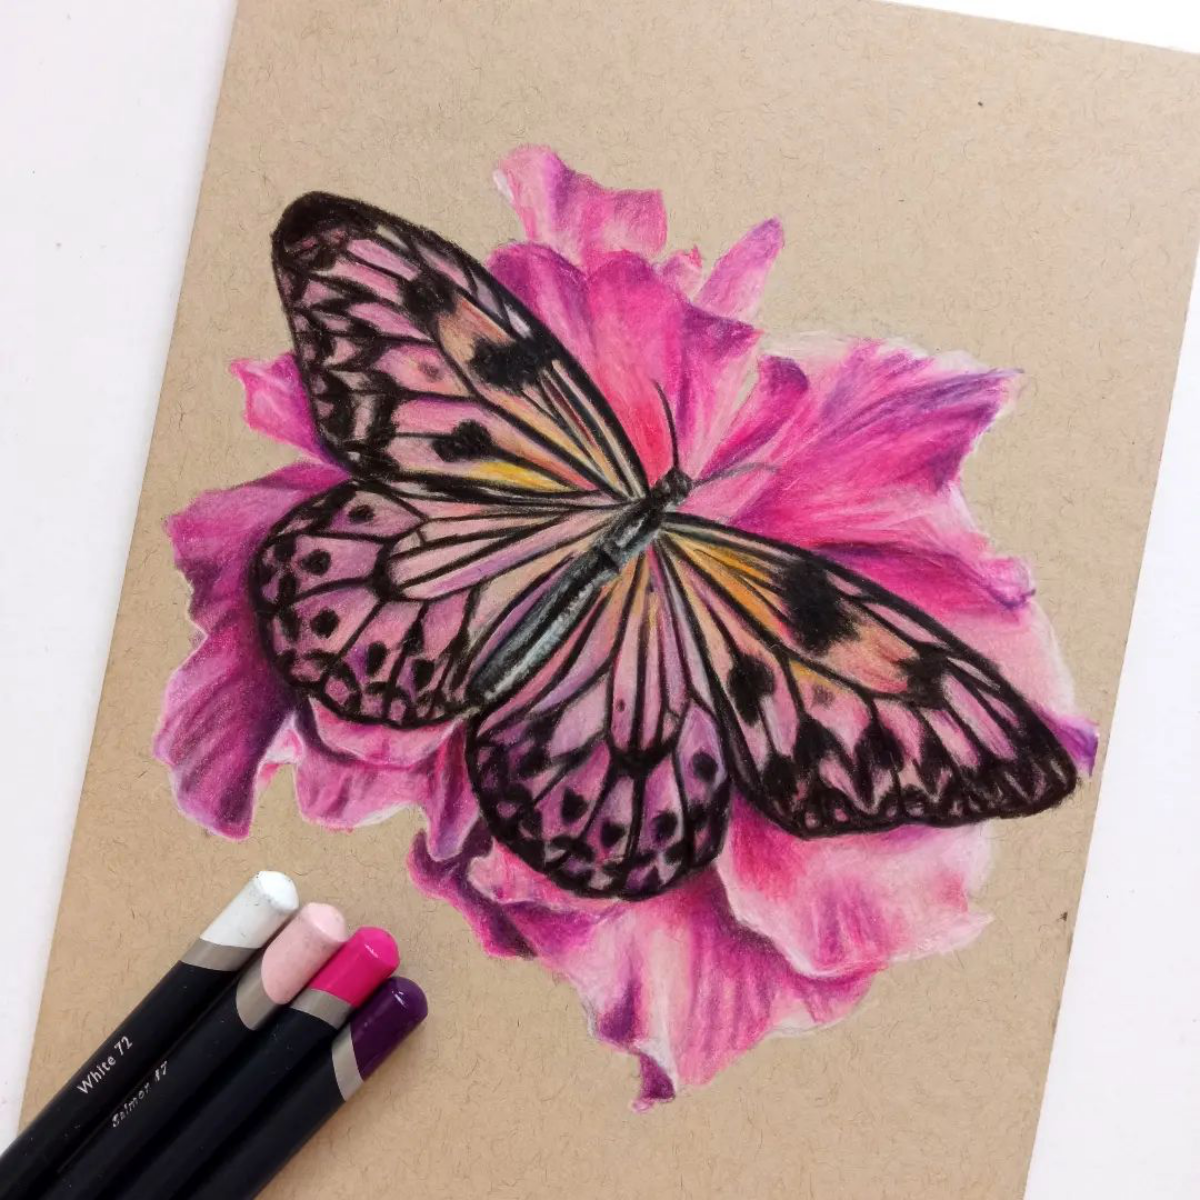
For Detail and Vibrant Color: Colored Pencils
If you love detail, colored pencils give you amazing control. Pro-grade, oil-based pencils are incredible for layering, but they can be pricey (sometimes $50-$150 for a good set). Wax-based pencils are a bit softer and also blend beautifully.
Budget-Friendly Tip: You don’t need the expensive set to start! Brands like Arteza or Castle Arts make excellent, vibrant colored pencil sets that you can often find for between $20 and $40. They’re a fantastic way to get into color without a huge investment.
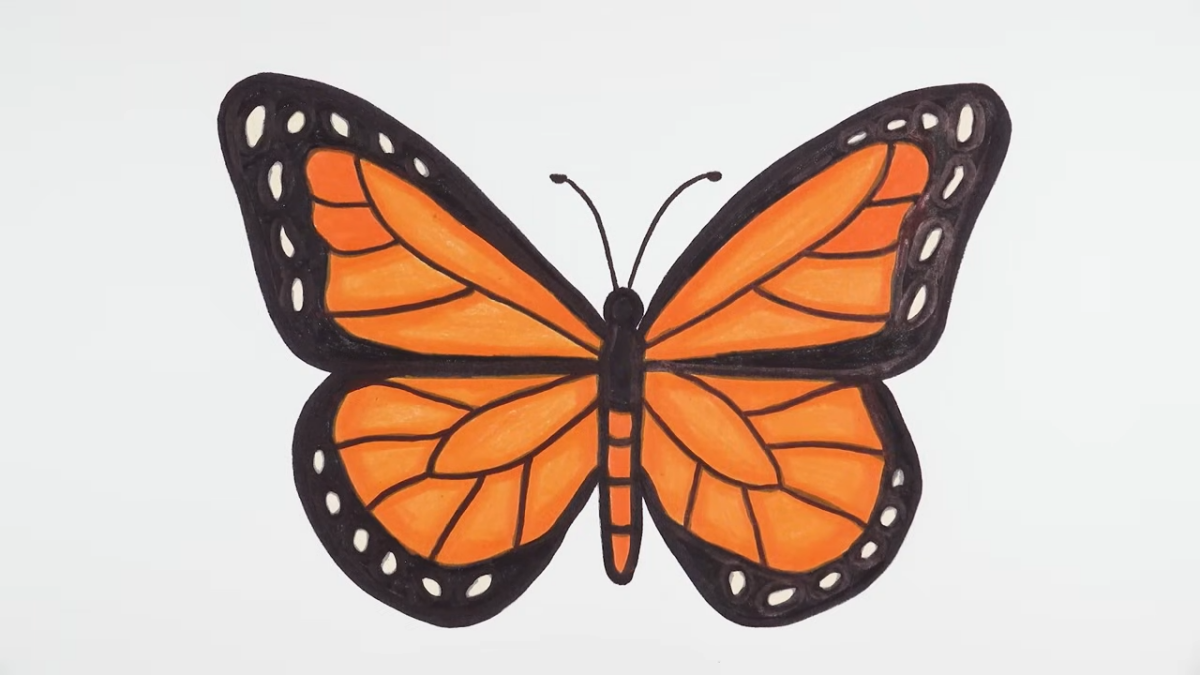
Pro Technique: The secret is light layering. Don’t press hard. Build up color slowly. For an orange wing, you might start with a layer of yellow, add light orange, then a deeper orange, and finish with hints of red in the shadows. To get that smooth, almost painted look, you can burnish by going over it with a white or colorless blender pencil.
For Life and Vibrancy: Watercolors
Watercolor is my personal favorite for capturing the light and energy of a butterfly. It can be a little tricky, but the results are stunning. The most important thing is your paper—you need at least 140 lb (300 gsm) cold-press watercolor paper, or it will buckle and warp.
Heads up! To paint those tiny white spots on a butterfly’s wing, don’t try to paint around them. Use masking fluid. It’s a liquid rubber you paint on the spots you want to keep white. Let it dry, paint your colors right over it, and then gently rub it off when you’re done. Crisp, perfect white spots every time.
For Bold, Graphic Styles: Ink
Ink is perfect for creating high-contrast, classic illustrations. For clean lines, technical pens like Microns are fantastic. For a more expressive feel, a traditional dip pen with a flexible nib lets you vary your line width with pressure. To create shading, you can’t blend ink. Instead, you use techniques like stippling (making tons of tiny dots) or cross-hatching (drawing overlapping sets of parallel lines). It’s time-consuming, but the result is beautiful.
Your First 5-Minute Butterfly Sketch (A Quick Win!)
Feeling overwhelmed? Let’s do something easy right now to build your confidence. Grab a pencil and a piece of scrap paper.
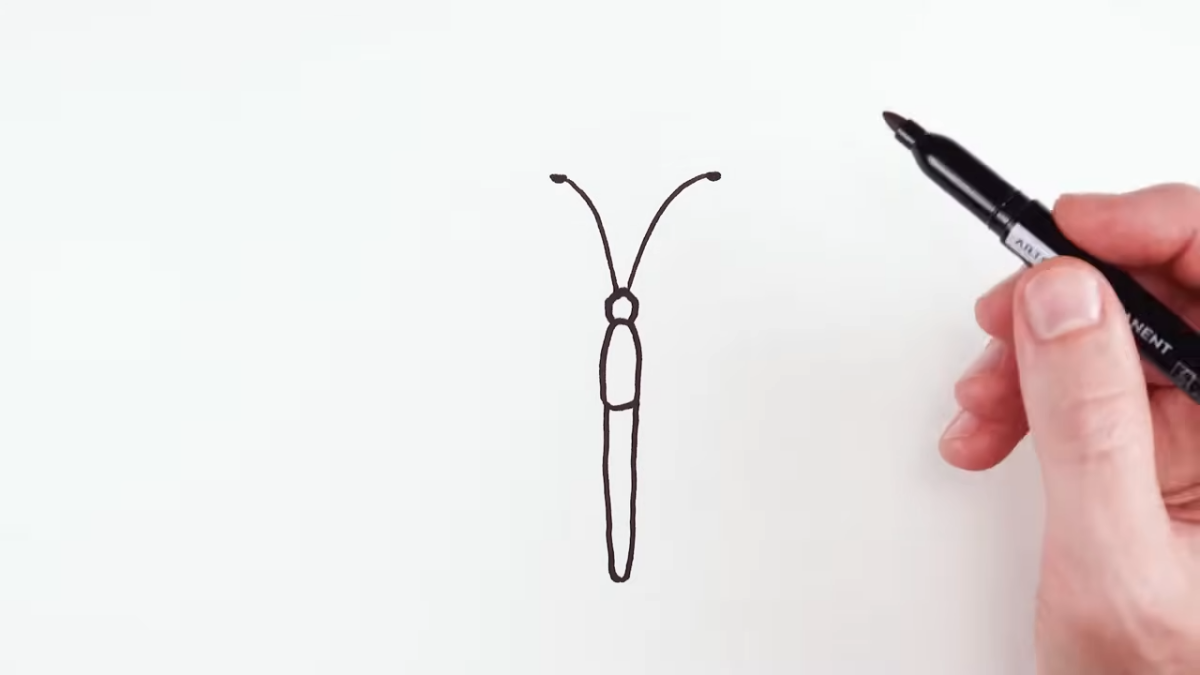
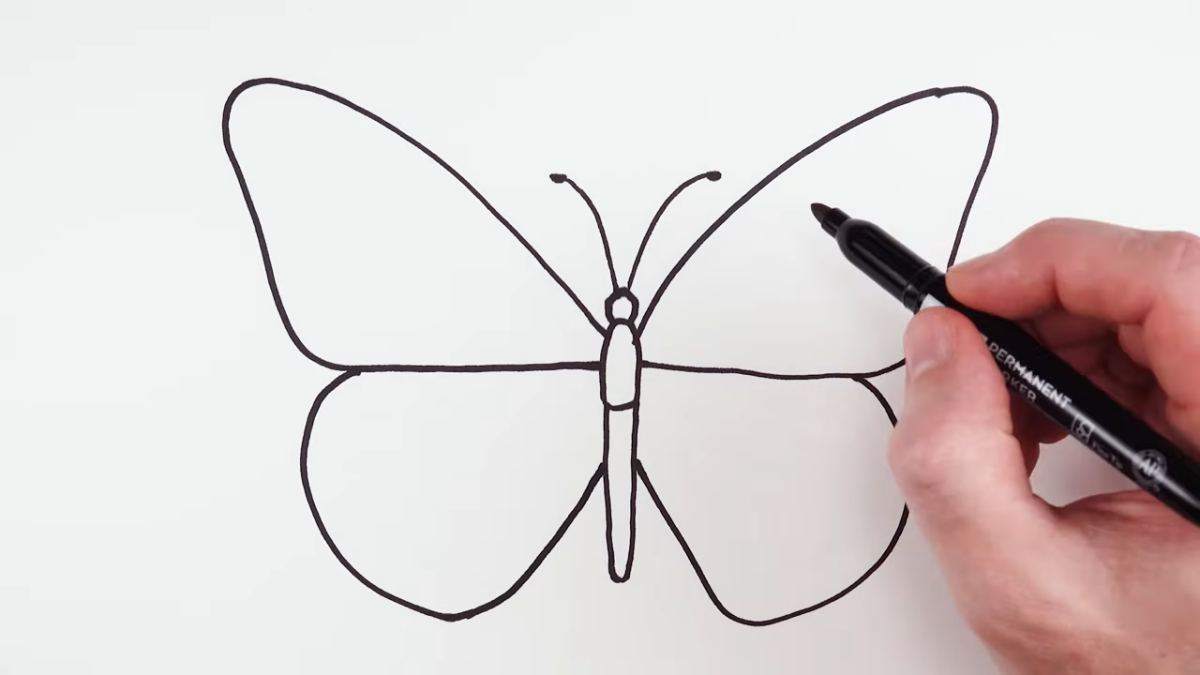
- Draw a small, sturdy oval for the thorax (the middle section).
- Attach a small circle on top for the head. Add two tiny sticks with dots on the end for antennae.
- Draw a long, thin teardrop shape attached to the bottom of the thorax for the abdomen.
- From the top-sides of the thorax, sketch in two simple, large, rounded triangle shapes for the forewings.
- From the bottom-sides of the thorax, add two smaller, rounder shapes for the hindwings.
That’s it! It won’t be a masterpiece, but you’ve just correctly mapped out the fundamental structure of a butterfly. You’ve established the right proportions and connection points. Feels good, right?
A Step-by-Step Process for a Finished Piece
Whether you’re using a pencil or a paintbrush, the core process is the same. Here’s how I approach a drawing from start to finish.
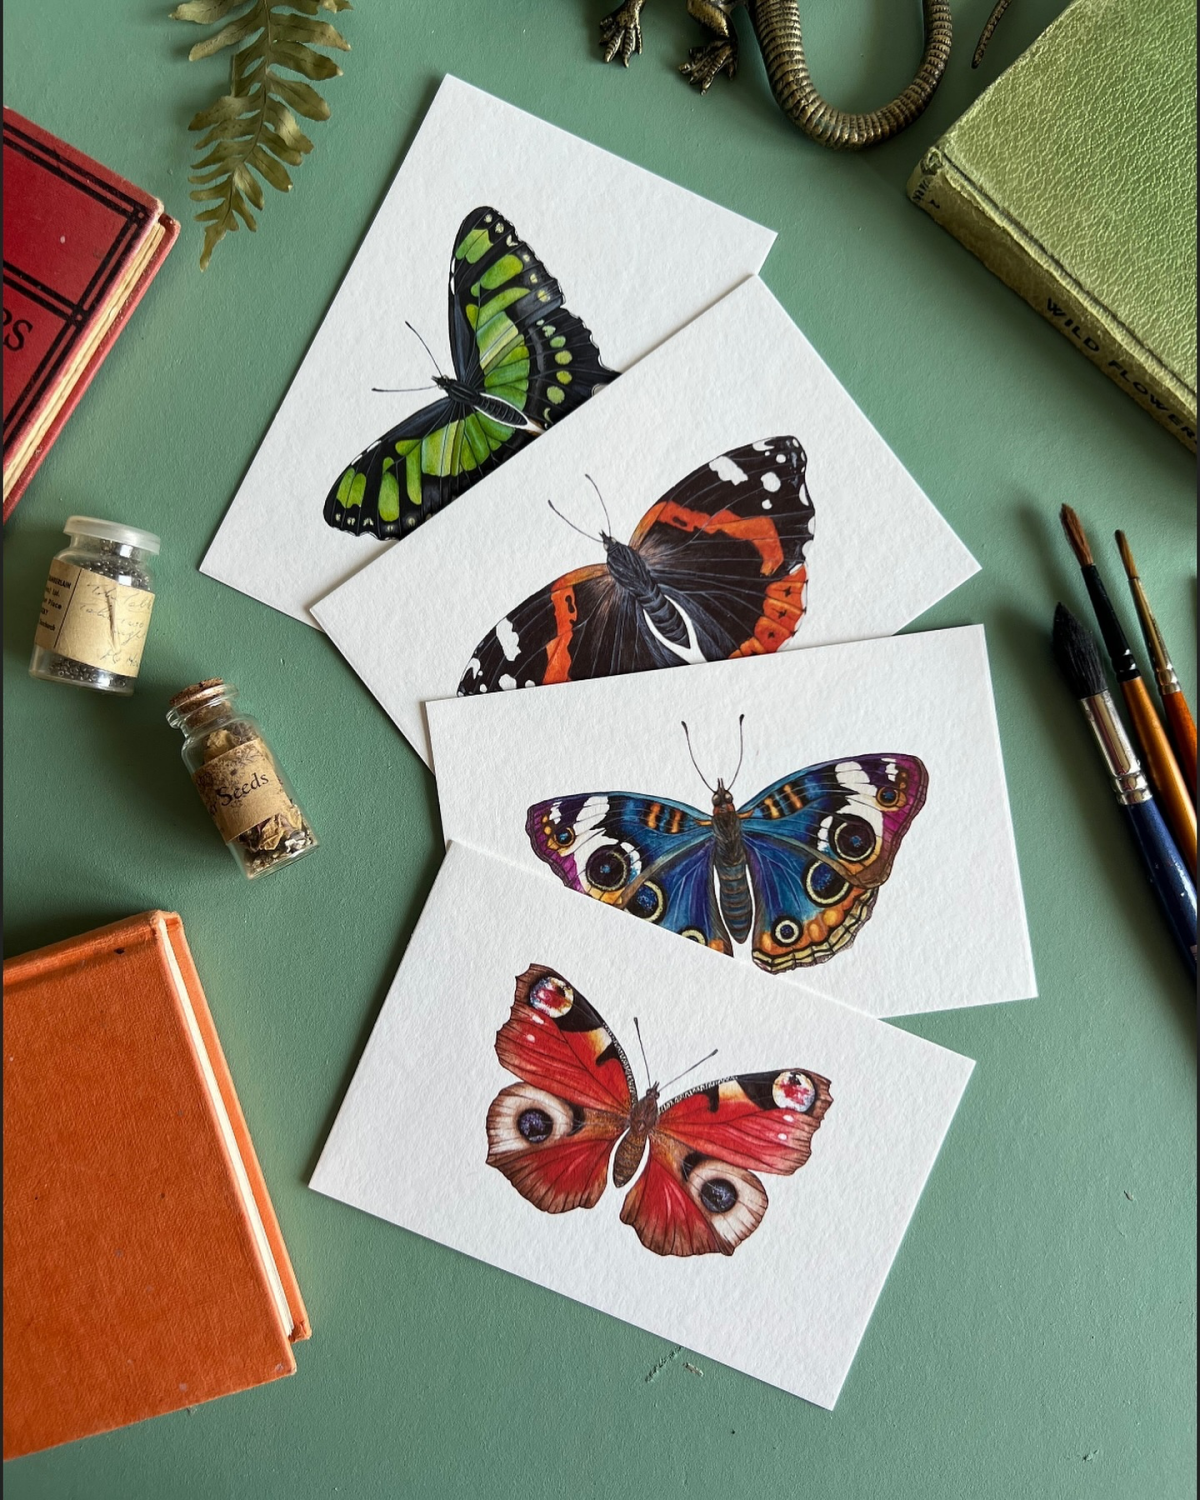
- Gather Your References: Don’t draw from memory! Work from high-quality photos. Look for pictures with good lighting and sharp details. Free stock photo sites like Pexels and Unsplash are amazing resources—just search for “butterfly macro.” Try to find photos of both the top and underside of the wings, as the patterns can be completely different.
- Light Construction Sketch: Using your hard (2H) pencil, lightly draw the basic shapes and a central line for the body, just like in our 5-minute exercise. Map out the general shape of the wings. This is your blueprint. Keep it light, keep it loose.
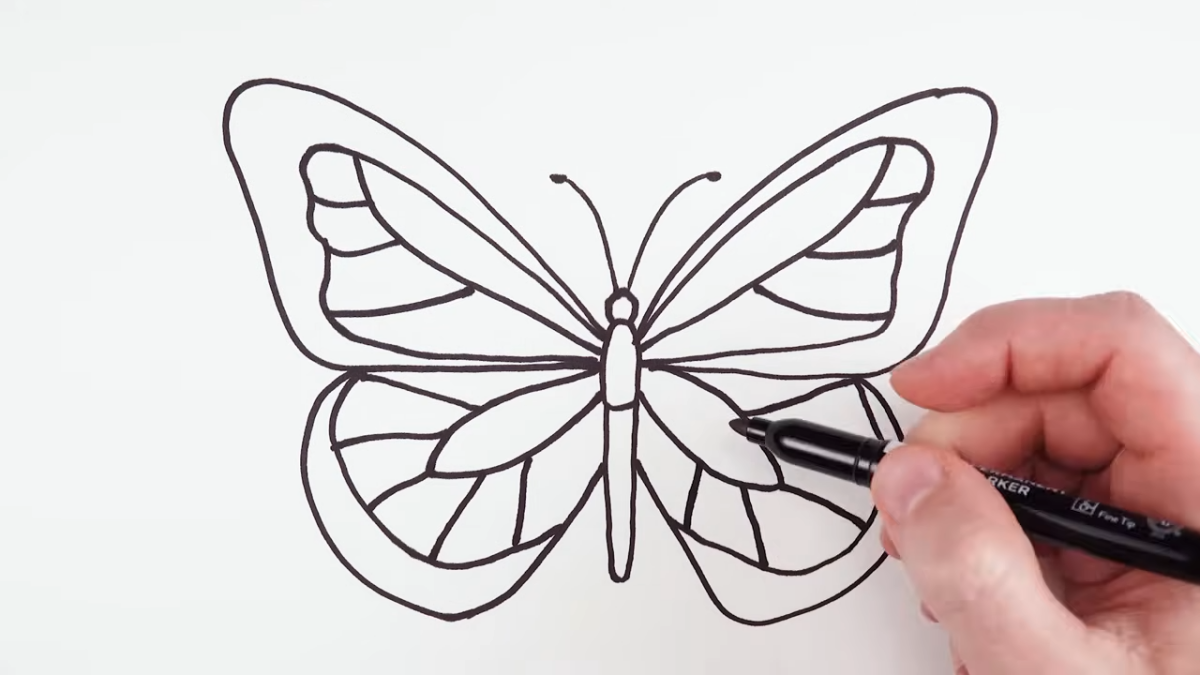
- Refine the Outlines: Now, firm up the outlines. Add the little scallops and curves on the wing edges. Draw in the legs and antennae. Double-check your symmetry. This is your last chance for easy fixes.
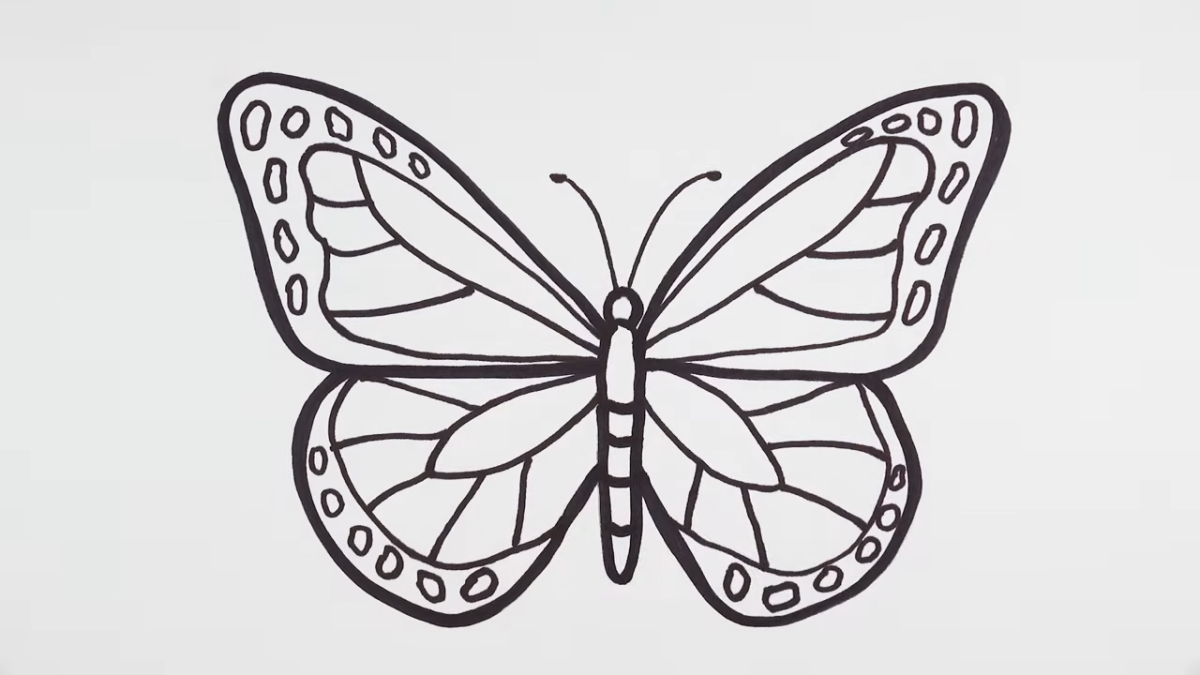
- Map the Patterns: Before you add any color or heavy shading, lightly sketch the main spots, stripes, and eyespots on the wings. This creates a roadmap and stops you from getting lost in the details later.
- Build Up Color and Value: Now for the fun part. Start with your lightest colors first and gradually work toward your darks. Work on the whole drawing at once, rather than perfecting one tiny spot, to keep it looking unified. Quick tip: A simple graphite sketch might take an hour or two. A detailed, full-color piece can easily take 5-10 hours or more, so be patient with yourself!
- Add Final Details & Highlights: This is the 10% of work that makes 90% of the difference. Use a sharp, dark pencil or a tiny brush to add the darkest blacks and shadows. Then, use a white gel pen or a touch of white paint to add back the brightest highlights—a glint on the eye, the tiny white fringe on the edge of a wing. It makes everything pop.
Troubleshooting Common Problems
Everyone runs into these issues. Here’s how to fix them.
- “My drawing looks flat and boring.” You need more contrast! Don’t be afraid to make your darks really dark and keep your lights bright. Also, adding a simple cast shadow underneath the butterfly will instantly make it feel like it’s lifting off the page.
- “The wings are lopsided!” Go back to your construction sketch. Use that ruler-and-tick-mark method to check your key points. It just takes practice!
- “My colors look muddy.” This is a classic problem. With colored pencils, it means you’re pressing too hard, too soon. Use more light layers. With watercolor, it usually means you’re not letting layers dry completely before adding new ones. Patience is key.
- “I keep smudging my pencil drawing!” Oh, this one is my favorite because the fix is so easy. Just stick a piece of scrap paper under your drawing hand. It acts as a barrier between your skin and the graphite. I learned that one the hard way after ruining a few drawings I’d spent hours on.
A Few Final Thoughts
Art should be fun and safe, so just a couple of quick reminders.
If you use a spray fixative to protect a finished drawing, please do it outside or in a room with a lot of ventilation—the fumes are no joke. And when you’re out in nature looking for inspiration, be respectful. Don’t touch the butterflies or trample their habitats. Leave things just as you found them.
Drawing a butterfly is a fantastic exercise in patience and observation. Those first clumsy sketches I made weren’t failures; they were lessons. Every drawing you do is a step forward, teaching you to see the world a little more clearly. So grab your tools, find a photo that inspires you, and just start. The magic is all in the details.
Galerie d’inspiration
Wax-based pencils (like Prismacolor Premier): These are perfect for rich, buttery blending. Their soft core lays down vibrant color quickly, allowing you to create smooth gradients for the solid parts of a Monarch’s wing.
Oil-based pencils (like Faber-Castell Polychromos): Their harder, more precise point is a game-changer for fine details. Use them for rendering the delicate veins in the wings or the fuzzy texture of the butterfly’s thorax. They hold a sharp point longer and are less prone to smudging.
For the best results, many artists use both—starting with wax-based for broad color and finishing with oil-based for crisp, final details.
How do you capture that magical, shimmering quality of iridescent wings?
The secret isn’t a single metallic pencil. It’s about layering unexpected colors. For a Blue Morpho, for instance, don’t just reach for blue. Start with a light layer of black or dark violet in the shaded areas. Then, work in your blues, from cerulean to ultramarine. The key is to leave tiny, uncolored flecks of paper showing through. Finally, add subtle hints of turquoise or even green on the highlights. This optical mixing creates a depth and vibrancy that a single color never could.
The iridescent color of a Blue Morpho’s wings isn’t from pigment. It’s created by the microscopic structure of the scales, which reflect light in a specific way.
This is why metallic markers often fall flat. To mimic this structural color, focus on creating depth through careful layering and contrast rather than trying to find a single “shiny” color. It’s an illusion you create with light and shadow.
A common pitfall: We often strive for perfect mirror images on each wing, but in nature, this is rare. A tiny nick on one wing, a slightly different spot pattern, or a subtle variation in angle will make your drawing feel more authentic and less like a sterile scientific diagram. Embrace the small imperfections; they are the signature of life.
- Show it from a low angle, resting on a leaf, to make it feel monumental.
- Draw it mid-flight, with one pair of wings up and the other down, to convey motion.
- Capture a side view with the wings closed, highlighting the often-camouflaged underwing patterns.
- Illustrate it feeding, with the proboscis uncoiled and deep in a flower’s nectar.
The secret to a dynamic drawing? Choosing a pose that tells a story and moves your art beyond a simple identification chart.
For digital artists, capturing the finest details is all about the right tools. Working in an app like Procreate with an Apple Pencil allows for immense precision. Try using a high-resolution canvas (at least 300 DPI). For the powdery texture of the scales, a softer brush like the default “6B Pencil” or a custom stipple brush on a low opacity can build up color and texture realistically, layer by layer, without overwhelming the delicate wing structure.