A Pro’s Guide to Nailing Your Wedding Guest Manicure
I’ve been doing nails for a long, long time, and if there’s one thing I’ve learned, it’s that getting ready for a big event is all in the details. The most common request I get? Nails for a wedding. It makes sense—it’s a special day, and you want to look and feel completely put together. I’ve had clients bring in everything from a photo of their dress to a tiny swatch of fabric, and my job is to turn that inspiration into a manicure that not only looks incredible but also lasts through every toast and dance move.
In this article
But here’s the thing: choosing your nails for a wedding isn’t just about picking a pretty color you saw online. It’s about the whole vibe. What’s the venue like? Is it a fancy black-tie affair or a chill beach party? What season is it? A great manicure is like the perfect accessory; it complements your outfit without screaming for attention. So, let’s talk about how to choose a look that’s gorgeous, practical, and genuinely elegant. This is the real-deal advice I share from my side of the nail desk.
First Things First: The Foundation
Before we even get to the fun stuff like colors and art, we have to talk about the canvas—your natural nails. I honestly can’t stress this enough. A stunning manicure starts with healthy nails. If your nails are weak, peeling, or damaged, whatever we put on top is just not going to look as smooth or last as long. Simple as that.
Think of your nail like the foundation of a house; it needs to be solid. And that little rim of skin at the base, the cuticle? It’s there for a reason! It’s a natural seal that keeps bacteria out of the nail matrix, which is the control center for nail growth. Aggressively cutting the cuticle can lead to infections and damage the nail. A good technician will always gently soften and tidy up the area, never cutting it all away. It’s a fundamental part of our training for a reason.
Gel vs. Dip vs. Regular Polish: What’s the Right Call?
The product you choose is a huge part of the equation. Each one has its pros and cons, and the best fit really depends on your needs for the wedding weekend.
- Traditional Nail Lacquer: This is your classic, air-dry nail polish. It’s perfect if you love changing your color often or want to do a quick DIY manicure. The downside for a big event? It’s not very durable. It can chip easily, especially if you’re traveling or helping with any setup. If you go this route, I’d suggest painting them the night before or the morning of. A good base coat is non-negotiable to prevent staining, and a quality top coat will add some shine and a little extra life.
- Gel Polish: To be frank, this is what I recommend for events 99% of the time. Gel is cured under an LED lamp, which creates a super strong, glossy finish that can easily last two weeks without a single chip. It’s ideal for a wedding—you can get it done a couple of days ahead and have zero worries. An appointment for a gel manicure usually takes about 45-60 minutes and will typically cost you between $45 and $75, depending on the salon and location.
- Dip Powder: This stuff is known for being incredibly tough. The process involves a base coat, dipping your nail into a colored acrylic powder, and using an activator to harden it. It’s a fantastic choice if your natural nails are a bit weak and you need that extra reinforcement. However, it can feel a little thicker on the nail. A dip powder manicure takes a bit longer, maybe 60-75 minutes, and the cost is often similar to gel, sometimes slightly more.
Timing is Everything
I always tell my clients to book their nail appointment one or two days before the wedding. That’s the sweet spot. Your nails will be perfectly fresh, but you also have a little buffer in case anything goes wrong. If a nail smudges or you have a last-minute change of heart on the color, there’s time to fix it without a full-blown panic. Trust me, you don’t need that kind of stress on the big day!
Choosing Your Style Like a Pro
Okay, now for the fun part—picking a look! The best way to approach this is to think like a stylist. Your nails are an accessory, just like your earrings or clutch. They need to harmonize with your entire look.
Match the Vibe: Venue and Dress Code
The wedding invitation is your cheat sheet. It tells you everything you need to know about the formality and style.
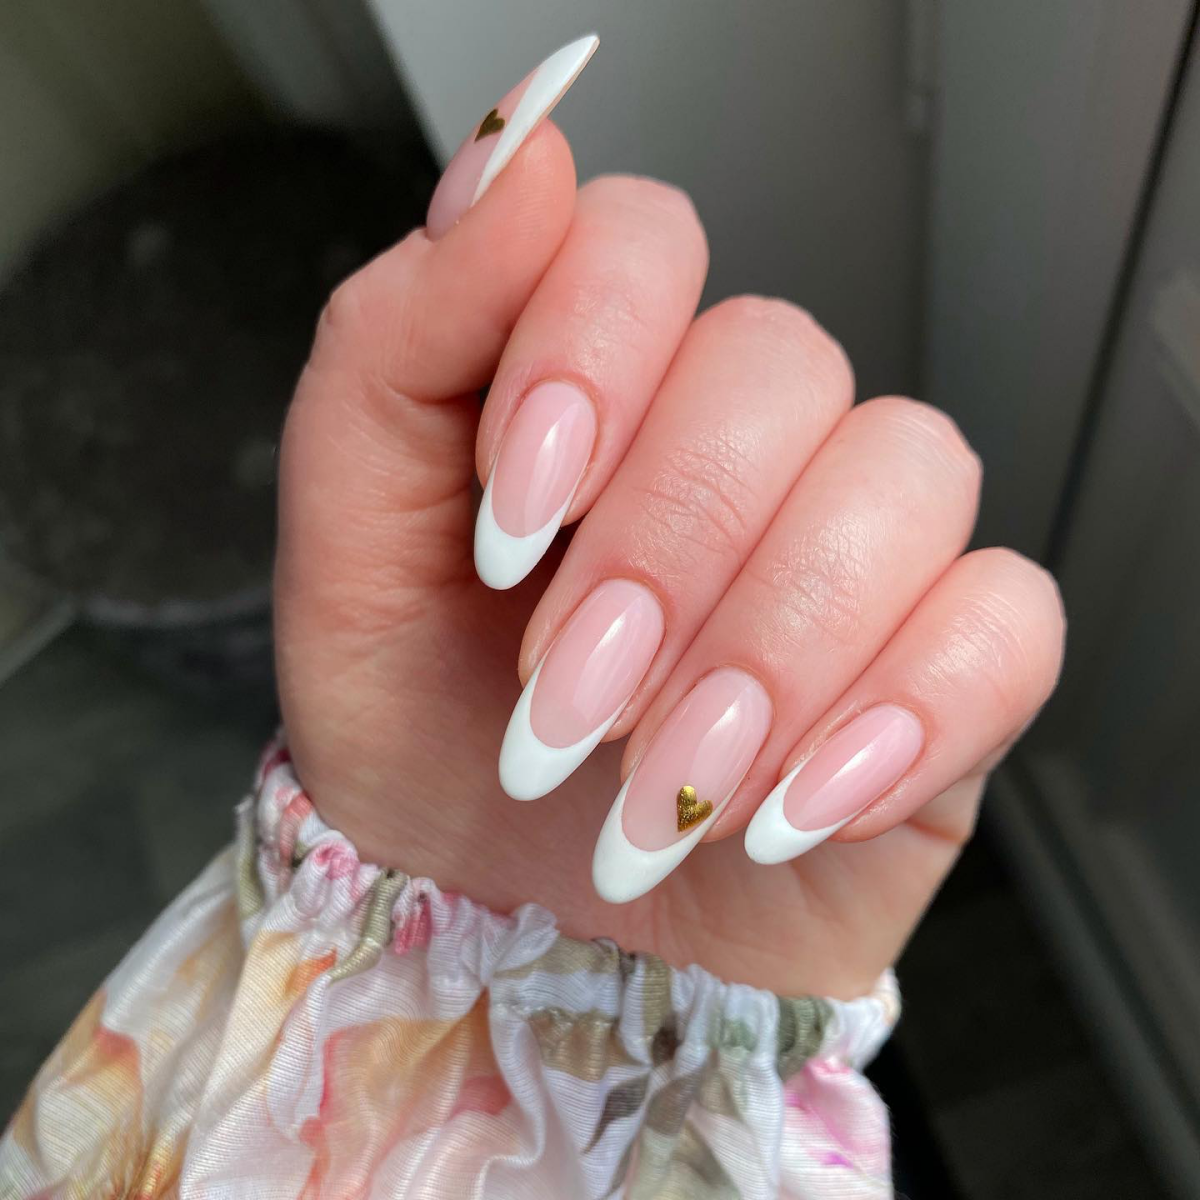
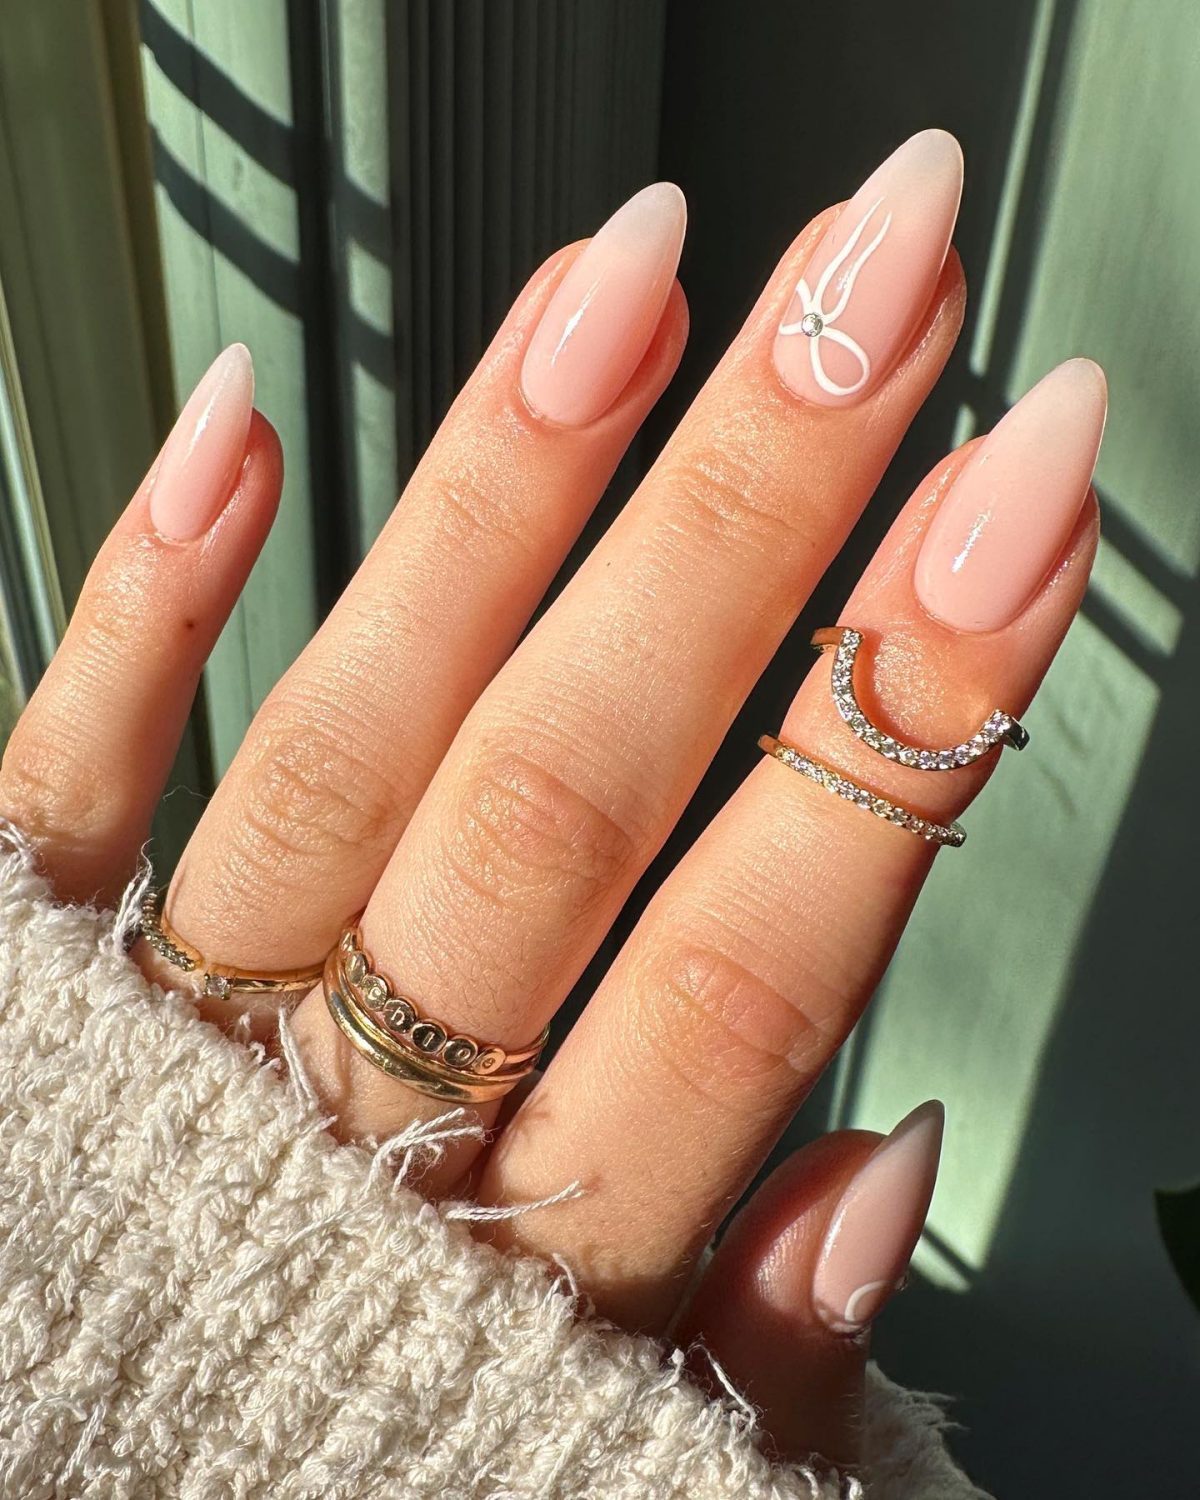
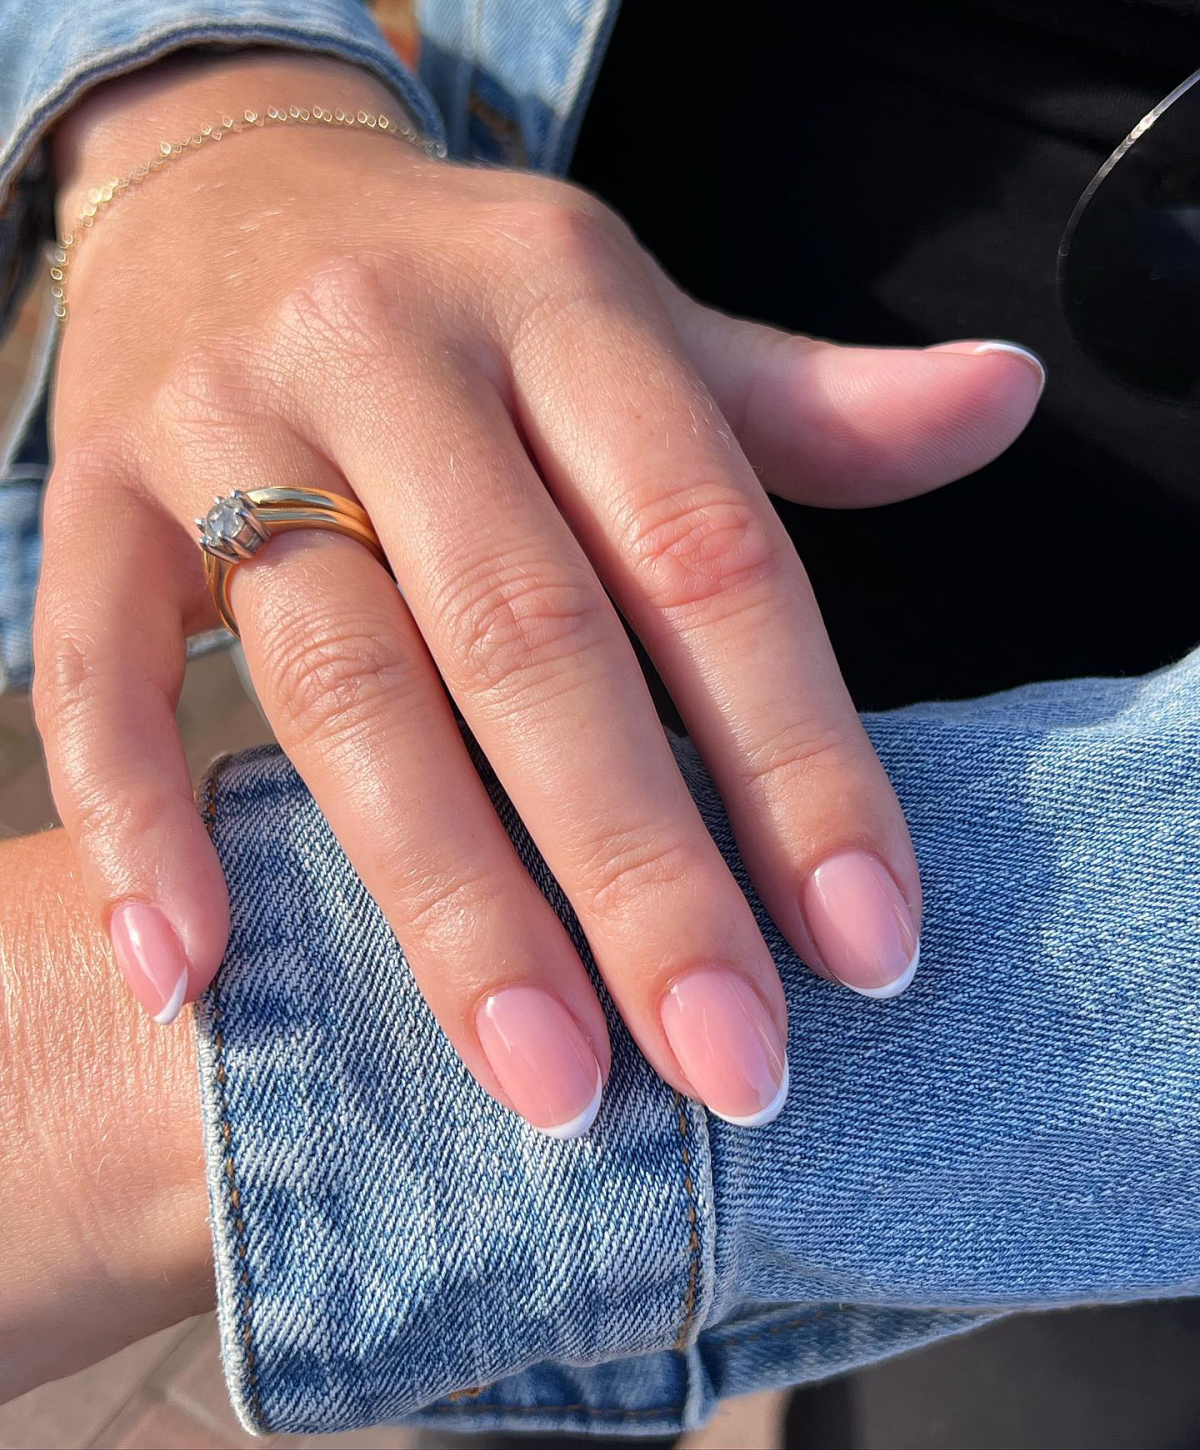
For a Black-Tie Wedding: This calls for pure elegance. You can never, ever go wrong with a classic. A flawless deep red, a rich wine color, or even a sophisticated navy blue looks stunning with a formal gown. A perfect French manicure is also a timeless choice. And I’m not talking about the thick, blocky white tips of the past. A modern French has a delicate, paper-thin white line on a sheer, natural-looking base that flatters your skin tone. Another foolproof option is an opaque nude. Finding the right one is an art form—it should complement your undertones, not wash you out.
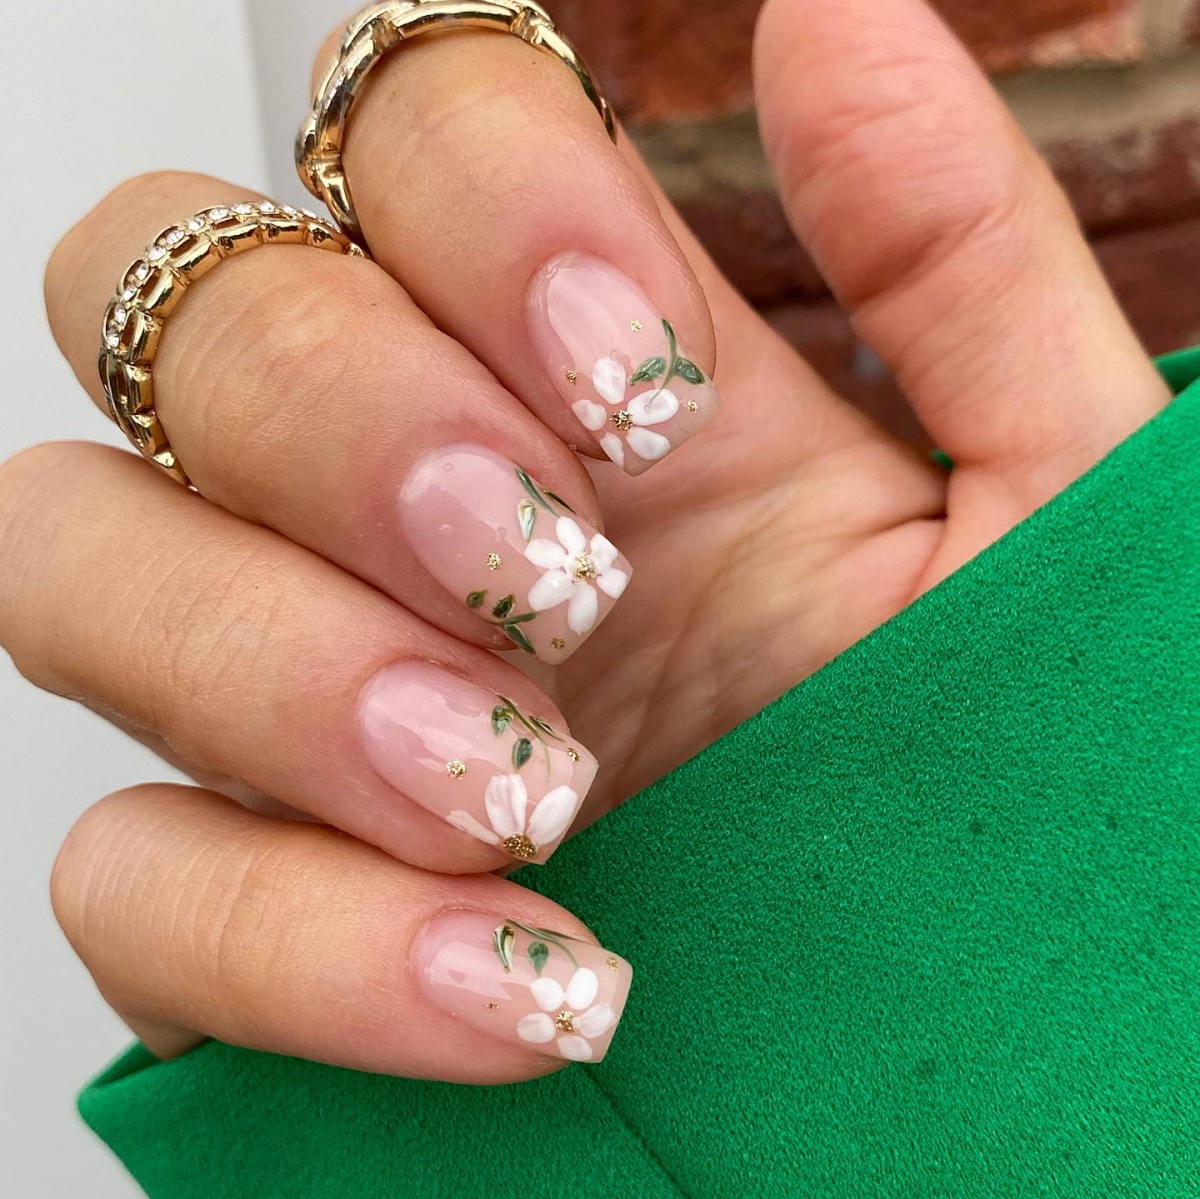
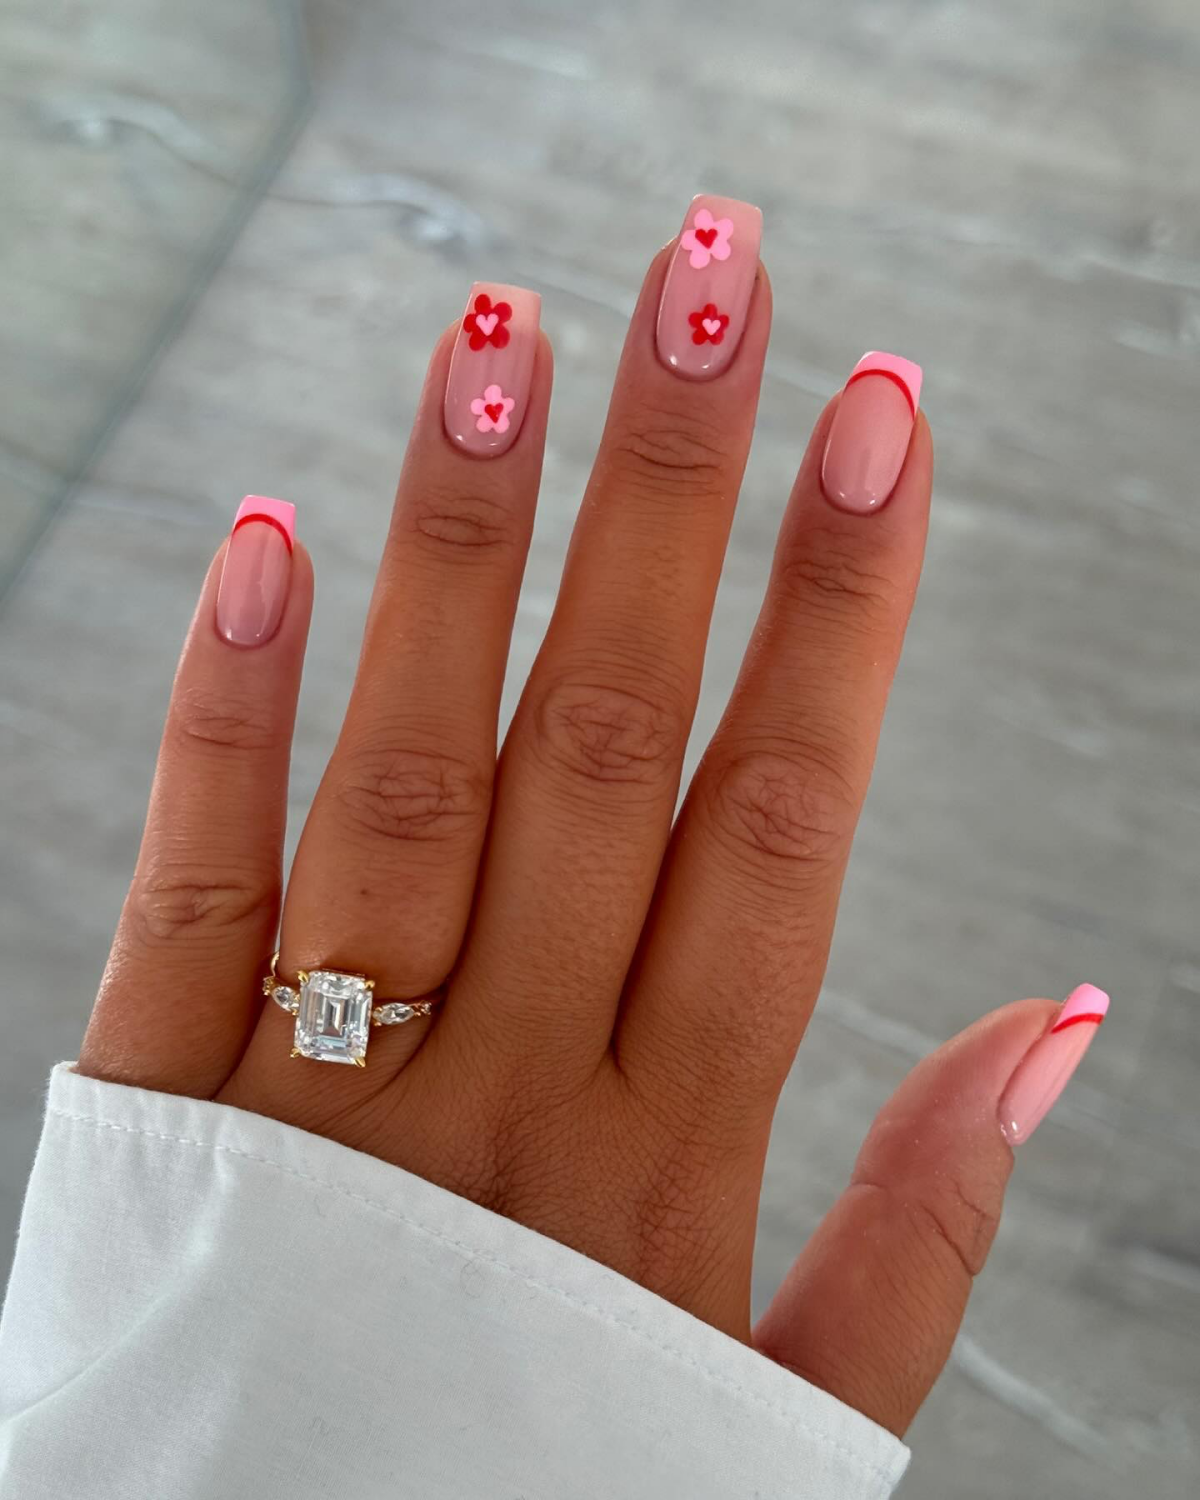
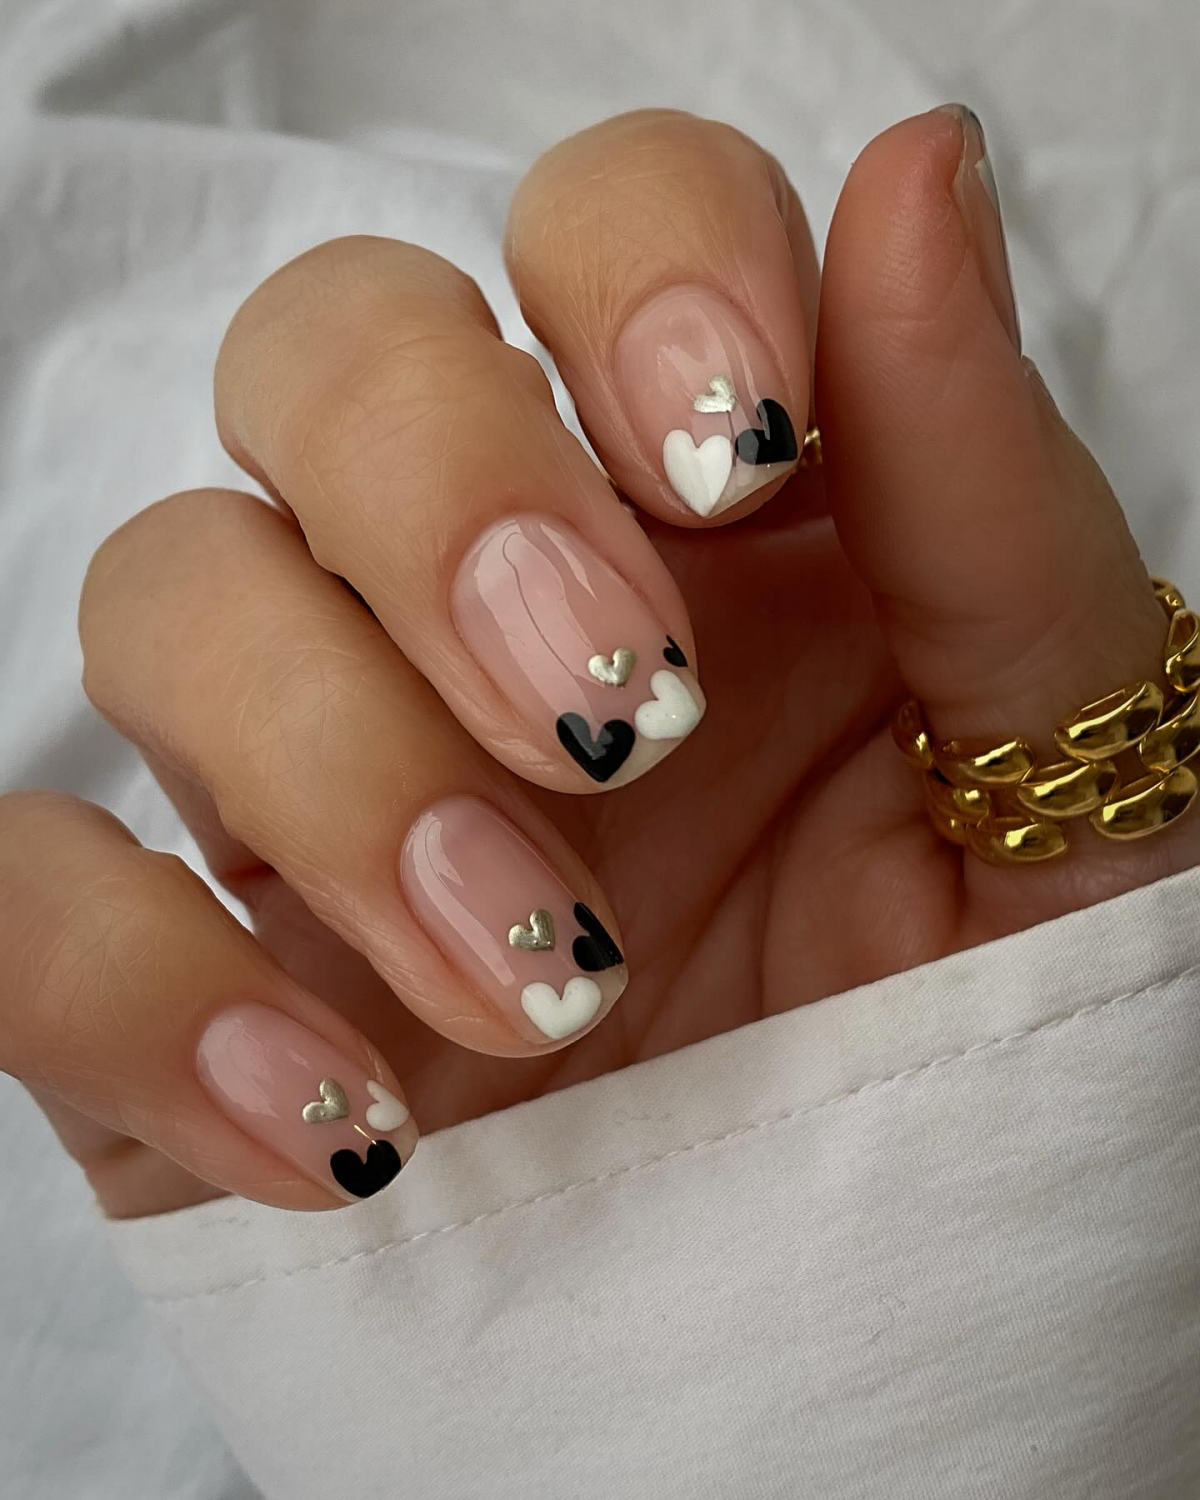
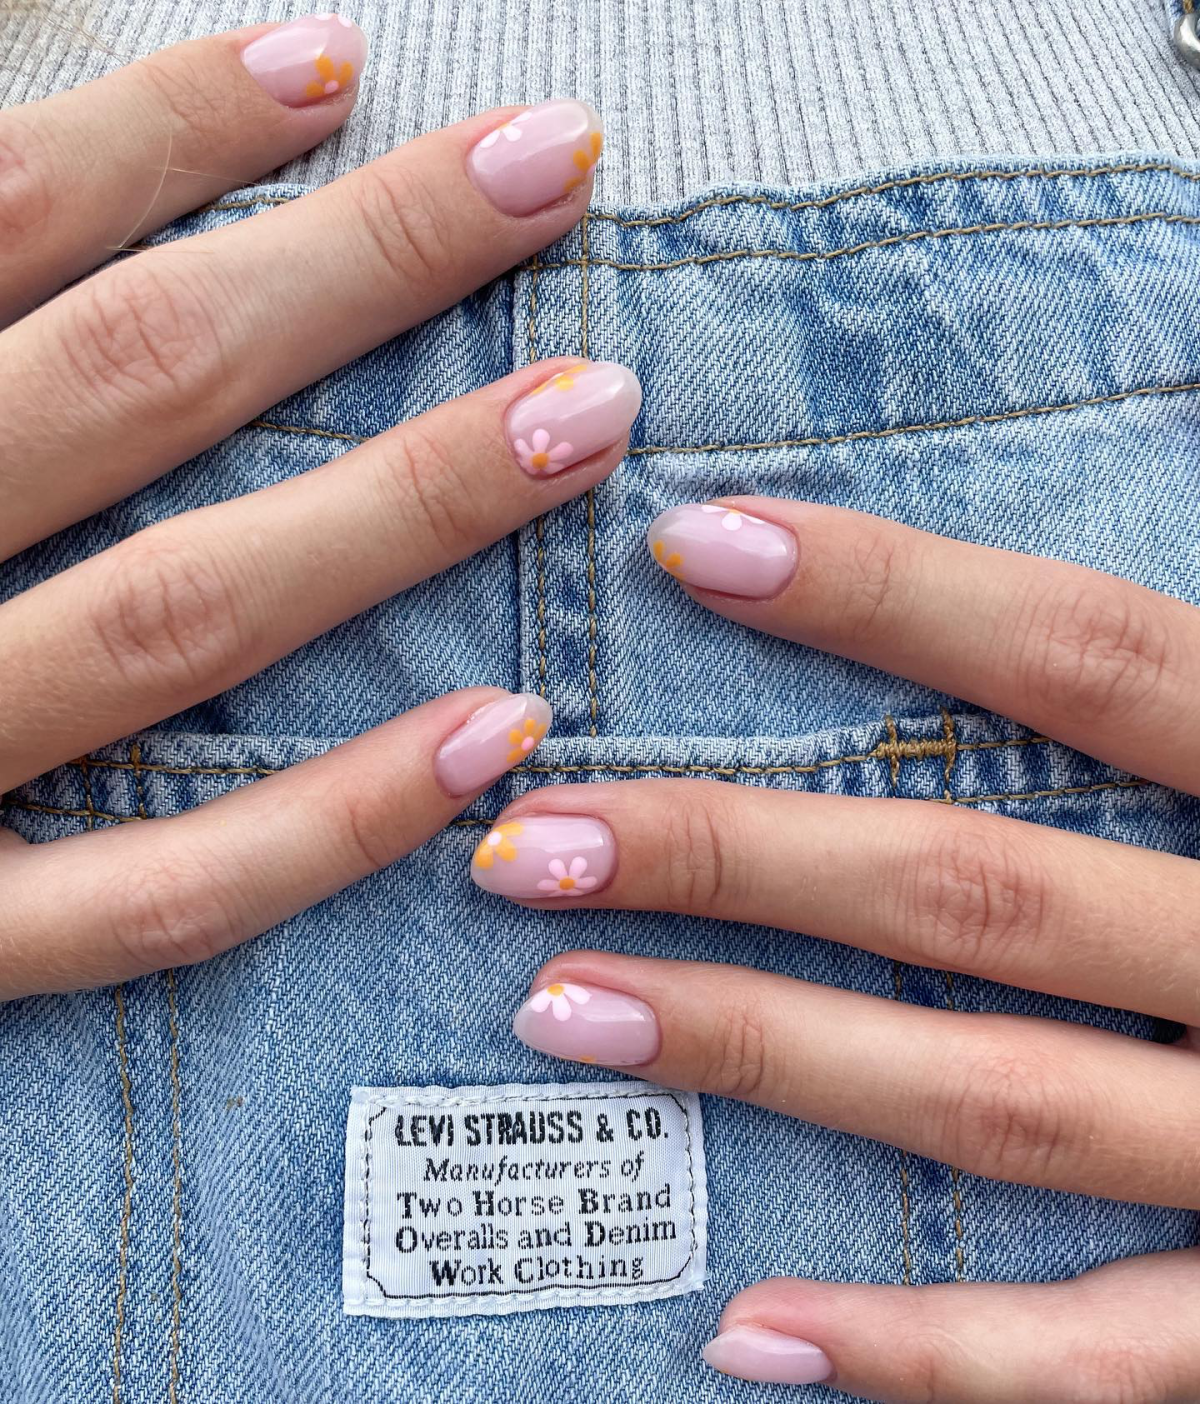
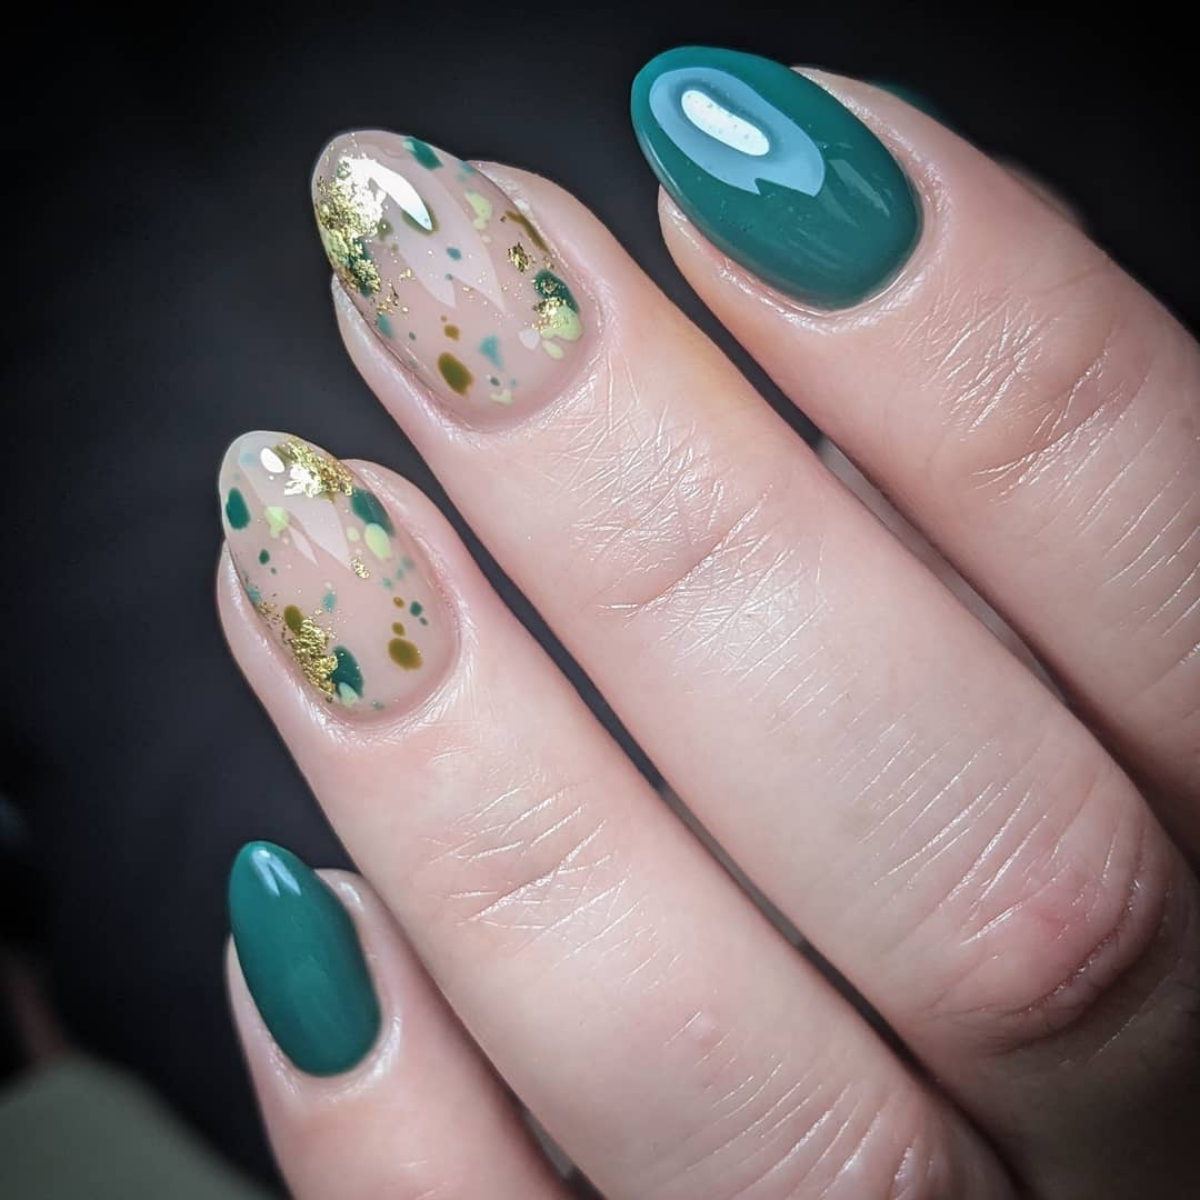
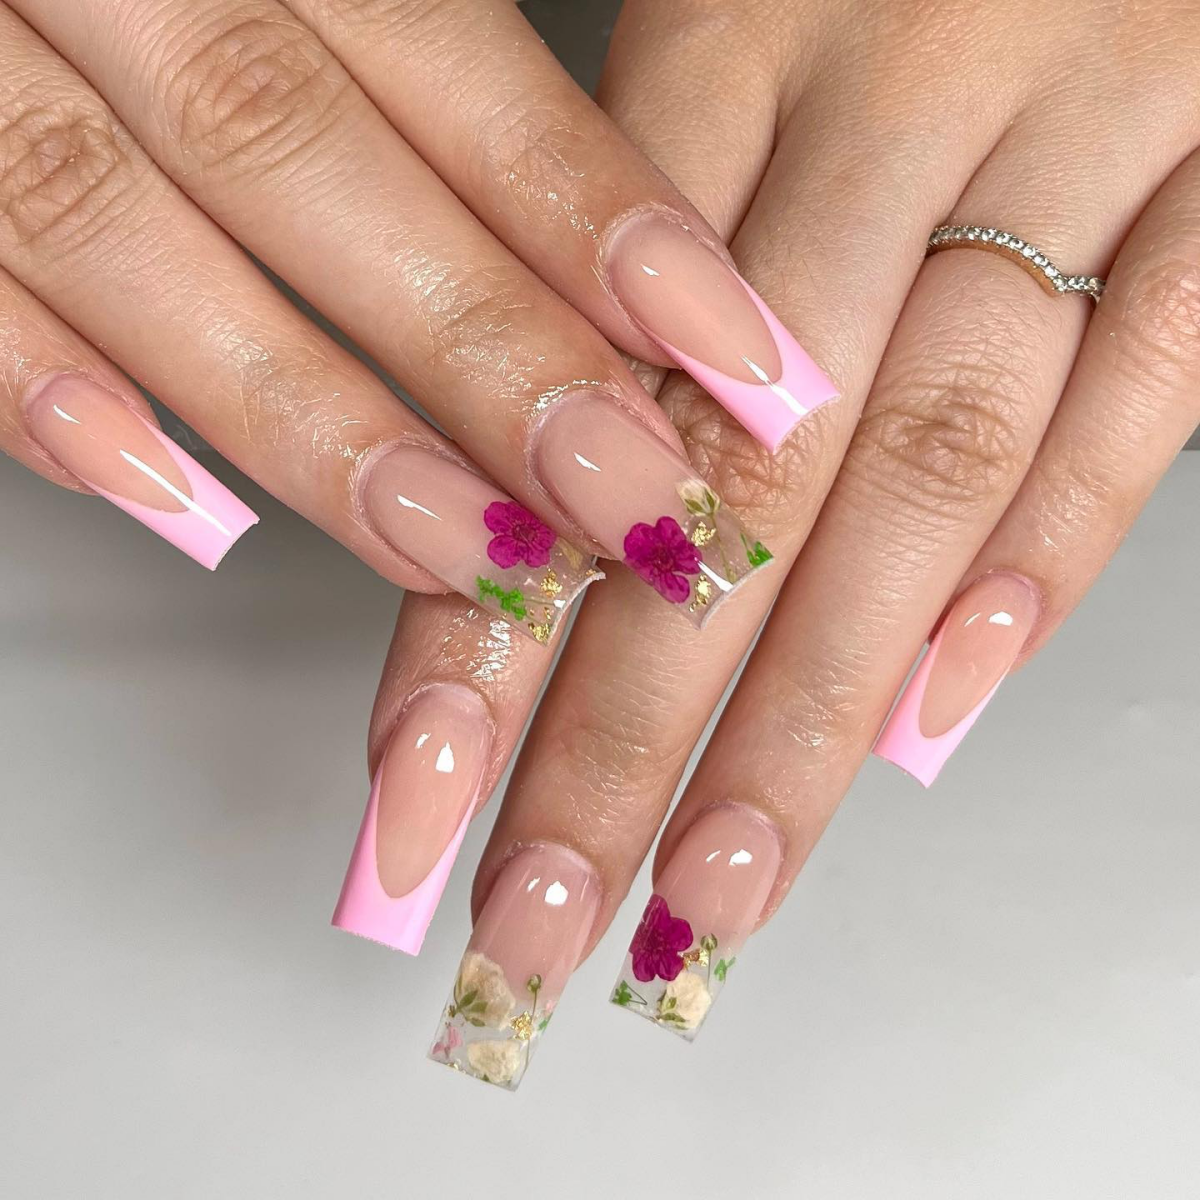
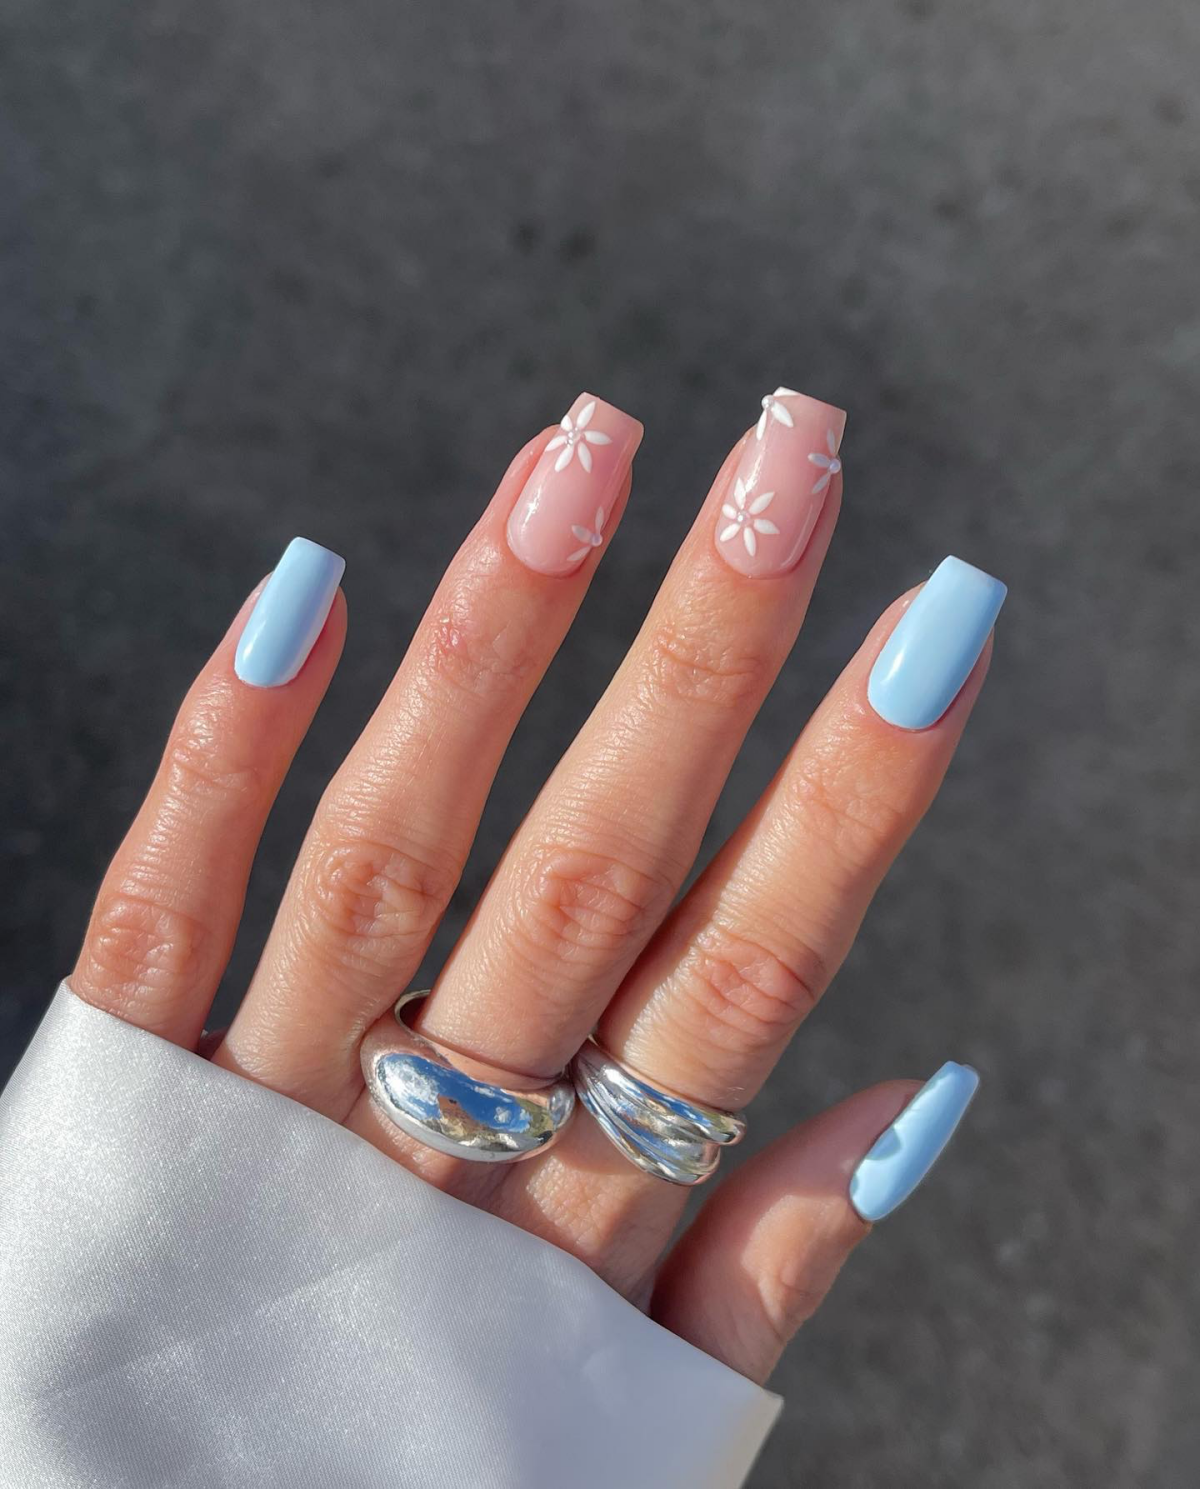
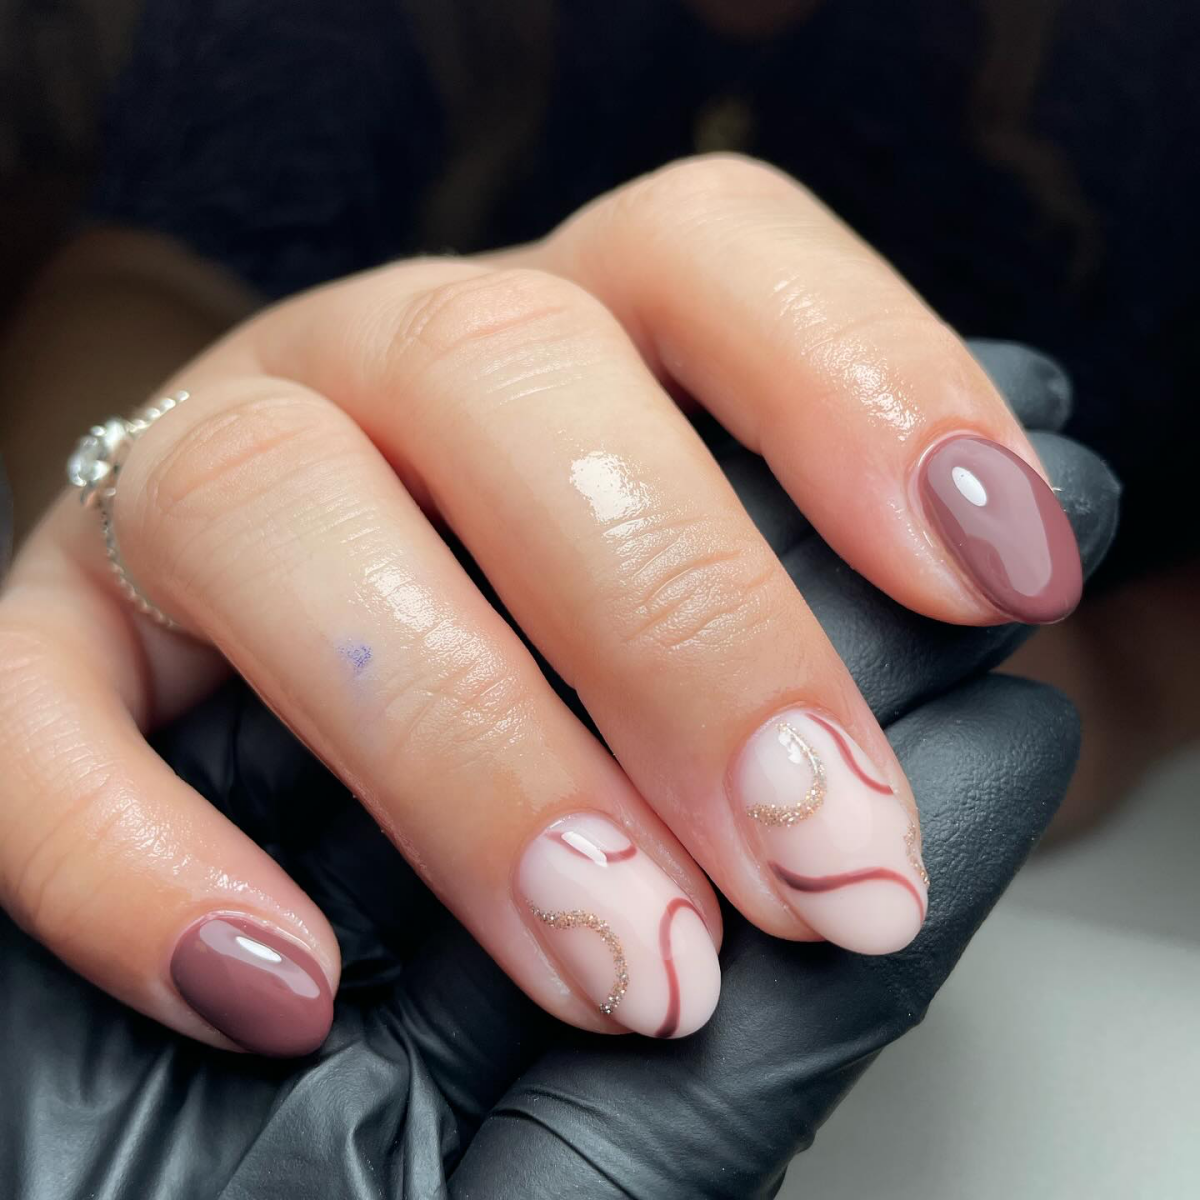
For a Garden, Vineyard, or Beach Wedding: These settings are usually more relaxed and romantic, which means you can play with softer colors or subtle nail art. Think dusty pinks, muted blues, and sage greens. A little floral detail on an accent nail can be a beautiful nod to a garden setting. Some artists can even encapsulate tiny, real dried flowers into the gel for a truly unique look. For a beach wedding, a sheer, pearly polish that catches the light like the inside of a seashell is just perfect.
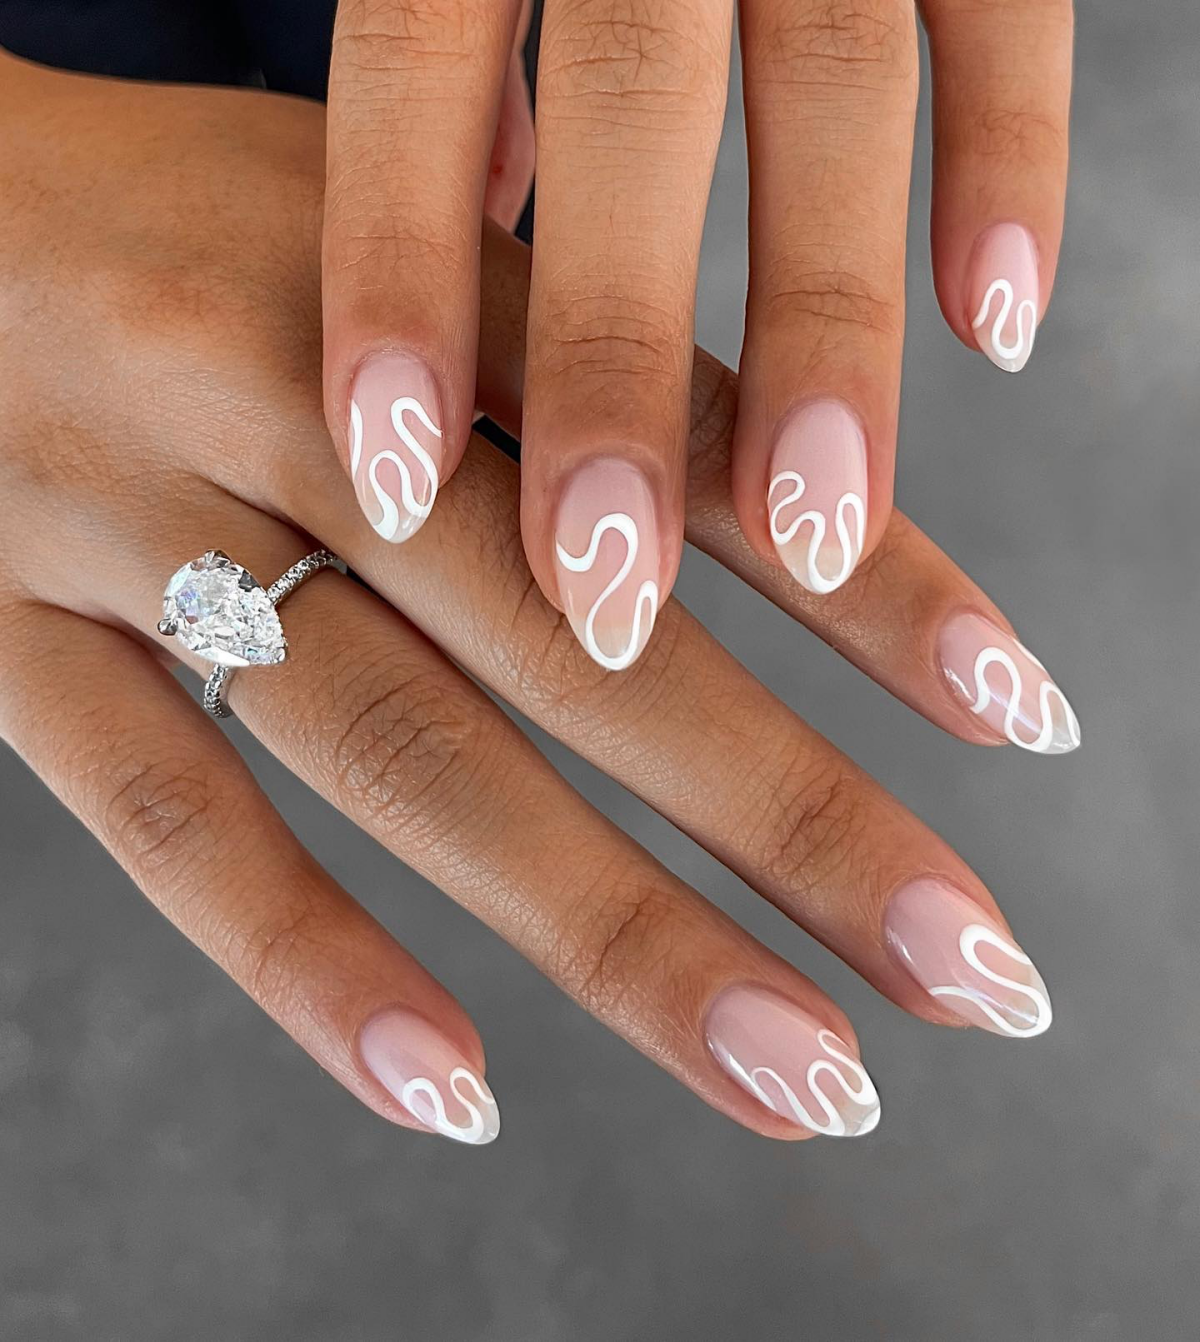
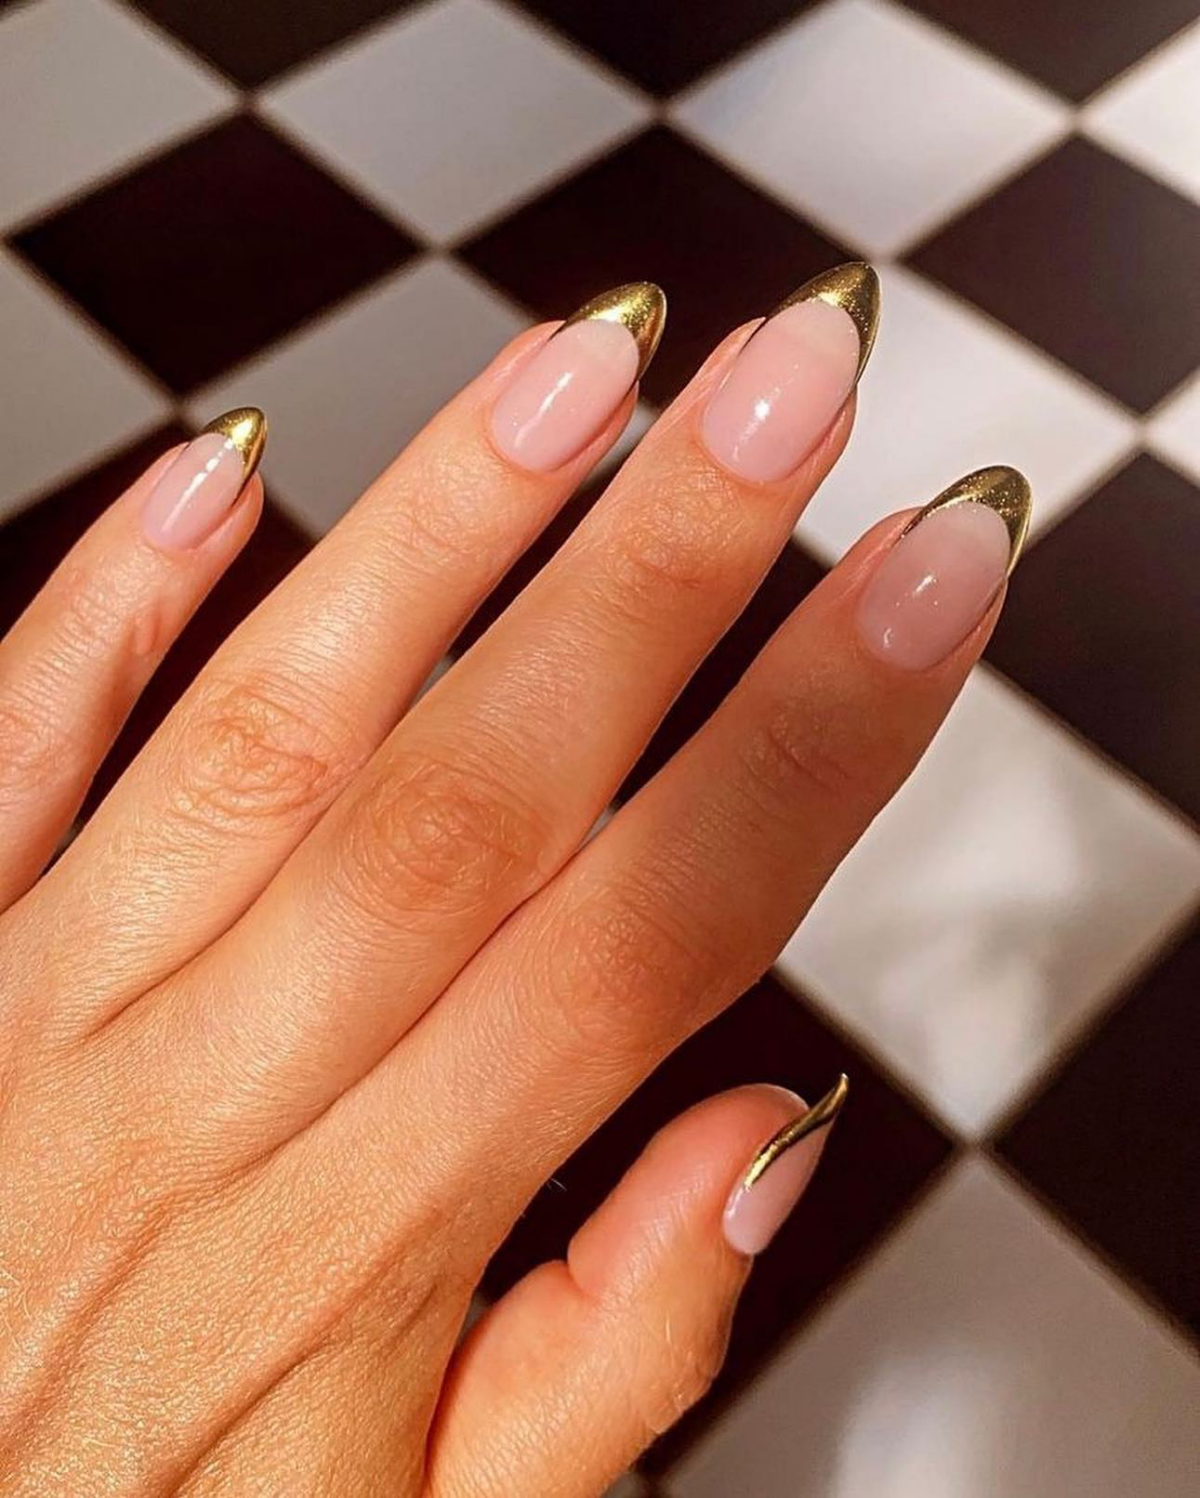
For a Modern, City Wedding: If the venue is an art gallery or a chic downtown loft, you have permission to be more fashion-forward. This is the perfect time to try a negative space design, where parts of your natural nail are left bare. Or consider thin geometric lines, a subtle metallic accent, or a trendy “half-moon” manicure. A matte top coat over a dark color can also lend a sophisticated, edgy vibe.
A Quick Word on Short Nails
By the way, you don’t need long nails to have a gorgeous manicure! In fact, some of the most chic looks are on shorter nails. If your nails are on the shorter side, here are a few ideas:
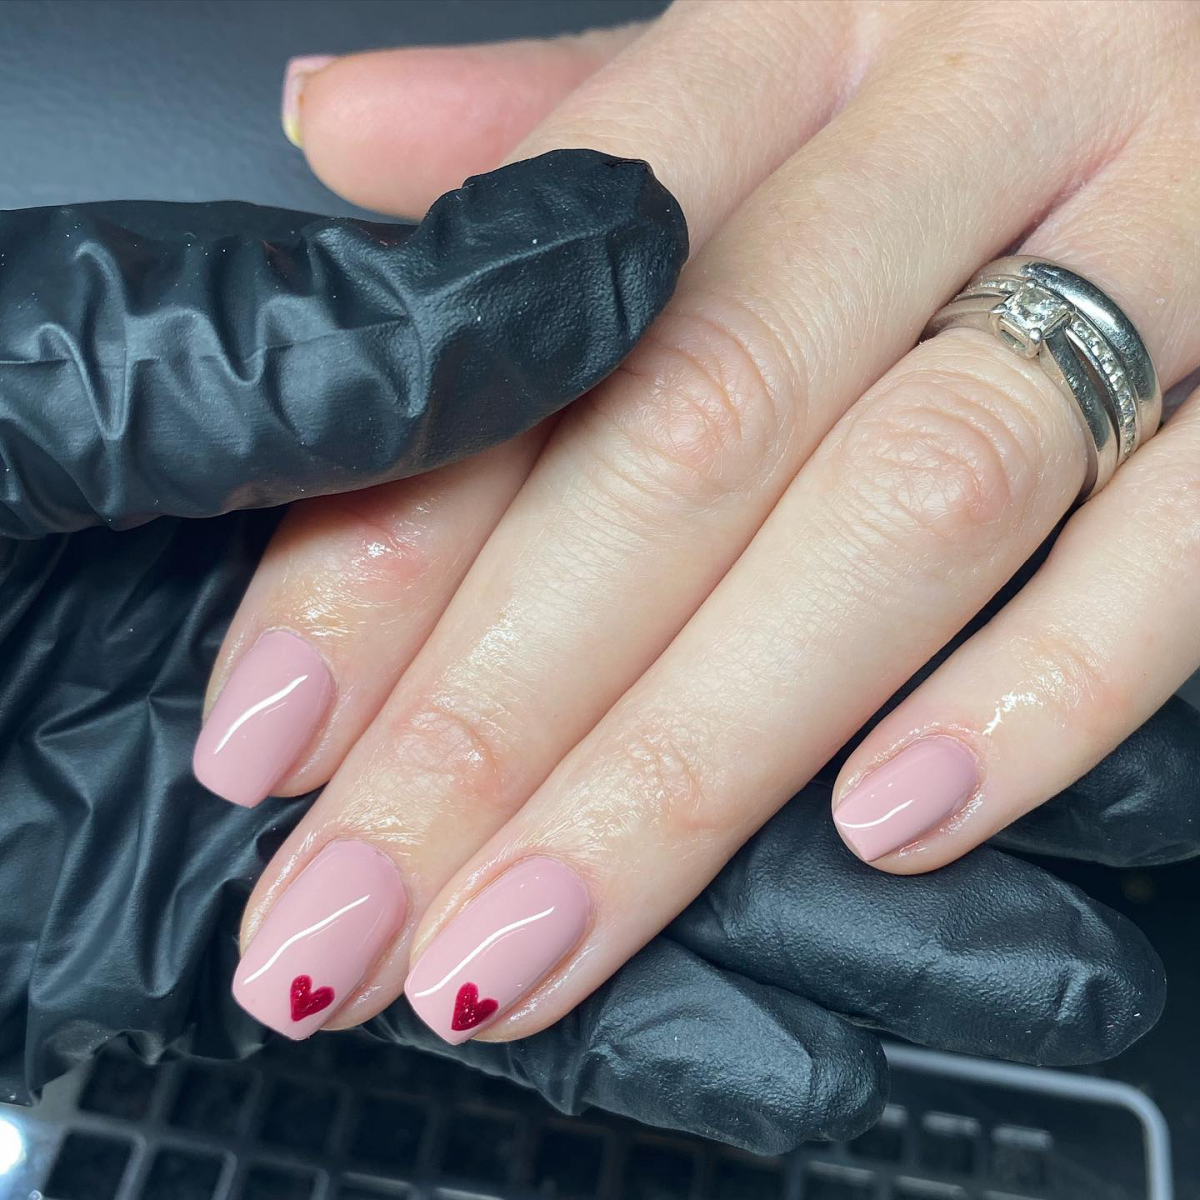
- Go Dark & Bold: A deep, vampy color like a burgundy or dark navy looks incredibly chic and intentional on short, neat nails.
- The Micro French: The modern, super-thin French manicure looks especially elegant on shorter nail beds.
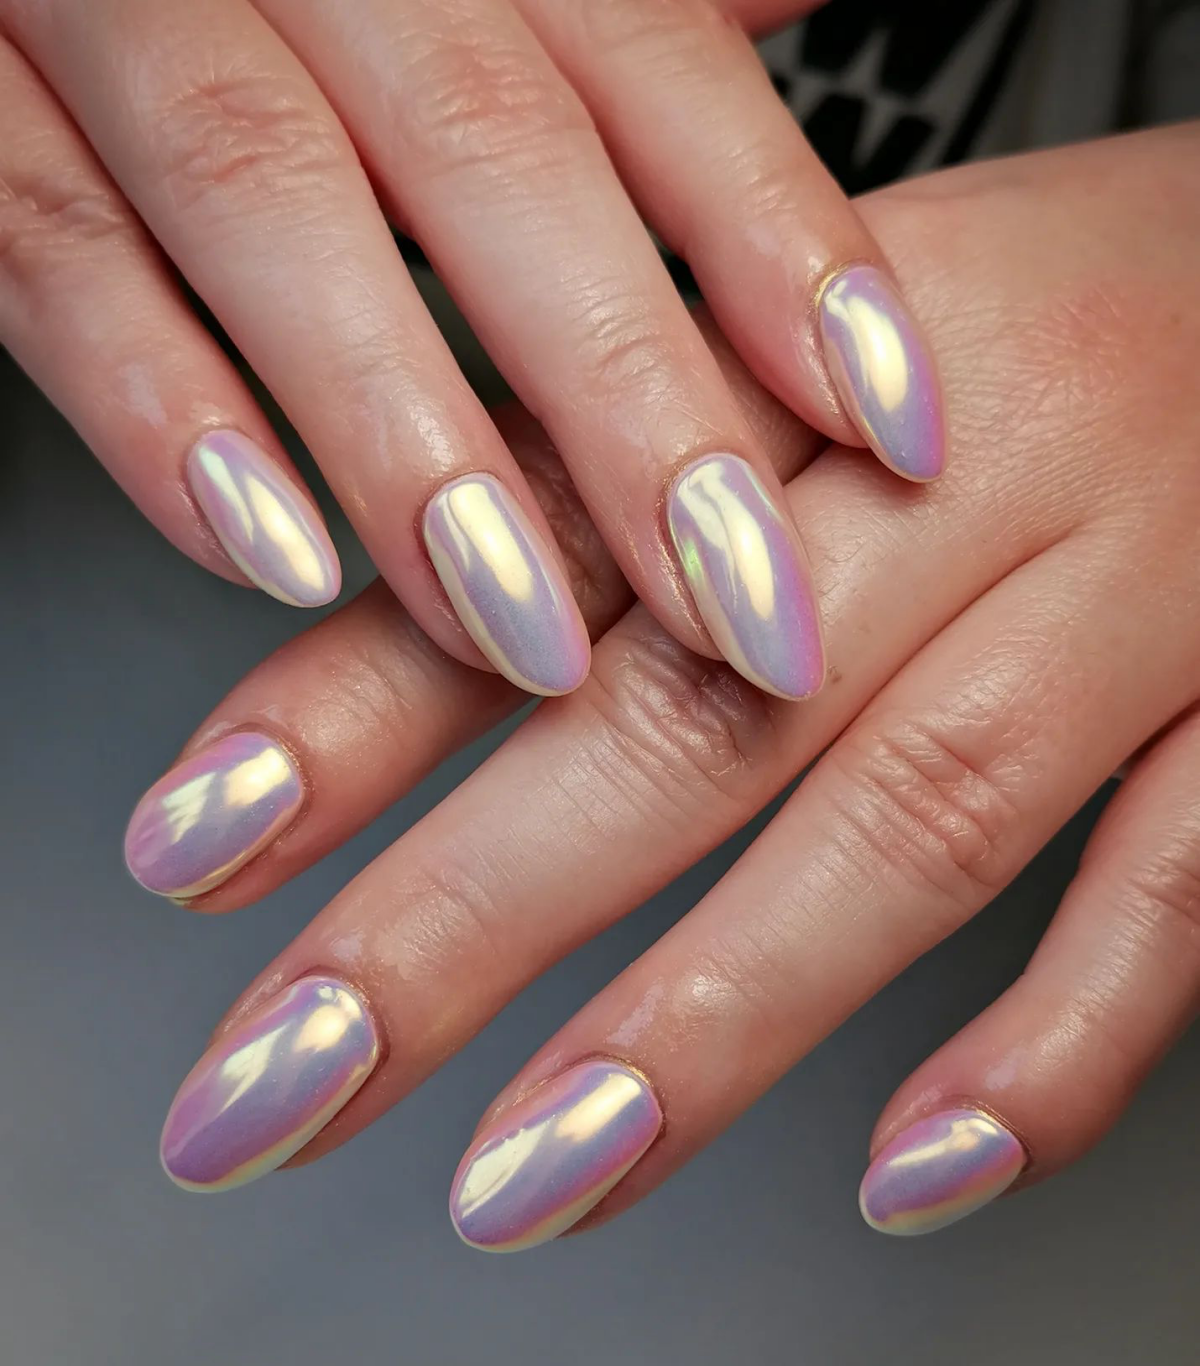
- Subtle Shimmer: A sheer, glittery polish or a pearlescent chrome finish adds dimension and a touch of glamour without needing length.
Secrets from the Salon Chair
So what makes a professional manicure look so… professional? It’s all about the tiny details and techniques we spend years perfecting.
The “glazed” or chrome effect, for instance, requires precision. We apply a base color, then a special “no-wipe” top coat. While it’s still warm from the lamp, we have to burnish a chrome powder onto the surface with just the right amount of pressure to get that flawless, mirror-like sheen. Then, it’s sealed with another top coat.
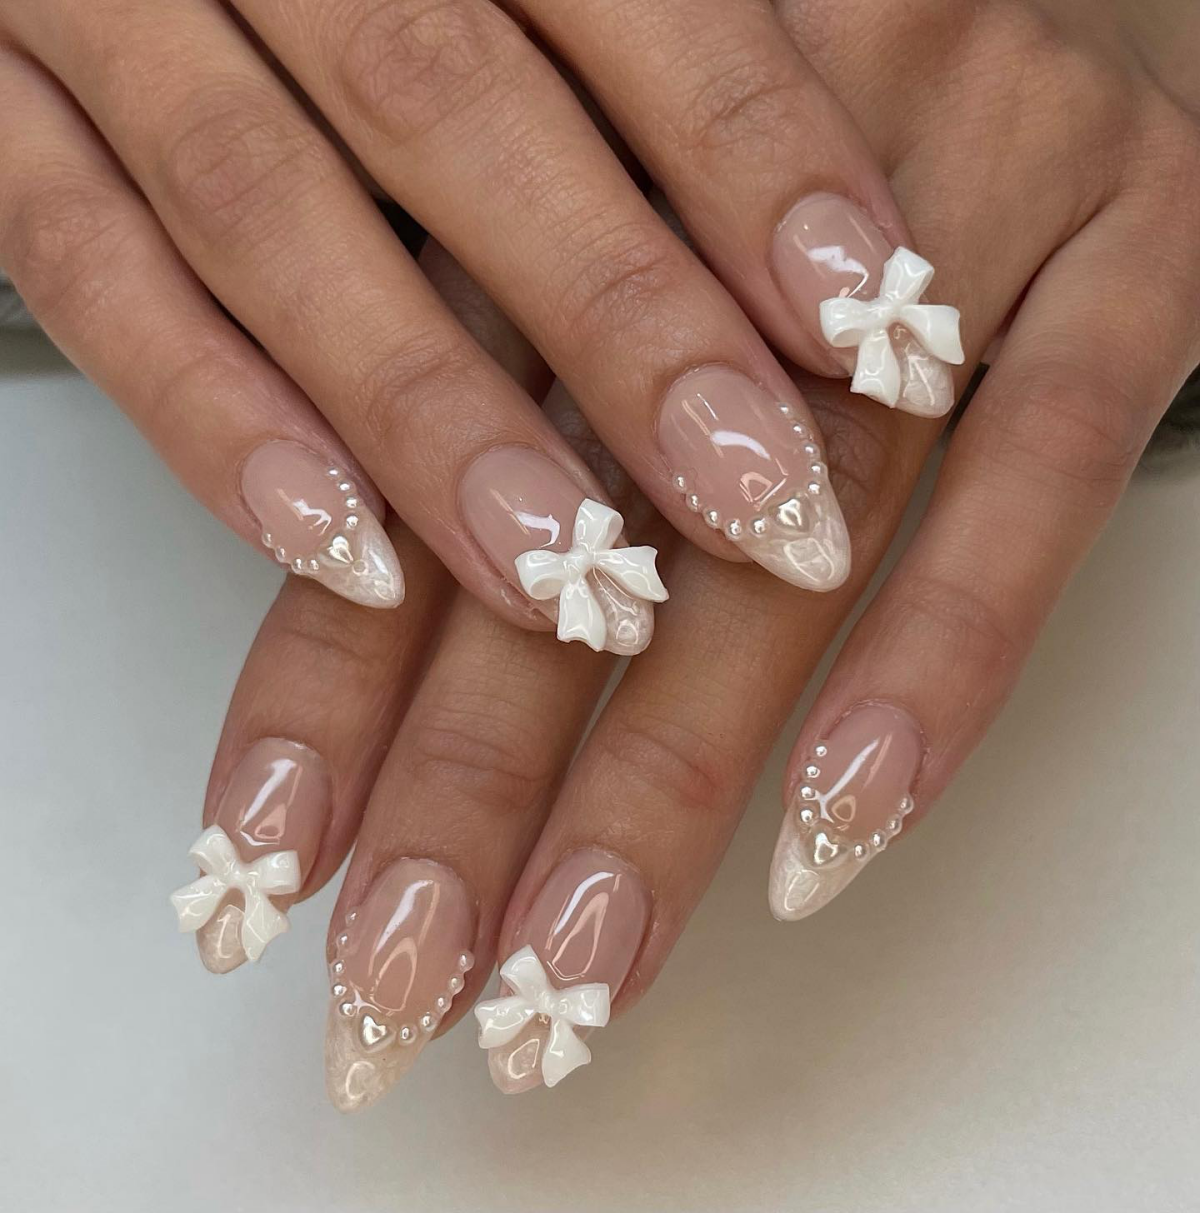
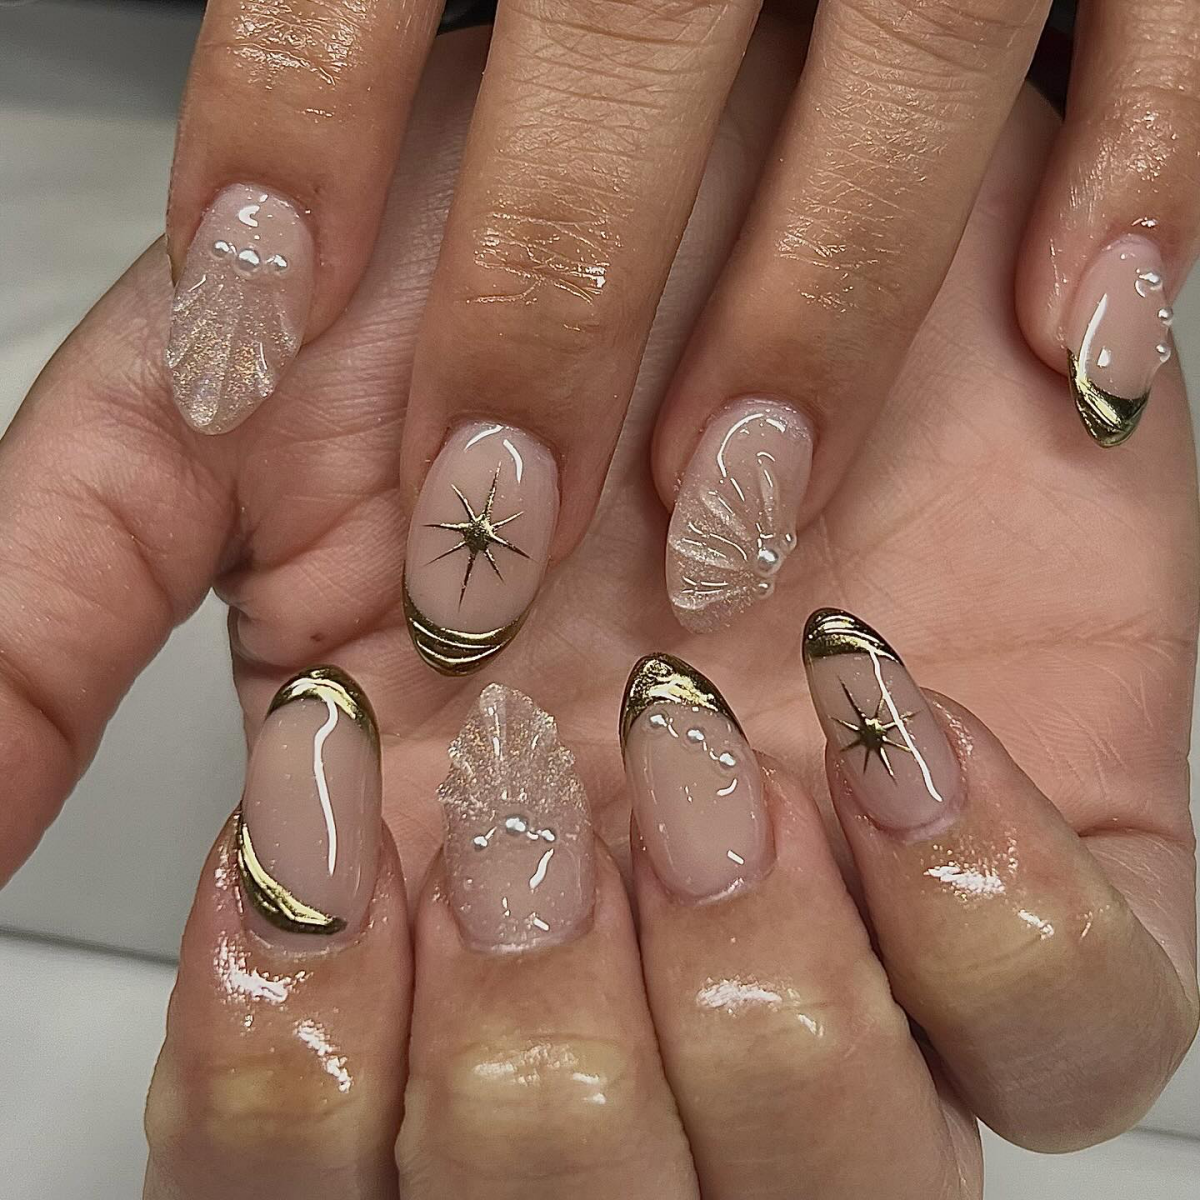
And if you want something really special, like encapsulated flowers or gold foil, we use a thicker builder gel. We place the art into a thin layer of the gel, cure it just enough to hold it, and then build a smooth, protective dome of gel over the top. It’s what gives the nail that beautiful, three-dimensional depth.
Heads up! This kind of intricate nail art is usually priced per nail. You should expect to pay an extra $5 to $15 per nail for something detailed like hand-painted flowers or chrome effects.
The Non-Negotiables: Safety and Finding a Good Tech
Let’s get serious for a moment. My first responsibility is always your health and safety. It’s the most important part of my job.
First, a critical warning about gel allergies. They are on the rise, often caused by repeated skin contact with certain ingredients in gel products. A well-trained tech should be meticulous about keeping the product off your skin. If you ever feel itching or see redness around your nails after a gel manicure, see a doctor and stop getting them. This is why I strongly advise against at-home gel kits unless you really know what you’re doing.
So, how do you spot a good, safe salon? Look for these signs:
- Green Flags: The salon is clean and well-ventilated. Your technician opens a sealed pouch of sterilized metal tools just for you. They use a new file and buffer for each client. They’re happy to answer your questions about their sanitation process.
- Red Flags: The workstations are dusty with old nail filings. They pull tools from a dirty drawer or a jar of blue liquid (that’s not proper sterilization!). They rush the service and are rough with your nails or cuticles. If you see any of this, walk away.
After the Wedding: Aftercare and Safe Removal
Your beautiful nails don’t have to be a one-day wonder. With a little TLC, you can make them last.
The secret? Cuticle oil. I sound like a broken record with my clients, but it works! A drop on each nail every day keeps the product and your natural nail flexible, which prevents chipping. I always recommend grabbing a bottle of something good, like CND SolarOil or OPI ProSpa. You can find them at beauty supply stores or online for around $10-$15.
And now, the most important rule: DO NOT PEEL OFF YOUR MANICURE. I’m begging you. When you peel off gel or dip, you’re ripping off the top layers of your natural nail along with it. This is what causes that thin, weak, post-manicure damage. Proper removal is key.
How to Safely Remove Gel & Dip at Home
The process is similar for both, but dip powder often requires a bit more patience and soaking time. You’ll need 100% acetone, cotton, and aluminum foil.
- File the Top Layer: Gently file off the shiny top coat. This is crucial as it breaks the seal and lets the acetone do its job. For dip powder, you’ll need to file away a bit more of the bulk.
- Soak the Cotton: Saturate a piece of cotton with acetone, place it directly on your nail, and wrap your fingertip snugly in a piece of aluminum foil.
- Wait Patiently: For gel, let it soak for 10-15 minutes. For dip powder, plan for at least 15-25 minutes.
- Gently Remove: After soaking, the product should be soft and flake away easily with a wooden cuticle stick. If it’s still stuck, don’t force it! Just re-wrap and soak for another 5-10 minutes.
Ultimately, a wedding is a joyous celebration. Your nails should be a small detail that makes you feel confident and ready to celebrate. By thinking about your personal style, choosing the right service, and trusting a good professional, you’ll end up with a perfect manicure that’s the cherry on top of a wonderful day.
Galerie d’inspiration
Did you know? Applying two thin coats of polish is always better than one thick one. The thinner layers adhere better to the nail and dry more thoroughly, significantly reducing the risk of smudges, bubbles, and chips during the festivities.
There’s a particular confidence that comes from having perfectly polished nails. It’s the final touch that pulls an entire outfit together. As you hold a champagne flute or clap for the happy couple, that flash of color or subtle shimmer is a small, personal detail that makes you feel elegant and ready for the celebration. It’s not just about aesthetics; it’s about the feeling of being completely, beautifully put-together.
Don’t forget your feet: Even if you’re wearing closed-toe shoes for the ceremony, you might end up barefoot on the dance floor! A coordinated pedicure makes you feel polished from head to toe. If your manicure is a bold color like deep burgundy, consider a complementary neutral pedi in a shade like Essie’s ‘Ballet Slippers’ for a chic, balanced look.
Help! My manicure chipped right before the wedding! What do I do?
Don’t panic. For a minor chip at the tip, a skilled move is to apply a thin line of glitter polish, like those from ILNP, along the free edge of all your nails, creating a ‘glitter French’ look. It camouflages the imperfection and adds an intentional touch of sparkle. For a larger crack, a tiny drop of nail glue can prevent it from getting worse until you can properly fix it.
For a flawless finish that rivals a salon gel manicure, consider your top coat a non-negotiable final step. A high-quality, quick-dry top coat not only provides a glassy shine but also creates a protective shield for your color.
- For Durability: Seche Vite Dry Fast Top Coat is a cult classic among professionals for its ability to penetrate through the polish layers and create a solid coating.
- For Plumpness: CND Vinylux Long Wear Top Coat gives a gel-like volume and shine to regular lacquer, making your manicure look more luxe and extending its life for the entire wedding weekend.
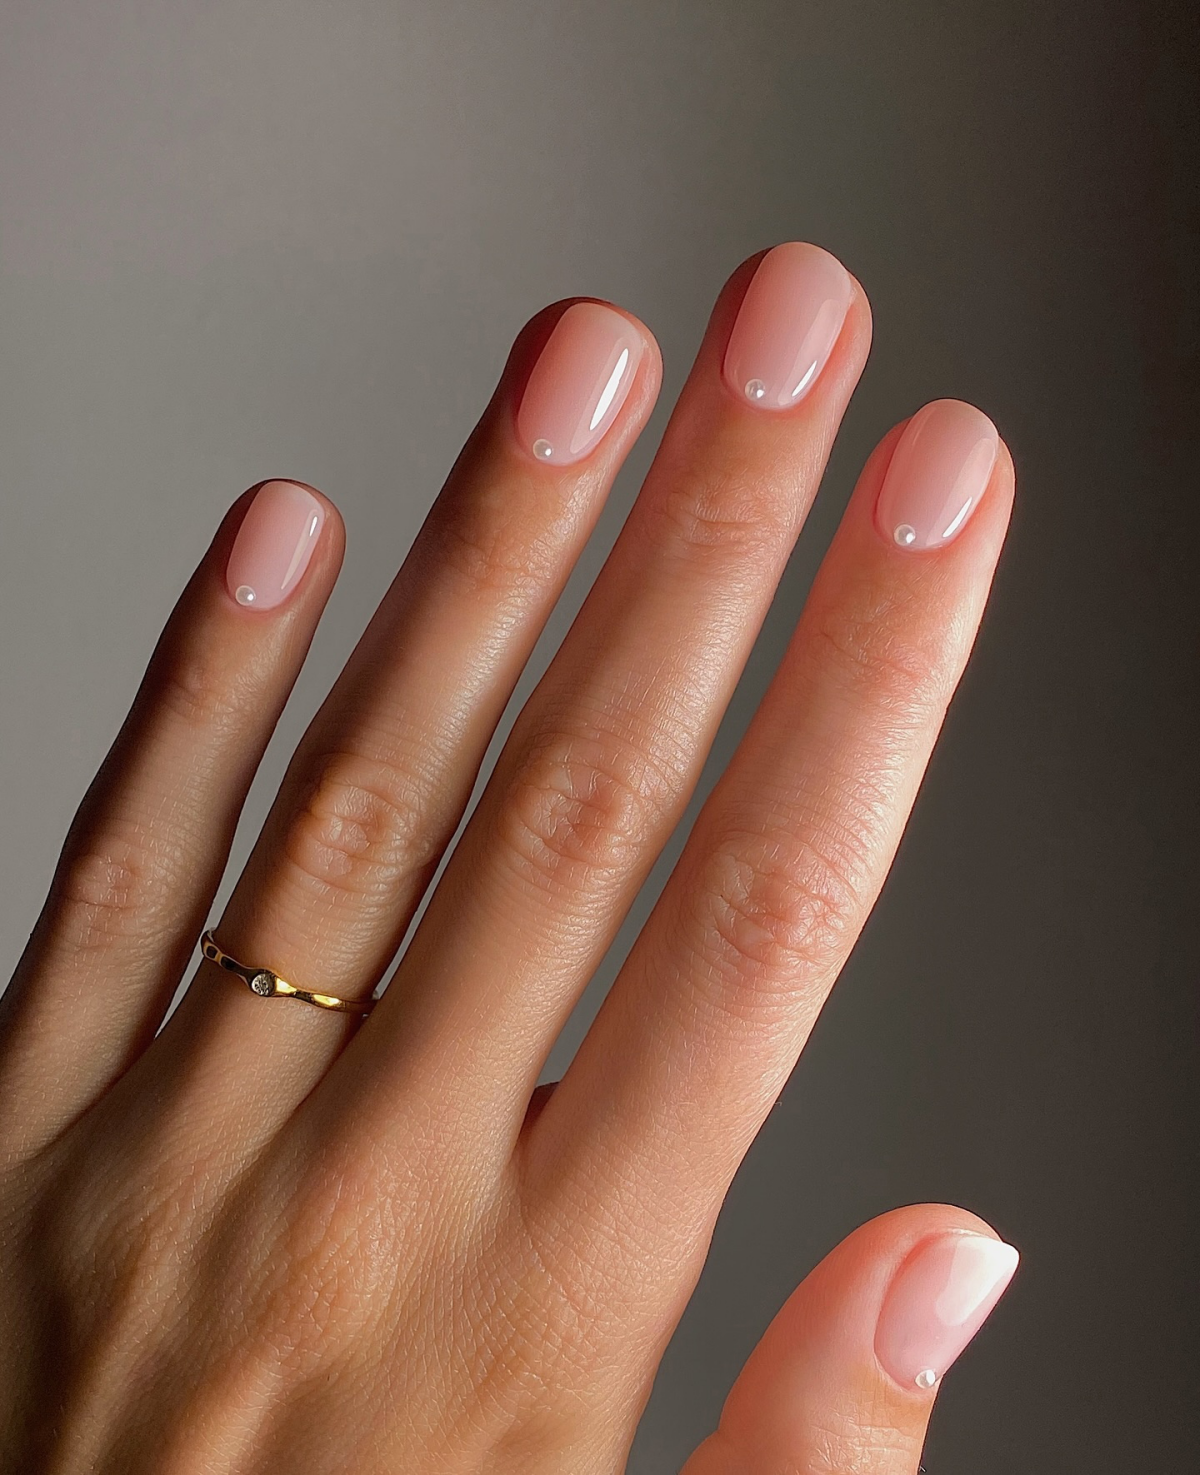
The Glazed Donut: This pearlescent, iridescent finish offers a subtle, ethereal glow that catches the light beautifully. It works with nearly any outfit and is achieved with a sheer white like OPI’s ‘Funny Bunny’ topped with a chrome powder.
The Micro French: A hyper-minimalist take on the classic, featuring a razor-thin tip on a clean, nude base. It’s modern, sophisticated, and elongates the nail bed.
Choose the Glazed Donut for a trendy, angelic vibe; opt for the Micro French for timeless, understated elegance.
- Restores hydration to brittle nails.
- Strengthens the nail plate after gel removal.
- Soothes stressed and dry cuticles.
The secret? A post-wedding nail recovery routine. After soaking off your gels or dip, dedicate a week to going polish-free. Apply a nourishing cuticle oil like CND SolarOil twice a day and use a nail strengthening treatment like OPI’s Nail Envy every other day. Your nails will thank you.
Match your manicure to the wedding’s setting for a truly thoughtful detail. A few ideas to inspire you:
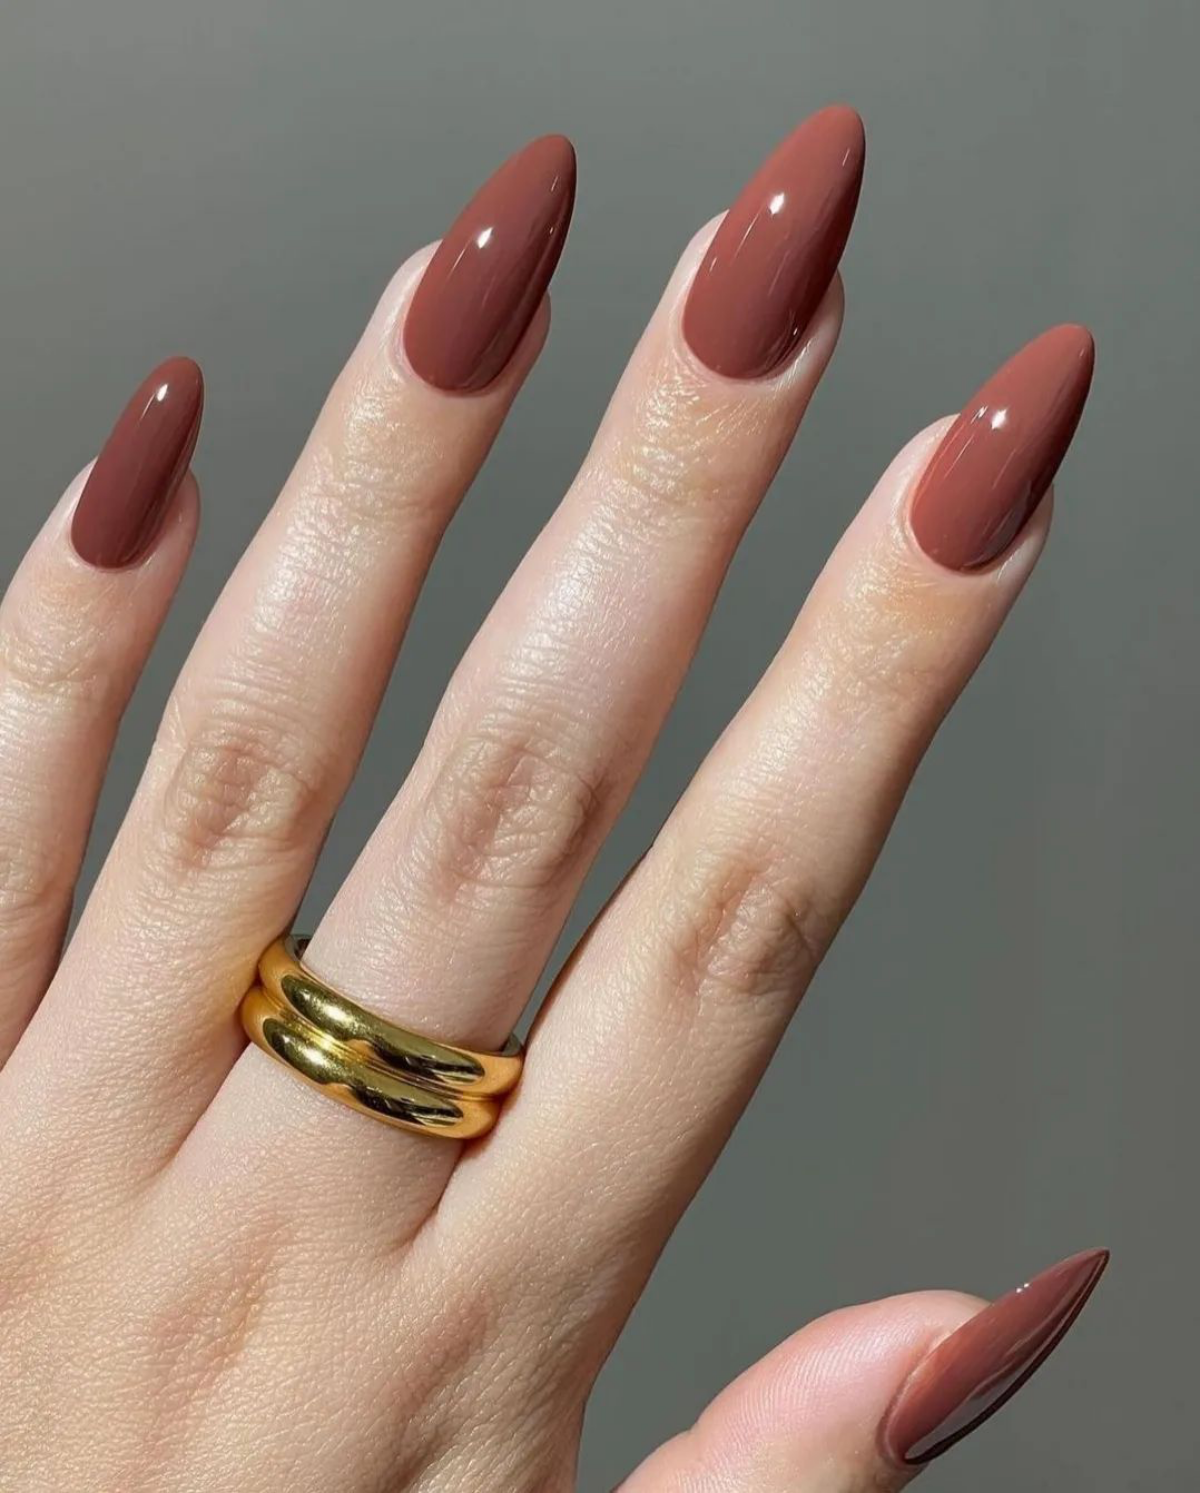
- Rustic Barn Wedding: Think earthy tones like terracotta, deep olive green, or a ‘milk bath’ manicure with tiny dried flowers.
- Chic City Affair: Opt for sophisticated classics like a deep bordeaux, a clean ‘your-nails-but-better’ nude, or a sharp, modern metallic.
- Beachside Ceremony: Embrace the location with a pearlescent white, a soft coral, or a dusty sky blue that mirrors the sea and sky.
Looking for a salon-perfect manicure without the time or budget? High-quality press-on nails are a game-changer for wedding guests. Unlike the options of the past, modern press-ons offer professional-level designs and a natural look. Brands like Static Nails or Olive & June offer everything from minimalist nudes to intricate art. Most use non-damaging glue, making them easy to apply for the event and remove afterward without harming your natural nails.


