For what feels like a lifetime, I’ve had flour on my apron and a little bit of buttercream under my fingernails. My career kicked off in a small, family-run bakery where the head baker, a stern but brilliant mentor, taught me something that’s stuck with me forever: a cake’s real beauty starts with its structure. He was convinced that nostalgia wasn’t just a feeling; it was a flavor, a texture, and a craft you had to earn.
These days, vintage-style cakes are everywhere, and I love to see it. But for me, they’re not a trend. They’re the foundation of good baking—a testament to techniques learned through a whole lot of patience and practice.
So, let’s be clear: this isn’t a quick project. These cakes demand respect for the ingredients and a solid understanding of the science happening in your mixing bowl. This guide is all about sharing the professional methods I’ve learned and used for years, so you can build a stunning vintage cake that genuinely tastes as incredible as it looks. We’re doing this from the ground up.
First Things First: The Science of a Perfect Cake Crumb
Before you even dream about fancy piping, we have to talk about the cake itself. A gorgeous cake that’s dry and crumbly on the inside is, frankly, a massive disappointment. The texture, what we bakers call the “crumb,” is all about chemistry. Getting it right isn’t luck; it’s about control.
Ingredient Temperature is NOT a Suggestion
Old-school recipes lean on simple, quality ingredients because they didn’t have all the modern stabilizers we do now. Their secret was technique. That means using real butter, not margarine. Butter gives you that unmatched flavor and, when creamed with sugar, creates the tiny air pockets that give the cake its lift.
Heads up! Your butter needs to be at the right temperature, which is around 65°F. Too cold, and it won’t mix properly; too warm, and it gets greasy, causing those precious air pockets to collapse. A good way to test it is to press it with your finger—it should give easily but not feel oily or melty. Oh, and your eggs absolutely must be at room temperature. Cold eggs will make the butter seize up and curdle, ruining the smooth batter you’re working so hard to create. It’s a small detail that makes a world of difference.
Flour and Leavening: Your Cake’s Skeleton
The type of flour you choose directly impacts the cake’s tenderness. All-purpose flour will work in a pinch, but for that truly delicate, vintage-style texture, cake flour is the way to go. It has a lower protein content (around 7-9%), which means less gluten development and a much softer final product.
The rise comes from two places: chemical leaveners (baking soda and powder) and mechanical leavening (the air you whip in). Always, and I mean ALWAYS, check the expiration date on your baking powder and soda. If they’re old, they’ve lost their power, and your cake will be dense and sad.
The real magic, though, is in the mechanical leavening. This happens when you cream the butter and sugar together for at least 5-7 minutes. You are literally forcing air into fat. Don’t skimp on this step!
Let’s Bake: A Go-To Classic Vanilla Cake Recipe
Theory is great, but let’s put it into practice. Here is a simple, reliable recipe for a two-layer, 8-inch cake that is perfect for applying these techniques.
Here’s what you’ll need:
2 ½ cups cake flour
2 ½ teaspoons baking powder
½ teaspoon salt
1 cup (2 sticks) unsalted butter, softened to about 65°F
1 ¾ cups granulated sugar
4 large eggs, room temperature
1 cup buttermilk, room temperature
2 teaspoons pure vanilla extract
A quick note for my fellow home bakers: Don’t have a fancy stand mixer? No sweat. You can absolutely do this with a trusty hand mixer. Just be prepared for a bit of an arm workout and double the creaming time from 5 minutes to about 10. The results are worth it!
Prep Your Station: Preheat your oven to 350°F. Grease and flour two 8-inch round cake pans, and line the bottoms with a circle of parchment paper. This triple-prep guarantees your cakes won’t stick.
Combine Dry Ingredients: In a medium bowl, whisk together the cake flour, baking powder, and salt. Set it aside.
Cream Butter and Sugar: In your stand mixer with the paddle attachment (or using a hand mixer), beat the softened butter and sugar on medium-high speed for a full 5-7 minutes. The mixture should become pale, light, and nearly double in volume. This is the most critical step for a light cake.
Add Eggs Slowly: Add your room-temperature eggs one at a time, letting each one fully incorporate before adding the next. This helps keep your batter from breaking.
Alternate Wet and Dry: Now, you’ll alternate adding the dry ingredients and the buttermilk. Start by adding about a third of the flour mixture, mixing on low until just combined. Then, add half of the buttermilk and vanilla. Repeat this process, always ending with the dry ingredients. This method prevents you from over-mixing and developing tough gluten.
Bake to Perfection: Divide the batter evenly between your prepared pans. Bake for 30-35 minutes, or until a wooden skewer inserted into the center comes out clean. Let the cakes cool in the pans for about 10 minutes before turning them out onto a wire rack to cool completely.
Frosting Face-Off: American vs. Swiss Meringue
The frosting you choose will completely define the cake’s personality. These are the two main players in the vintage cake world, and they couldn’t be more different.
American Buttercream is what most people think of when they hear “buttercream.” It’s a simple mix of powdered sugar, butter, a little milk, and vanilla. It’s super easy to make, very stable for decorating, and crusts over nicely. The downside? It is incredibly sweet, and the texture can sometimes be a bit grainy from the powdered sugar. It’s a solid choice for beginners, but it has its limits.
Swiss Meringue Buttercream (SMBC), on the other hand, is the professional’s choice for a reason. It’s silky smooth, far less sweet, and a dream to pipe with. It’s made by heating egg whites and sugar, whipping them into a meringue, and then beating in butter. It takes more time and precision, but the elegant flavor and texture are unbeatable. From my experience, once you master SMBC, you’ll never go back.
How to Make Silky Swiss Meringue Buttercream
This process is precise, but don’t be intimidated. The recipe makes about 5 cups, which is enough to generously fill and frost a three-layer, 8-inch cake.
Heat the Eggs and Sugar: In the bowl of your stand mixer, combine 5 large pasteurized egg whites and 1 ½ cups of granulated sugar. Set this bowl over a pot of simmering water (like a double boiler) and whisk constantly until the sugar has completely dissolved and the mixture reaches 160°F on a candy thermometer. Rub a bit between your fingers—if it’s smooth, you’re good to go.
Whip the Meringue: Move the bowl to your mixer fitted with the whisk attachment. Whip on high speed until you have a stiff, glossy meringue and the outside of the bowl feels cool to the touch. This can take 10-15 minutes. Be patient! A warm meringue will melt your butter.
Beat in the Butter: Switch to the paddle attachment. On low speed, add 2 cups (4 sticks) of softened, room-temperature butter, one tablespoon at a time. The mixture might look curdled or soupy at some point. DON’T PANIC. This is totally normal. Just keep mixing.
Troubleshooting Tip: If your SMBC looks like cottage cheese, it’s probably because the butter was too cold. Just let the mixer keep running for another 5-10 minutes. The friction will warm it up, and I promise, it almost always comes together. If it looks soupy, your meringue or butter was too warm. Just pop the whole bowl in the fridge for 20 minutes, then whip it again.
The Secrets to Vintage Decoration
That iconic, elaborate look of vintage cakes comes from specific techniques that, you guessed it, require practice. Don’t expect perfection on your first attempt!
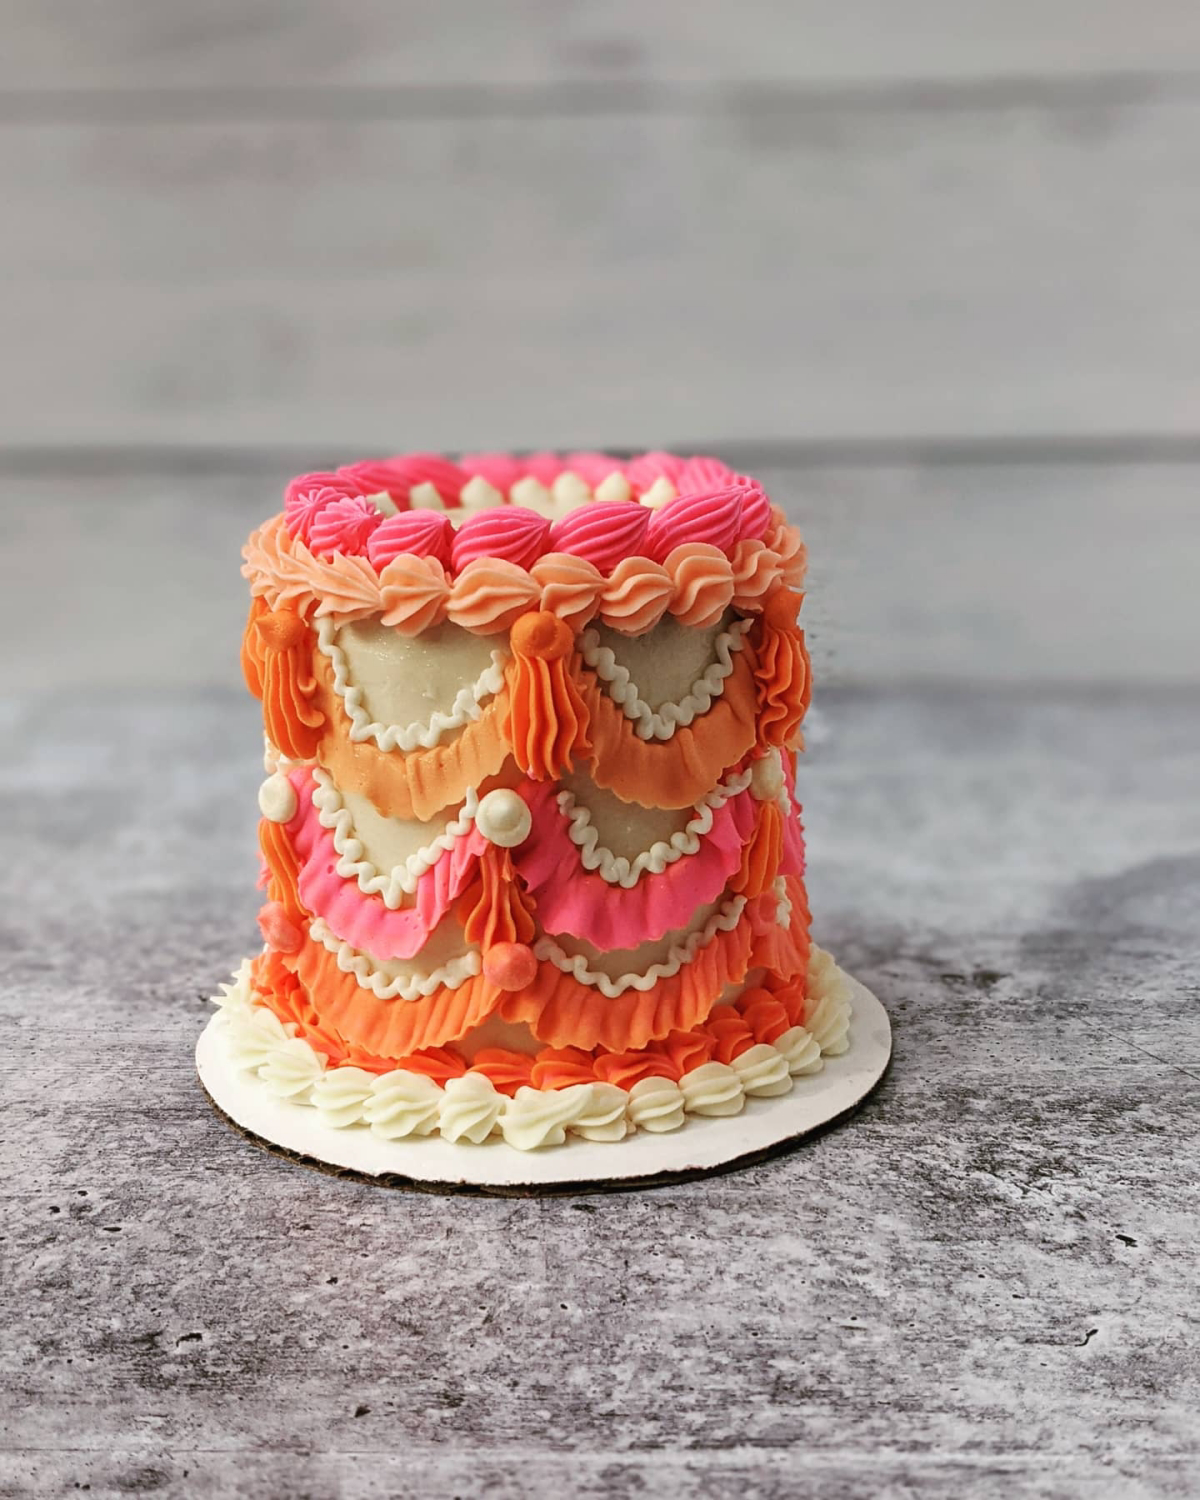
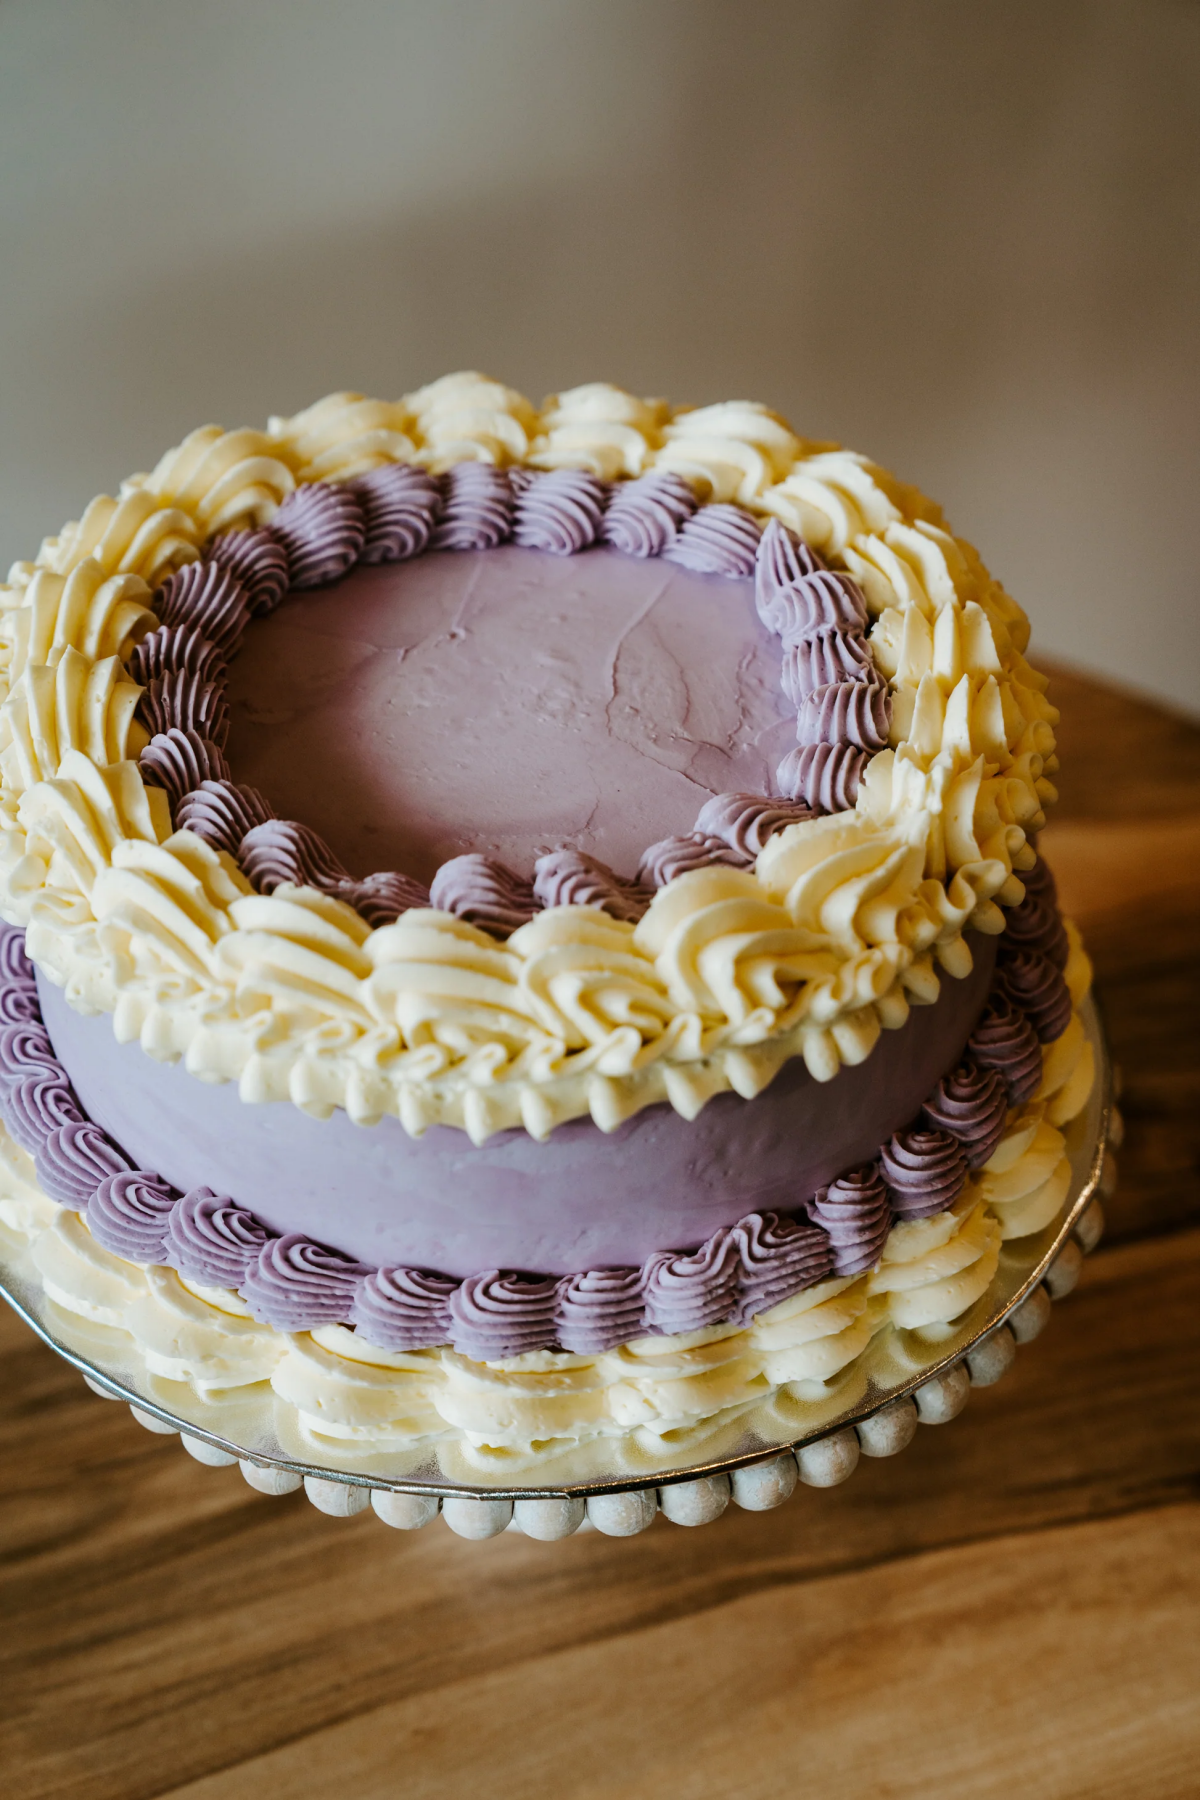
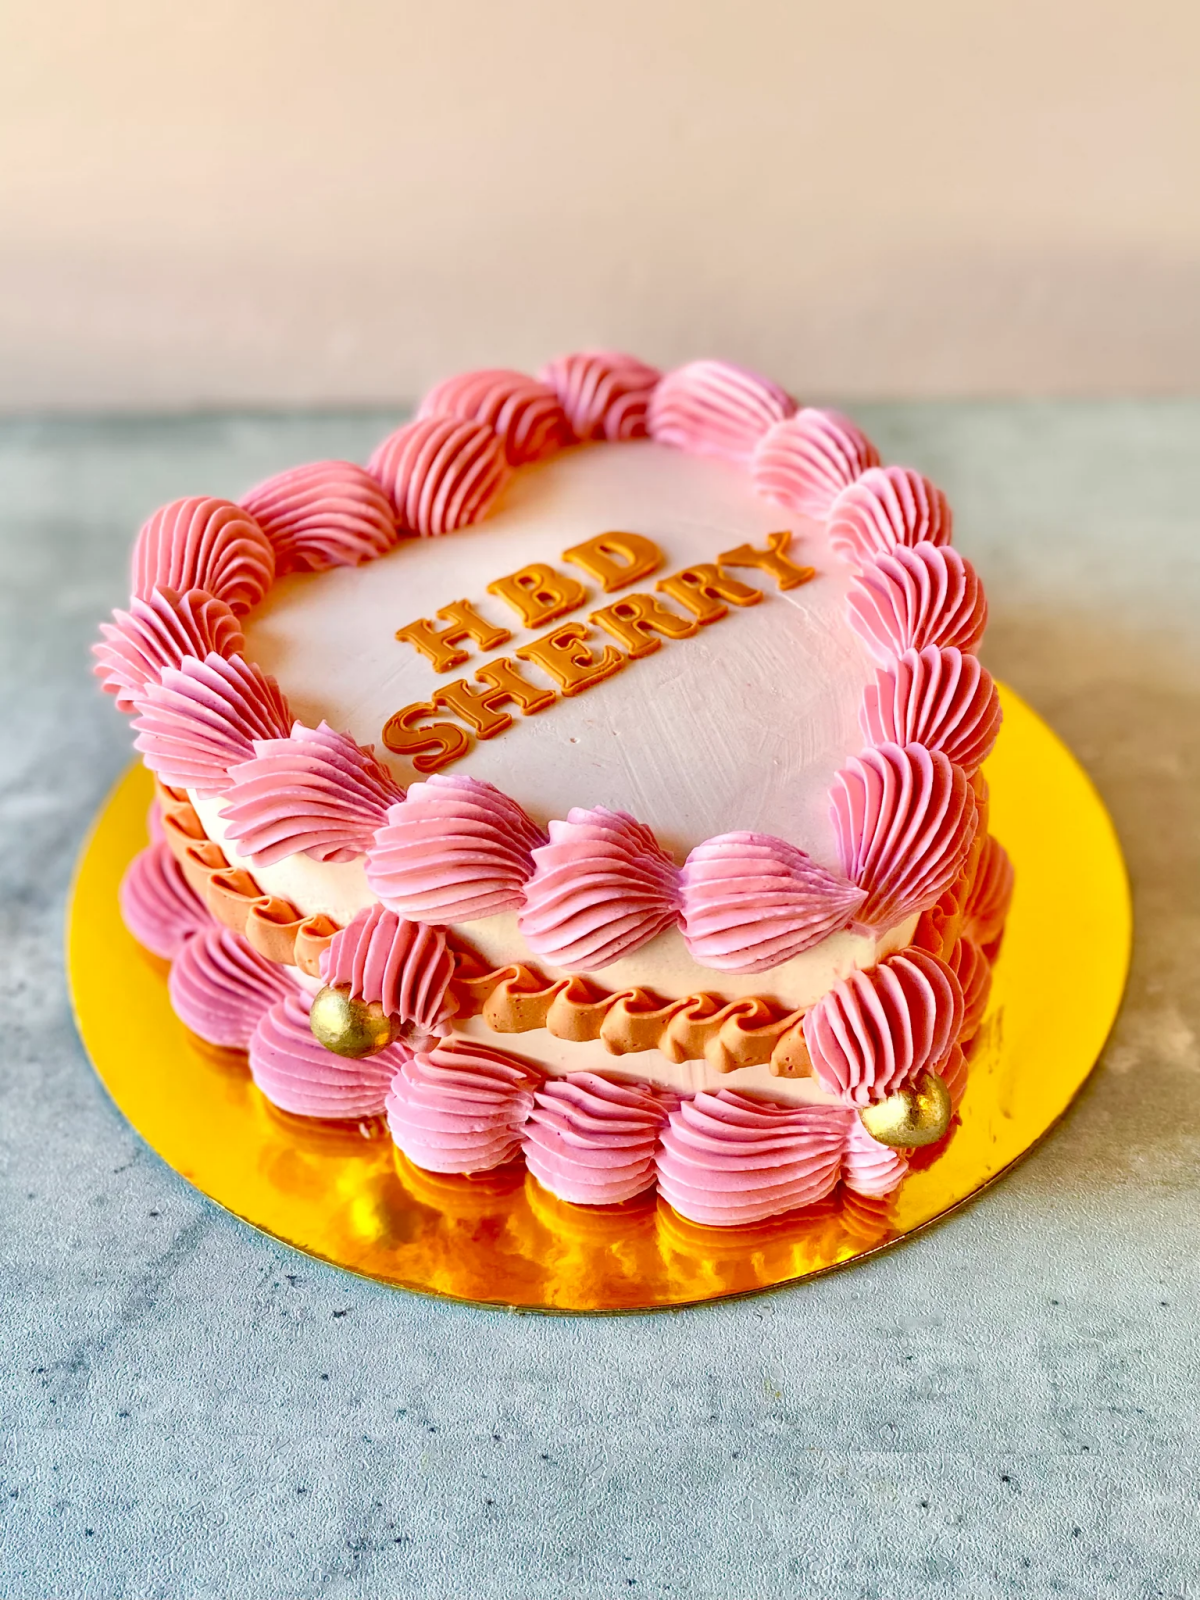
Intricate Over-Piping
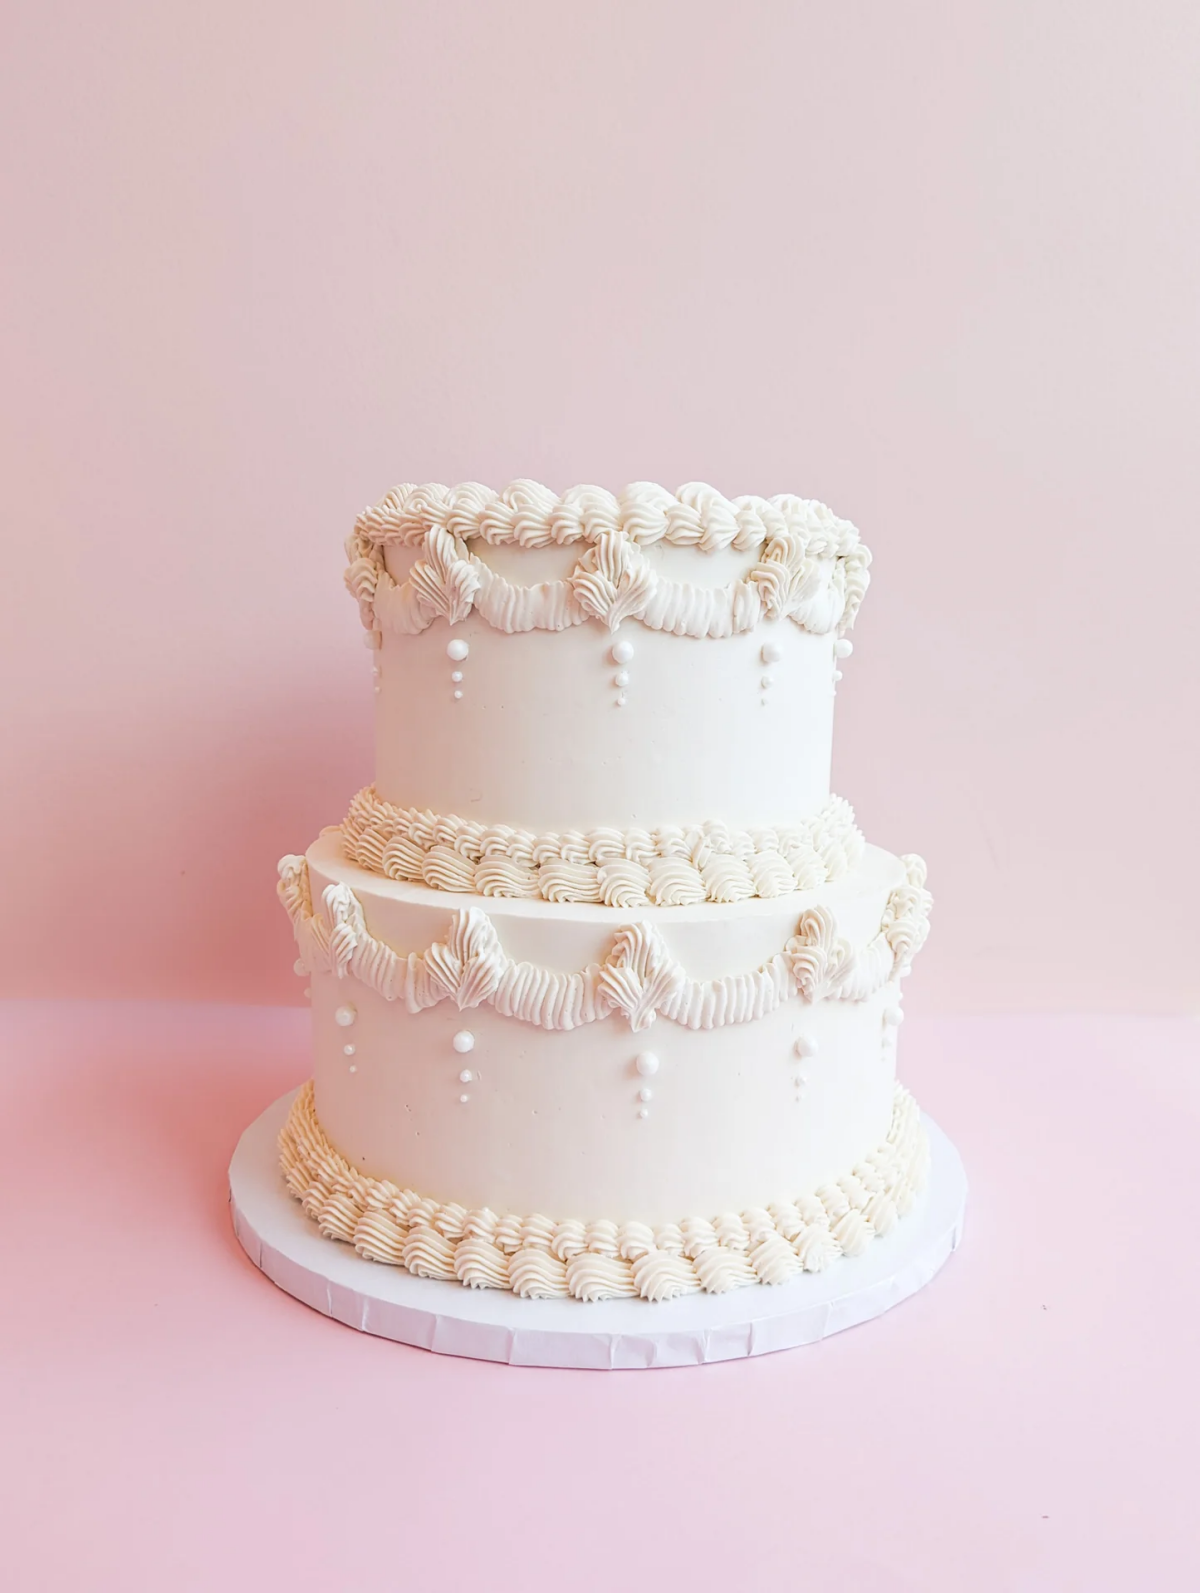
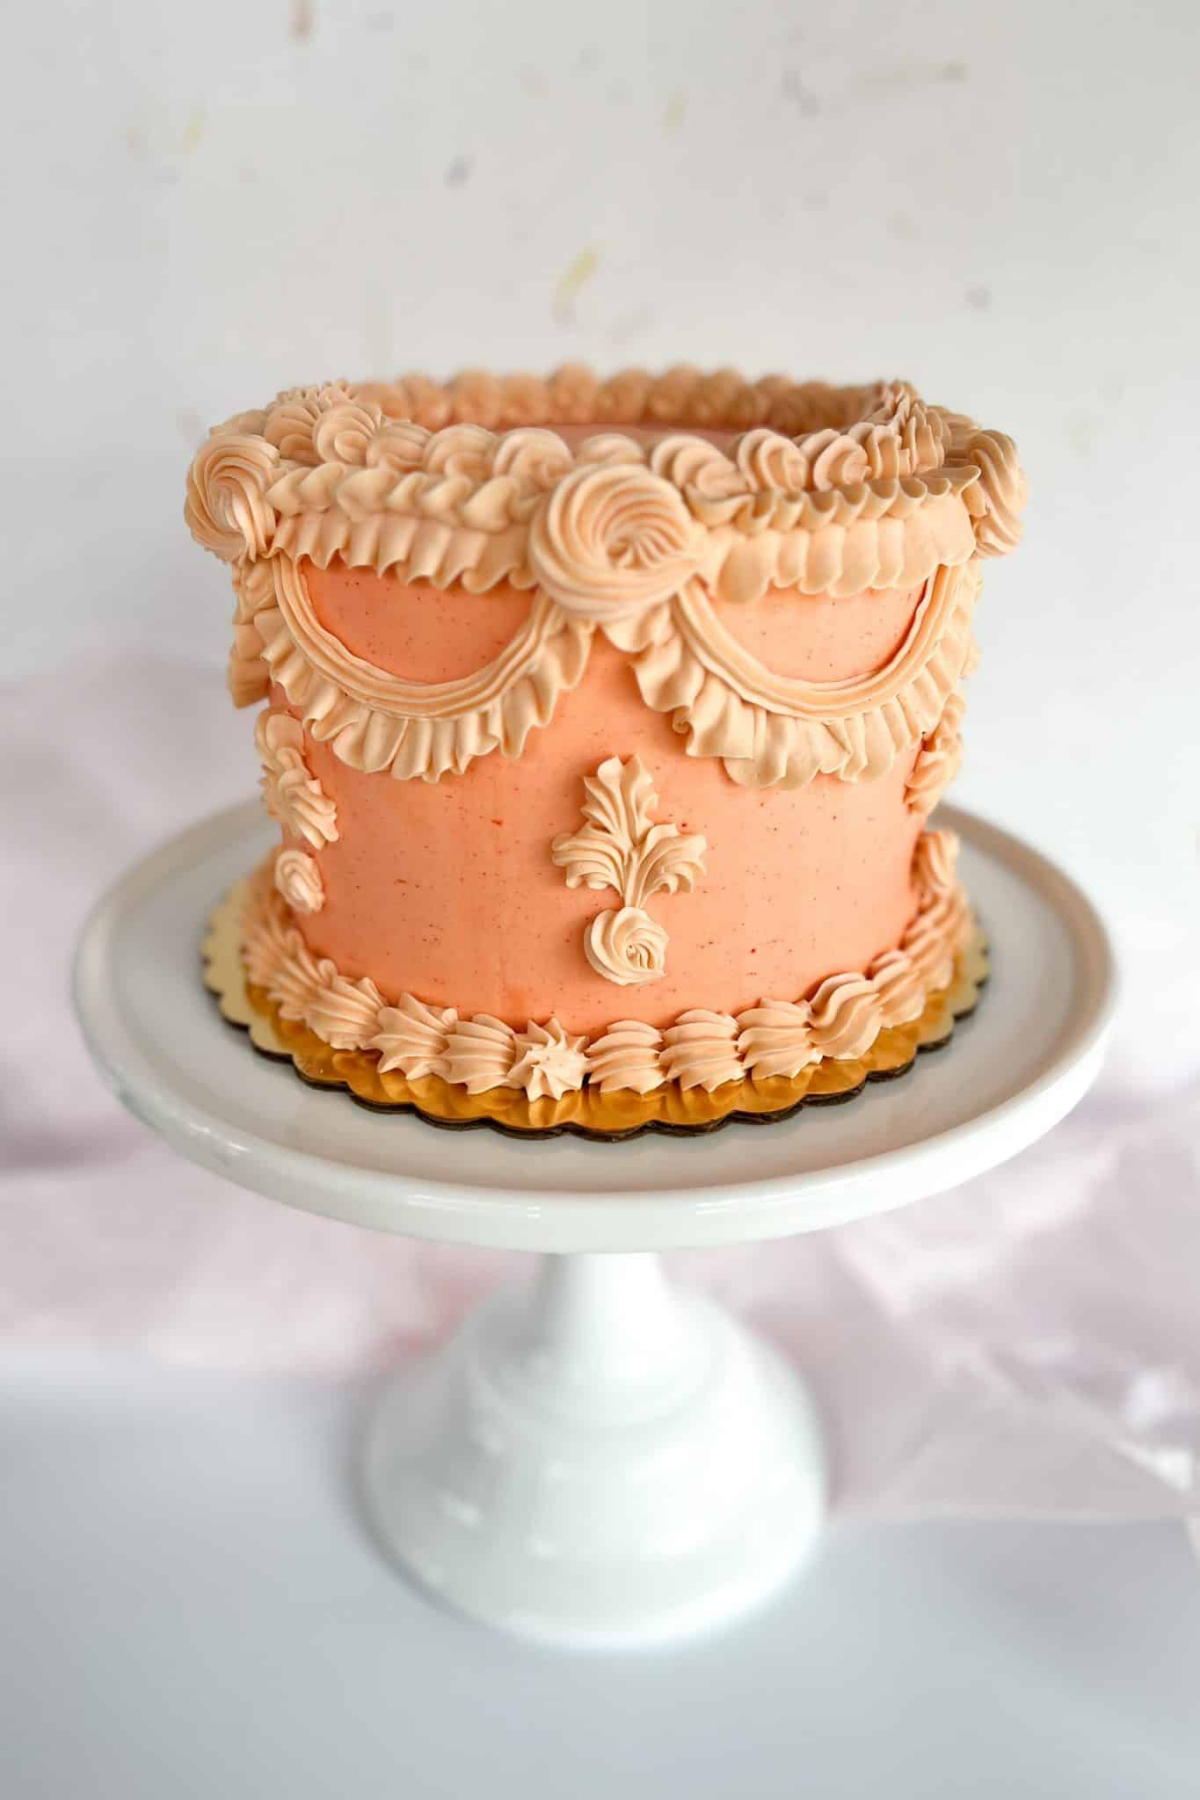
This stunning style, rooted in traditional English confectionery, is all about layering piped details to create incredible depth. It looks impossibly complex, but it’s really just simple shapes—like shells and scrolls—repeated with precision. You need a stiff buttercream for this. The key is to pipe a line of shells, let it set for a few minutes, and then pipe another, smaller line directly on top of it. Building these layers takes patience, but it’s what creates that jaw-dropping 3D effect.
When I was learning, I spent a full week just piping shells on parchment paper before I was even allowed near a real cake. Practice is truly the only way to develop the muscle memory for this.
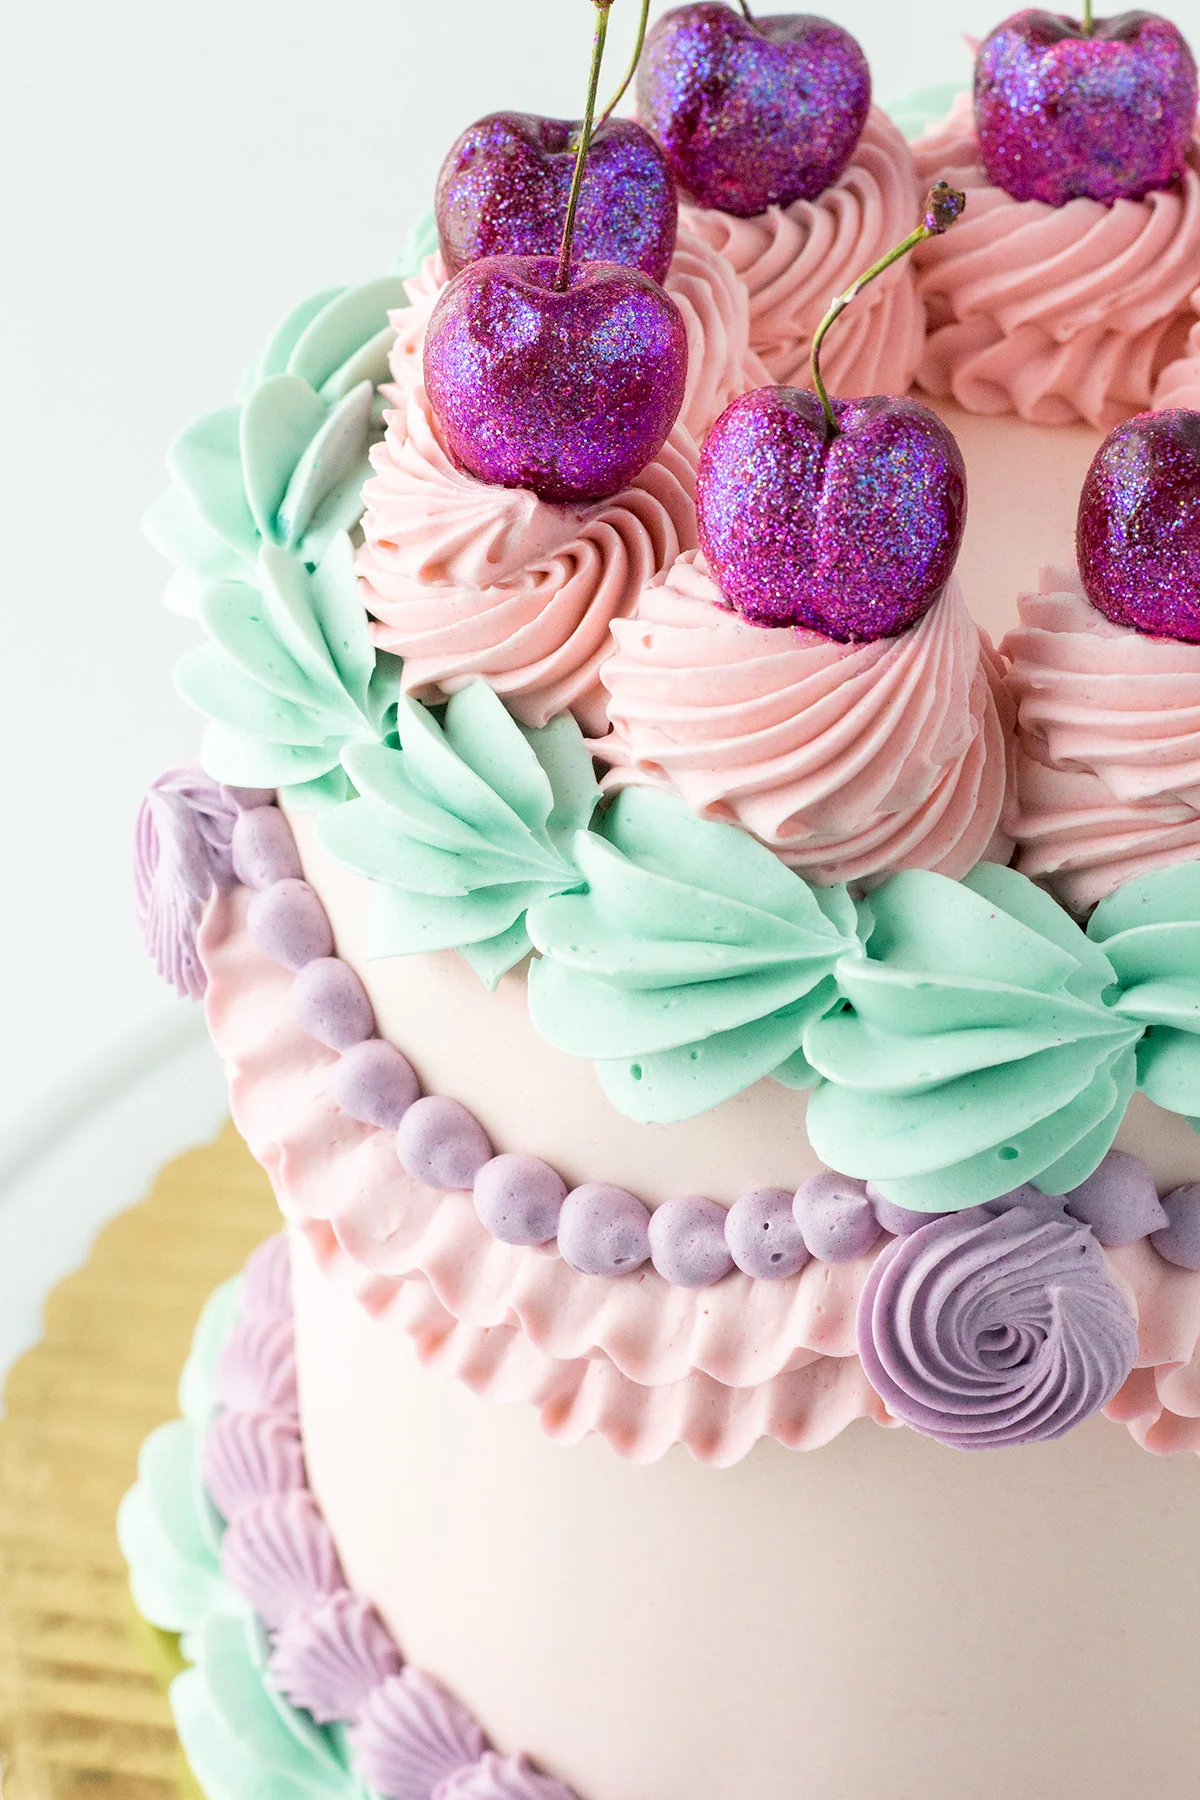
Crystallized Flowers: Nature’s Sprinkles
Before bakers had complex silicone molds, they used what was beautiful and available: edible flowers. Violets, pansies, and rose petals are all wonderful choices. A critical warning here: ONLY use flowers that are grown to be eaten. Flowers from a florist are almost always treated with pesticides and are not food-safe. You can often find edible flowers at farmers’ markets or grow your own.
The process is simple: gently paint a thin layer of pasteurized egg white onto each petal, sprinkle it with superfine sugar, and let it dry for 24-48 hours until completely stiff. They become these beautiful, fragile, glass-like decorations.
Assembly Required: Putting It All Together
Building a layer cake without a plan can lead to leaning towers and a lot of frustration. Let’s make sure that doesn’t happen.
The Non-Negotiable Tools
You don’t need a ton of fancy gear, but a few items are essential. A revolving cake stand makes frosting so much easier. An offset spatula lets you spread icing without getting your knuckles in it. And a bench scraper—seriously, this will change your life. It’s a flat metal scraper that gives you those perfectly smooth sides. You can get a great one for under $10 online or at any kitchen supply store.
The Magic of the Crumb Coat
Here it is, the single biggest secret to a professional-looking cake. A crumb coat is a thin, messy layer of frosting you apply all over the stacked cake. Its only job is to trap all the loose crumbs. Imagine trying to frost a cake and dragging brown specks through your perfect white finish. That’s the ‘before.’ Now, imagine a perfectly clean, smooth final coat. That’s the ‘after’ you get with a crumb coat.
Just apply a thin layer of frosting, then chill the cake in the fridge for 30 minutes until it’s firm. Now you have a clean canvas for your beautiful final layer.
Structural Integrity for Tiered Cakes
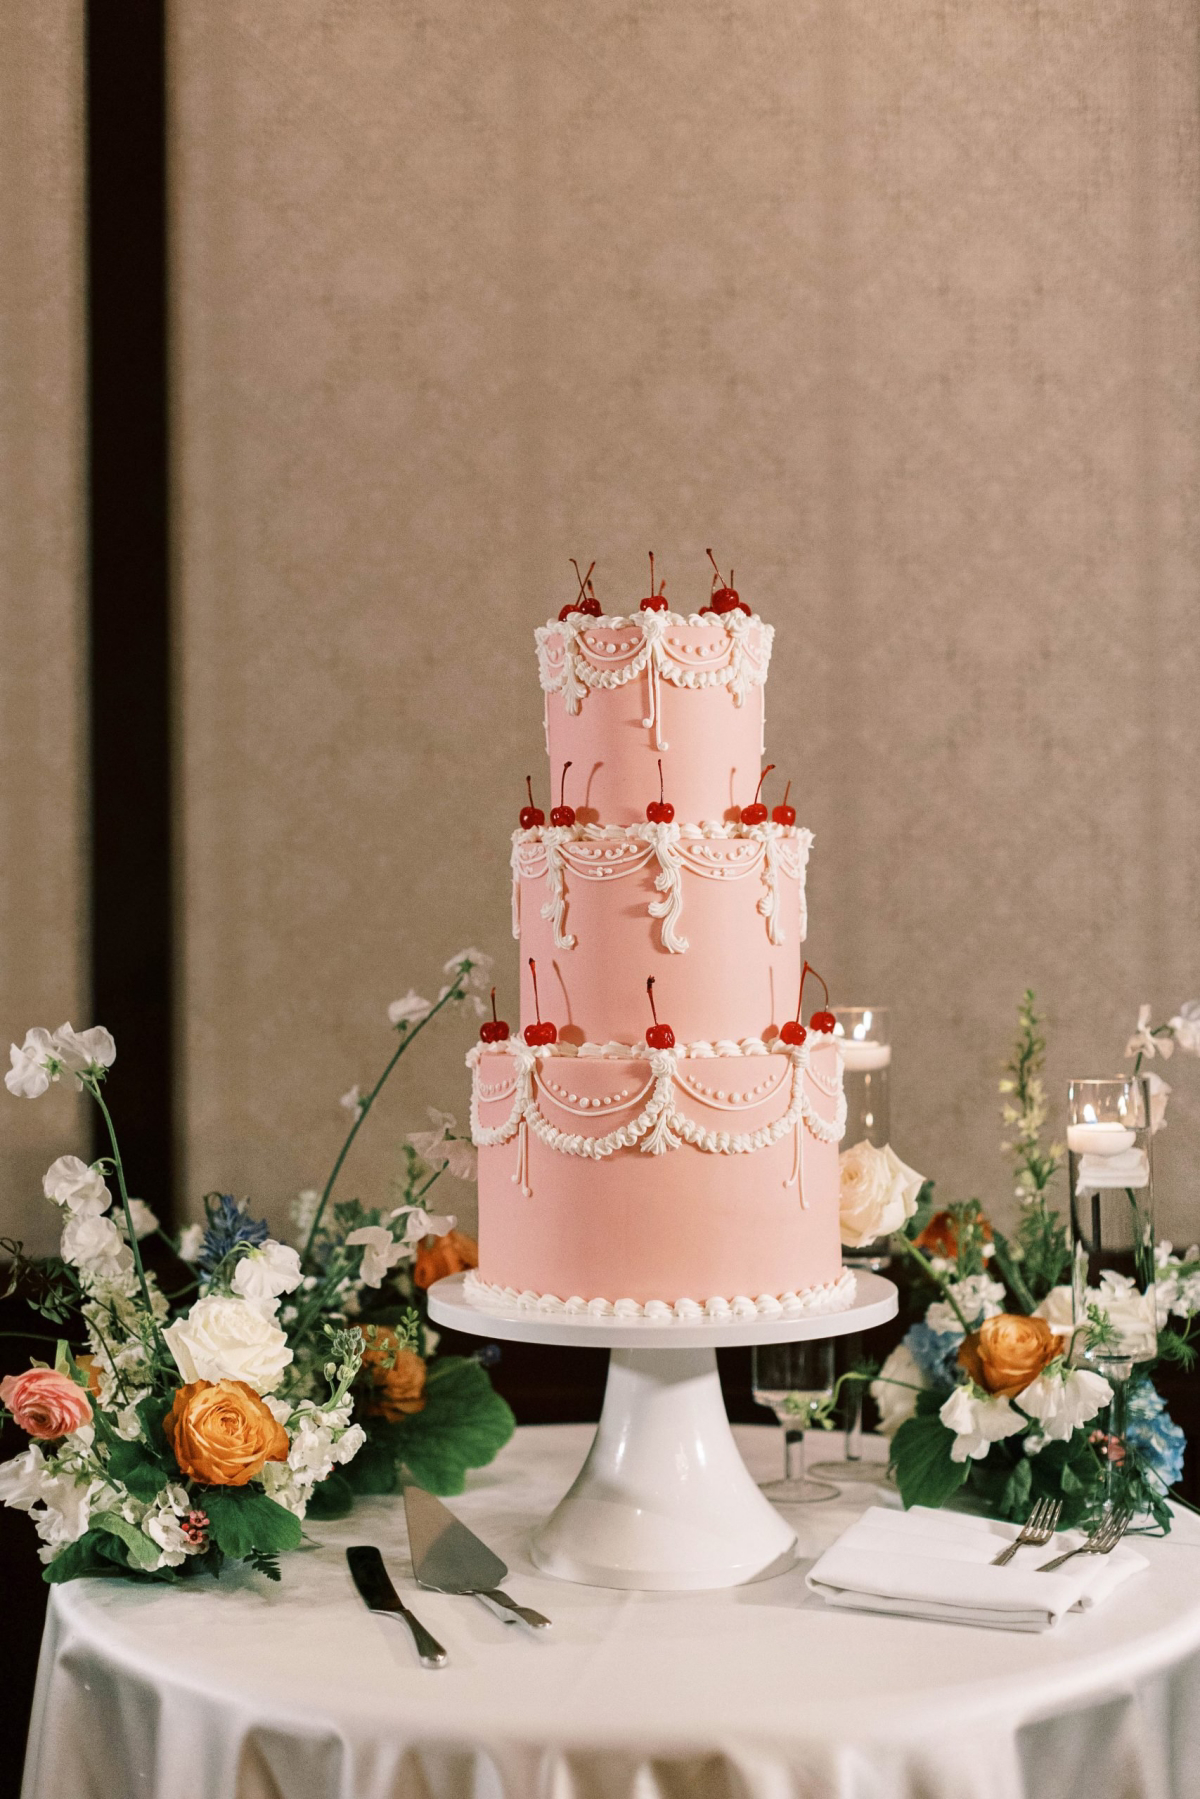
If you’re feeling ambitious and want to stack cakes, you have to use supports. Never, EVER stack cake tiers directly on top of each other. The weight will crush the bottom layer. Each tier needs its own cardboard base and a system of dowels inserted into the tier below it to act as pillars. I once saw a three-tier wedding cake that wasn’t doweled collapse into a heap of frosting and tears. It’s a hard lesson to learn that way.
Feeling a little intimidated? Here’s a quick win. Just make a half-batch of the American Buttercream. Grab a piece of parchment paper and a piping tip, and just practice making shell borders. When you’re done, you can scrape the frosting right back into the bowl and do it again. All practice, zero pressure! Baking these cakes connects you to generations of craftspeople who made magic with simple ingredients. Be patient with yourself, respect the process, and you’ll create something truly special.
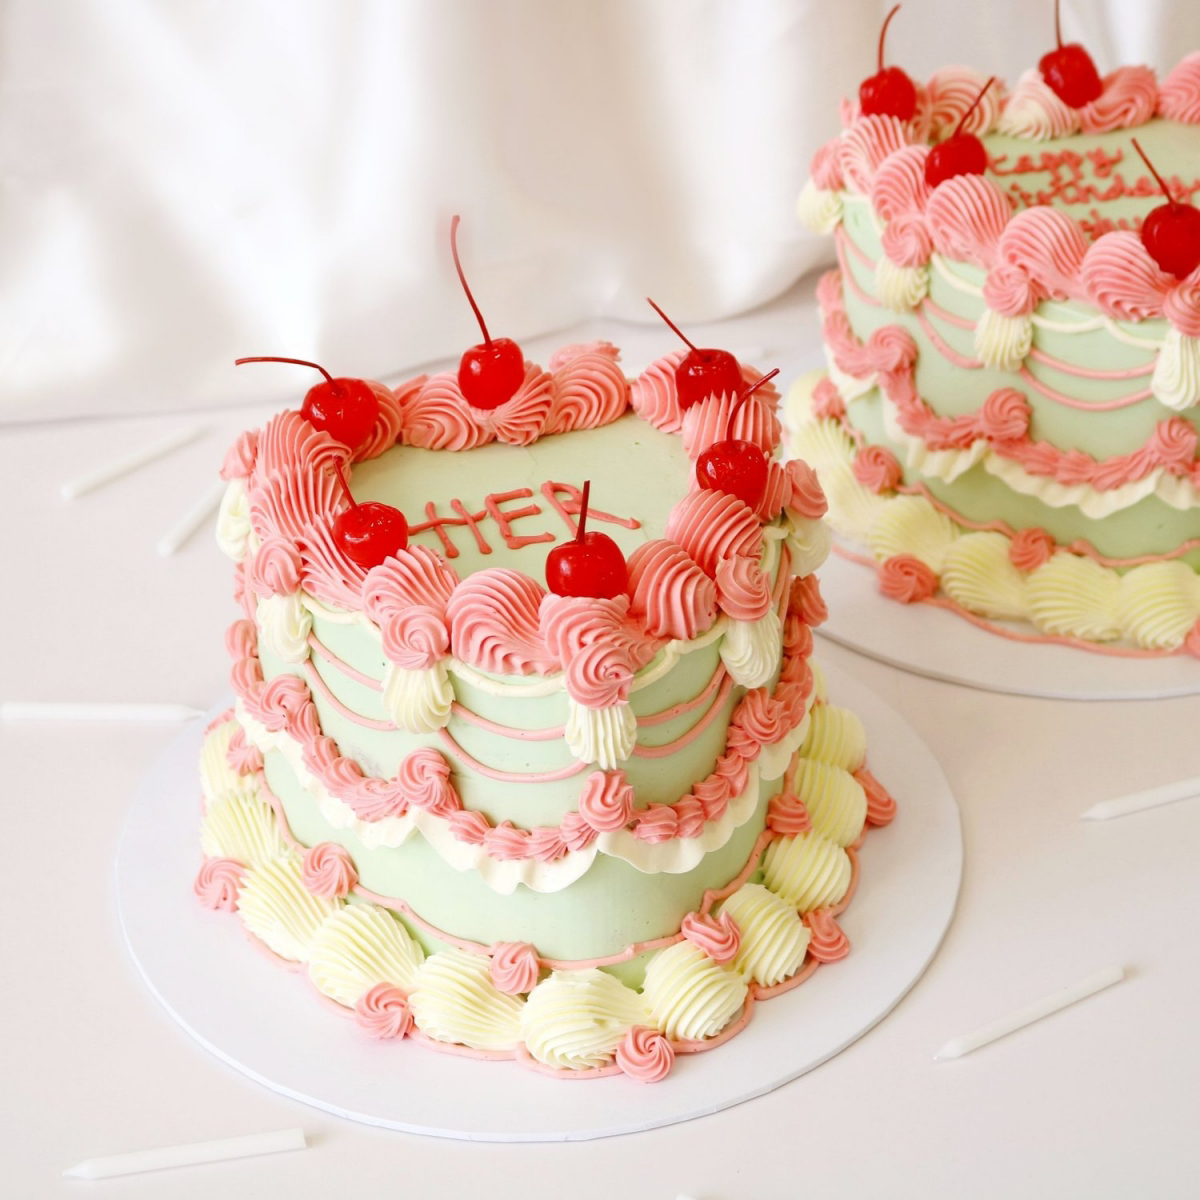
Galerie d’inspiration
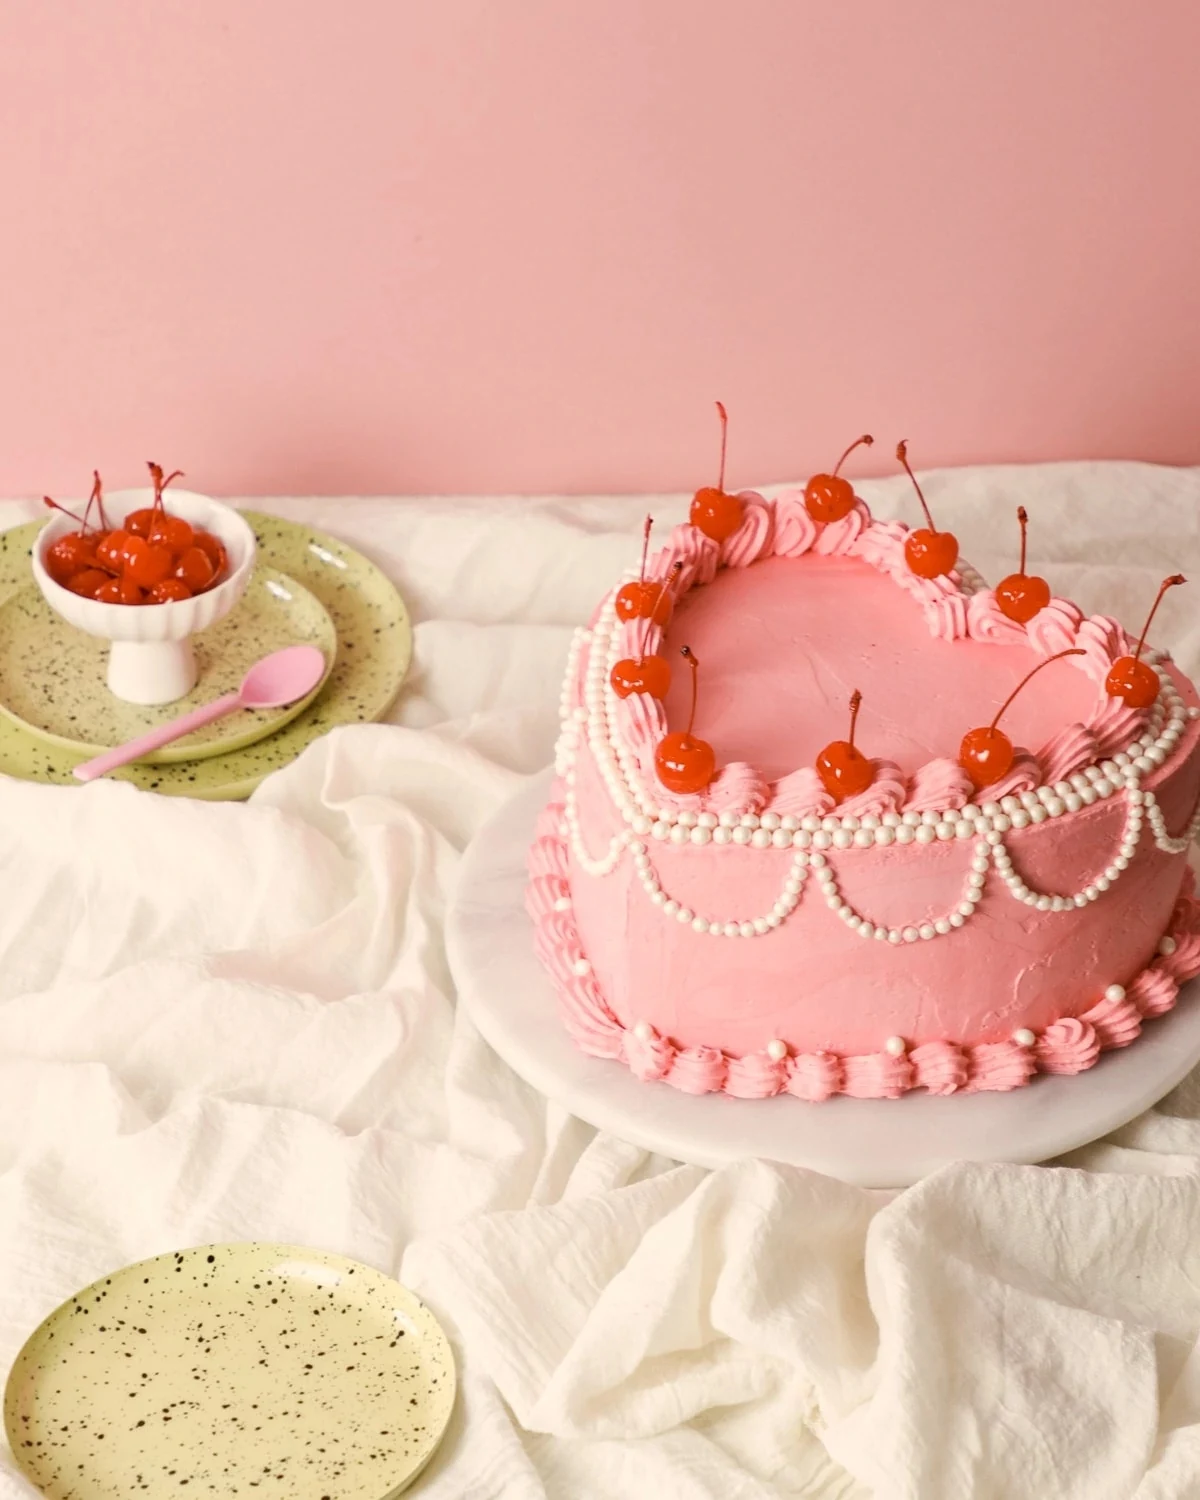
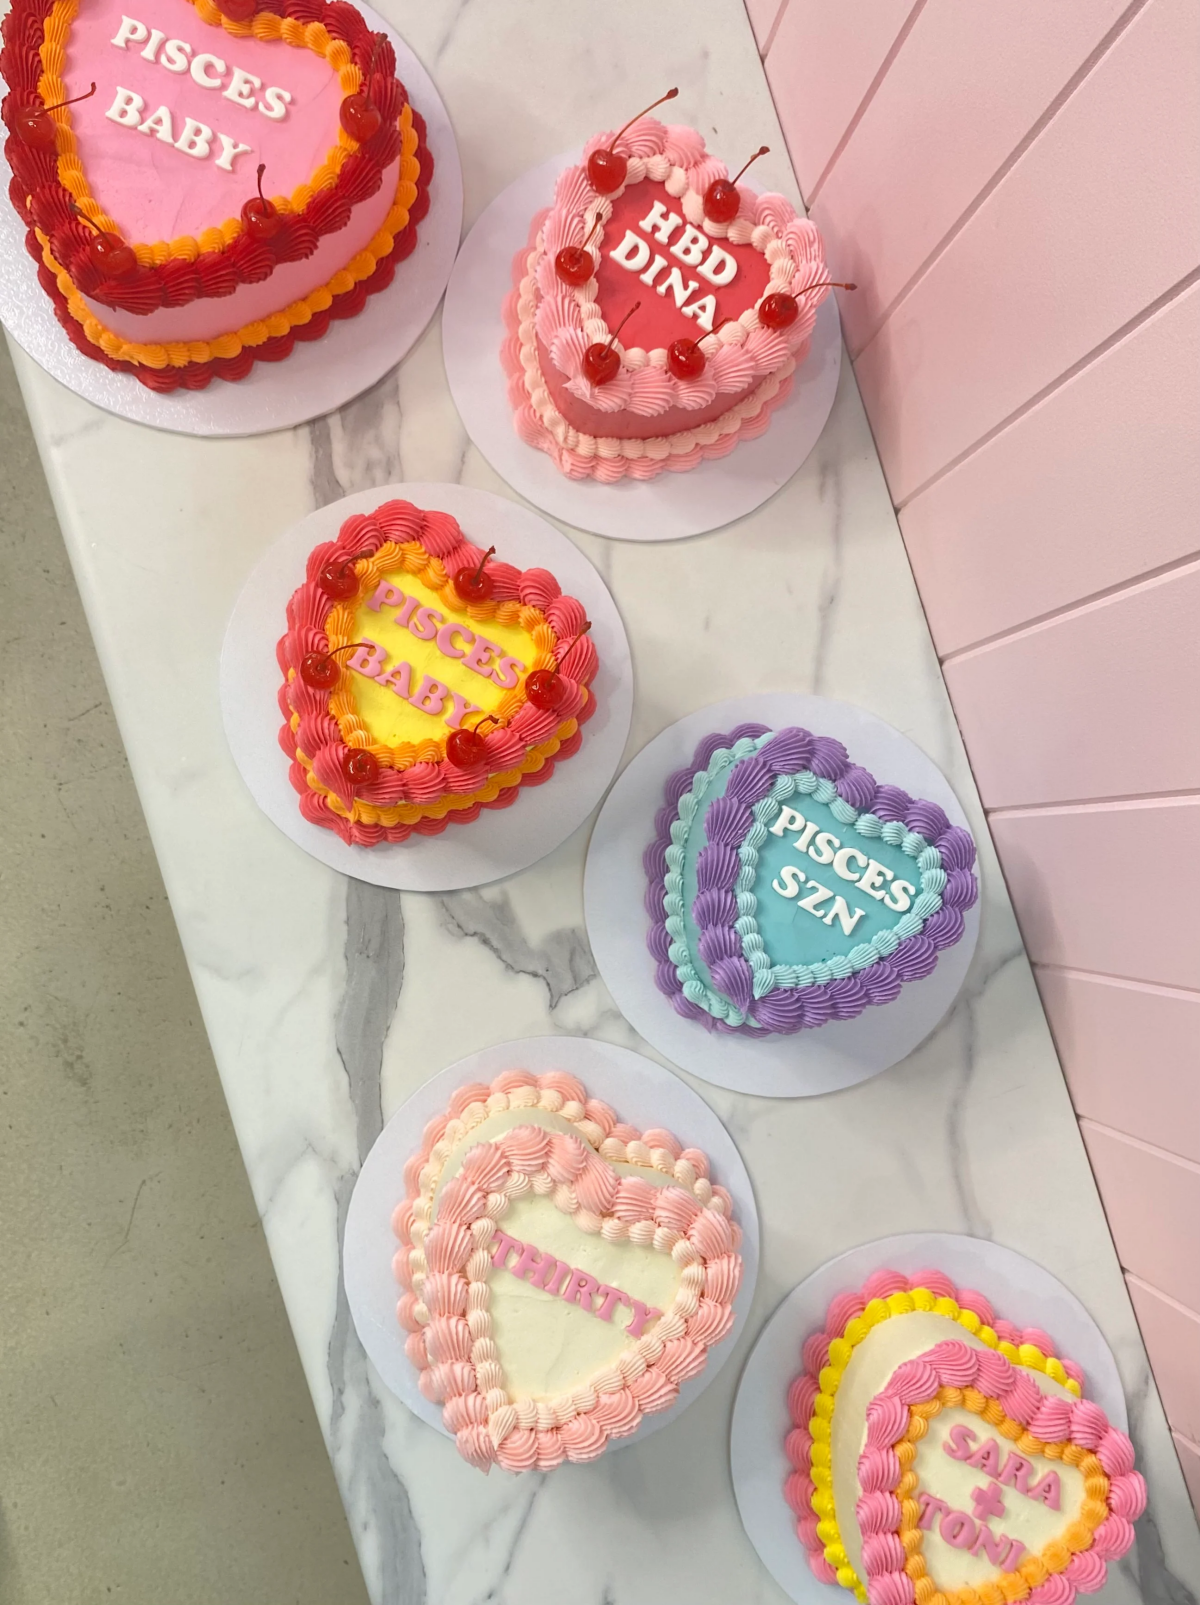
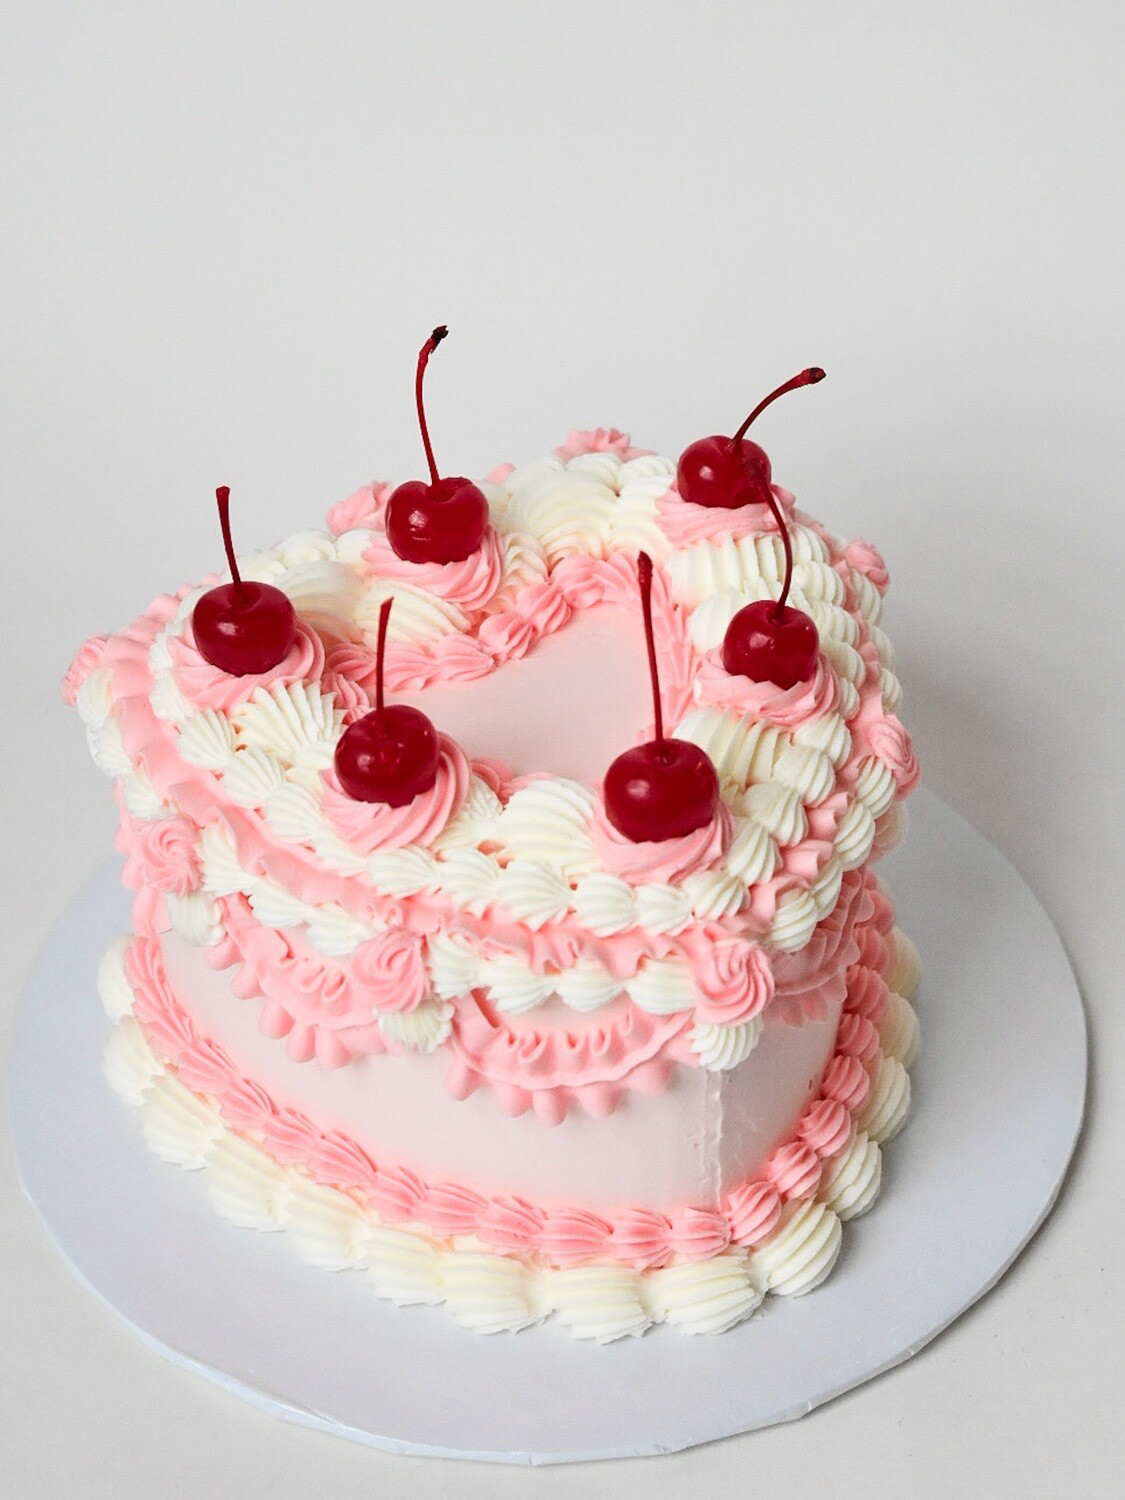
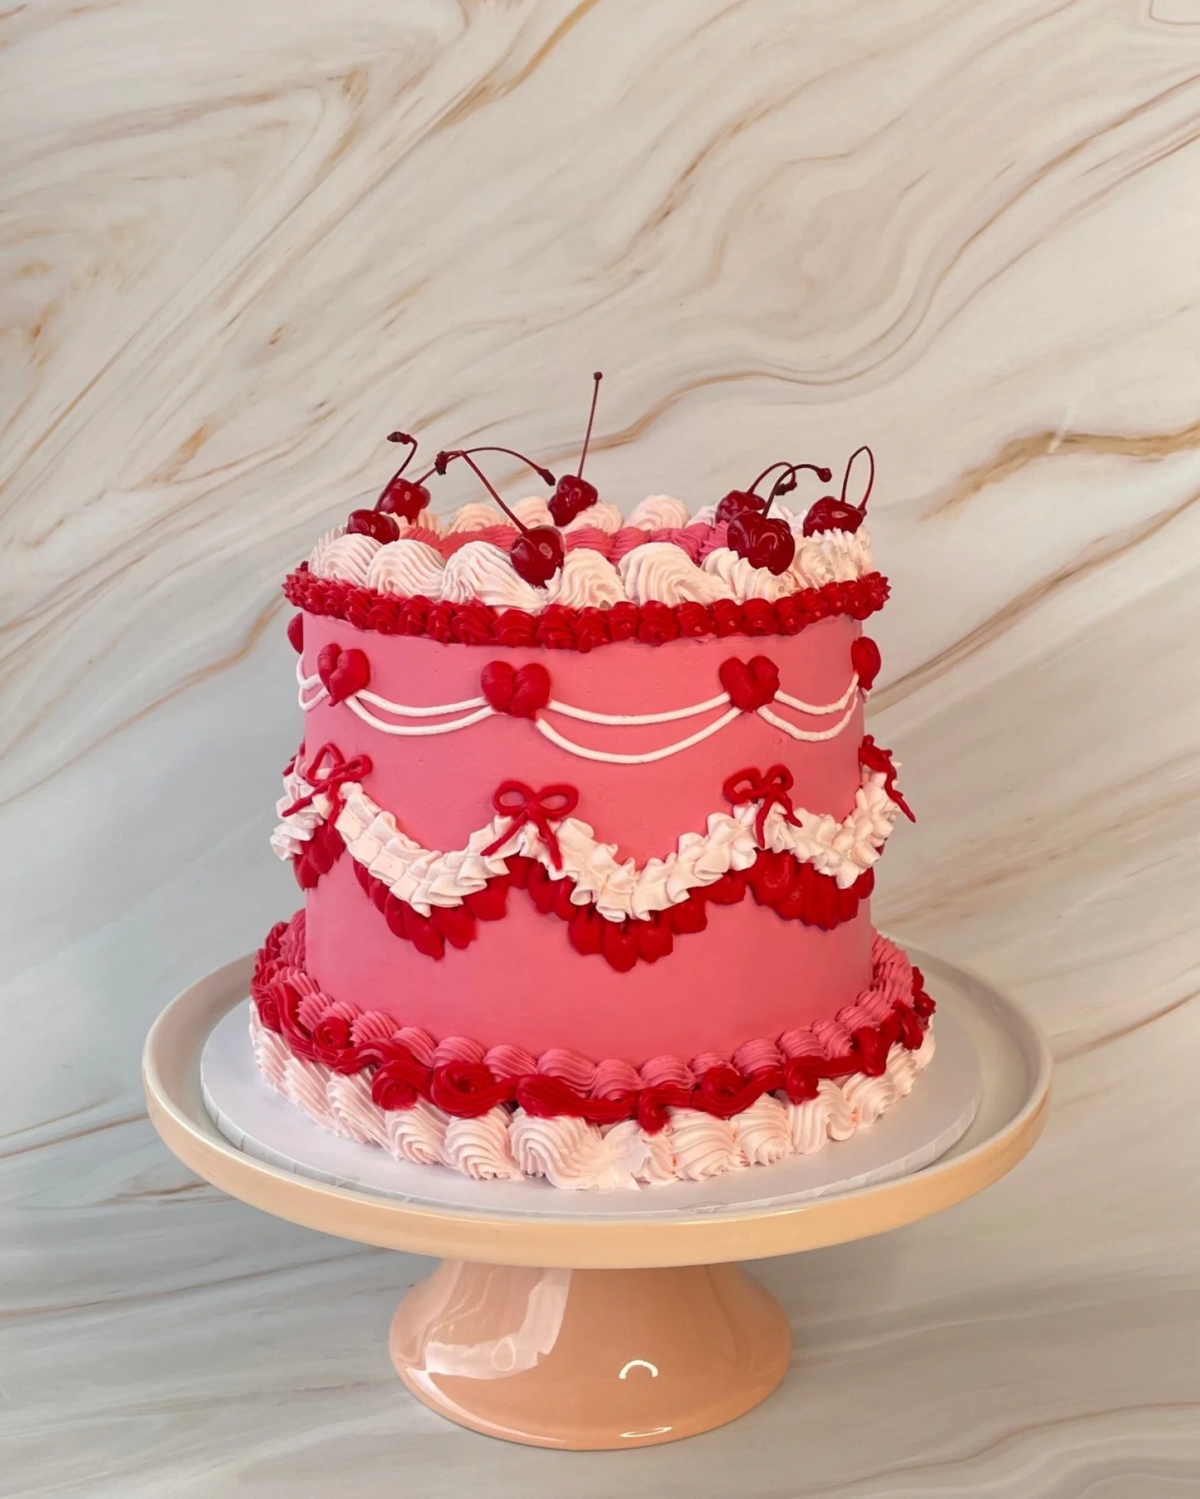
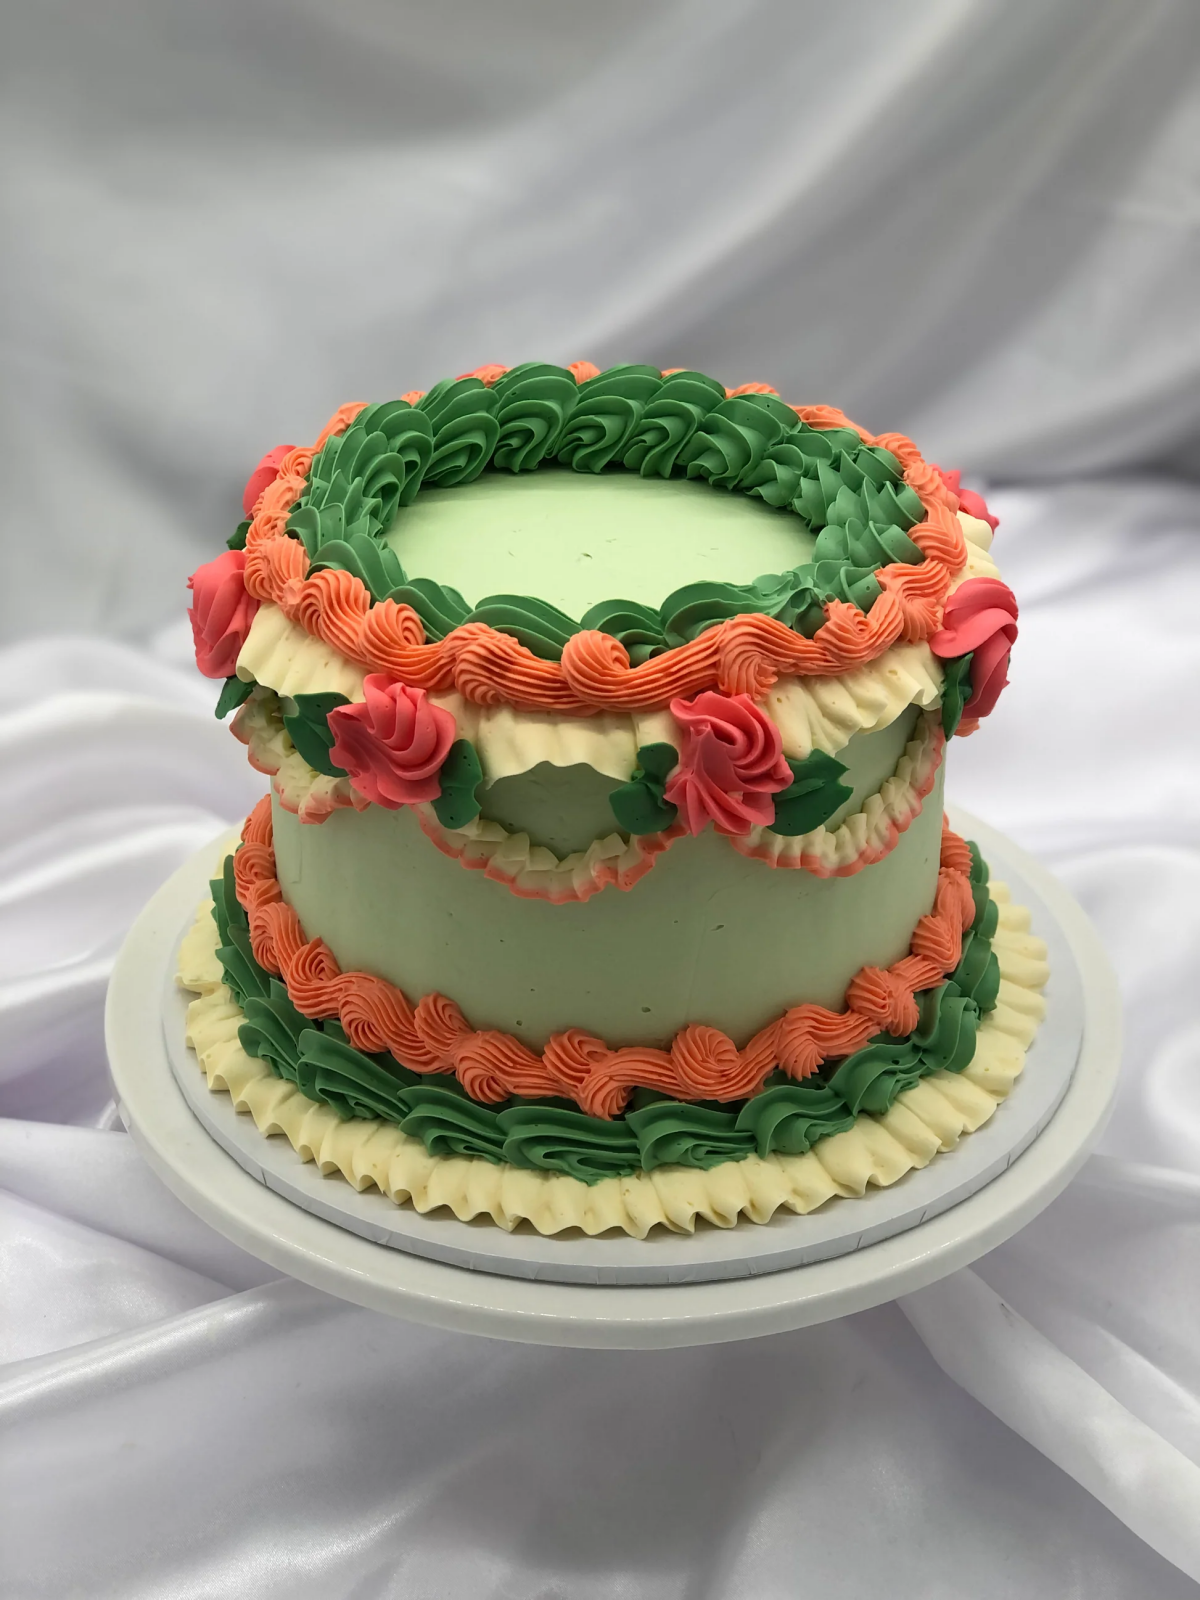
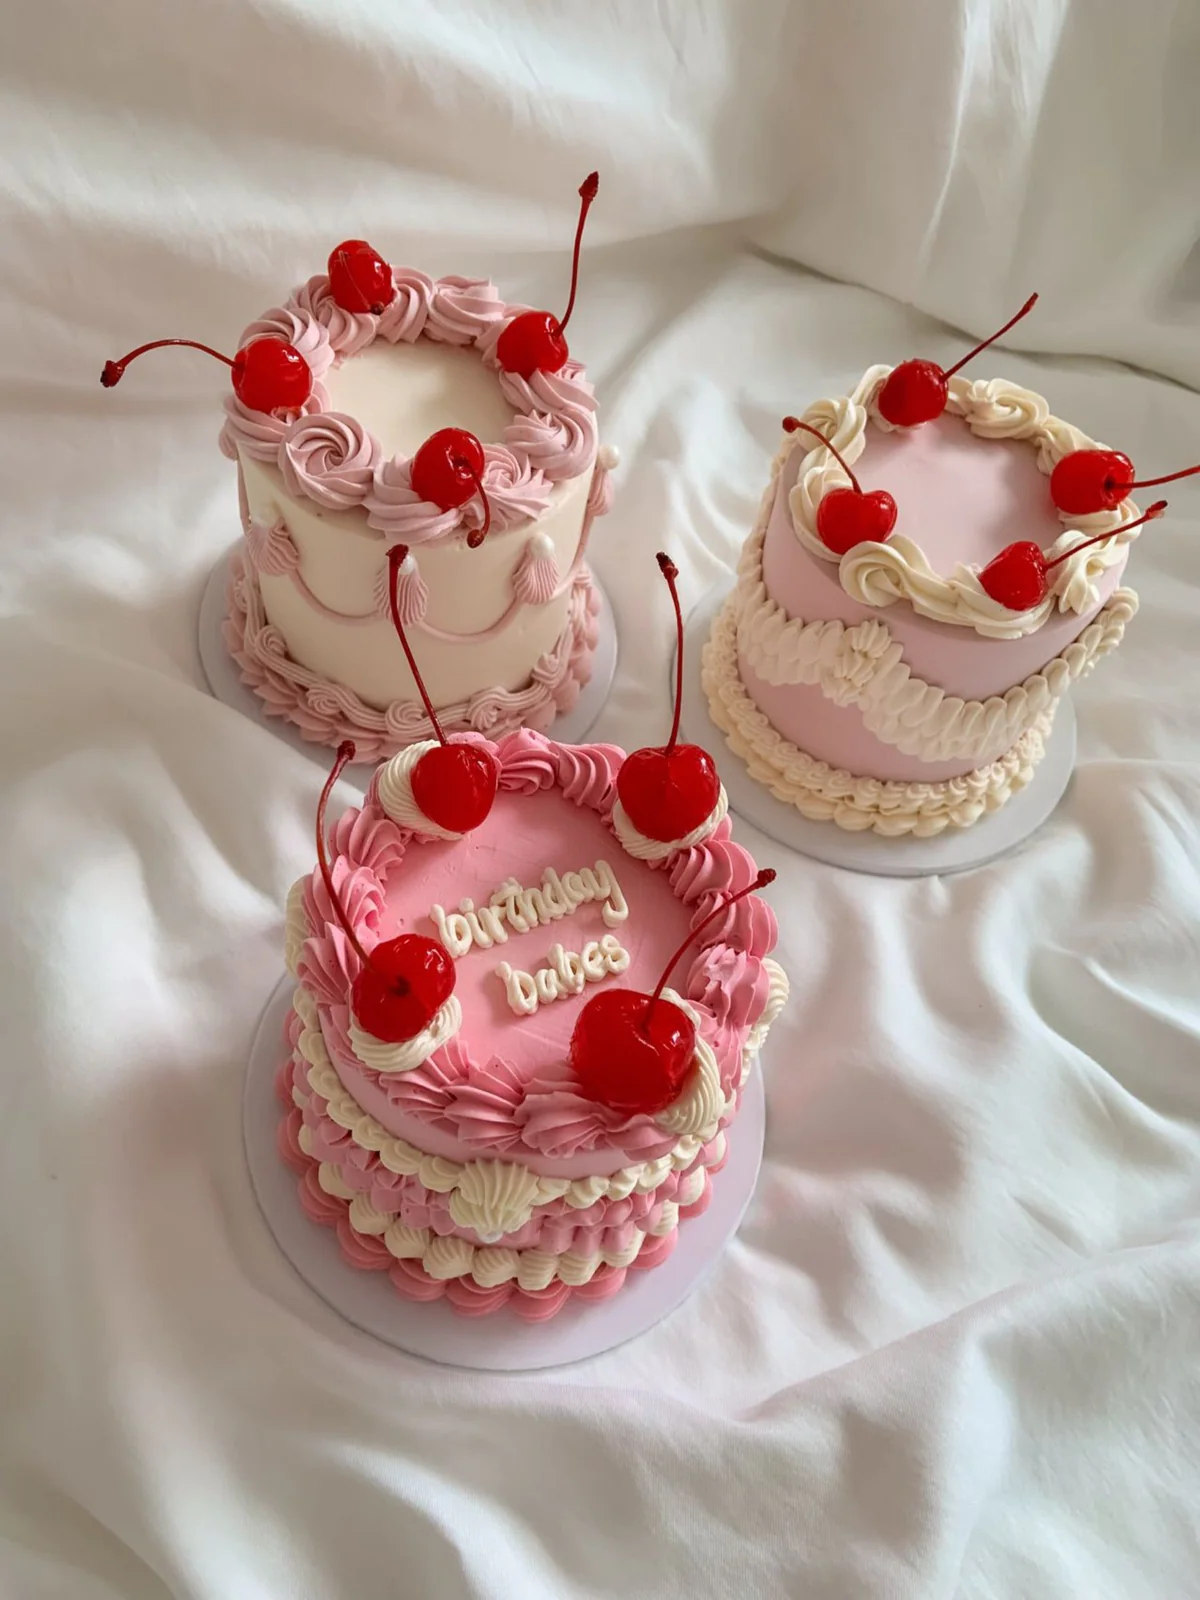
The magic of a vintage cake often lies in its slightly whimsical, nostalgic color palette. Don’t be afraid of dusty pastels paired with a single, shocking pop of color, like a soft mint green with bold cherry red. To achieve deep, vibrant shades without affecting your buttercream’s consistency, opt for high-quality gel colorings. Brands like Americolor or Chefmaster offer ‘super red’ or ‘electric pink’ that require just a tiny drop for maximum impact.
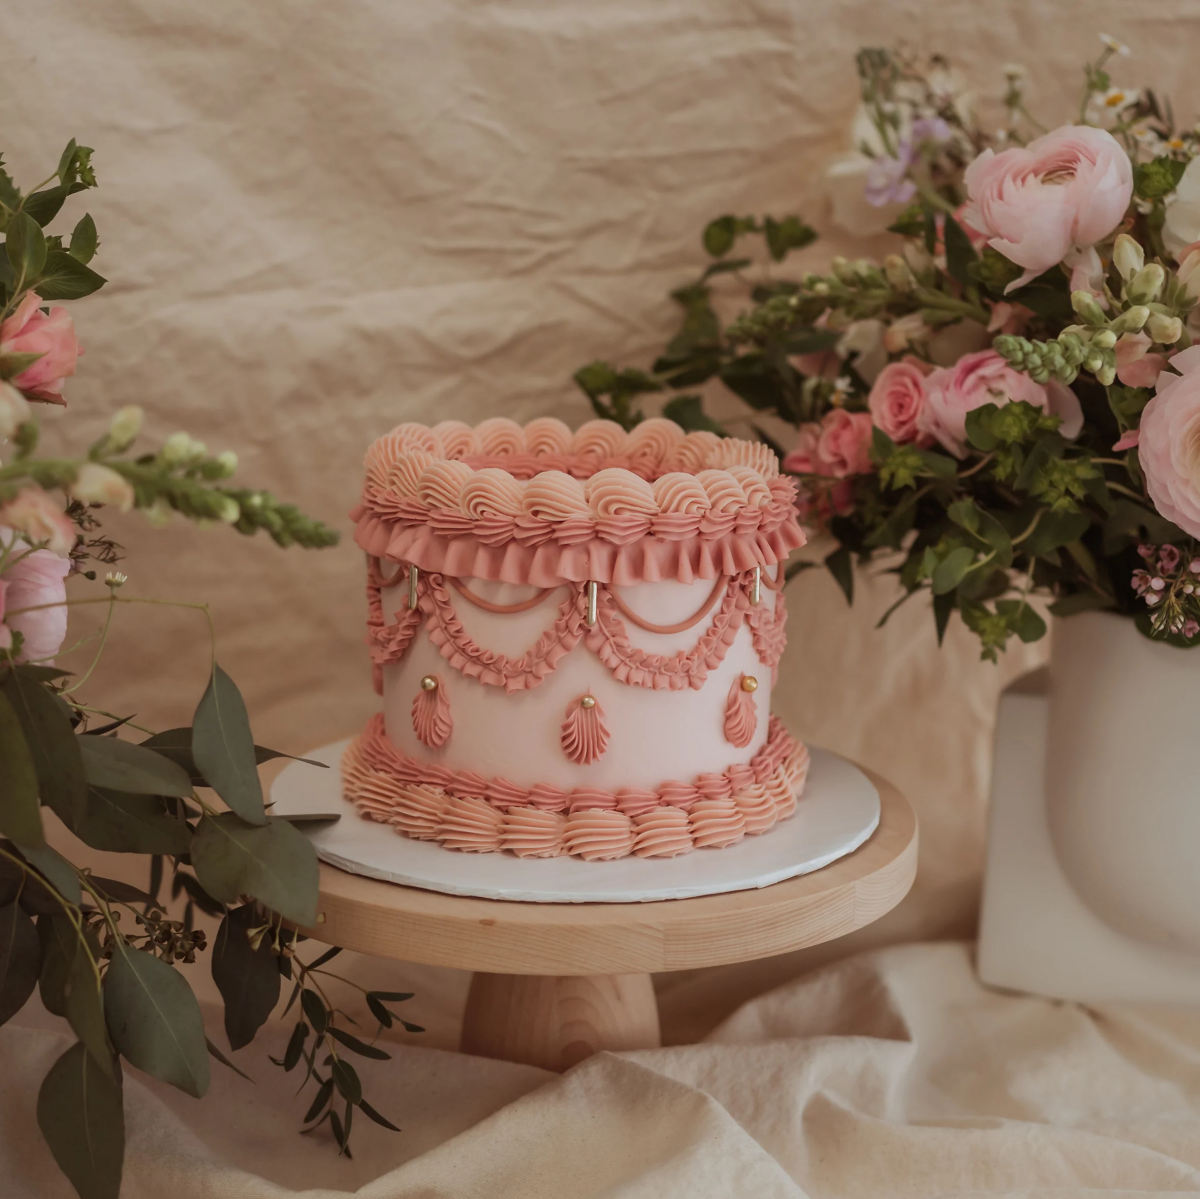
The Lambeth Method, a highly ornate style of cake decorating, was popularized by Joseph Lambeth in the 1930s. His book,
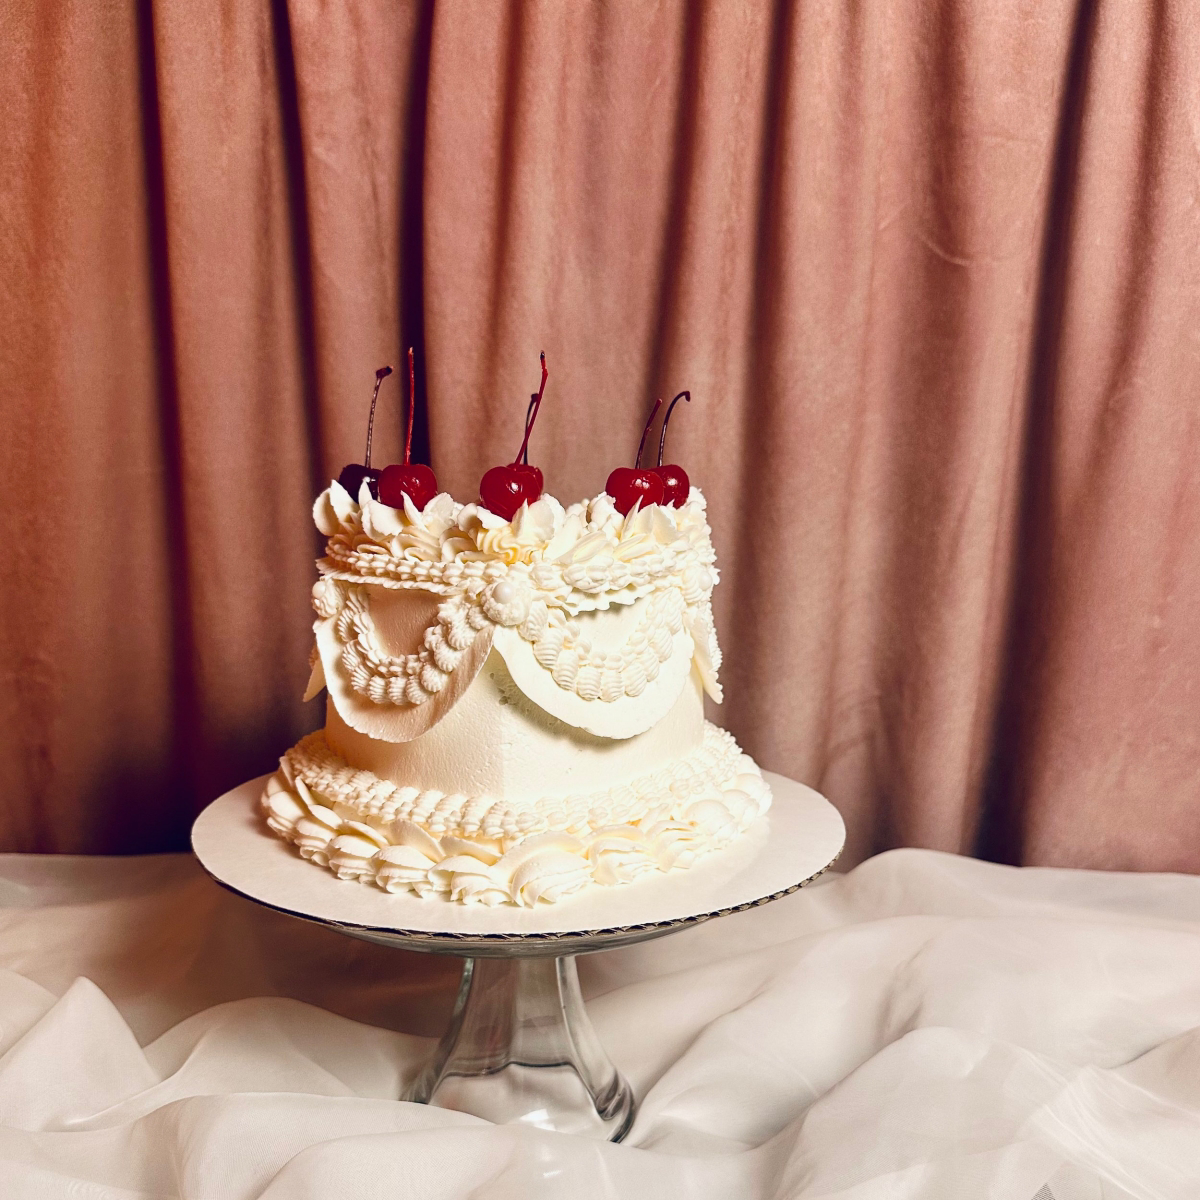
Piping is the star, but don’t forget the supporting cast. Adding texture and a touch of kitsch can elevate your vintage design:
Maraschino Cherries: The quintessential retro garnish. Ensure they are blotted completely dry to prevent red juice from running.
Edible Pearls or Dragees: Use tweezers for precise placement at the center of piped flowers or along borders.
Candied Violets: A truly old-fashioned touch that adds a delicate, elegant flair and a surprising hint of floral flavor.
Help! My vibrant piping colors are bleeding into the white base. What’s going on?
This common heartbreak is usually caused by excess moisture. It often happens when a cake is moved from the fridge directly into a warm, humid room, causing condensation. To prevent it, let your fully-chilled, decorated cake sit in the fridge uncovered for at least 30-60 minutes to ‘set’ the colors. This light crusting of the buttercream creates a barrier that keeps your sharp lines crisp.
American Buttercream: Made with powdered sugar and butter, it’s sweet, simple, and ‘crusts’ slightly, making it sturdy for some designs. However, it can be gritty if not mixed well.
Swiss Meringue Buttercream: Made by heating egg whites and sugar before whipping with butter. It’s silky-smooth, less sweet, and pipes like a dream. For the delicate, intricate piping of classic vintage cakes, Swiss Meringue is often the professional’s choice.
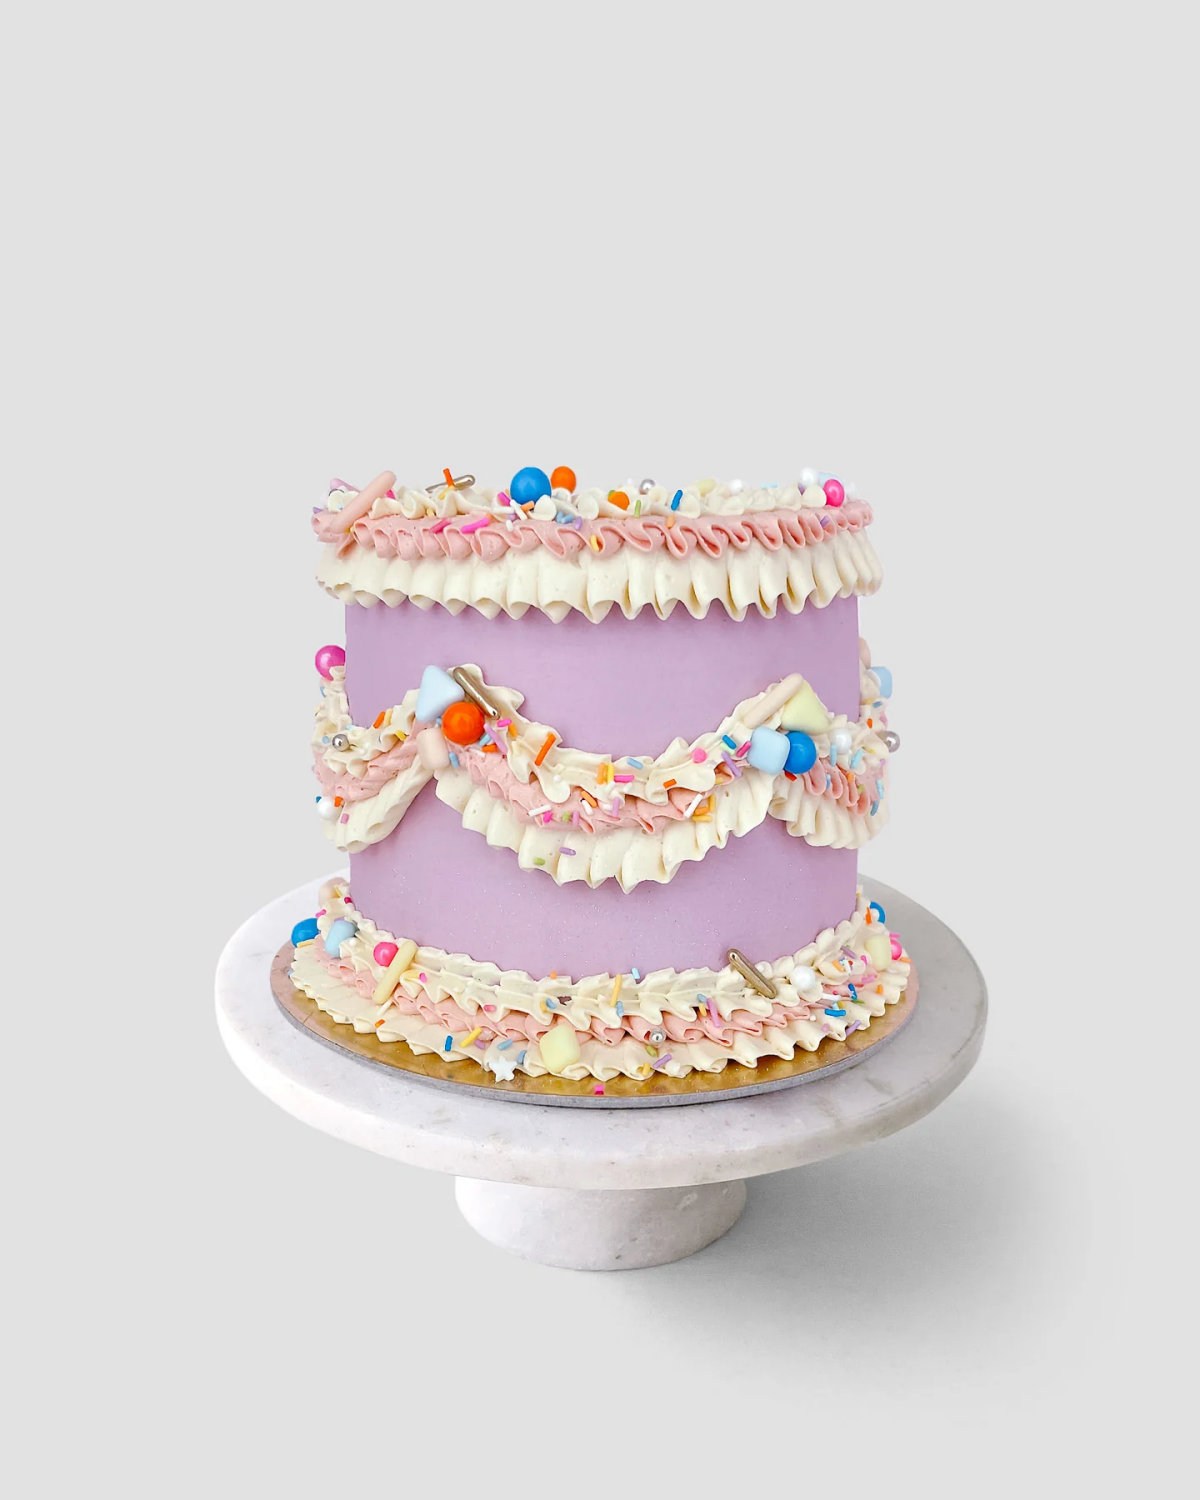
Perfectly defined ruffles that don’t wilt.
Piping intricate details without the warmth of your hands melting the buttercream.
The secret? Work in short bursts and chill your tools. Keep your filled piping bag in the refrigerator for 10-15 minutes before you start. If you’re doing a lot of detail work, have a second chilled bag ready to swap out.
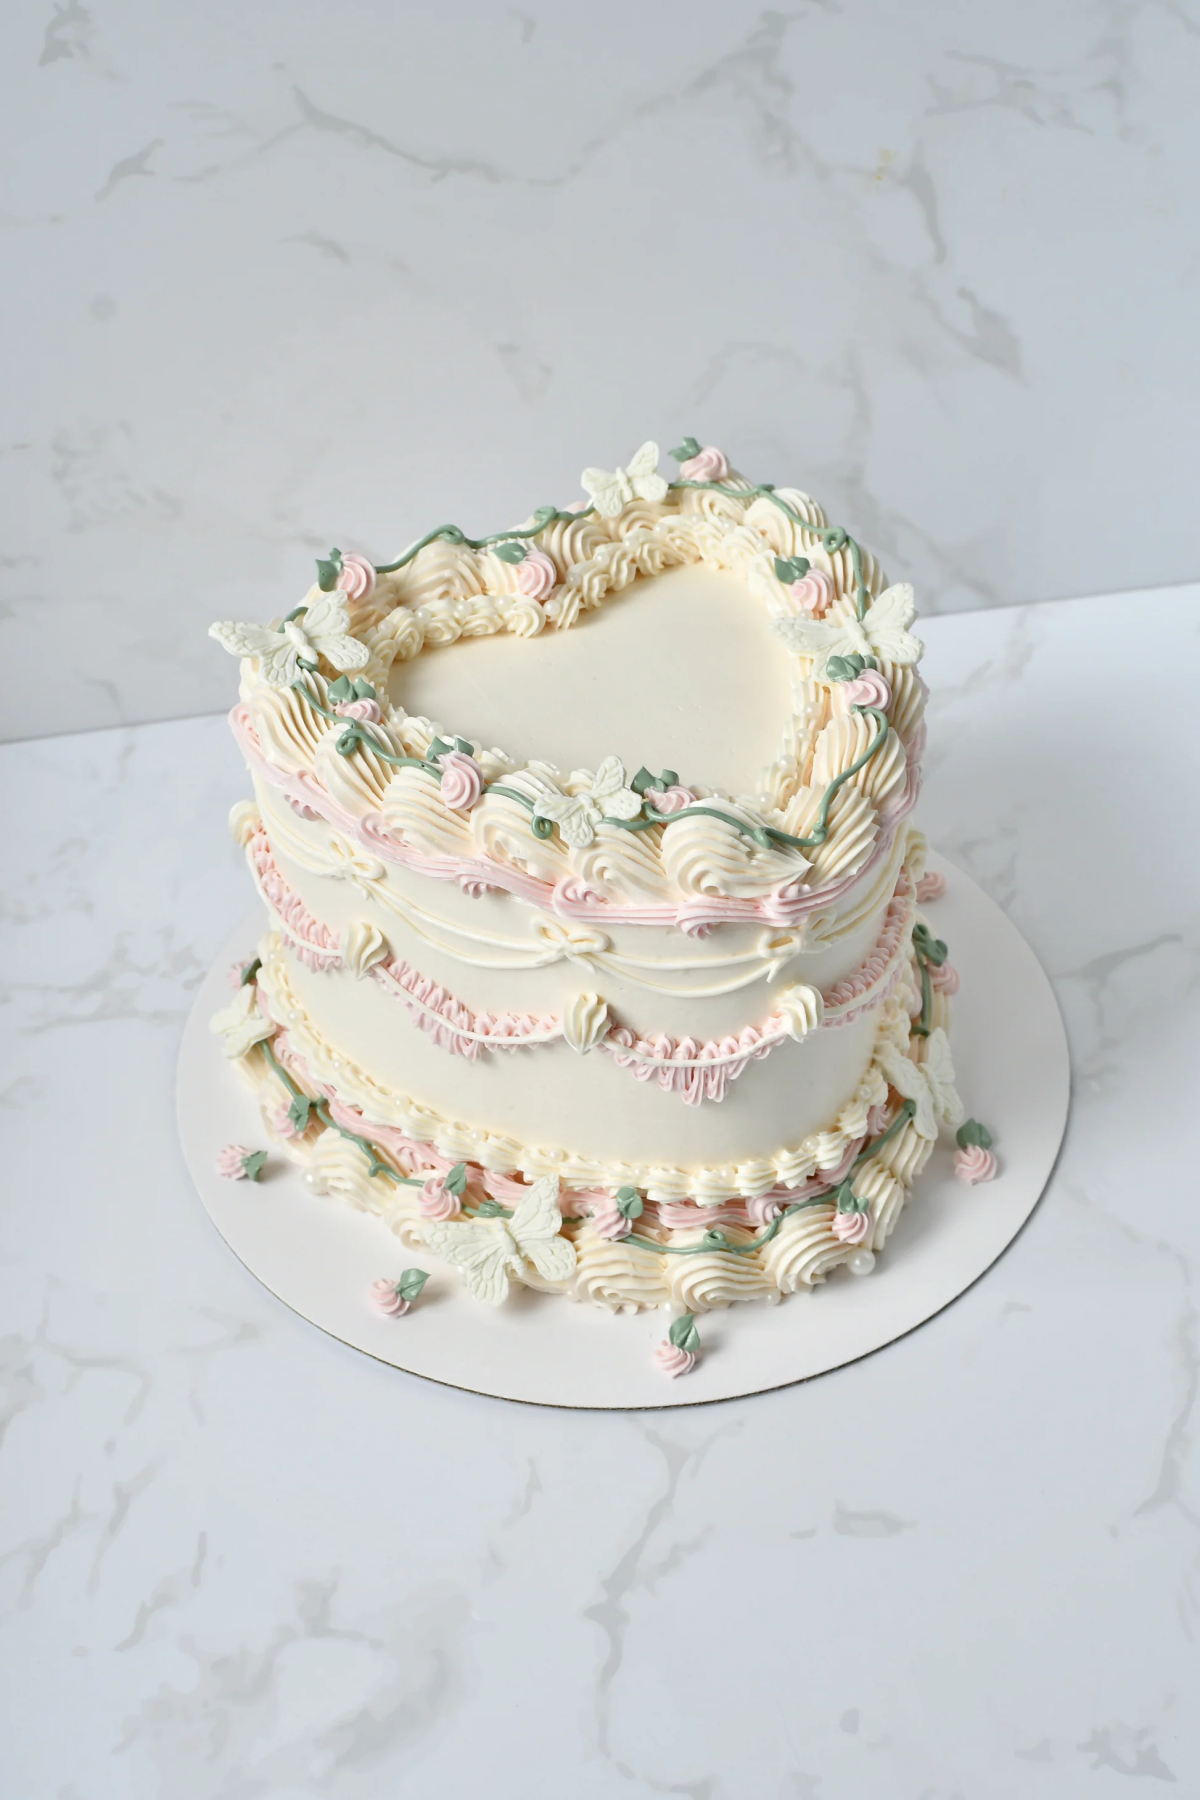
A note on composition: Vintage doesn’t have to mean chaotic. The most stunning cakes often follow a simple rule: pick one or two main piping styles and commit. A cake covered in perfect Lambeth-style swags doesn’t also need rosettes, shells, *and* basketweave. A well-placed, perfectly executed detail will always look more professional than a jumble of competing textures.
Want to practice your shell borders or swags without wasting a mountain of precious buttercream? Mix a small amount of solid vegetable shortening (like Crisco) with some powdered sugar until you get a pipeable consistency. You can practice on a sheet of parchment paper, scrape it all back into the bowl, and reuse it indefinitely. It’s the perfect no-cost way to build muscle memory.
According to Pinterest’s 2024 trend report, searches for
Wilton 1M: For classic rosettes and big, generous swirls.
Ateco 32: Creates the delicate, open-star shells often seen in borders.
Ateco 846: A larger closed-star tip for dramatic, fluted edges.
A small round tip (like Wilton 3): Essential for adding dots, delicate script, or strings of pearls.
Maria Konou combines her fine arts degree from Parsons School of Design with 15 years of hands-on crafting experience. She has taught workshops across the country and authored two bestselling DIY books. Maria believes in the transformative power of creating with your own hands and loves helping others discover their creative potential.
To provide the best experiences, we use technologies like cookies to store and/or access device information. Consenting to these technologies will allow us to process data such as browsing behavior or unique IDs on this site. Not consenting or withdrawing consent, may adversely affect certain features and functions.
Functional
Always active
The technical storage or access is strictly necessary for the legitimate purpose of enabling the use of a specific service explicitly requested by the subscriber or user, or for the sole purpose of carrying out the transmission of a communication over an electronic communications network.
Preferences
The technical storage or access is necessary for the legitimate purpose of storing preferences that are not requested by the subscriber or user.
Statistics
The technical storage or access that is used exclusively for statistical purposes.The technical storage or access that is used exclusively for anonymous statistical purposes. Without a subpoena, voluntary compliance on the part of your Internet Service Provider, or additional records from a third party, information stored or retrieved for this purpose alone cannot usually be used to identify you.
Marketing
The technical storage or access is required to create user profiles to send advertising, or to track the user on a website or across several websites for similar marketing purposes.