Growing a Lemon Tree from a Grocery Store Seed: The Real Deal
So, you want to grow a lemon tree from a seed you scooped out of a lemon. I love this idea. After years of working with citrus trees, I can tell you it’s one of the most rewarding projects you can tackle. It connects you to the whole life cycle of a plant in a really cool way. But first, let’s have a real talk.
In this article
- What You’ll Need to Get Started
- Part 1: Finding and Prepping Your Seed
- Part 2: The Best Way to Sprout a Lemon Seed
- Part 3: Potting Up and Avoiding Common Mistakes
- Part 4: Caring for Your New Seedling
- Part 5: The Path to Fruit (The Grafting Secret)
- Part 6: Long-Term Care and Troubleshooting
- A Quick Timeline of Your Lemon’s Journey
- Inspirational Gallery
Growing from a seed is an exercise in patience. You’re not just making a copy of a lemon tree; you’re creating a brand new, genetically unique plant. That’s the magic… and the challenge. If you’re dreaming of picking lemons from your windowsill in a year, a seed-grown tree will likely break your heart. It can take anywhere from 5 to 15 years to even think about flowering, and the fruit might be totally different from the lemon you started with. This guide is about doing it the right way, understanding the journey, and learning the secrets to getting fruit much, much sooner. Let’s get our hands dirty.

What You’ll Need to Get Started
Before we dive in, let’s talk supplies. Nothing fancy, but having this stuff ready makes everything smoother.
- A Lemon: Go for a big, ripe organic one. Non-organic citrus is sometimes treated to stop sprouting. Cost: about $1-2.
- Basic Supplies: You’ll need paper towels, a zip-top bag, and small 3-4 inch pots to start. You probably have most of this at home.
- Potting Mix Ingredients: We’ll make our own. You’ll need peat moss (or coco coir), perlite, and some good compost. Budget around $20-$30 for bags of these from Home Depot or a local garden center, and they’ll last you for a ton of projects.
- Later On (Optional but Recommended): A full-spectrum LED grow light bulb (a good 15W SANSI bulb is about $20 online) and a bottle of citrus-specific fertilizer (like Espoma or Jobe’s, around $10-15).
Total initial investment? Probably under $30 if you have to buy everything. Not bad for a long-term hobby!

Part 1: Finding and Prepping Your Seed
Your journey starts at the grocery store. Grab a plump, healthy, organic lemon. Once you cut it open, look for the fattest seeds and discard any that are shriveled or nicked. I always gather 8-10 seeds because, honestly, not all of them will make it. This gives you the best odds of getting a few really strong contenders.
Now, here’s a cool bit of plant science. Most common lemon seeds are ‘polyembryonic,’ meaning one seed can have multiple embryos. One is a true genetic mix, but the others are clones of the mother tree.
Lesser-known trick: When your seeds sprout, one seedling will almost always grow faster and look more vigorous than the others from the same seed. That’s the nucellar one—the clone! If you want a tree that’s most likely to produce fruit similar to the parent, that’s the one you want to keep.
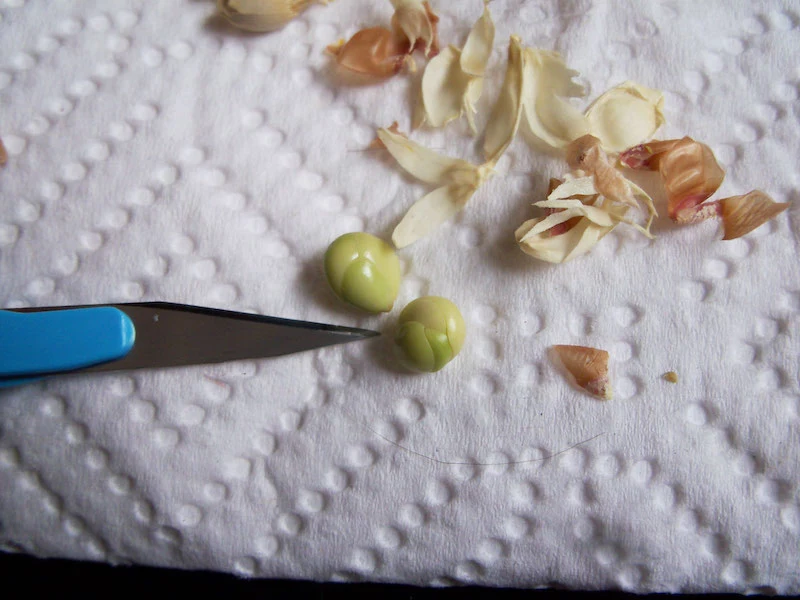
To get them ready, you have to clean them. That slippery gel coating on the outside? It’s called a pectin coat, and it can cause mold. Just wash them under cool water, rubbing them between your fingers. Yeah, you can also just pop one in your mouth and suck it clean. Sounds weird, but it works perfectly. You’re aiming for a seed that’s no longer slick.
Part 2: The Best Way to Sprout a Lemon Seed
You can toss a seed in dirt and hope, but for the most reliable results, the paper towel method is king. It lets you see exactly what’s happening. First, an optional but helpful step: you can carefully peel off the thin outer shell of the seed. I do this because it can speed up germination by a week or more. Just use your fingernail to nick the pointed end and peel it back gently. If you’re nervous about damaging it, no worries, just skip this part.
Here’s the setup:
- Get a paper towel damp, but not sopping wet. Squeeze it out well.
- Place your clean seeds on one half, about an inch apart.
- Fold the other half over them.
- Slide the whole thing into a zip-top plastic bag but don’t seal it all the way. A little air exchange is good.
- Put the bag somewhere warm and dark, like on top of your fridge. The sweet spot is between 70-85°F.
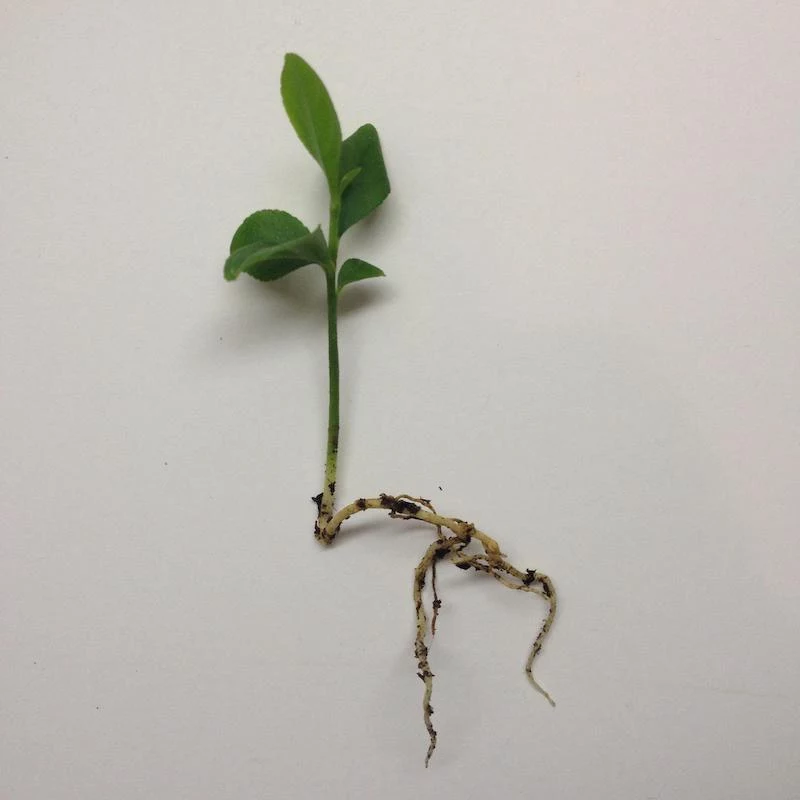
Check on them every few days. In about one to three weeks, you should see a tiny white root (the radicle) emerge. Once that root is about a half-inch long, it’s go-time.
Part 3: Potting Up and Avoiding Common Mistakes
Let’s talk soil. Citrus trees are picky; they need excellent drainage. You can buy a pre-made ‘Citrus & Palm’ mix, but I swear by my own simple recipe. It’s cheaper and, in my experience, works better. Just mix equal parts of these three things in a bucket:
- 1 part peat moss or coco coir (the base)
- 1 part perlite (the little white rocks for drainage—don’t skip these!)
- 1 part good, finished compost (for a gentle start of nutrients)
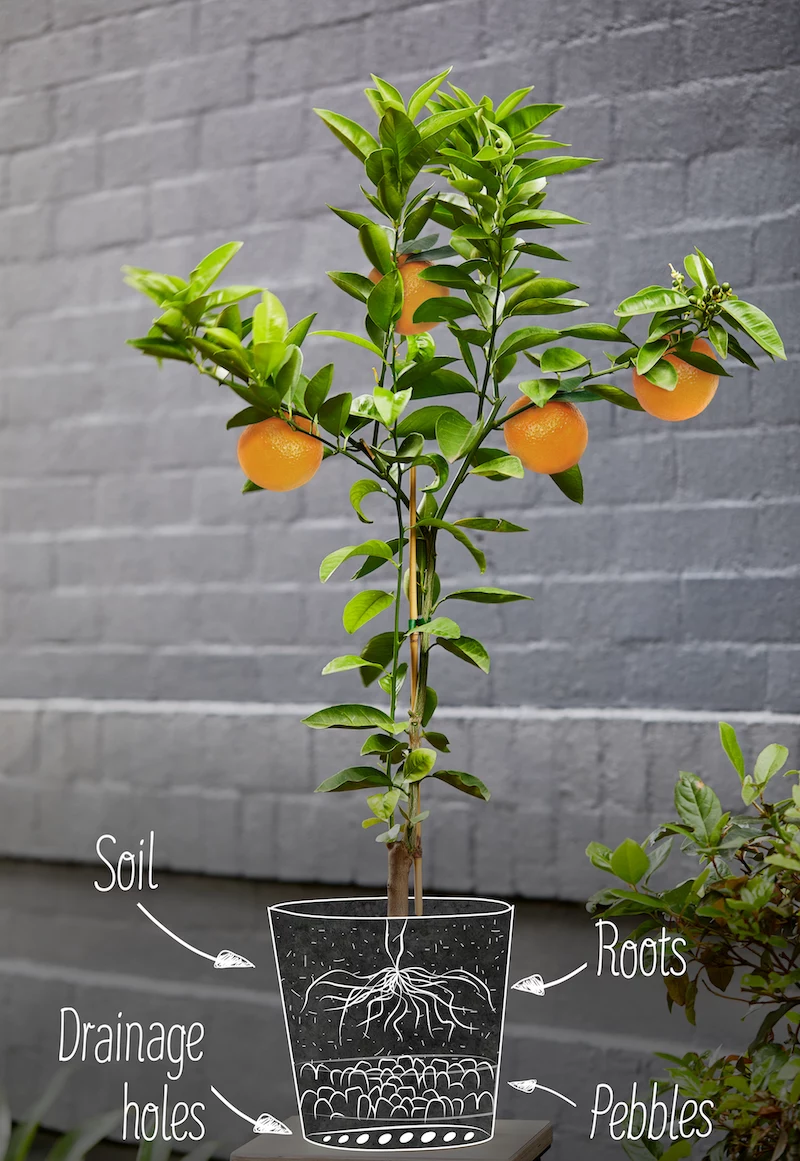
Before you use it, get the mix a little damp. Now, let’s plant that sprout. Grab a small 3-4 inch pot with drainage holes. This is critical. A common mistake is using a giant pot, which holds too much water and drowns the delicate new roots. Fill the small pot with your mix, poke a half-inch deep hole, and gently place the seed inside with the root pointing down. Cover it lightly with soil—don’t pack it in! A gentle watering settles everything. Place it in a warm spot with bright, indirect light, and you should see a green shoot in a week or two.
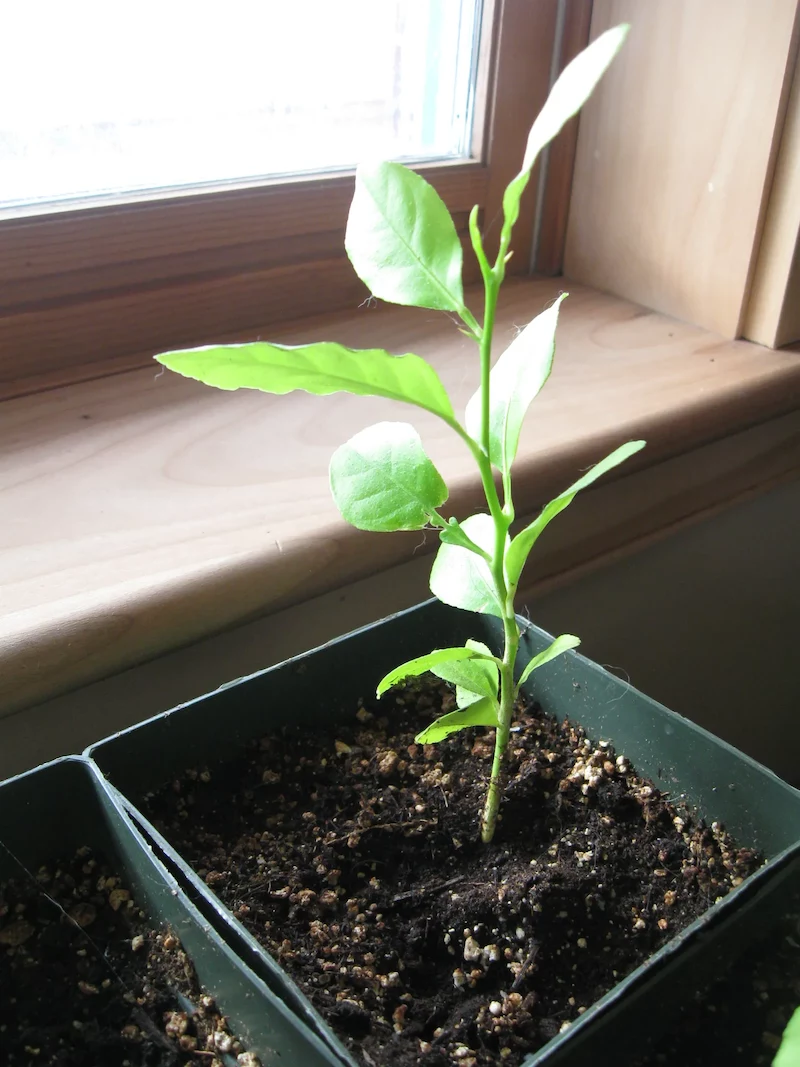
Part 4: Caring for Your New Seedling
Once you have a couple of leaves, light becomes the most important thing. Lemon trees need at least 8 hours of direct sun. A south-facing window is best. If you don’t have that, a full-spectrum LED grow light is a fantastic investment. Just keep it 6-12 inches above the plant for 12-14 hours a day.
Now, let’s talk about the #1 killer of potted lemon trees: overwatering. The best way to know when to water is to feel the weight of the pot. Pick it up right after you’ve watered it. Then pick it up every day. You’ll quickly learn the difference between wet-and-heavy and dry-and-light. Only water when it’s light and the top inch of soil is dry. When you do water, drench it until water runs out the bottom, then dump the excess from the saucer. As a general starting point, a 4-inch pot indoors probably needs water every 5-7 days.
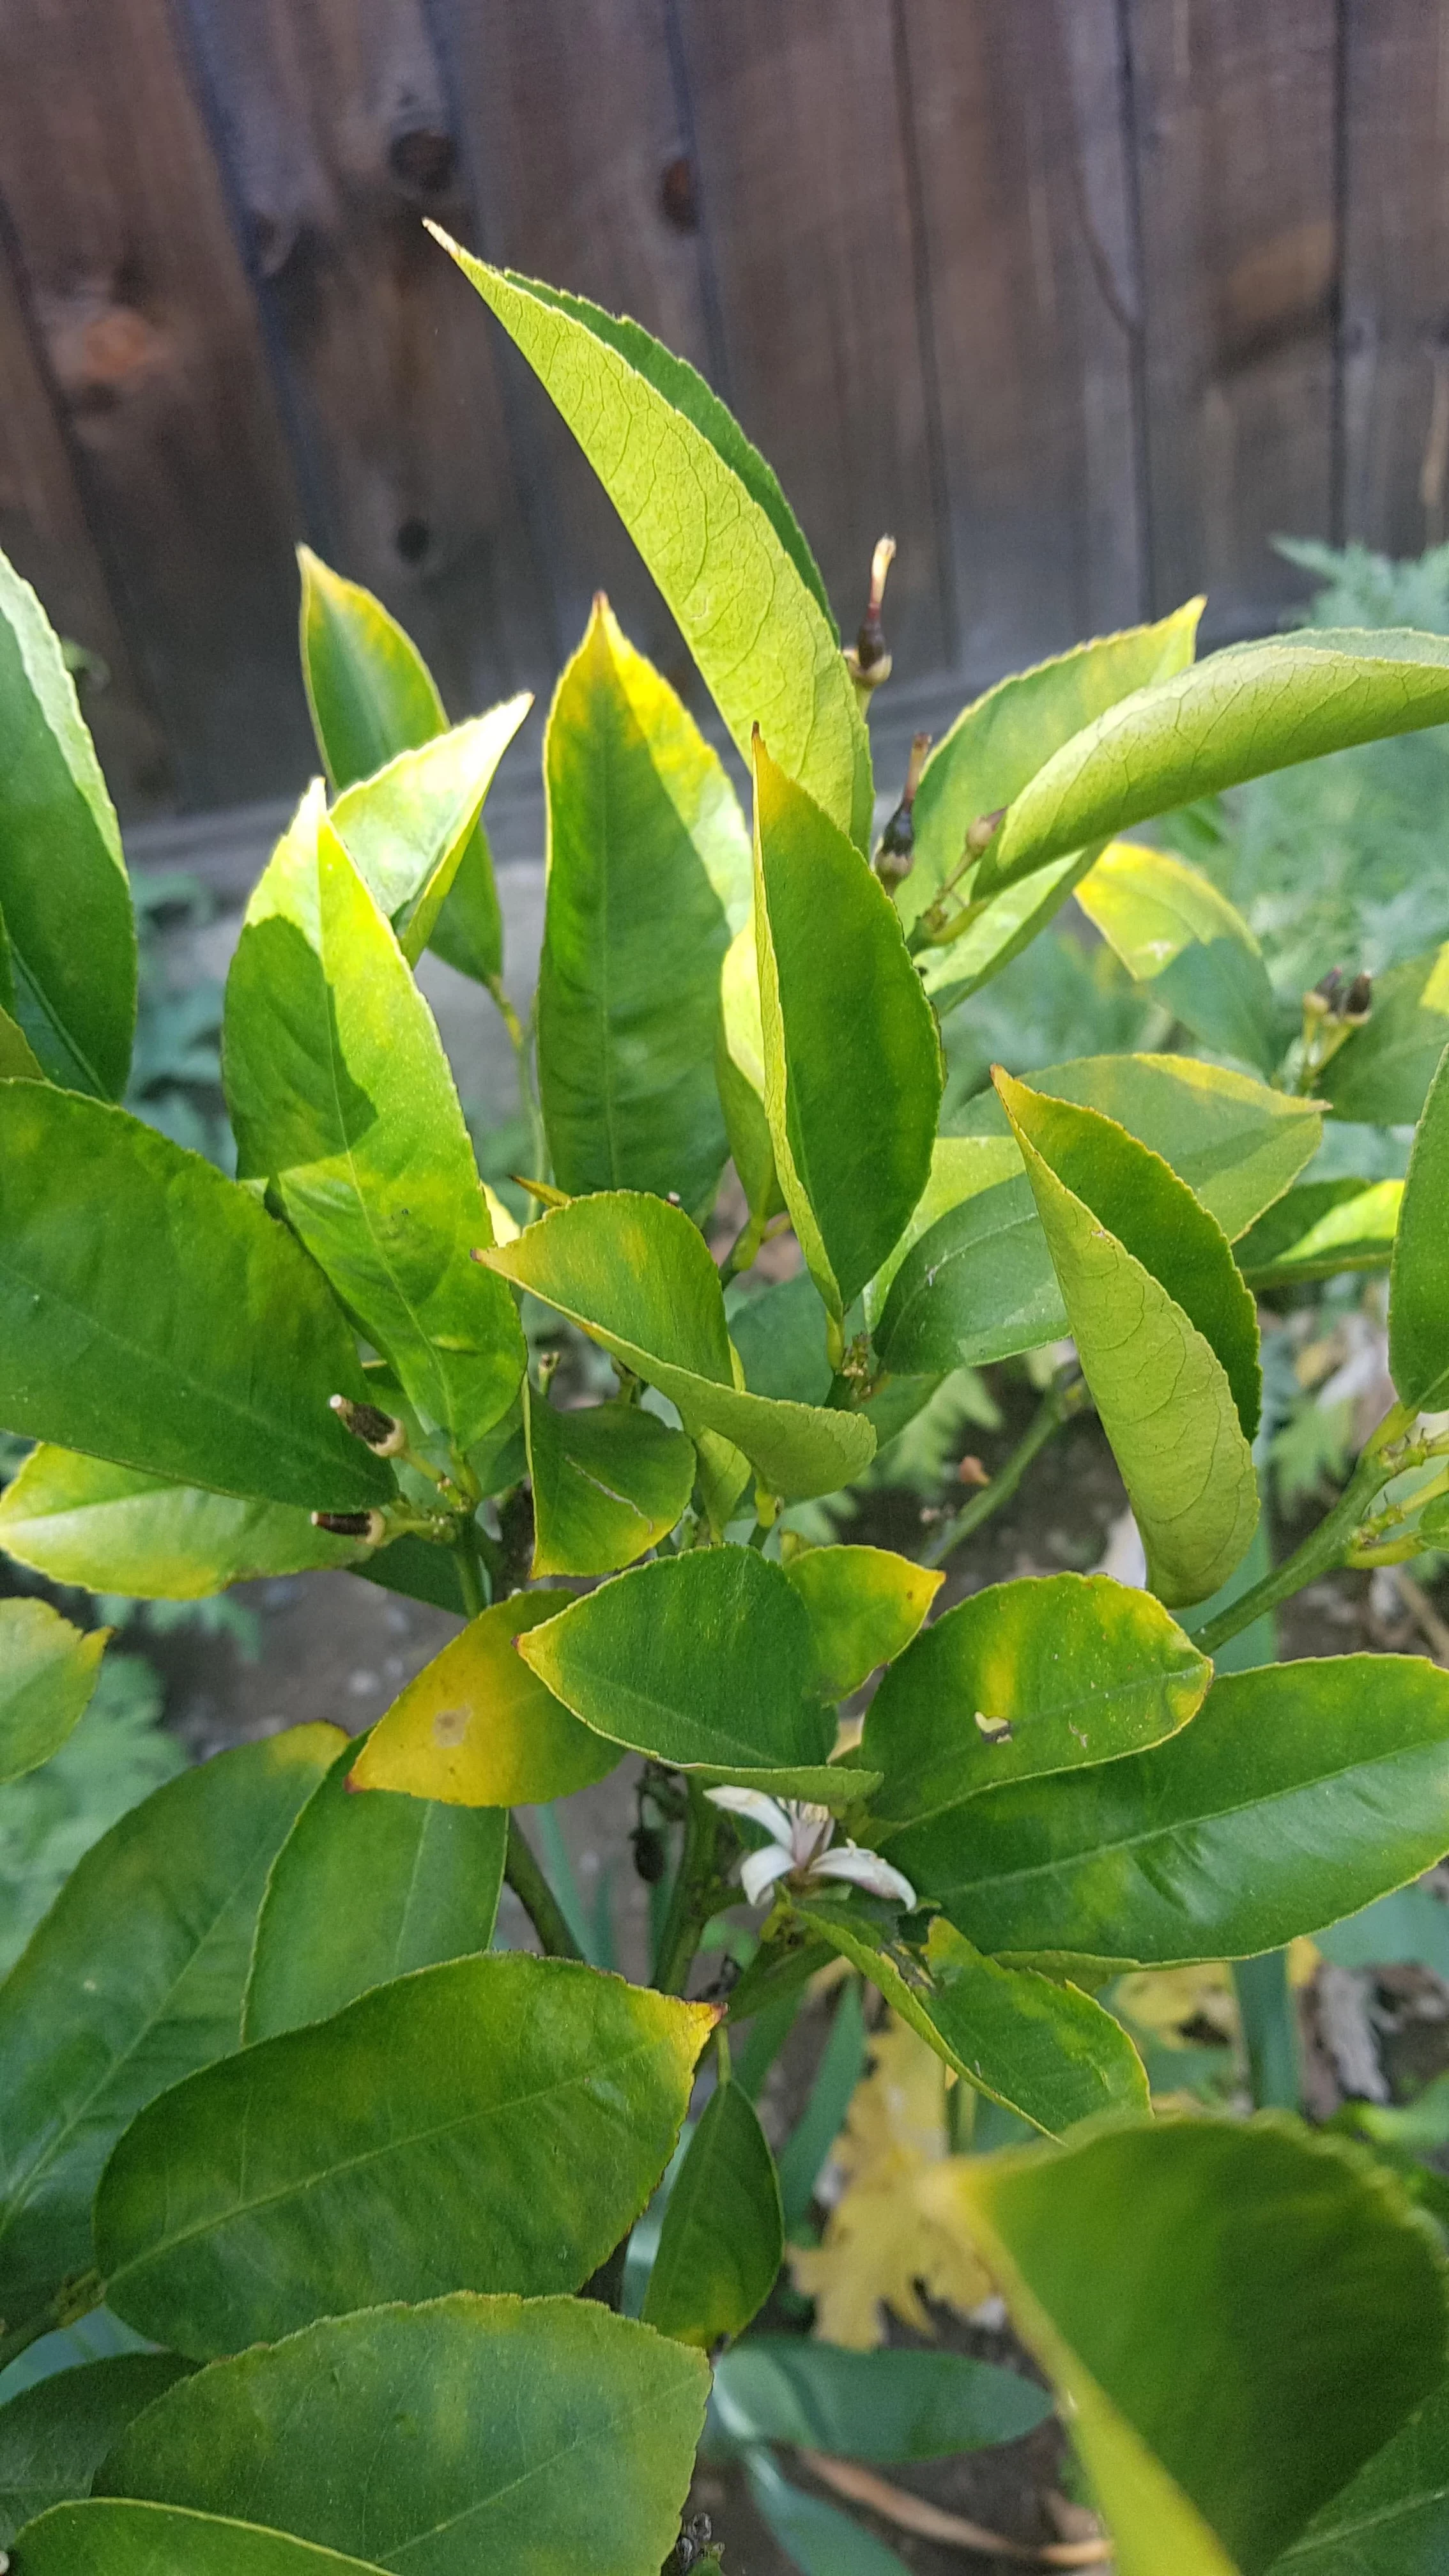
Quick tip for yellowing leaves: Panicking because your leaves are turning yellow? It’s usually one of three things. If the whole leaf is yellow and the soil is damp, you’re likely overwatering. If the leaves are pale green or yellow but the veins are still dark green, it’s a nutrient problem (probably needs iron, which a good citrus fertilizer will fix). If the yellowing is combined with stunted growth, it probably needs more light.
Don’t fertilize for the first few months. The compost has it covered. After that, use a balanced liquid fertilizer diluted to half-strength once a month during spring and summer. Stop in the fall and winter.
Part 5: The Path to Fruit (The Grafting Secret)
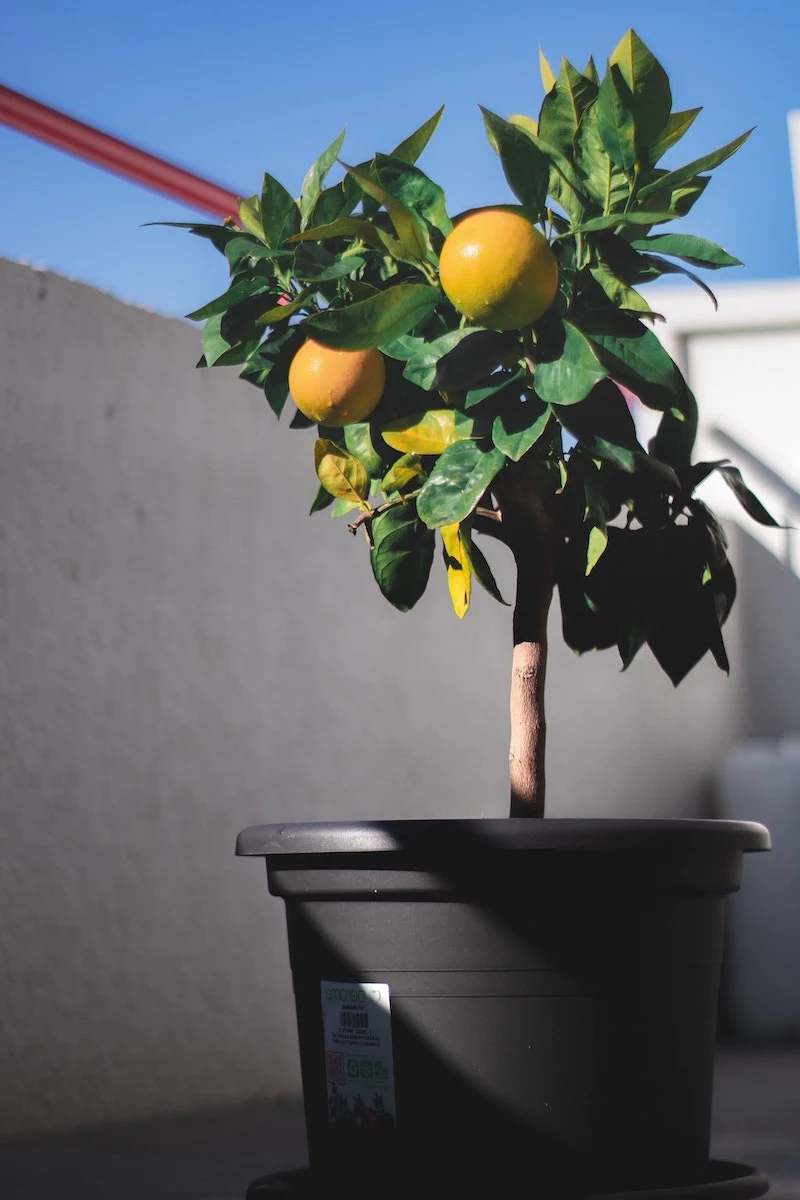
Okay, you’ve nurtured this little green stick into a beautiful, fragrant-leafed little tree. It’s a fantastic houseplant. But if you want actual lemons in the next decade, we need to talk about grafting.
Here’s the comparison to make it clear. Your seed-grown tree is in its ‘juvenile’ stage, focused only on growing bigger. It might take 5-15 years to produce fruit, which will be a genetic surprise. By grafting, you take a small piece of a mature, fruit-producing tree (the ‘scion’) and attach it to your seedling (the ‘rootstock’). The rootstock provides the strong roots, while the scion provides the mature genetics. A successful graft can give you predictable fruit in just 1-3 years. It’s the ultimate citrus shortcut.
I’ll be honest, my first few grafting attempts were a mess. One failed because I didn’t line up the green layers under the bark properly—the ‘cambium’—so the two parts never fused. It takes a bit of practice, but it’s an amazing skill to learn.
A good method for beginners is called T-budding. You’ll need your seedling (at least pencil-thick), a piece of ‘budwood’ from a healthy lemon tree (check with local garden clubs), a sharp craft knife, and some grafting tape (about $5-10 for a roll).
Heads up! Grafting knives are incredibly sharp. Always cut away from yourself.
Here’s the quick version: you make a T-shaped cut in the bark of your seedling, slice a single bud off the mature ‘budwood,’ tuck that bud into the ‘T,’ and wrap it all snugly with grafting tape. In a few weeks, if the bud is still green, the graft has taken. You then snip off the original top of your seedling just above the new bud, forcing all the plant’s energy into your new, fruit-ready branch. It will become the new top of your tree!
Part 6: Long-Term Care and Troubleshooting
As your tree gets bigger, it’ll need a proper citrus fertilizer that contains micronutrients like iron and zinc. Feed it every 4-6 weeks in the growing season. And keep an eye out for pests like spider mites and scale, especially indoors. For most issues, skip the harsh chemicals. A spray bottle with a quart of water and a teaspoon of mild dish soap is your best friend. Spray the whole plant, especially under the leaves.

Unless you live somewhere warm year-round, you’ll need to bring your tree inside for the winter when temps dip below 50°F. It will probably drop some leaves in protest at the lower light levels—this is normal. Just give it your sunniest window, cut back on watering, and stop fertilizing until spring.
When your seedling is about a foot tall, you can ‘pinch back’ the very top tip. Just snip off the top half-inch. This encourages the plant to branch out and become a bushy tree instead of a single, lanky stalk.
A Quick Timeline of Your Lemon’s Journey
To help you visualize the process, here’s a rough guide:
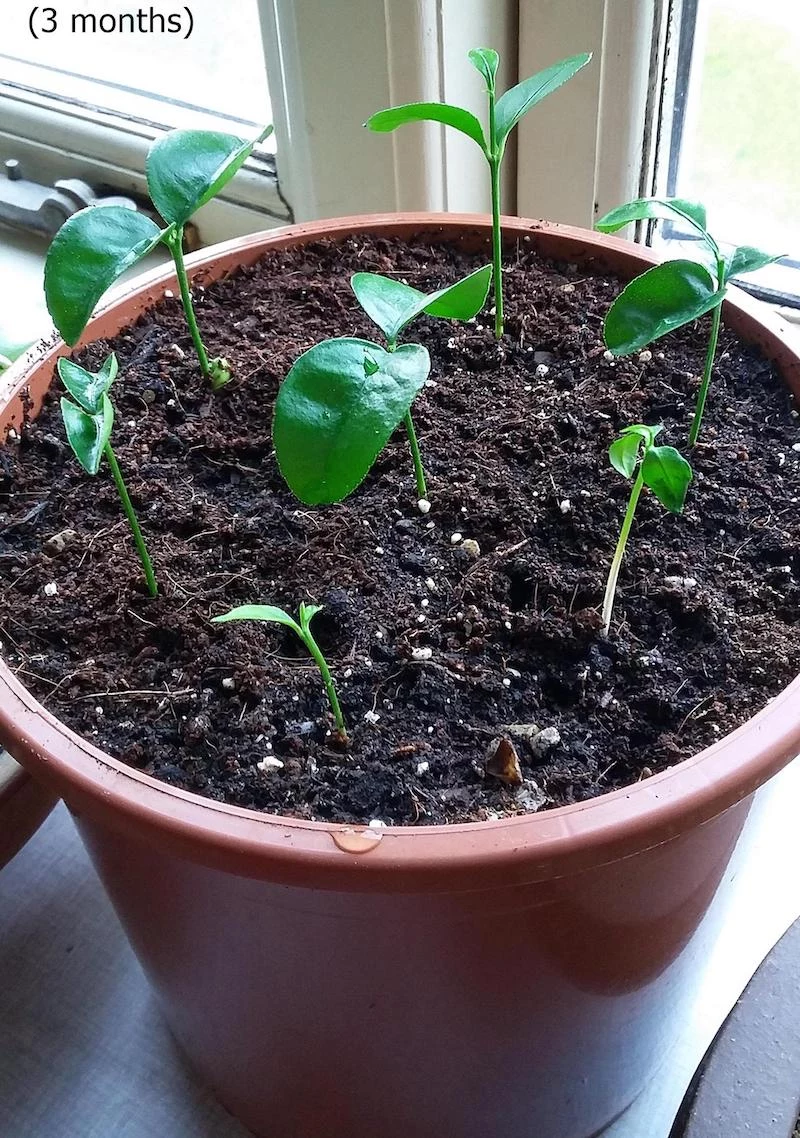
- Weeks 1-3: Germination. Your seed sprouts a root.
- Weeks 4-6: A green shoot appears above the soil.
- Month 3: You can start a gentle, half-strength fertilizing routine.
- Months 6-12: Your seedling might need its first repotting.
- Year 1: Time to ‘pinch back’ the top to encourage branching.
- Years 1-2: The trunk should be thick enough for grafting.
- Years 2-4 (with graft): You could see your first flowers and fruit!
- Years 5-15 (no graft): The natural timeline for potential first fruit.

Growing a lemon tree from a tiny seed is a slow, beautiful process. Whether you keep it as a leafy houseplant or take the leap into grafting, you’re creating something special. I still get a kick out of seeing a seed I planted turn into a thriving tree. Enjoy the journey!
Inspirational Gallery

What about those tiny webs appearing on my seedling’s leaves?
You’ve likely met spider mites, the number one pest for indoor citrus. They thrive in the warm, dry air of our homes. The first line of defense is simple: gently wipe down the leaves (top and bottom) with a damp cloth every week to disrupt them. For a more stubborn infestation, a diluted spray of neem oil, like Bonide’s ‘Neem Oil Concentrate’, is an effective organic solution that disrupts their life cycle without harming your plant.
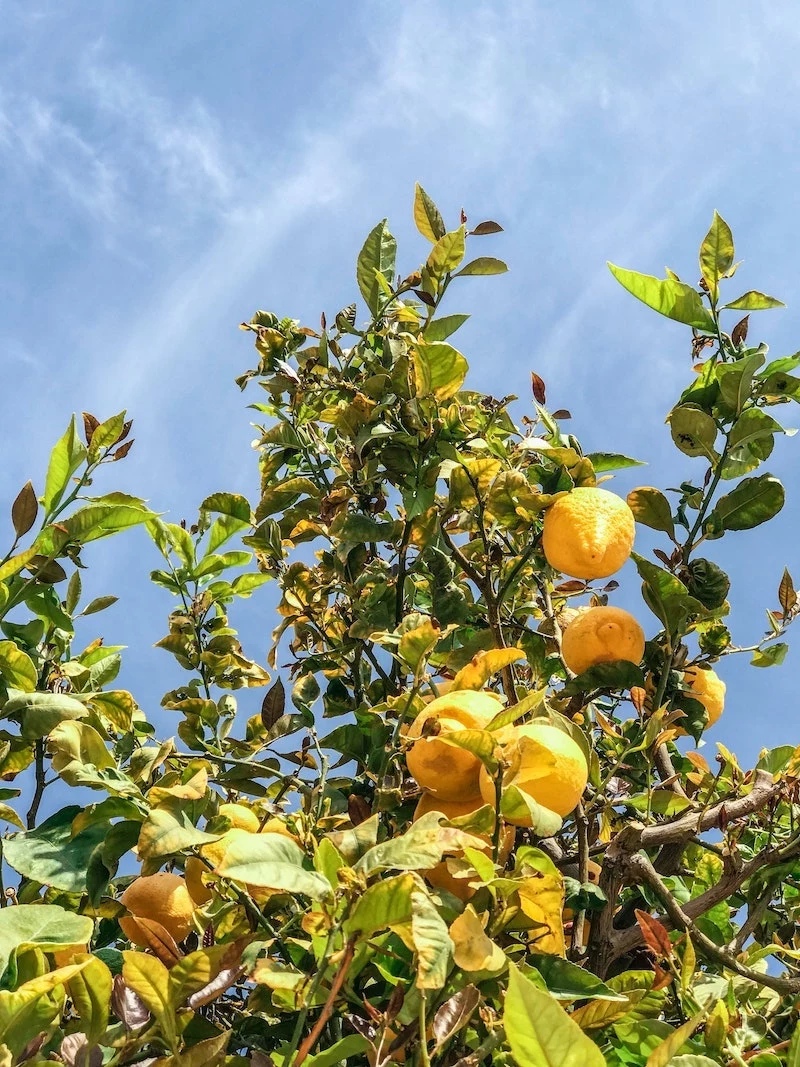
Did you know? Commercial lemon varieties like ‘Eureka’ and ‘Lisbon’ are often grafted. This means a cutting from a mature, fruit-bearing tree is attached to a hardy rootstock. This is the secret to getting fruit in just 2-3 years.
Your seed-grown tree, on the other hand, is a genetic wild card on its own roots. That’s what makes the journey longer but also uniquely personal. You’re not just growing a lemon tree; you’re creating a completely new one.
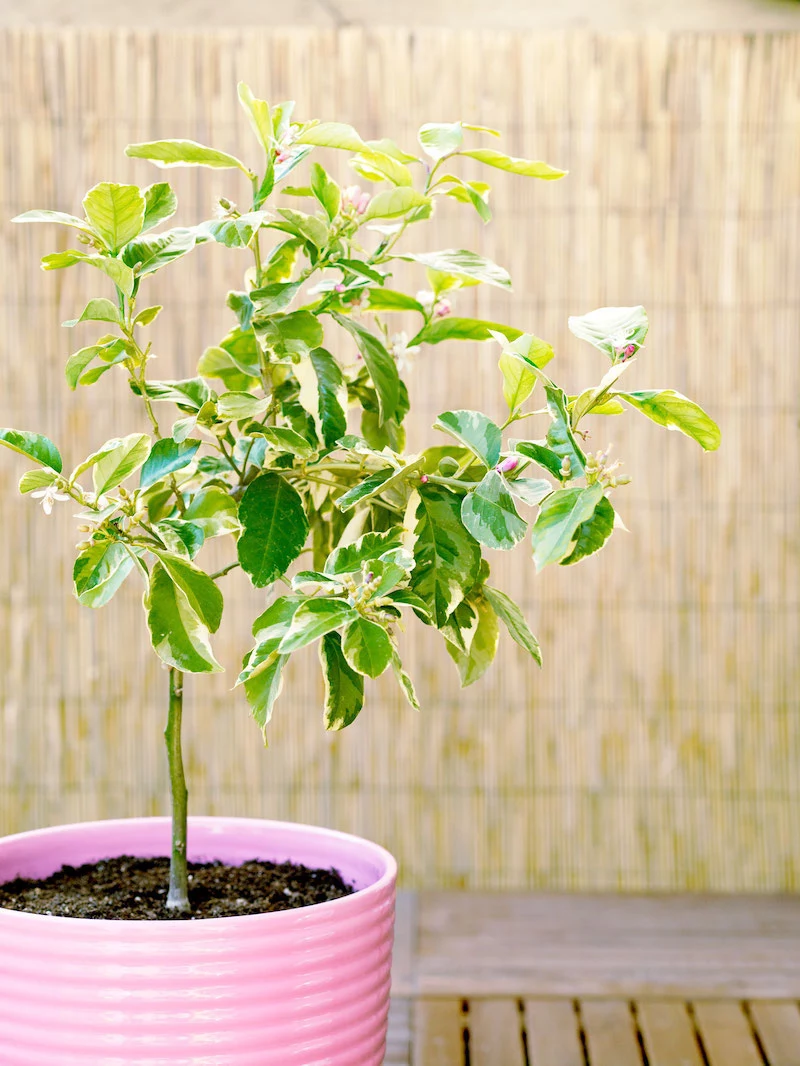
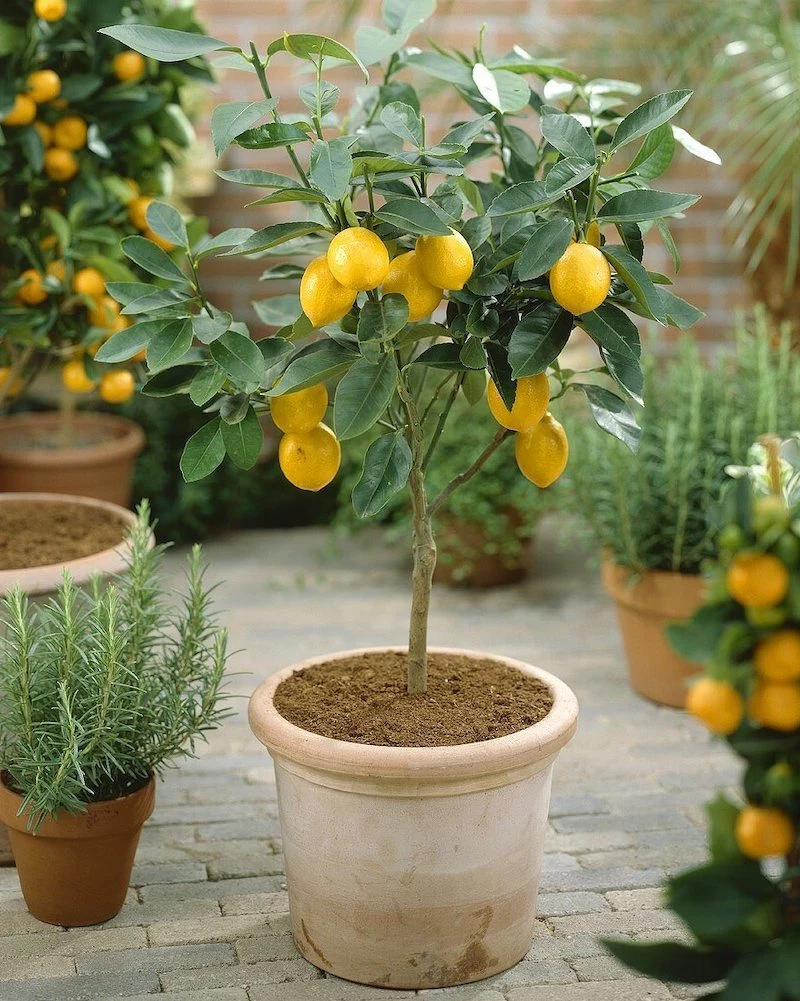
The right pot is more than just a container; it’s part of the plant’s life support system. A classic, unglazed terracotta pot is a fantastic choice as its porous nature helps the soil breathe and prevents the dreaded ‘wet feet’ that citrus trees hate. For a more modern aesthetic, look for a ceramic planter from brands like Peach & Pebble or Pottery Barn, but triple-check that it has at least one large drainage hole at the bottom. Style should never sacrifice health.
Peat Moss: The traditional choice for creating the acidic, well-aerated soil that citrus loves. It’s widely available (think Miracle-Gro or Espoma) and holds moisture well, but its harvesting raises environmental concerns.
Coco Coir: A fantastic, renewable alternative made from coconut husks. It has a more neutral pH, provides excellent aeration, and re-wets easily without compacting. Brands like Canna or FoxFarm offer high-quality, pre-rinsed coir.
For a beginner, either works, but starting with coco coir is a great step towards more sustainable gardening from day one.
One of the most immediate rewards of your lemon tree project has nothing to do with fruit. On a sunny morning, gently brush your fingers against one of the glossy green leaves. The sharp, bright, citrusy perfume that’s released is an instant mood-lifter, a tiny burst of Mediterranean sunshine right on your windowsill long before any blossom appears.
- Resist the urge to water on a strict schedule. Environmental conditions change daily.
- The “finger test” is your most reliable tool: stick your finger one to two inches into the soil. If it feels dry, it’s time to water.
- When you do water, do it thoroughly until you see water drain from the bottom of the pot. Then, let it dry out again.