The Art of Hanging Art: A Pro’s Guide to Ditching the Fear (and the Crooked Pictures)
After years of hanging art in people’s homes, I’ve pretty much seen it all. I’m talking about priceless paintings held up by a single thumbtack or beautiful family photos that slide crooked every time a door closes. But honestly, the most common thing I see is wonderful art that’s still rolled up in a tube or leaning against a wall, gathering dust. Why? Because the owner is simply terrified of making a mistake.
In this article
They’re scared of putting a hole in the wrong place, of choosing a spot that just feels ‘off.’
Let’s get one thing straight: my job isn’t just about putting nails in walls. It’s about giving you the confidence to make your space feel like your own. Art is a piece of you, out there for the world (or at least your family) to see. And getting it right doesn’t require some mystical design sense. It just takes a little practical know-how about balance, light, and solid, safe hardware. So, forget the glossy magazines for a minute. Let’s talk about how to get this done with purpose and skill.
First Things First: Understanding Your Space
Before you even think about grabbing a hammer, we need to look at the room itself. This isn’t some abstract design theory; it’s about how our eyes and brains actually perceive the space around us. Nailing this part first makes everything else fall into place.
Light: Art’s Best Friend and Worst Enemy
Light can make your art sing, or it can completely destroy it. The wrong kind of light washes out colors, creates a distracting glare, or worse, permanently damages the piece. Natural sunlight is packed with UV rays that are absolutely brutal on pigments and paper. I once saw a gorgeous, vibrant watercolor that had been in direct sun for a decade. It was a pale ghost of its former self, and the damage was totally irreversible.
Heads up! Here’s what you need to think about:
- Dodge Direct Sunlight: Never, ever hang important pieces—especially original works, prints, or photographs—where the sun can beat down on them. If you absolutely must use that spot, you have to invest in UV-protective glazing for the frame. Museum-grade acrylic or glass can block up to 99% of UV rays. Be prepared, though; this upgrade can add anywhere from $50 to over $200 to a custom framing job, depending on the size. Think of it as insurance for your art.
- Know Your Bulbs: The type of light bulb you use really matters. Look for bulbs with a high Color Rendering Index (CRI), ideally 90 or above. A high CRI means the bulb shows colors accurately, so the art looks the way it was intended. A cheap LED with a low CRI can make warm reds look muddy or cool blues appear dull. Also, pay attention to the color temperature. A warm light (around 2700K) gives off a cozy, inviting glow, while a cooler light (4000K or more) creates a more modern, gallery-like feel.
- Get the Angle Right: The best way to light art is usually with a ceiling-mounted spotlight aimed at the piece from about a 30-degree angle. This simple trick dramatically reduces glare on the glass and stops you from casting a shadow on the art when you stand in front of it.

The 57-Inch Rule: Your Secret Weapon
The single most common mistake I see is art hung way too high. It just floats up there on the wall, completely disconnected from the furniture and the rest of the room. The guiding principle the pros use is hanging art at average eye level. We call it the ‘57-inch rule.’
The idea is to have the CENTER of the artwork (not the top or bottom) hovering at 57 inches from the floor. This is the standard used by most galleries because it connects the art to the viewer on a human scale. It makes the art feel like part of the room, not just something stuck on a wall.
But how do you find the right spot for the nail without doing a bunch of confusing math? Here’s the foolproof formula:
The Can’t-Mess-It-Up Hanging Formula:
1. Measure the height of your framed art. Let’s say it’s 24 inches high. Half of that is 12 inches.
2. On the back, pull the hanging wire tight and measure the distance from the top of the frame down to the taut wire. Let’s say it’s 4 inches.
3. Now for the simple math: Start with 57 inches, add half the art’s height, then subtract the wire drop. So, 57 + 12 – 4 = 65.
4. Your nail goes 65 inches up from the floor. The center of your art will be perfectly at 57 inches. Every single time.
Of course, this is a guideline, not a law. If the art is going over a sofa, the bottom of the frame should be about 6-8 inches above the sofa back to make them feel connected. Over a lower piece like a credenza, you might shrink that gap to 4-6 inches. The key is to create a visual relationship.
Your Go-To Toolkit (That Won’t Break the Bank)
Sure, you can hang a picture with just a hammer, but if you want it to be level, secure, and perfectly placed, you’ll need a few more things. This is the basic kit I carry to every job. You can get a solid starter version with everything you need for about $30 at a place like Home Depot or Lowe’s.
- A Good Tape Measure: A 25-footer is your best friend.
- A Level: A small 9-inch “torpedo” level works for single pieces, but for gallery walls or big stuff, a 24-inch or 48-inch level is much better. (A laser level is a game-changer if you’re doing a lot of this!)
- A Pencil: For marking the wall. Mark lightly!
- Painter’s Tape: Great for testing spots on the wall without leaving a mark.
- The Right Hangers: Please, stop using a single nail. For anything over a few pounds, you need a real hook. Picture hangers are rated for specific weights (10lb, 30lb, 50lb), and for drywall, you’ll want to choose your anchor wisely.
Good to know: for drywall, not all anchors are created equal. A plastic anchor is okay for things under 15 pounds, like a small, light frame. For most medium-sized art, from 15 to 50 pounds, my go-to is a self-drilling anchor that just screws right into the wall. But for the really heavy stuff—anything over 50 pounds where you can’t hit a stud—you need a toggle bolt. It requires a bigger hole, but it opens up wings behind the wall for a super secure hold that’s not going anywhere.
Hanging Like a Pro: Simple Tricks for a Better Result
The method you use depends on your art’s weight and your wall type. Getting this right is a huge deal for safety, especially with heavy pieces.
The Two-Hook Method for Stability
You know why your pictures are always crooked? It’s probably because they’re hanging from a single hook. For any piece with a wire, always use two hooks. As a general rule, place them about one-third of the frame’s width apart. So for a 36-inch wide frame, you’d put the hooks about 12 inches from each other. This creates a stable base that won’t shift every time a truck drives by. Just use your level to make sure the two hooks are perfectly even!
Heavy Art and Tricky Walls
If a piece weighs more than 30-40 pounds, you’re in a different league. I was once called to a home to re-hang a massive mirror that the owner had hung on two drywall anchors. They failed overnight. The mirror crashed down, shattering and gouging the hardwood floor. It was a costly and dangerous lesson.
For heavy items, your best bet is to use a stud finder to locate the vertical wood beams in your wall and drive your screws directly into them. For anything really heavy or wide, I recommend a French cleat. It’s a system of two interlocking brackets—one on the wall (screwed into studs) and one on the frame. The art just slides down and locks into place, distributing the weight perfectly. It’s what galleries use, and it’s surprisingly easy to install.
By the way, if you have older plaster walls, never just hammer a nail in—it’ll crumble. You must pre-drill a hole and use a toggle bolt for anything heavy. For brick or concrete, you’ll need a hammer drill and a masonry bit to make your hole, then you insert a wall plug before screwing in your hook. It’s more work, but it’s the only way.
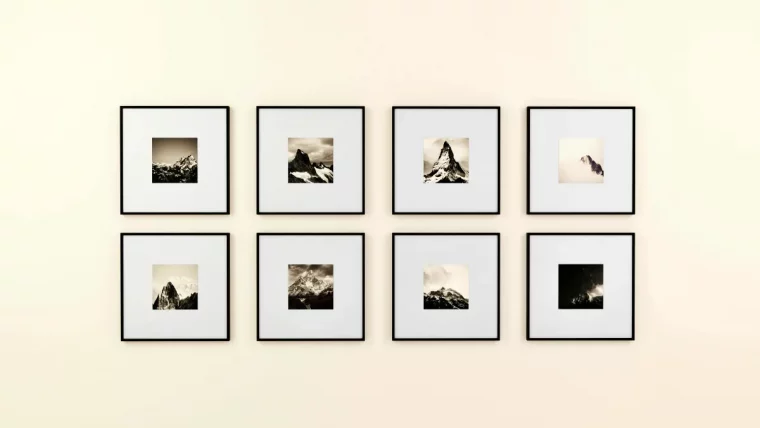
Creating a Killer Gallery Wall (Without Losing Your Mind)
A gallery wall can be an amazing focal point, but a poorly planned one just looks like clutter. The secret is 100% in the planning. Before you even think about templates, lay all your frames out on the floor. You can shuffle them around for hours with zero commitment until you find a balance you love.
Once you have a layout, it’s time for the foolproof paper template method. Trace each frame onto craft paper, cut out the templates, and use painter’s tape to arrange them on the wall. You can live with it for a day or two and make adjustments without making a single hole. I’ll be honest, the first gallery wall I ever did for myself, I tried to eyeball it. It was a disaster of extra holes and crooked frames. That’s how I learned to live and die by the paper template method.
Once you’re happy with the paper layout, mark where the nail goes on each template. Then, drill or hammer right through the paper. Tear the paper away, and you’re left with perfectly placed hooks. For a cohesive look, keep the spacing between frames consistent—usually 2-3 inches apart. That little bit of breathing room is crucial.
A Final Word: Trust Yourself (and Know When to Call for Help)
This guide gives you the methods and principles I use every day. But at the end of the day, use your common sense.
Quick win for today: Grab a level and walk around your house. Fix every single crooked picture. It takes five minutes, and that feeling of ‘ahhh, that’s better’ is instant gratification.
And here’s a clear safety warning: if you are hanging something extremely heavy (over 75 pounds), or a piece that is irreplaceable, or if you just feel uncertain, please hire a professional art installer. It might cost between $75 and $150 an hour, which is cheap insurance compared to the cost of a broken mirror or a trip to the emergency room. Don’t be afraid to put a hole in the wall. A little spackle and paint can fix anything. That’s a tiny price to pay for a home that feels alive and reflects who you are.
Inspirational Gallery
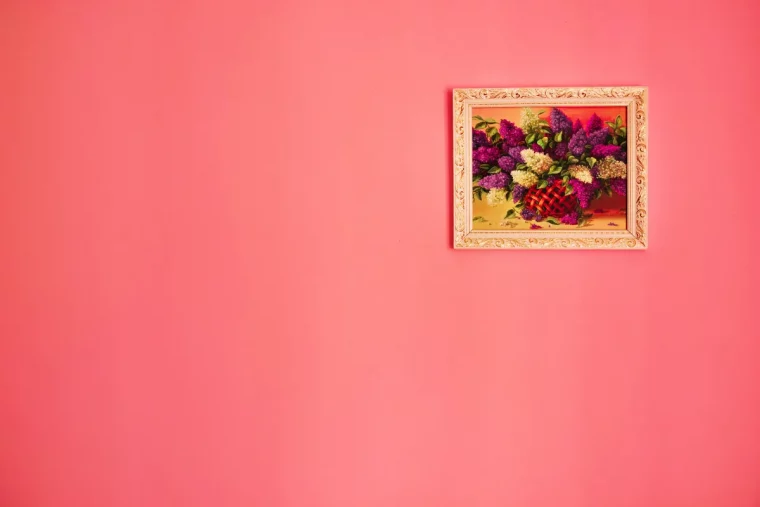
The frame isn’t just a border; it’s a bridge between the art and your room. A common mistake is choosing a frame that matches the wall color, which can make the art disappear. Instead, select a frame that complements a secondary or tertiary color within the artwork itself. This small detail pulls the viewer’s eye inward and makes the piece feel intentionally curated for the space.
The center of your artwork should hang approximately 57 inches from the floor.
This isn’t an arbitrary number. It’s the average human eye level, and it’s the standard used by most art galleries and museums to ensure art is comfortably viewable. When hanging a piece over furniture like a sofa or console, aim for it to be 6-8 inches above the furniture’s top edge.
How do you hang heavy art on tricky plaster or drywall without causing a disaster?
Forget the standard nail. For anything over 10 pounds on drywall, a self-drilling anchor like an E-Z Ancor is your best friend; it supports up to 50 lbs and requires no pre-drilling. For old, crumbly plaster walls, professionals often use toggle bolts or strap toggles. They open up behind the wall, distributing the weight over a much larger area and preventing the plaster from cracking under pressure.
Planning a gallery wall can feel overwhelming. Before making a single hole, trace each frame onto kraft paper or old newspaper. Cut out these templates and use painter’s tape to arrange them on your wall. This allows you to visualize the final layout, adjust spacing, and find the perfect balance—all without a single misplaced nail.
- Supports immense weight, up to several hundred pounds.
- Guarantees your art will never hang crooked.
- Spreads the load evenly across the wall, reducing stress.
The secret used by professionals for heavy mirrors and oversized canvases? The French Cleat. This simple system of two interlocking 45-degree angled brackets is incredibly secure and a surprisingly easy DIY project.
Traditional Nail & Hook: Best for lighter pieces (under 15 lbs) on drywall. Quick and simple, but can leave a noticeable hole and may not be secure enough for high-traffic areas.
Monkey Hook or Gorilla Hook: A brilliant solution for drywall when you don’t have tools. This self-boring steel hook is simply pushed through the wall and twisted into place, holding up to 50 lbs with minimal wall damage.
For most medium-weight art, the Monkey Hook offers superior strength with less fuss.
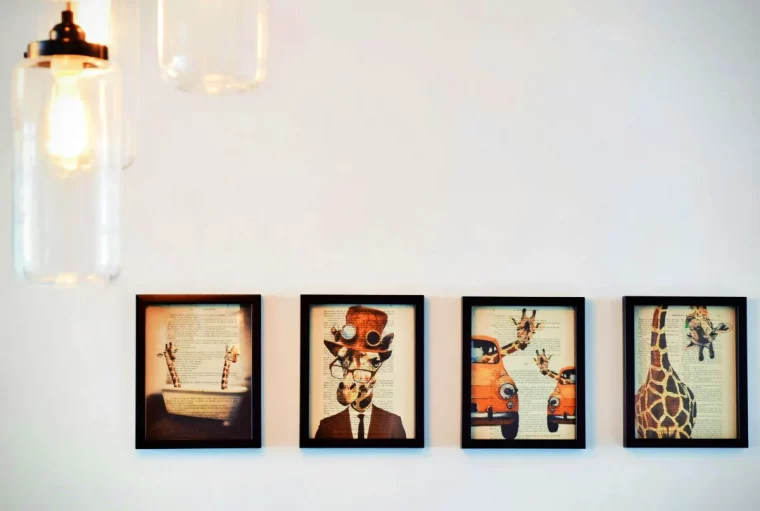
Think beyond framed prints. Your walls are a canvas for texture and personality. Consider hanging:
- A beautiful textile or vintage rug using a simple curtain rod or a specialized quilt hanger.
- A collection of decorative plates, easily mounted with adhesive disc hangers that won’t damage the porcelain.
- An array of woven baskets or straw hats to bring a natural, bohemian feel to a room.
A 2021 report noted a 30% increase in sales of digital art frames.
The art world is no longer just physical. Digital canvases like the Meural or Samsung’s
Your eye can be a poor judge of what’s truly level, especially over long distances. For a single frame, a small, inexpensive torpedo level is essential. For a gallery wall or a long-format piece, investing in a laser level like a Bosch GLL 30 is a revelation. It projects a perfectly straight, crisp line across the wall, ensuring every piece in your arrangement is flawlessly aligned.