Ditch the Can: How to Use DIY Dry Shampoo Without Looking Like a Ghost
So, you’re standing in front of the mirror on day-two (or, let’s be real, day-three) hair, and things are looking a little… slick. We’ve all been there. For years, the only answer seemed to be a blast from an aerosol can, but honestly, those things aren’t always great. After years behind the salon chair, I’ve seen firsthand how overuse of commercial dry shampoos can lead to itchy scalps, annoying buildup, and straw-like ends. Yikes.
In this article
- First, Why Does Hair Get Greasy Anyway?
- DIY vs. The Can: A Quick Breakdown
- Getting Started: What You’ll Need
- The Pro-Level Powder Method: How to Do It Right
- Customize Your Mix for Your Hair Color
- Other Powders: What to Use and What to Avoid
- Frequently Asked Questions & Quick Fixes
- The Real Goal: A Healthy, Balanced Scalp
- Inspirational Gallery with Photos
But before those pricey cans took over every store shelf, we had other tricks up our sleeves. Simple, effective things you probably have in your kitchen right now. This isn’t about throwing your favorite spray in the trash; it’s about giving you other, often healthier, options. When you get the technique right, these pantry staples can be a game-changer for your hair routine.
First, Why Does Hair Get Greasy Anyway?
Before we start dusting our heads with powder, let’s quickly get into the ‘why’. Your scalp has these little glands that produce a natural oil called sebum. Sebum is your friend! It’s your body’s built-in conditioner, keeping your hair waterproof and preventing it from snapping off. A little bit gives you that healthy, natural shine.
The trouble starts when those glands go into overdrive. This can be triggered by anything from stress and diet to hormonal shifts. But a super common culprit I see? Over-washing. When you use harsh shampoos every single day, you strip away all that good oil. Your scalp panics and produces even more oil to compensate, and you get stuck in a greasy, frustrating cycle. The goal here isn’t to get rid of oil completely but to manage the excess at the roots so you can go longer between washes.
DIY vs. The Can: A Quick Breakdown
Okay, so why bother with a DIY powder when you can just buy a spray? It really comes down to three things: cost, ingredients, and control.
- Cost: This one’s a no-brainer. A can of decent dry shampoo can run you anywhere from $8 to $20 and might last a month or two. A box of cornstarch costs, what, $3 at the grocery store? And it will last you for a year, maybe more. The savings are huge over time.
- Ingredients: With a DIY mix, you know exactly what you’re putting on your scalp. It’s usually just one or two simple food-grade ingredients. Commercial sprays, on the other hand, often contain a long list of chemicals, propellants like butane and propane, alcohol, and synthetic fragrances that can be irritating.
- Control & Impact: You get to customize your homemade version for your specific hair color, and you’re not creating aerosol can waste. It’s a small thing, but it feels good.
Getting Started: What You’ll Need
Ready to give it a shot? It’s super simple. Here’s your shopping list, and you probably have most of this already.
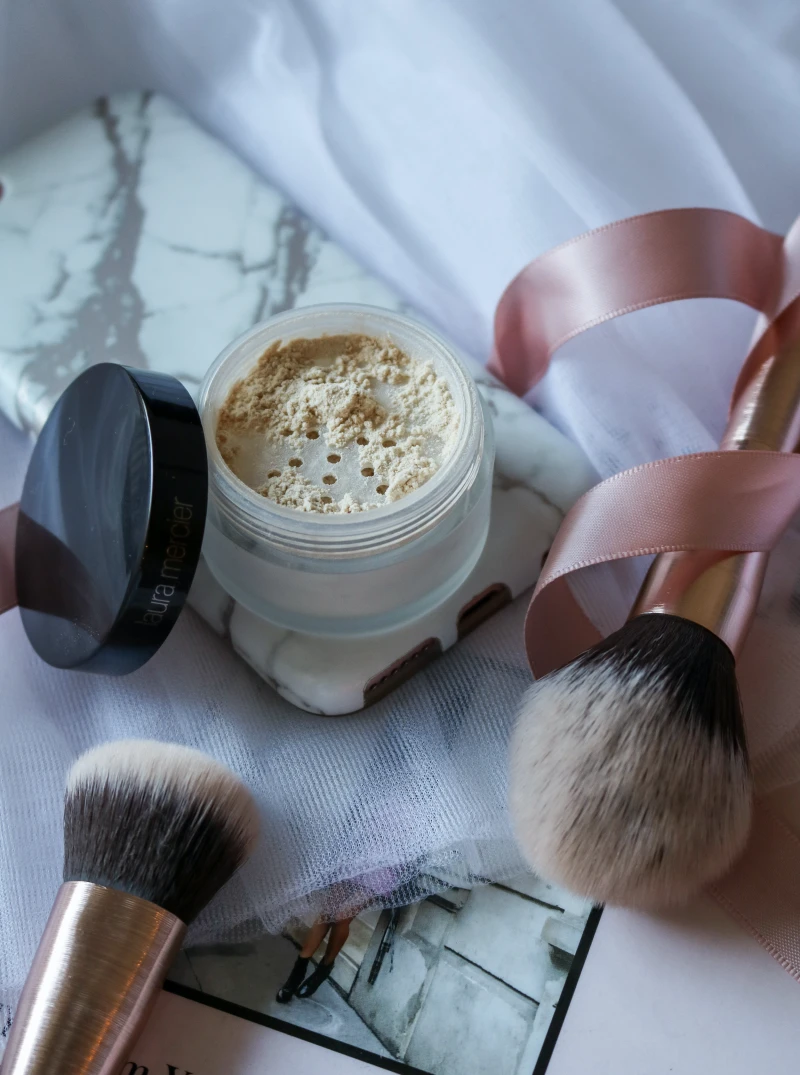
- A Base Powder: Cornstarch or arrowroot powder are the best. They’re fine, super absorbent, and gentle. You can find them at any grocery store for about $3-5.
- An Applicator: A fluffy makeup brush is the secret weapon here. A big, soft blush or powder brush works perfectly. Grab a cheap one from a drugstore for around $5 and make it your dedicated hair powder brush. An old, clean spice shaker with small holes also works in a pinch.
- A Small Bowl: Just something to put a little powder in for easy application.
- (Optional) A Tint: For dark or red hair, you’ll want unsweetened cocoa powder or cinnamon. Again, a few bucks at the grocery store.
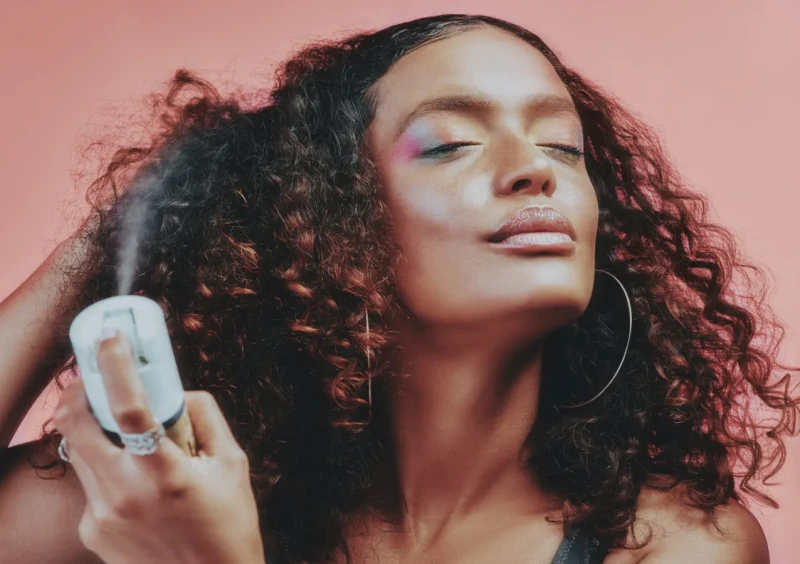
The Pro-Level Powder Method: How to Do It Right
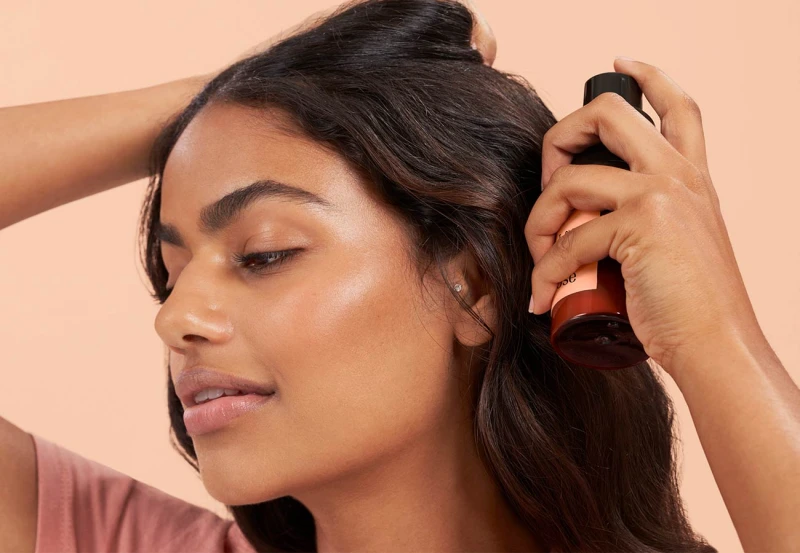
The biggest mistake people make is just dumping the powder straight onto their part line. That leaves you with a chalky stripe on top and greasy hair underneath. Let’s do it the way the pros do.
Step 1: Section Your Hair
This is the most important step! Start with your hair parted normally. Then, using a comb or your fingers, create a new part about a half-inch over. You’re trying to expose the oily roots, layer by layer.
Step 2: Apply Lightly with a Brush
Put about a teaspoon of your powder into a small bowl. Heads up! You’ll probably only use about 1-2 teaspoons total for your whole head, so don’t go crazy. Dip the very tips of your fluffy brush into the powder, then tap it hard against the side of the bowl to knock off the excess. You want a whisper-light dusting, not a heavy clump. Gently dab and press the brush along the exposed root line.
Step 3: Keep Sectioning and Applying
Continue making new parts across the top and sides of your head, lightly dabbing the powder at the roots each time. Focus on the areas that get the oiliest, like around your hairline and at the crown of your head.
Step 4: Let It Sit and ‘Bake’
Don’t skip this! Let the powder sit on your roots for at least 5 to 10 minutes. This gives it time to actually absorb the oil. I always tell people to do this step, then go do their makeup or brush their teeth. It makes a huge difference.
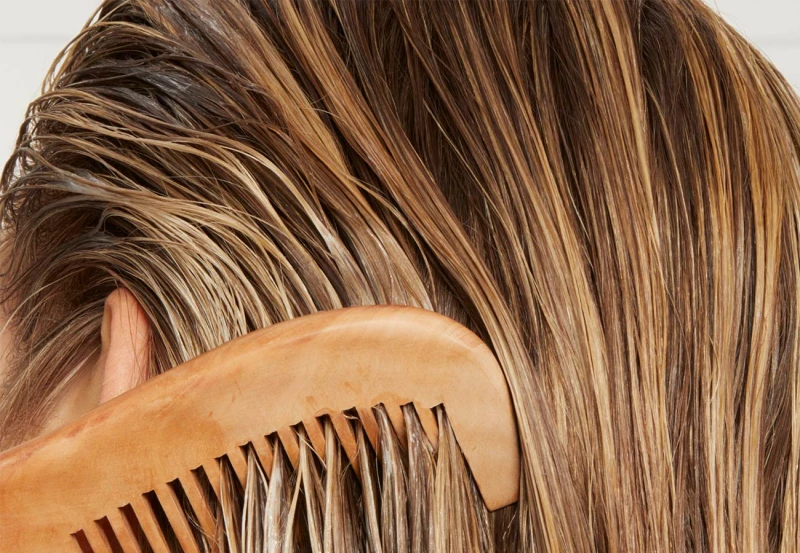
Step 5: Blend It All Out
Now it’s time to make the powder disappear. Start by massaging your scalp with your fingertips to work the powder in and create some volume. Then, brush your hair thoroughly from root to tip. A boar bristle brush is fantastic for this because it helps pull the powder out and distribute any remaining natural oils down the hair shaft, but any clean brush will do.
Special Tip for Curls, Coils & Waves:
If you have textured hair, DO NOT brush it out—that’s a one-way ticket to frizz city. Instead, after letting the powder sit, flip your head over and use your fingertips to vigorously shake out your roots. Really get in there! You can also use a blow dryer on a cool, low setting with a diffuser (or just the open end) to blast out any excess powder without messing up your curl pattern.
Time-Saver Hack: In a major hurry? You can skip the 10-minute wait. Just apply the powder, massage it into your roots for about 30 seconds, and then immediately hit it with a cool blast from your blow dryer to get rid of the evidence. It’s not quite as effective, but it works in a pinch!
Customize Your Mix for Your Hair Color
A white cast on dark hair is the number one giveaway that you’re using dry shampoo. The easy fix is to tint your powder.
- For Brown to Black Hair: Mix your cornstarch or arrowroot with some unsweetened cocoa powder. It blends seamlessly and smells amazing. A good starting point is a 4-to-1 ratio (4 parts starch, 1 part cocoa), but adjust it until it looks right for your root color. For very dark hair, you can add a TINY pinch of activated charcoal, but be careful—it’s intensely pigmented and can stain.
- For Red or Auburn Hair: Cinnamon is your best friend here. Mix a little into your base powder to give it a reddish hue. A quick warning: cinnamon can be a skin irritant for some, so maybe do a quick patch test on your arm first.
By the way, I love keeping my custom mix in an old, clean spice shaker. It’s perfect for tapping the powder right where I need it without making a mess.
Other Powders: What to Use and What to Avoid
The internet is full of suggestions, but not all of them are great for your hair.
- Baby Powder: A classic, but you have to be choosy. I strongly advise against using any baby powder that contains talc due to long-standing health concerns. If you use it, make sure the bottle is clearly labeled ‘talc-free’ and is made from 100% cornstarch.
- Baking Soda: Please, be careful with this one. I see it recommended all the time and it makes me cringe. Baking soda is highly alkaline, and your scalp is naturally acidic. Using it can seriously mess up your scalp’s protective barrier, leading to major dryness, irritation, and even hair breakage. It’s just not worth the risk.
- Kaolin Clay: This is a fantastic, more advanced option. It’s a super fine cosmetic clay that’s amazing at absorbing oil. You can use it on its own or add a spoonful to your cornstarch base for extra power. You can find it online or at health food stores.
Frequently Asked Questions & Quick Fixes
Even with the best technique, you might run into a few issues. Here’s how to solve them.
- Problem: “My hair looks dull and has a white cast.”
You likely used a bit too much powder or didn’t blend it well. Just brush it again with a clean brush or, even better, blast your roots with your blow dryer on a cool setting. That usually blows the excess right out. - Problem: “My scalp feels itchy or gritty.”
This means you need a really good shampoo session. The powder has built up a bit on your scalp. When you wash, spend extra time massaging your scalp with your fingertips to break it all up. And if it’s really itchy, you might be sensitive to an ingredient (like cinnamon), so try switching it up. - Question: “How many days in a row can I do this?”
Good question! You can usually get away with it for day two and day three hair. But by day four, you’re mostly just piling powder on top of oil, and your scalp is going to need a real, thorough wash. Think of it as a bridge to your next shampoo, not a total replacement.
The Real Goal: A Healthy, Balanced Scalp
At the end of the day, these DIY tricks are tools, not a cure-all. The long-term solution is to get your scalp to a place where it isn’t producing so much oil to begin with.
Try to go one extra day between washes. Your scalp will eventually get the memo and calm down its oil production. When you do shampoo, use a gentle, sulfate-free formula and always wash twice—the first shampoo breaks up the gunk, and the second one washes it all away. And don’t forget to wash your brushes! A dirty brush just puts oil and product right back into your clean hair.
Ultimately, understanding these simple alternatives gives you more control over your hair’s health and your wallet. You know exactly what you’re using, and you can tailor it perfectly for you. Healthy hair always, always starts with a happy scalp.
Inspirational Gallery with Photos
I have dark brown hair. Won’t I just look like I’m covered in flour?
This is the number one fear, but the solution is in your kitchen cabinet. For brunettes, mix unsweetened cocoa powder into your base. For redheads, a dash of cinnamon works wonders. Start with a ratio of about one part color to four parts powder (e.g., 1 tablespoon cocoa to 4 tablespoons arrowroot powder) and test it on a small, hidden section of hair. Adjust until you get a perfect, invisible match.
- Wake up with refreshed, voluminous roots.
- Avoid any trace of white powder in the morning.
The secret? Apply your DIY dry shampoo before you go to bed. A light dusting at the roots before you sleep gives the powder hours to absorb oil. The tossing and turning helps distribute and work the powder in, so you wake up ready to go without any tell-tale residue.
Did you know that adding a small amount of bentonite or kaolin clay to your DIY mix can help draw out impurities from the scalp, not just oil?
This simple addition elevates your dry shampoo from a quick fix to a mini scalp treatment. Look for cosmetic-grade clays online or at health food stores. It’s a key principle of ‘skinification’ for hair: treat your scalp with the same care as the skin on your face.
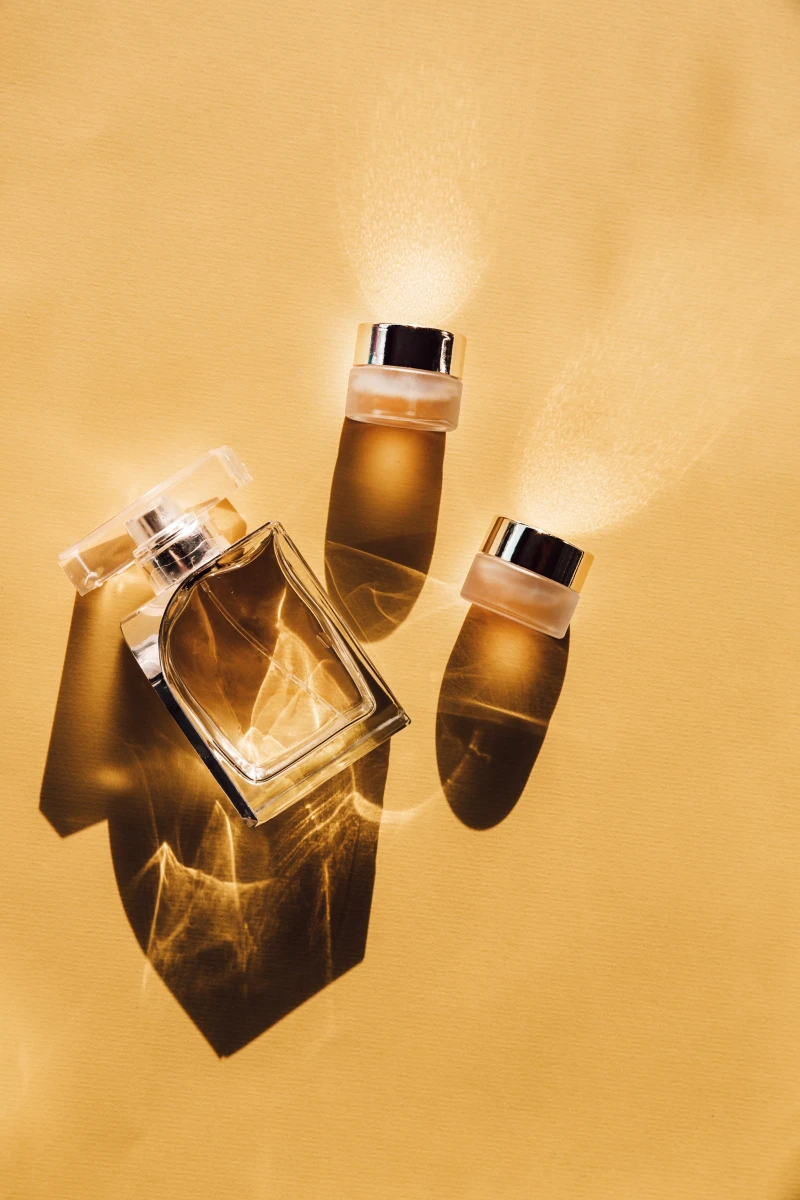
The right container makes all the difference. Ditch the messy baggie and decant your homemade powder into something more functional. A glass salt or pepper shaker with adjustable holes gives you perfect control. For a more luxe experience, find a vintage powder jar with a sifter and a soft puff—it turns a daily routine into a small moment of pampering.
Cornstarch: The classic, inexpensive, and highly absorbent choice available in any grocery store. It works perfectly but can sometimes feel a bit heavy on very fine hair.
Arrowroot Powder: Often found in the baking or health food aisle (from brands like Bob’s Red Mill), this alternative is finer and lighter than cornstarch. It provides a silkier feel and is less likely to clump.
Many users prefer arrowroot for its lightweight texture, but both are incredibly effective oil absorbers.
Go beyond a neutral scent by adding a few drops of essential oils to your powder. It’s a great way to customize your experience and add therapeutic benefits.
- Rosemary: Often used to stimulate the scalp and encourage healthy hair growth.
- Lavender: Known for its calming properties, great for soothing an itchy scalp.
- Peppermint: Provides a refreshing, cooling tingle that feels amazing on tired hair.
- Tea Tree: A powerful choice if you’re prone to dandruff, thanks to its antimicrobial properties.
Just add 5-10 drops to your powder mix in a jar, shake well, and let it sit overnight for the scent to infuse.
In 18th-century Europe, elaborate hairstyles were often cleaned and styled not with water, but with scented and colored powders made from starches, just like modern DIY recipes.
The biggest mistake: Applying too much product directly on your parting. This creates that obvious, chalky look. Instead, section your hair and sprinkle the powder underneath the top layer, directly onto the oiliest roots. Let it sit for two minutes to work its magic before you massage and brush it through. You’ll get all the volume and none of the evidence.


