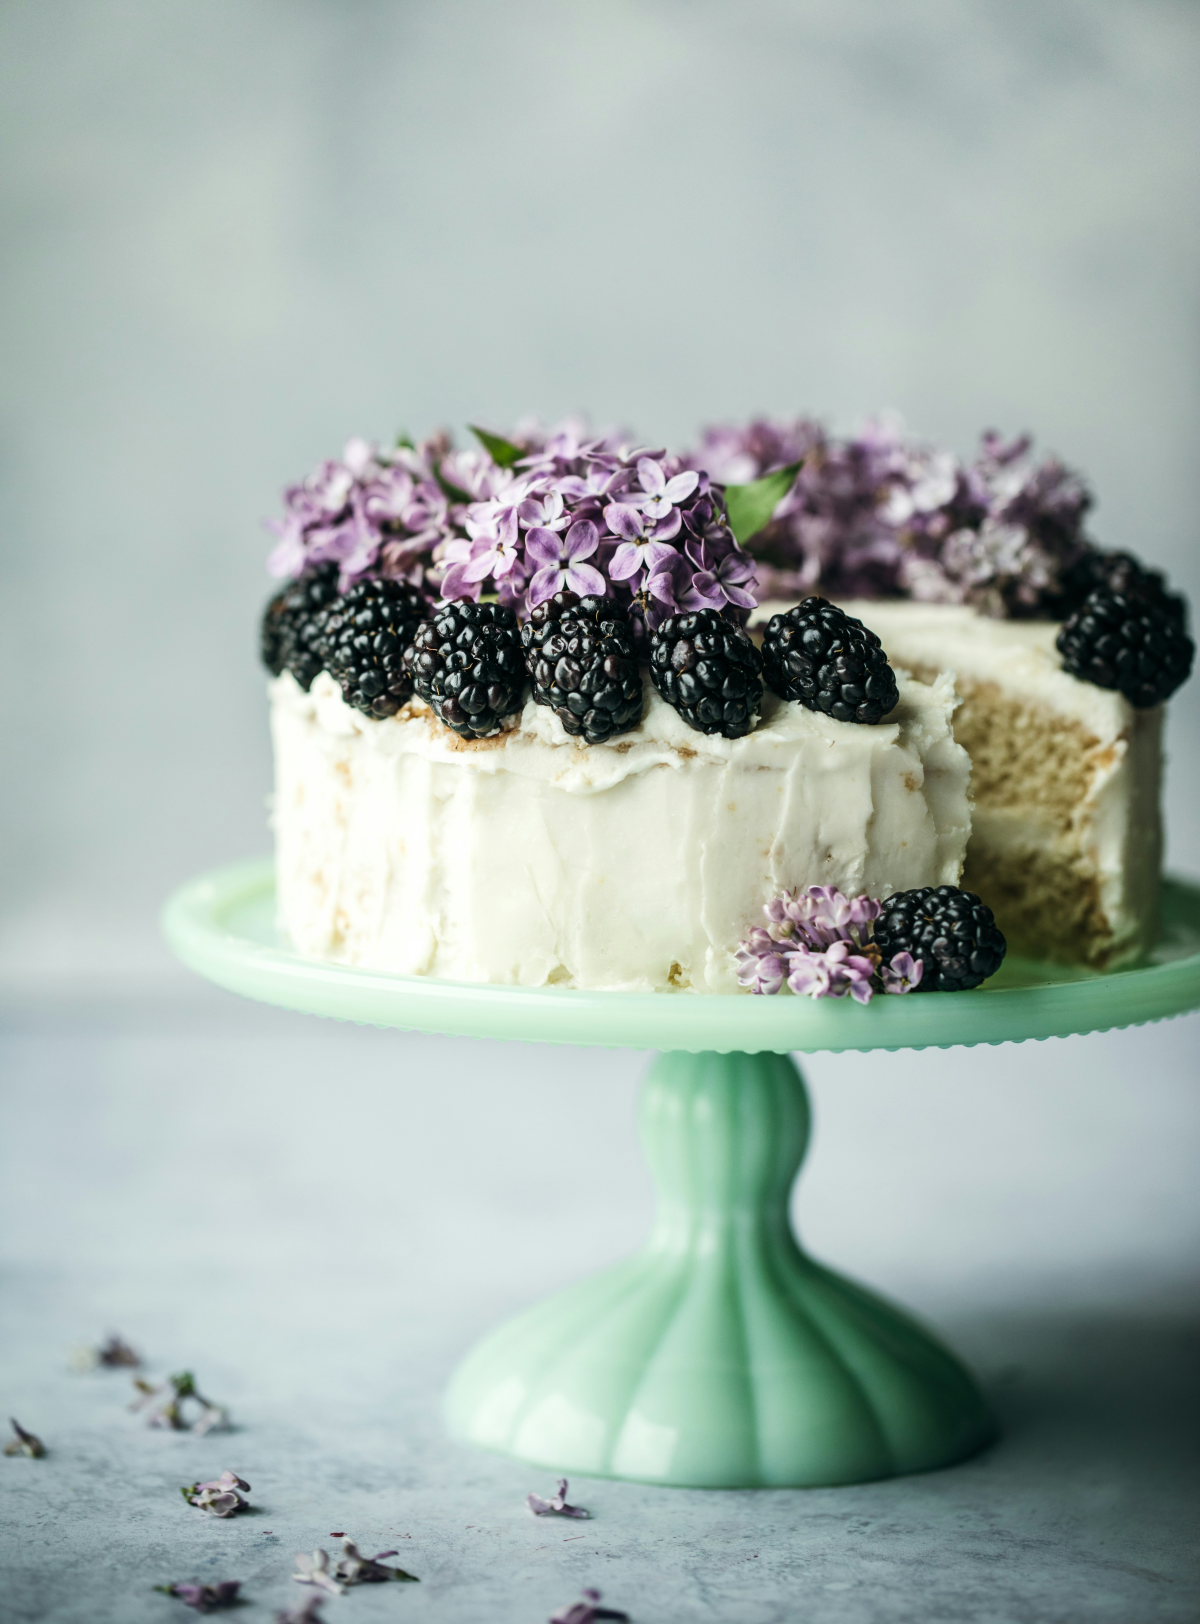
Cake Fillings Are More Important Than the Cake Itself. Here’s Why.
For my first few years in a professional kitchen, I was obsessed with the cake. I mean, truly obsessed. Getting that perfect, even crumb, the dead-level top… I thought that was the entire game. My mentor, a very no-nonsense pastry chef, let me run with that belief for a while. Then came the day of reckoning.
In this article
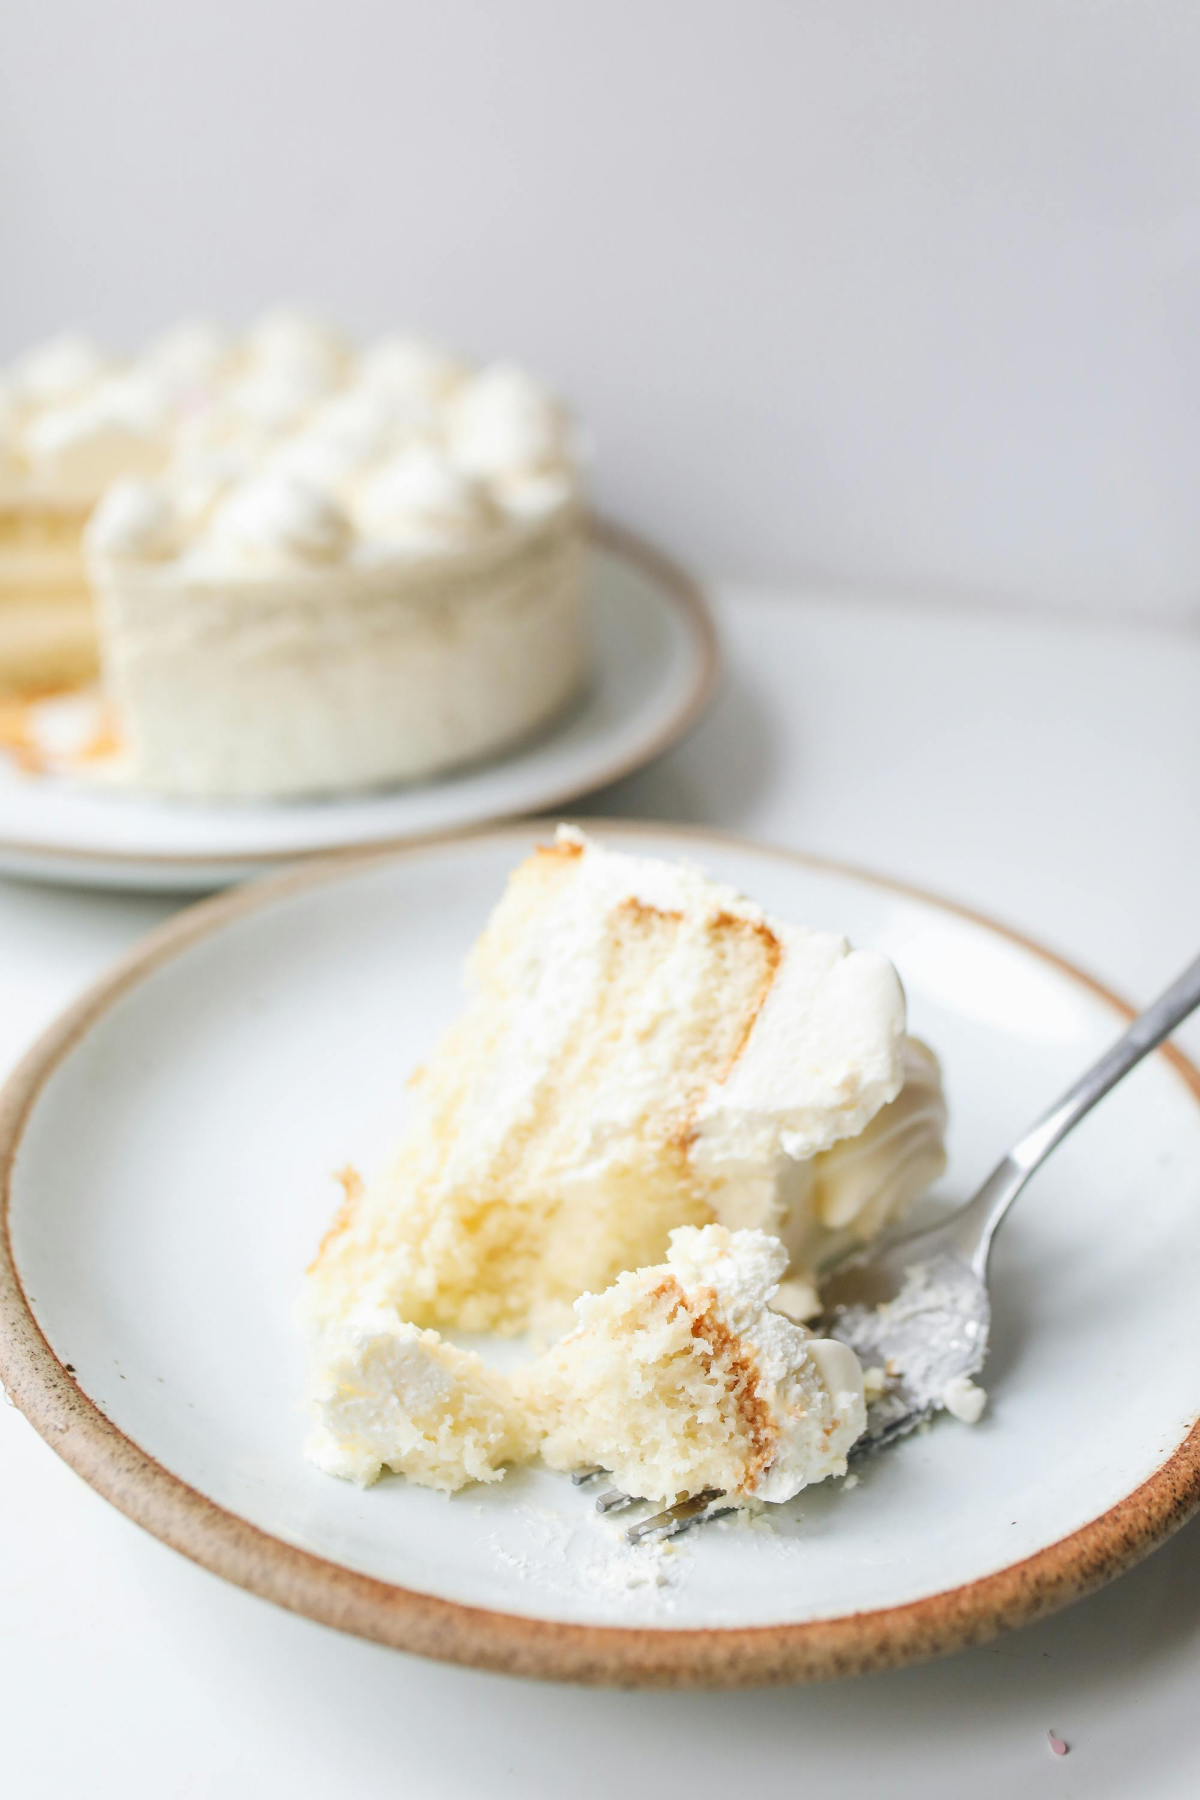
He had me fill a gorgeous, three-tiered sponge with a simple raspberry mousse I’d just perfected. I was so proud. It tasted incredible. An hour later, the two of us stood there in complete silence, watching the top two tiers of my masterpiece slowly, gracefully, slide right off the base. It left a sad, pink puddle on the workbench.
He wasn’t mad. He just looked at me and said, “Flavor is nothing without structure. Now, you learn about fillings.”
That lesson hit me harder than any recipe ever could. A cake filling isn’t just the delicious goo in the middle; it’s a critical piece of engineering. It’s what manages moisture, creates texture, and provides the stability for the whole creation. Honestly, getting this wrong is the number one reason I see amazing-looking cakes completely fail. After years working everywhere from high-volume bakeries to fancy wedding cake studios, I can tell you this: mastering a handful of core fillings is what separates the pros from the hobbyists. It’s about knowing the why behind them, so you can build, improvise, and fix things with confidence.
More Than Just Sweet: The Real Job of a Filling
Before you even think about flavors, you have to think like an engineer. Every great filling nails three things: flavor balance, complementary texture, and rock-solid stability. Get these right, and you’re moving from a simple homemade treat to something truly professional.
Pillar 1: Flavor Balance
Look, anyone can make something sweet. The real art is in the balance. A filling that’s just a sugar bomb will completely overpower a delicate cake and fatigue everyone’s taste buds. We balance that sweetness using a few key tools:
- Salt: Seriously, this is the most underrated ingredient in the pastry world. A tiny pinch of salt doesn’t make your filling salty; it just makes it taste more like itself. It makes fruit flavors pop and gives chocolate and caramel a deep, resonant flavor. My rule of thumb? About 1/8 to 1/4 teaspoon of fine sea salt for every cup of sugar.
- Acid: A little squeeze of lemon juice or a dash of citric acid is your secret weapon against flat, one-note sweetness. It’s a must-have for fruit fillings to brighten them up, but I also use it in vanilla buttercream to cut through the richness of all that powdered sugar.
- Fat: Fat is a flavor delivery system. Things like butter, heavy cream, and egg yolks carry flavor to your palate and create that satisfying, rich mouthfeel. It’s the reason a buttercream made with actual butter has a depth of flavor that one made with shortening just can’t touch.

Pillar 2: Texture (aka Mouthfeel)
Texture is all about how the filling feels when you eat it. Is it silky and smooth? Light and airy? Or dense and fudgy? The key is to make sure the texture complements the cake. A light, delicate chiffon cake would be crushed by a heavy filling, so it pairs beautifully with something airy like a whipped ganache. On the other hand, a dense, sturdy chocolate cake can easily handle a thick, rich layer of ganache.
Pillar 3: Stability
This is it. This is the pillar my mentor was trying to teach me about with that raspberry mousse disaster. Stability is everything, and it breaks down into two key areas.
- Structural Stability: Can the filling actually hold the weight of the cake layers above it? A loose, watery filling will just squish out the sides. This happens because of something called “water activity,” where water from a wet filling literally migrates into the dry cake, making it soggy and compromising the whole structure. This is why we cook fruit down into a compote (to evaporate water) and use stable emulsions like buttercream, where the water is locked in with fat.
- Temperature Stability: Will your filling hold its shape on a dessert table? A simple whipped cream is delicious, but it will start to weep and collapse after about an hour at room temperature. In contrast, a Swiss meringue buttercream or a firm chocolate ganache are workhorses for a reason—they stay put, even if the cake has to sit out for a few hours at an event.
The Foundational Four: Master These and You Can Make Anything
You don’t need a hundred different recipes. You just need to truly understand a few key types. Once you get the hang of these, you can create endless variations.
1. Buttercream: The Go-To for Almost Everything
Not all buttercreams are created equal. The type you choose has a massive impact on your cake’s flavor, stability, and overall vibe.
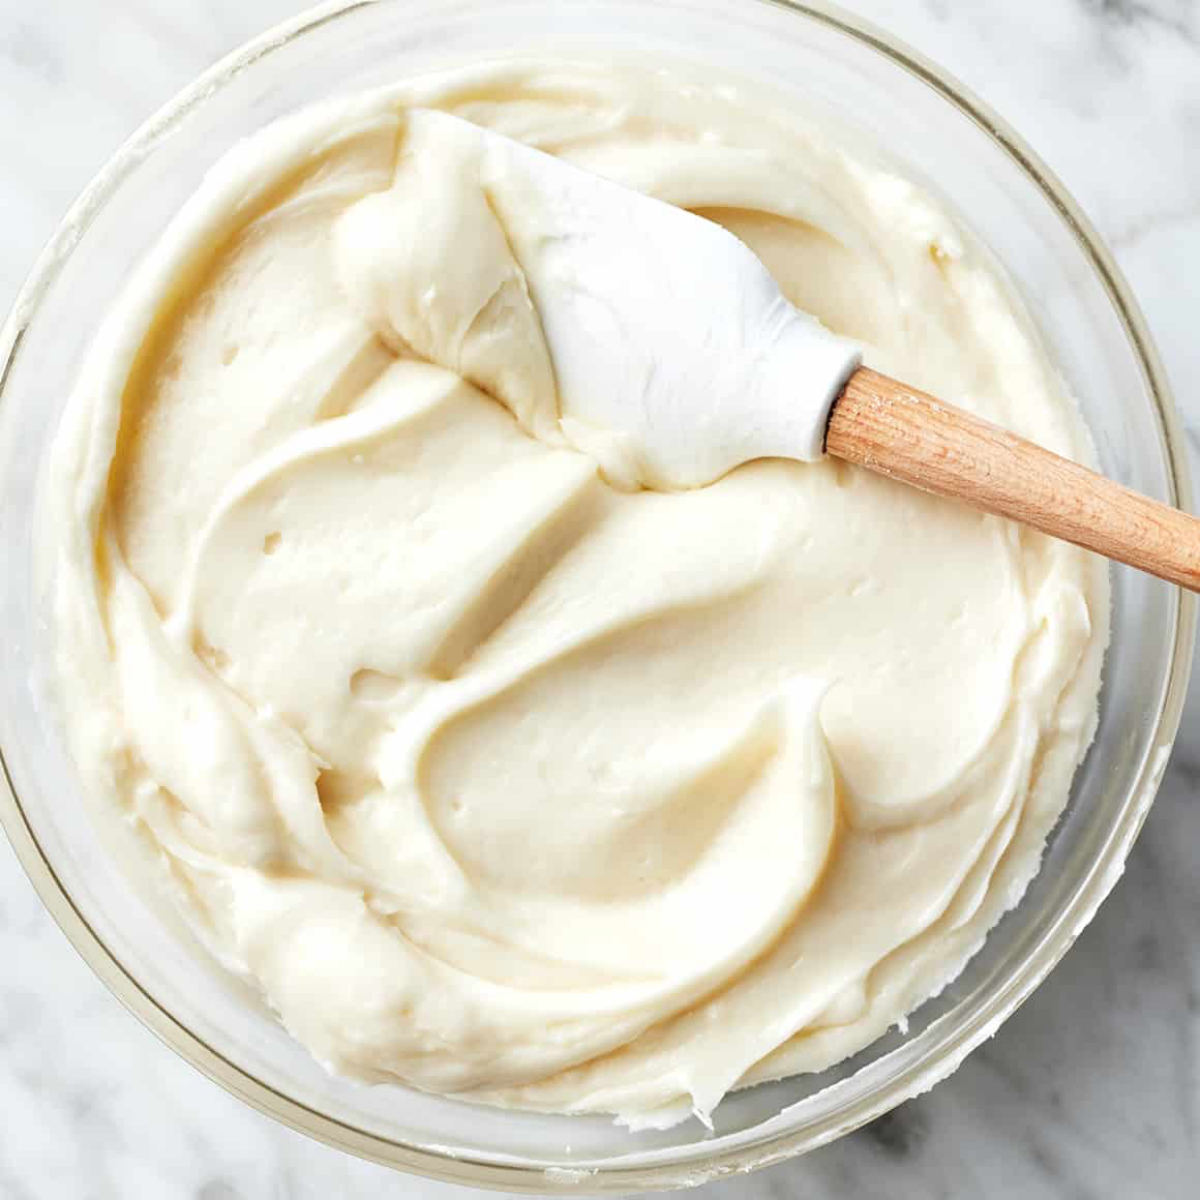
Simple Crusting Buttercream (aka American Buttercream)
This is the one most people know: fat (usually butter) beaten with powdered sugar and a bit of liquid. It’s sweet, simple, and quick.
- Quick Starter Recipe: Beat 1 cup (2 sticks) of softened butter on medium-high for 5-8 minutes until it’s super light and pale. Sift in 4 cups of powdered sugar, one cup at a time. Add 1-2 tablespoons of milk or cream and a teaspoon of vanilla. Beat until smooth.
- Pro Tip: If it tastes gritty, it just needs more mixing or another teaspoon of liquid to help the sugar dissolve. If it’s overwhelmingly sweet (which it can be), you can’t take the sugar out, but you can balance it. Add a generous pinch of salt and about 1/4 teaspoon of lemon juice. I promise you won’t taste the lemon, it just cuts the sweetness.
- Best For: Sheet cakes, cupcakes, and as a structural “dam” for softer fillings. It forms a light crust, which makes it easy to work with. Budget-wise, it’s a winner, costing only about $4-$5 for a full batch.
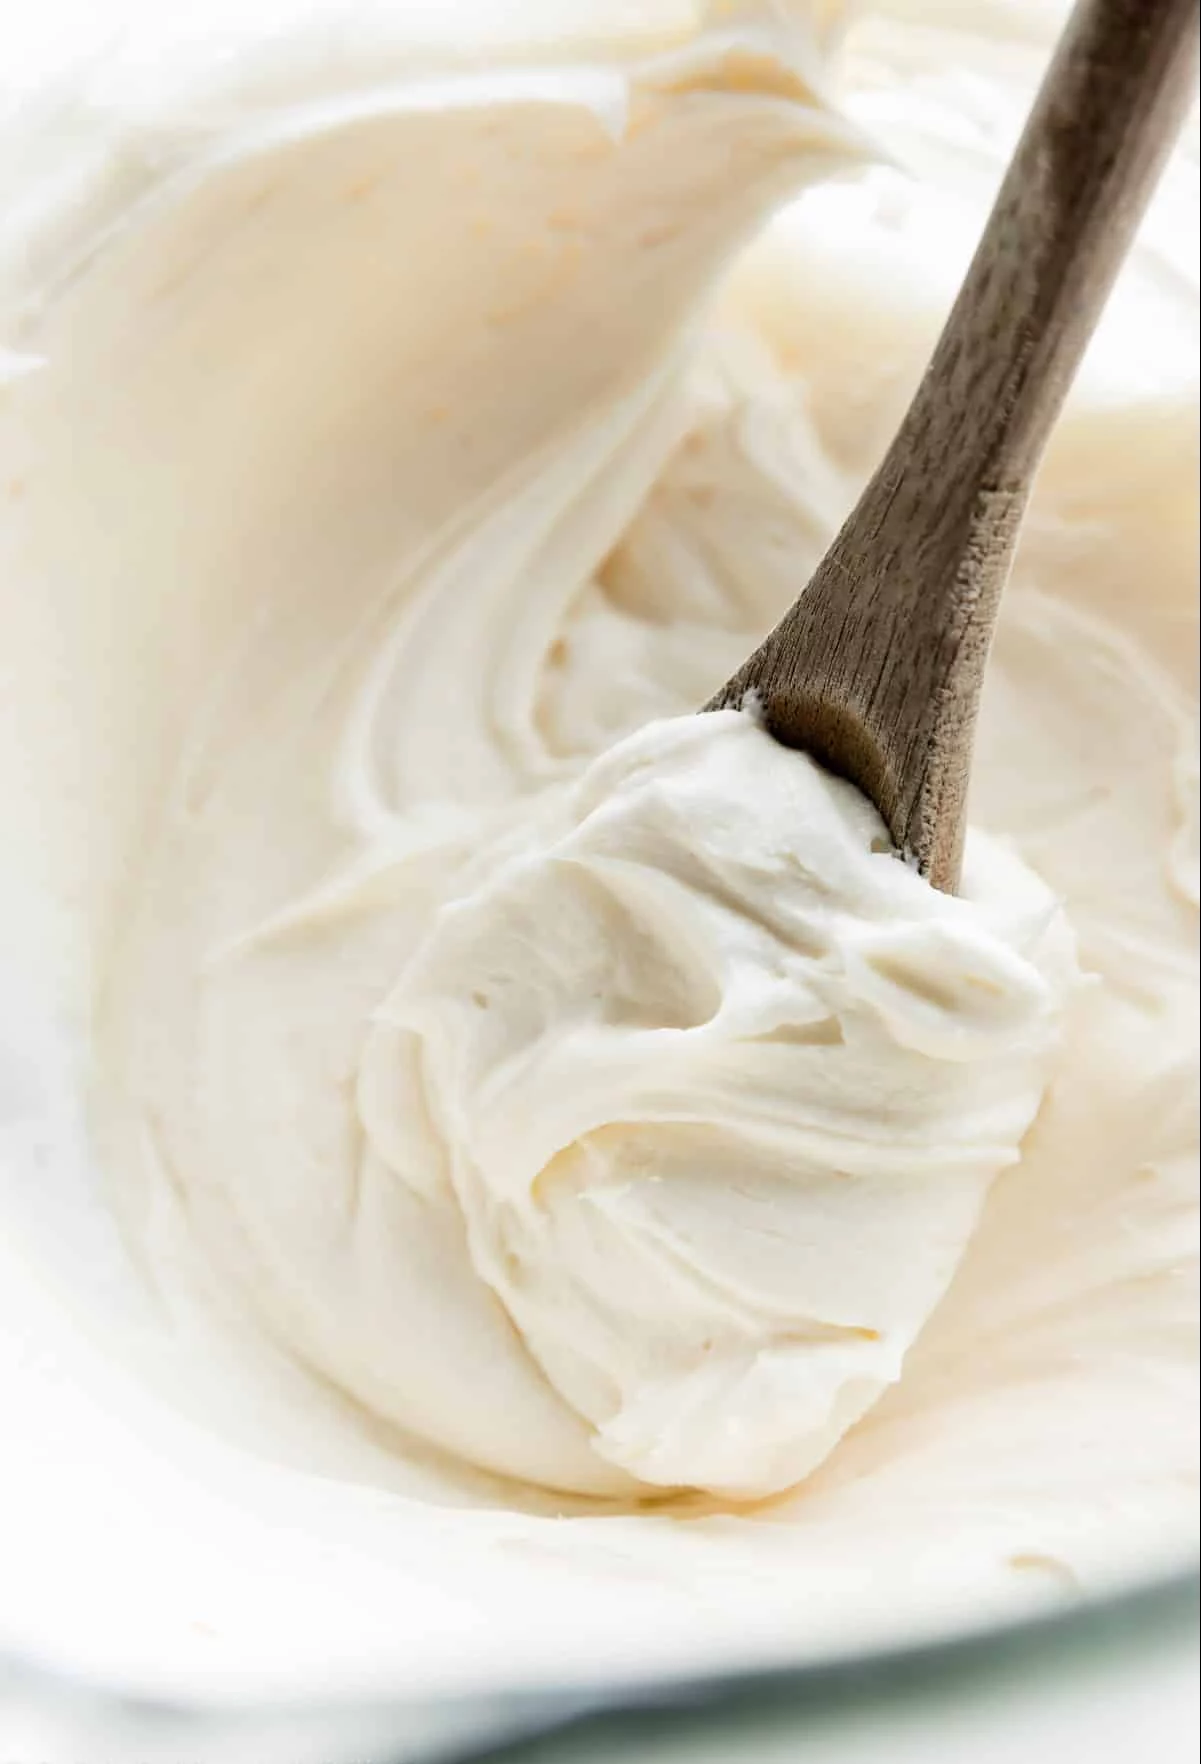
Meringue-Based Buttercream (The Pro’s Choice)
This is the stuff you find in high-end bakeries and wedding cake studios. It’s silky, far less sweet, and incredibly stable. The Swiss method is my favorite because it’s more straightforward and food-safe.
- How It Works: You gently cook egg whites and sugar together over a double boiler until the sugar dissolves and the mixture is hot, then whip it into a stiff meringue. After it cools, you beat in softened butter.
- Quick Starter Recipe (Swiss Method): Whisk 4 large egg whites and 1 cup of granulated sugar in a heatproof bowl over a pot of simmering water. Whisk constantly until the sugar is fully dissolved (it shouldn’t feel gritty between your fingers) and it reaches 160°F. Transfer to a stand mixer and whip on high until you have a stiff, glossy, and completely cool meringue. On low speed, add 1.5 cups (3 sticks) of softened, cubed butter, one piece at a time. It will look curdled—don’t panic! Just keep mixing and it will magically come together into a silky cream.
- Time & Cost: Be patient. This process takes about 45 minutes from start to finish. It’s also pricier due to the large amount of butter, running you closer to $8-$10 a batch.
- Troubleshooting Tip: If your buttercream turns to soup, the meringue was too warm when you added the butter. Just pop the whole bowl in the fridge for 20 minutes, then try whipping it again. It should come right back together.
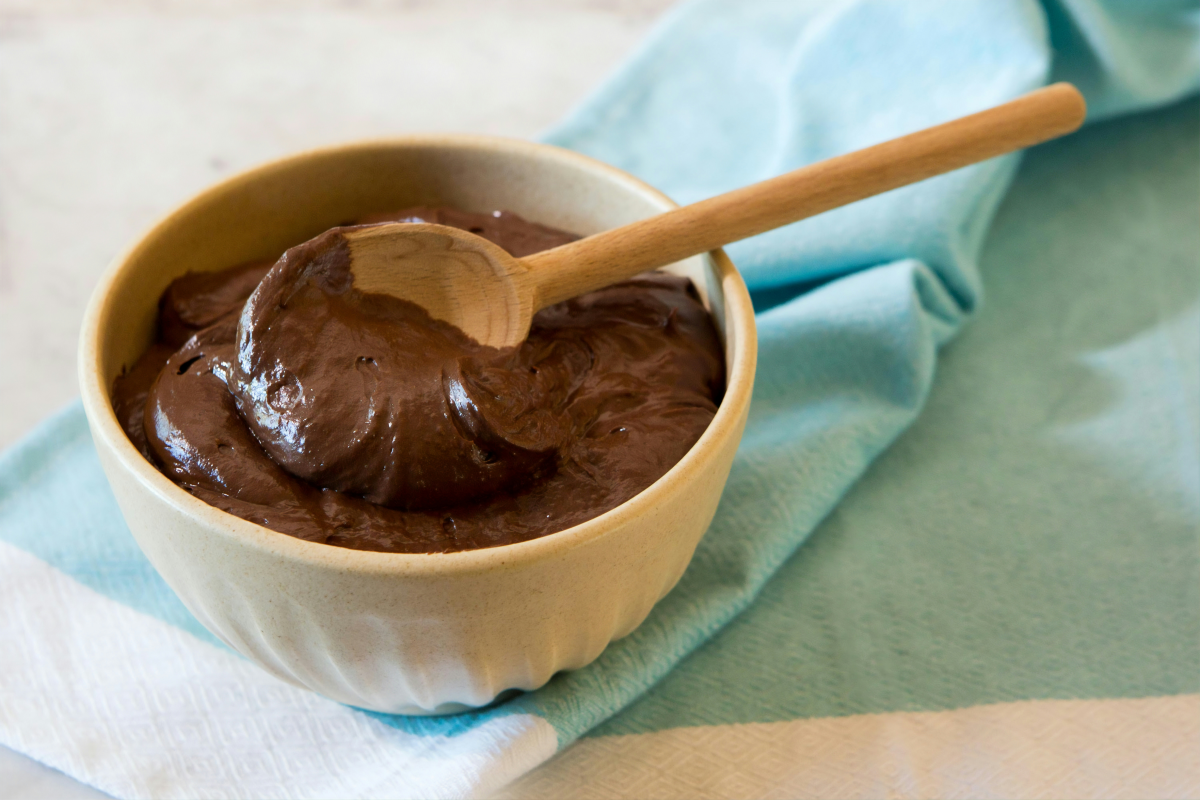
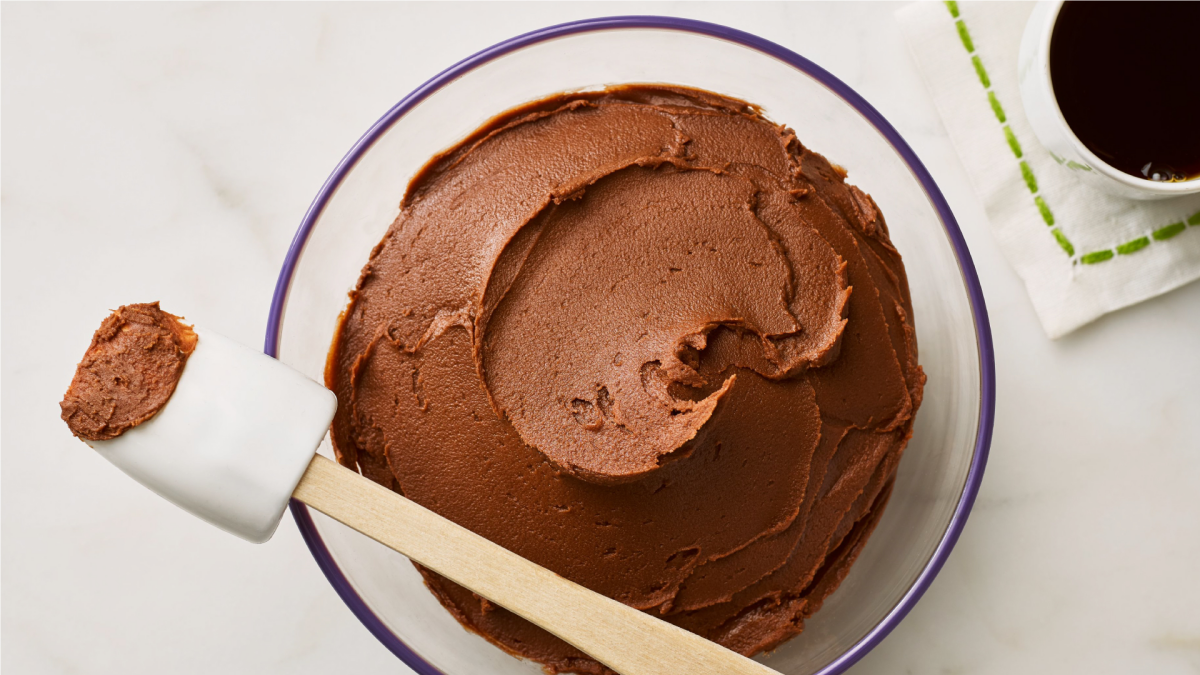
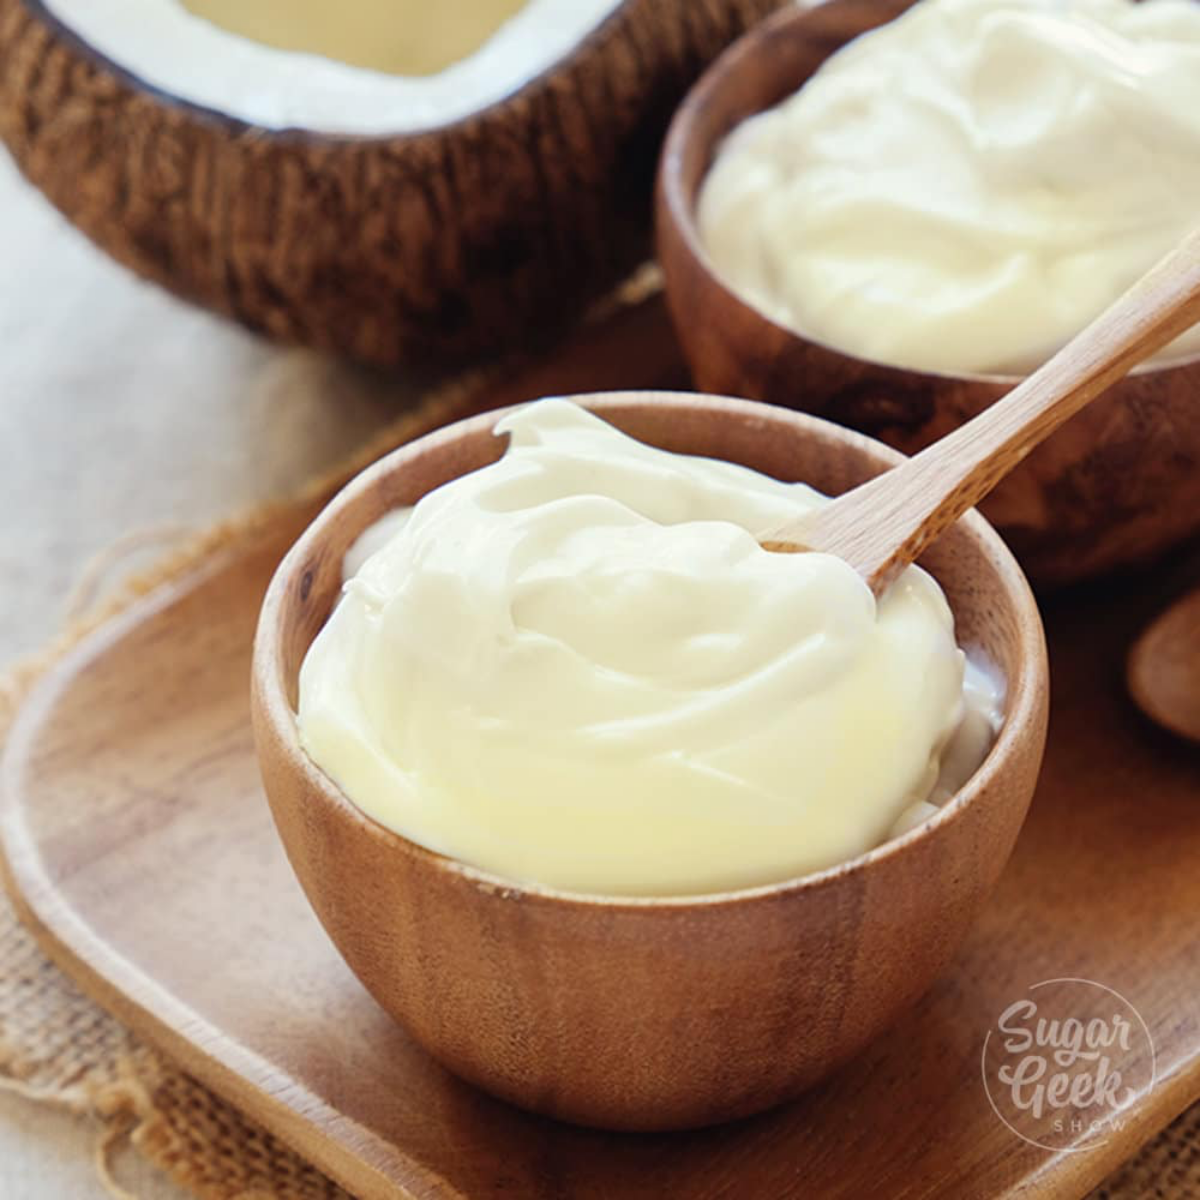
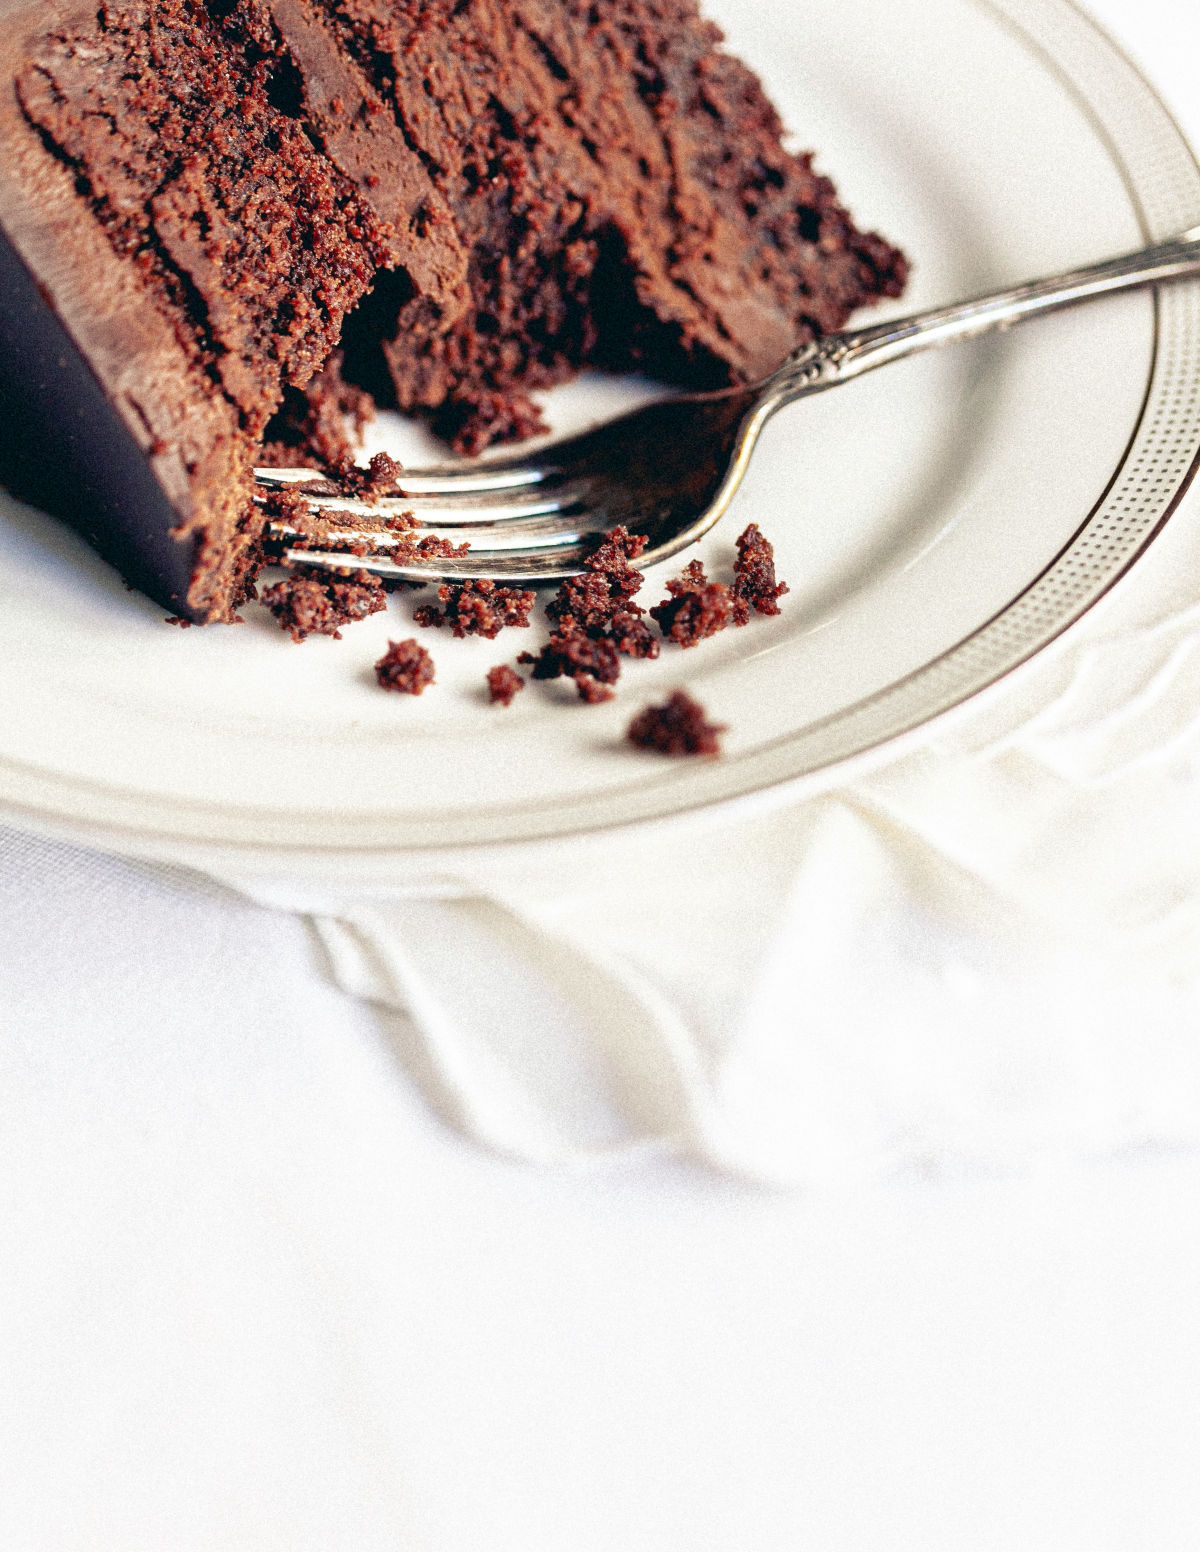
2. Ganache: The Rich and Versatile Workhorse
Ganache is a simple mix of chocolate and cream, but by changing the ratio, you can do almost anything with it. A heads up: you need to use real chocolate here, not candy melts. The emulsion relies on the cocoa butter in real chocolate to work properly.
- The Ratios (By Weight!):
- 2:1 (Chocolate to Cream): This makes a super firm, fudgy ganache. Perfect for a sturdy filling layer or for creating razor-sharp edges on a cake.
- 1:1 (Equal Parts): Your all-purpose ratio. Think 8 oz chocolate to 8 oz cream. Perfect for a rich filling or a beautiful drip glaze.
- 1:2 (Chocolate to Cream): This creates a very thin sauce. Once it’s fully chilled, you can whip it into a light, airy chocolate mousse.
- The Technique: Finely chop your chocolate. Heat the cream until it’s just simmering, then pour it over the chocolate. Let it sit for 5 full minutes without touching it. Then, gently whisk from the center outward until it’s perfectly smooth and glossy.
- Patience is Key: Let ganache set at a cool room temperature. Putting it in the fridge can make it grainy. A firm ganache can take 4-6 hours, or even overnight, to fully set up.
- Flavor Idea: Before you heat it, let your cream infuse with a vanilla bean, a cinnamon stick, or some espresso beans for 30 minutes. Strain, then proceed with the recipe for an instant flavor upgrade.
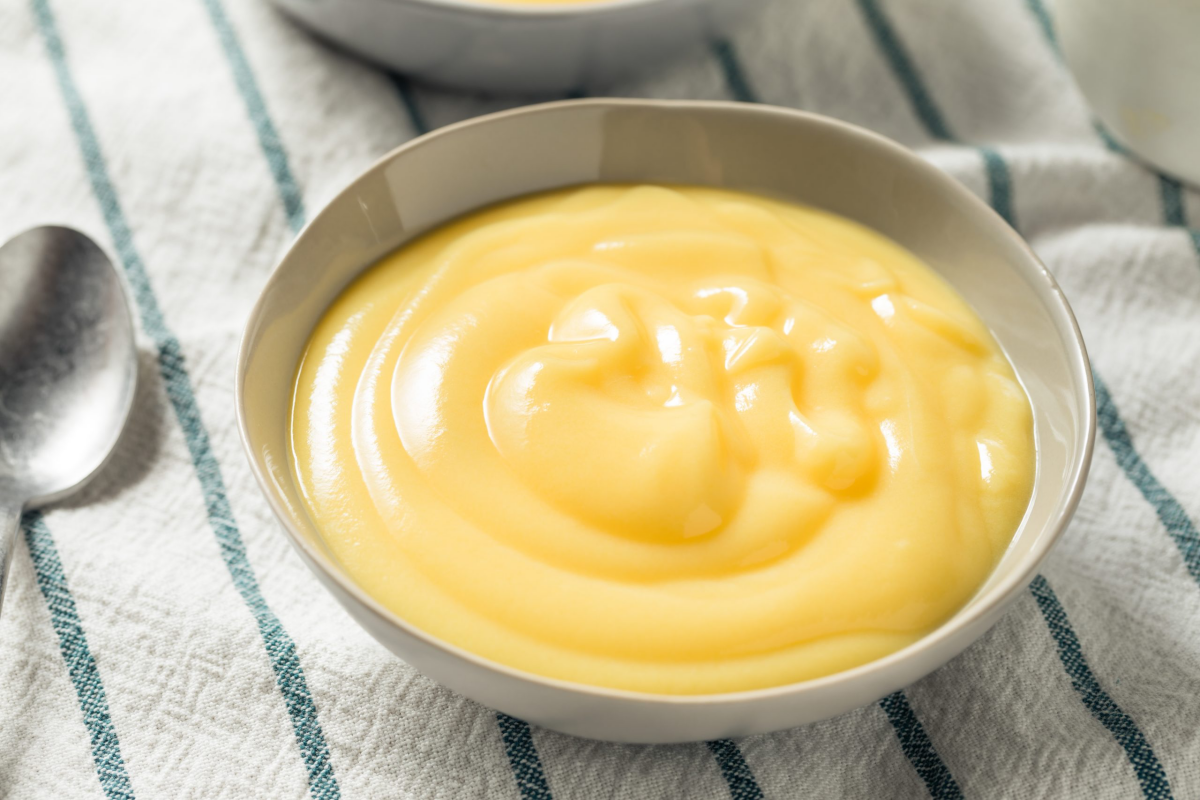
- Pastry Cream: This is a classic cooked custard thickened with egg yolks and cornstarch. The secret is to bring the mixture to a full boil for at least a minute to cook out any starchy, chalky taste from the cornstarch. Always press plastic wrap directly on the surface while it cools to prevent a skin from forming. And remember, this is a high-risk food—it must be kept refrigerated.
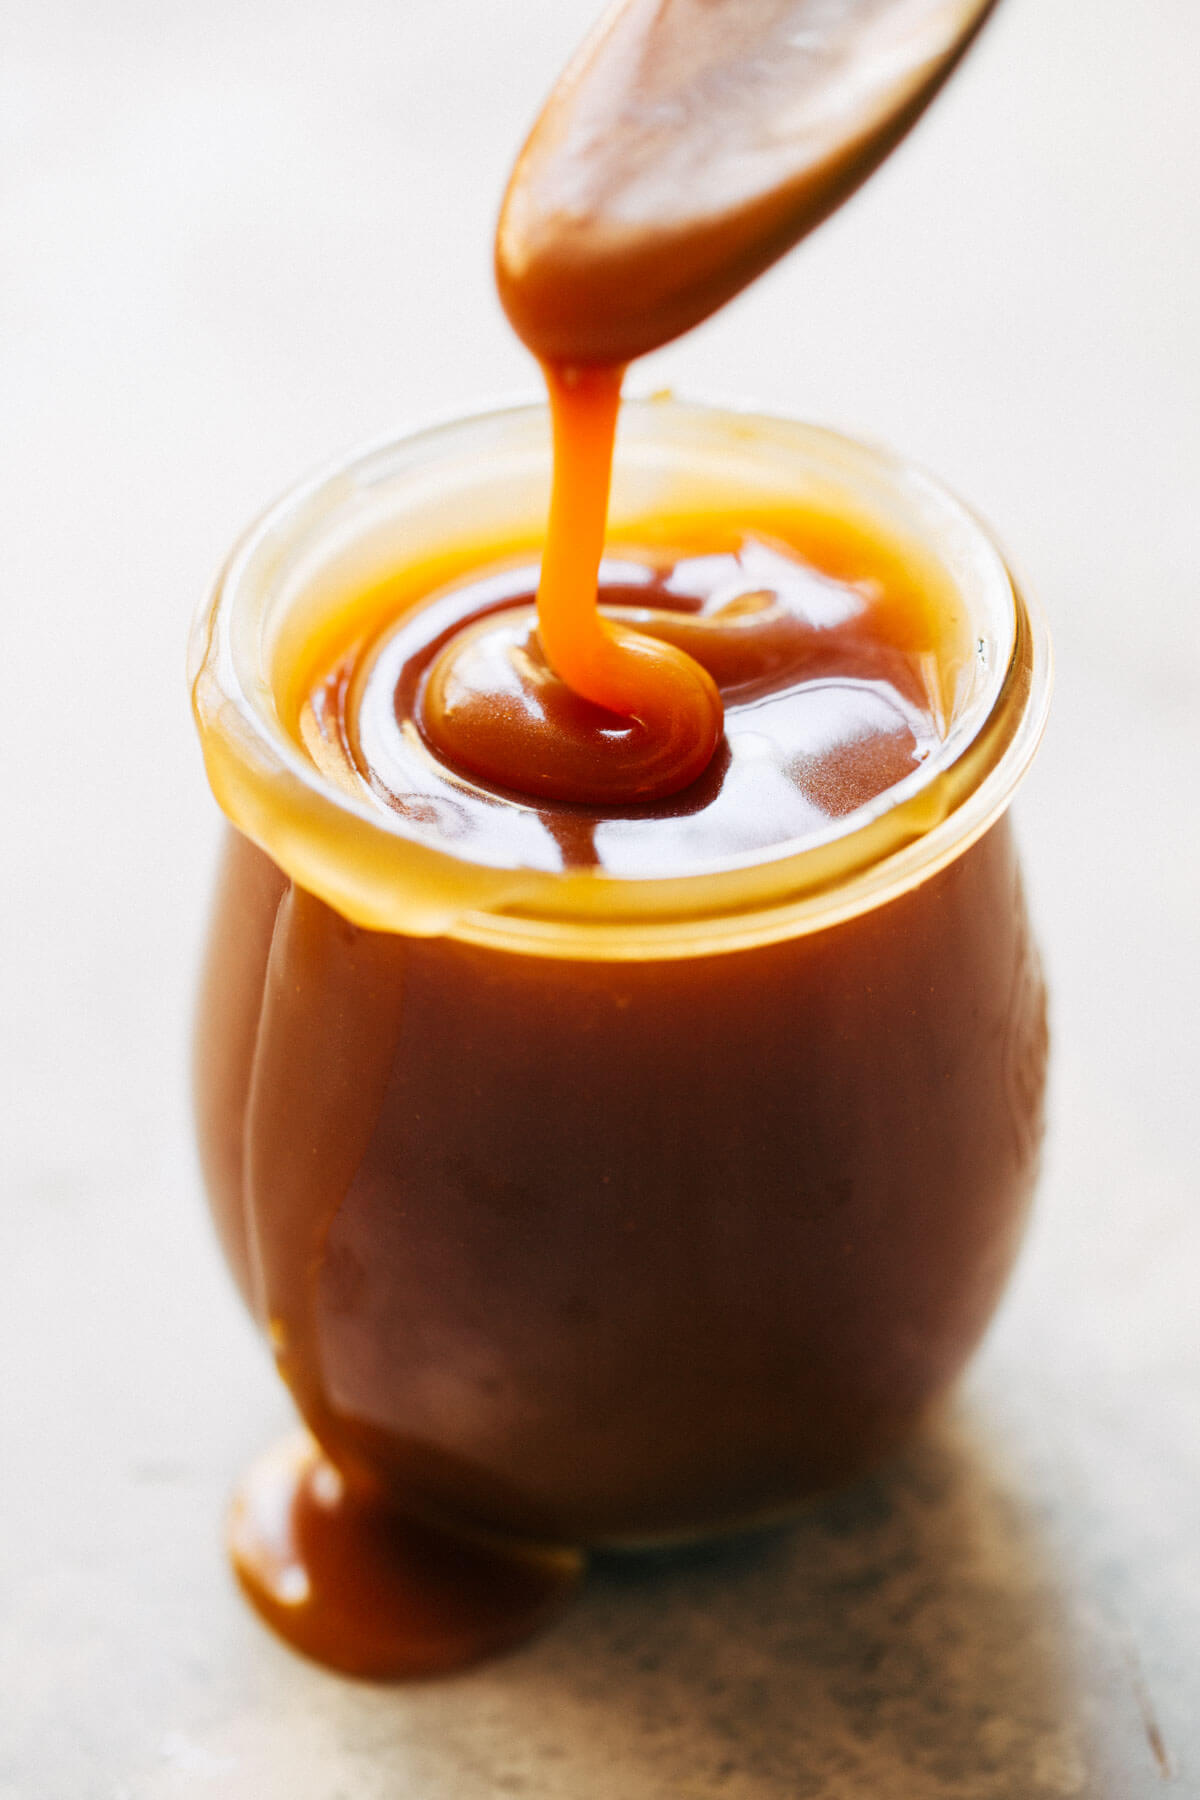
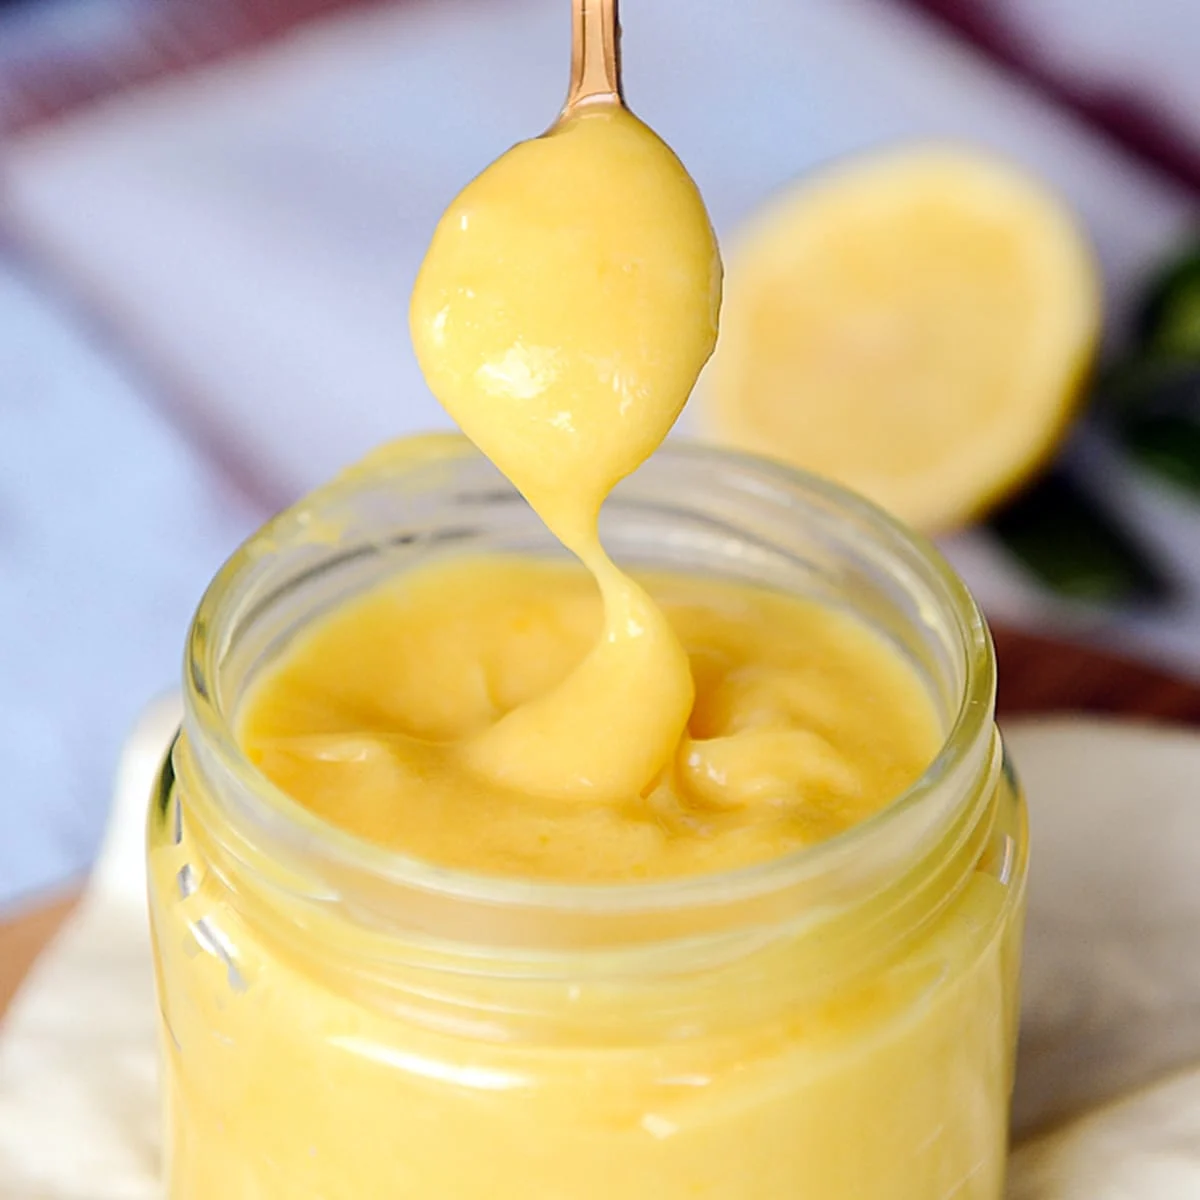
- Fruit Curds: Think of a curd as a custard where fruit juice provides the liquid and flavor. Cook it low and slow in a non-reactive pan (like stainless steel, not aluminum) to avoid a metallic taste. You’ll know it’s done when it’s thick enough to coat the back of a spoon.
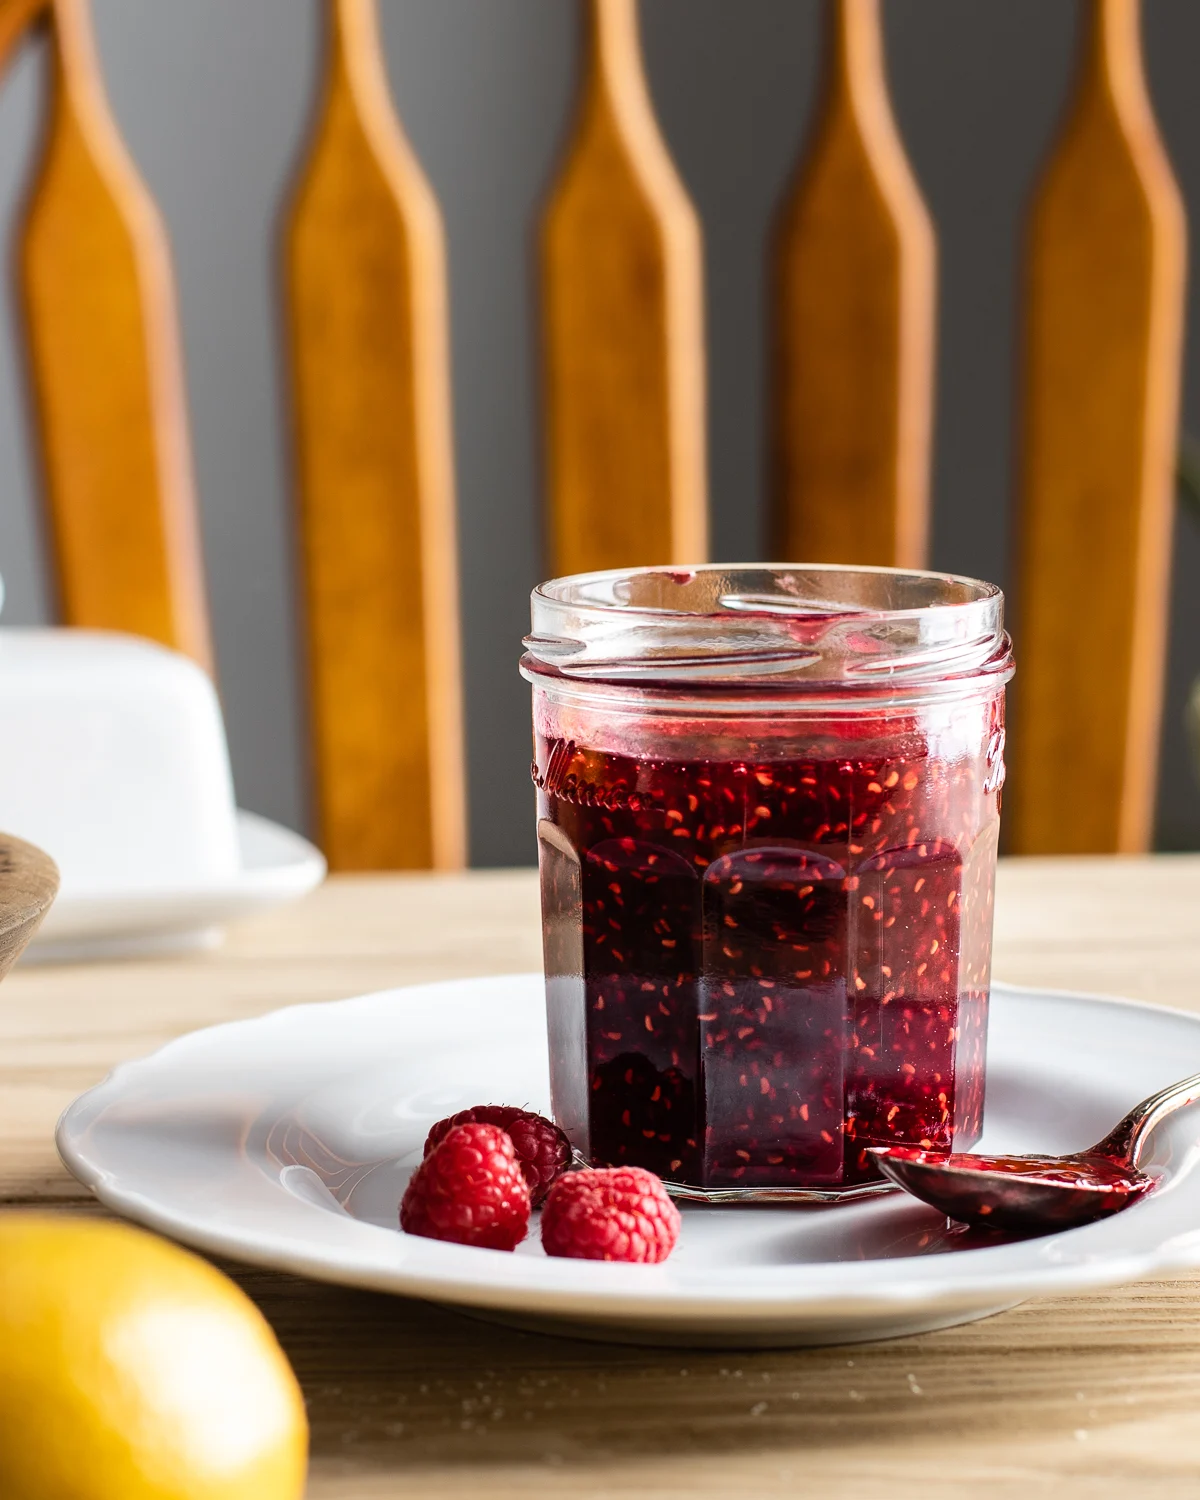
- Cooked Compote: Cook down fresh or frozen fruit with sugar, lemon juice, and a thickener. Cornstarch works, but I prefer a product called Clear Jel. You can find it online or at specialty baking shops. It’s fantastic because it doesn’t break down with acidic fruits and it holds up perfectly if you freeze it.
- The “Dam” Technique: This is non-negotiable for soft fillings like curds or compotes. Before you fill the cake, pipe a sturdy ring of buttercream around the inside edge of your cake layer. This creates a wall that holds the soft filling in place and prevents it from oozing out. Pro tip: Use the simple crusting buttercream for this; it’s much stiffer and forms a stronger barrier than the softer meringue-based buttercreams.
- What’s the Cake? A delicate cake needs a light filling. A dense cake can handle a heavy one. Simple as that.
- What’s the Occasion? Is it a wedding cake that will sit in a warm tent for hours? You need a temperature-stable filling like Swiss meringue buttercream or firm ganache. A kid’s birthday party where it’ll be gone in 20 minutes? The simple stuff is fine.
- What’s the Flavor Plan? Look for contrast. A super-rich Devil’s food cake is amazing with a tart raspberry curd or a bitter espresso buttercream. A simple vanilla cake lets the filling be the star.
- How Long Does It Need to Last? Anything with custard, cream cheese, or fresh cream needs to be refrigerated and eaten quickly. High-sugar, high-fat fillings like buttercream and ganache have a much safer shelf life.
- Ignoring Maceration: Fruits like strawberries release a lot of liquid. Tossing them with sugar and letting them sit for 30 minutes allows you to drain off excess syrup (which you can use to moisten your cake layers!).
- Skipping a Thickener: A slurry made from a tablespoon of cornstarch or arrowroot powder, cooked briefly with your fruit, will create a perfectly set, jam-like consistency that won’t slide out.
- Filling While Warm: Never add even a slightly warm fruit compote to a cold cake. It will instantly melt your buttercream dam and compromise the entire structure. Cool completely, always.
3. Custards & Curds: The Tangy, Creamy Center
These are your flavor powerhouses, offering a soft texture and a bright, tangy contrast to a sweet cake.
4. Fruit Fillings: Keeping It Stable
Fresh, uncooked fruit in a layer cake is usually a bad idea. The water content will make your cake a soggy mess. The professional approach is to make a cooked fruit compote.
The Pro’s Checklist: How to Choose the Right Filling
When I’m planning a cake, I run through a quick mental checklist.
By the way, a great way to save time is to make your fillings ahead! You can freeze a big batch of Swiss meringue buttercream. Just let it thaw in the fridge overnight, then put it back in the mixer. It will look like a curdled disaster, but just let it whip for 5-10 minutes and it will come back to silky perfection.
Feeling a little overwhelmed by all the options? Here’s your quick win for today: Make a small batch of the 1:1 ganache. It only takes about 10 minutes of active time. Just leave it on your counter and check on it every hour. Get a feel for how its texture changes as it cools. It’s a great way to learn without the pressure of building a whole cake.
At the end of the day, mastering these foundations is what gives you creative freedom. It lets you move beyond just following recipes and start designing cakes with intention. That sticky, sliding mousse cake was a mess, but it was also the start of my real education. Understanding these principles will be the start of yours, too.
Galerie d’inspiration
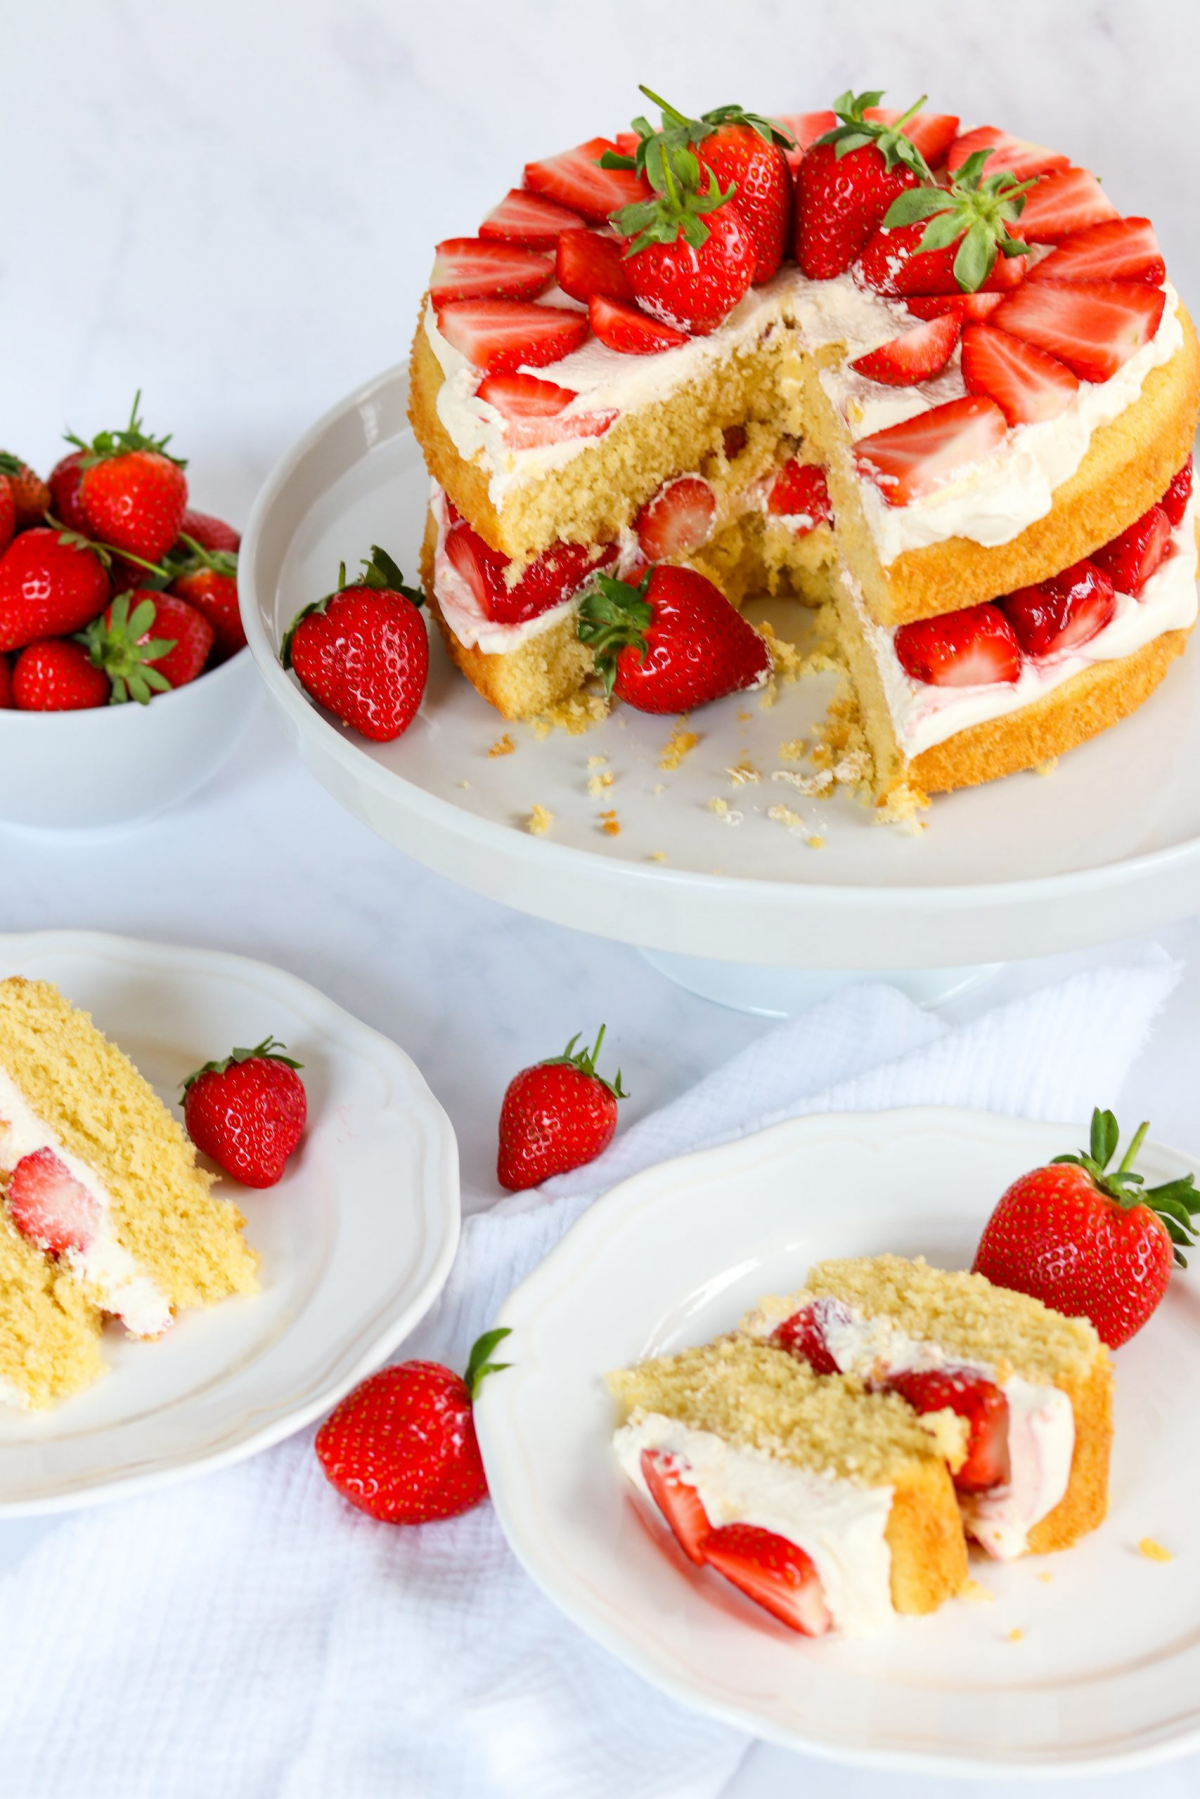
To prevent softer fillings like jams or curds from seeping into your cake layers and creating a soggy mess, use a simple baker’s trick: the buttercream dam. Before adding your main filling, pipe a sturdy ring of buttercream, like an American or Swiss meringue style, just inside the top edge of each cake layer. This creates a barrier that holds everything perfectly in place. A Wilton 1A round tip is perfect for the job.
Studies in sensory science show that texture, or “mouthfeel,” can dramatically alter our perception of flavor and overall enjoyment.
This is why a cake filling is more than just taste. The contrast between a fluffy sponge and a silky crème pâtissière, or the surprise crunch from a praline layer, creates a dynamic experience. A single-note texture can make even the most delicious flavor feel flat and uninteresting. The goal is a textural journey in every bite.
Want to take a simple vanilla or cream cheese filling from basic to brilliant?
Try infusing your cream or milk with unexpected aromatics before you begin. A few crushed green cardamom pods will add a warm, complex spice that pairs beautifully with peach or pistachio. Alternatively, a single high-quality tonka bean, grated sparingly, imparts sophisticated notes of vanilla, cherry, and almond. It’s a professional touch that elevates the entire cake.
Fresh fruit fillings are divine, but their high water content makes them a common point of failure. Avoid these pitfalls for a vibrant, stable result:
Gelatin: The classic choice for mousses and bavarian creams, animal-derived gelatin (like from the brand Knox) creates a tender, melt-in-your-mouth texture. It needs to be bloomed in cold liquid and then gently dissolved without boiling.
Agar-Agar: This vegan alternative from seaweed (e.g., Now Foods brand) provides a much firmer, more sliceable set that’s also more heat-resistant. It must be boiled with the liquid to activate.
For a classic silky mouthfeel, choose gelatin; for a vegan-friendly or heat-stable option, agar-agar is your champion.
The secret to a stress-free cake assembly: Make your key fillings in advance! Sturdy options like chocolate ganache, lemon curd, and all styles of buttercream can be prepared up to three days ahead and stored in airtight containers in the refrigerator. Just be sure to bring them back to room temperature and re-whip them to restore their original silky texture before use.


