The Scalp Massage Method I Swear By for Healthier, Thicker-Looking Hair
I’ve spent a long, long time in the world of professional hair care, and I’ve seen every miracle product you can imagine. But honestly, one of the most powerful techniques I rely on doesn’t come in a fancy bottle. It’s a proper, intentional scalp massage.
In this article
When I was first learning the ropes, my mentor had a favorite saying: “The soil must be healthy before the plant can grow strong.” That idea is the absolute bedrock of good hair care, and it’s stuck with me ever since.
A scalp massage is so much more than a relaxing treat at the salon. When you do it right and, more importantly, consistently, you’re creating the perfect environment for your hair to truly thrive. We’re talking about improving circulation and relieving the hidden tension that could be holding your hair back from its full potential. While it won’t reverse genetic hair loss, it can make a world of difference in your hair’s thickness and strength. So, let’s walk through the exact methods I use and teach, breaking down what works, why it works, and how to do it safely at home.
So, What’s Actually Happening Up There?
To really get why a scalp massage is so effective, you have to stop thinking of your scalp as just skin. It’s a surprisingly complex system, and understanding a little of the mechanics turns simple rubbing into a powerful, targeted treatment.
The Anatomy of a Tense Scalp
Right under the skin on your head is a tough, fibrous sheet that covers the top of your skull. Think of it like a tight-fitting cap. When you’re stressed or even just have bad posture from slouching over a screen, the muscles in your forehead and neck get tight. This can pull on that fibrous sheet, creating tension across your entire scalp.
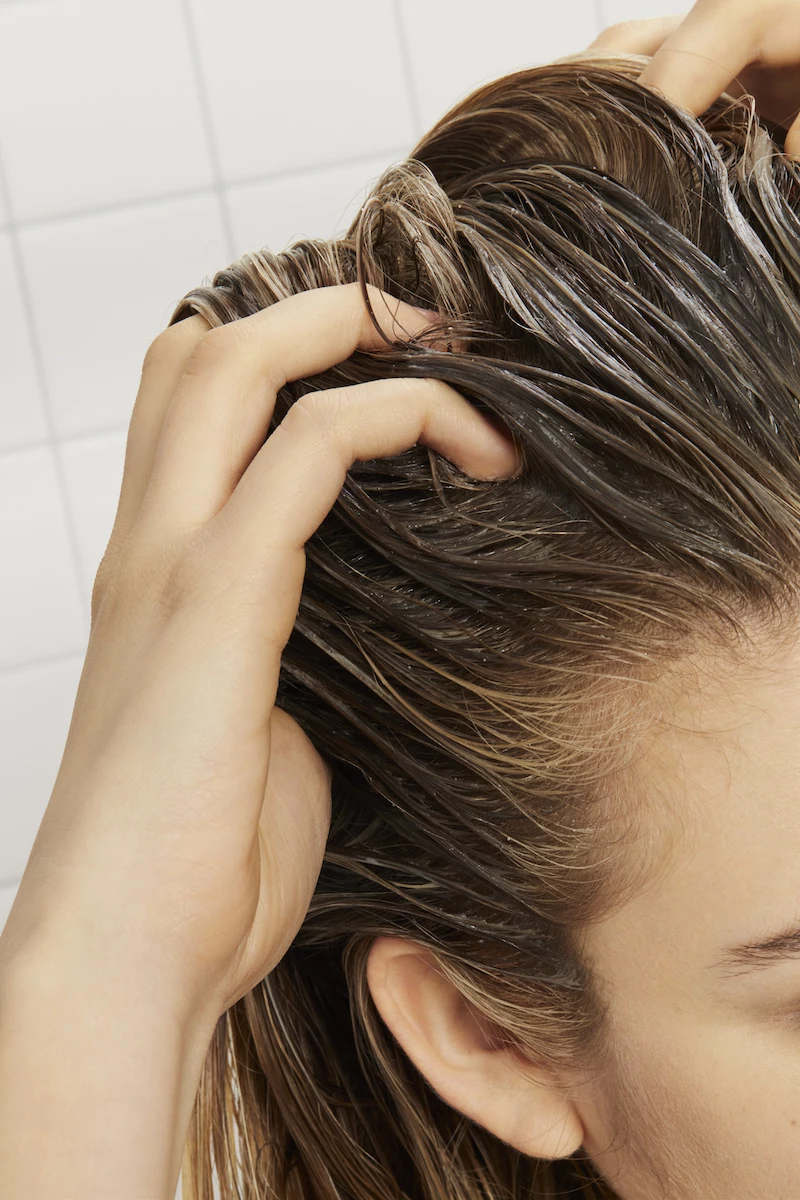
This compression can literally squeeze the tiny blood vessels that are the lifeline to your hair follicles. The real goal of a deep scalp massage isn’t to rub the skin’s surface, but to physically move the scalp over the skull bone.
Go on, try it right now. Place your fingertips on your scalp and, without letting them slide, try to move the skin in a small circle. Feel that? That sensation of the scalp shifting over the bone… that’s the good stuff. That’s the movement that relieves tension and gets things flowing again.
Boosting Blood Flow to Your Follicles
Every single hair on your head grows from a follicle, and each follicle is fed by tiny blood vessels. These vessels deliver all the oxygen and nutrients—proteins, vitamins, minerals—needed to build a strong hair shaft. When that supply line is constricted, the follicle is basically starved. The result? Hair can become weaker, thinner, and have a shorter growth cycle.
Research has shown that consistent, mechanical stimulation of the scalp can lead to thicker hair over time. It’s believed that the gentle stretching of the scalp’s cells stimulates activity related to hair growth. The massage also directly boosts blood flow. You’ll often feel this as a warm, tingling sensation afterward. That warmth is a sign of increased circulation, which is exactly what we’re aiming for.
And Don’t Forget Lymphatic Drainage
If the circulatory system brings in the groceries, the lymphatic system takes out the trash. Your scalp, like the rest of your body, creates metabolic waste. A sluggish lymphatic system can cause a buildup of this waste and low-level inflammation around the follicles. A gentle, rhythmic massage helps get the lymphatic system moving, clearing out the junk and creating a cleaner, healthier environment for your hair to grow.
The Four Keys to a Pro-Level Massage at Home
A professional scalp massage isn’t just random rubbing; it’s structured and intentional. I’ve broken my technique down into four key areas. If you focus on these, your at-home massages will be infinitely more effective.
1. The Right Pressure
Pressure is everything. Too little, and you’re just tickling yourself. Too much, and you can cause soreness or even damage follicles. And a huge heads-up: never use your fingernails. I’ve seen clients come in with angry, scratched scalps. Those little micro-tears can open the door to nasty infections. Always use the pads of your fingertips.
As for how much pressure to use, think about testing a ripe avocado. It should be firm enough to feel you’re making an impression, but not so hard you’d leave a bruise. Your body will tell you what’s right—if an area feels tender, especially around the temples, ease up. The goal is stimulation, not punishment.
2. The Right Pattern
Using a consistent pattern ensures you cover your whole scalp with the most effective movements. Here are the three main strokes to use:
- Gliding Strokes (Effleurage): This is for warming up and cooling down. Use your open palms or spread fingertips to make long, gentle, sweeping strokes from your front hairline to the back, or from the nape of your neck upwards.
- Kneading (Petrissage): This is the most important part. Plant your fingertips firmly and, without lifting them, make slow, small circles. Remember that feeling of moving the scalp over the skull? This is it. Work in sections across your entire head.
- Focused Stimulation (Friction): For areas where you feel your hair is a bit thinner, use one or two fingertips to apply firm pressure and make very small, deep, circular motions right on the spot.
3. The Right Placement
While the whole scalp benefits, some spots are major hubs for tension. Give these areas a little extra love:
- The Temples: If you clench your jaw, you hold a ton of stress here. Gentle circles can provide incredible relief.
- The Occipital Ridge: That’s the bony ridge at the base of your skull. It’s a hotspot for “tech neck” tension. Use your thumbs to press and massage along this ridge.
- The Hairline: Massaging along your front hairline helps release tension that can pull on the entire scalp.
4. The Right Pace and Duration
Slow down! A deliberate, unhurried pace is much more calming and effective. For daily maintenance, aim for just 5 to 7 minutes. Seriously, consistency is way more important than duration. Then, maybe once a week, set aside 15 to 20 minutes for a more intensive session, maybe with a hair oil.
What to Use: Hands, Tools, and Oils
You can do an amazing massage with nothing but your own two hands. In fact, your hands are the best tool because you can feel exactly what’s going on. But sometimes, tools and oils can make the experience even better.

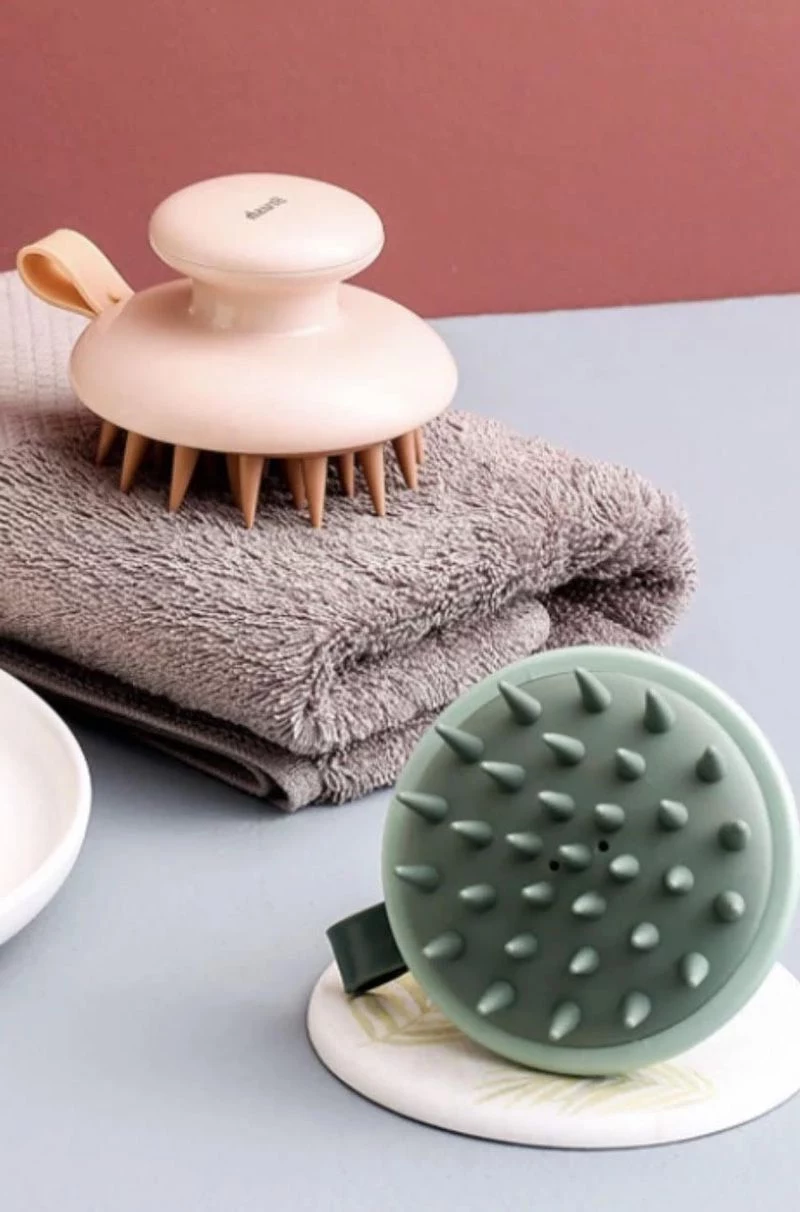
Hands vs. Tools
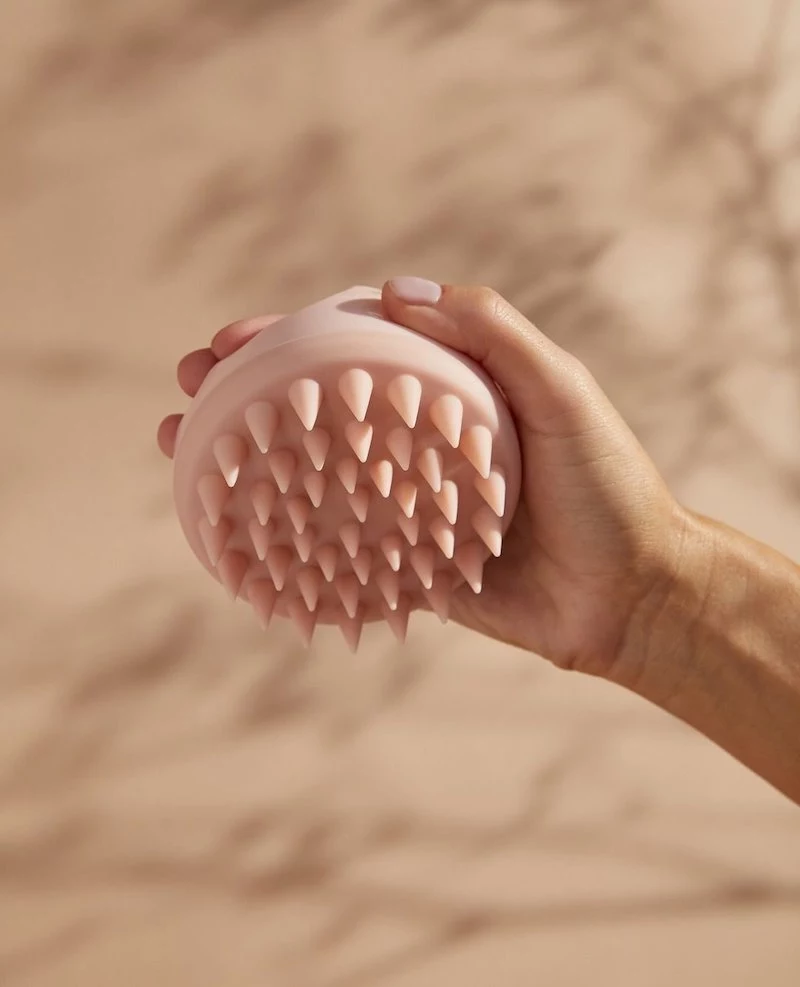
Silicone scalp massagers are great, especially for using in the shower. They help distribute shampoo, exfoliate the scalp, and can be a lifesaver if you have arthritis or long nails that get in the way. Look for one with soft, flexible bristles, and you can find them for around $10-$20 at places like Target or online. Just remember to use slow, circular motions, not aggressive scrubbing.
Gua sha combs are a more advanced tool. They aren’t for rubbing but for a gentle scraping or pulling technique that requires a very light touch and a carrier oil for slip. To be frank, I’d only recommend these if you’ve been taught how to use them properly, as it’s easy to cause bruising if you’re not careful.
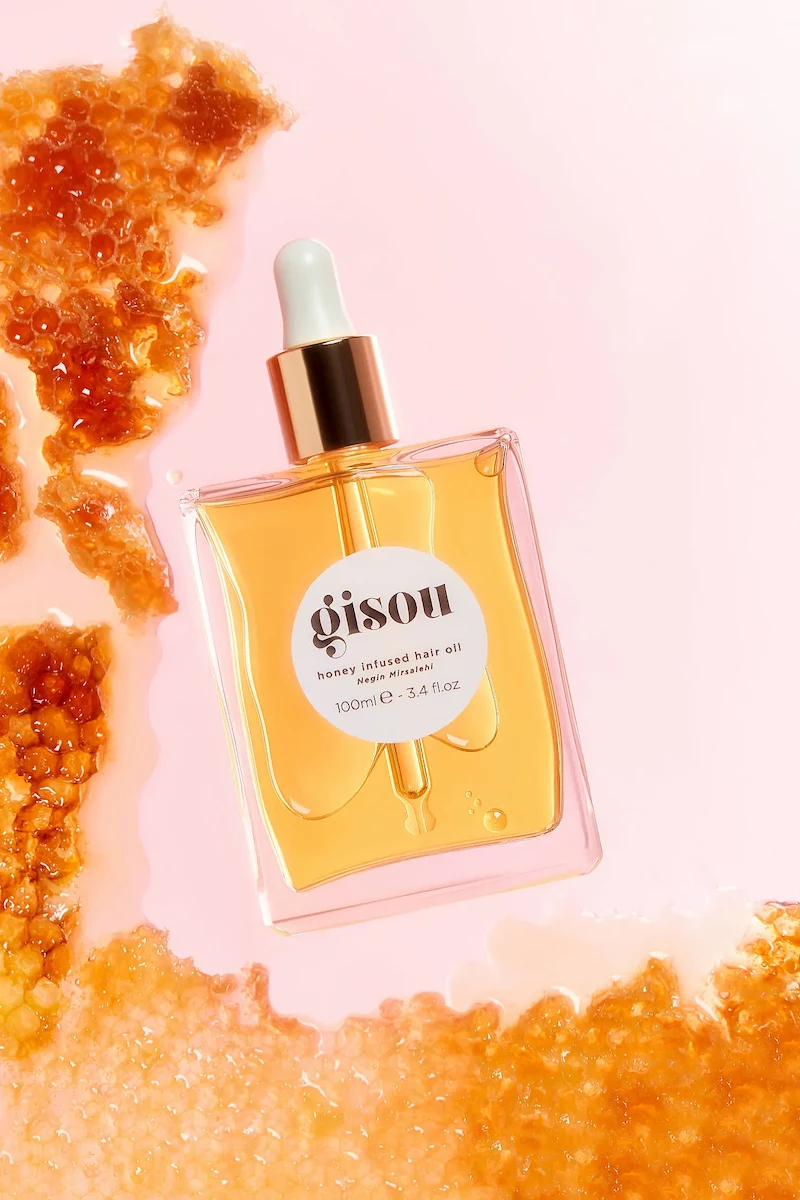
To Oil or Not to Oil?
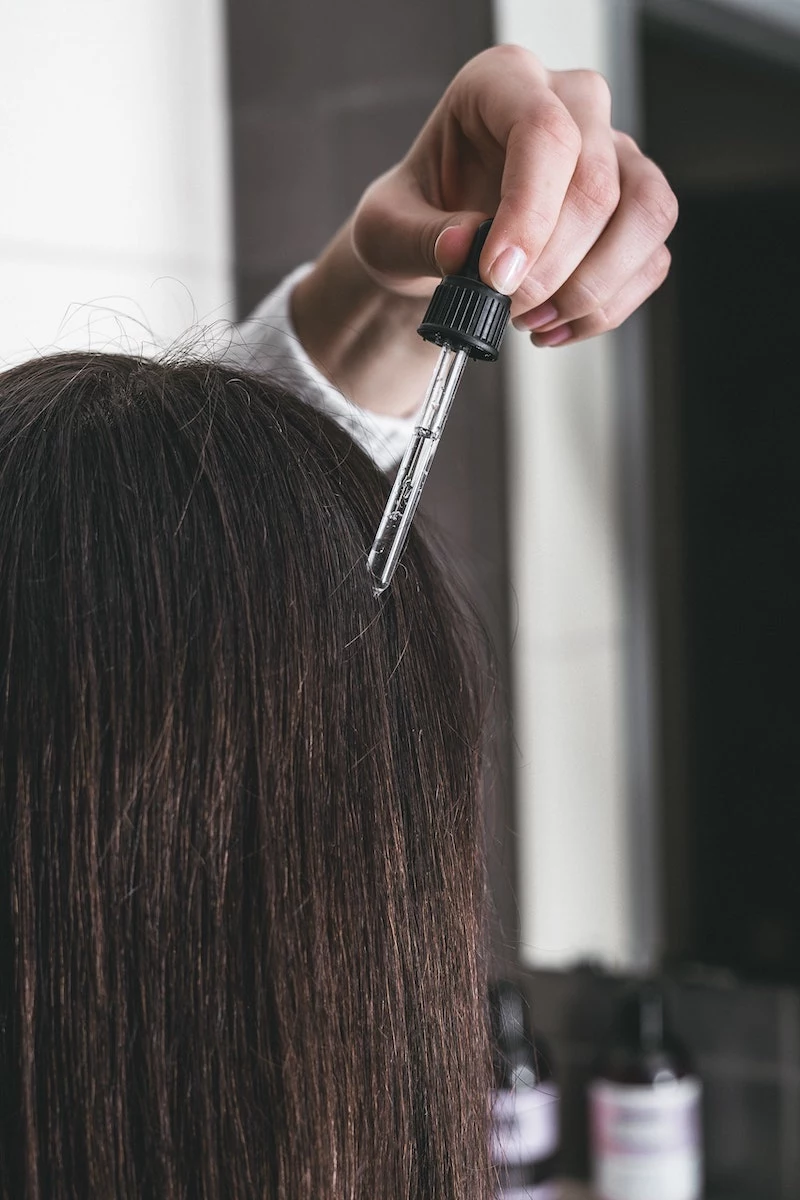
An oil can be a game-changer, providing lubrication to prevent pulling on your hair. But let’s be clear: the oil isn’t a magic growth potion. Its main job is to help your massage be more effective. The type of oil you choose, however, does matter.

First, this is not an expensive habit. You can get a fantastic, high-quality carrier oil for $10 to $15 at any health food store or online. Look for oils that are labeled “cold-pressed,” as this means they retain more of their natural nutrients.
- For Normal to Oily Scalps: Jojoba oil is your best friend. Its structure is incredibly similar to your scalp’s natural sebum, so it absorbs beautifully. Grapeseed oil is another super light, non-greasy option. And if you’re worried about making your oily scalp even greasier—a totally valid fear!—using a light oil like jojoba can actually help balance your own oil production over time.
- For Dry Scalps: Coconut oil is a hydration hero, but a heads-up: it can clog pores for some people. If you’re prone to acne, you might want to try argan oil instead. It’s rich in vitamin E and just as moisturizing without feeling as heavy.
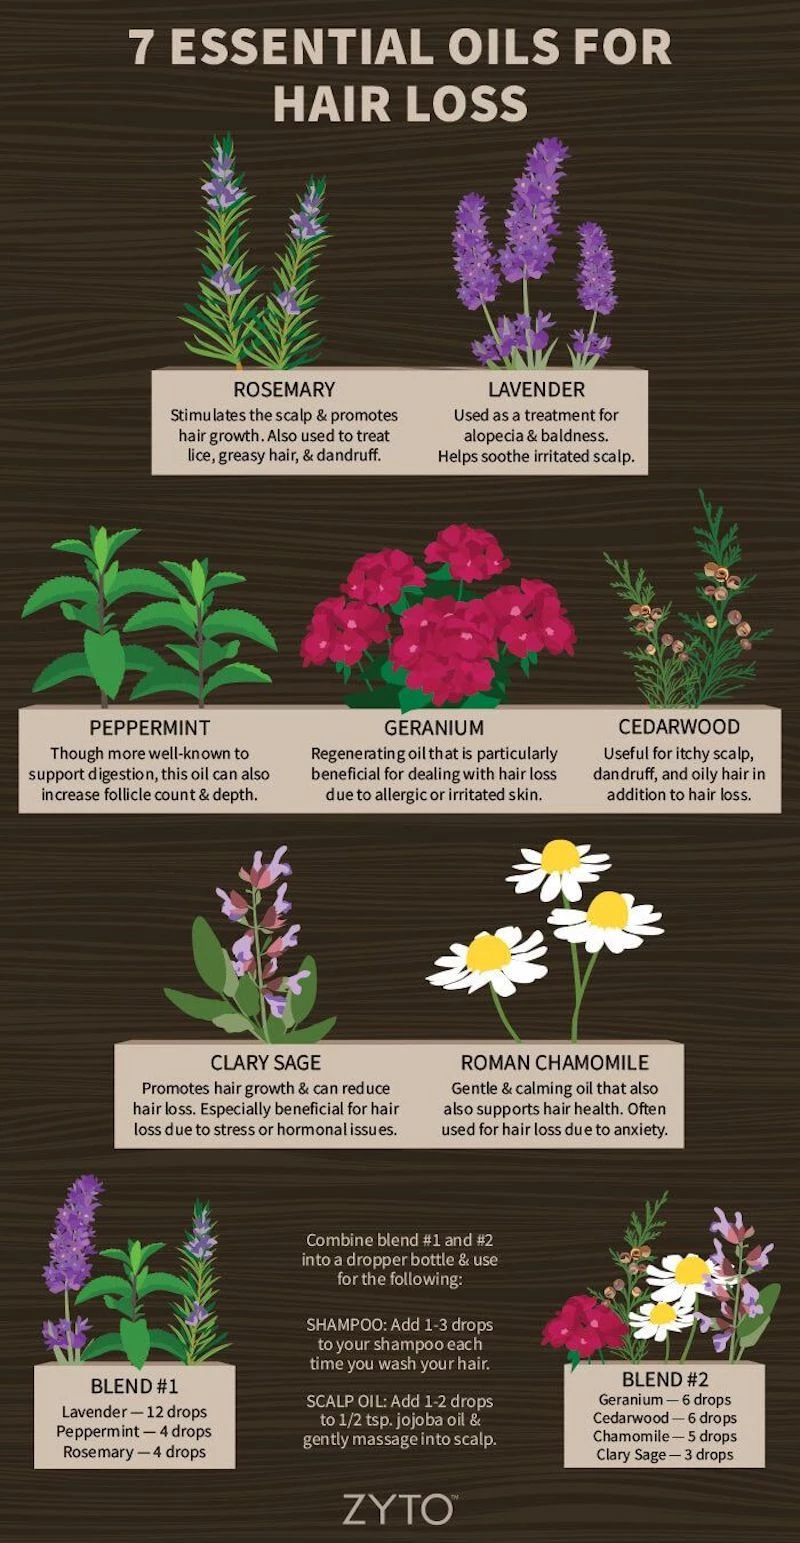
A Quick Word on Essential Oils
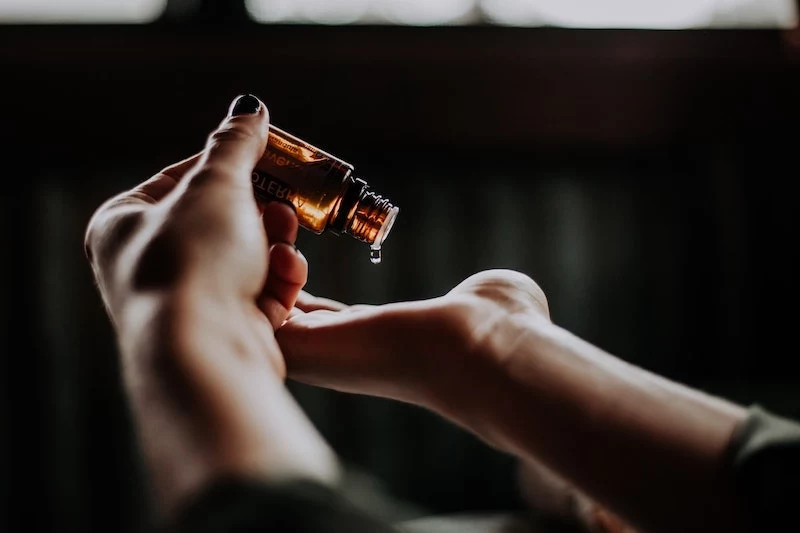
Certain essential oils, like rosemary and peppermint, are often mentioned for hair health because they can boost circulation. But they are incredibly potent. I learned this the hard way years ago when I got a little too excited with peppermint oil and my scalp felt like it was on fire for an hour. Trust me: dilute, dilute, dilute! A safe bet is 2-3 drops of essential oil per tablespoon of carrier oil. And always do a patch test on your inner arm first.
Putting It All Together: Simple Home Routines
Okay, here’s how to make this a realistic part of your life.
The 5-Minute Daily Dry Massage
This is perfect to do while you’re winding down for the night. No oil needed.
- Warm-Up (1 min): Start with those gentle, gliding strokes all over your head.
- Kneading (3 min): Use the fingertip kneading method. Work in sections: temples, above the ears, hairline, crown, and back. Focus on moving the scalp.
- Release (1 min): Use your thumbs to make small, firm circles along that bony ridge at the base of your skull.
Time-Saving Hack: In a real rush? Just add 1-2 drops of rosemary oil to your blob of shampoo in your palm, mix it up, and give yourself a solid 60-second massage in the shower. Quick, easy, and effective!

The 20-Minute Weekly Oil Treatment
Set aside a little time for this once a week. Your scalp will thank you.
- Prep: Choose your oil and warm it up slightly by placing the bottle in a bowl of warm water.
- Application: Part your hair and apply the oil directly to your scalp.
- Massage (15 min): Go through the full sequence: gliding strokes to start, a long session of deep kneading all over, and some focused friction on any areas of concern.
- Rest: Leave the oil on for at least 30 minutes. You can wrap your head in a warm towel.
- Wash: Here’s the pro tip for getting oil out without a struggle. Before you get your hair wet, apply shampoo directly to your dry, oiled scalp. Work it in really well to break down the oil. Then add water, lather up, and rinse. You might still need a second shampoo, but this trick makes a world of difference.
A Realistic Look: Safety and Expectations
Scalp massage is safe for most people, but it’s a supportive therapy, not a miracle cure. It’s crucial to know your limits.
First, let’s manage expectations. This is a marathon, not a sprint. You might feel less scalp tension and more relaxation in a week, but when it comes to seeing a potential difference in hair health and thickness, you need to be patient. Give it a solid 3-6 months of consistent effort before you look for changes.
And please, DO NOT massage your scalp if you have an active infection, open sores, or a bad flare-up of a condition like psoriasis. You can make it much worse. If you find any new or weird lump on your head, see a doctor right away.
If you’re dealing with significant, sudden hair shedding, bald patches, or a painfully itchy scalp, it’s time to see a dermatologist. These can be signs of an underlying medical issue that a massage won’t fix. A good massage is about creating a healthy foundation, giving your hair the best possible chance to grow strong from a happy, well-nourished scalp.
Inspirational Gallery
Silicone Brush: Perfect for the shower, these flexible-bristled tools, like the popular one from Briogeo, help distribute shampoo and exfoliate the scalp without being too harsh. They are easy to clean and great for beginners.
Kansa Comb: Rooted in Ayurvedic tradition, these metal combs (often bronze) are used on a dry, oiled scalp. They are believed to balance pH and reduce tension with a uniquely cooling sensation.
The choice depends on whether you prefer an in-shower scrub or a more meditative, dry-scalp ritual.
A 2016 study published in the ePlasty journal found that standardized scalp massage for just four minutes per day over 24 weeks resulted in increased hair thickness.
Choosing the right oil can amplify the benefits of your massage. Consider these natural allies:
- Rosemary Oil: Often compared to minoxidil for its circulation-boosting properties. Always dilute it in a carrier oil.
- Peppermint Oil: Creates a cooling, tingling sensation that invigorates the scalp and increases blood flow to the follicles.
- Jojoba Oil: Its molecular structure is very similar to our skin’s natural sebum, making it a perfect, non-clogging moisturizer for the scalp.
Is it possible to massage your scalp too much?
Yes, moderation is key. Overly aggressive or too-frequent massaging can cause irritation, scalp sensitivity, or even hair breakage, especially if your hair is fine or fragile. Aim for a 5-minute session, 3 to 4 times a week. Listen to your body; the pressure should feel firm and stimulating, never painful.
- Deeper, more restful sleep.
- A noticeable reduction in daily hair fall on your brush.
- Better absorption of topical treatments and serums.
The secret? A pre-bedtime massage. Taking five minutes before you sleep to massage your scalp can help lower cortisol levels from the day’s stress, creating a better physiological environment for overnight hair growth and repair.
Important point: Don’t mistake gliding for moving. The biggest mistake is simply rubbing a tool or your fingers across your hair. To be effective, the pads of your fingers or the silicone tips of a massager (like those from Vegamour or Tangle Teezer) must gently grip the skin. Your focus should be on creating small, deep circles that move the scalp itself over the bone beneath. That’s where the circulatory magic happens.
The tradition of ‘Champi,’ or Indian head massage, is an ancient practice that goes far beyond simple hair care. It’s considered a vital ritual for releasing stress and balancing the body’s energy. Unlike a quick in-shower scrub, a true Champi is a slow, deliberate experience.
- It often begins with warm, herb-infused coconut or sesame oil.
- The massage extends beyond the scalp to include the neck, shoulders, and upper back.
- It focuses on stimulating ‘marma’ points—Ayurvedic energy centers on the head.
Did you know the scalp ages six times faster than the skin on your face? It’s exposed to the same environmental aggressors—UV rays, pollution, oxidative stress—but with far less care.
This is why treating your scalp with the same attention as your facial skin is crucial. Incorporating an antioxidant serum or a dedicated scalp sunscreen, like those from Supergoop, into your routine can protect the foundation from which your hair grows, ensuring its health for years to come.
Elevate your scalp massage into a true self-care moment. Before you begin, try applying a specialized treatment to amplify the effects. The Ordinary’s Multi-Peptide Serum for Hair Density is a budget-friendly option packed with powerful complexes. For a more luxurious, spa-like experience, the pre-shampoo Kérastase Fusio-Scrub provides deep cleansing and exfoliation, leaving your scalp feeling incredibly fresh and purified before you even start the massage.
Looking for a simple DIY boost for your massage?
Create your own rosemary-infused carrier oil. Gently warm a quarter cup of jojoba or sweet almond oil in a small pan over low heat—do not let it boil. Remove from heat and add two fresh rosemary sprigs. Let the sprigs infuse in the oil as it cools completely. Strain into a small dropper bottle. The natural compounds from the rosemary will infuse the oil, giving your scalp an extra stimulating treat.


