Finally! The Ultimate Guide to Crispy, Not-Soggy Zucchini Fritters
For what felt like forever, my biggest kitchen frustration was the humble zucchini fritter. I’d follow recipes to the letter, but more often than not, I’d end up with a plate of disappointment. They were either soggy, fell apart the second they hit the pan, or tasted like, well, nothing. It’s a super common problem; I’ve seen so many home cooks and even pros struggle with a fritter that’s golden on the outside but a dense, wet mess on the inside. It took a lot of trial and error (and countless batches) to finally crack the code. And honestly, the secret isn’t in one specific recipe, but in understanding the why behind the technique.
In this article
- It All Starts with the Zucchini
- The Salt Secret: Why You MUST Sweat Your Zucchini
- The Squeeze: Getting All That Water Out for Good
- The Master Batter: Your Reliable Starting Point
- Fun Variations on a Theme
- The Art of Frying: Getting That Perfect Golden Crust
- What About Leftovers? (And Can I Prep Ahead?)
- Troubleshooting Common Fritter Fails
- Inspirational Gallery
So, this isn’t just another ingredient list. I’m going to walk you through the real-deal techniques that ensure you get consistently crisp, flavorful fritters every single time. We’ll cover why these steps work, how to fix common problems, and the essential safety stuff you need to know when you’re dealing with hot oil. Once you get the foundation down, you can adapt any fritter recipe with total confidence. My goal here is for you to never, ever serve a soggy fritter again.
By the way, let’s talk timing so you can plan your attack. All in, you’re looking at about 15 minutes of active prep, 30 minutes for the zucchini to sweat (this is mostly hands-off time, so you can prep other things), and another 20 minutes to cook. Totally doable!
It All Starts with the Zucchini
Success begins long before you even think about mixing the batter. It starts with the zucchini itself. Picking the right kind and prepping it the right way is more than half the battle.
Choosing the Best Zucchini
When you’re at the grocery store or farmer’s market, skip the giant ones. I know they seem like a great value, but they’re the enemy of a crispy fritter. Look for smaller, younger zucchini, maybe about six to eight inches long. They should feel firm with smooth, shiny skin. Those huge ones are mostly water and big, tough seeds. Smaller zucchini have way more flesh, less water, and a sweeter, more concentrated flavor. Plus, their finer texture helps the fritters bind together beautifully. You can usually grab a pound of zucchini for just a couple of bucks, which makes this a fantastic budget-friendly meal.
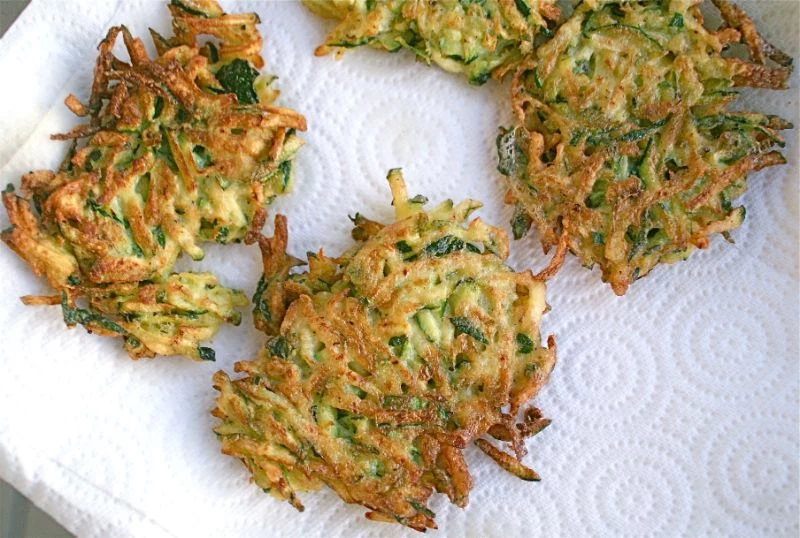
The Grating Method: Coarse is Your Best Friend
How you grate the zucchini actually makes a difference. You’ve got two main choices: a classic box grater or a food processor.
- Box Grater: This is my go-to method, hands down. Use the largest holes on the grater. A coarse grate gives you nice, distinct shreds of zucchini that keep a bit of their texture after cooking. Crucially, they’re also much, much easier to squeeze dry.
- Food Processor: It’s definitely faster, but the grating disc can sometimes pulverize the zucchini into a fine, wet pulp. This pulpy mess is a nightmare to drain properly. If you do use a food processor, just use short pulses and keep a close eye on it to avoid turning it into mush.
The goal is a pile of recognizable shreds, not a watery soup. You’ll really notice the textural difference in the finished product.
The Salt Secret: Why You MUST Sweat Your Zucchini
Okay, listen up, because this next part is the absolute game-changer. If you remember one thing from this whole guide, let it be this: you have to salt your grated zucchini and let it sit. We call this “sweating.”
Zucchini is over 90% water. When that water heats up in the pan, it turns to steam. If that steam is trapped inside the batter, you get a gummy interior and a soft exterior. By salting the zucchini first, you use osmosis to pull a shocking amount of water out. The salt on the outside of the zucchini cells creates an imbalance, literally drawing the moisture to the surface.
Here’s how to do it:
- Put your grated zucchini in a colander and set that colander inside a larger bowl.
- For every pound of zucchini (that’s about 2 medium ones), sprinkle it with one teaspoon of fine sea salt.
- Toss it gently with your hands to get the salt everywhere.
- Now, walk away. Let it sit for at least 20 minutes, but 30 is even better.
Don’t rush this! You’ll come back to a significant pool of water in the bowl. It’s wild! Don’t be surprised if you wring out a whole half-cup of liquid from a pound of zucchini. This step does all the hard work for you.
The Squeeze: Getting All That Water Out for Good
After sweating, you have to get rid of all that liquid you just pulled out. And a gentle pat with a paper towel isn’t going to cut it. You need to be forceful here. There are a few ways to tackle this, each with its own pros and cons.
The gold standard is using a cheesecloth or a thin, clean kitchen towel (one you don’t mind staining). Just dump the salted zucchini in the center, gather the corners, and twist and wring it out over a bowl with all your strength. Keep going until you can’t get another drop out. It’s the most effective method, though it does require some muscle.
In a pinch, you can just use your hands. Grab a handful of zucchini and squeeze it tightly over the sink. It’s less efficient and a bit messy, but it works fine for a small batch.
A pretty clever kitchen hack is using a potato ricer, if you happen to have one. It acts like a giant garlic press and squeezes the water out with minimal mess and effort. When you’re done, the zucchini should feel like damp confetti and look like about half the amount you started with. This dry base is the key to a crispy, stable fritter.
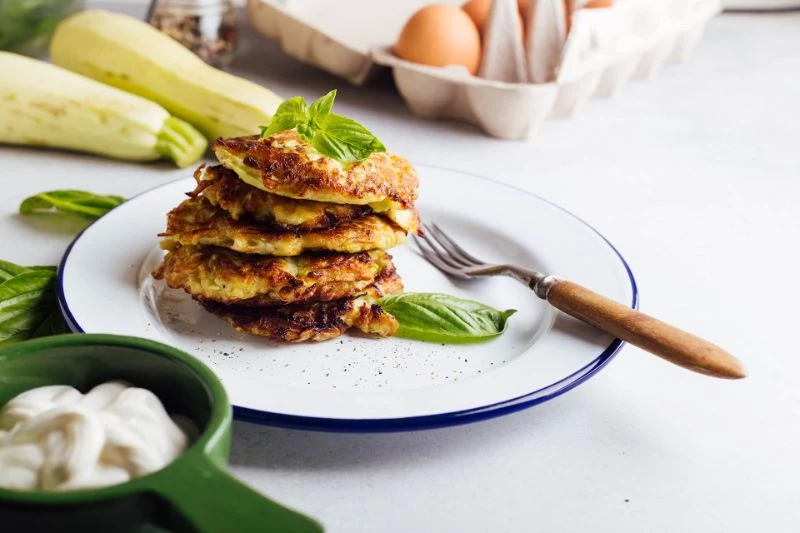
The Master Batter: Your Reliable Starting Point
Instead of a dozen confusing recipes, here’s one master batter that just works. This is the foundation. Once you nail this, you can customize it endlessly. The best part? A big batch of these using the master recipe will probably only cost you about $5 to $7, depending on where you shop.
Master Zucchini Fritter Recipe
This makes about 12-15 fritters, perfect for 3-4 people.
Here’s what you’ll need:
- 1.5 lbs (about 3 medium) zucchini, grated and squeezed VERY dry
- 1 large egg, lightly beaten
- 1/2 cup all-purpose flour
- 1/2 teaspoon baking powder (our little secret for a light texture!)
- 2-3 green onions, finely sliced
- 1 clove garlic, minced or grated on a microplane
- 1/2 teaspoon black pepper
- 1/4 teaspoon salt (go easy—the zucchini is already salty)
- Neutral oil for frying, like canola, grapeseed, or sunflower
In a medium bowl, mix the super-dry zucchini, egg, green onions, garlic, pepper, and that little bit of salt. In a separate small bowl, whisk the flour and baking powder together, then sprinkle it over the zucchini mix. Use a fork to gently fold everything together until it’s just combined. Whatever you do, don’t overmix! Overmixing develops gluten and makes your fritters tough and chewy instead of light and tender.
Fun Variations on a Theme
Now that you have a solid base, let’s get creative. The key is to add ingredients that don’t bring a lot of extra moisture to the party.
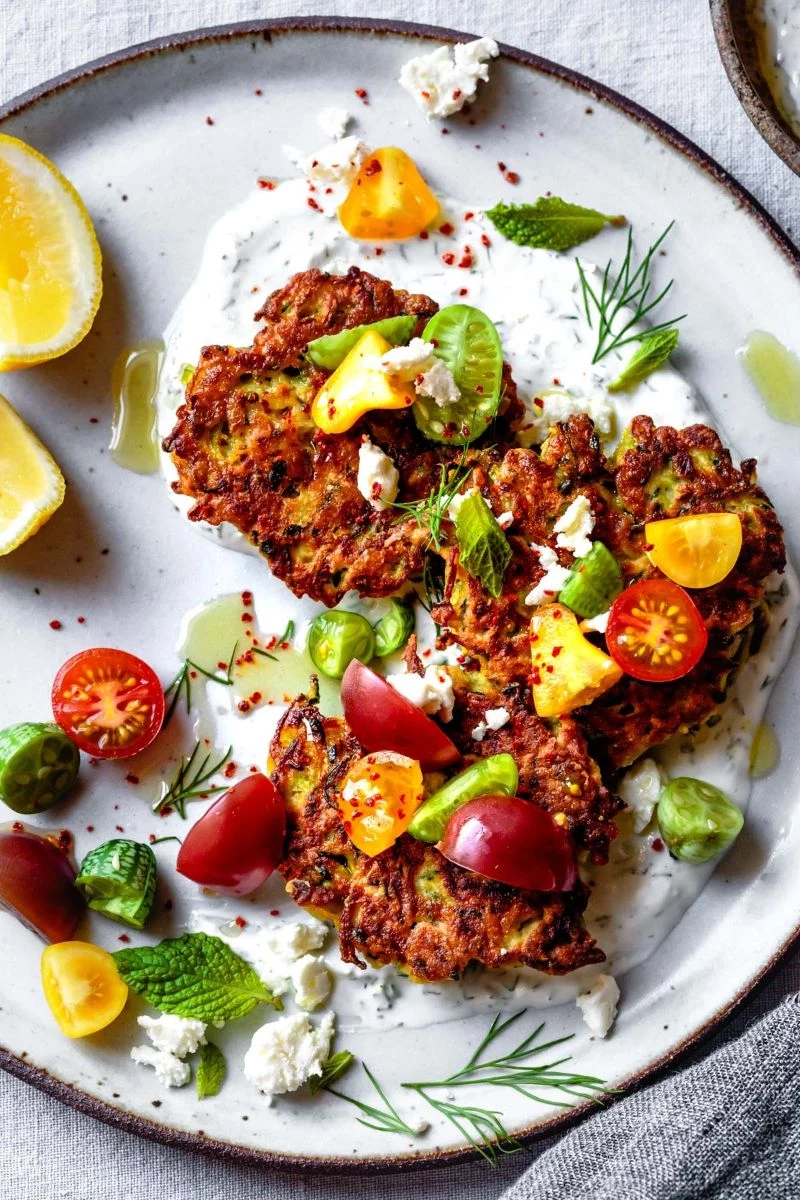
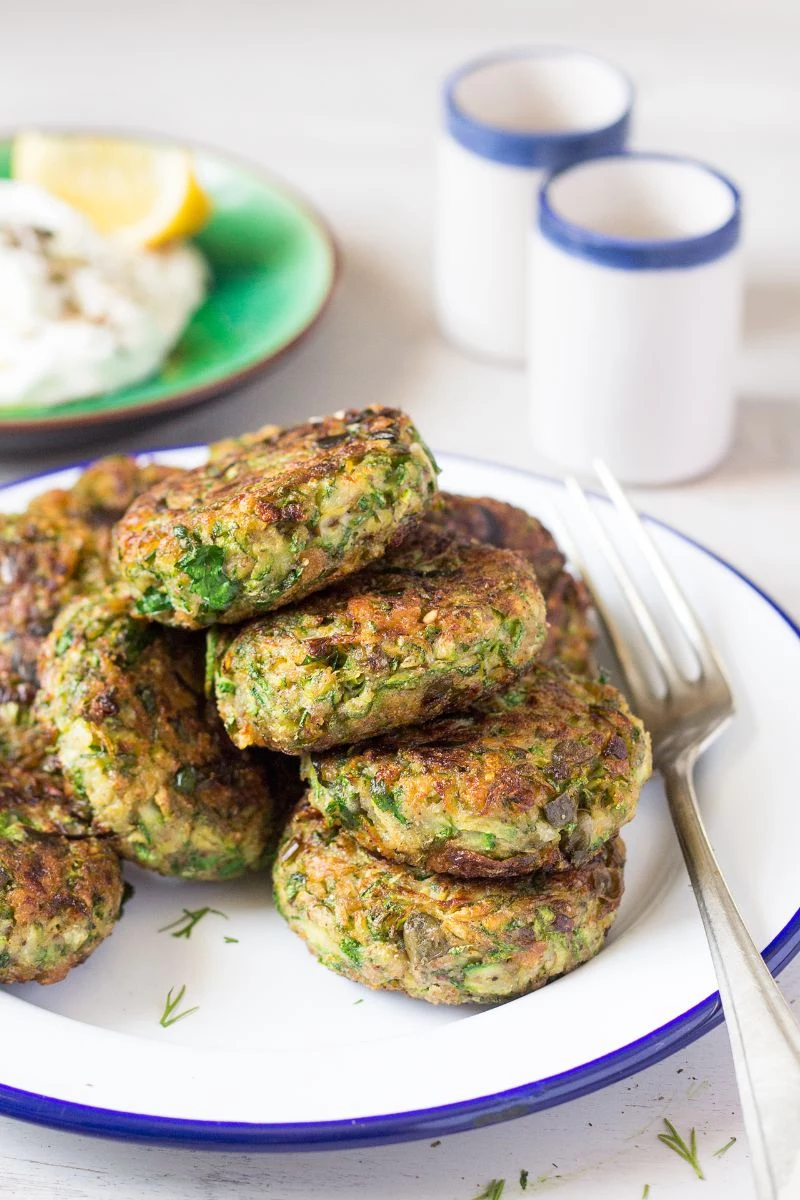
- Mediterranean Style: This is a classic for a reason. Add 1/2 cup of crumbled feta, 2 tablespoons of chopped fresh dill, 2 tablespoons of chopped fresh mint, and the zest of half a lemon to the master batter. Pat the feta dry before adding it! Serve these with a simple lemon-dill yogurt sauce or tzatziki.
- Italian Style: For a nutty, savory flavor, add 1/2 cup of grated Parmesan or Pecorino cheese and 1/4 cup of chopped fresh parsley. A tiny pinch of nutmeg in here is also amazing. These are fantastic on their own, but a simple garlic aioli takes them over the top.
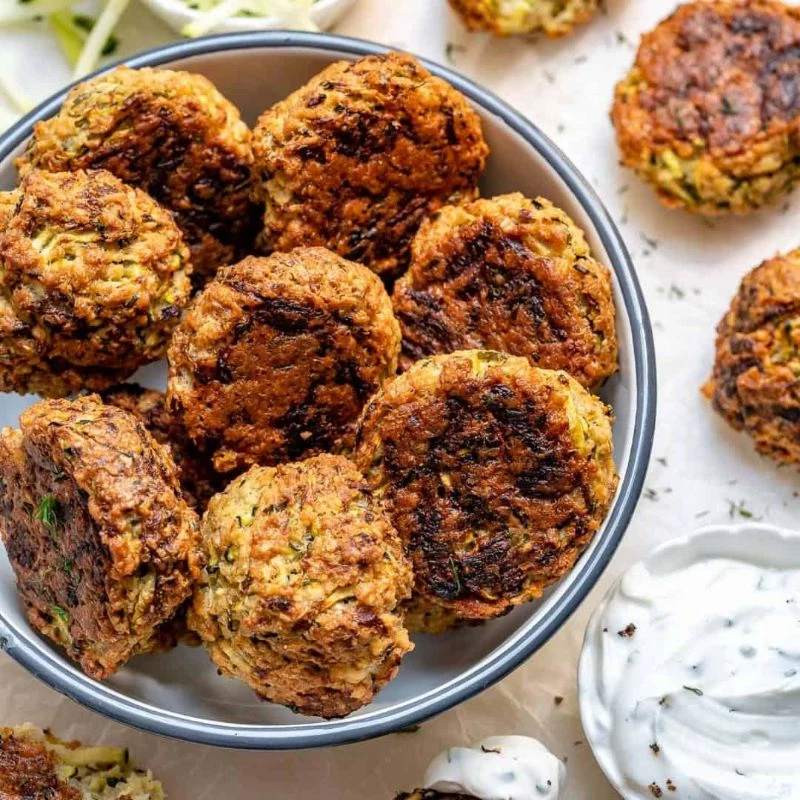
- Spicy Chorizo and Manchego: For something heartier, add 1/2 cup of finely diced, dry Spanish chorizo and 1/2 cup of grated Manchego cheese. A crucial step here: you must cook the chorizo first to render out its fat. Let it cool before adding it to the batter, or your fritters will be greasy. To balance the spice, try a vibrant romesco sauce.
What About Gluten-Free or Vegan?
Easy peasy. For gluten-free, just swap the all-purpose flour with chickpea flour (which adds a lovely, earthy flavor) or a good 1-to-1 gluten-free blend. For vegan, replace the egg with a “flax egg”—just mix one tablespoon of ground flaxseed with three tablespoons of water and let it sit for 10 minutes to gel up. Easy!
The Art of Frying: Getting That Perfect Golden Crust
You’ve done all the prep. Now for the fun part. Your frying technique is the final hurdle between you and a plate of crispy perfection.
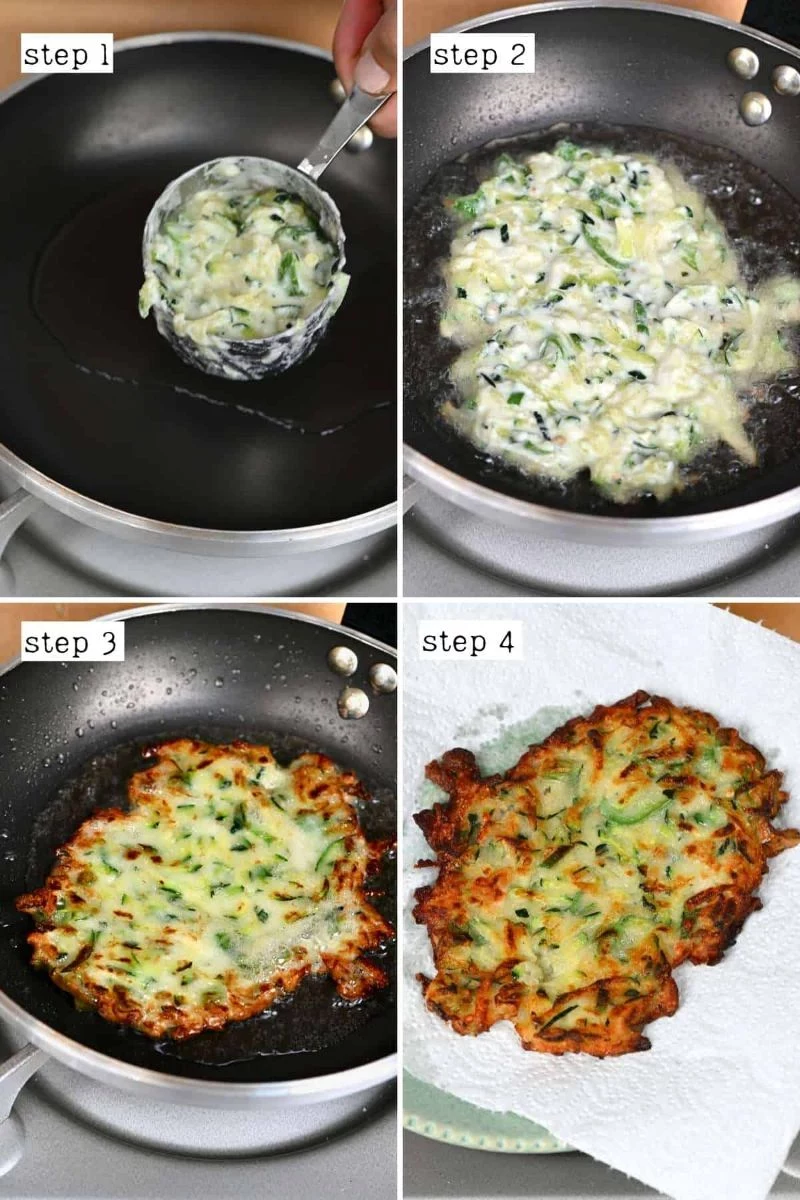
Use a heavy-bottomed skillet, like cast iron, which holds heat really well. For oil, choose something neutral with a high smoke point, like canola or grapeseed. You’re looking for about 1/4 to 1/2 inch of oil in the pan. Heads up! For a typical 10-inch skillet, that means pouring in about 1 to 1.5 cups of oil. This gives you a reference point so you’re not just guessing.
The ideal oil temperature is between 350°F and 375°F. A cheap candy thermometer (around $15-20 online or at a kitchen store) takes all the guesswork out of it. If the oil is too cool, the fritters get greasy. Too hot, and the outside burns before the inside cooks. No thermometer? Dip the handle of a wooden spoon in the oil. If it bubbles steadily, you’re good to go.
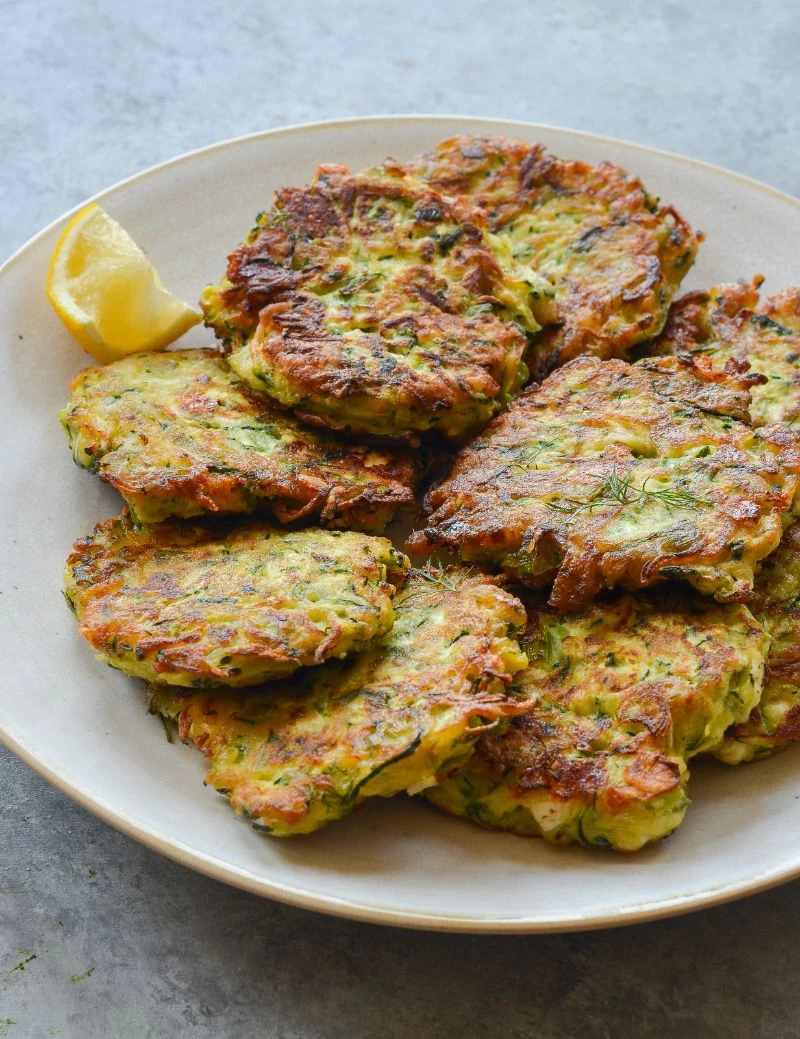
Use a tablespoon or a small cookie scoop to drop mounds of batter into the hot oil, working in batches so you don’t overcrowd the pan. Gently flatten each one with the back of a spoon and fry for 2-4 minutes per side, until deep golden brown.
And now, for the single most important tip in this whole guide. If you do nothing else, do this:
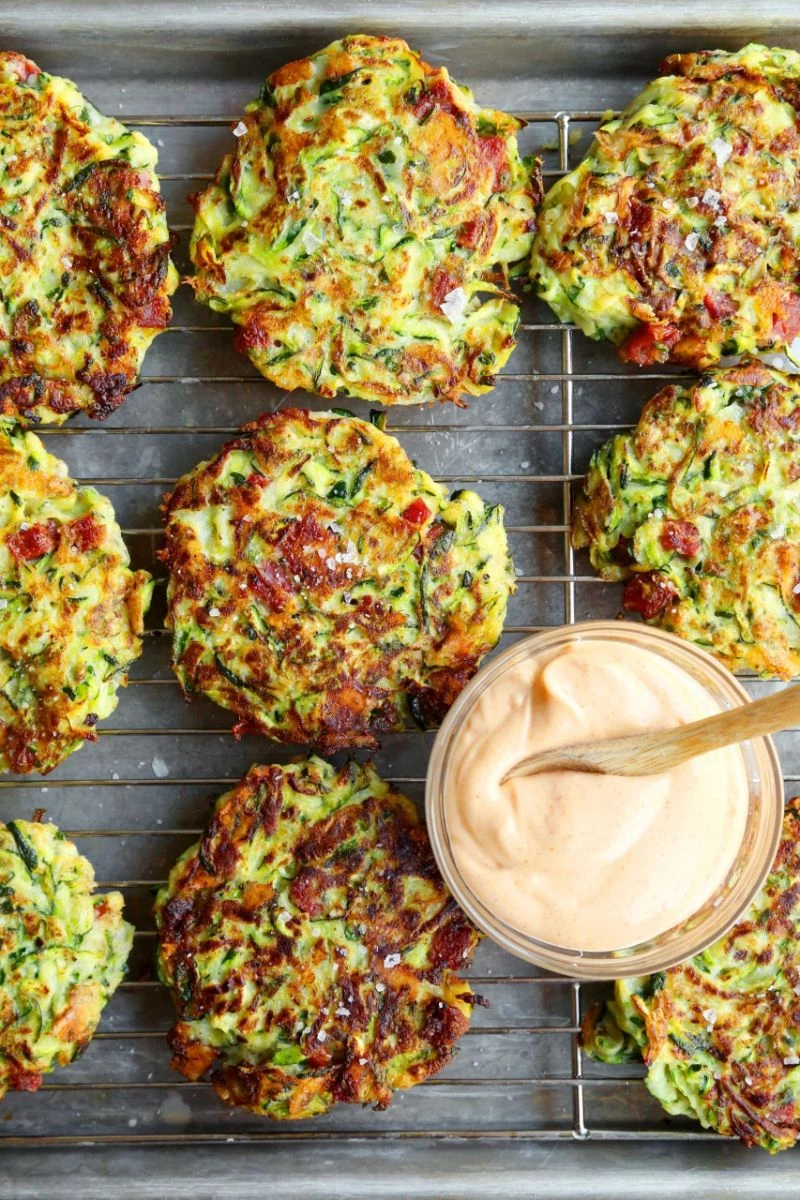
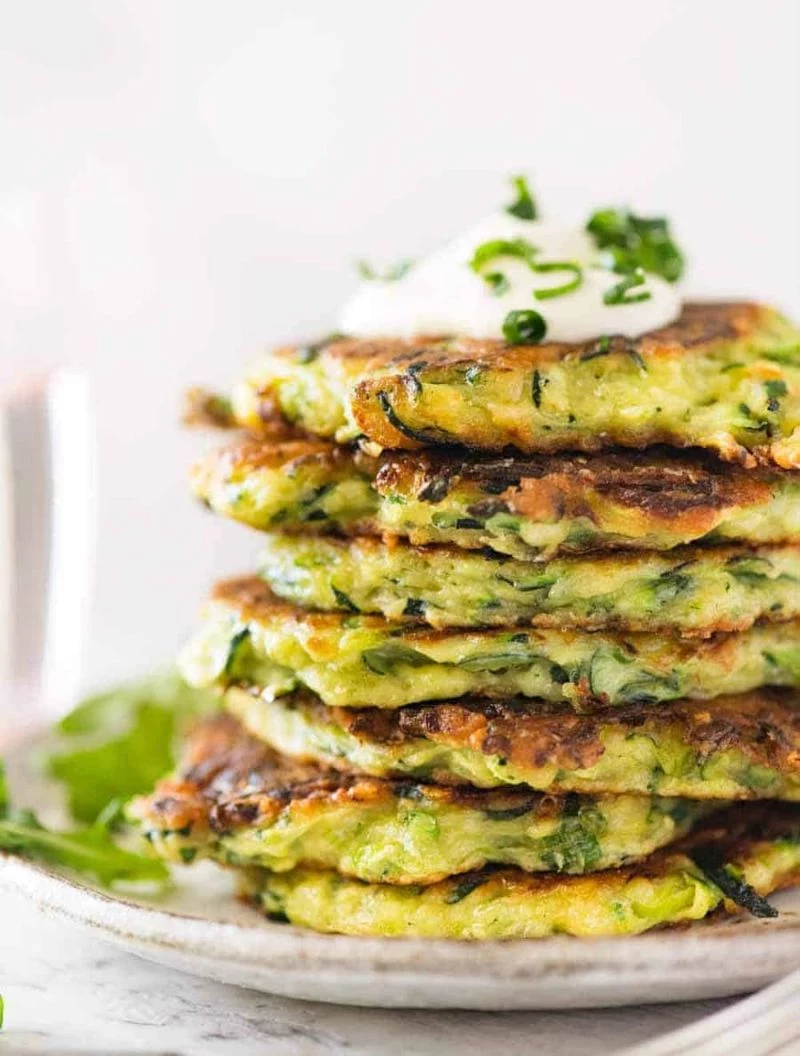
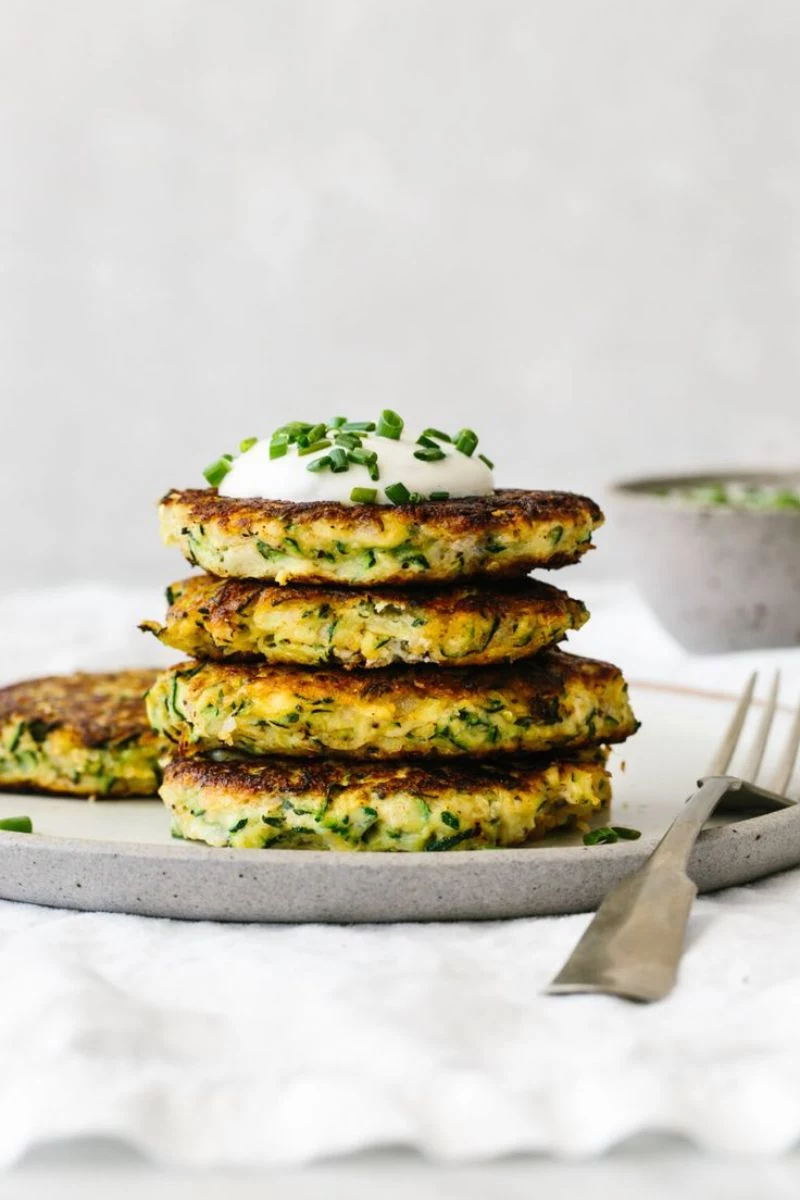
Always drain your cooked fritters on a wire rack set over a baking sheet. DO NOT put them on paper towels! Paper towels trap steam, which instantly makes the bottom of your perfectly crispy fritter soggy. The wire rack lets air circulate, keeping them crispy all around. This one change will blow your mind.
What About Leftovers? (And Can I Prep Ahead?)
This is a big one! So, can you make the batter ahead of time? Unfortunately, no. Once everything is mixed, the batter will get watery and the baking powder will lose its power. You’ll have a sad, flat fritter.
BUT, you can totally prep ahead! You can grate, salt, and squeeze the zucchini a day in advance. Just store the super-dry zucchini shreds in an airtight container in the fridge. When you’re ready to cook, all you have to do is mix and fry!
As for leftovers, they reheat surprisingly well. The best way, by far, is in an air fryer. A few minutes at 375°F, and they’ll be almost as crispy as when they were fresh. You can also pop them on a baking sheet in a 400°F oven for 5-7 minutes.
Troubleshooting Common Fritter Fails
- Problem: “My fritters are a soggy, oily mess!”
Cause & Solution: You probably didn’t squeeze out enough water, or your oil wasn’t hot enough. Next time, be more aggressive with the squeeze and use a thermometer to monitor the oil. And remember: wire rack, not paper towels! - Problem: “Help, they’re falling apart in the pan!”
Cause & Solution: The batter is too wet, likely from not squeezing the zucchini enough. The batter should be a thick, shaggy paste. If it seems loose, try folding in one extra tablespoon of flour. - Problem: “The outside is burnt, but the inside is raw.”
Cause & Solution: Your oil is definitely too hot. Turn down the heat and aim for that 360°F sweet spot.
Mastering the zucchini fritter is a true kitchen win. It teaches you so much about managing moisture and controlling temperature. Once you nail the core principles—squeeze the water, control the heat, and drain on a rack—you’ll be a fritter-making pro.
Okay, your turn! Give the master recipe a shot, then let me know what you think. And if you come up with a killer flavor combo, drop it in the comments below—I’m always looking for new ideas!
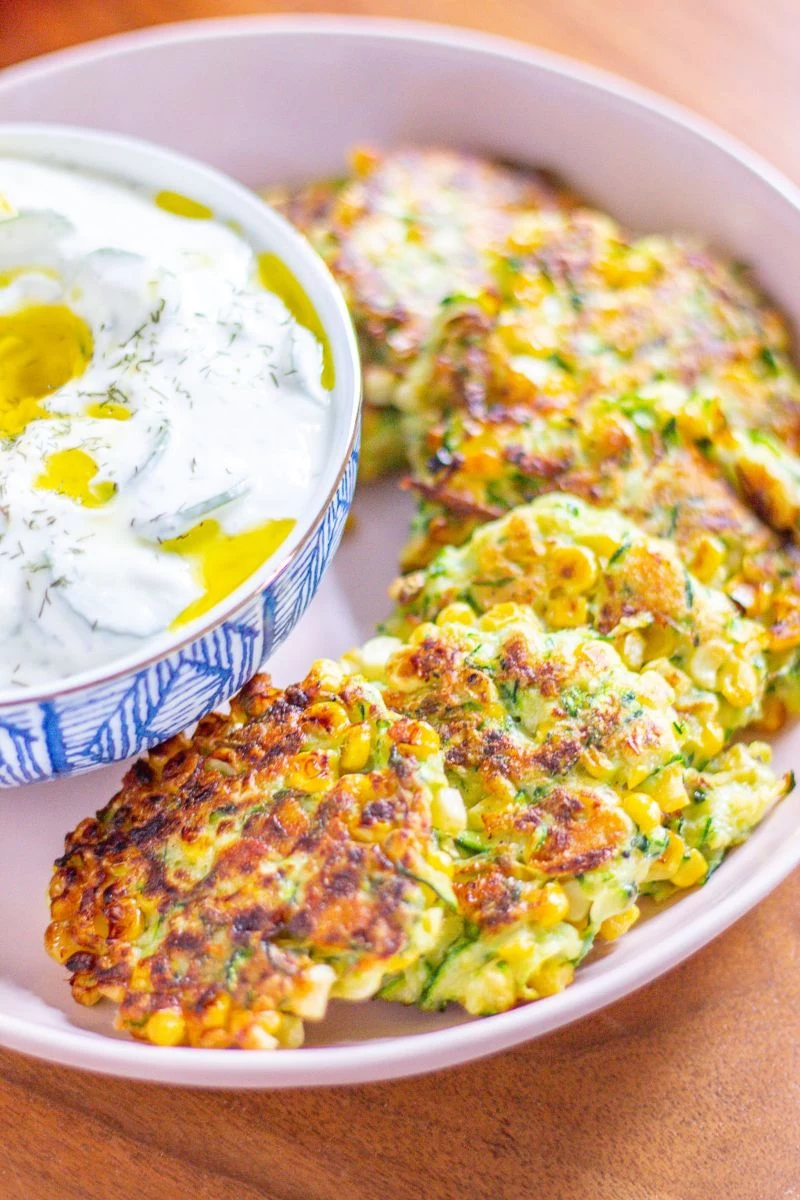
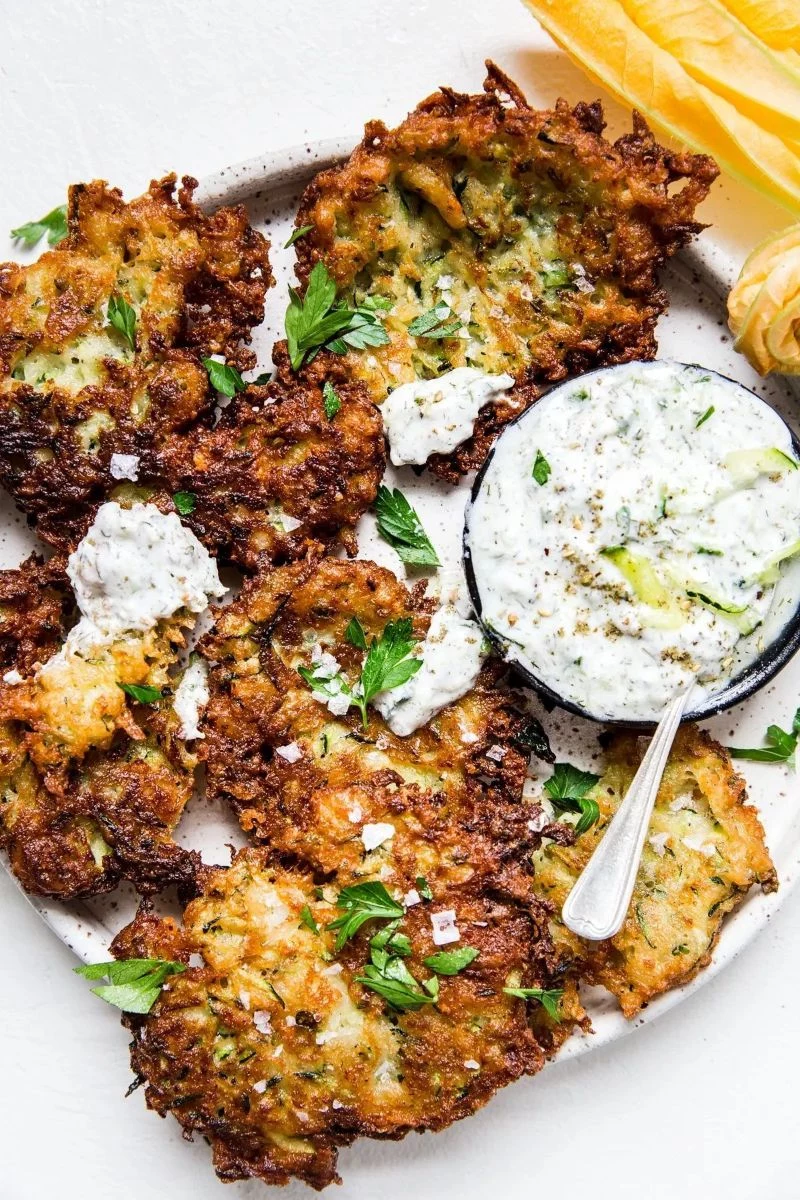
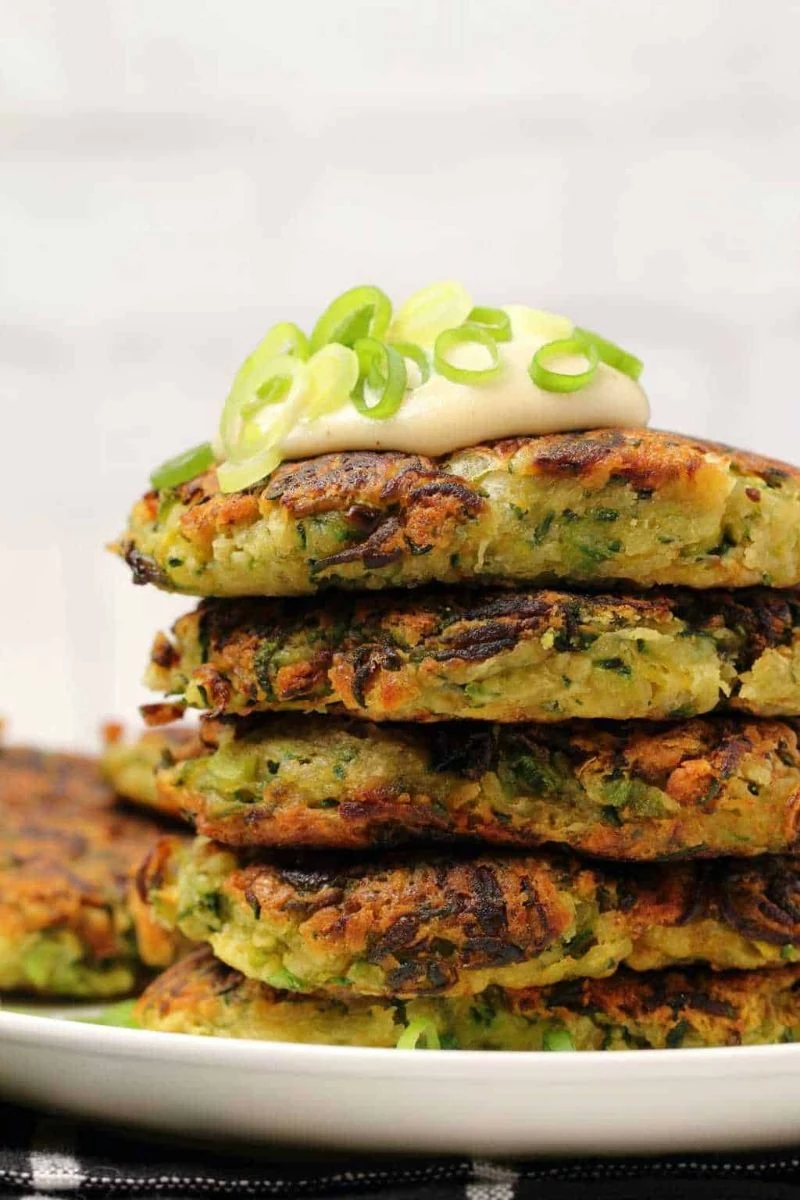
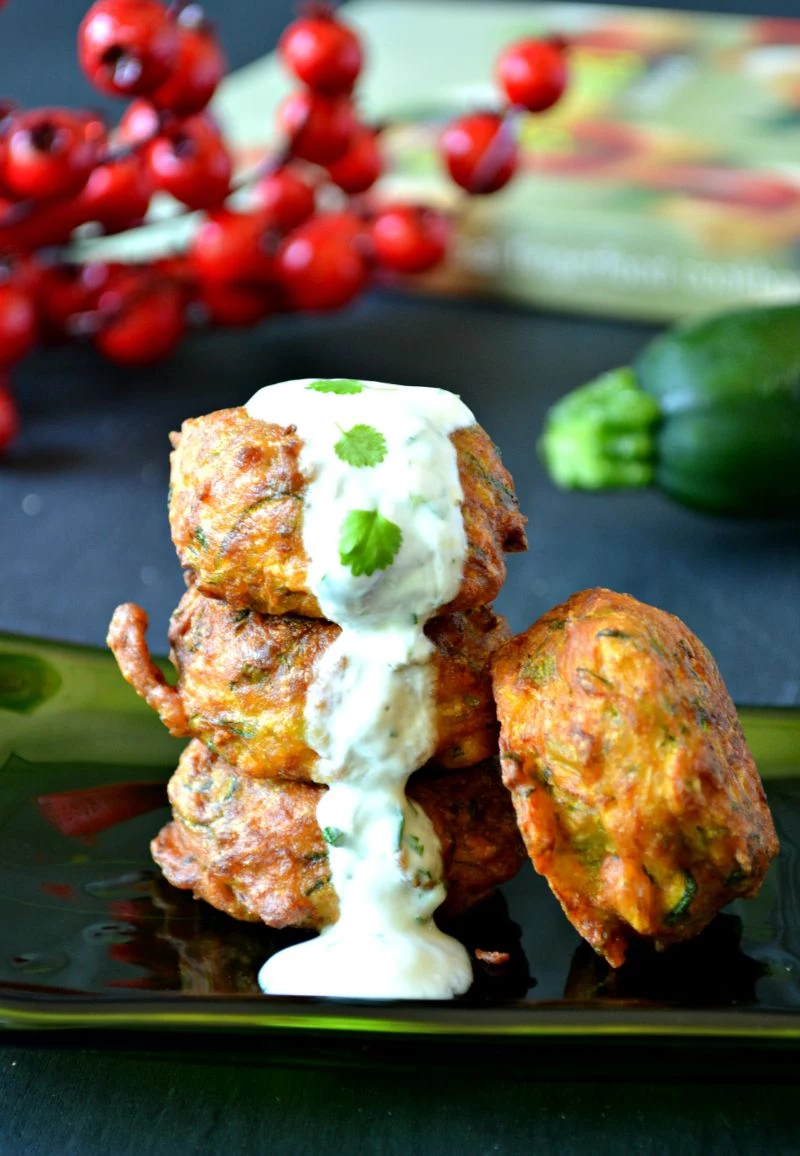
Inspirational Gallery
Zucchini is composed of over 90% water.
This single fact is why “sweating” the grated vegetable with salt is the non-negotiable, game-changing step. It’s not just about removing a little moisture; it’s about drawing out a significant amount of liquid before it has a chance to turn your batter into a soggy mess in the pan.
Beyond basic salt and pepper, how can I easily boost the flavor?
Think of your batter as a blank canvas. For a Mediterranean feel, add a tablespoon of chopped fresh dill and 1/2 cup of crumbled feta cheese. For a warmer, smokier profile, a teaspoon of smoked paprika and a pinch of cumin work wonders. Don’t underestimate the power of finely grated Parmesan cheese for a salty, umami kick that also aids in browning.

The right tool for the job: While a food processor’s shredding disc is fast, a classic box grater often yields a superior texture for fritters. The coarse-grating side creates longer, more defined strands of zucchini that hold up better after salting and squeezing, preventing the final mix from becoming mushy. This better texture is key to a light, non-pasty interior.
- Creates an incredibly light and crispy crust.
- Adds a subtle, nutty flavor that enhances the zucchini.
- Is naturally gluten-free.
The secret? Try replacing the all-purpose flour with chickpea flour (also called gram or besan flour). It fries beautifully and adds a lovely golden color.

Don’t let leftover fritters lose their magic in the microwave. To revive their crispiness, arrange them in a single layer on a baking sheet or in an air fryer basket. A few minutes at 375°F (190°C) is all it takes to heat them through and bring that satisfying crunch right back, making them perfect for lunch the next day.
Pan-Frying Oil: A neutral oil with a high smoke point is essential. Canola or vegetable oil are reliable, budget-friendly choices.
For Extra Flavor: Try using avocado oil, which also has a high smoke point but adds a subtle, buttery flavor. A small splash of olive oil can be added for taste, but avoid using it exclusively as it can burn at high frying temperatures.
Whichever you choose, ensure the oil is shimmering before adding the fritters for an instant sizzle.
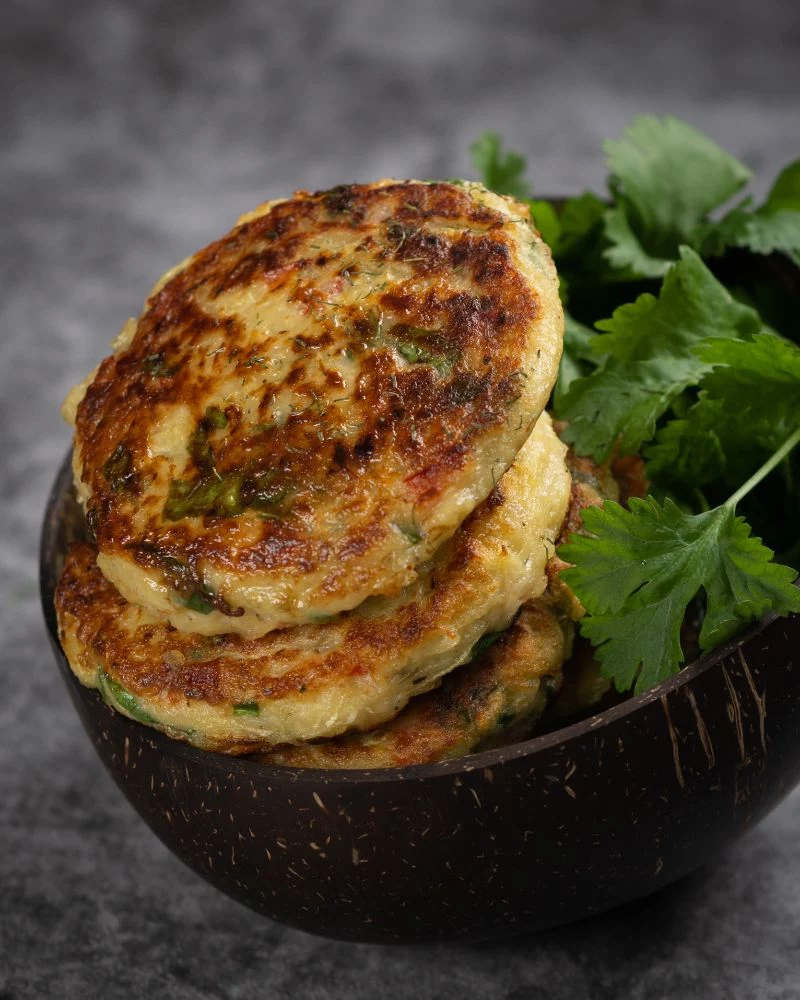
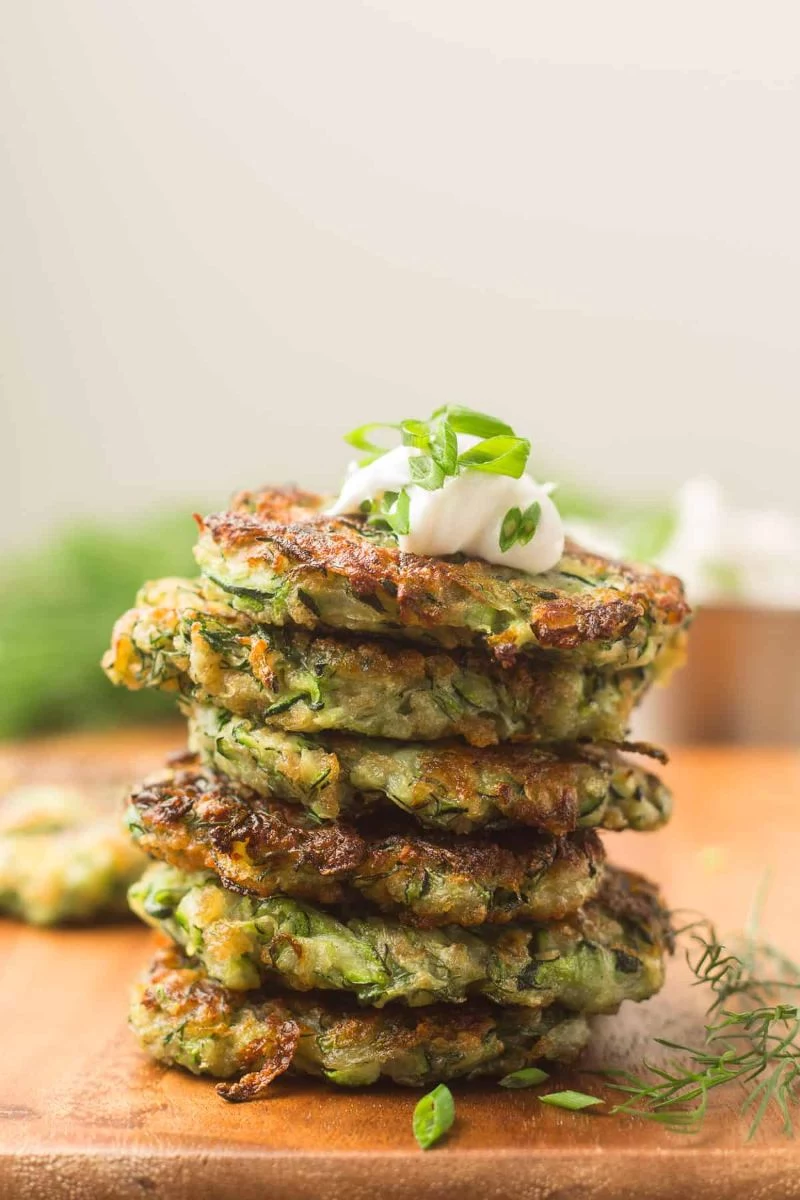
The way you serve them can make all the difference. For an elegant appetizer, stack two or three small fritters, placing a dollop of lemon-dill yogurt on top. Garnish with a sprig of fresh dill or a sprinkle of flaky sea salt from a brand like Maldon. This simple vertical presentation, common in restaurants, instantly elevates the dish.
For a taste of a Greek taverna, look to kolokithokeftedes, the traditional Greek zucchini fritters. The key difference is the flavor profile: they are typically loaded with fresh mint and dill, and bound together with crumbled feta cheese. Served with a thick, garlicky tzatziki, they offer a refreshing and aromatic take on the classic recipe.

- Your fritters are falling apart in the pan.
- They absorb too much oil and feel greasy.
- The centers are still raw while the outside is browning too fast.
The likely culprit? Your oil isn’t hot enough. Use a thermometer to ensure it reaches 350-360°F (175-180°C) before you start. This creates an instant crust that seals the fritter, preventing these common issues.
The Ultimate Dip: Whipped Feta with Lemon and Herbs. In a food processor, blend 8oz of quality block feta (like Dodoni) with 3 tablespoons of olive oil and the zest of one lemon until smooth and creamy. Fold in chopped parsley and mint. This tangy, salty, and incredibly rich dip is the perfect counterpoint to the crispy, earthy fritters.


