My Pro Baker’s Guide to Unforgettable Winter Cakes
I’ll never forget my first holiday season working in a professional kitchen. I was constantly covered in a fine dusting of flour and powdered sugar, and the air was just electric with the smell of ginger, cinnamon, and warm chocolate. We were doing more than just churning out desserts; we were crafting the centerpiece for countless family memories. Every single cake had to be flawless. It had to taste like winter feels.
In this article
- First, Let’s Talk Shop Before We Bake
- Which Cake Should You Bake First?
- 1. Spiced Gingerbread Cake: A Masterclass in Moisture and Spice
- 2. Winter White Chocolate Cake: A Lesson in Elegance
- 3. Cranberry Orange Bundt Cake: A Lesson in a Perfect Release
- 4. Decadent Chocolate Peppermint Cake: A Study in Flavor Depth
- A Final Note from My Kitchen
- Inspirational Gallery
Over the years, I’ve realized that a truly great winter cake isn’t about some wildly complicated, 50-step recipe. It’s about understanding the craft. It’s the ‘why’ behind the ‘what’—like knowing why hot water is the secret weapon in gingerbread, or how to keep delicate white chocolate from turning into a grainy mess.
So, this isn’t just another recipe roundup. Think of this as a page from my personal baking journal, covering four essential winter cakes. Each one is designed to teach a core baking skill. We’ll dive into a deeply spiced gingerbread, a surprisingly delicate white chocolate cake, a stunning cranberry-orange bundt, and a show-stopping chocolate peppermint cake. My goal here is to share the little secrets and techniques I picked up along the way, so you can feel confident and create something truly special in your own kitchen.
First, Let’s Talk Shop Before We Bake
Before you even think about grabbing a mixing bowl, let’s go over a few fundamentals. Getting these things right is non-negotiable in any pro bakery, and honestly, it’s what separates a pretty good home-baked cake from a fantastic one.
Ingredient Temperature Is a Bigger Deal Than You Think
You see “room temperature ingredients” in almost every recipe, especially for butter and eggs. Please, don’t skip this. Cold butter simply can’t cream properly with sugar. Instead of creating those microscopic air pockets that give a cake its lift and tender crumb, you end up with dense, greasy clumps. And cold eggs? They can make a perfectly smooth batter curdle and separate. A broken batter almost always means a coarse, uneven texture in the final product.
Quick tip: To get eggs to room temp fast, just pop them in a bowl of warm (not hot!) tap water for about 5-10 minutes. For butter, I slice it into small half-inch cubes. They’ll soften way quicker than a whole stick. And whatever you do, don’t microwave butter to soften it for a cake. It melts unevenly and will absolutely ruin your cake’s structure.
The Age-Old Debate: Measuring by Weight or Cups
In every single professional kitchen I’ve ever set foot in, we measure by weight with a digital scale. It’s the only way to get consistent, repeatable results. A cup of flour can vary by 30 grams or more depending on how you pack it, and that’s easily the difference between a moist cake and a dry, crumbly one. I’ve included both measurements for you, but if you’re getting serious about baking, a simple digital kitchen scale is the best $15 you’ll ever spend. It will improve your baking more than any other tool, guaranteed.
Get to Know Your Oven
Every oven has its own quirks. Seriously. Most home ovens aren’t perfectly calibrated; they can run hot, run cold, or have hot spots that burn one side of your cake. An inexpensive oven thermometer (you can find one for under $10) is your best friend. It shows you the actual temperature inside. Always preheat for at least 20 minutes to let the oven walls heat up properly for stable, even heat. And try not to peek! Opening the door can cause the temperature to drop dramatically, which is a classic reason for a cake to sink in the middle.
Which Cake Should You Bake First?
Not sure where to start? Here’s a quick rundown to help you choose:
- For a cozy, classic flavor: Go with the Spiced Gingerbread Cake. It’s fairly easy (Difficulty: 2/5) and teaches the crucial skill of flavor blooming.
- For an elegant challenge: Try the Winter White Chocolate Cake. This one is a bit more demanding (Difficulty: 4/5) but you’ll master working with delicate chocolate and creating a fine, tender crumb.
- For a beautiful, shareable centerpiece: The Cranberry Orange Bundt Cake is your winner. It’s moderately easy (Difficulty: 2/5) and the main lesson is all about perfect pan prep to avoid any sticking disasters.
- For a decadent showstopper: The Chocolate Peppermint Cake is a must. It’s surprisingly straightforward (Difficulty: 3/5) and teaches you how to get the most intense chocolate flavor imaginable.
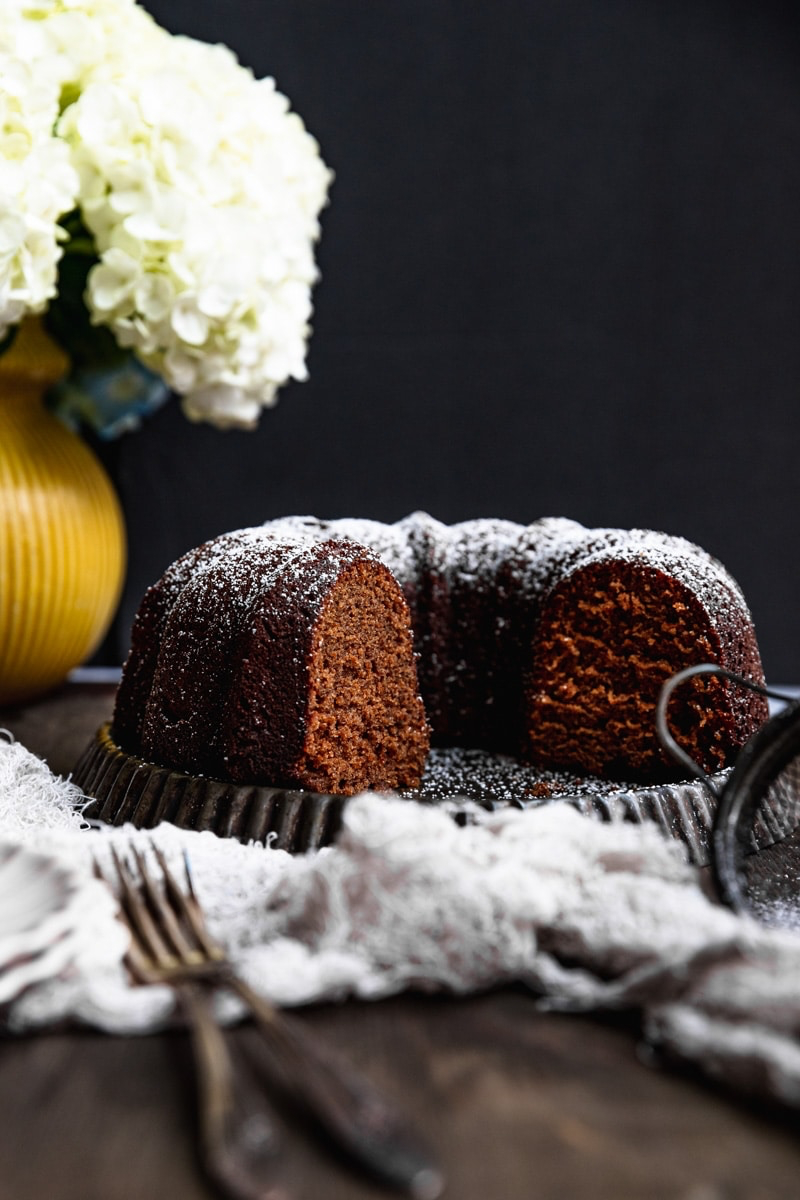
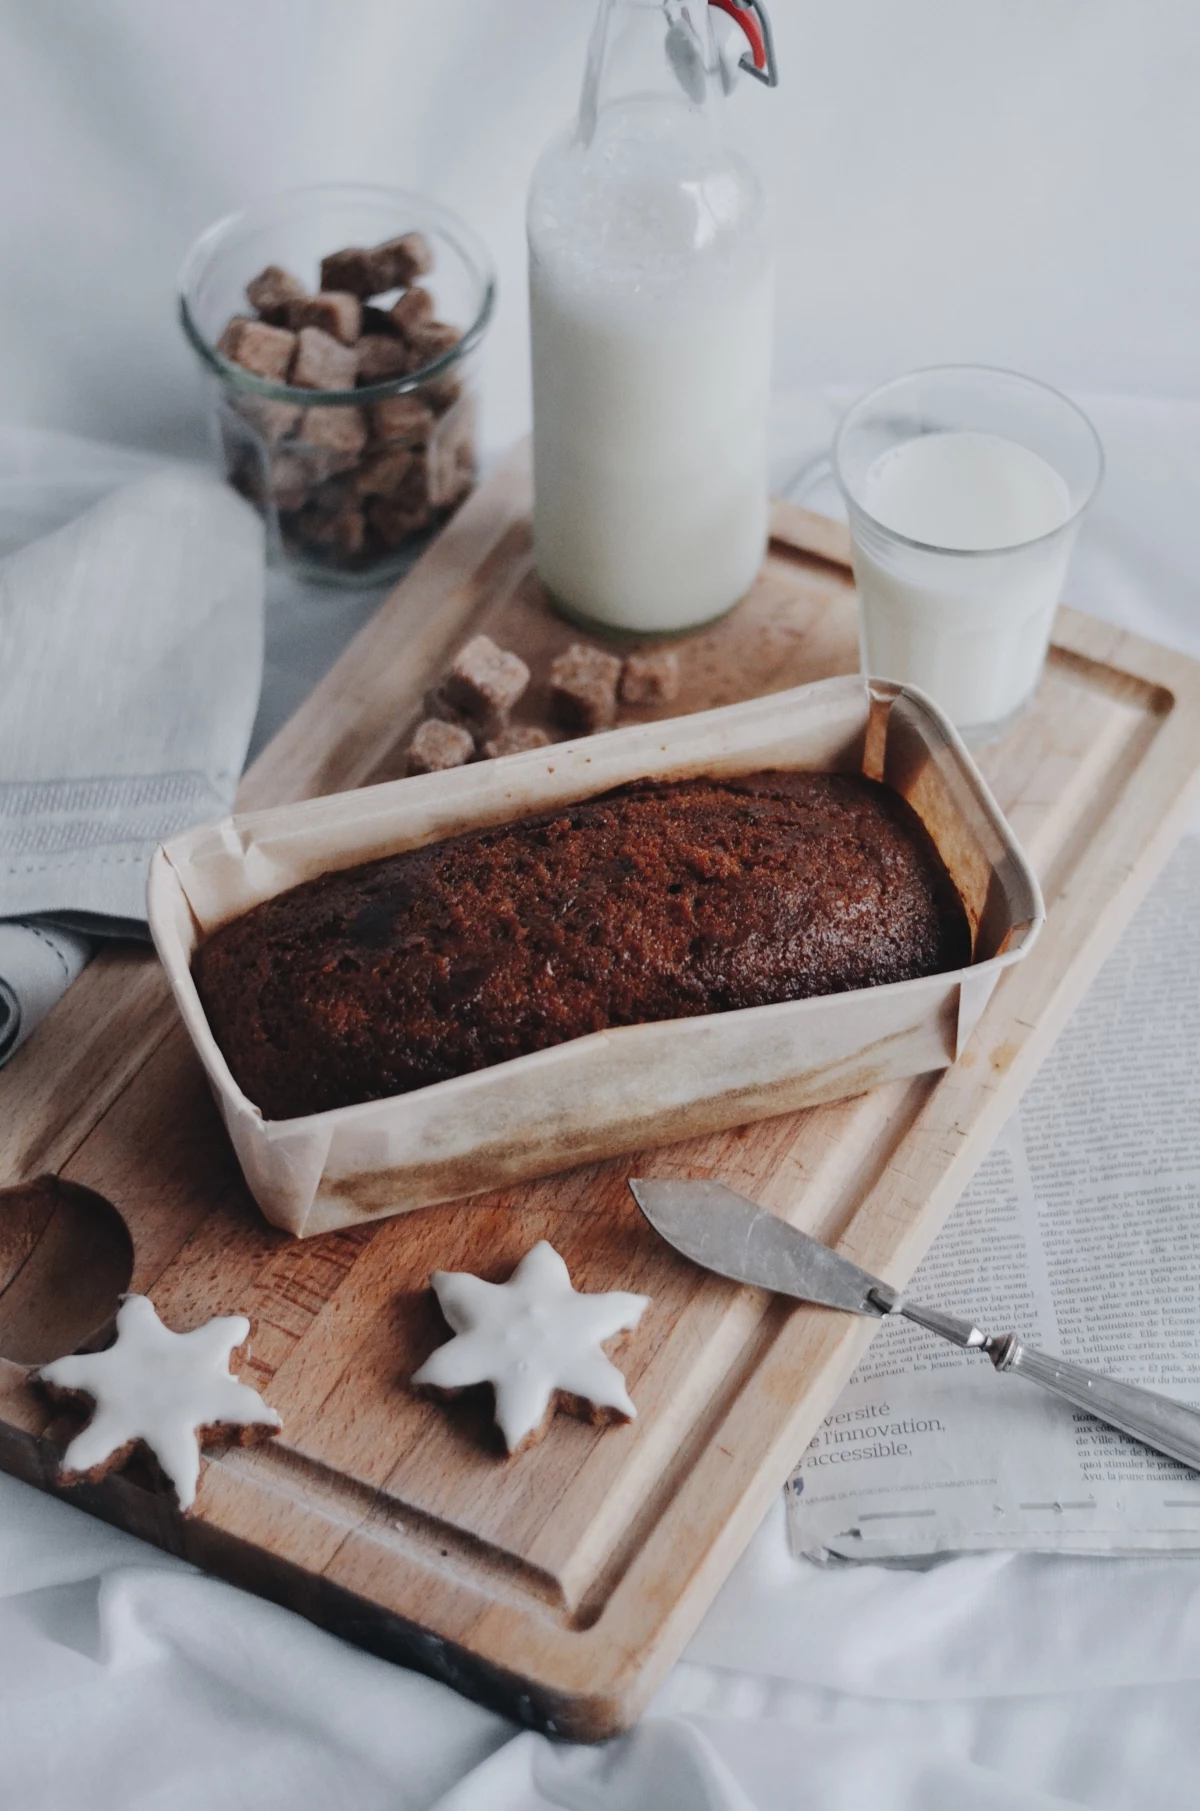
1. Spiced Gingerbread Cake: A Masterclass in Moisture and Spice
Gingerbread is the quintessential winter bake. It’s supposed to be dense, dark, and deeply comforting—not a light, airy sponge. The goal is a robust, sticky crumb that actually gets better a day or two after baking. The real magic here is all in the chemistry.
Time Commitment: Prep takes about 20 minutes, baking is 50-60 minutes, and cooling needs a few hours for the best flavor.
Tools You’ll Need: A 9×9-inch metal pan, parchment paper, a digital scale (recommended!), and a stand or hand mixer.
The Science of Great Gingerbread
The stars of the show are molasses and baking soda. Molasses is acidic, and when it meets baking soda (an alkali), they create carbon dioxide gas. That reaction is what gives the cake its lift. The hot water is also a key player. It does two things: it dissolves the baking soda so it can react evenly, and more importantly, it “blooms” the ground spices. This just means the hot liquid coaxes out the spices’ essential oils, making their flavor way more intense and aromatic.
Ingredients for Spiced Gingerbread Cake
- All-Purpose Flour: 310g (2 ½ cups)
- Ground Ginger: 10g (2 ½ teaspoons)
- Ground Cinnamon: 6g (1 ½ teaspoons)
- Ground Cloves: 1g (½ teaspoon)
- Unsalted Butter, softened: 113g (½ cup or 1 stick)
- Packed Brown Sugar: 110g (½ cup)
- Large Eggs: 100g (2), at room temperature
- Unsulphured Molasses: 340g (1 cup)
- Baking Soda: 10g (2 teaspoons)
- Hot Water: 240ml (1 cup), just off a boil

Building the Flavor: The Method
- Prep Your Pan: Set the oven to 350°F (175°C). Grease a 9×9-inch pan, then line it with parchment paper, leaving some overhang on two sides. These will be your handles to lift the sticky cake out later.
- Whisk the Dry Stuff: In a medium bowl, whisk together the flour and all the spices. This is like a mini-sift, making sure you don’t get a random pocket of cloves.
- Cream with Care: In a larger bowl, beat the softened butter and brown sugar on medium speed for 3-4 minutes. You’re aiming for a light-colored paste.
- Add the Wet Ingredients: Beat in the eggs one by one. Scrape down the bowl, then turn the speed to low and slowly drizzle in the molasses. It might look a little curdled at this point—that’s totally fine.
- Activate the Magic: In a separate heatproof cup, pour the hot water over the baking soda and stir. It’ll fizz up. With the mixer still on low, carefully stream this hot mixture into the batter. It will look very thin.
- Finish the Batter: Add all the dry ingredients at once. Mix on the lowest possible speed for just 15-20 seconds—stop as soon as the flour streaks are gone. Overmixing now will make your cake tough.
- Bake and Cool: Pour the thin batter into the pan. Bake for 50-60 minutes. A toothpick in the center should come out with moist crumbs, not wet batter. Let it cool completely in the pan; gingerbread’s flavor gets deeper and richer as it rests.
Serving Suggestion & Troubleshooting
This cake is amazing on its own, but if you want to dress it up, a simple cream cheese frosting is the perfect tangy counterpoint. Just beat 8 oz of softened cream cheese with 4 oz of softened butter until smooth. Then, mix in 1-2 cups of powdered sugar and a teaspoon of vanilla until you get the sweetness you like.
- What went wrong? My cake is dry. You likely overbaked it or measured your flour by volume and accidentally added too much. This is where a kitchen scale really saves the day!
- Why does it taste bitter? You might have used blackstrap molasses. I prefer a classic, robust unsulphured dark molasses. Blackstrap is much more intense and can be overpowering for some people.
- Lesser-known trick: For an even richer, deeper flavor, swap the hot water for hot, freshly brewed coffee. It beautifully enhances the earthy notes of the molasses.
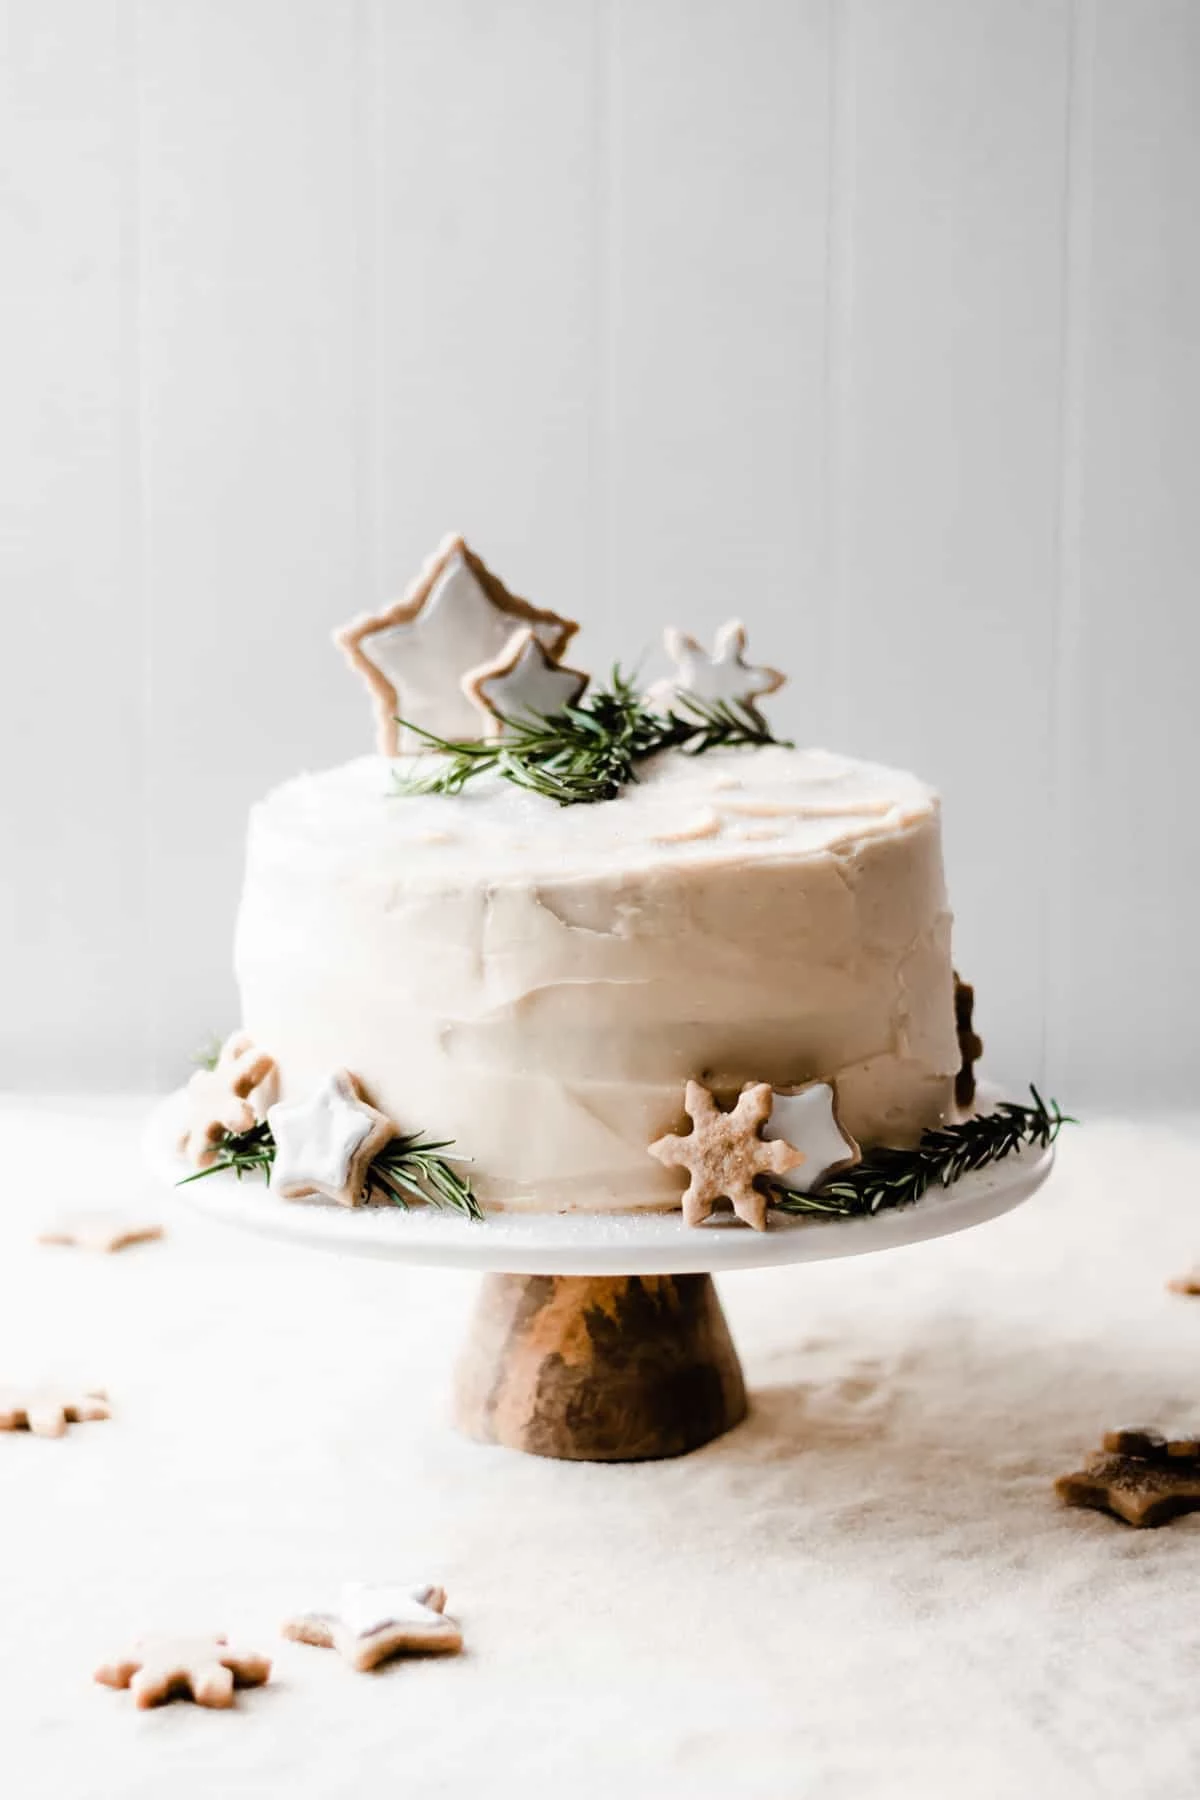
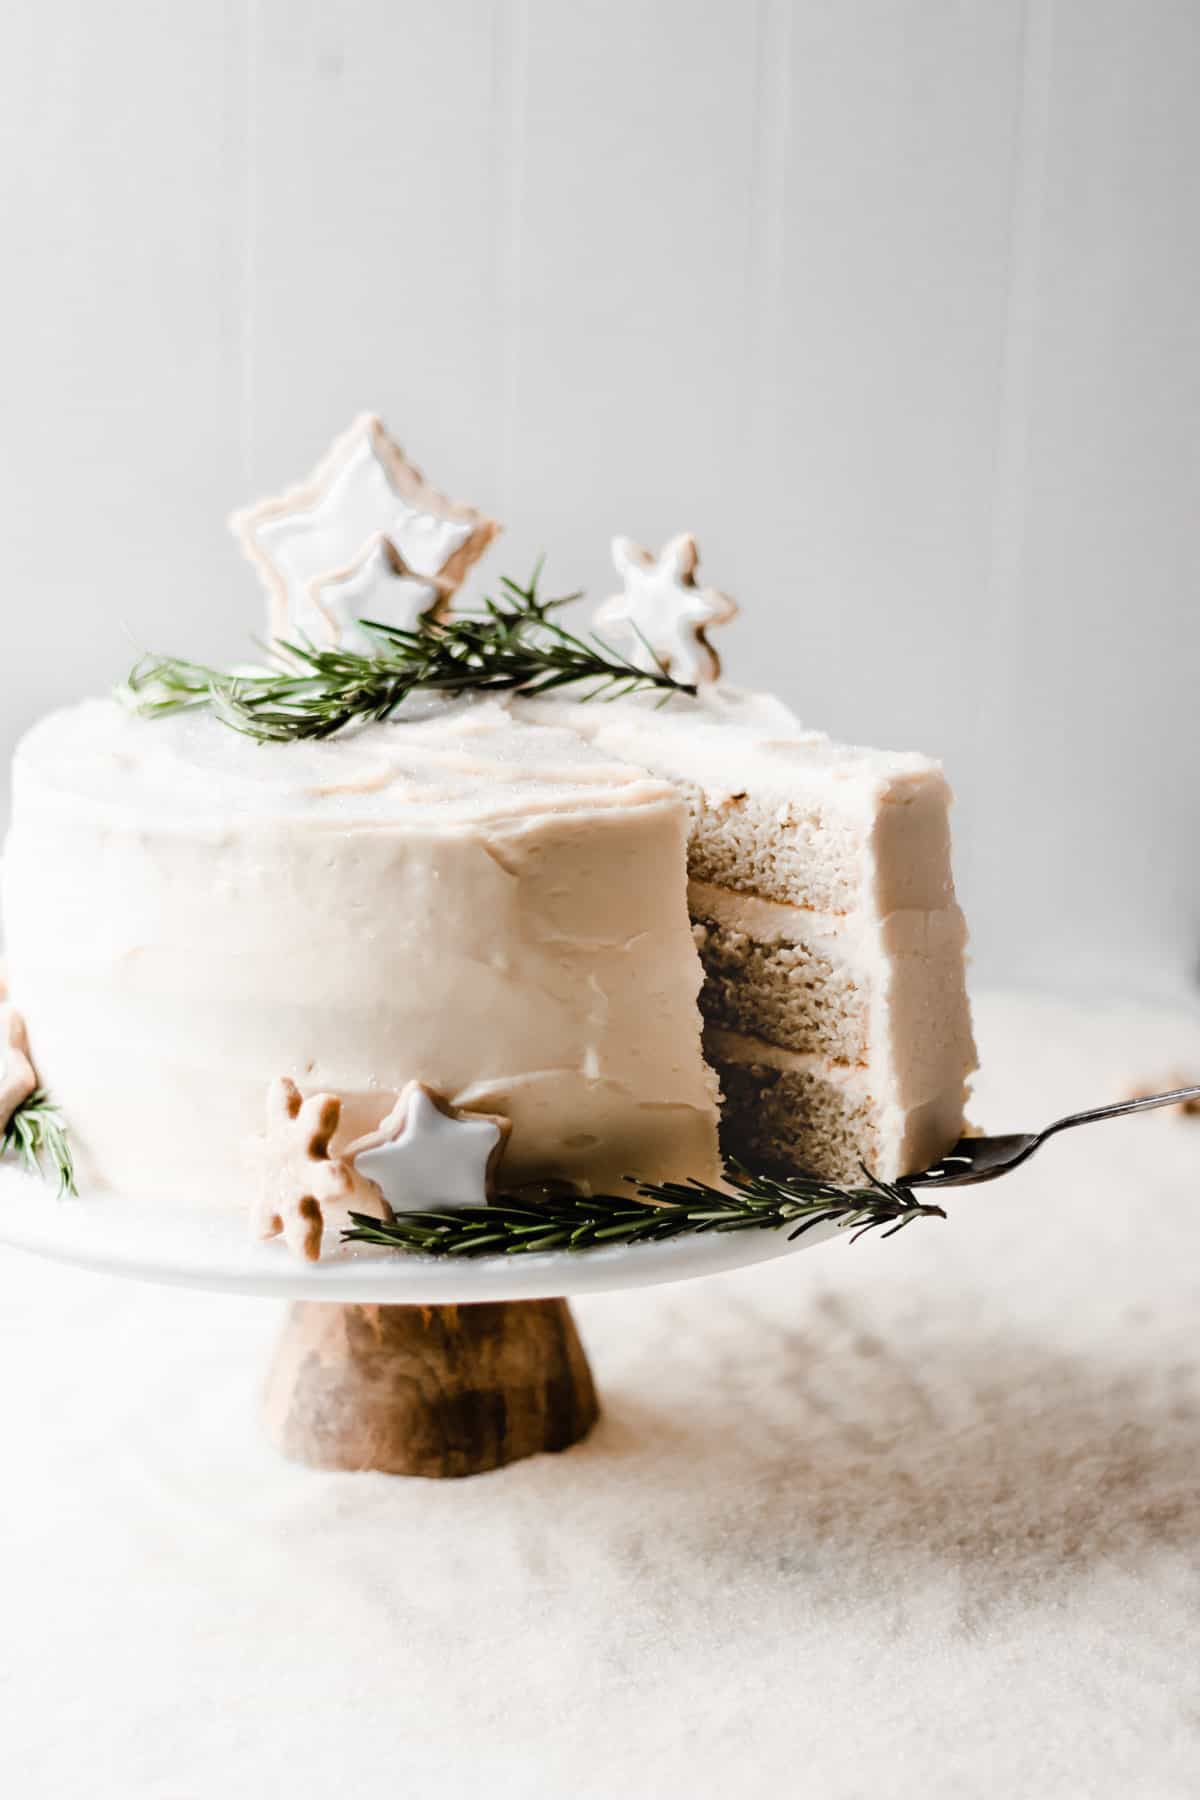
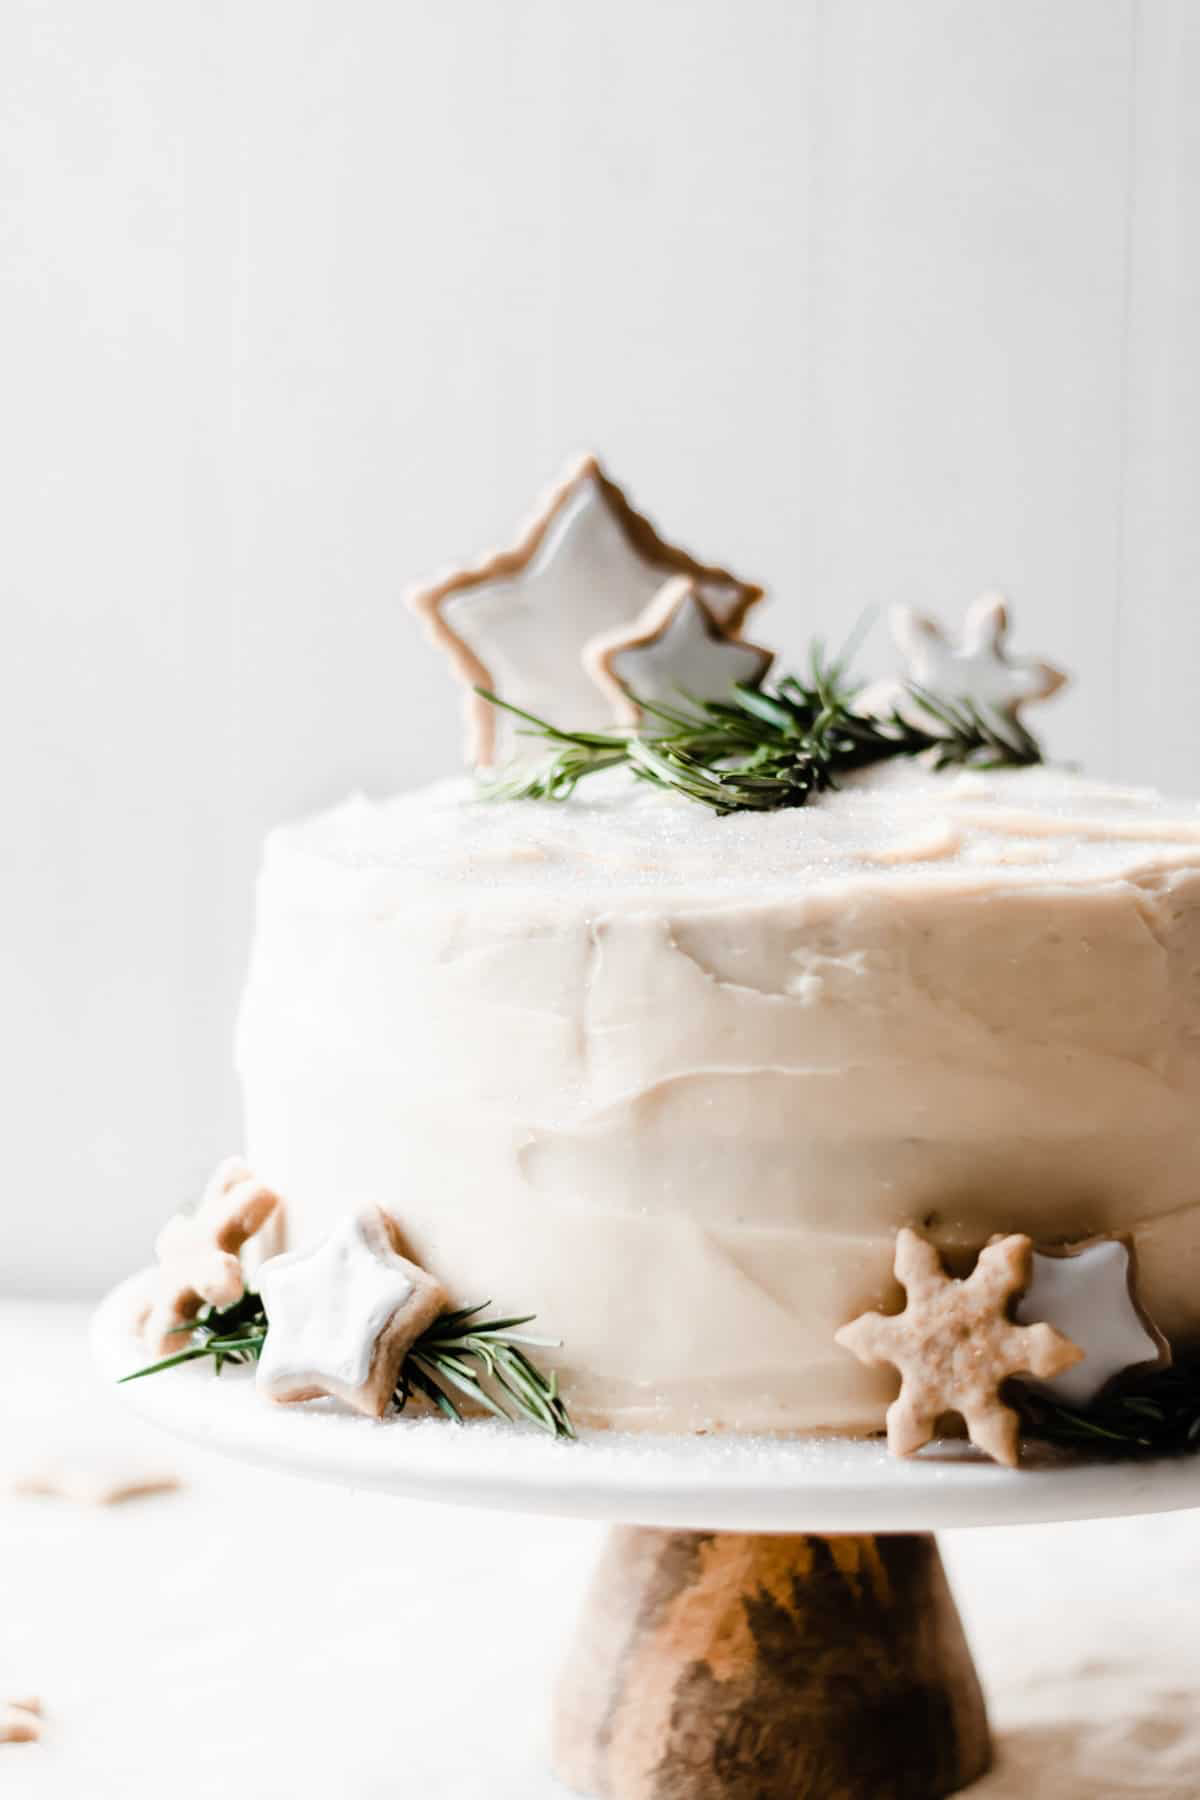
2. Winter White Chocolate Cake: A Lesson in Elegance
This cake is the polar opposite of gingerbread. It’s all about a fine, tender crumb, a light color, and a subtle, sophisticated flavor. White chocolate is famously fussy—it hates heat and water. Nailing this cake means you’ve mastered finesse and control.
Time Commitment: Prep is about 30 minutes, bake time is 25-30 minutes, plus at least an hour for cooling and another 30-45 minutes for assembly.
Tools You’ll Need: Three 8-inch round cake pans, parchment paper, a double boiler (or a pot and a heatproof bowl), and an offset spatula for frosting.
The Science of a Tender Crumb
White chocolate is mostly cocoa butter, sugar, and milk solids. Because it has such a high sugar and fat content, it scorches in a heartbeat. The secret to a tender crumb here is a perfect emulsification—getting the fat and liquid to mix smoothly. That’s why room temperature ingredients are non-negotiable. We also use cake flour, which is lower in protein than all-purpose flour. Less protein means less gluten, which gives you a super soft, delicate cake.
Ingredients for White Chocolate Cake
- Cake Flour: 240g (2 cups)
- Granulated Sugar: 400g (2 cups)
- Unsalted Butter, softened: 226g (1 cup or 2 sticks)
- Whole Milk: 240ml (1 cup), at room temperature
- Large Eggs: 200g (4), at room temperature
- Pure Vanilla Extract: 10ml (2 teaspoons)
- Baking Powder: 5g (1 teaspoon)
- Salt: 3g (1/2 teaspoon)
- High-Quality White Chocolate: 225g (8 ounces), chopped
For the Buttercream
- Unsalted Butter, softened: 340g (1 ½ cups)
- Powdered Sugar, sifted: 720g (6 cups)
- Heavy Cream: 60ml (1/4 cup), at room temperature
- Pure Vanilla Extract: 5ml (1 teaspoon)
- Pinch of Salt
The Professional Method
- Prep is Key: Preheat your oven to 350°F (175°C). Grease and flour three 8-inch round cake pans and line the bottoms with parchment.
- Melt the Chocolate (Carefully!): This is the most crucial step. Set up a double boiler by placing a heatproof bowl over a saucepan of gently simmering water (the bowl shouldn’t touch the water). Add the chopped white chocolate and stir constantly until it’s just melted and smooth. Immediately take it off the heat and set it aside to cool for about 10 minutes.
- Combine Dry Ingredients: Whisk together the cake flour, baking powder, and salt.
- Cream for Fluffiness: Beat the softened butter and sugar on medium-high speed for a full 5-7 minutes. It should look very pale and fluffy. This step whips a ton of air into the batter, which is your main source of lift.
- Incorporate Eggs: Add the eggs one at a time, beating for a full minute after each. Scrape the bowl often. This helps build a strong, stable batter. Mix in the vanilla.
- Alternate Wet and Dry: On low speed, add the flour mix in three parts, alternating with the milk in two parts (start and end with flour). Mix only until combined.
- Fold in Chocolate: Gently fold in the slightly cooled, melted white chocolate with a spatula.
- Bake and Cool: Divide the batter evenly between the pans. Bake 25-30 minutes, until a toothpick comes out clean. Cool in the pans for 10 minutes, then turn out onto a wire rack to cool completely.
Assembly and Troubleshooting
- Make the Buttercream: Beat the butter until creamy. Slowly add the sifted powdered sugar. Add the vanilla and salt. Drizzle in the cream and beat on high for 3-5 minutes until it’s light and fluffy.
- The Crumb Coat: A pro secret for clean frosting! Apply a very thin layer of frosting all over the assembled cake to trap loose crumbs. Chill it in the fridge for 20-30 minutes to firm up.
- Final Frosting: Cover the chilled cake with the rest of your buttercream for a smooth finish.
- Sourcing the Chocolate: Steer clear of white chocolate chips; they have additives that keep them from melting well. Look in the baking aisle for high-quality white chocolate bars. You want something with a high percentage of cocoa butter (over 20%). You can find good options for $4-$7 at most grocery stores—it makes a huge difference.
- Buttercream Fixes: If your frosting is too stiff, add more cream a teaspoon at a time. Too thin? Add more sifted powdered sugar until it’s right.
- Make it Simpler: In a rush? You can bake this as a single-layer sheet cake in a greased and floured 9×13-inch pan. Just adjust the baking time to around 35-40 minutes.
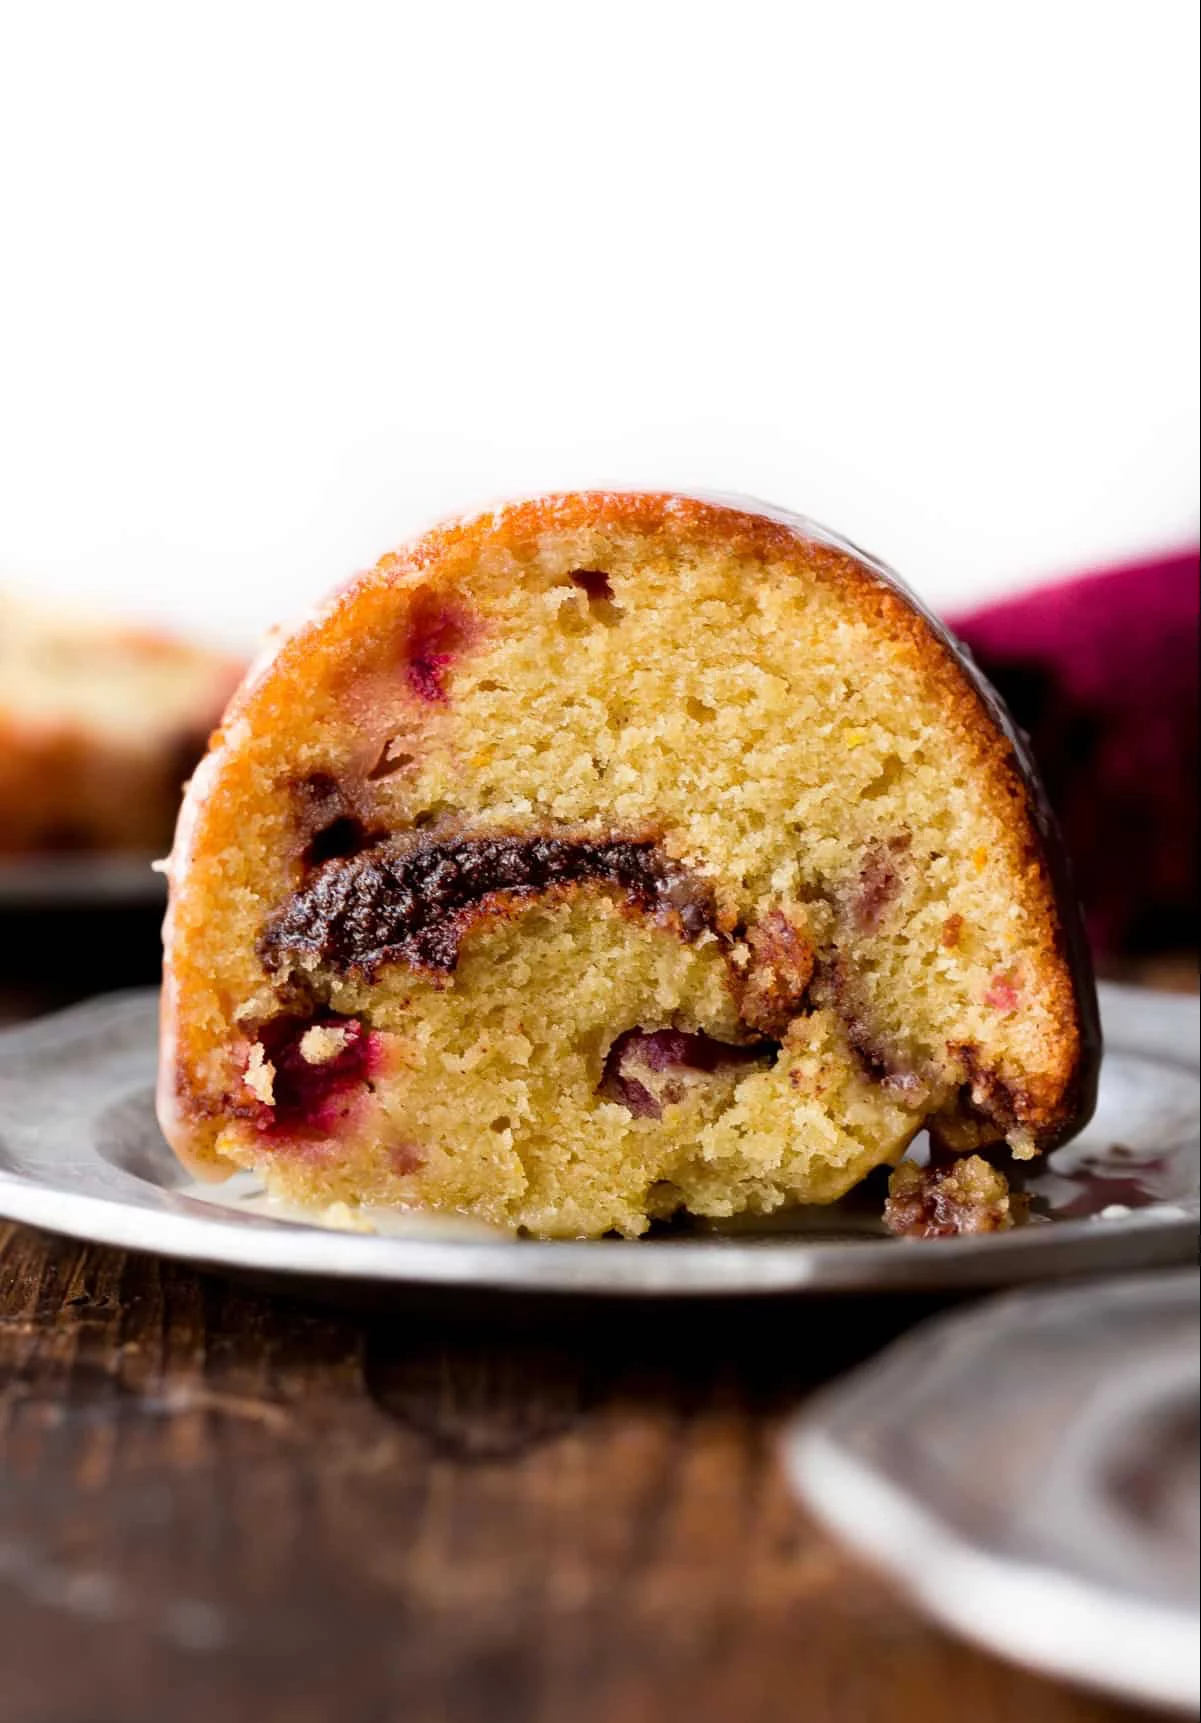
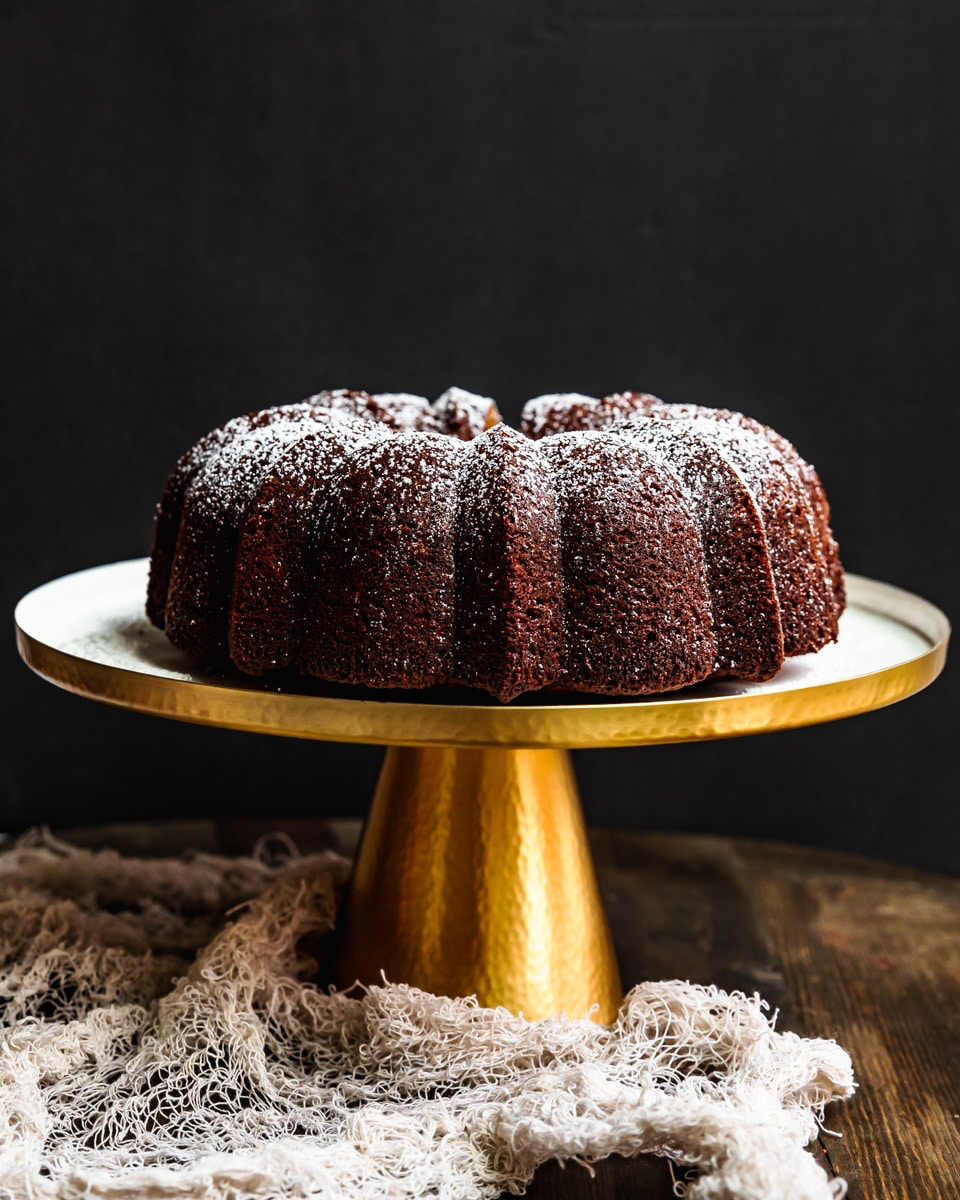
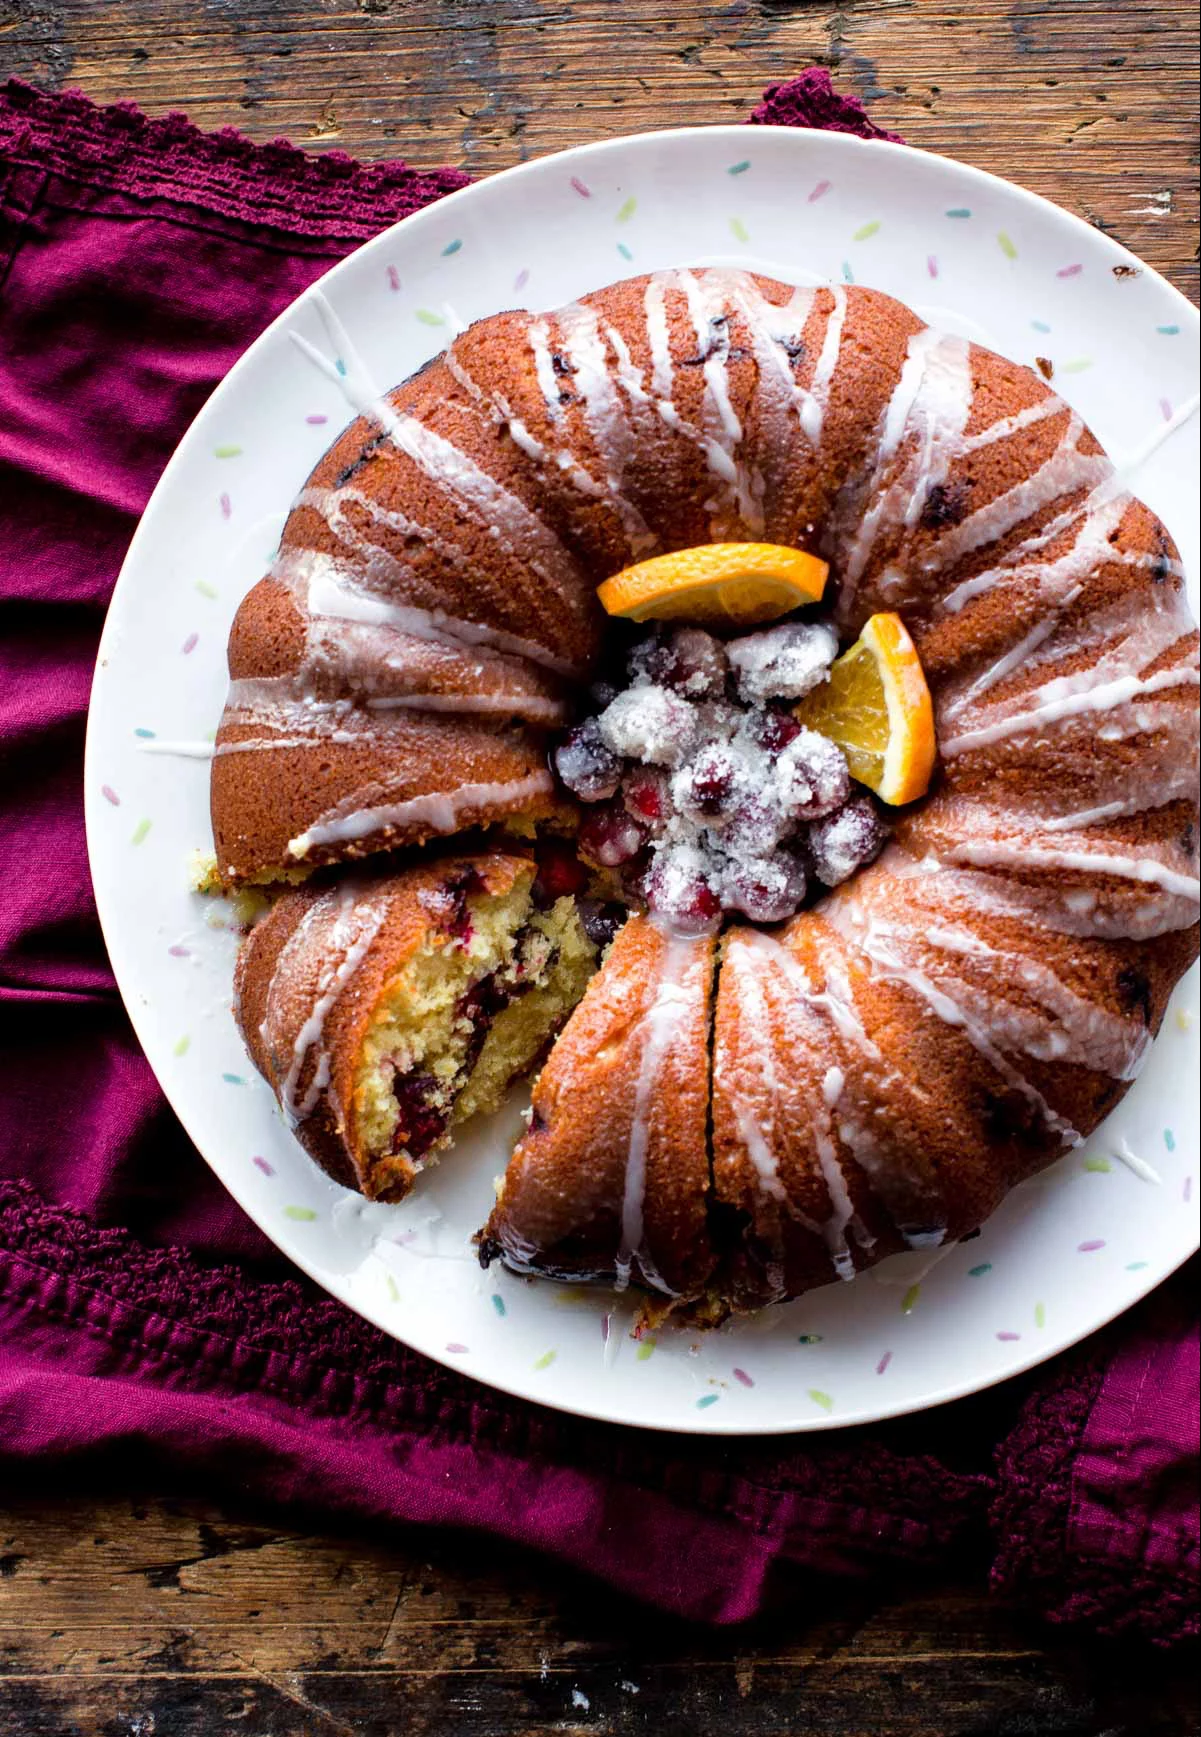
3. Cranberry Orange Bundt Cake: A Lesson in a Perfect Release
Everyone loves a Bundt cake. The pan does all the fancy decorating for you! But those beautiful, intricate designs are also their greatest weakness. A stuck Bundt cake is a true baker’s nightmare.
Time Commitment: About 25 minutes of prep, 50-60 minutes to bake, and a crucial 10-minute cool-down before flipping.
Tools You’ll Need: A 10-cup Bundt pan, a pastry brush, and a long wooden skewer for testing doneness.
The Science of the No-Stick Bundt
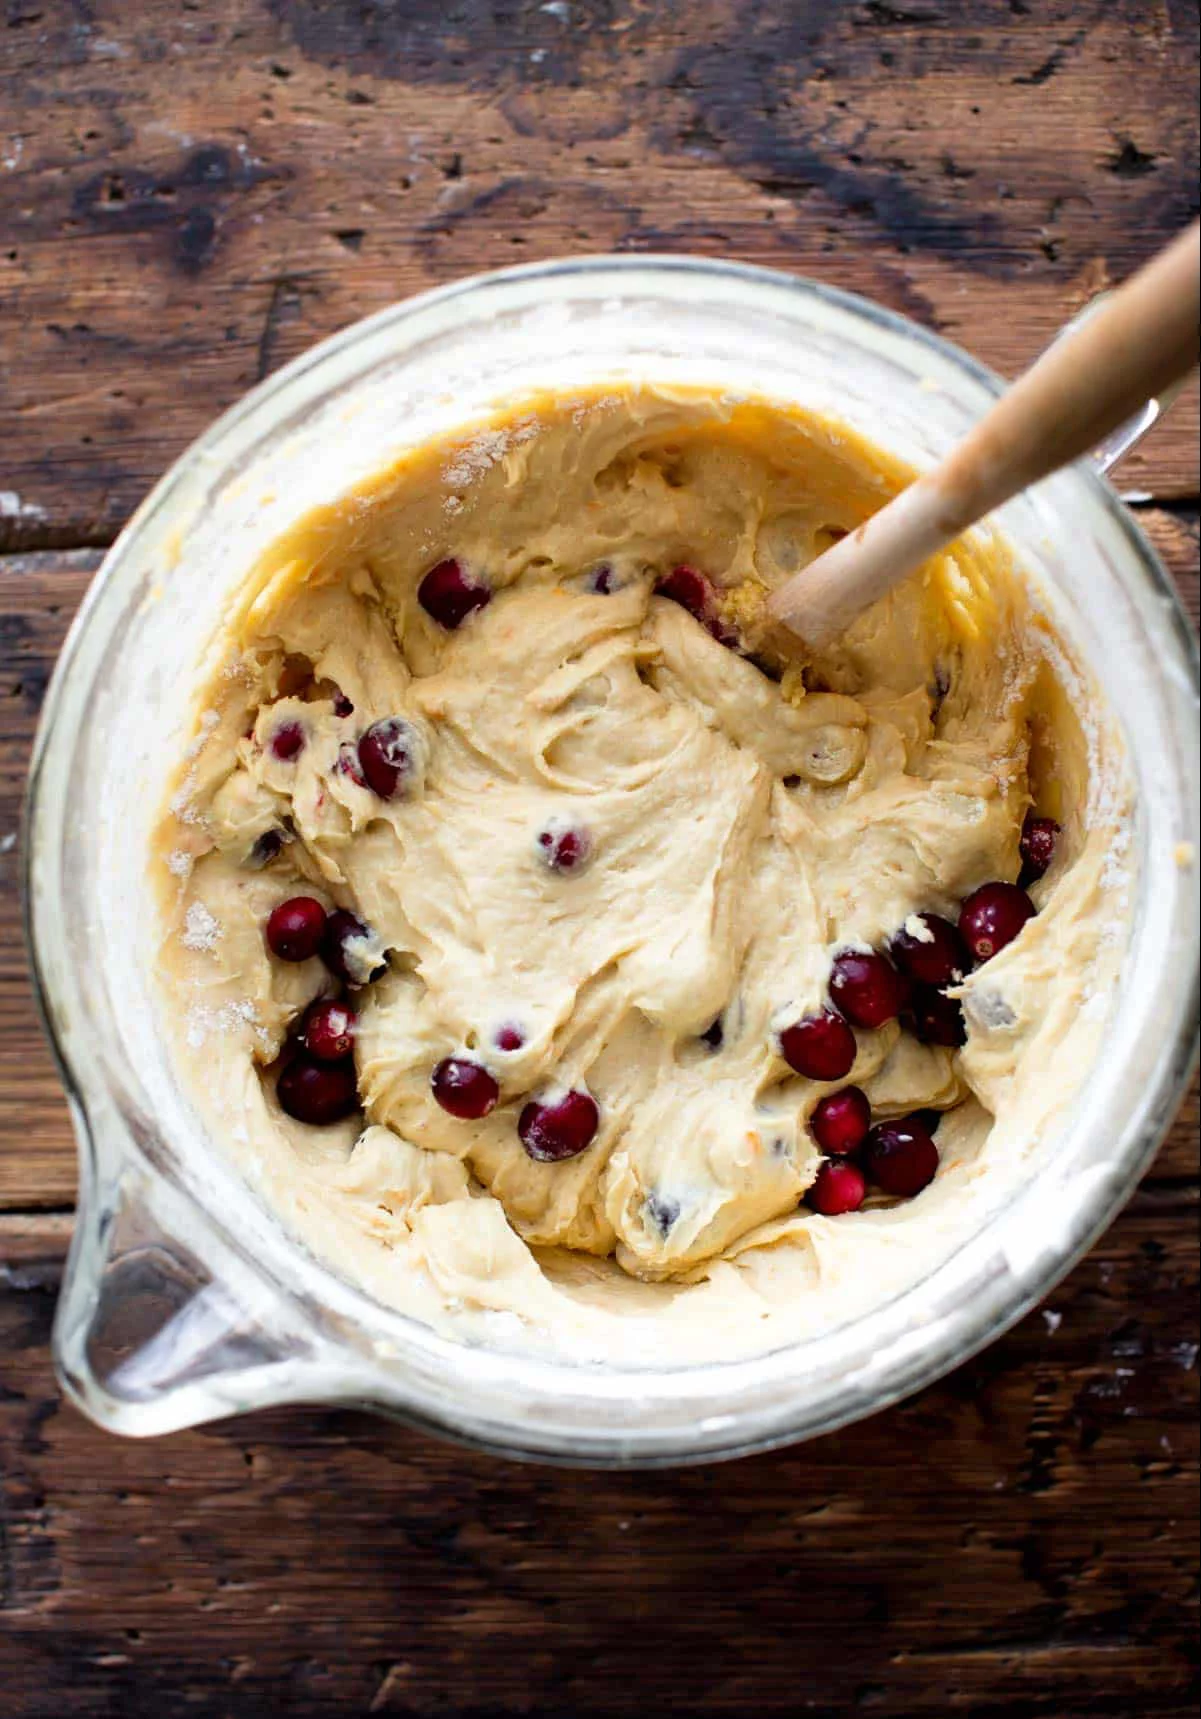
A successful Bundt is 90% in the prep. Those little crevices need a solid barrier. The goal is to create a non-stick layer of fat and flour. As for the fruit, the challenge is gravity. Heavy, wet cranberries want to sink. Tossing them in a bit of flour absorbs some surface moisture and creates friction, helping to suspend them in the batter as it bakes.
Ingredients for Cranberry Orange Bundt Cake
- All-Purpose Flour: 375g (3 cups), plus 1 tablespoon for the cranberries
- Baking Powder: 7.5g (1 ½ teaspoons)
- Baking Soda: 2.5g (½ teaspoon)
- Salt: 3g (½ teaspoon)
- Unsalted Butter, softened: 226g (1 cup or 2 sticks)
- Granulated Sugar: 300g (1 ½ cups)
- Large Eggs: 150g (3), at room temperature
- Pure Vanilla Extract: 5ml (1 teaspoon)
- Zest of 2 large oranges
- Fresh or Frozen Cranberries: 200g (1 cup)
- Buttermilk: 120ml (½ cup), at room temperature
- Freshly Squeezed Orange Juice: 120ml (½ cup)
The No-Fail Bundt Method
- The Ultimate Pan Prep: This is THE most important step. Use a pastry brush to paint every single nook and cranny of your Bundt pan with about a tablespoon of softened butter or shortening. Then, spoon in 2 tablespoons of flour, tilt and tap the pan until it’s fully coated, then tap out the excess.
- Preheat: Set your oven to 350°F (175°C).
- Combine Dry Stuff: Whisk together the 3 cups of flour, baking powder, baking soda, and salt.
- Prep Fruit and Zest: Toss the cranberries with that extra tablespoon of flour. Zest the oranges right into your main mixing bowl to infuse the sugar with all those fragrant oils.
- Cream Butter, Sugar, and Zest: Add the softened butter and sugar to the zesty bowl. Beat on medium-high for 4-5 minutes until light and fluffy.
- Add Eggs and Vanilla: Beat in the eggs one at a time, then the vanilla.
- Alternate Liquids and Drys: Combine the buttermilk and orange juice. On low speed, add the dry ingredients in three additions, alternating with the liquid in two additions (start and end dry).
- Fold in Fruit: Gently fold in the flour-coated cranberries.
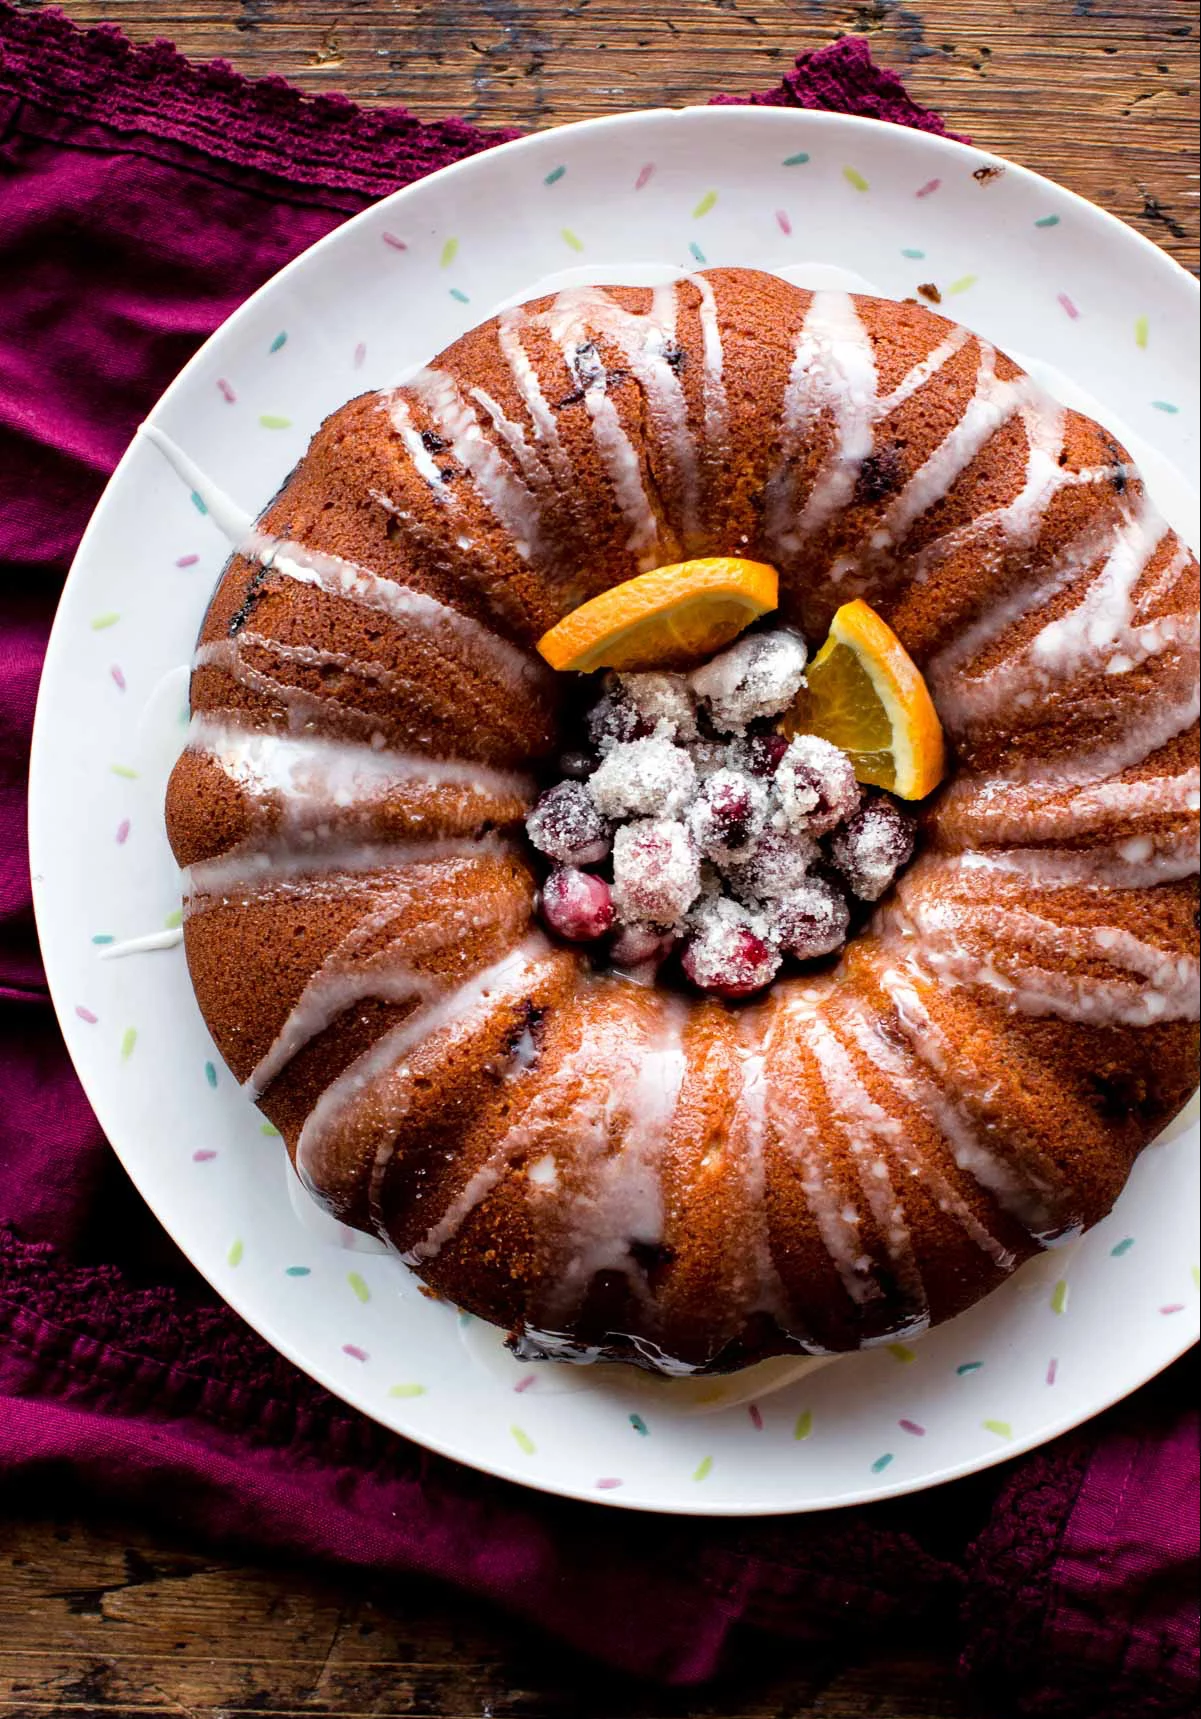
- Bake: Spoon the thick batter into your prepared pan. Bake for 50-60 minutes, until a long wooden skewer comes out clean.
- The Critical Cool-Down: Let the pan cool on a wire rack for exactly 10 minutes. No more, no less. This lets the cake set up but not start sticking. Then, confidently invert it onto the rack.
What If It Sticks? (And Other Tips)
From my experience, patience is key. I once got impatient and tried to flip a Bundt after only 5 minutes… and had to perform ‘cake surgery’ to piece the top back on for a family dinner. Trust me, wait the full 10 minutes!
- If a piece does stick: Don’t panic. Let the cake cool completely. You can often ‘glue’ the piece back on with a little glaze, and no one will ever know.
- A Simple Orange Glaze: For a perfect finish, just whisk 1 cup of powdered sugar with 2-3 tablespoons of fresh orange juice until it’s smooth and pourable. Drizzle it over the cooled cake.
- Fruit Options: Using frozen cranberries? Don’t thaw them! Just toss them in the flour while they’re still frozen.
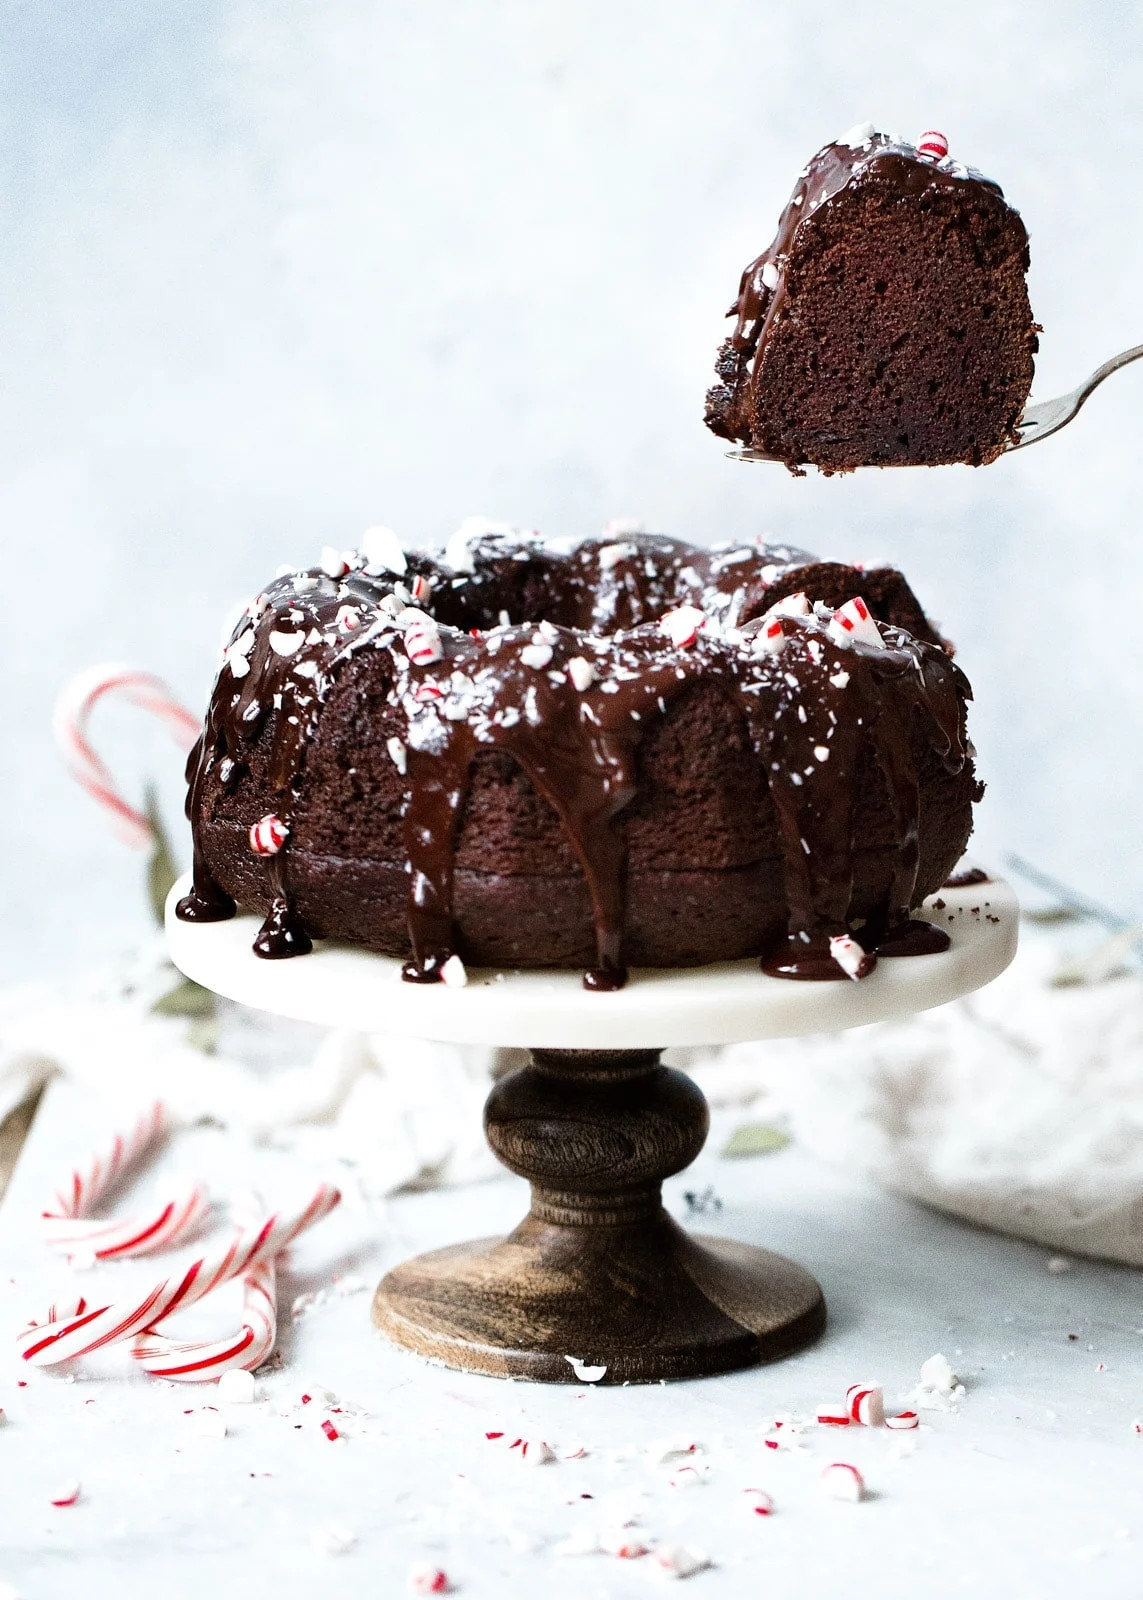
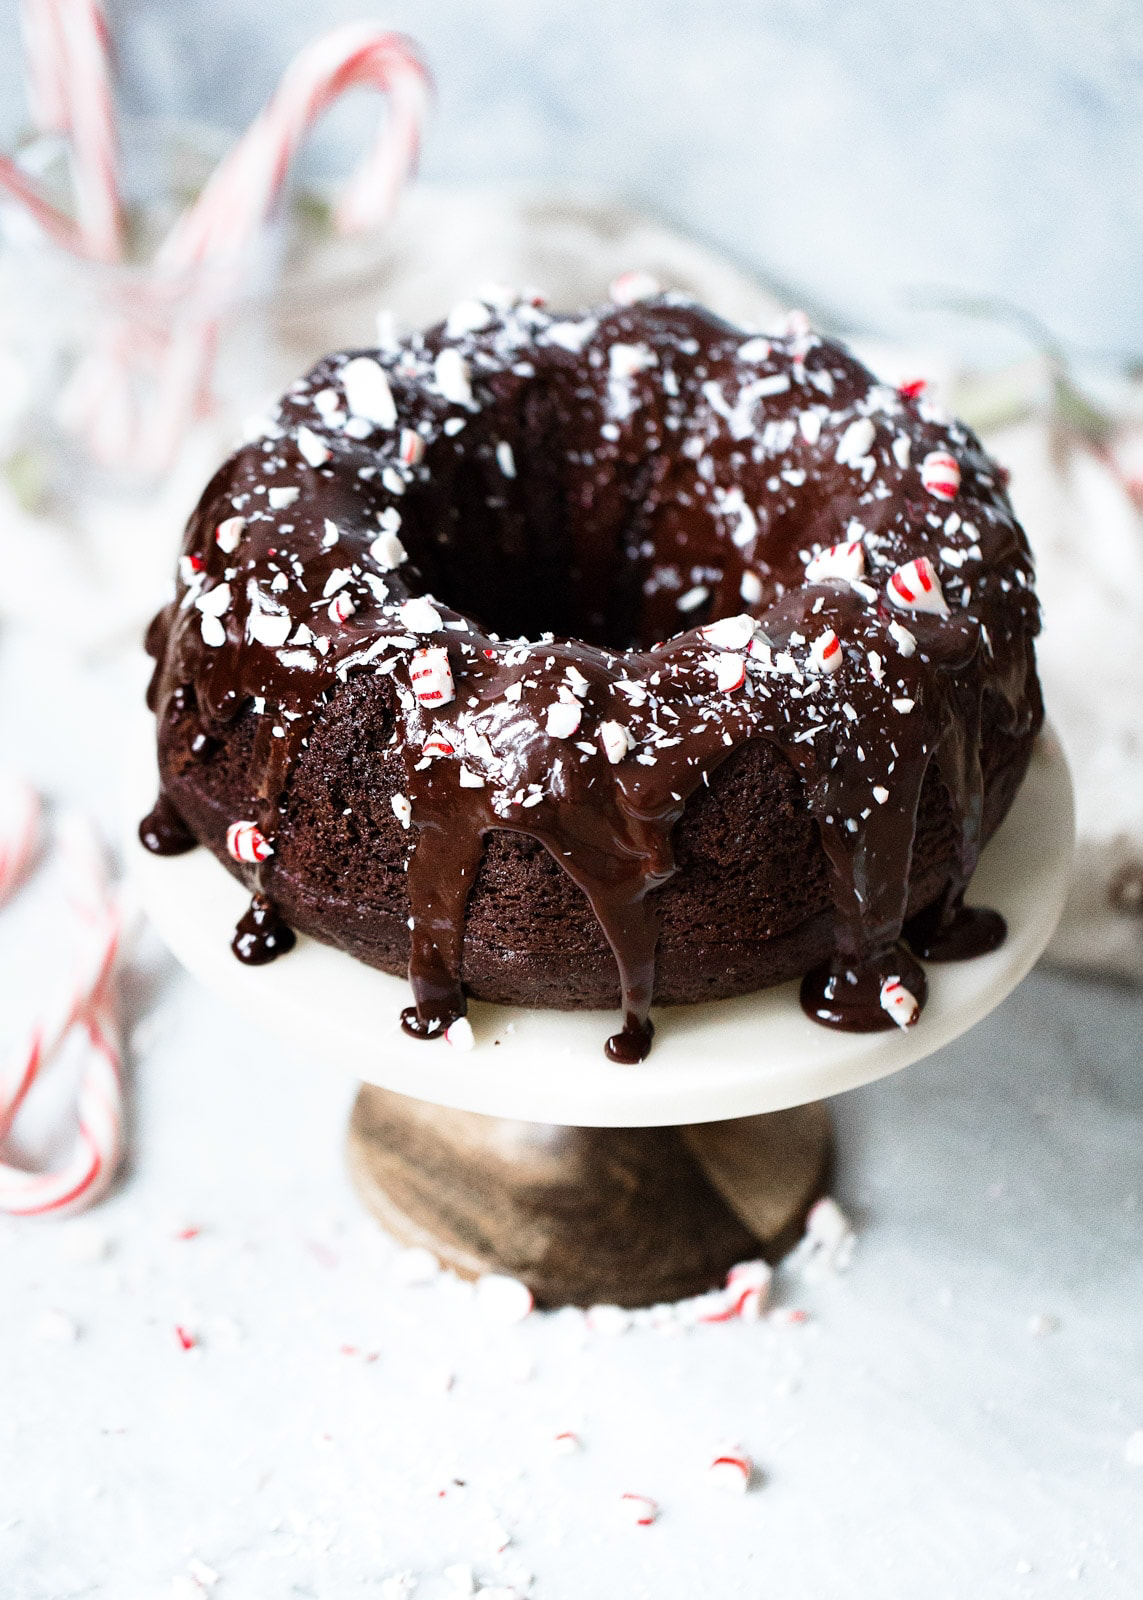
4. Decadent Chocolate Peppermint Cake: A Study in Flavor Depth
This last cake is a total showstopper. It has a deep, dark chocolate flavor brightened by a cool blast of peppermint. The secret to a truly amazing chocolate cake isn’t just using cocoa powder; it’s how you use it.
Time Commitment: Prep is a quick 15 minutes, bake time is 30-35 minutes, plus cooling and frosting time.
Tools You’ll Need: Two 9-inch round cake pans, parchment paper, a sifter or fine-mesh sieve.
The Science of Blooming Cocoa
Unsweetened cocoa powder can taste a bit harsh on its own. To unlock its full potential, you have to “bloom” it in hot liquid. The boiling water or coffee dissolves the cocoa particles and releases trapped flavor compounds, making the cake taste incredibly rich and complex. We also use oil instead of butter. Oil is 100% fat, which coats the flour and inhibits gluten, resulting in a ridiculously moist cake that stays fresh for days.
Ingredients for Chocolate Peppermint Cake
- All-Purpose Flour: 250g (2 cups)
- Granulated Sugar: 300g (1 ½ cups)
- Unsweetened Cocoa Powder: 65g (¾ cup), natural or Dutch-process
- Baking Powder: 7.5g (1 ½ teaspoons)
- Baking Soda: 7.5g (1 ½ teaspoons)
- Salt: 5g (1 teaspoon)
- Large Eggs: 100g (2), at room temperature
- Whole Milk: 240ml (1 cup), at room temperature
- Vegetable Oil: 120ml (½ cup)
- Pure Vanilla Extract: 10ml (2 teaspoons)
- Boiling Water or Hot Coffee: 240ml (1 cup)
For the Peppermint Buttercream
- Unsalted Butter, softened: 226g (1 cup)
- Powdered Sugar, sifted: 480g (4 cups)
- Peppermint Extract: 10ml (2 teaspoons)
- Heavy Cream or Milk: 45-60ml (3-4 tablespoons)
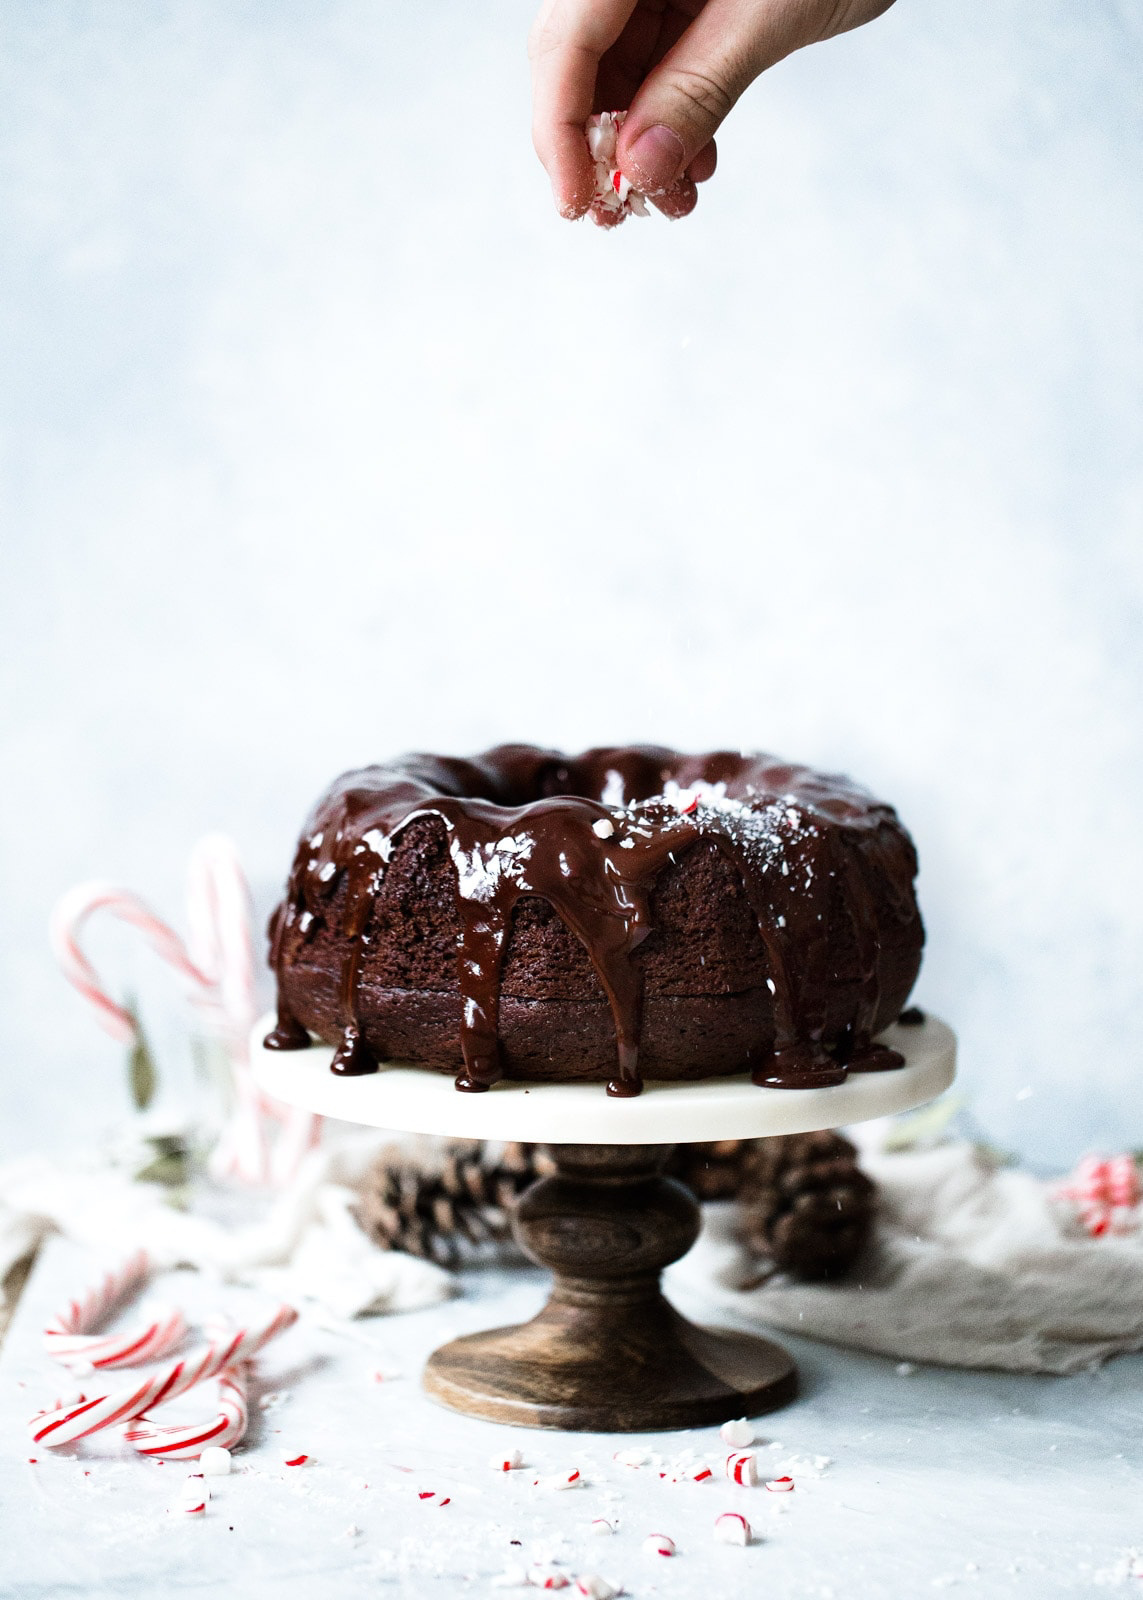
- Crushed Candy Canes for decoration
The Easy-but-Precise Method
- Prep and Preheat: Preheat your oven to 350°F (175°C). Grease, flour, and line two 9-inch round pans.
- Sift Dry Ingredients: In a large bowl, sift together the flour, sugar, cocoa powder, baking powder, baking soda, and salt. Sifting is extra important here to get rid of any cocoa lumps.
- Combine Wet Ingredients: In a separate bowl, whisk the eggs, milk, oil, and vanilla.
- Mix the Batter: Pour the wet into the dry. Beat on medium speed for about 2 minutes. The batter will be very thick.
- Bloom the Cocoa: Now, carefully pour the boiling water or coffee into the batter. Mix on low until it’s smooth. The batter will be very thin and liquidy—don’t worry, this is exactly right!
- Bake: Pour the batter evenly between the pans. Bake 30-35 minutes, until a toothpick comes out clean.
- Cool: Let the cakes cool in their pans for 10 minutes before turning them out onto a wire rack. They’re delicate, so be gentle.
Frosting and Final Tips
- Make the Buttercream: Beat the butter until creamy, then gradually add the sugar. Beat in the peppermint extract, then add the cream one tablespoon at a time until it’s smooth and spreadable.
- Assemble and Decorate: Frost your cooled cake. Press crushed candy canes onto the sides or top right before serving. If you add them too early, the moisture from the frosting makes the candy get sticky and ‘weep’ color everywhere.
- CRITICAL NOTE: Use peppermint extract, not peppermint oil. Peppermint oil is insanely concentrated and will make your frosting taste like toothpaste.
- Make it Simpler: Just like the white chocolate cake, you can bake this in a 9×13-inch pan for an easy sheet cake. Bake for 35-40 minutes and frost right in the pan once it’s cool.
A Final Note from My Kitchen
Baking these cakes is about so much more than just following steps. It’s about engaging all your senses—the feel of the batter coming together, the incredible smell of spices blooming in hot water, the satisfying sight of a perfect cake. These four recipes give you a solid foundation. Once you understand the techniques behind them, you can start to experiment and create with real confidence. Be patient with yourself, trust the process, and most importantly, enjoy every single delicious bite.
Inspirational Gallery
The Flour Trap: Once you add the flour, your mixer’s job is almost done. Mix only until the last streaks disappear. Over-mixing develops gluten, which is great for bread, but it’s the enemy of a tender cake, leading to a tough, rubbery crumb. Gentle hands make for a delicate texture.
Did you know? The intense, dark color of a ‘Black Magic’ or Devil’s Food cake often comes from using Dutch-processed cocoa powder. This cocoa has been treated to neutralize its acidity, which results in a darker hue and a smoother, less bitter flavor than natural cocoa.
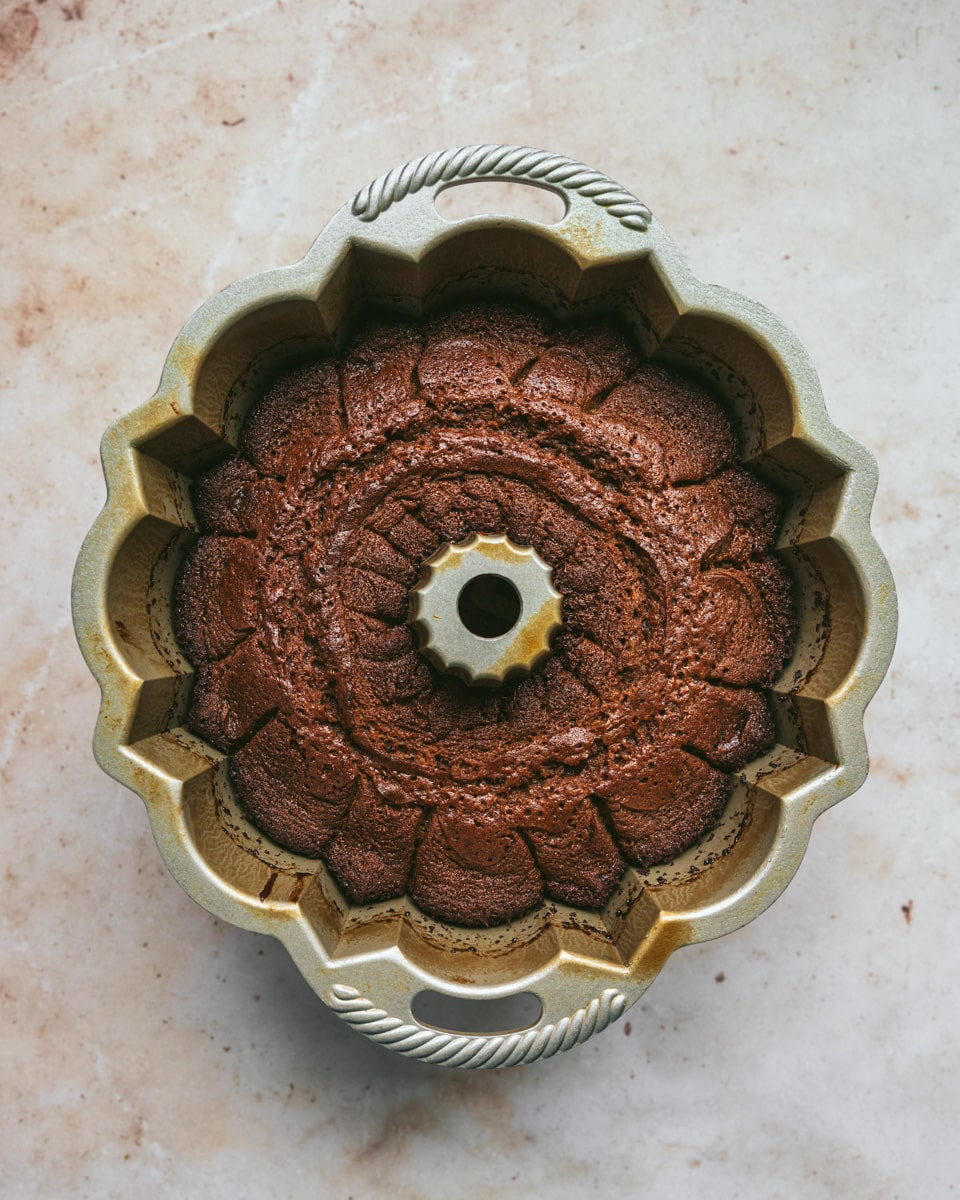
How do I get those sharp, professional-looking details on my bundt cake?
It’s often down to the pan itself. Heavy-duty cast aluminum pans, like the iconic ones from Nordic Ware, are worth the investment. They conduct heat far more evenly than thinner, standard pans. This ensures every nook and cranny of the design bakes and browns uniformly, resulting in a crisp, defined pattern that releases cleanly.
Elevate your presentation with simple, elegant garnishes that scream winter.
- Sugared Cranberries: Dip fresh cranberries in a simple sugar syrup, let them get tacky on a wire rack, then roll in caster sugar for a frosted look.
- Rosemary ‘Trees’: A few fresh rosemary sprigs tucked into white frosting look just like miniature snow-dusted pine trees.
- Chocolate Shards: Spread melted dark chocolate thinly on parchment paper, sprinkle with crushed peppermint candies, and break into artistic shards once set.
The moment you begin warming spices like ginger, cinnamon, and allspice on the stove or creaming them with butter, your kitchen undergoes a transformation. This aromatic prelude is a crucial part of the experience, a sensory signal that comfort, warmth, and celebration are just an oven’s-length away.
High-Quality White Chocolate: It should be ivory, not bright white. A yellowish tint indicates a high content of cocoa butter, the key ingredient for a smooth, creamy melt. Brands like Valrhona (specifically their Ivoire 35%) or Callebaut’s W2 are excellent choices that won’t turn grainy when heated carefully.
Budget-Friendly White Chocolate: If you’re using baking chips, Ghirardelli is a reliable supermarket option that balances quality and price, containing real cocoa butter for a better texture than most confectionary coatings.
- A perfectly clean release from the pan, every time.
- Every intricate detail of your cake’s design is preserved.
- No more heartbreaking moments of a cake stuck in pieces.
The secret? A homemade pan release paste. Whisk together equal parts (by volume) of all-purpose flour, vegetable shortening, and vegetable oil to create a ‘baker’s goop’. Brush a thin layer into your pan with a pastry brush—it works better than any spray.
Don’t throw away cake trimmings! If you level the tops of your cakes before frosting, save those scraps. Crumble them and mix with a little leftover frosting to create delicious cake pops. Alternatively, layer the cake crumbles in a glass with whipped cream and fruit compote for an impromptu, rustic trifle.


