My Pro Secrets for Veggie Appetizers That Steal the Show
I’ve spent years and years in professional kitchens, catering more events than I can count. I’ll never forget one of my first big gigs—a swanky cocktail party for a tech company. We had these gorgeous beef sliders and perfect shrimp skewers, but I completely blanked on the vegetarian options. At the last minute, I threw together some basic cheese and crackers. The host was kind, but I caught that flash of disappointment on a few guests’ faces. That night, I made a deal with myself: vegetarian food would never, ever be an afterthought on my watch. It would be so incredible that even the most dedicated carnivores would be elbowing their way back for more.
In this article
- First, The Theory: What Makes an Appetizer Unforgettable?
- Technique 1: The Art of the Creamy, Savory Cheese Ball
- Technique 2: The Secret to Crispy (Never Greasy) Fried Bites
- Technique 3: Nailing Homemade Soft Pretzel Bites
- My 5-Minute Lifesaver Appetizer
- Putting It All Together: A Pro’s Planning Guide
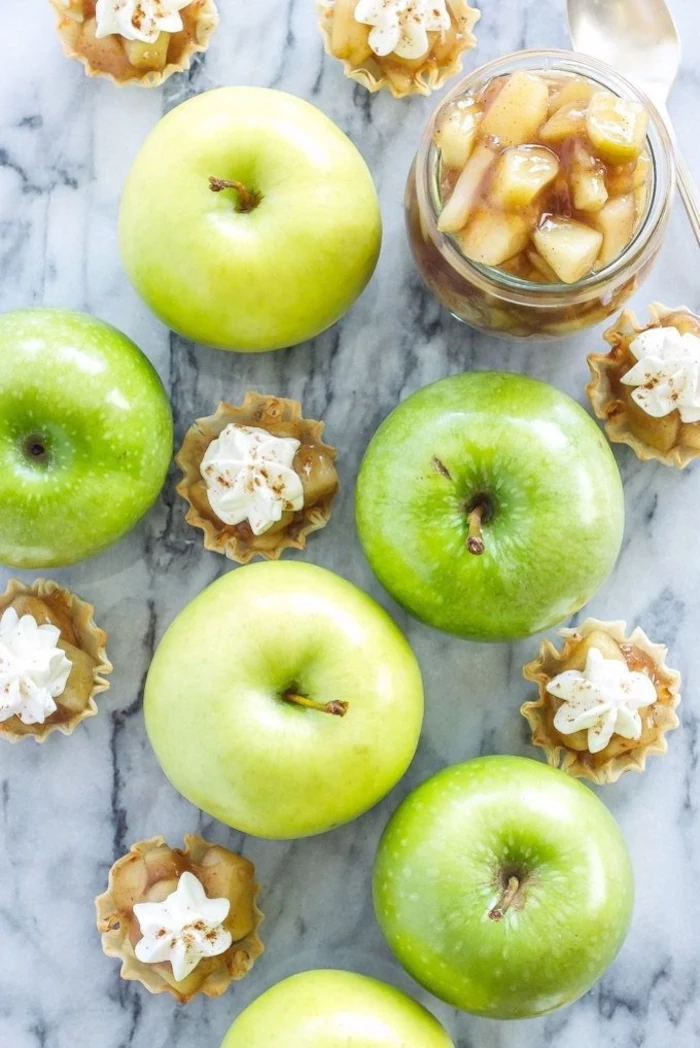
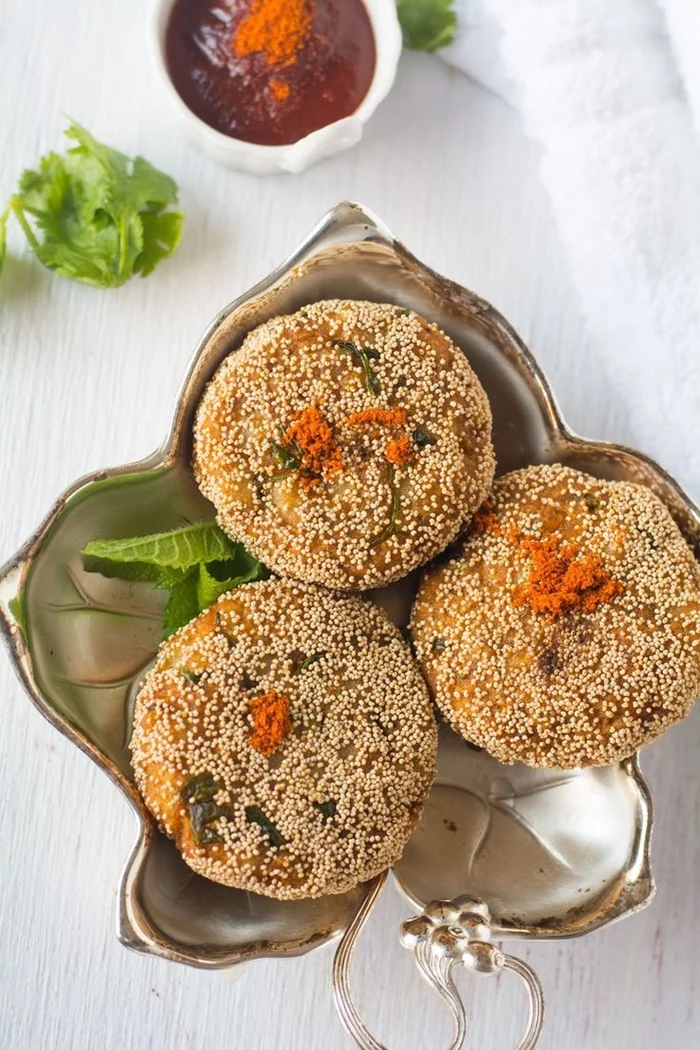
- Bonus Application: Sweet Potato Rounds with Savory Cashew Cream
- Inspiration Gallery
And let me tell you, creating truly great vegetarian appetizers isn’t about just leaving out the meat. It’s a craft. It’s all about building layers of flavor, playing with textures, and really understanding how ingredients sing together. Over time, I’ve boiled it down to a set of core techniques that are the foundation for nearly every knockout starter I serve. This isn’t about just following a recipe blindly; it’s about learning the why so you can go off-script and create your own showstoppers. Today, I’m pulling back the curtain on that professional approach.
First, The Theory: What Makes an Appetizer Unforgettable?
Before we even think about ingredients, let’s talk strategy. In my world, every successful appetizer has to nail three things: flavor, texture, and appearance. A guest might not be able to pinpoint why they love a bite, but it’s almost always because these three elements are in perfect harmony.
Flavor Balance is Key: Your taste buds get bored easily. An appetizer that’s just rich and savory feels heavy and one-note. The magic happens when you get a little contrast going:
- Salty: Think feta, olives, capers, or just a proper hand with the salt shaker.
- Sweet: This can come from roasted veggies like carrots or sweet potatoes, a bit of fruit, or a drizzle of honey or maple syrup.
- Acidic: This is the secret weapon! A squeeze of lemon, a splash of vinegar, or some bright tomatoes cut through richness and make everything taste brighter.
- Rich (Umami): That deep, savory satisfaction you get from mushrooms, roasted garlic, or aged cheeses like Parmesan.
Don’t Forget Texture: This is what makes food fun to eat. A plate of mush is just sad. I always aim for a mix of sensations.
- Crunchy: Toasted nuts, crispy breadings, or fresh veggie sticks.
- Creamy: Smooth dips, luscious cheeses, or pureed veggies.
- Chewy: Things like baked dough or sun-dried tomatoes.
- Tender: Perfectly cooked vegetables that yield with a gentle bite.
Looks Matter: It’s a cliché because it’s true—we eat with our eyes first. A simple sprinkle of fresh herbs, a swirl of sauce, or a colorful garnish signals that you care. It makes the food feel special before anyone even takes a bite.
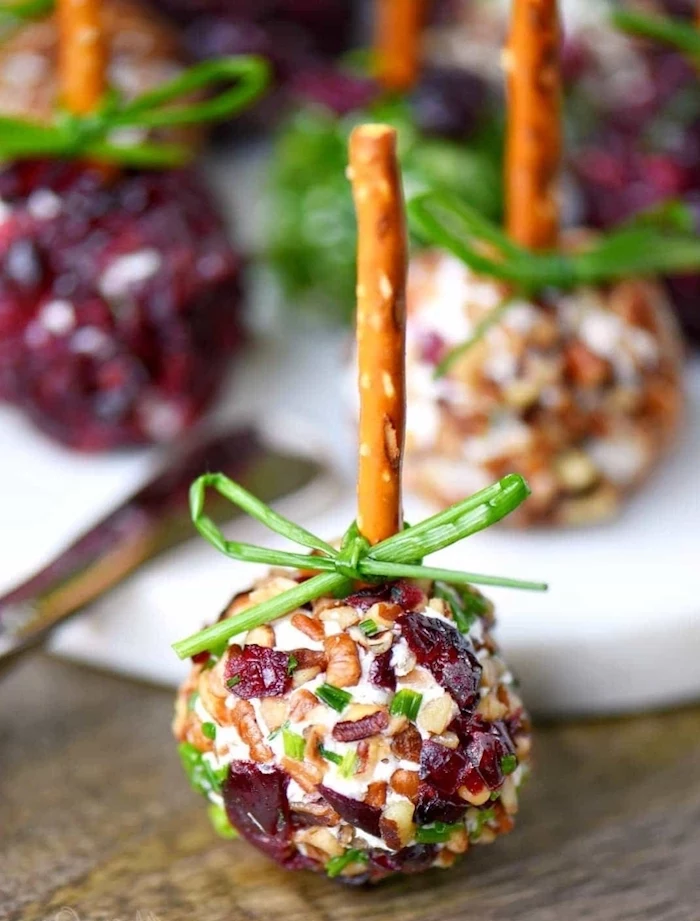
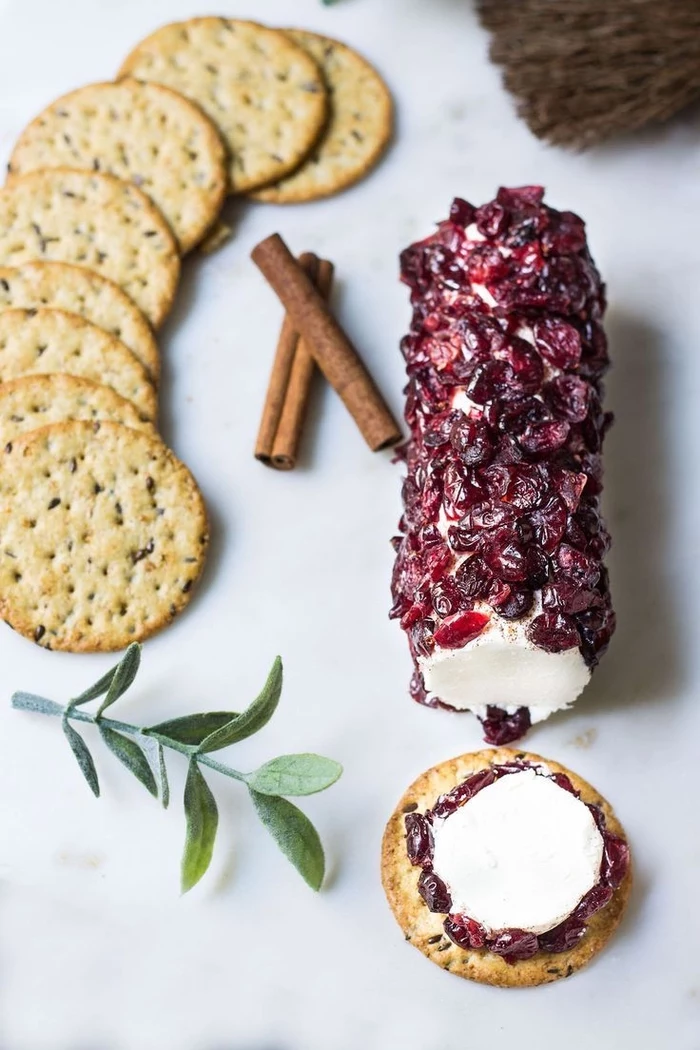
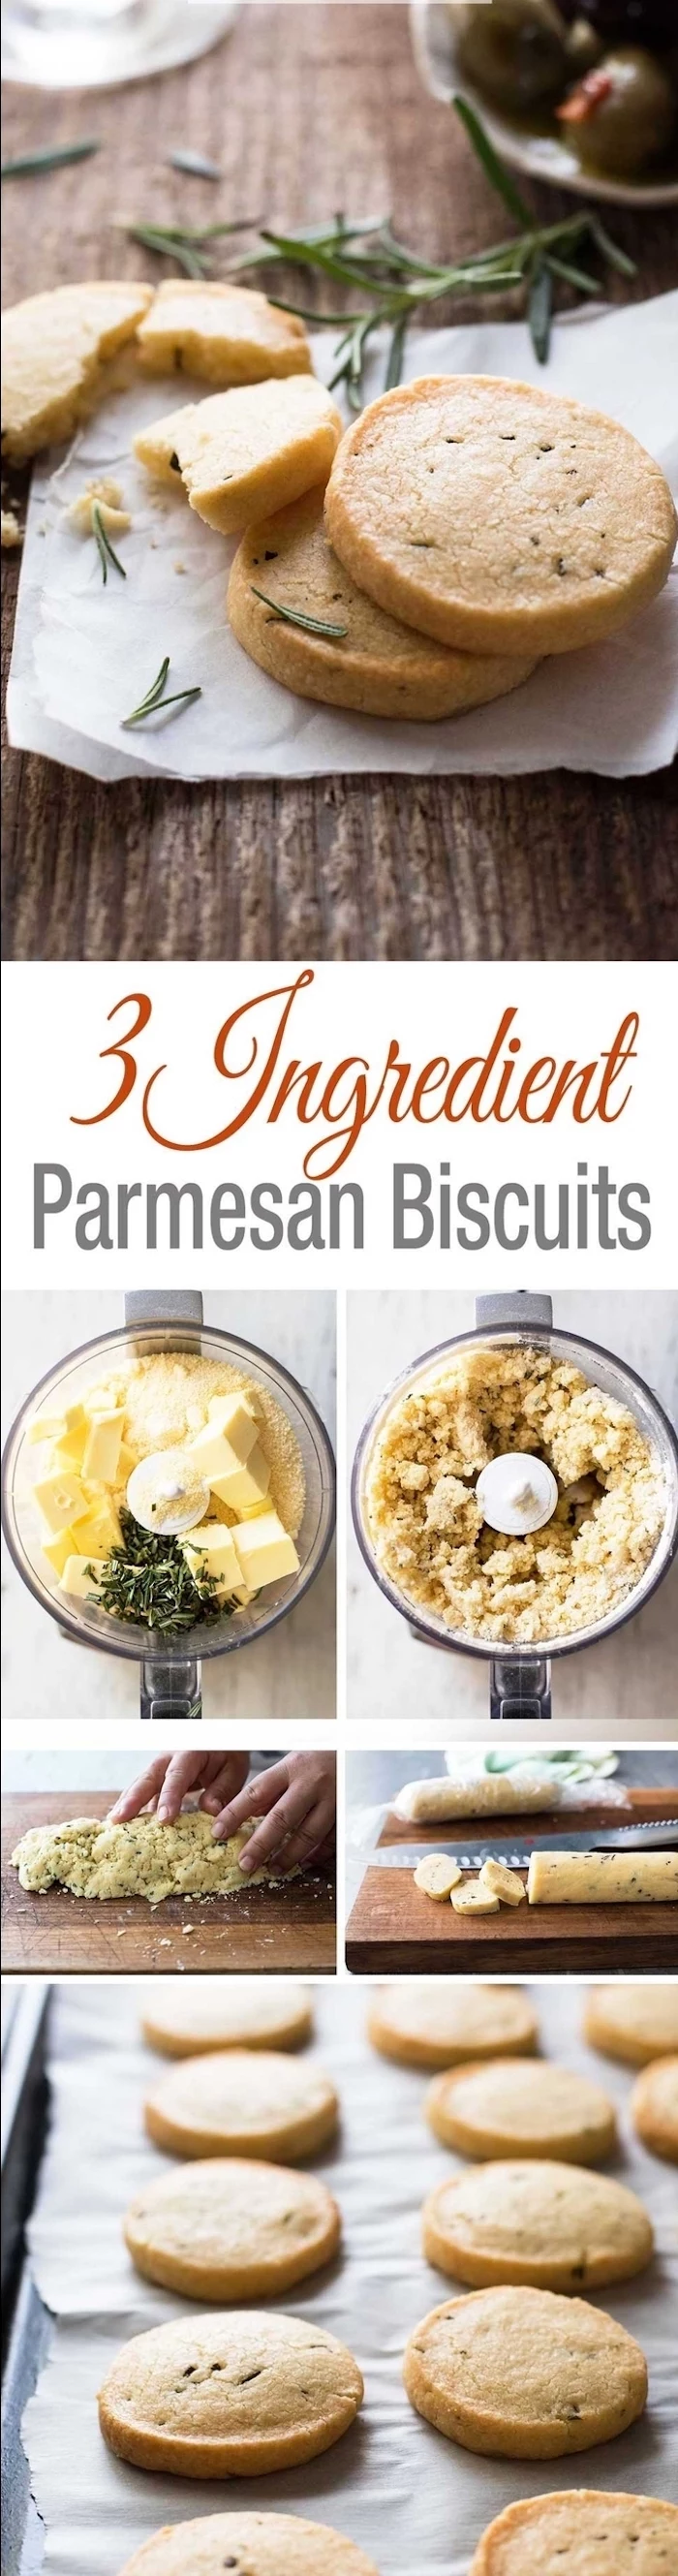
Technique 1: The Art of the Creamy, Savory Cheese Ball
Ah, the cheese ball. It’s a classic for a reason, but let’s be honest, it’s often a dense, sad lump. The secret to a professional-grade cheese spread isn’t a long list of fancy ingredients; it’s about temperature and balance. Here’s how we elevate it.
The Pro Method: A Cheese Ball That’s Actually Light and Creamy
The Why: Cream cheese is an emulsion. When it’s cold, the fat is solid, and trying to beat it will just give you lumps. You need it at room temperature so the fat softens, which allows you to whip air into it. That’s the key to a light, fluffy texture. Then, we add something acidic like Greek yogurt or sour cream. It’s not just for tang—it cuts through the fat, making the whole thing feel less heavy and more delicious.
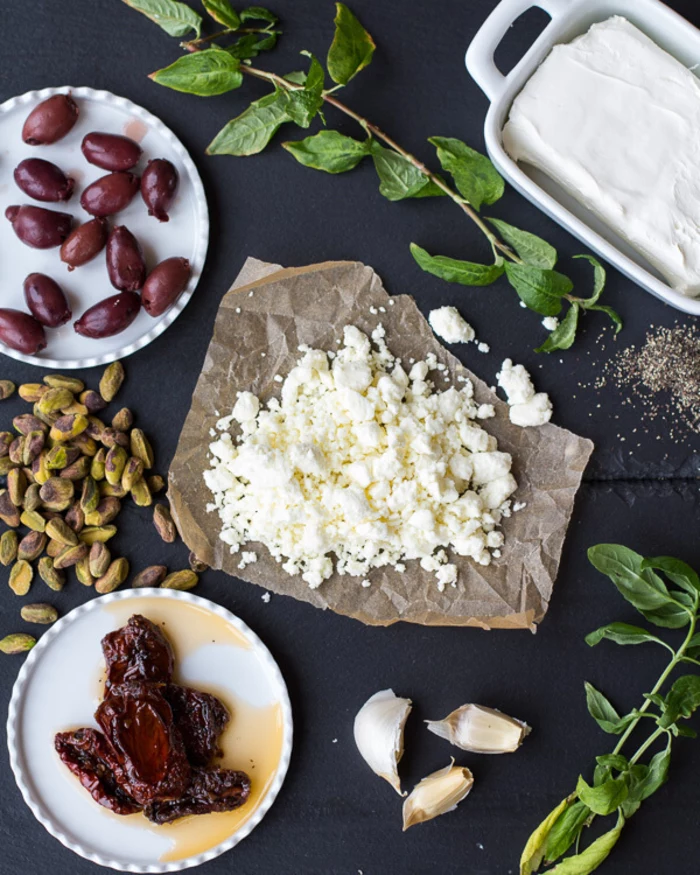
My Go-To Base Recipe:
- 16 oz (two blocks) full-fat cream cheese, left on the counter for at least 2 hours. Seriously, don’t try to soften it in the microwave; it will melt unevenly.
- 4 oz soft goat cheese or crumbled feta. Goat cheese adds a wonderful tang, while feta brings a salty punch.
- 1/4 cup full-fat Greek yogurt or sour cream.
- 1 whole head of roasted garlic (I’ll show you how below).
- 1/2 teaspoon kosher salt & 1/4 teaspoon black pepper.
Good to know: All in, the ingredients for a really good cheese ball will probably run you between $15 and $20, but it makes a generous amount and you’ll have leftover herbs and spices for other projects!
The Roasting Trick:
Preheat your oven to 400°F (200°C). Slice the top off a head of garlic, just enough to expose the cloves. Pop it on a small piece of foil, drizzle with a little olive oil, and wrap it up. Roast for 30-40 minutes until the cloves are golden and soft enough to squeeze out like toothpaste. This transforms the garlic from sharp and pungent to sweet and deeply savory. Let it cool completely. You can do this a day or two ahead to save time.
Mixing and Forming:
- In a stand mixer (or with a hand mixer), beat the room-temp cream cheese on medium for about 2 minutes until it looks light and totally smooth. Don’t forget to scrape down the bowl.
- Squeeze in that cooled, roasted garlic paste. Add your goat cheese, Greek yogurt, salt, and pepper. Mix on low to combine, then bump it up to medium for one more minute.
- Here’s a key step: stir in your chunky bits by hand with a spatula. This keeps them intact. I love adding about 1/4 cup of chopped sun-dried tomatoes and 2 tablespoons of fresh chives.
- Scrape the mix onto a big piece of plastic wrap and use the wrap to shape it into a ball or a log. Twist the ends to make it tight.
- Crucial step: Let it chill in the fridge for at least 4 hours, but overnight is even better. This lets the flavors marry and helps the ball get firm enough to coat without making a mess.
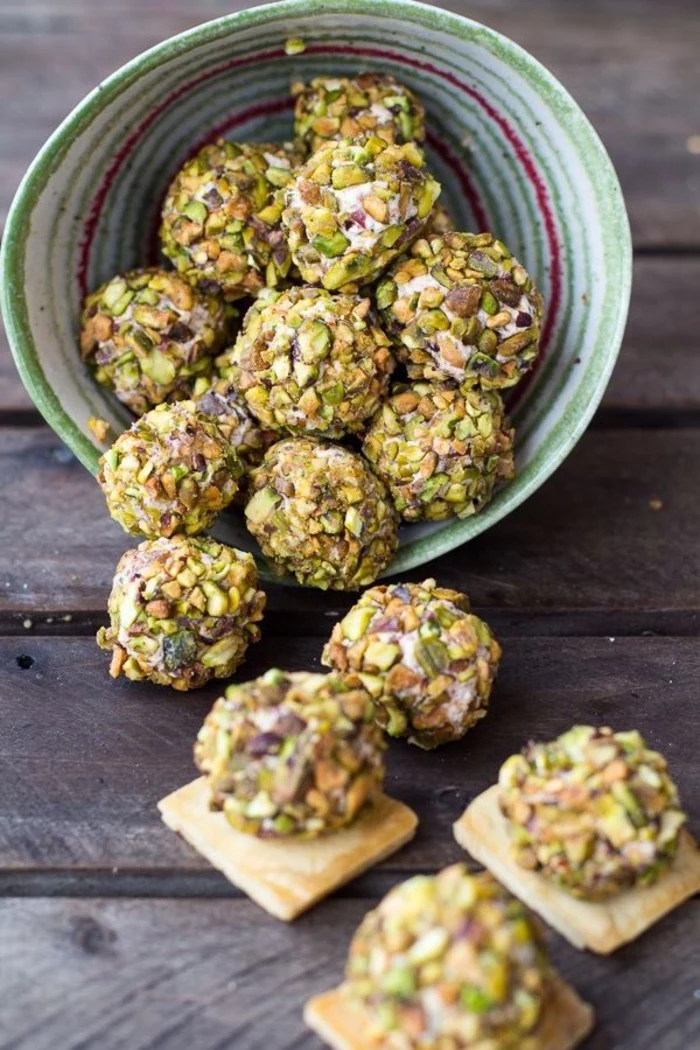
Coating and Serving:
Just before you’re ready to serve, unwrap the firmed-up cheese ball and roll it in your coating. For a fantastic texture and flavor combo, I use a mix of finely chopped toasted pecans, fresh parsley, and a little flaky sea salt. Serve it with sturdy crackers or slices of baguette.
Make-Ahead & Substitution Lifesavers:
- Make-Ahead: You can make the cheese ball (uncoated) up to 3 days in advance and keep it wrapped in the fridge. But for the love of all things crunchy, do NOT coat it until you’re about to serve. A friend of mine learned this the hard way—the nuts get soft and soggy, and you lose that amazing texture contrast.
- Substitutions: Not a fan of goat cheese? No worries. An herbed cheese spread like Boursin is a fantastic swap. You could also use an equal amount of sharp white cheddar, just make sure to grate it finely. For a nut-free version, try rolling the ball in a mix of toasted everything bagel seasoning and chopped fresh chives. It’s a total winner.
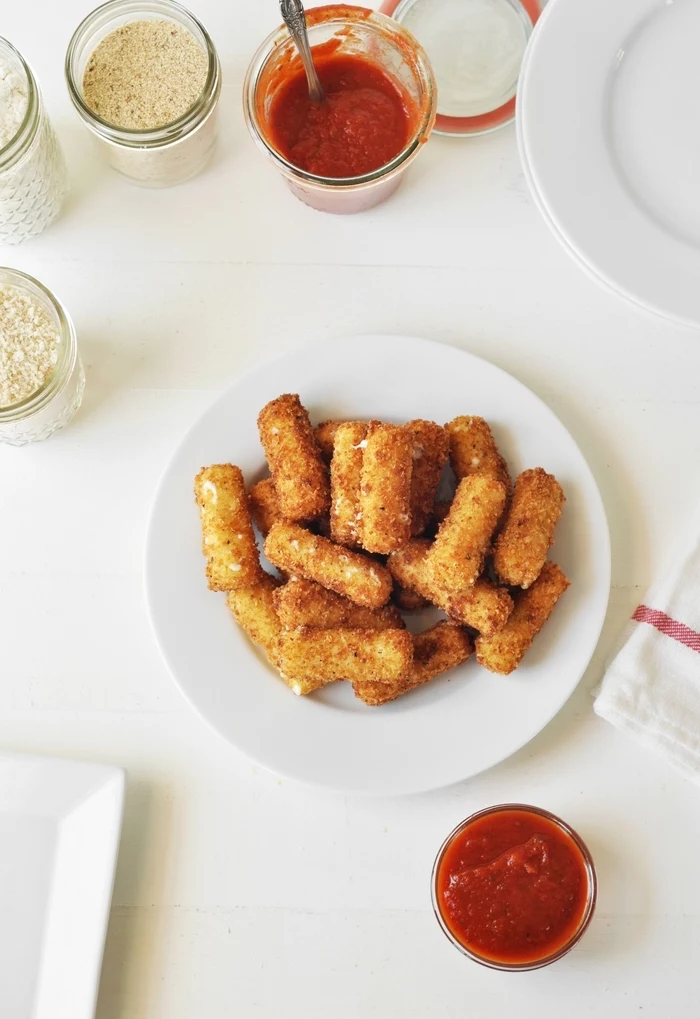
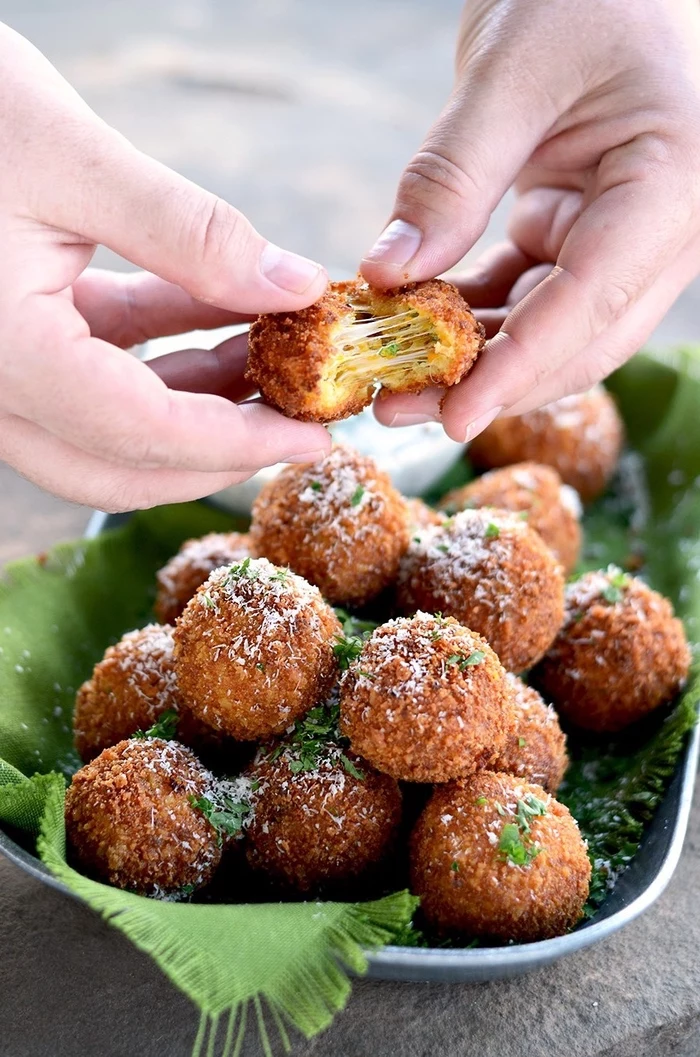
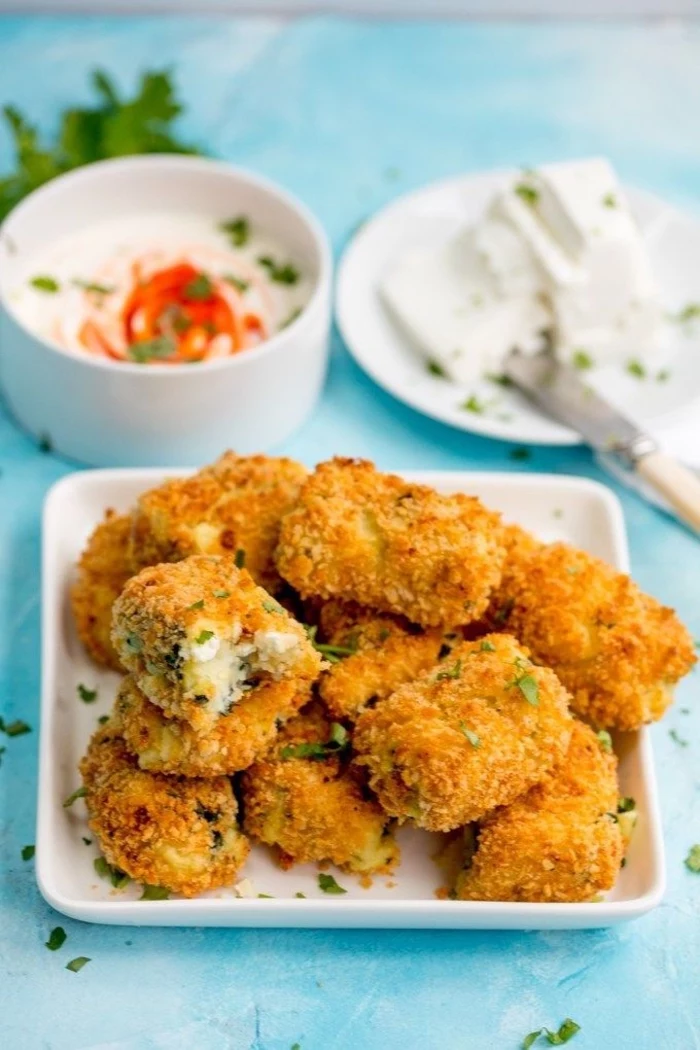
Technique 2: The Secret to Crispy (Never Greasy) Fried Bites
Let’s be real, anything breaded and fried is usually the first thing to disappear at a party. The goal is a perfect, golden-brown crust that shatters when you bite into it, giving way to a hot, tender interior. The enemy? A greasy coating that slides right off.
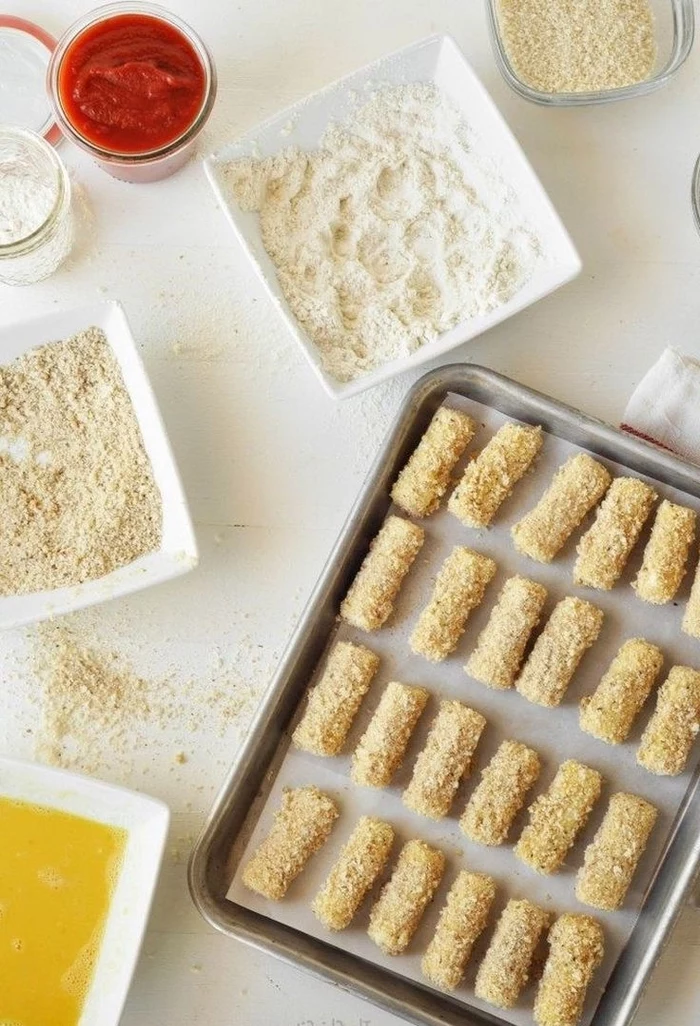
The Pro Method: The Three-Stage Breading Station
There’s a reason every professional kitchen on earth uses this method: it’s foolproof.
The Why: You need three layers for a crust that sticks. First, a light coating of flour gives the wet egg something to grab onto. Without it, the egg wash just slips off. The egg wash is the glue. And finally, the breadcrumbs provide that crunchy outer shell.
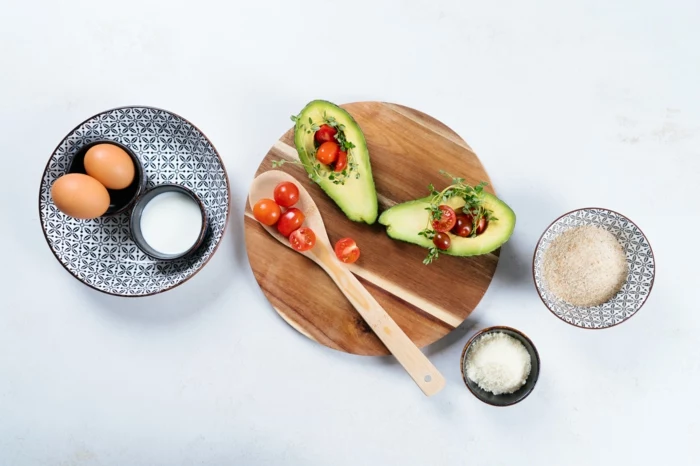
Setting Up Your Station (in three shallow pans):
- Pan 1 (Flour): About 1 cup of all-purpose flour, seasoned well with a teaspoon of salt and a half teaspoon of pepper.
- Pan 2 (Egg Wash): 2 large eggs beaten with 2 tablespoons of milk or water. This thins the egg just enough for a perfect, even coat.
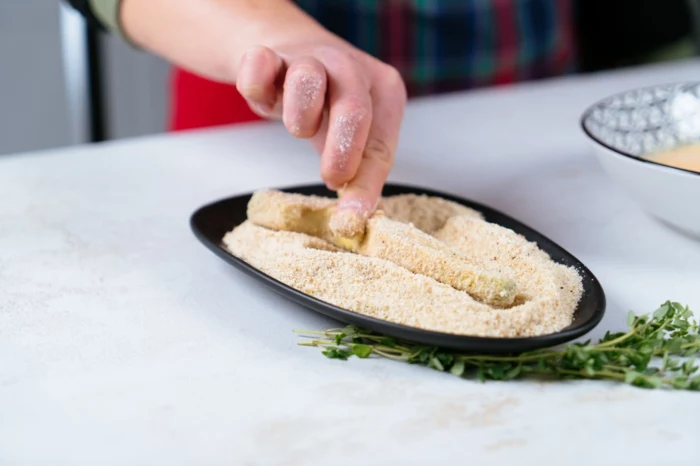
- Pan 3 (Breadcrumbs): 2 cups of Panko breadcrumbs. Quick tip: Panko is a Japanese-style breadcrumb you can find in the international or breading aisle of most supermarkets now. It’s flakier and absorbs less oil, which means it’s WAY crispier than the regular kind. I like to mix in 1/2 cup of grated Parmesan here for extra flavor.
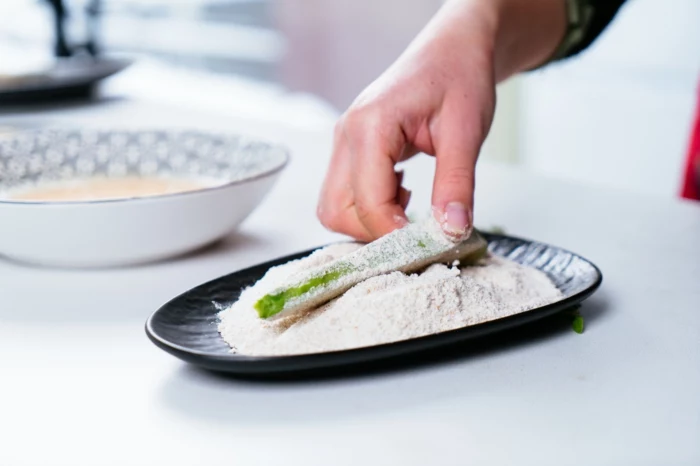
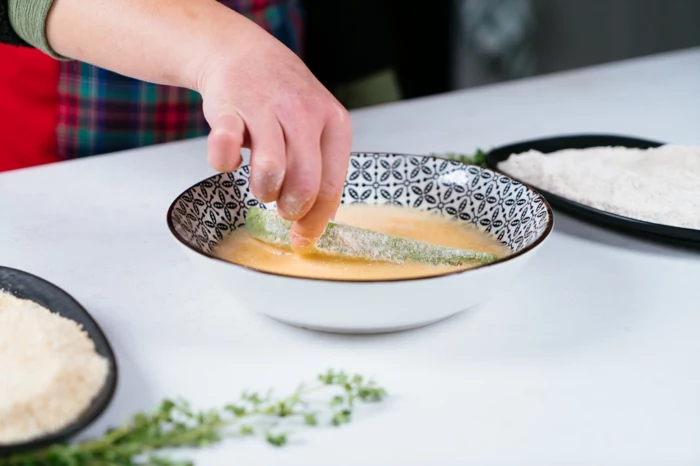
And now for the trick that will change your life: the ‘dry hand, wet hand’ method. Use one hand (your ‘dry hand’) to toss your food item in the flour and move it to the egg. Use your other hand (your ‘wet hand’) to coat it in the egg and lift it into the breadcrumbs. Then, go back to your dry hand to press the breadcrumbs on. This simple trick keeps you from breading your own fingers and making a clumpy mess.

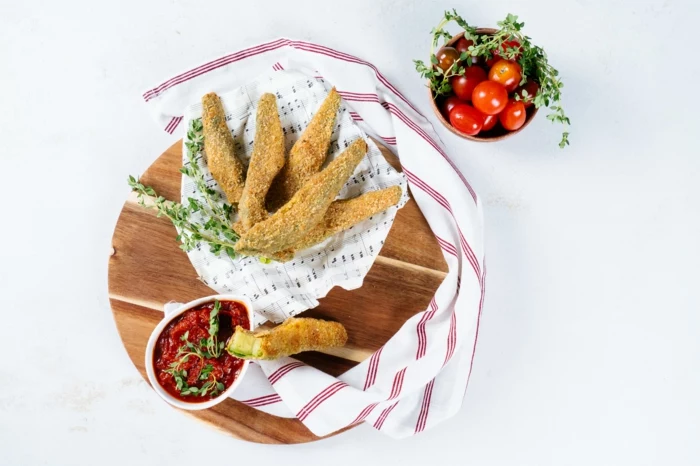
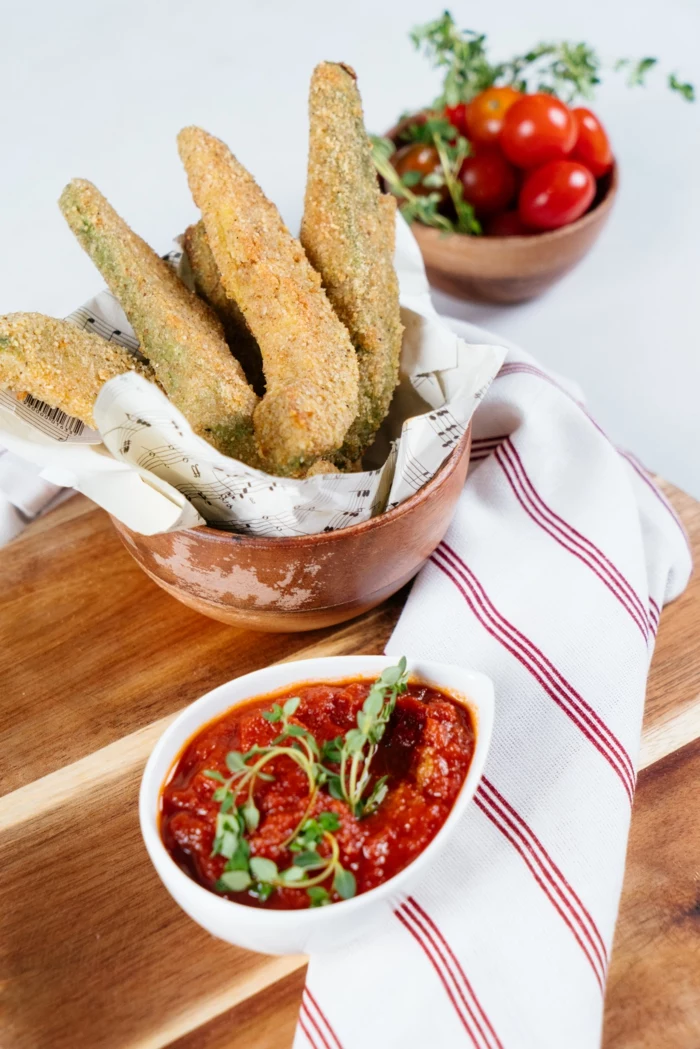
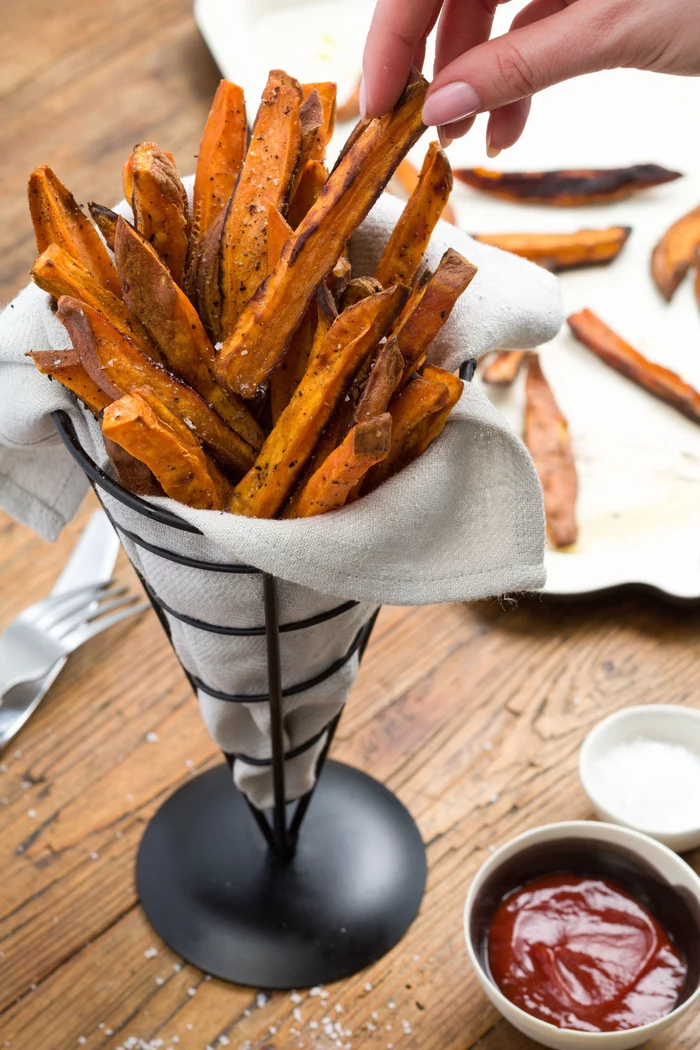
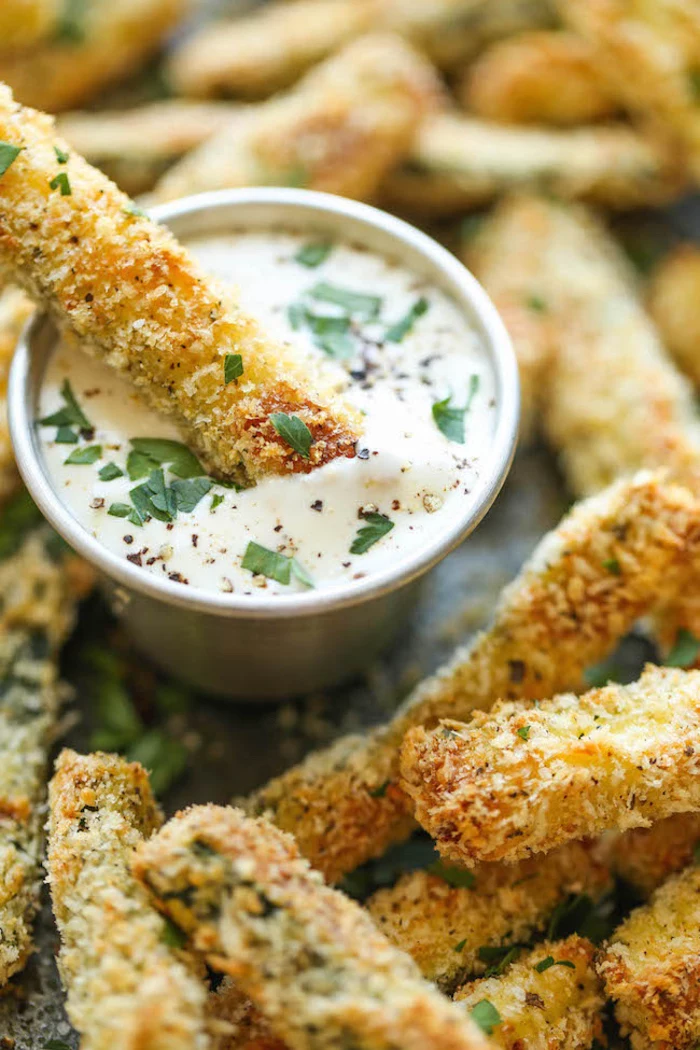
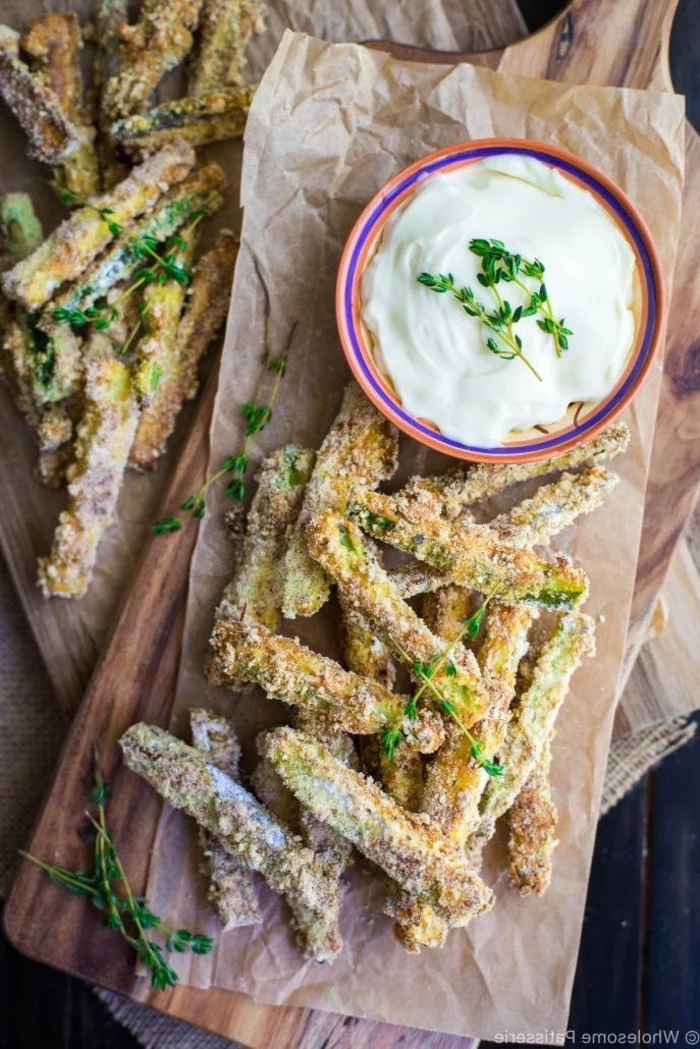
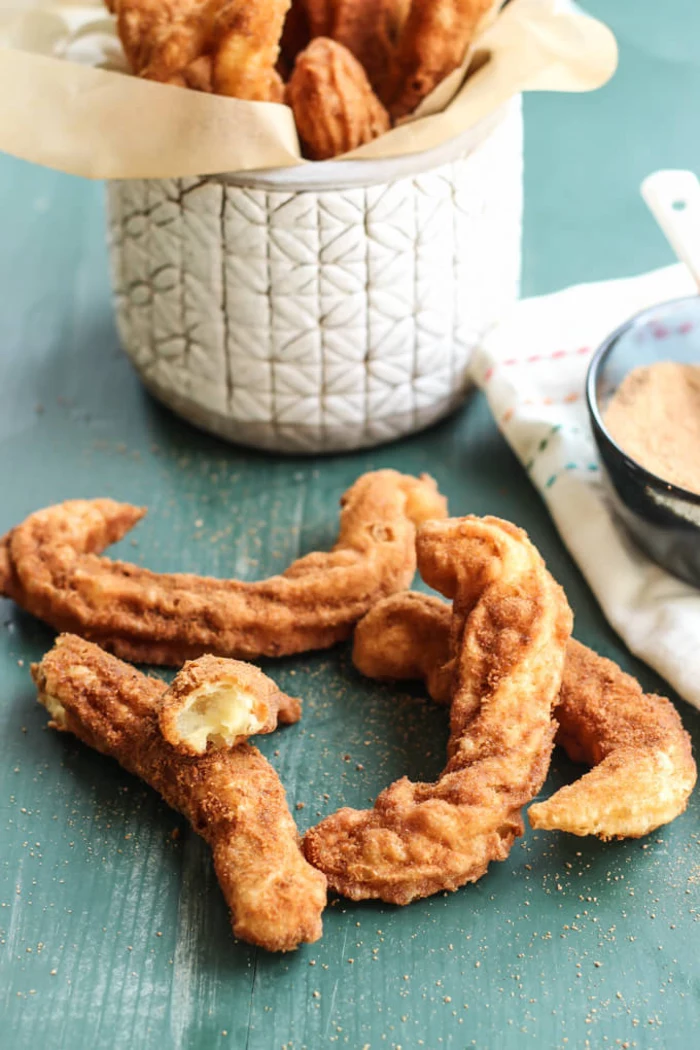
Application: Crispy Baked Avocado Fries
Deep-frying avocado can be a bit tricky; it gets mushy if you’re not careful. For home cooks, baking at a high temp is a much more reliable (and less messy) way to go.
- Preheat your oven to a hot 425°F (220°C). Place a wire rack inside a baking sheet—this lets hot air circulate underneath, making the fries crispy all over. No more soggy bottoms!
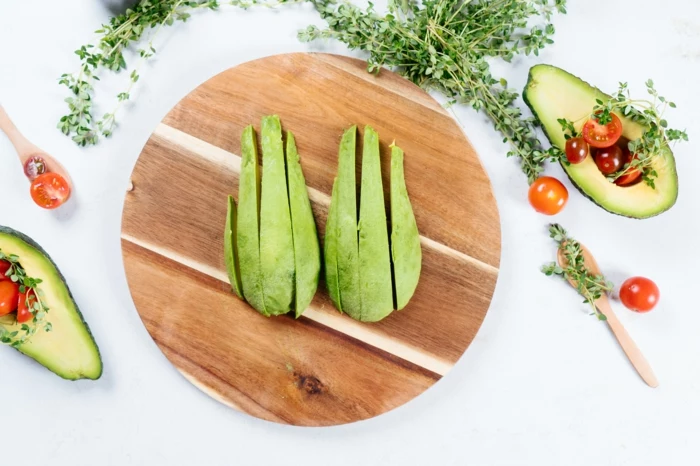
- Pick avocados that are firm-ripe. They should give just a little when you press them. Slice them into 4-5 wedges per half.
- Set up your breading station and use the ‘dry hand, wet hand’ method to coat each wedge. Place them on the wire rack with a little space in between.
- Lightly spray the tops with cooking oil spray. This helps them get golden and crunchy.
- Bake for 15-20 minutes until crispy and brown. Serve them IMMEDIATELY with a killer dip.
My Go-To Dip Recipe (Chipotle Aioli Cheat): You can’t have fries without a dip. My 2-minute secret weapon is to simply whisk together 1 cup of good quality mayonnaise, 1-2 canned chipotle peppers in adobo (minced up), 1 tablespoon of the adobo sauce from the can, and the juice of half a lime. That’s it. It’s smoky, creamy, zesty, and perfect.
So, Should You Bake or Fry? A common question! Honestly, it comes down to your priorities. Baking is hands-down the winner for easier cleanup and is obviously the healthier option. You’ll get a really nice, even crispiness without the stress of hot oil. Frying, on the other hand, delivers that next-level, shatteringly crisp crust that is just pure indulgence. It’s also faster per batch if you’re in a rush. But… the cleanup is a bear. For most home parties, I recommend baking.
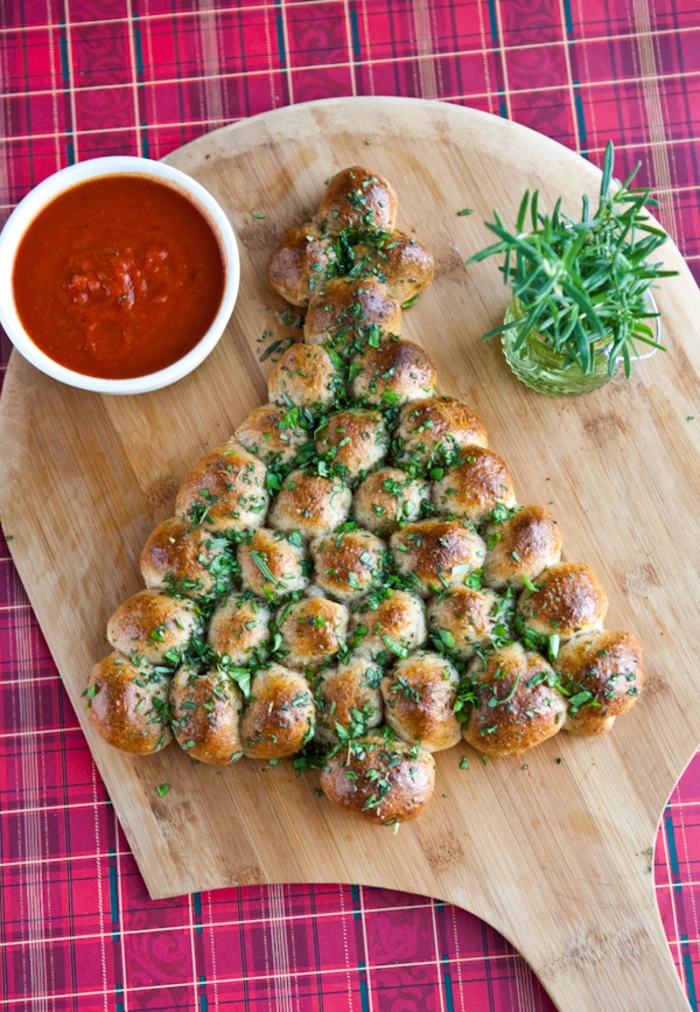
Technique 3: Nailing Homemade Soft Pretzel Bites
There’s simply no comparison between frozen pretzel bites and ones made from scratch. The magic is in the yeasted dough and a quick bath in a special solution that gives them that signature chewy crust and deep brown color.
The Pro Method: The Pretzel-Making Process
The Why: It’s a two-part science experiment. First, yeast eats sugar and releases gas, making the dough rise and giving it a light texture. But the real secret is the baking soda bath. This alkaline solution dramatically speeds up the Maillard reaction (the thing that makes browned food taste so good) when the pretzels hit the oven. It’s what creates that classic, shiny, deep-brown crust and unmistakable ‘pretzel’ flavor.
The Dough Ingredients:
- 1 ½ cups warm water (about 110°F or 43°C—if it feels like a nice warm bath, it’s perfect)
- 1 packet (2 ¼ teaspoons) active dry yeast
- 1 tablespoon brown sugar
- 2 teaspoons kosher salt
- 4 cups all-purpose flour
- 4 tablespoons unsalted butter, melted
The Bath and Bake:
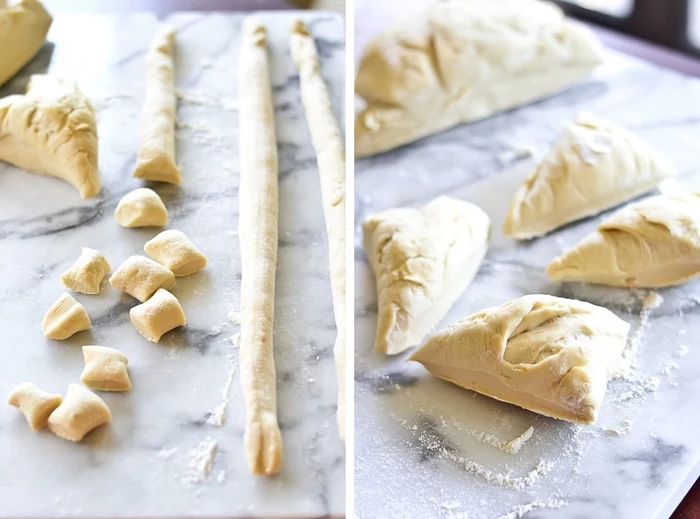
After you’ve mixed and kneaded the dough and let it rise for about an hour, it’s time for the fun part. You’ll roll the dough into ropes, cut them into bite-sized pieces, and then give them a quick 30-second boil in a pot of water with ½ cup of baking soda. This is the crucial step! Then, fish them out, place them on a baking sheet, brush with an egg wash, sprinkle with coarse pretzel salt, and bake at 425°F (220°C) for 12-15 minutes until they’re a gorgeous deep brown.
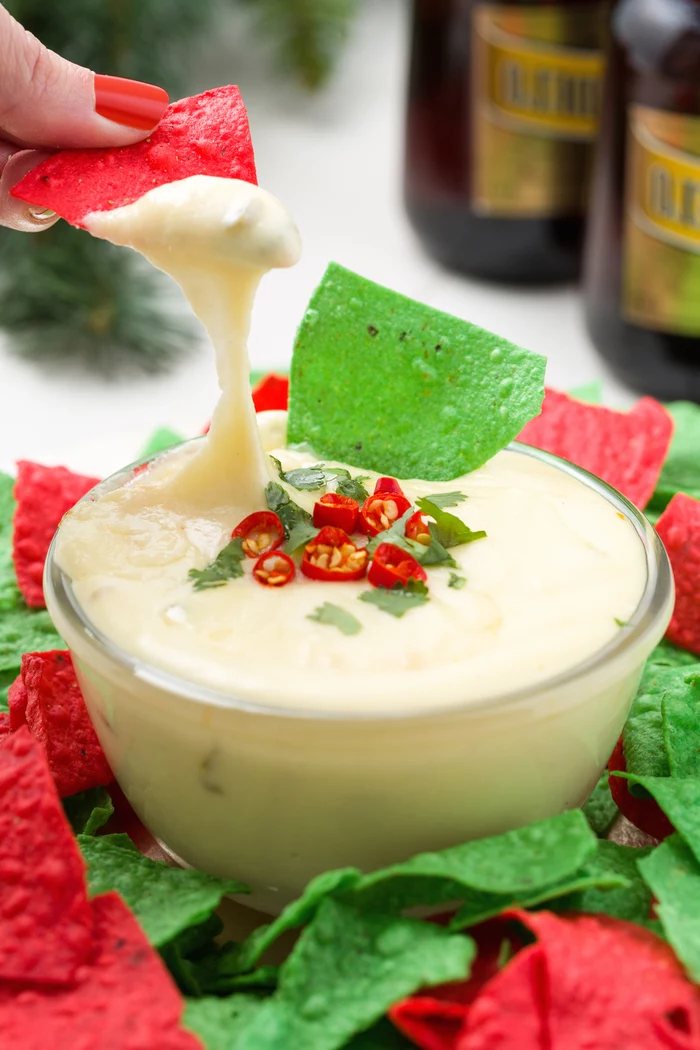
The Perfect Partner: Quick Beer Cheese Sauce Pretzel bites scream for cheese sauce. Here’s a super easy one: In a saucepan over medium heat, melt 2 tablespoons of butter. Whisk in 2 tablespoons of flour and cook for a minute. Slowly pour in a ½ cup of milk and a ½ cup of a lager or pilsner-style beer, whisking constantly until it’s smooth and thick. Turn the heat to low and stir in 8 ounces of shredded sharp cheddar cheese until it’s melted. Season with a pinch of salt and a dash of cayenne. Done.
Make-Ahead & Freezing Tips: This is a game-changer for party prep. You can make the dough and let it do its first rise in the fridge for up to 2 days—this slow ferment actually develops even more flavor. Or, you can fully bake the pretzel bites, let them cool, and freeze them in a zip-top bag for up to a month. Just reheat them on a baking sheet in a 350°F oven for 5-10 minutes until warm.
My 5-Minute Lifesaver Appetizer
Okay, what if you’re in a real pinch for time? Here’s my ultimate caterer’s cheat. Grab a block of Boursin (the garlic and herb one is perfect), and unwrap it right onto the center of a nice platter. Use a spoon to create a little well in the top and pour in a generous spoonful of fig jam or hot honey. Surround it with some fancy-looking crackers (like Raincoast Crisps). It looks elegant, tastes amazing, and takes literally zero effort. You’re welcome.
Putting It All Together: A Pro’s Planning Guide
Having amazing recipes is one thing, but pulling them all off for a party is another. This is where planning saves your sanity.
How much do I make? For a typical 2-hour cocktail party, I plan on about 10-12 total bites per person. If I’m serving 5 different appetizers, that means each guest will probably have about 2 of each. So for 20 guests, you’re aiming for around 200-240 total pieces.
Balance Your Menu: A good menu offers variety. I always try to include:
- Something Crispy: Like the avocado fries. (Higher effort, serve immediately).
- Something Rich: Like the cheese ball. (Total make-ahead, zero effort on party day).
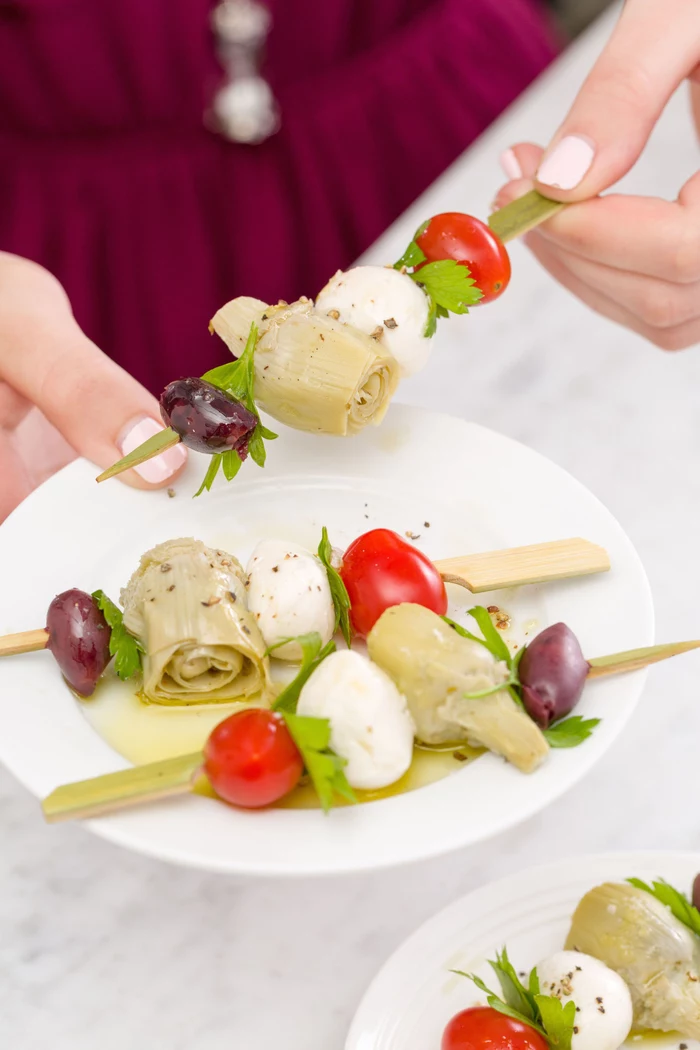
- Something Fresh: A simple Caprese skewer is perfect for this. (Minimal cooking, provides a bright contrast).
- Something Substantial: The pretzel bites with cheese sauce fit the bill. (Can be kept warm, very satisfying).
By planning a mix of make-ahead items and last-minute bakes, you won’t be stuck in the kitchen the whole time. The goal is to actually enjoy your own party!

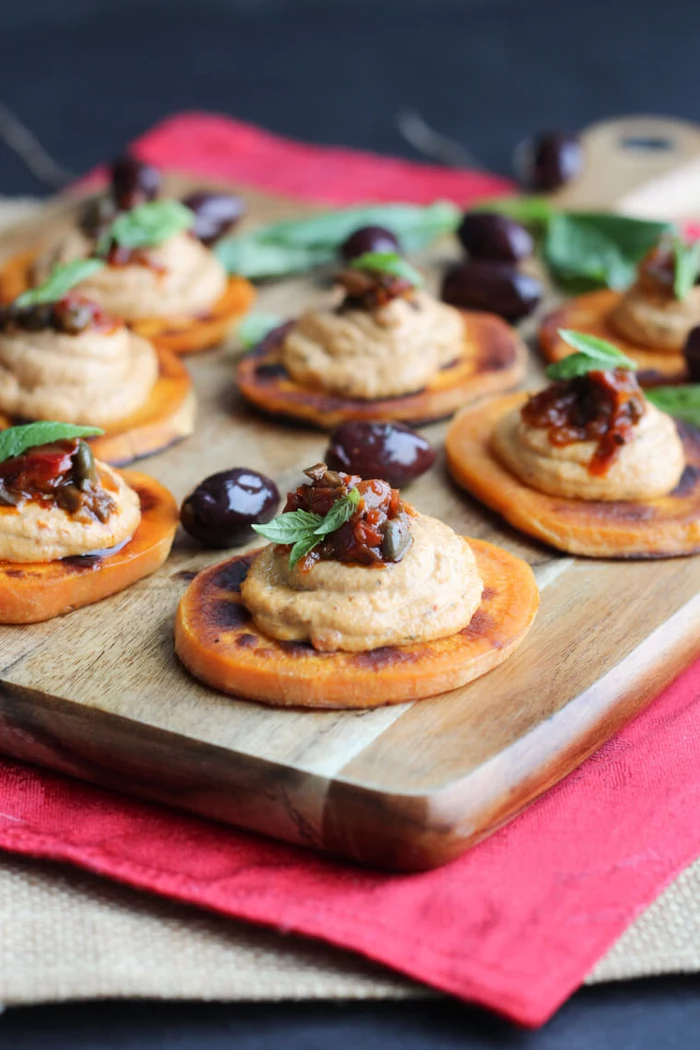
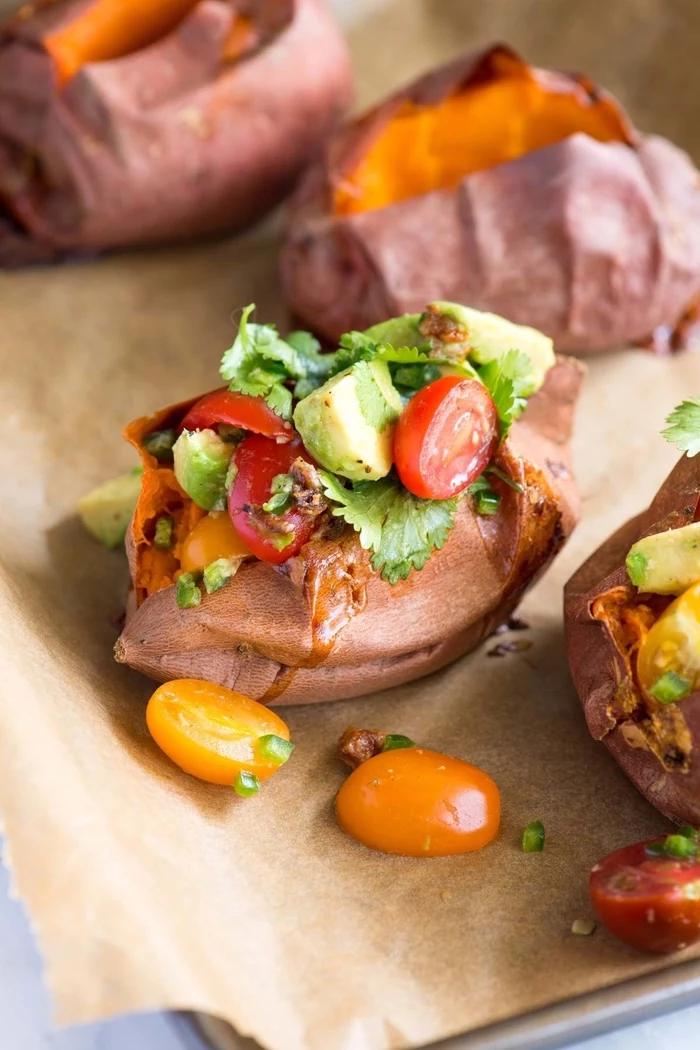
Bonus Application: Sweet Potato Rounds with Savory Cashew Cream
This one looks super fancy but is secretly easy, and it’s a great vegan option that everyone loves. It combines a few techniques and shows off a more complex flavor profile.
First, roast some ¼-inch thick sweet potato rounds at 400°F (200°C) until tender and caramelized. While they roast, make the cashew cream. Just soak 1 cup of raw cashews in boiling water for 30 minutes, then drain and blend them in a high-speed blender with ½ cup of fresh water, 2 tablespoons of nutritional yeast, a tablespoon of lemon juice, a small garlic clove, and a little salt. Blend until it’s perfectly smooth and creamy. By the way, you can find nutritional yeast (or ‘nooch’ as we call it) in the health food aisle; it has a nutty, cheesy flavor that’s amazing in vegan sauces.
To assemble, just top each cooled sweet potato round with a dollop of the cashew cream, a sprinkle of smoked paprika, and maybe some chopped pistachios for crunch. It’s a perfect, self-contained bite.
Finally, a word of advice: be realistic. If you’re hosting a big party, trying to make five complicated appetizers by yourself is a recipe for stress, not fun. Sometimes, the smartest move is to just pick one or two of these homemade showstoppers and buy the rest. Master these techniques, and you won’t just be making food—you’ll be creating memorable moments for your guests, one delicious bite at a time.
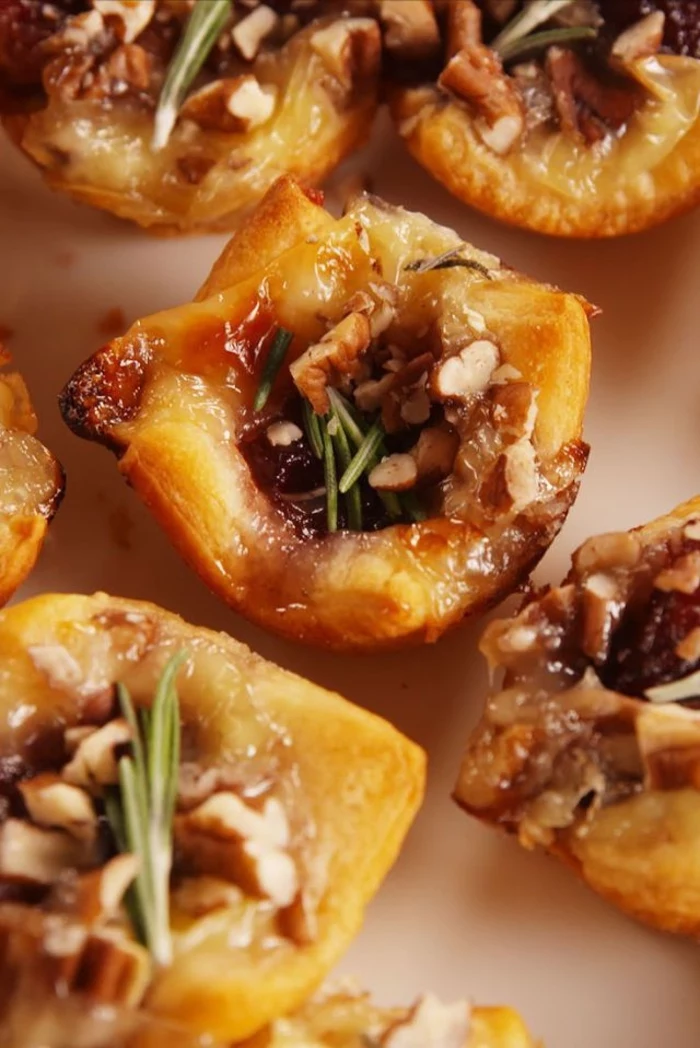
Inspiration Gallery
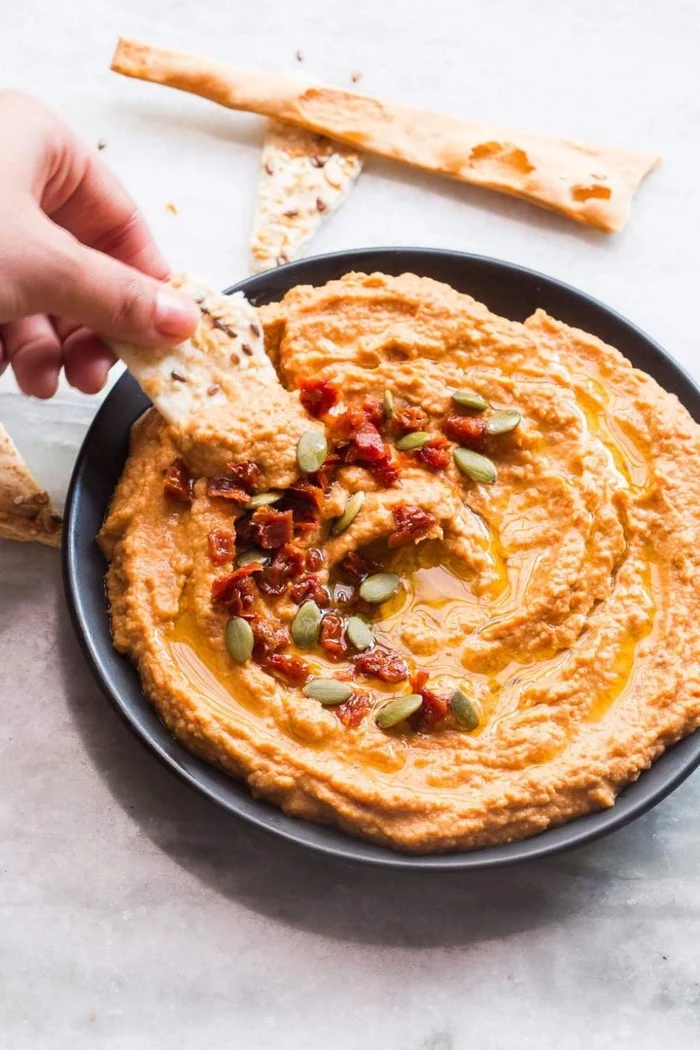
Don’t just serve dip; stage it. Swirl your hummus or bean dip with the back of a spoon to create deep ravines, then drizzle with high-quality extra virgin olive oil. Finish with a dramatic sprinkle of smoked paprika, sumac, or za’atar and a scattering of fresh parsley. It’s a five-second trick that makes a store-bought dip look completely bespoke.

- Create vibrant Caprese skewers with cherry tomatoes, fresh basil, and ciliegine (small mozzarella balls).
- For a refreshing twist, try cubes of watermelon, feta, and a single mint leaf.
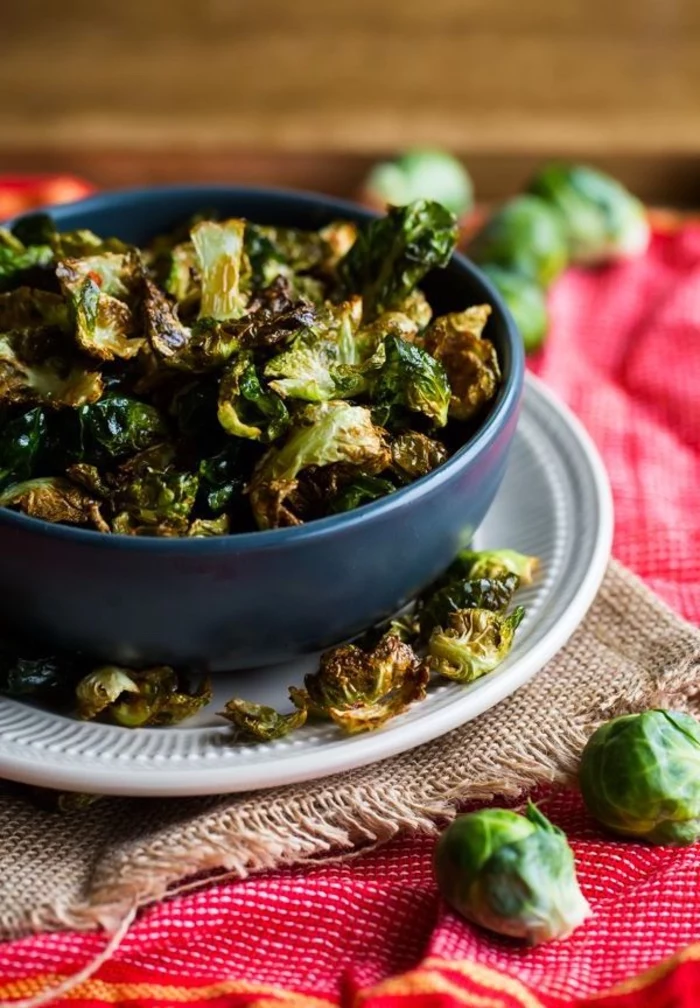
- In cooler months, thread roasted Brussels sprouts with a drizzle of balsamic glaze.
The secret? A final sprinkle of flaky Maldon sea salt just before serving.
The Golden Rule of Crunch: When frying appetizers like mozzarella sticks or avocado fries, the oil temperature is non-negotiable. If it’s too low, your food will absorb excess oil and become greasy. Too high, and the outside will burn before the inside is perfectly melted or tender. An instant-read thermometer is your best friend here—aim for 350-375°F (175-190°C) for that perfect, golden finish.
The global appetizer market is projected to grow from $15.52 billion in 2023 to $22.41 billion by 2030.
This surge isn’t just about wings and sliders; it’s driven by a huge demand for creative, plant-based, and globally-inspired small plates. Your veggie creations are right on trend.
Looking for a cheese that can be the star?
Meet Halloumi. This semi-hard, brined cheese from Cyprus has a uniquely high melting point, meaning you can grill or pan-fry it until golden and crisp without it turning into a puddle. Cut it into thick sticks for dipping or cubes for skewers. Its satisfyingly squeaky texture and salty flavor are a guaranteed crowd-pleaser.
Can I really make impressive appetizers ahead of time?
Absolutely, it’s a professional caterer’s secret. Dips like hummus or muhammara often taste even better the next day. You can chop all your vegetables, blanch hardier ones like broccoli or asparagus, and mix your doughs or batters. Store everything in airtight containers. On party day, your job is simply to assemble, bake, or fry. This saves stress and ensures you’re not stuck in the kitchen when guests arrive.
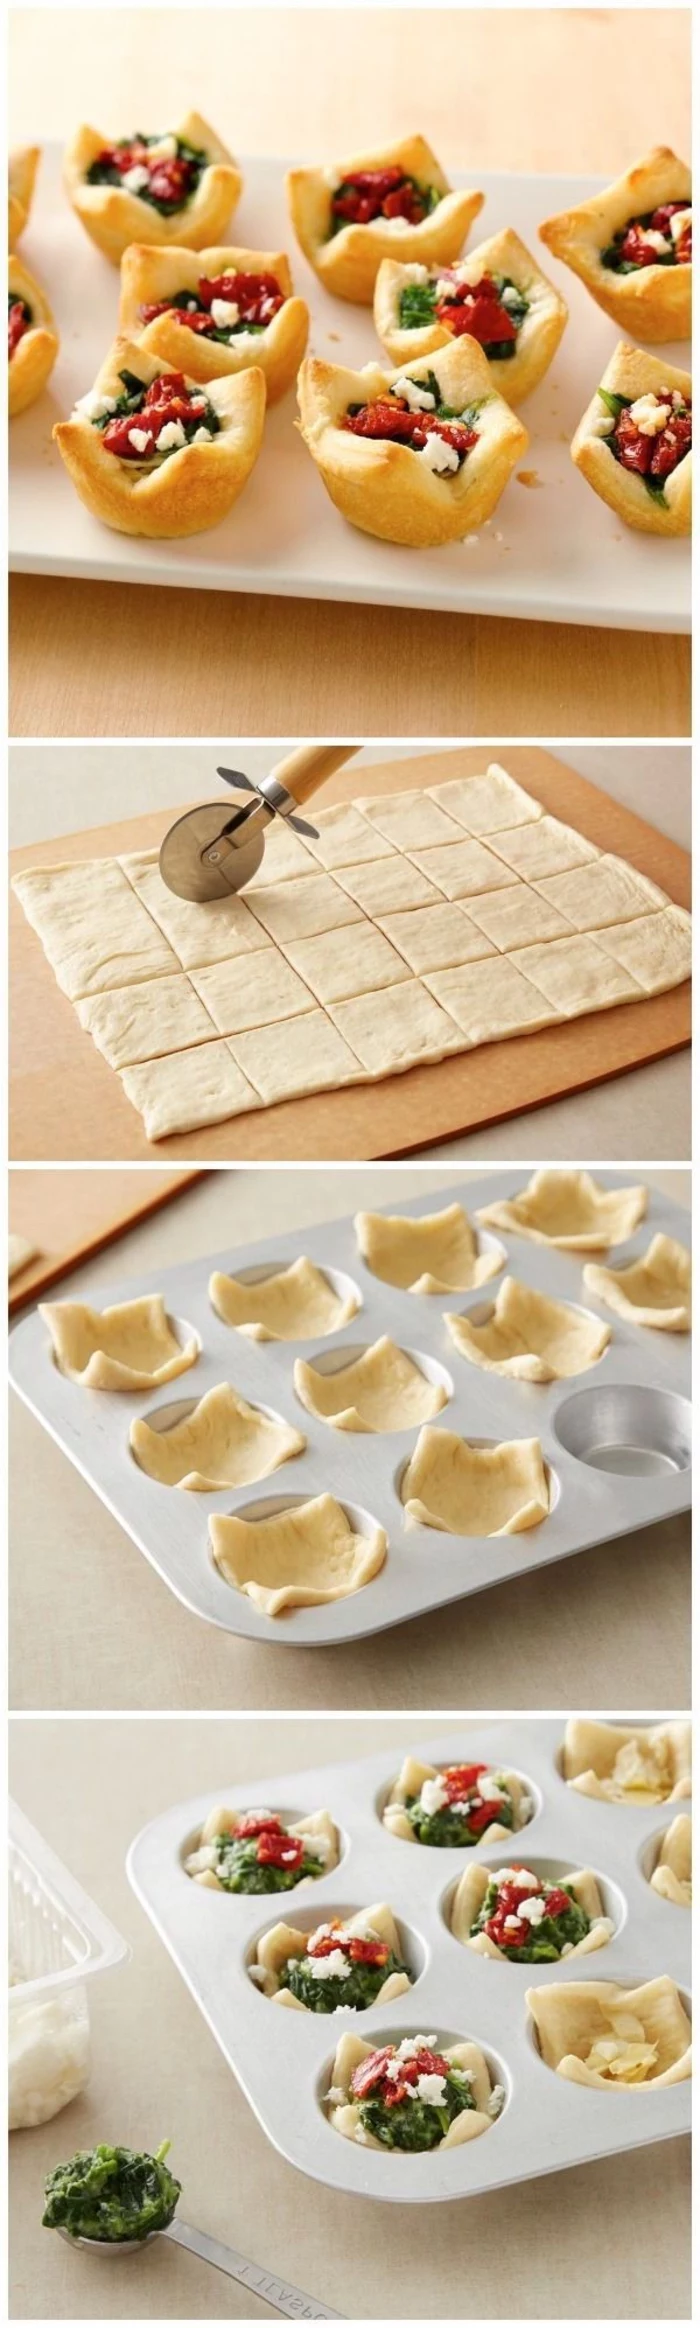
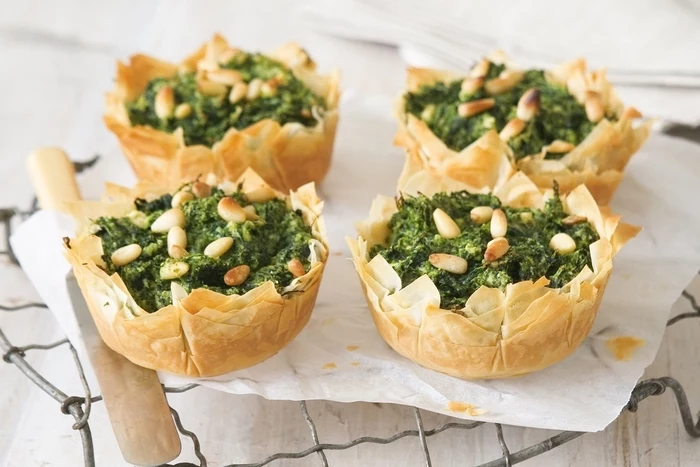
Puff Pastry: Your go-to for flaky, buttery layers. Brands like Pepperidge Farm offer an all-butter version that delivers professional results for savory tarts, pinwheels, or cheese straws.
Phyllo Dough: Thinner and more delicate, creating an shatteringly crisp texture. It’s perfect for Mediterranean-inspired bites like spanakopita triangles or crispy cigars filled with feta and herbs.
For ease and richness, puff pastry wins. For a lighter, crunchier result, choose phyllo.

- They encourage mingling as guests don’t need a table and fork.
- They allow guests to sample a wider variety of flavors without getting full.
- They reduce cleanup, with fewer plates and cutlery required.
The key is making them truly single-bite. Think small, manageable, and mess-free.

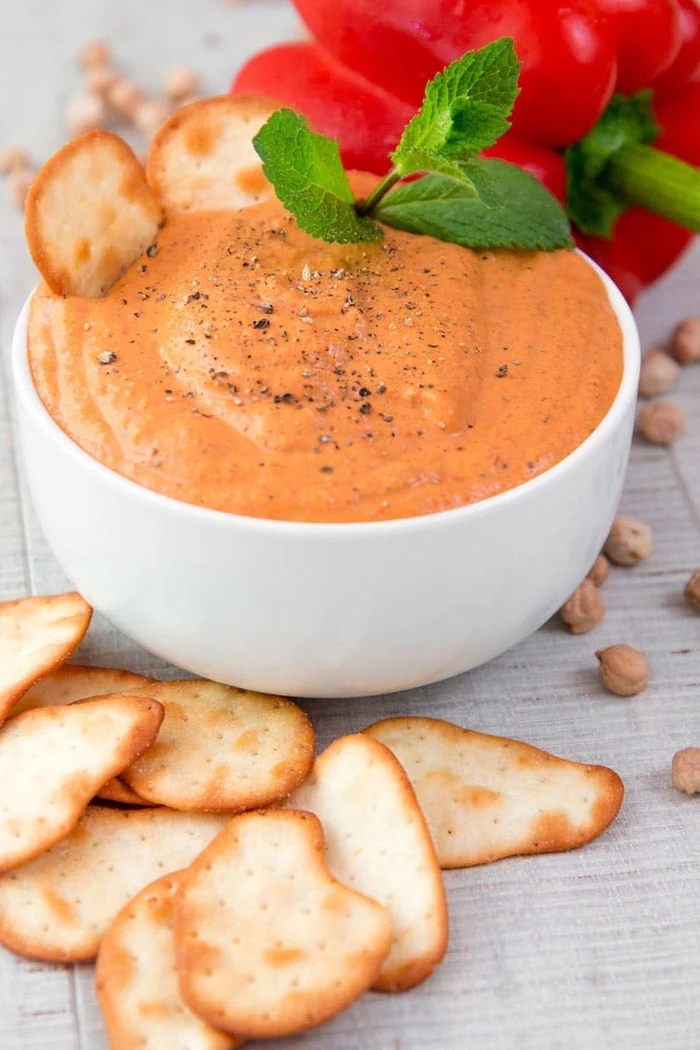
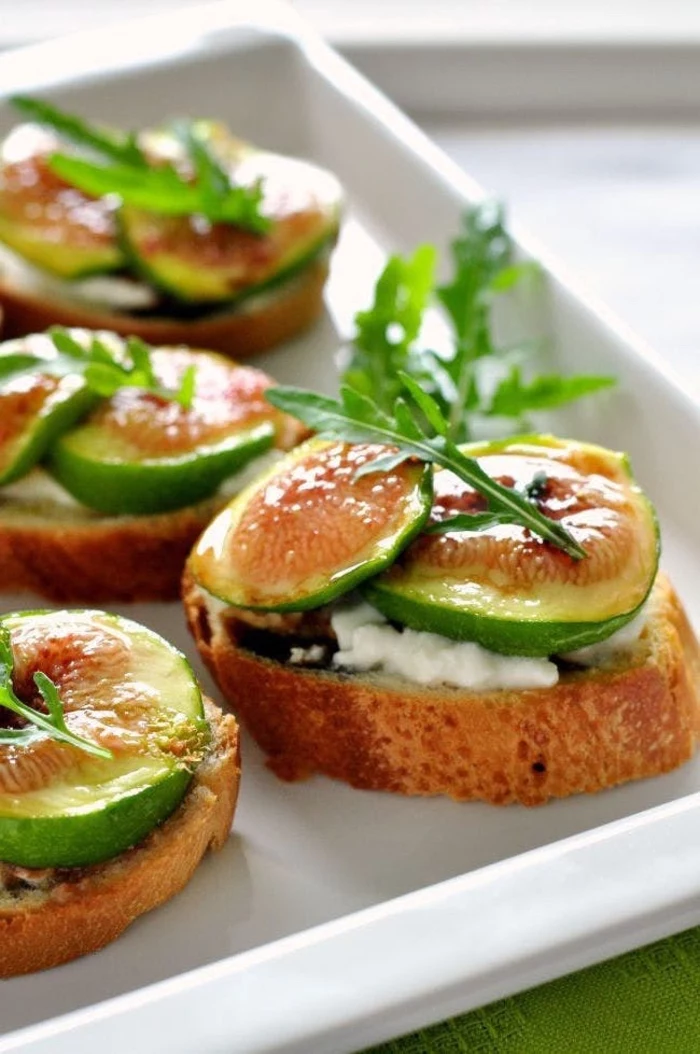
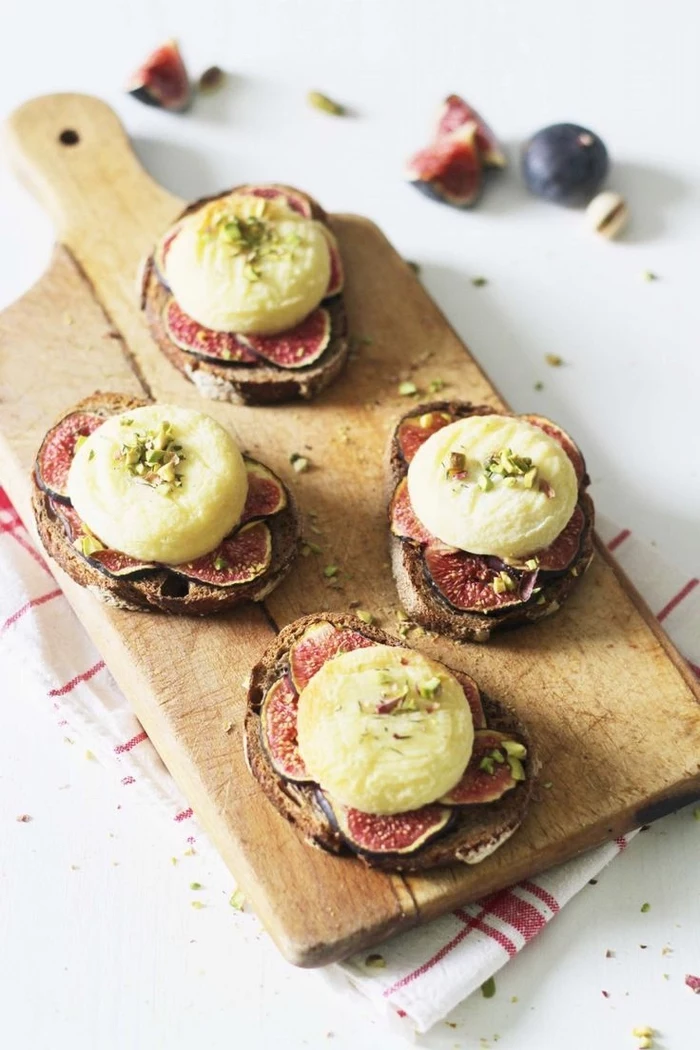
Take a cue from Middle Eastern mezze platters, the original masters of the vegetable starter. Go beyond hummus and explore muhammara, a robust dip made from roasted red peppers and walnuts, or labneh, a strained yogurt so thick it’s almost a cheese, perfect for drizzling with olive oil and za’atar. These dishes prove that vegetarian appetizers can be deeply complex and satisfying.
Food researchers have found that roasting vegetables can increase their umami compounds by over 650%.
That savory, ‘meaty’ flavor you’re trying to achieve? It’s not just in mushrooms or cheese. The simple act of high-heat roasting transforms the glutamates in vegetables like tomatoes, onions, and asparagus, creating a depth of flavor that can easily rival meat-based dishes.
One critical detail: Serve hot appetizers HOT, and cold appetizers COLD. It sounds obvious, but a lukewarm mozzarella stick or a room-temperature cucumber bite is instantly disappointing. If serving something hot, bring it out in smaller batches to ensure every guest gets that fresh-from-the-oven experience.
How do I make a creamy vegan ‘cheese’ sauce without cashews?
The secret lies in humble vegetables. Boil potatoes and carrots until very soft. Drain them (reserving some of the starchy water) and blend with nutritional yeast for cheesy flavor, a little Dijon mustard for tang, garlic powder, onion powder, and a splash of the reserved water until you reach your desired consistency. It’s a nut-free, surprisingly convincing alternative for nachos or dips.
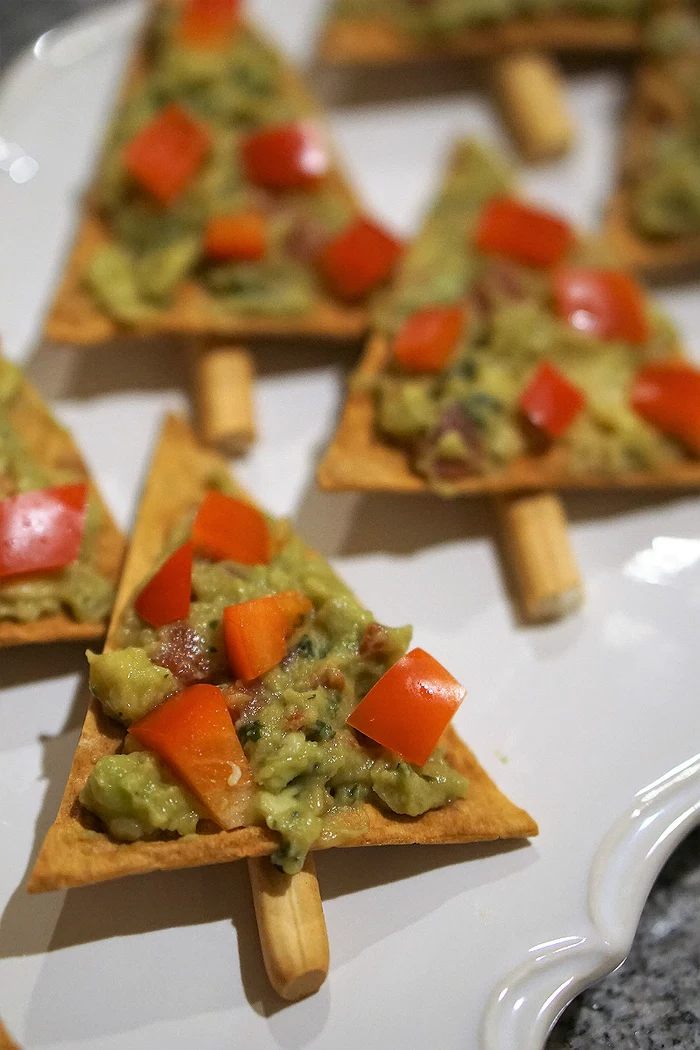
When planning your menu, think about the visual journey. A platter full of beige, fried foods can look monotonous. This is where garnishes become heroes.
- A sprinkle of bright green chopped chives or cilantro.
- The deep red of pomegranate seeds scattered over a dip.
- A few finely sliced red chili rings for a pop of color and heat.
- Edible flowers like nasturtiums or borage for a touch of elegance.
Hot Honey Drizzle: The sweet-and-spicy condiment is a game-changer. A drizzle of a brand like Mike’s Hot Honey over roasted sweet potato rounds or fried halloumi is pure magic.
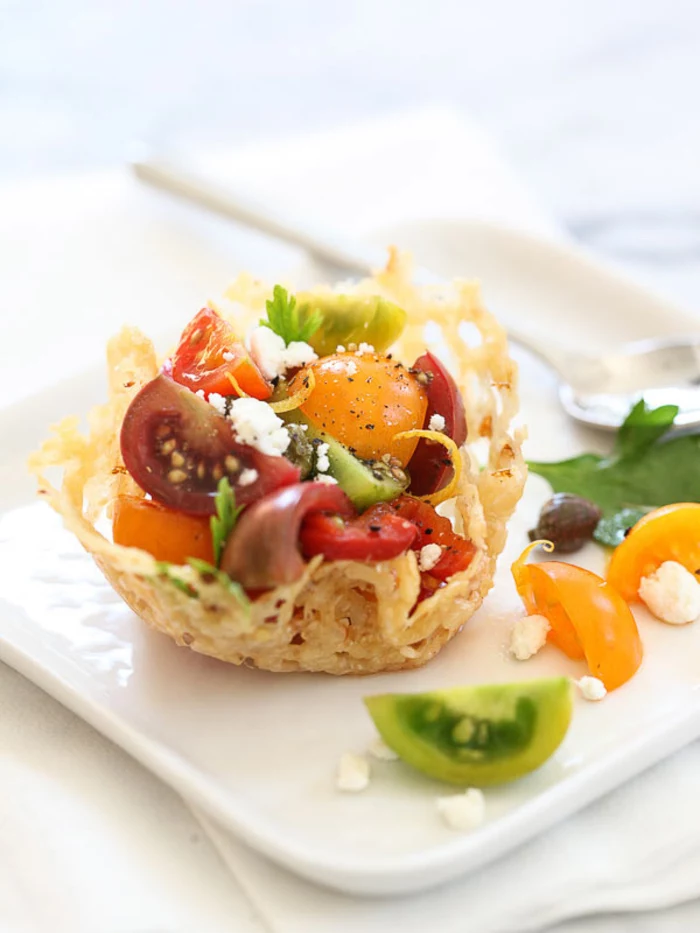
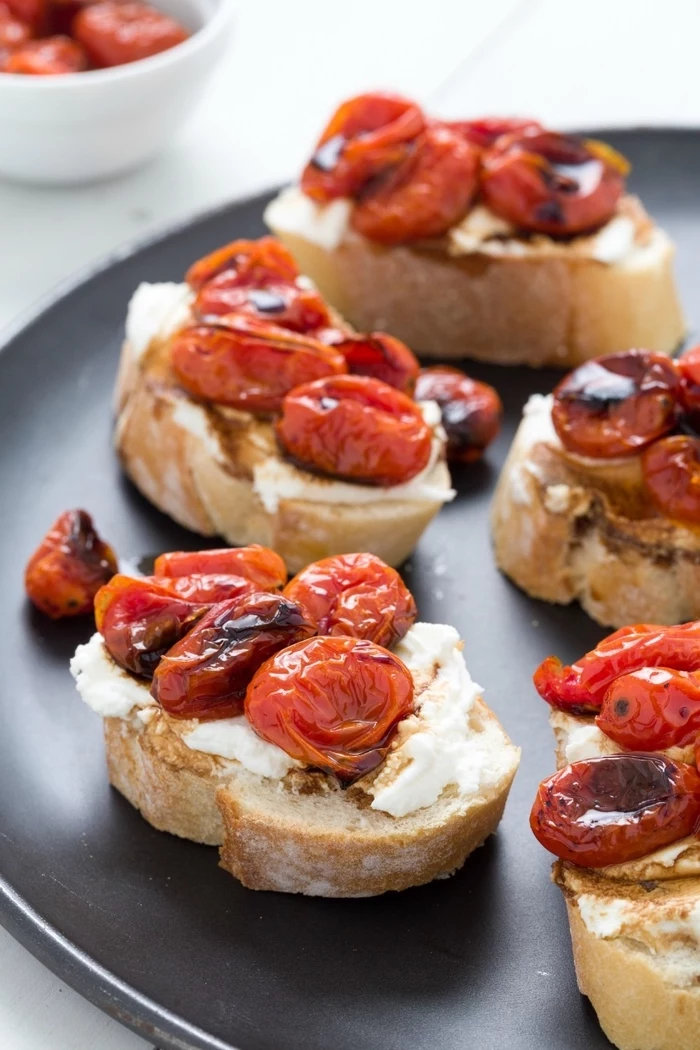
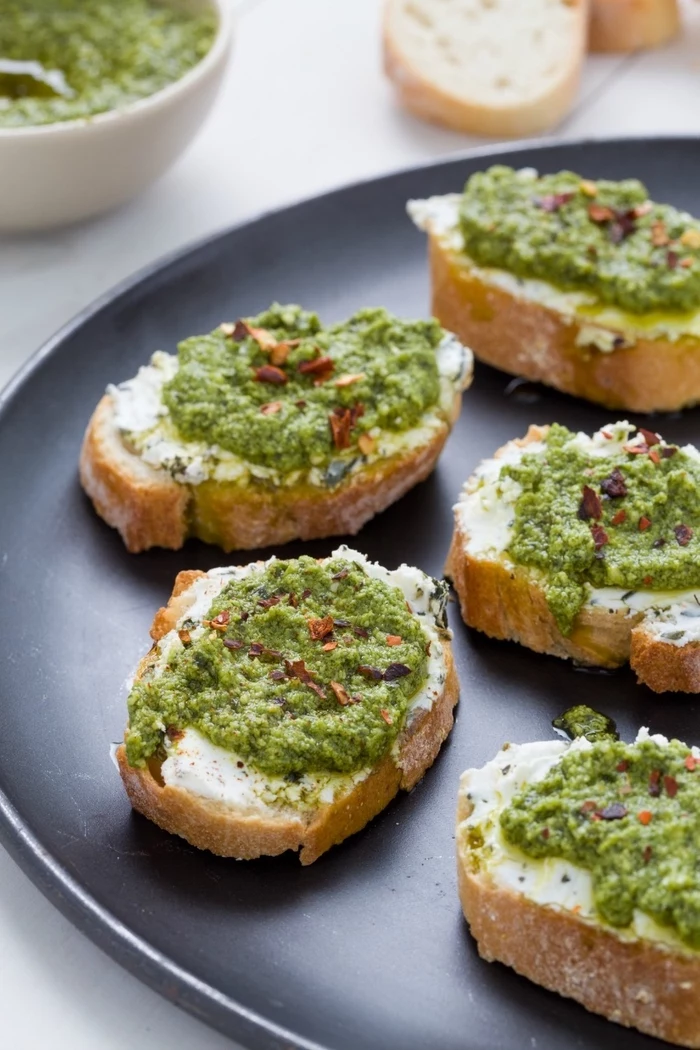
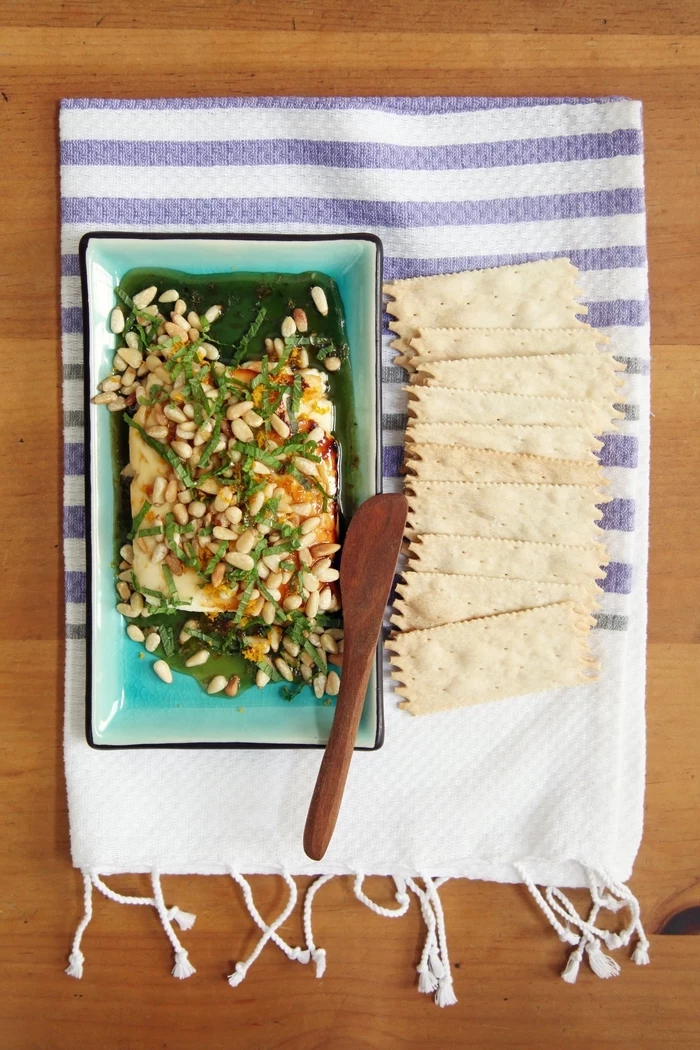
Whipped Feta: Blend feta cheese with Greek yogurt or cream cheese until impossibly smooth. Serve it as a dip topped with roasted cherry tomatoes.

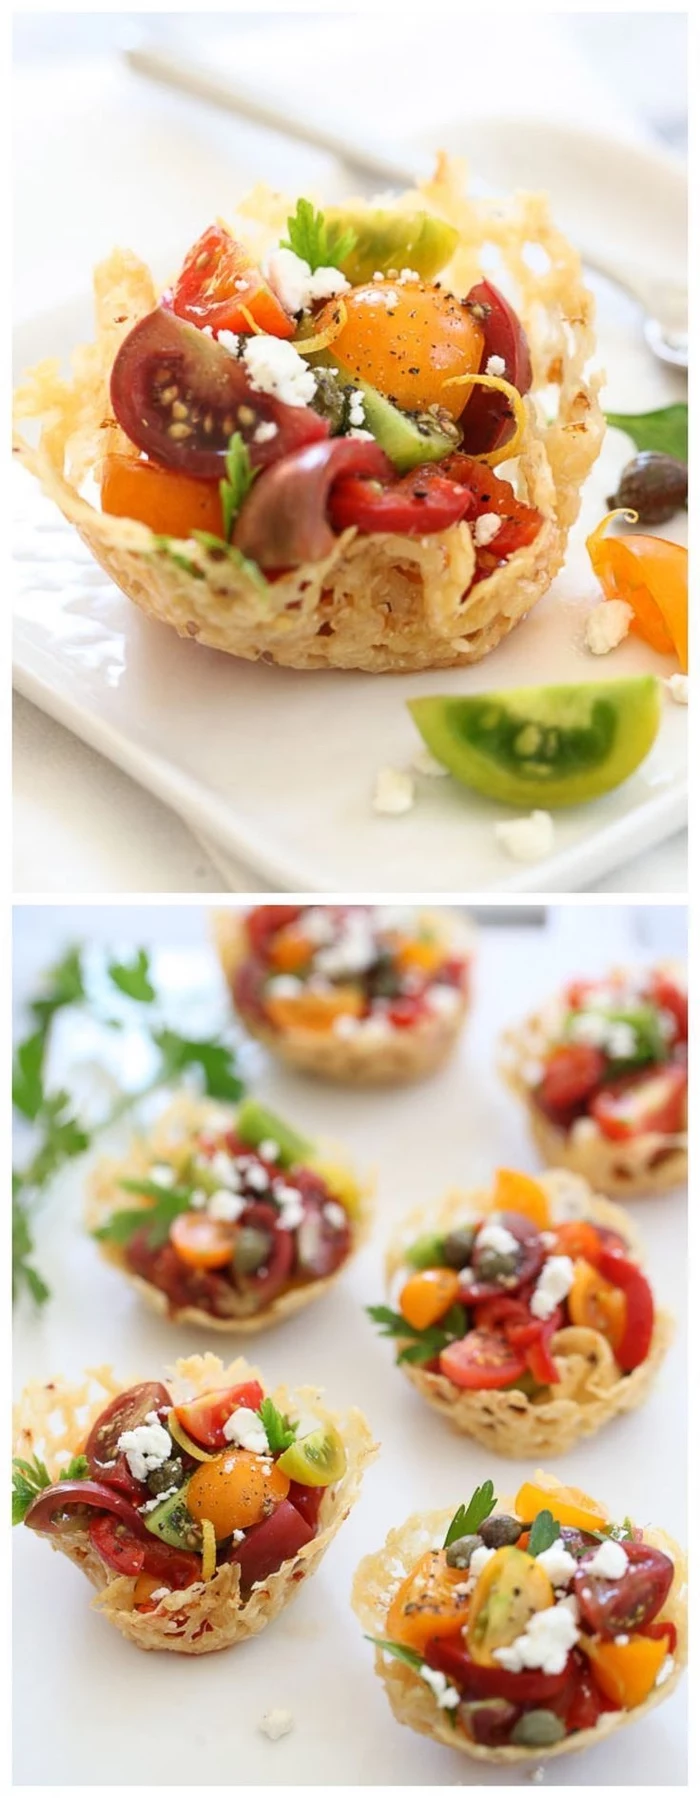
A mandoline slicer is not a luxury; it’s a secret weapon for consistency. An affordable model from a brand like OXO allows you to create paper-thin potato or zucchini slices for elegant baked chips, perfect vegetable ribbons for salads, or uniform batons for a crudité platter. This precision elevates the look and texture of your dishes instantly.
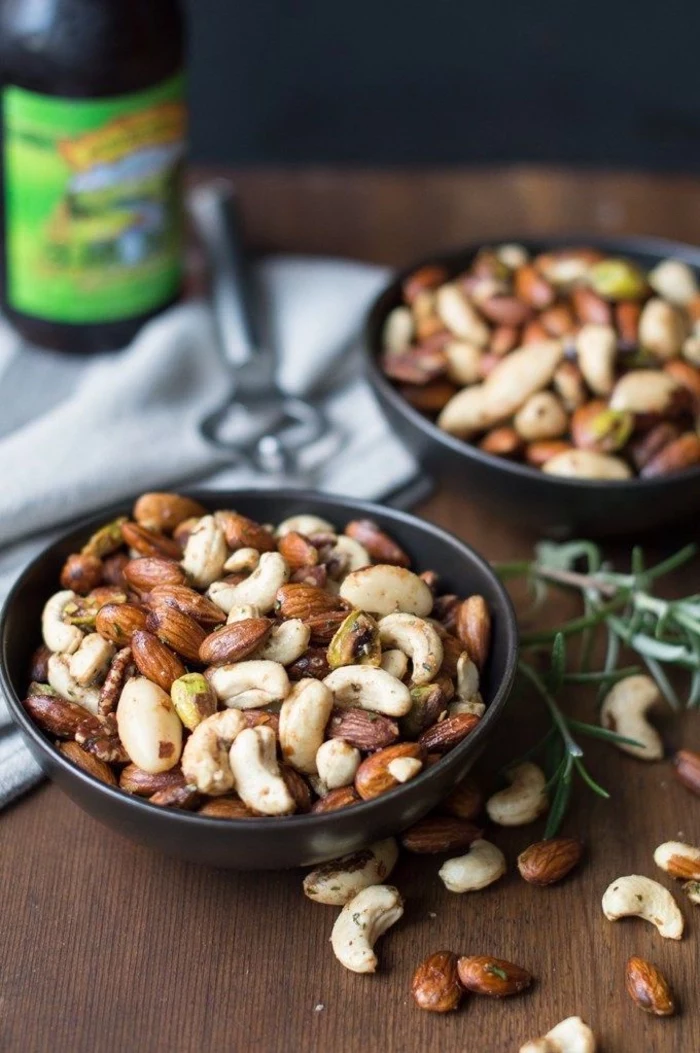
The aroma that greets your guests is the first part of the appetizer experience. Just before they arrive, toast some spices in a dry pan, bake a batch of garlic bread, or have a tray of rosemary-roasted nuts finishing in the oven. This creates an inviting atmosphere that promises delicious things to come, setting the stage long before the first bite is taken.


What exactly is a veggie ‘grazing table’?
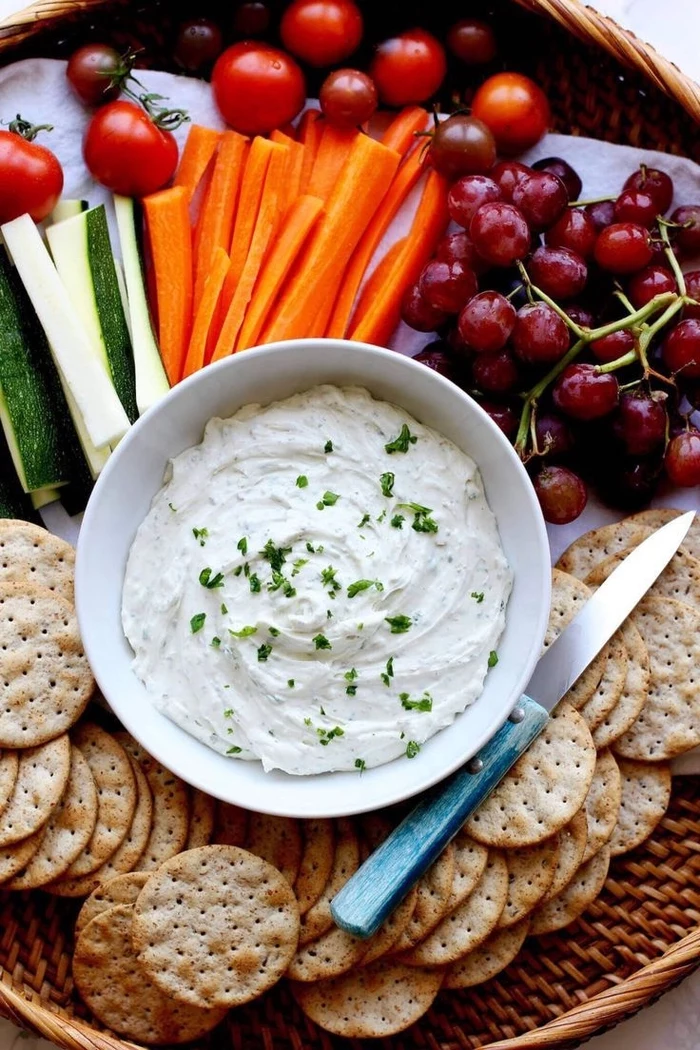
Think of it as a deconstructed, sprawling appetizer platter that covers an entire table. It’s an abundant, stunning display that invites guests to create their own pairings. For a veggie version, anchor it with 2-3 dips (like beet hummus and a creamy onion dip), add various cheeses, piles of artisanal crackers, breadsticks, olives, pickles, nuts, fresh fruit like grapes and figs, and sliced raw veggies. It’s a feast for the eyes and the stomach.

- They don’t get soggy or lose their crispness from the heat of other items.
- They feel more deliberate and ‘cheffy’.
- You can perfectly portion out more expensive ingredients.
The technique? Building your appetizers on individual crackers, toasted baguette slices (crostini), or cucumber rounds.
A 2012 study from Cornell University’s Food and Brand Lab found that people perceive food served in smaller portions as being more sophisticated and flavorful.
This psychological quirk is your best friend. Serving mini quiches instead of a large one, or individual bruschetta instead of a shared dip, makes your appetizers seem more special and encourages guests to savor each bite.

Common Mistake: Overcrowding the pan. When you’re pan-searing mushrooms or frying zucchini fritters, dumping everything in at once is tempting. Don’t do it! Overcrowding drops the pan’s temperature, causing the vegetables to steam in their own moisture instead of developing that delicious, brown, caramelized crust. Work in batches for the best texture.
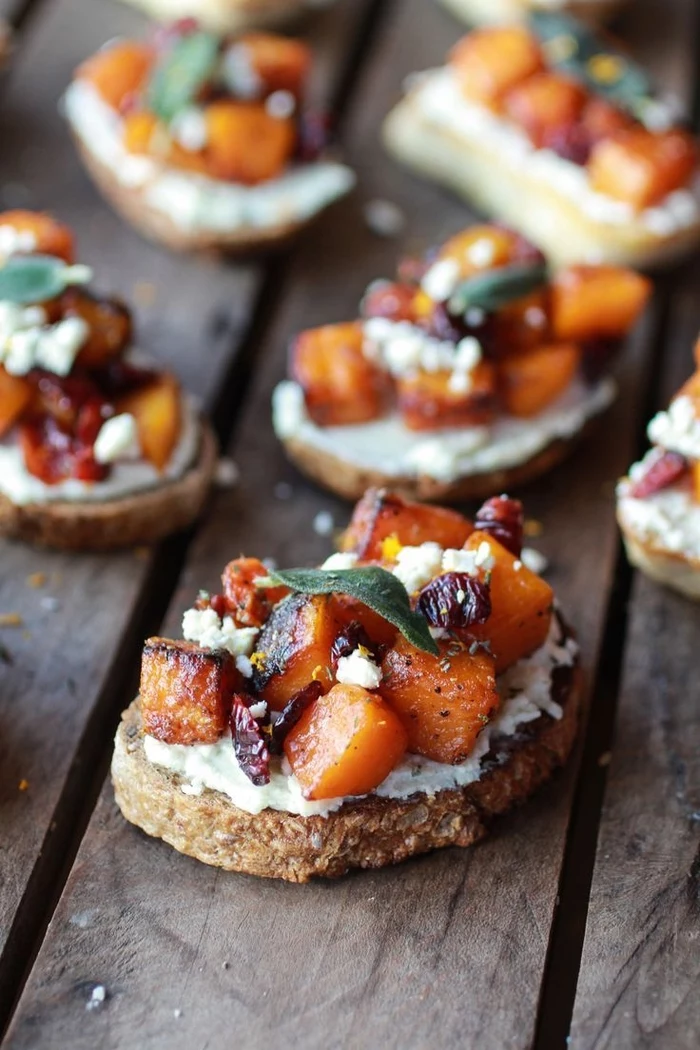
Embrace the season to create stunning appetizers on a budget. In summer, think bruschetta piled high with fresh, sweet tomatoes from the market, or grilled zucchini rolls. In autumn, switch to roasted butternut squash cubes with sage and brown butter, or mini tarts with mushrooms and thyme. Seasonal produce is not only cheaper but also at its absolute peak of flavor.
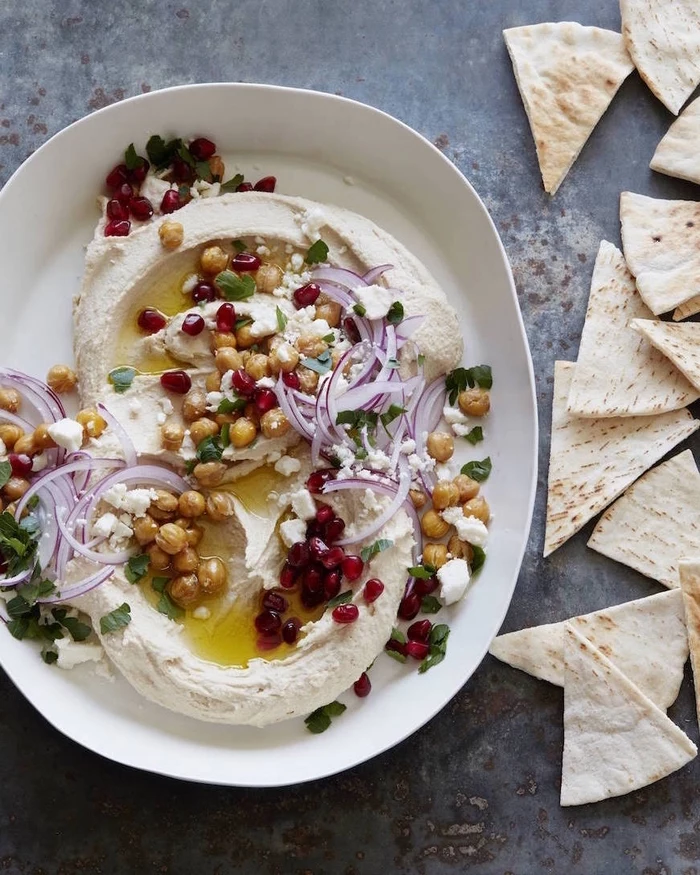
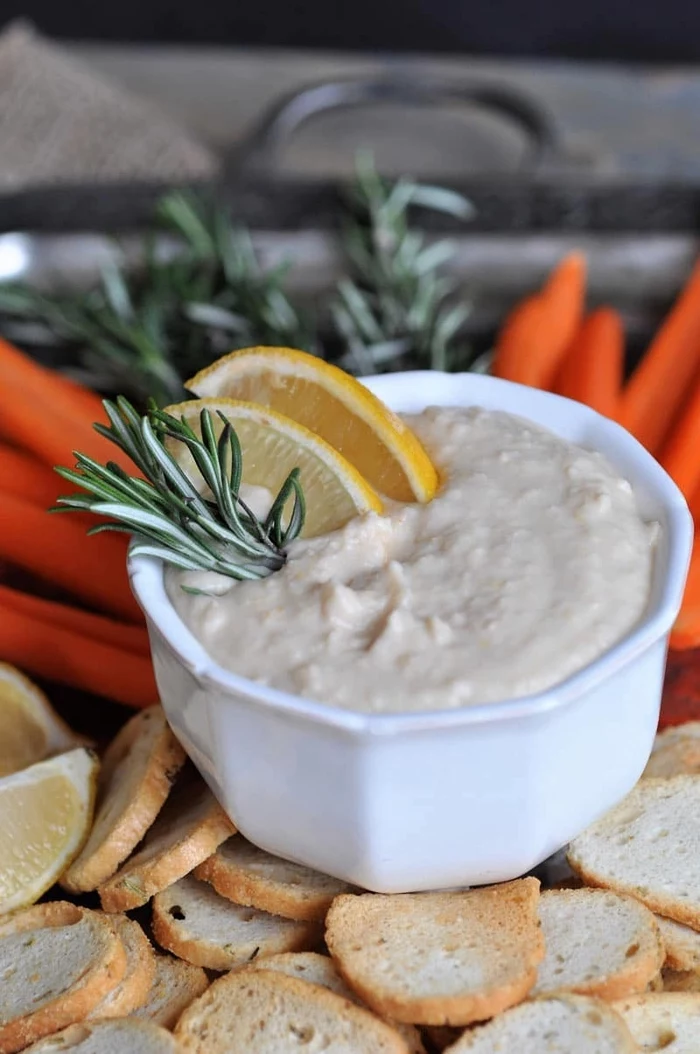
Chickpea Hummus: The classic. Creamy, nutty, and earthy. Its neutral-yet-savory base makes it a perfect canvas for countless toppings like chili oil, herbs, or toasted pine nuts.
Baba Ghanoush: The smoky sibling. Made from roasted and puréed eggplant, it has a silkier, looser texture and a deep, complex flavor from the charring process.
Choose hummus for a hearty, crowd-pleasing dip; opt for baba ghanoush to add a touch of smoky sophistication.
- Creates a flavorful base for soups or risottos.
- Reduces food waste in your kitchen.
- Costs virtually nothing to make.
The secret? Keep a bag in your freezer for onion peels, carrot ends, celery tops, and mushroom stems. When the bag is full, simmer them with water and herbs to create a delicious vegetable stock.
For an incredibly easy but impressive appetizer, use pre-made refrigerated pizza dough. Roll it out, brush with garlic-infused olive oil, and top with thin slices of potato, fresh rosemary, and a generous sprinkle of sea salt. Bake until golden and crisp, then cut into small squares. It’s a rustic, satisfying bite that takes almost no effort.


