My Pro Secrets to the Ultimate Vegan Appetizer Board
I’ve spent years working in professional kitchens, from crazy-busy restaurant lines to running my own plant-based catering gigs. And if there’s one thing I’ve learned, it’s that an appetizer is never just an appetizer. It’s the opening act. The first impression. It sets the whole vibe for a meal or a party.
In this article
I’ll never forget one big corporate event I catered a while back. The organizer was visibly stressed. “Listen,” she said, “our clients are mostly steak-and-potatoes people. Are you absolutely sure an all-vegan spread is going to fly?”
I smiled and told her not to worry. That night, we didn’t just put out food; we created a whole experience. We had hot, crispy falafel right out of the fryer, served with a cool, creamy tahini dip. There were vibrant summer rolls bursting with fresh herbs and a satisfying crunch. We even had a rich, savory mushroom-walnut pâté on perfectly toasted sourdough. The reaction was incredible. People weren’t just eating; they were buzzing, asking what was in everything, and coming back for seconds… and thirds. No one was thinking, “This is good for vegan food.” They were just thinking, “This is seriously good food.”
That’s what this guide is all about. It’s not just a collection of recipes. It’s a deep dive into the core techniques that make appetizers incredible, so you can build a platter that impresses everyone, from your vegan cousin to your skeptical uncle. We’re going to cover the ‘why’ behind the methods, so you can cook with confidence and start creating your own knockout dishes.
The Holy Trinity: Flavor, Texture, and Temperature
Before we even chop an onion, we need to talk about the foundation. Home cooks often get laser-focused on the ingredient list, but the pros know that a killer appetizer is all about balancing three key things. Get these right, and you’re golden.
1. The Flavor Triangle: Salt, Fat, and Acid
Every truly satisfying bite of food has this trio working in harmony. It’s especially crucial in plant-based cooking where you can’t lean on the built-in savory richness of meat and dairy.
- Salt: This isn’t just about the shaker. It’s the savory, umami punch. Think soy sauce (or tamari for a gluten-free option), miso paste, nutritional yeast, or just a quality sea salt. It’s the flavor amplifier.
- Fat: Fat is what carries flavor and gives food that luxurious, satisfying mouthfeel. We’re talking about good olive oil, avocado, creamy nuts like cashews, seeds like tahini, or full-fat coconut milk.
- Acid: This is the secret weapon! Acid cuts through richness and makes everything pop. A squeeze of lemon or lime, a splash of vinegar, or the tang from fresh tomatoes can take a dish from heavy to heavenly.
When you’re tasting, don’t just ask if it’s good. Ask if it’s balanced. If it tastes a little flat, it probably needs a pinch of salt or a hit of acid. If it’s too sharp or harsh, a bit more fat can smooth out the edges.
2. The Magic of Texture
Oh man, this is a common rookie mistake. A platter with hummus, baba ghanoush, and a cashew dip is just… a whole lot of soft. Your palate gets bored fast. A great platter is a playground of textures.
- Creamy: Think silky dips and smooth sauces.
- Crunchy: Toasted nuts, fresh carrot sticks, crisp celery.
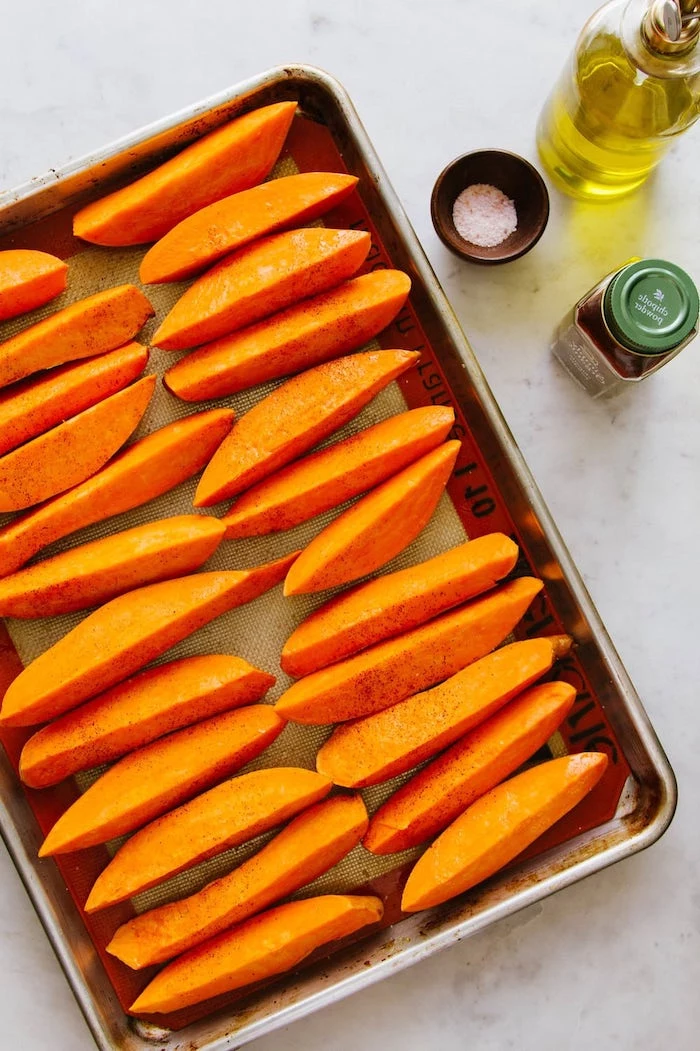
- Crispy: The glorious shatter of fried falafel or baked sweet potato wedges.
- Chewy: A good piece of sourdough bread or some marinated mushrooms.
When I plan a board, I make sure there’s a mix. That creamy dip gets served with crunchy crackers and crisp veggies for contrast. It’s simple, but it makes a world of difference.
3. The Hot & Cold Contrast
Here’s another pro-level trick that’s actually super easy. Temperature contrast. Serving something hot and sizzling next to something cool and refreshing is an instant upgrade. Imagine biting into a warm, savory piece of flatbread, and then following it with a cool, herb-packed summer roll. It wakes up your senses and makes the whole experience more dynamic.
Which Appetizer Should You Make?
Okay, let’s get practical. You’ve got four amazing options below, but which one is right for you tonight? Here’s the quick-and-dirty breakdown:
- For the Quick Win: Cashew & Herb ‘Cheese’. Honestly, if you’re short on time or new to this, start here. It takes 15 minutes, feels incredibly fancy, and will blow your guests away. Minimal effort, maximum impact.
- For the Easy Crowd-Pleaser: Tomato & Tahini Flatbread. Using store-bought dough, this is a 25-minute masterpiece. It’s warm, savory, and familiar, making it a safe bet for any crowd.
- For a Fresh & Healthy Vibe: Vietnamese Summer Rolls. These aren’t technically difficult, but they require some patience for all the chopping and rolling. They’re the perfect light and impressive counterpoint to richer dishes.
- For the Weekend Project: Chickpea Falafel from Scratch. Let’s be real, this one’s a commitment because of the chickpea soaking. But the payoff is HUGE. The flavor and texture are a million times better than any store-bought version. This is the one to make when you want to show off a little.
Mastering the Techniques: Four Core Recipes
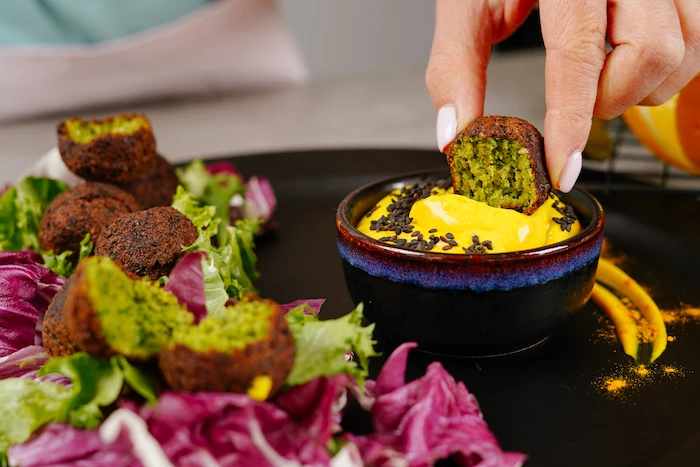
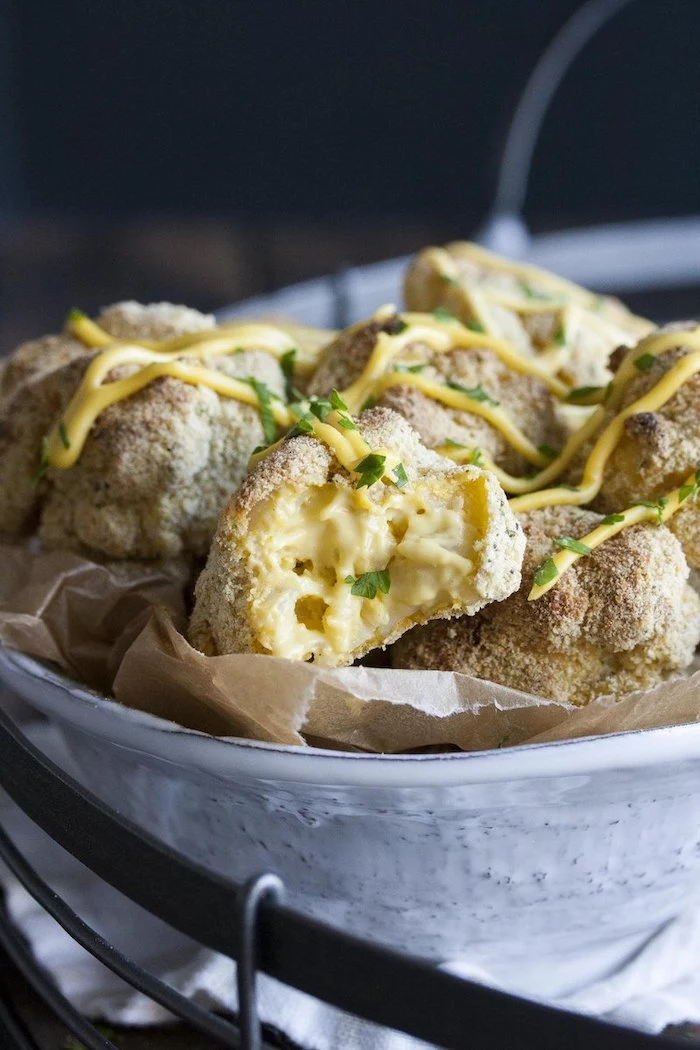
1. The Perfect Fried Bite: Chickpea Falafel
There’s falafel, and then there’s great falafel. The bad kind is dry, dense, and tastes like dusty cardboard. The great kind is unbelievably light and fluffy on the inside with a deeply crispy, golden-brown shell that shatters when you bite it. The secret? It all comes down to the chickpeas.
The Golden Rule: Use Dried, Not Canned, Chickpeas
I’m going to say this in bold because it’s that important: Do not, under any circumstances, use canned chickpeas for falafel. I know it’s tempting, but don’t do it! Canned chickpeas are already cooked and waterlogged. They’ll turn your mix into a sad, pasty goop that will likely disintegrate in the hot oil. Dried chickpeas that have been soaked are still structurally raw, and that raw starch is what binds the mixture and creates that signature fluffy interior. It’s non-negotiable.
The Details:
- Time Commitment: This is a 2-day affair, but don’t panic! It’s about 18-24 hours of hands-off soaking, 20 minutes of active prep, and 15 minutes of frying.
- Budget: Super affordable! A big bag of dried chickpeas costs just a few dollars. This is a great way to feed a crowd on a budget.
- Servings: Makes about 20-24 falafel balls, perfect for 6-8 people as part of a platter.
The Method:
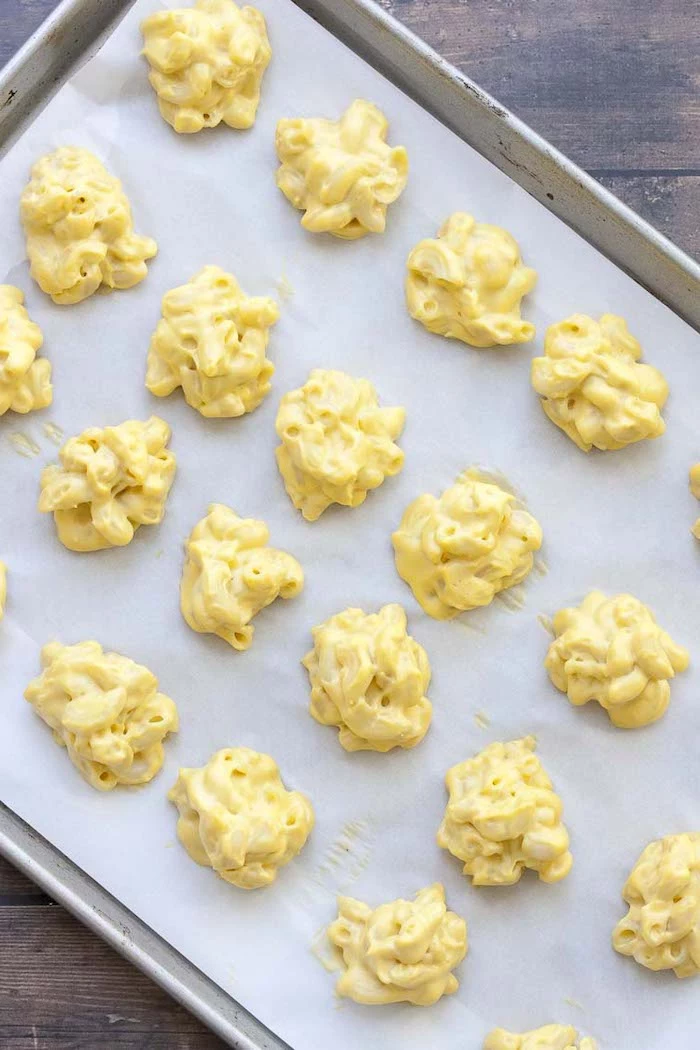
- The Soak: Start with 1 cup of dried chickpeas. Put them in a big bowl and cover them with several inches of cold water. Let them soak for 18-24 hours. They will triple in size! Then, drain them and rinse them really, really well. Pat them dry.
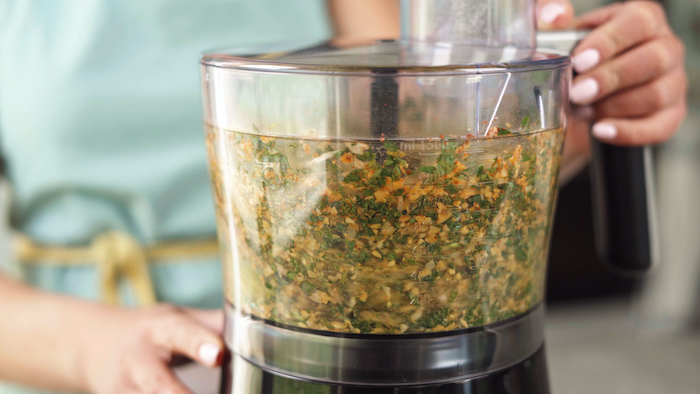
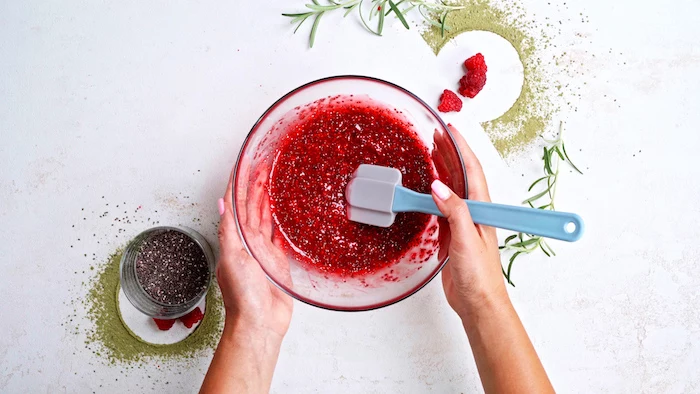
- The Mix: In a food processor (not a blender!), combine the soaked chickpeas, a large bunch of fresh parsley, a large bunch of fresh cilantro (stems and all!), 1 small chopped onion, and 4-6 cloves of garlic. Pulse until it looks like coarse sand or couscous. It should stick together when squeezed.
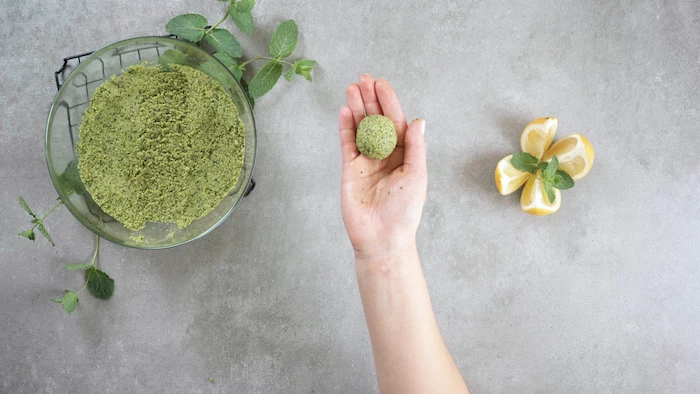
- The Rest: Scrape the mix into a bowl, cover it, and pop it in the fridge for at least an hour. This step is crucial for preventing blowouts in the fryer.
- The Final Touch: Right before you fry, stir in 1 ½ tsp salt, 1 tbsp ground cumin, 1 tsp ground coriander, and the secret weapon: 1 tsp of baking powder. This makes them incredibly light and airy.
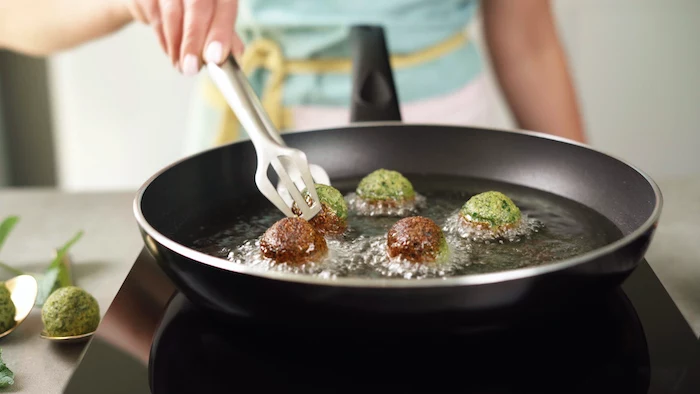
- The Fry: Heat about 2 inches of a neutral oil (like canola or sunflower, which cost about $4-$6 a bottle) in a heavy pot to 350°F. A thermometer is your friend here! Too cool and they get greasy; too hot and they burn. Carefully fry 4-5 balls at a time for 3-5 minutes until deep golden brown.
- Drain Smart: Use a slotted spoon to move them to a wire rack, not paper towels. This keeps the bottoms from getting soggy. Hit them with a little extra salt while they’re hot.
Heads up! If your falafel falls apart, your mix was too wet or your oil wasn’t hot enough. You can try stirring in a tablespoon or two of chickpea flour to help bind it.
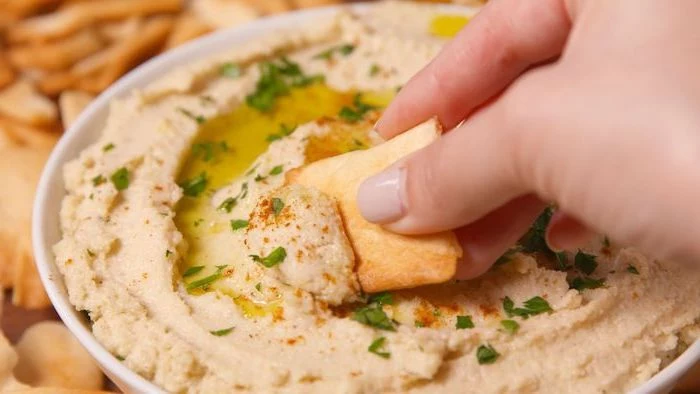
2. The Perfect Creamy Dip: Cashew and Herb ‘Cheese’
Every platter needs a fantastic creamy element, and this cashew dip is a total game-changer. It has a richness that can mimic soft cheese and, as I mentioned, it’s shockingly fast to make.
The Secret: Soaking + High-Speed Blending
To get that silky-smooth texture, you need to soften the cashews first. The ‘quick soak’ method is a lifesaver: just boil them for 10 minutes. Then, you really need a high-speed blender. A regular blender will get you a decent dip, but a powerful one will create a truly luxurious, perfectly smooth cream with zero grittiness.
The Details:
- Time Commitment: Just 15 minutes. No, that’s not a typo. 10 minutes to boil the cashews, 5 minutes to blend.
- Budget: This is the most expensive component. Raw cashews can be pricey, maybe $8-$12 for a bag at the supermarket. Pro tip: check the bulk bins at stores like Whole Foods or local health food shops to buy just what you need.
- Servings: Makes about 2 cups of dip, which is plenty for 8-10 guests.
The Method:
- The Base: In a high-speed blender, combine 1 ½ cups of quick-soaked raw cashews, 3 tbsp fresh lemon juice, 2 tbsp nutritional yeast (you’ll find this in the health aisle; it looks like yellow fish food and has a cheesy flavor), 1 small garlic clove, ¾ tsp salt, and ¼ cup of water.
- Blend It Smooth: Blast it on high for 1-2 minutes until it’s completely, utterly smooth. If it’s too thick to blend, add another tablespoon of water. You’re aiming for the consistency of thick Greek yogurt.
- Fold in Herbs: Once it’s smooth, add ¼ cup of fresh herbs like dill or chives and just pulse a few times. You want to see the pretty green flecks, not turn the whole dip green.
- Chill Out: Transfer to a bowl and let it chill for at least 30 minutes. It thickens as it cools and the flavors get even better.
Good to know: For a nut-free version, you can use raw sunflower seeds. You’ll need to soak them overnight, and the flavor will be a bit more earthy, but it’s a great alternative.
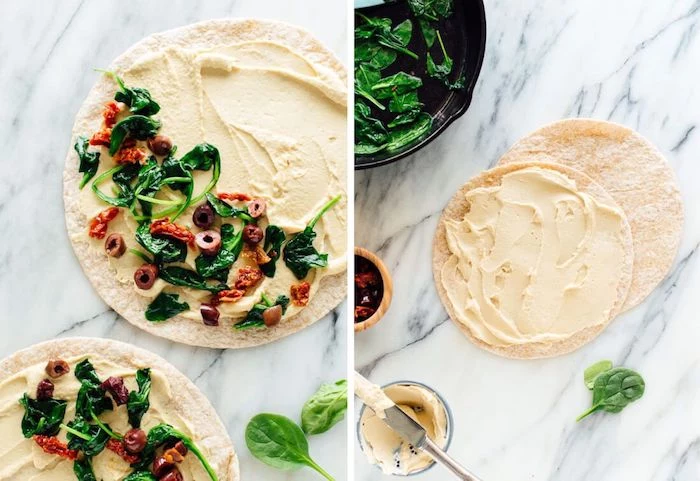
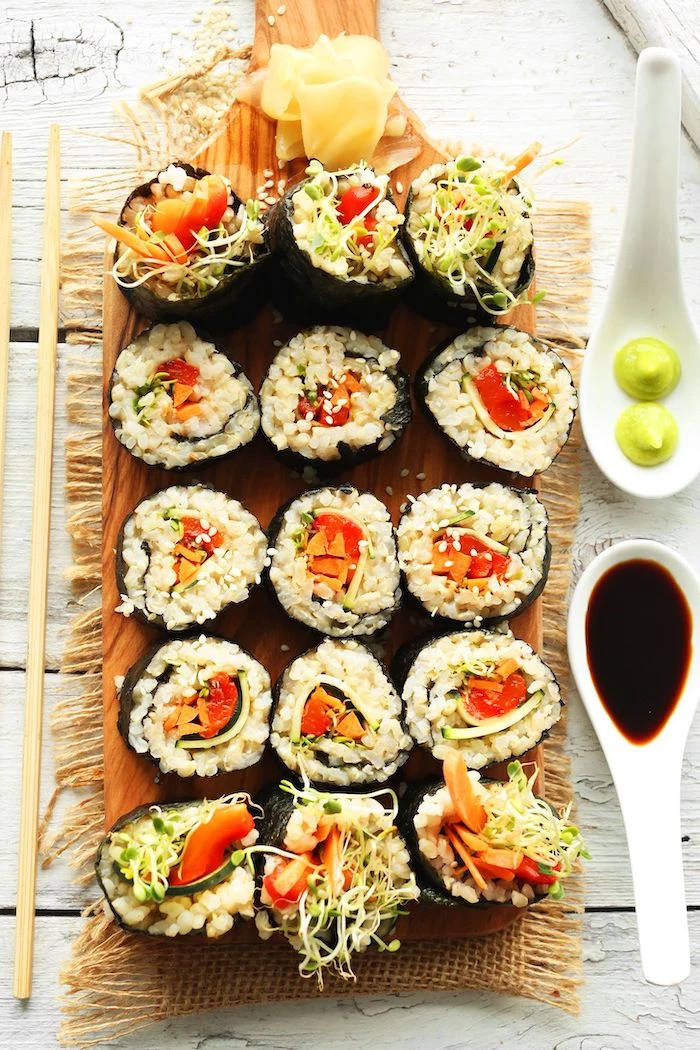
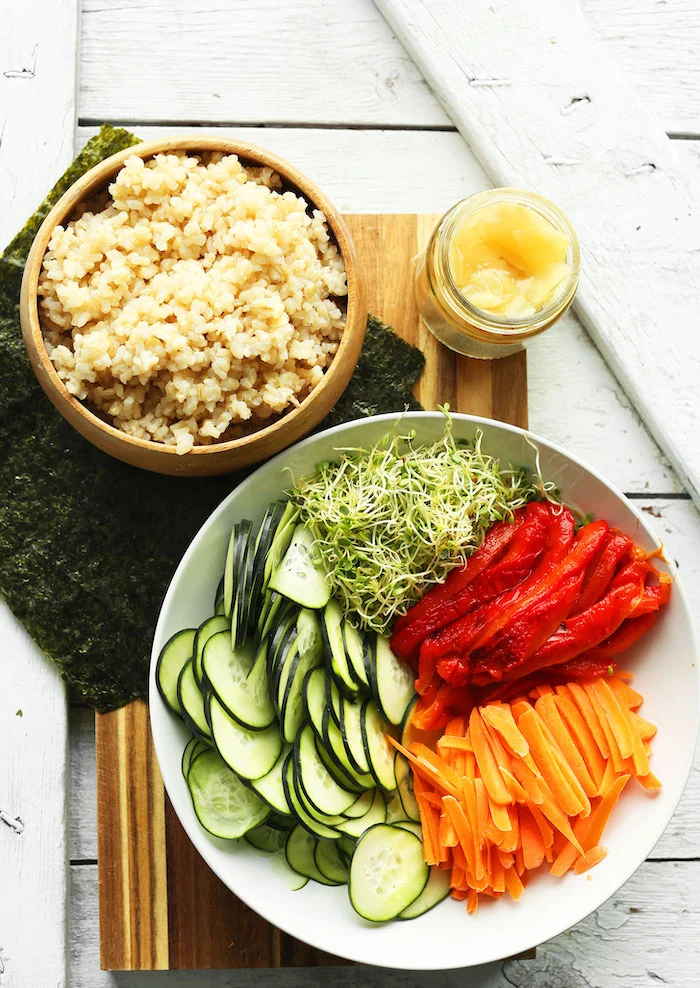
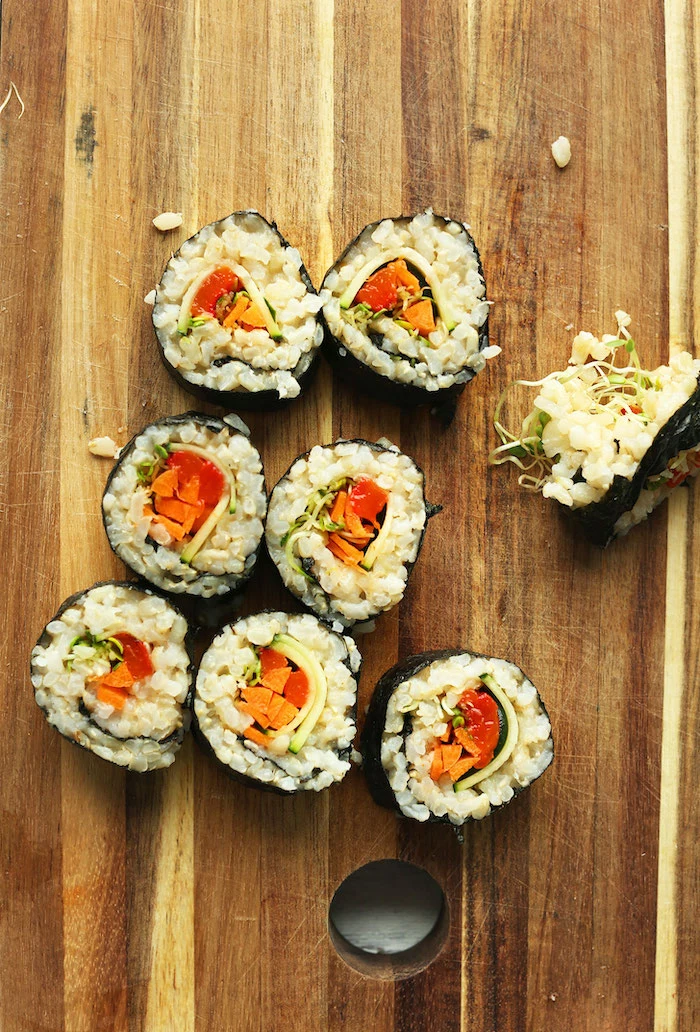
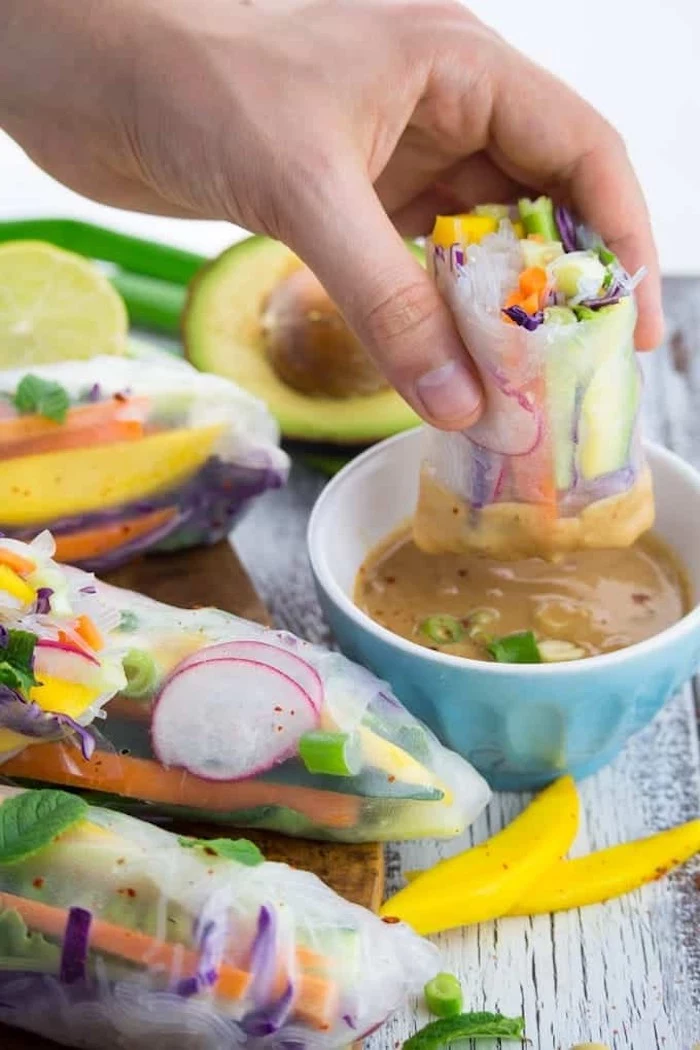
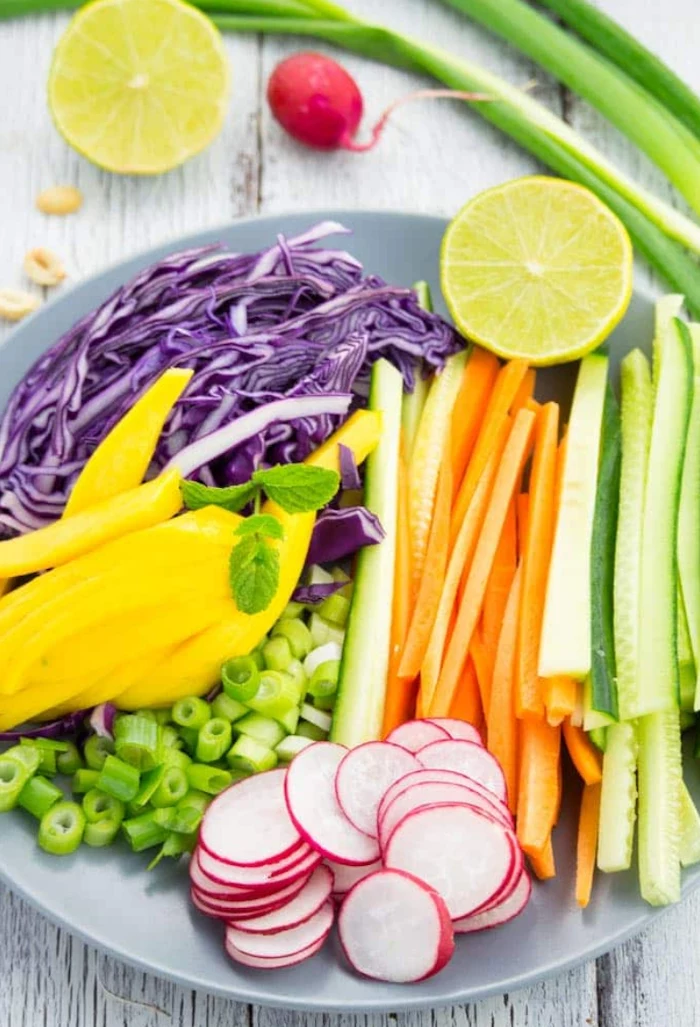
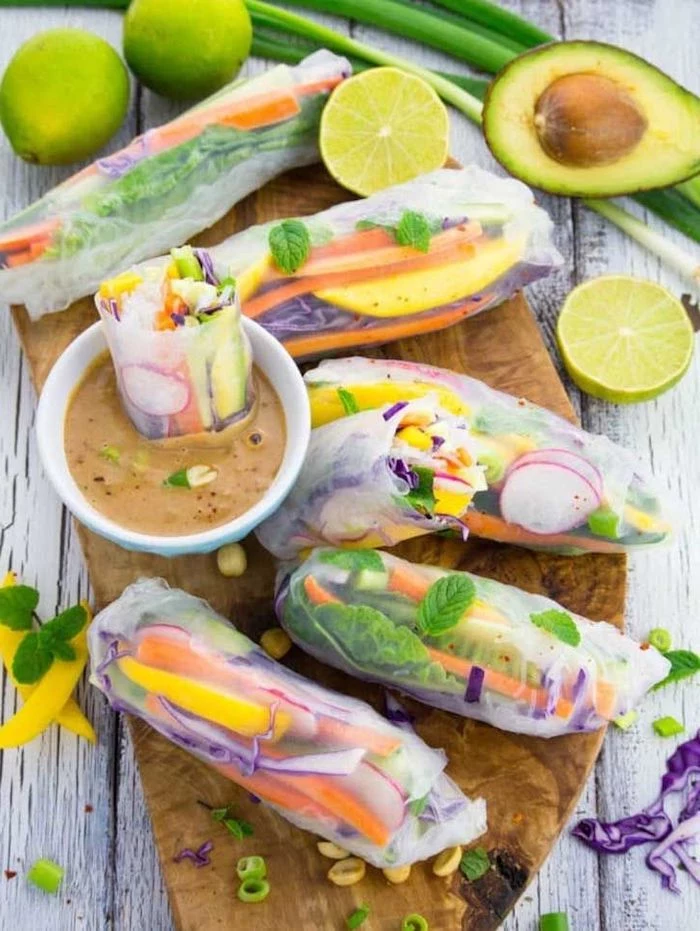
3. The Perfect Fresh Bite: Vietnamese Summer Rolls
These are pure freshness. They’re all about the interplay of soft, crunchy, and chewy textures, and they look stunning on a platter. The key here isn’t skill, it’s prep work. Get all your ingredients chopped and ready before you even think about rolling.
The Secret: Taming the Rice Paper
Rice paper wrappers are delicate. Dip one in warm water for too long, it becomes a sticky nightmare. Not long enough, and it cracks. The sweet spot is a quick 15-20 second dip. It should still feel a little firm when you take it out; it will continue to soften as you fill it.
The Details:
- Time Commitment: The prep is the real work. Budget 30-40 minutes for all the chopping. The rolling itself takes another 20 minutes once you have your system down.
- Budget: Very reasonable. Rice paper and vermicelli noodles are cheap. The main cost is just the fresh vegetables and herbs you choose.
- Servings: This recipe makes 8-10 rolls, a nice appetizer for 4-5 people.
The Method:
- Prep Station: Cook and cool some vermicelli rice noodles. Julienne your veggies—carrots, cucumber, bell peppers. Have your fresh herbs (mint and cilantro are a must!) and some lettuce leaves ready. For protein, I like to use baked tofu sliced thin. You can find rice paper wrappers in the international aisle of most grocery stores for just a few dollars.
- Time-Saving Hack: A julienne peeler is your absolute best friend for this recipe. It makes perfect, thin matchsticks of carrots and cucumbers in seconds and costs about $10 online or at kitchen stores.
- The Roll: Dip a wrapper in warm water for 15 seconds and lay it on a clean, damp surface. On the third closest to you, lay down a lettuce leaf, then a small amount of noodles, veggies, and herbs. Don’t overfill! That’s the #1 mistake. Fold the bottom edge up over the filling, fold in the sides, and then roll it away from you tightly.
These are best served fresh with a simple peanut dipping sauce (just whisk peanut butter, soy sauce, lime juice, a little maple syrup, and hot water).
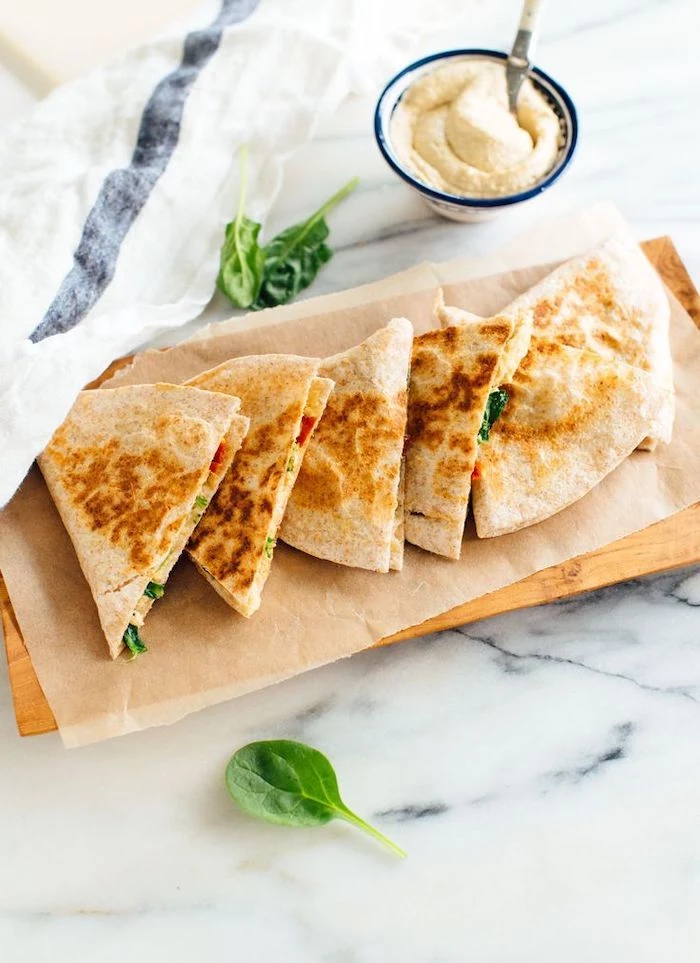
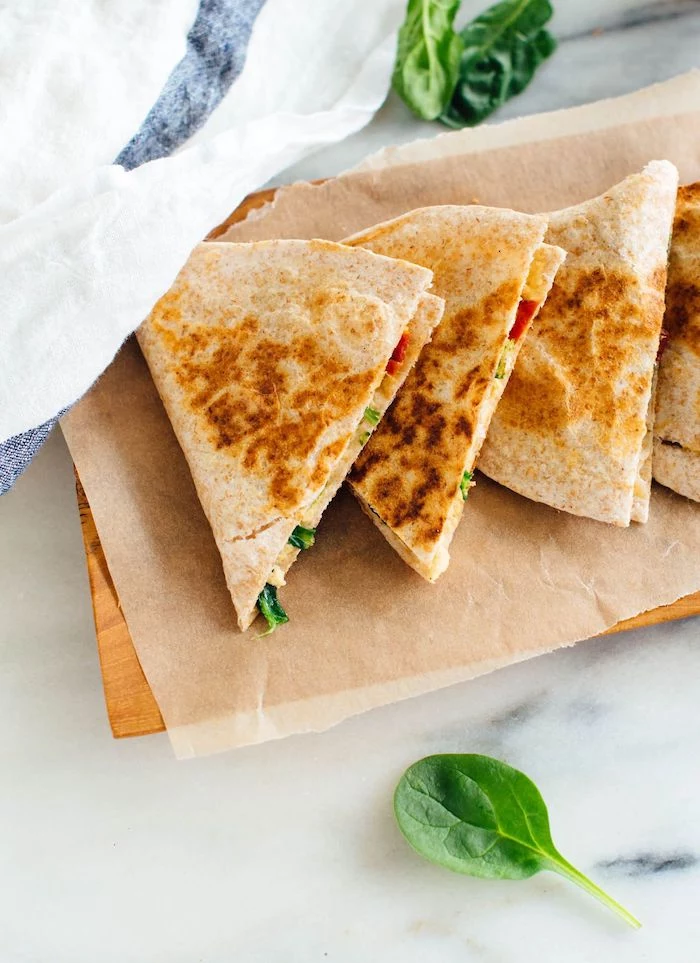
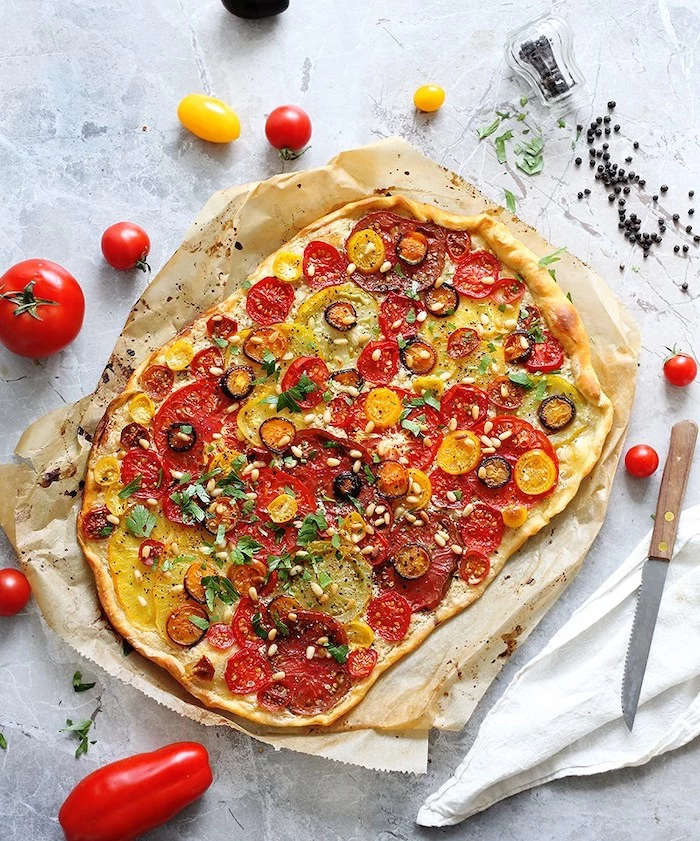
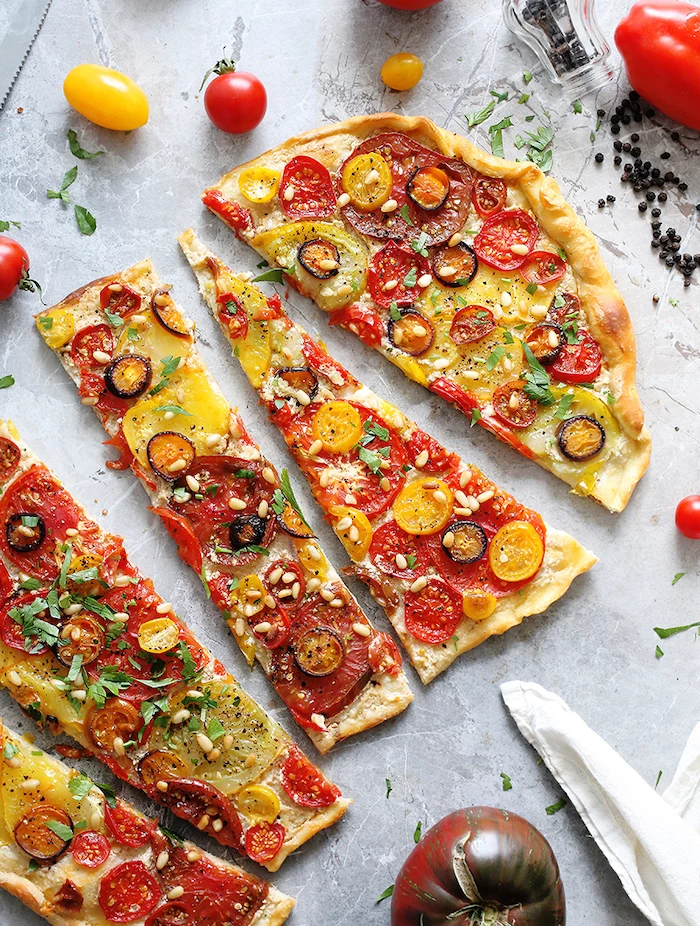
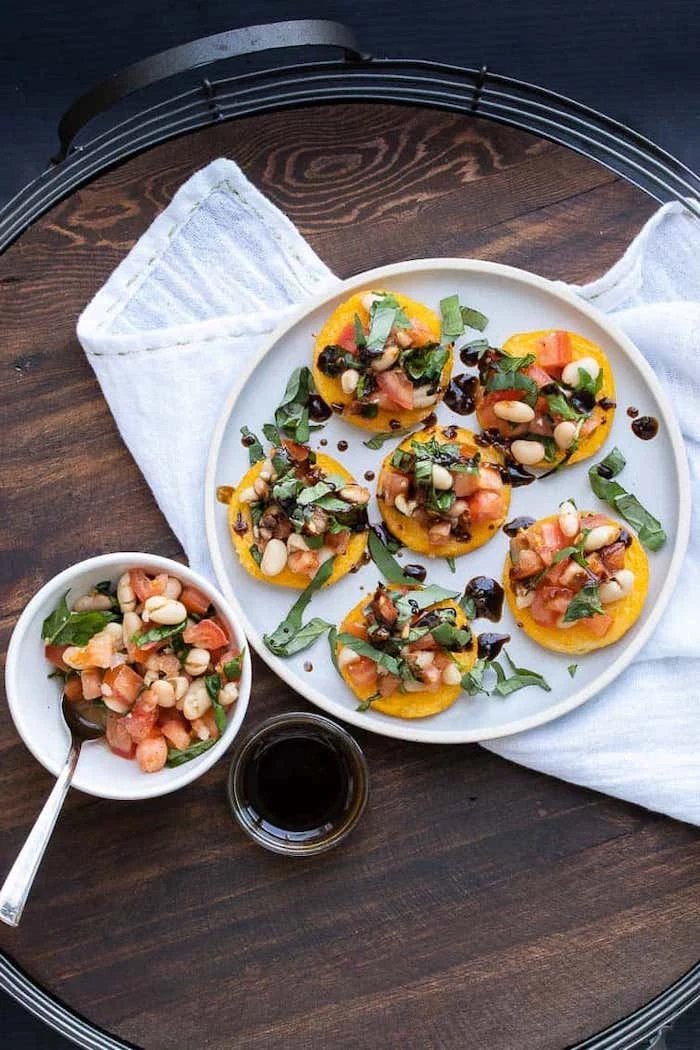
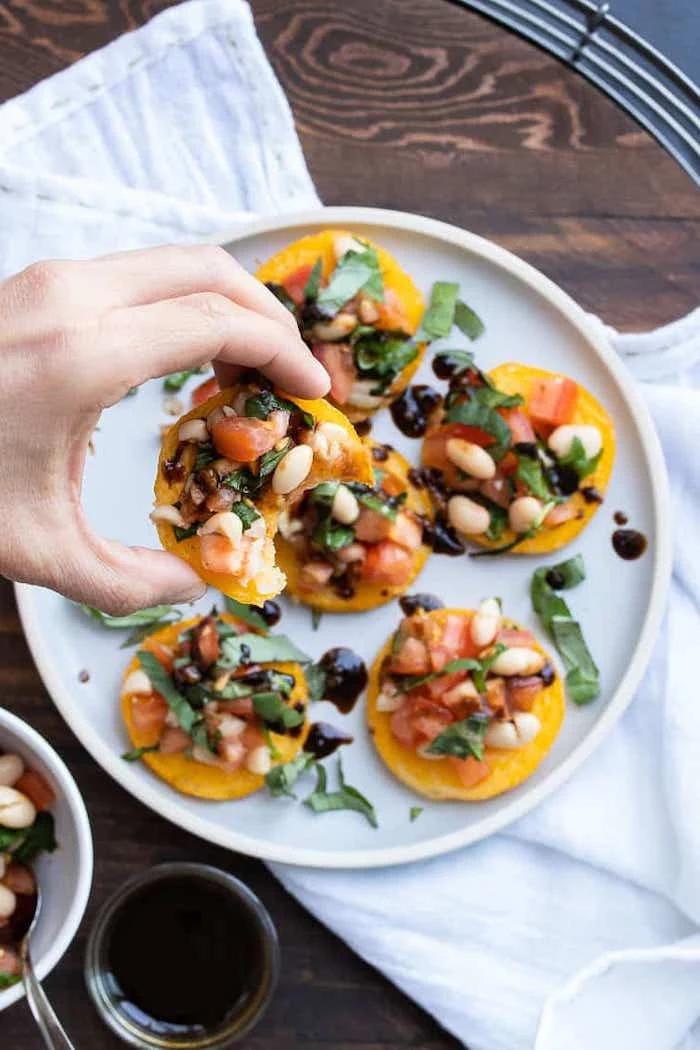
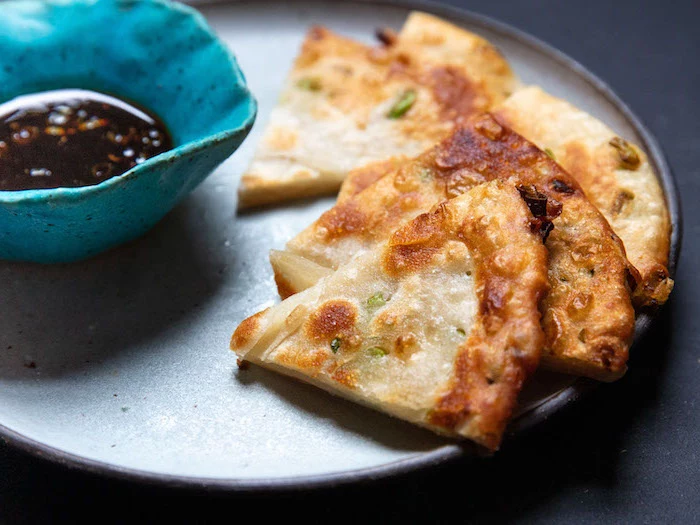
4. The Perfect Baked Bite: Tomato and Tahini Flatbread
This appetizer is a total winner. It’s warm, savory, and incredibly versatile. By using store-bought pizza dough, you get something that feels gourmet with minimal effort.
The Secret: Get Your Oven HOT
To get a crust that’s crispy on the bottom but still has a nice chew, you need high heat. Crank your oven up as high as it will go (usually 475-500°F) and preheat your baking surface—a pizza stone or even just an overturned heavy baking sheet works great. Hitting the dough with that intense, direct heat is what creates that perfect pizzeria-style crust.
The Details:
- Time Commitment: With store-bought dough, this is on the table in under 30 minutes. Super fast.
- Budget: Very friendly on the wallet. A ball of fresh pizza dough is usually $3-$5 at the grocery store.
- Servings: Easily serves 4-6 people as an appetizer when cut into strips.
The Method:
- Preheat: Place your pizza stone or baking sheet in the oven and preheat to its highest temp.
- The Base: Instead of tomato sauce, we’re making a savory tahini base. Whisk together ¼ cup of tahini, 1 minced garlic clove, 1 tbsp lemon juice, and a few tablespoons of water until it’s a spreadable paste. A good, runny tahini is key here—look for it in the international aisle.
- Assemble: Stretch a 1 lb ball of room-temperature pizza dough into a rustic shape. Spread the tahini mix on top, then scatter with a pint of halved cherry tomatoes and some thinly sliced red onion.
- Bake: Bake for 10-15 minutes, until the crust is golden and the tomatoes are blistered.
- Finish: Let it cool for a minute, then top with a handful of fresh arugula, a drizzle of good olive oil, and a sprinkle of flaky sea salt before slicing.
Your Make-Ahead Game Plan for Easy Hosting
Okay, this is the real secret to a stress-free party. Nobody wants to be frantically chopping and frying when their guests are arriving. Here’s how you can prep this entire platter in advance.

- Two Days Before: Make the cashew-herb ‘cheese.’ Honestly, it tastes even better on day two as the flavors meld. Store it in an airtight container in the fridge.
- One Day Before: Soak your chickpeas for the falafel. Make the falafel mixture (but DON’T add the baking powder and salt yet!) and store it covered in the fridge. Chop all your vegetables for the summer rolls and store them in containers. Whisk together the peanut dipping sauce.
- The Day of the Party (Morning): Assemble the summer rolls. They are best fresh, but you can make them a few hours ahead. Lay them on a platter without touching each other and cover them with a damp paper towel and then plastic wrap to keep them from drying out.
- Right Before Serving: Fry the falafel. Bake the flatbread. These two things are best served hot and fresh, so time them for just as your guests are settling in.
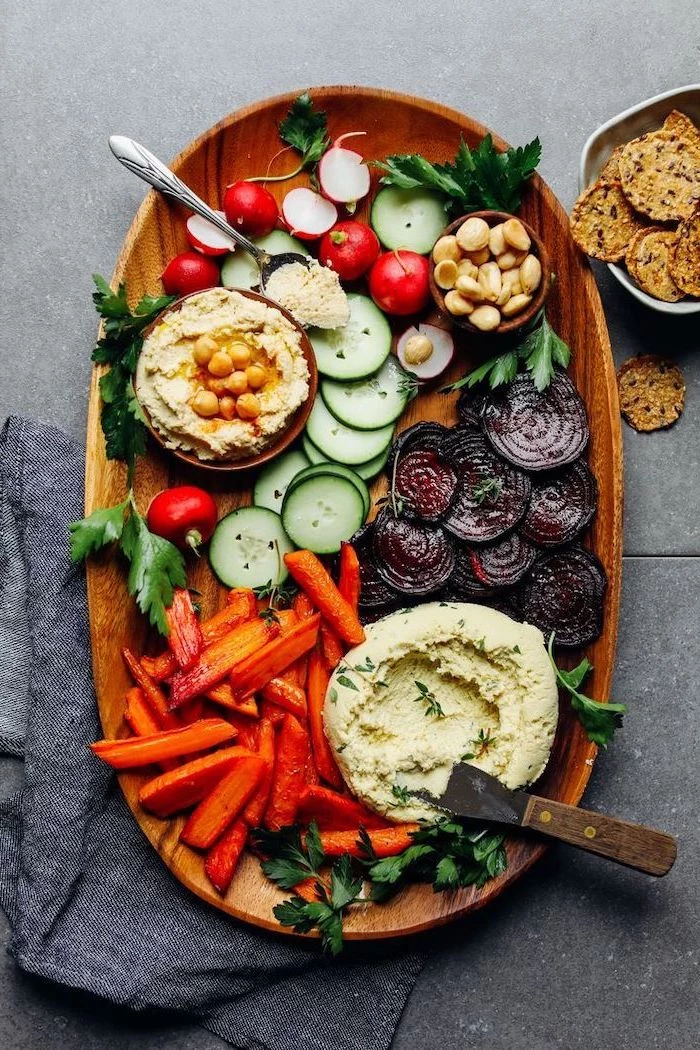
Platter Assembly 101
You don’t need a fancy, expensive wooden board (though they are nice!). A large cutting board, a clean baking sheet, or even a couple of large dinner plates pushed together works perfectly.
- Start with Bowls: First, place your bowls on the board. One for the cashew dip, one for the peanut sauce. This creates structure.
- Add Large Items: Next, place your biggest items. Slice up the warm flatbread and arrange it in a corner.
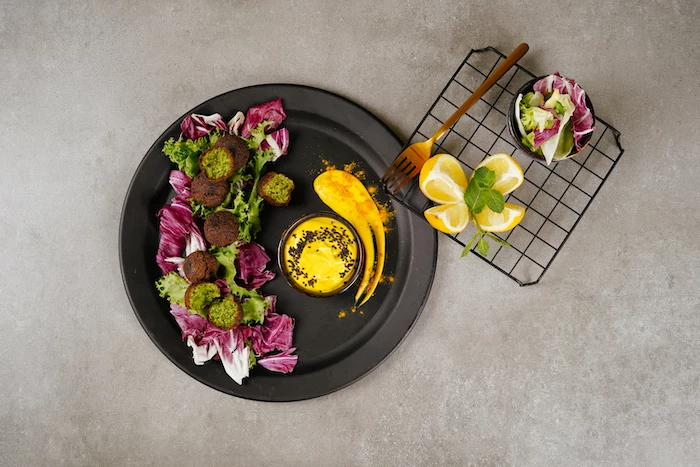
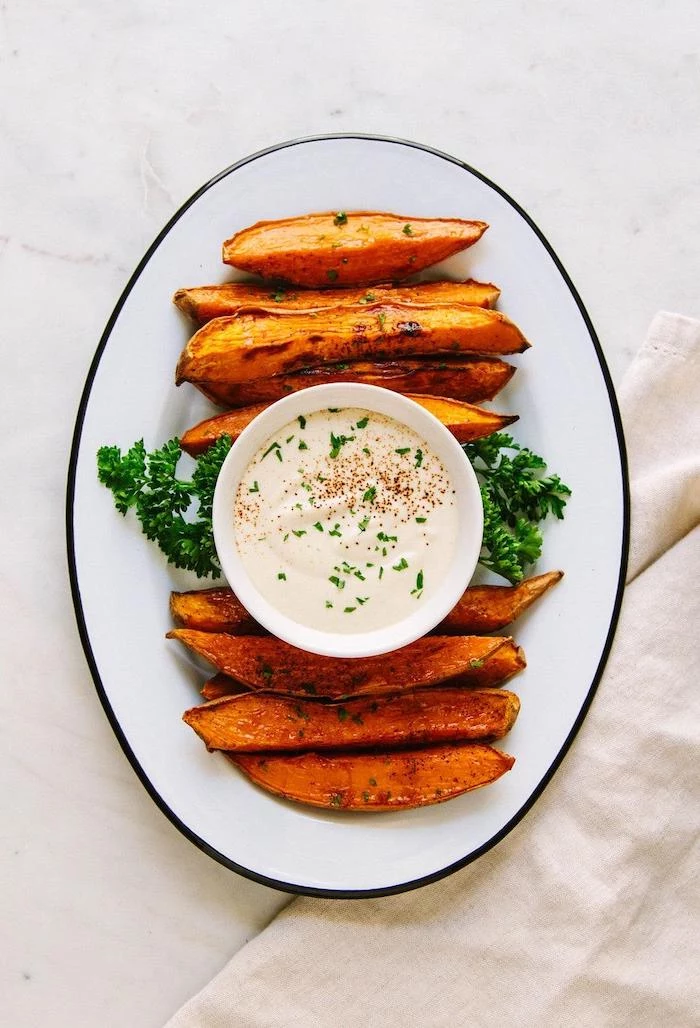
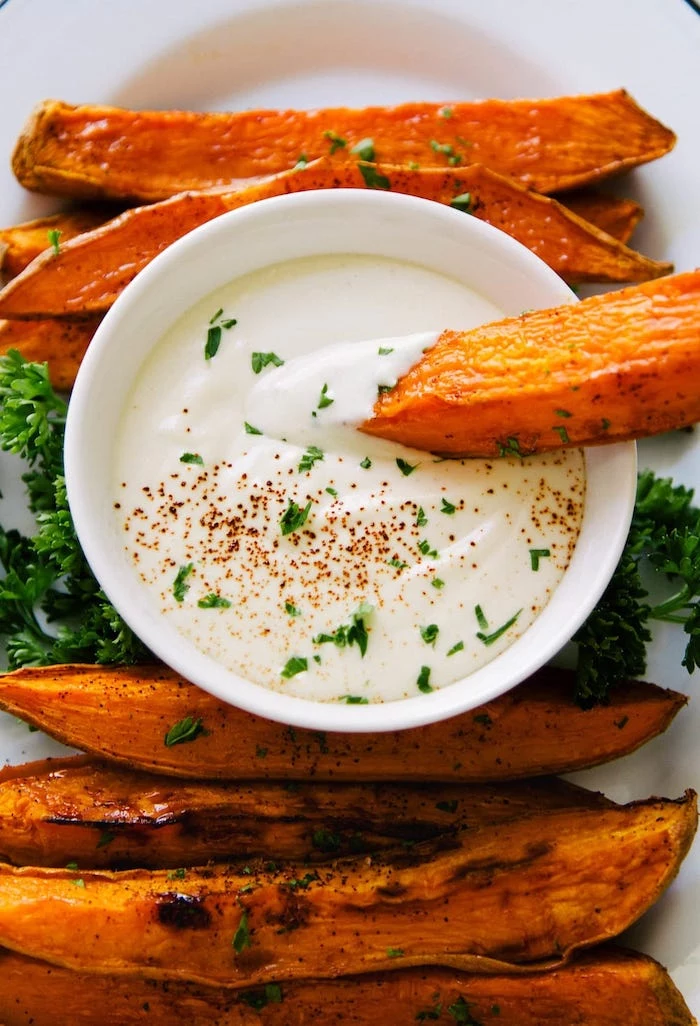
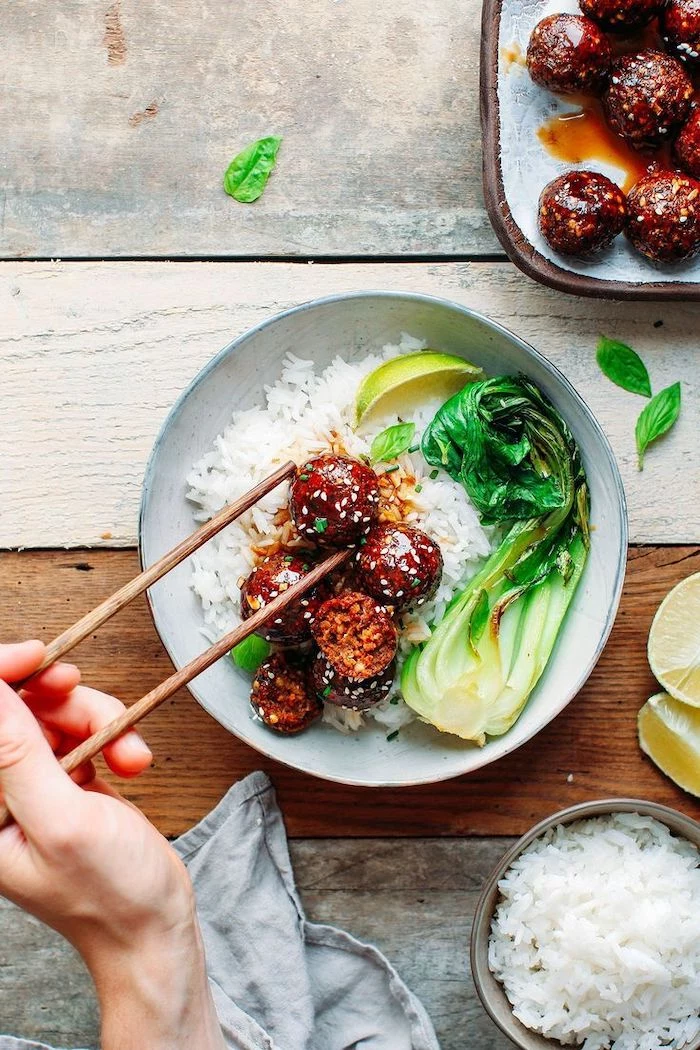
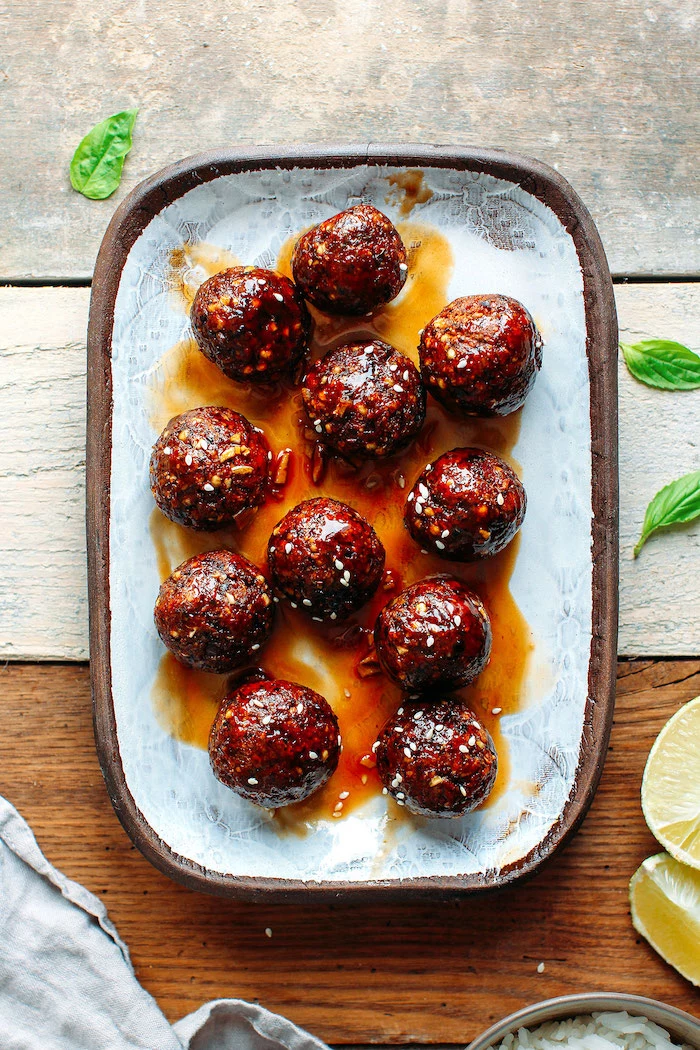
- Fill the Gaps: Now, have fun filling in all the empty spaces. Nestle the hot falafel in a pile, line up the summer rolls, and add your crunchy elements like crackers, pita triangles, and fresh veggie sticks (carrots, cucumber, bell peppers).
- The Final Flourish: Tuck some fresh herbs like rosemary sprigs or parsley into any remaining nooks and crannies. It makes the whole thing look abundant and beautiful.
And there you have it. You’ve got hot, cold, creamy, crispy, fresh, and rich all on one platter. When you move beyond just following recipes and start thinking about these techniques, you unlock a whole new level of cooking. You start to understand how to build flavors and create experiences. So start with one of these, get comfortable, and soon you’ll be mixing and matching to create platters that are all your own.
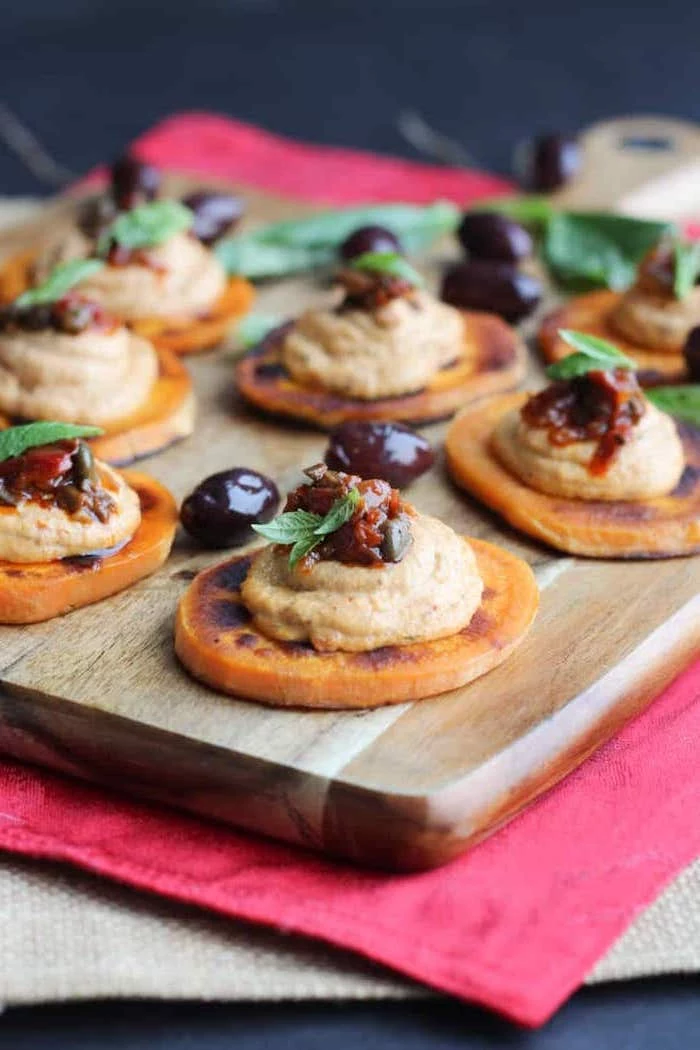
Inspirational Gallery
The Centerpiece Secret: Every stunning board needs a visual anchor. Instead of scattering everything evenly, create a focal point. A large bowl of vibrant beet hummus, a wheel of gourmet vegan cheese like Miyoko’s Kitchen Smoked English Farmhouse, or a ramekin piled high with glistening olives draws the eye and makes the whole arrangement feel more intentional.
- Keep it crispy by reheating fried items like falafel or arancini in an air fryer or a hot oven, never the microwave.
- Make dips and spreads like hummus or cashew cheese 2-3 days ahead. Their flavors will meld and deepen.
- Chop all your veggies and store them in airtight containers a day before to make assembly a breeze.
The key to a stress-free party? Prep work.
More than one-third of Americans are actively trying to incorporate more plant-based foods into their diet, according to a 2022 Yale survey.
This isn’t about catering to a niche anymore. A well-crafted vegan platter meets a growing demand for delicious, inclusive, and modern food choices that appeal to a broad audience.
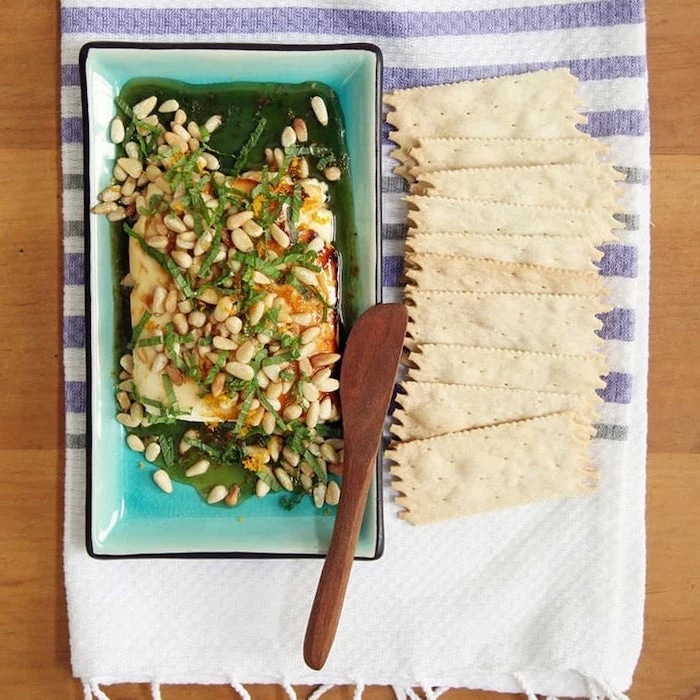
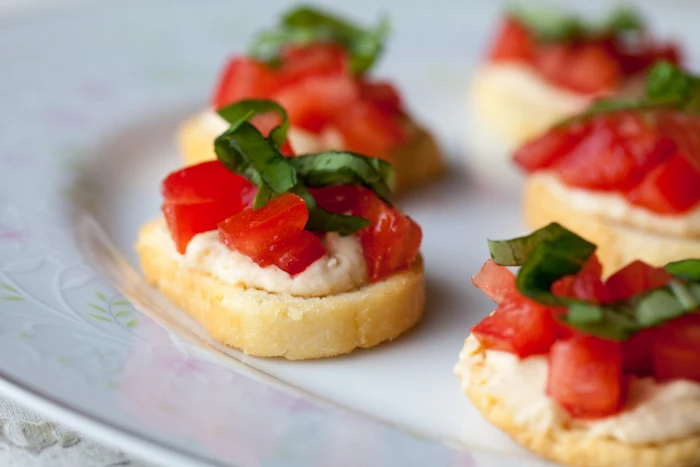
How do you get that creamy, cheesy texture without dairy?
The answer often lies in cashews. Soaking raw cashews in hot water for at least an hour (or overnight in cold water) softens them perfectly. When blended with a splash of water, lemon juice (for tang), and nutritional yeast (for cheesy flavor), they transform into an unbelievably silky base for dips, sauces, or even spreadable cheese.
Slate Board: Offers a dramatic, dark backdrop that makes colors pop. It’s non-porous, easy to clean, and can be chilled to help keep items cool.
Wooden Board: Provides a warm, rustic, and inviting feel. Acacia and olive wood are beautiful, durable choices. It requires occasional oiling but adds an organic touch.
For a modern, high-contrast look, go with slate. For a classic, homey vibe, wood is unbeatable.

Don’t underestimate the power of a good cracker. It’s not just a vehicle for the dip; it’s part of the textural experience. Move beyond the basics and include a variety. Think sturdy, seedy crackers like Mary’s Gone Crackers for heavy dips, thin water crackers for delicate pâtés, and maybe some crunchy breadsticks for height and fun.
A touch of smoky flavor can instantly elevate a dish from ‘good’ to ‘unforgettable’. A few drops of liquid smoke—Wright’s is a classic, naturally-derived brand—can add a bacony, grilled depth to mushroom pâté, BBQ jackfruit sliders, or a simple bean dip. Use it sparingly; a little goes a long way!
- Provides a bright, acidic crunch that cuts through rich flavors.
- Adds a stunning pop of fuchsia color to your board.
- Incredibly easy to make with just four ingredients.
The secret? Quick-pickled red onions. Thinly slice one red onion and pack it into a jar. Heat 1/2 cup apple cider vinegar, 1 tbsp maple syrup, and 1.5 tsp salt until just simmering, then pour over the onions. They’ll be ready in an hour!
Think beyond the board. A truly pro platter uses varying heights to create visual interest. Place a dip in a tall, elegant bowl. Use a small pedestal stand for a special item like vegan caviar. Lean long crackers or breadsticks up against a ramekin. This simple trick breaks up the flatness and makes the spread look more abundant and dynamic.
I need a great store-bought option. What are the best vegan puff pastries?
You’re in luck! Many widely available frozen puff pastry brands are ‘accidentally vegan.’ The most famous is Pepperidge Farm Puff Pastry Sheets, which uses vegetable oils instead of butter. Always double-check the ingredients list, but it’s a fantastic shortcut for making savory pinwheels, tartlets, or cheese straws.
Take inspiration from the Mediterranean Mezze platter. It’s a masterclass in variety and balance. Combine creamy (hummus, baba ghanoush), briny (olives, caper berries), fresh (cucumber, tomato), and hearty (dolmades, falafel) elements, all served with warm pita bread. It’s naturally vibrant and full of crowd-pleasing, plant-based flavors.
Did you know? Nutritional yeast, the secret weapon for cheesy vegan flavor, is a deactivated yeast from the Saccharomyces cerevisiae strain and is a complete protein. It’s also a fantastic source of B vitamins, especially B12 in fortified versions like Bragg’s.
The biggest rookie mistake: Overcrowding the board. While you want it to look abundant, cramming every inch makes it difficult for guests to pick up items without causing an avalanche. Leave some ‘breathing room’ between clusters of food. It looks more elegant and is far more user-friendly.
Building a beautiful board doesn’t have to be expensive. Anchor it with budget-friendly homemade dips like a spicy black bean dip or a white bean-rosemary dip. Fill in the gaps with seasonal produce, which is always cheaper and tastier. A handful of toasted pumpkin seeds can add the same crunch as pricier nuts.
Don’t just serve olives from the jar. Elevate them in two minutes:
- Drain a jar of your favorite olives (Castelvetrano are great).
- Gently warm them in a small pan with a splash of olive oil, a few strips of orange or lemon zest, and a sprig of rosemary or thyme.
Serve warm. The infused aroma is intoxicating and signals to guests that every detail has been considered.
To keep your wooden serving boards looking their best, never soak them or put them in the dishwasher. After use, wash with a little mild soap and warm water, and dry immediately. Once a month, rub the surface with a food-safe mineral oil or a specialized board cream like Howard’s Butcher Block Conditioner to prevent the wood from drying out and cracking.
A single ingredient can create a showstopper. Try roasting a whole head of garlic until soft and caramelized. To do it, slice the top off, drizzle with olive oil, wrap in foil, and bake at 400°F (200°C) for 40-50 minutes. Place the whole head on the board and let guests squeeze the sweet, mellow cloves onto crackers themselves. It’s interactive, aromatic, and deeply flavorful.
- Dresses up simple grilled bread or crackers.
- Adds a final, professional-looking flourish to dips.
- Introduces subtle layers of flavor.
The trick? A finishing oil. A drizzle of high-quality extra virgin olive oil, a chili-infused oil for a kick of heat, or a basil-infused oil for freshness can transform the look and taste of your entire platter.
What’s the difference between hummus and baba ghanoush?
Both are classic Middle Eastern dips, but their base ingredients are different. Hummus is made from chickpeas, tahini, lemon, and garlic, resulting in a nutty and earthy flavor. Baba ghanoush is made from roasted, smoky eggplant, giving it a silkier texture and a distinct, complex flavor. Offering both provides a fantastic contrast in taste and texture.
Think in threes for maximum variety without overwhelming yourself. Aim for: three colors (e.g., green olives, red pepper dip, pale crackers), three textures (creamy hummus, crunchy nuts, soft bread), and three flavor profiles (salty pretzels, sweet fruit jam, acidic pickles). This simple guideline ensures a balanced and visually appealing board every time.

The ‘Butter Board’ trend is easily adapted for a vegan crowd. Start by whipping a high-quality vegan butter, like Miyoko’s Kitchen Cultured Vegan Butter, until it’s light and fluffy. Spread it thinly on a board and get creative with toppings: flaky sea salt, lemon zest, fresh herbs like dill and chives, finely chopped red onion, and even edible flowers. Serve with warm, crusty bread for a truly decadent experience.
A study from the University of Oxford suggests that eating with our hands can make food seem tastier and more satisfying.
This is the magic of an appetizer board! It encourages a relaxed, communal, and sensory style of eating that formal place settings can’t replicate. Provide plenty of napkins!
A simple garnish can make store-bought feel homemade. Sprinkle smoked paprika and a swirl of olive oil on packaged hummus. Top a block of vegan feta with fresh thyme and cracked black pepper. Toss roasted red peppers from a jar with fresh parsley and minced garlic. These small touches take seconds but make a huge impact.
Don’t forget the tools! A beautiful board can be frustrating if guests can’t serve themselves easily. Ensure every single item has its own serving utensil. That means a small knife for each cheese, a separate spoon for every dip, and tiny forks or tongs for pickles and olives. It keeps the board tidy and prevents flavors from mixing.


