How to Make a No-Bake Rice Pudding Cake That Actually Slices Perfectly
After years of working in professional kitchens, you learn a funny thing: the most impressive dishes are rarely the most complicated. They’re usually simple classics, just executed perfectly. And this no-bake rice pudding cake? It’s the perfect example.
In this article
This isn’t just another dessert recipe. Honestly, it’s a crash course in how ingredients actually work together. So many online recipes just give you the steps but skip the why—like why a certain rice makes it creamy, or how gelatin magically holds it all together. We’re going to get into the nitty-gritty, the stuff that makes the difference between a pretty good dessert and one that people talk about for weeks.
Heads up, though: this isn’t a 30-minute shortcut. It’s about doing it right. Here’s a quick time budget so you can plan your day:
- Active Time: About 45 minutes of stirring and mixing.
- Cooling Time: Around 1 hour for the base to cool down.
- Chilling Time: At least 6 hours, but overnight is even better.
So, let’s dive in and make something amazing.
The ‘Why’ Behind the Wow: A Little Kitchen Science
Before we even grab a pan, let’s talk about what’s happening behind the scenes. Understanding this stuff is what will let you nail this recipe and even start creating your own versions later. It all comes down to a few key ideas.
1. The Rice is Everything (No, Really)
Your choice of rice is the single most important decision you’ll make. The magic is in the starch. We’re looking for rice high in a starch called amylopectin, which gets super creamy when cooked. When heated in milk, it bursts and thickens the liquid into a luscious pudding.
Your best bet is Arborio rice. It’s the classic choice for a reason. It creates an incredibly creamy base while the grains themselves keep a subtle, pleasant chew. It’s the dependable workhorse you can find in most grocery stores for around $4-$6 a box. If you feel like splurging, you can upgrade to Carnaroli rice. It’s a bit pricier, maybe $7-$9 a box, but it’s known as the ‘king’ of risotto rices for a reason. It’s even creamier and a little more forgiving if you’re worried about overcooking.
And what should you absolutely avoid? Standard long-grain rice like Basmati or Jasmine. They just won’t work here. They’re designed to stay fluffy and separate, so you’ll end up with a soupy, grainy mess instead of a smooth, sliceable cake. Save those for your stir-fry!
2. Gelatin: The Invisible Skeleton
So, how does this pudding become a cake without an oven? Thank gelatin. When you soak gelatin in cold water and then melt it into a warm base, its protein strands unwind. As it all cools down in the fridge, those strands tangle up, trapping the liquid and forming a stable gel. It’s what gives the cake its structure.
Professionals often lean towards sheet gelatin because it provides super consistent results. You might be wondering, “Where do I even buy that?” Check specialty baking shops or online retailers like Amazon. A pack of 50 sheets might cost you between $15 and $20, but it lasts a long time. If you can’t find it, don’t sweat it—powdered gelatin works just fine. One standard 1/4-ounce envelope is roughly equivalent to 3-4 silver-grade sheets. The key is to sprinkle the powder over a few tablespoons of cold water and let it sit for 5-10 minutes. Don’t just dump it in, or it’ll clump up.
Quick tip: Temperature is crucial. You have to add the bloomed gelatin to a warm base, not a hot one. If the base is boiling, it will destroy the gelatin’s setting power. Too cold, and you’ll get nasty stringy bits. Aim for warm to the touch, like a hot cup of coffee you can actually drink.
3. The Magic of Whipped Cream
The final piece of the texture puzzle is whipped cream. Folding in whipped cream is what turns a dense pudding into a light, airy, almost mousse-like cake. Use real heavy whipping cream with at least 35% fat content. Anything less just won’t whip up properly or hold its shape.
And here’s a pro tip that makes a huge difference: make sure everything is COLD. The cream, the bowl, even the whisk. I always pop my metal bowl and beaters in the freezer for 15 minutes before I start. It makes the cream whip up faster and more stable.
Let’s Get Cooking: The Step-by-Step Method
Alright, with the theory out of the way, let’s get our hands dirty. Follow these steps and pay attention to the little details—they matter!
What You’ll Need
- A good heavy-bottomed saucepan: A 3 or 4-quart pan is perfect. The heavy base is non-negotiable; it prevents the milk and rice from scorching on the bottom.
- An 8-inch springform pan: This makes unmolding the cake a breeze. By the way, if you only have a 9-inch pan, that’s totally fine! Your cake will just be a bit thinner and might set faster, so check on it around the 5-hour mark.
- Silicone Spatula: For folding and making sure you don’t waste a drop.
- Mixer: A stand mixer or electric hand mixer for the cream.
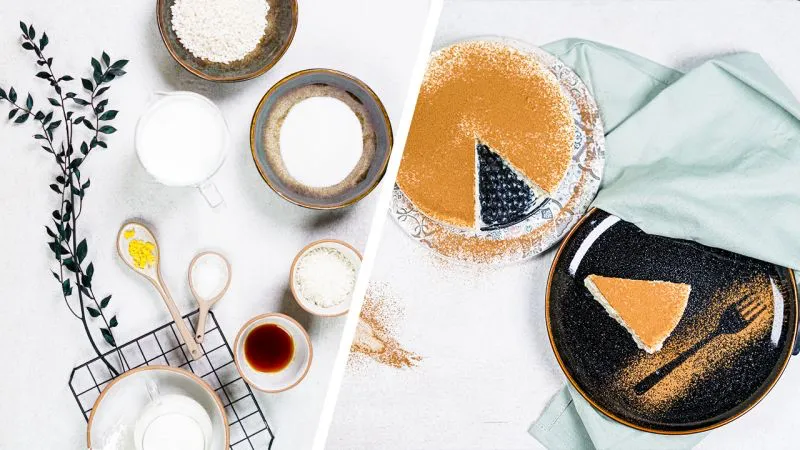
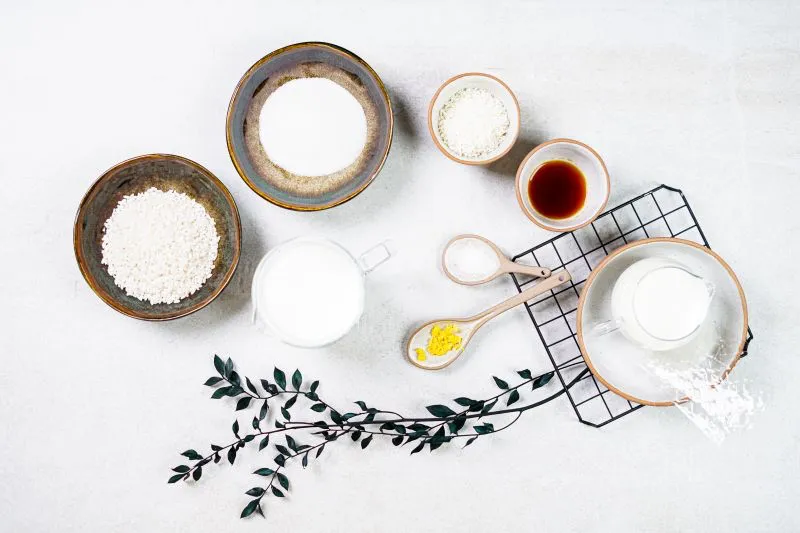
Ingredients:
- Whole Milk: 2 cups (about 500ml)
- Arborio Rice: 2/3 cup (125g)
- Granulated Sugar: 1/2 cup (100g)
- Lemon Zest: 1 wide strip (use a vegetable peeler)
- Vanilla Bean: 1, split, or 2 tsp pure vanilla extract
- Fine Sea Salt: 1/4 tsp
- Silver-Grade Gelatin Sheets: 4 sheets (or 1 envelope powdered gelatin)
- Heavy Whipping Cream: 1 cup (240ml), very cold
- Unsweetened Shredded Coconut: 1/4 cup (25g), toasted
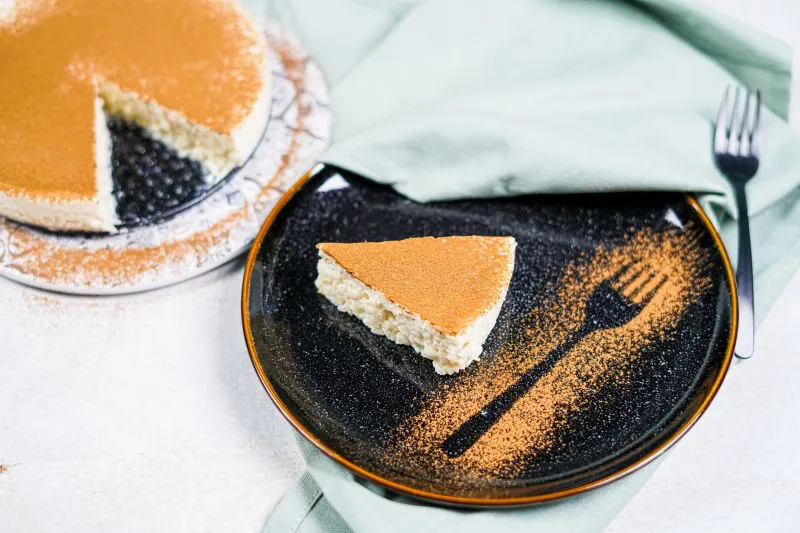
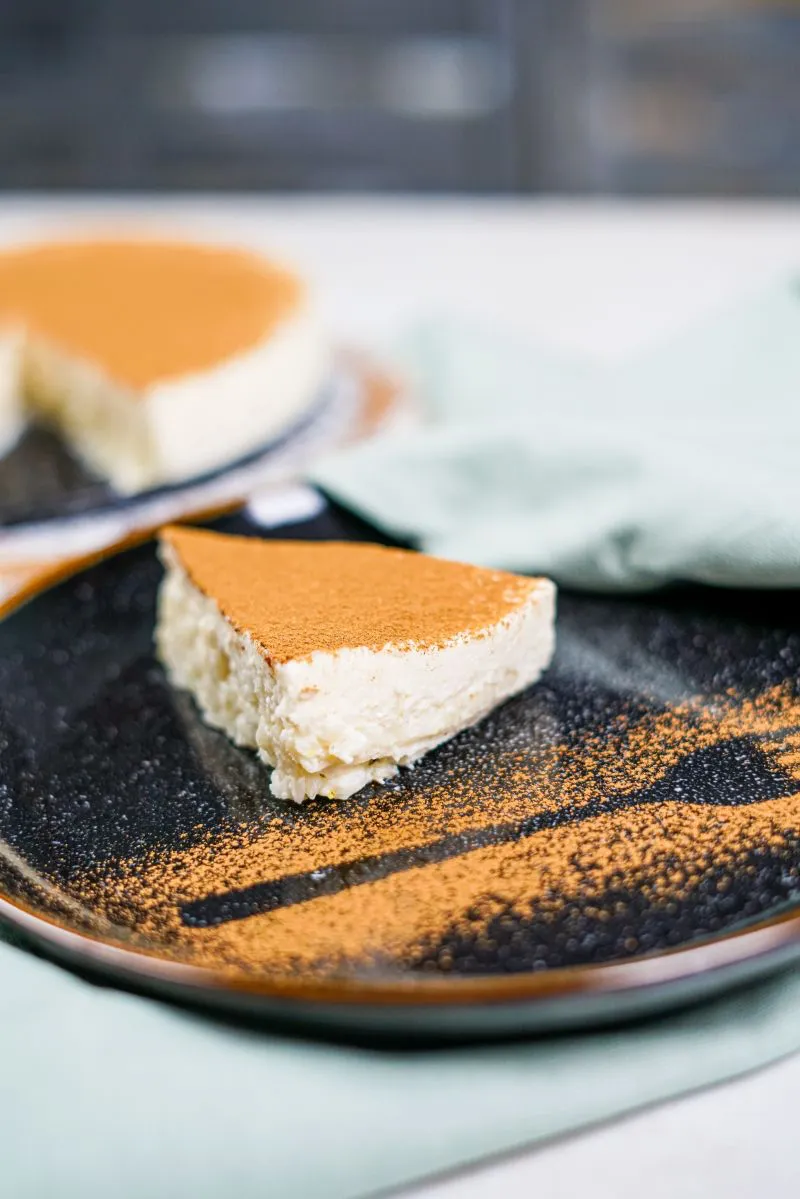
- Ground Cinnamon: For dusting
The Process
1. Get Your Gelatin Ready
First thing’s first. Place your gelatin sheets in a bowl of ice-cold water to soften for about 10 minutes. If using powder, sprinkle it over 3 tablespoons of cold water in a small bowl and leave it to bloom.
2. Cook the Pudding Base
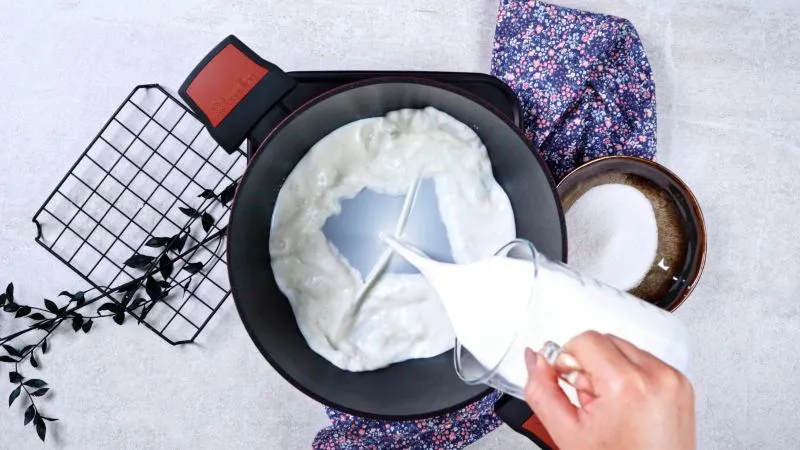
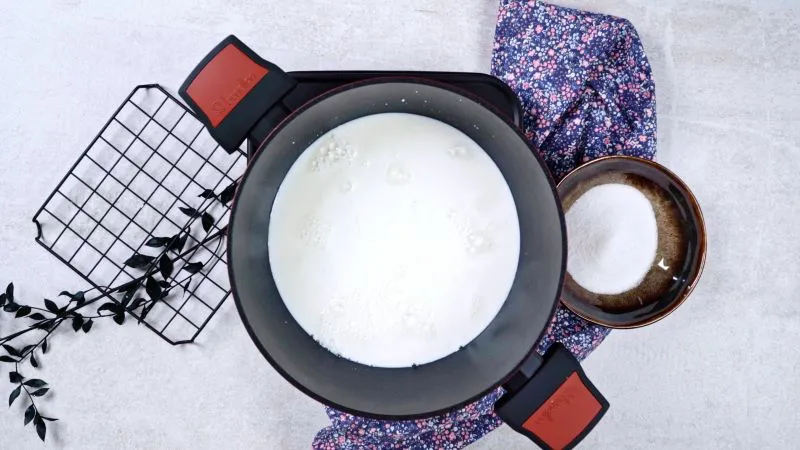
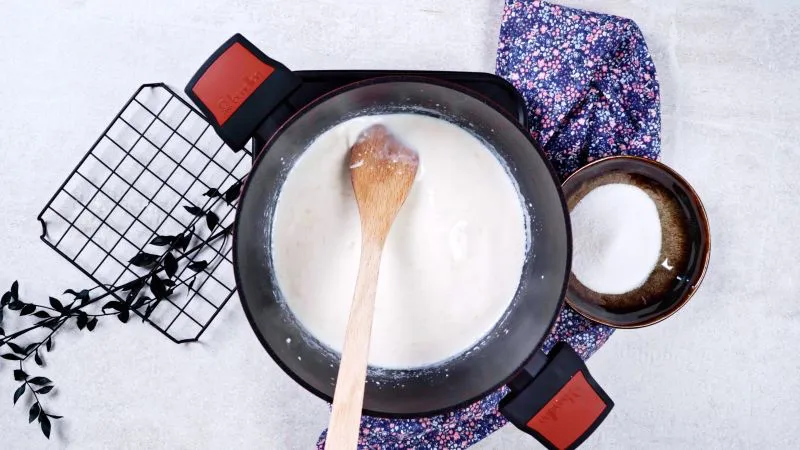
In your saucepan, combine the milk, sugar, salt, and lemon zest. If you’re using a vanilla bean, scrape the seeds into the milk and toss the pod in too for extra flavor. Bring it all to a gentle simmer over medium-low heat. Once the sugar is dissolved—and before adding the rice—give the milk a quick taste. It should be pleasantly sweet. This is your only chance to add another tablespoon of sugar if you have a sweet tooth!
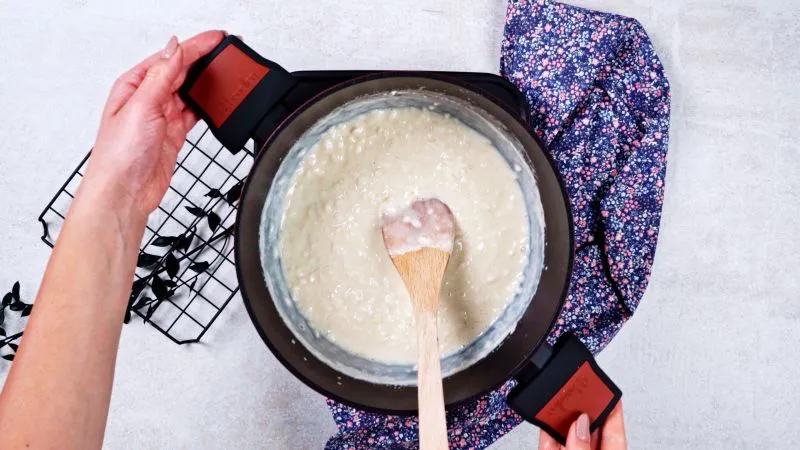
Now, add the Arborio rice. Turn the heat down to low and get ready to stir. For the next 20-25 minutes, you’ll need to stir frequently, scraping the bottom and sides to prevent sticking. You’ll feel it thicken up. It’s ready when the rice is tender but still has a tiny bite (al dente) and the mixture is thick enough to coat the back of a spoon. Don’t rush it!
3. Mix in the Gelatin
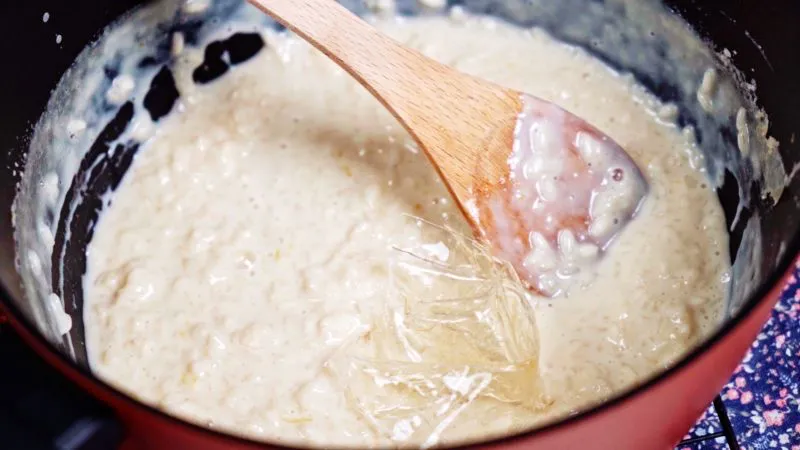
Take the pan off the heat. Fish out the lemon zest and vanilla pod. Let the pudding cool for just 5 minutes. Squeeze the excess water from your softened gelatin sheets, drop them into the warm pudding, and stir until they’ve vanished completely. If you’re using powdered, scrape the entire jiggly mass into the pudding and stir until it’s fully dissolved.
4. Cool the Base (Properly)
Pour the pudding into a wide bowl to help it cool faster. If you’re using vanilla extract, stir it in now. Press a piece of plastic wrap directly onto the surface of the pudding—this is a classic trick to stop a skin from forming. Let it cool on the counter for about an hour, until it’s lukewarm. If you try to add whipped cream to a hot base, it will just melt into a sad, liquidy mess.
5. Fold in the Fluff
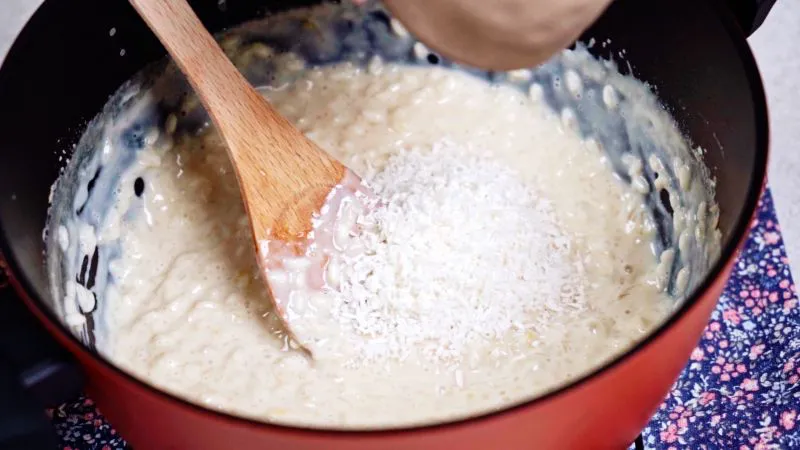
While the base is cooling, toast your coconut on a dry pan over medium heat for a few minutes until it’s golden and fragrant. Watch it like a hawk; it can burn in seconds.
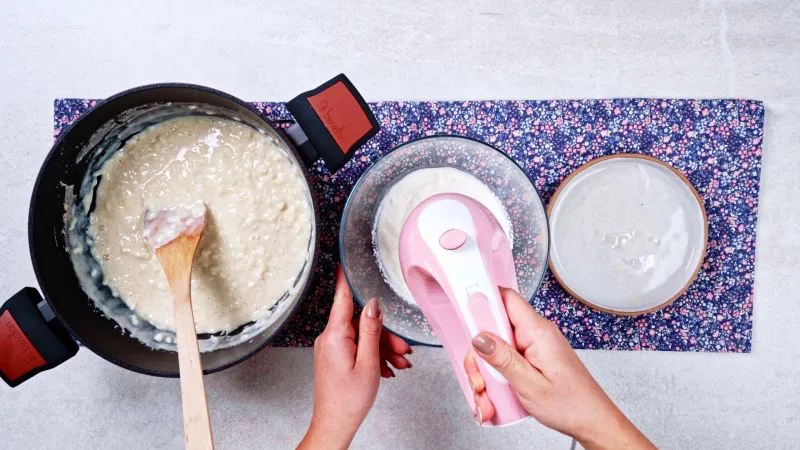
In your chilled bowl, whip the cold heavy cream. You’re looking for medium peaks. A good way to tell is when you lift the beaters, the peak should mostly hold its shape, but the very tip gently curls over, like it’s giving you a little wave. Don’t overwhip it!
Gently stir the toasted coconut into your now-lukewarm rice base. Then, add about a third of the whipped cream and stir it in. This lightens the base, making it easier to fold in the rest. Add the remaining cream and fold gently with your spatula until just combined. Stop as soon as you don’t see any more white streaks.
Lesser-known trick: You can actually make the pudding base (steps 1-4) a day in advance. Just let it cool completely with the plastic wrap on top and store it in the fridge. When you’re ready, let it sit at room temperature for about 30 minutes to take the chill off before folding in your freshly whipped cream.
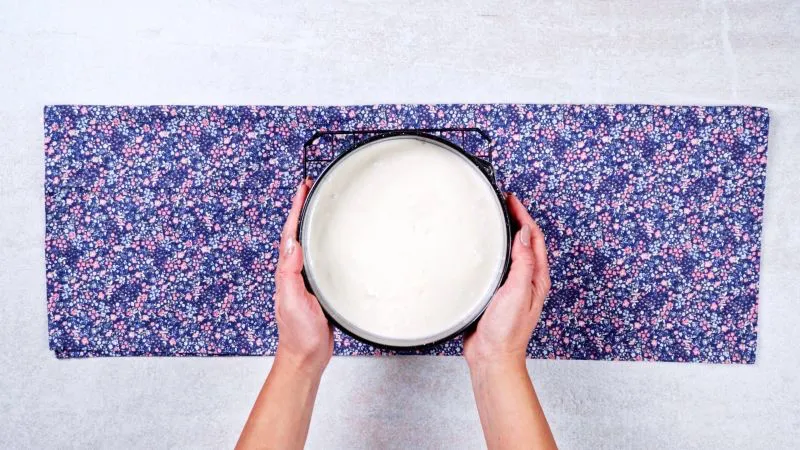
6. Set the Cake
Pour the mixture into your springform pan and gently spread it evenly. Cover and pop it in the fridge for at least 6 hours, or even better, overnight. This time lets the flavors meld and the gelatin work its magic.
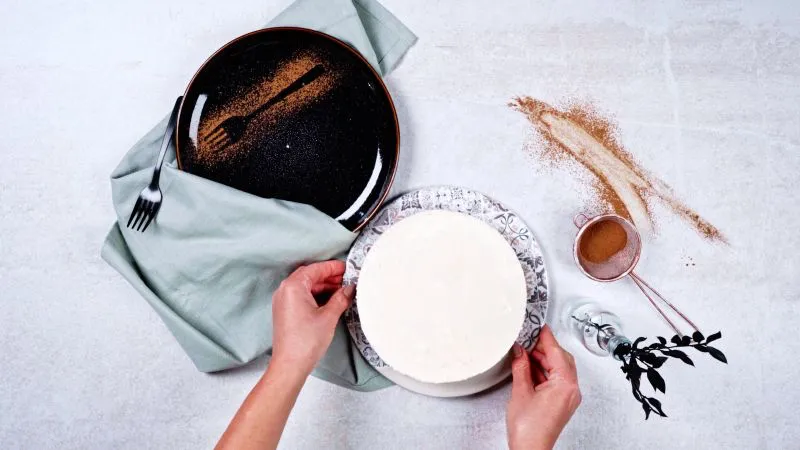
7. The Grand Finale: Serving
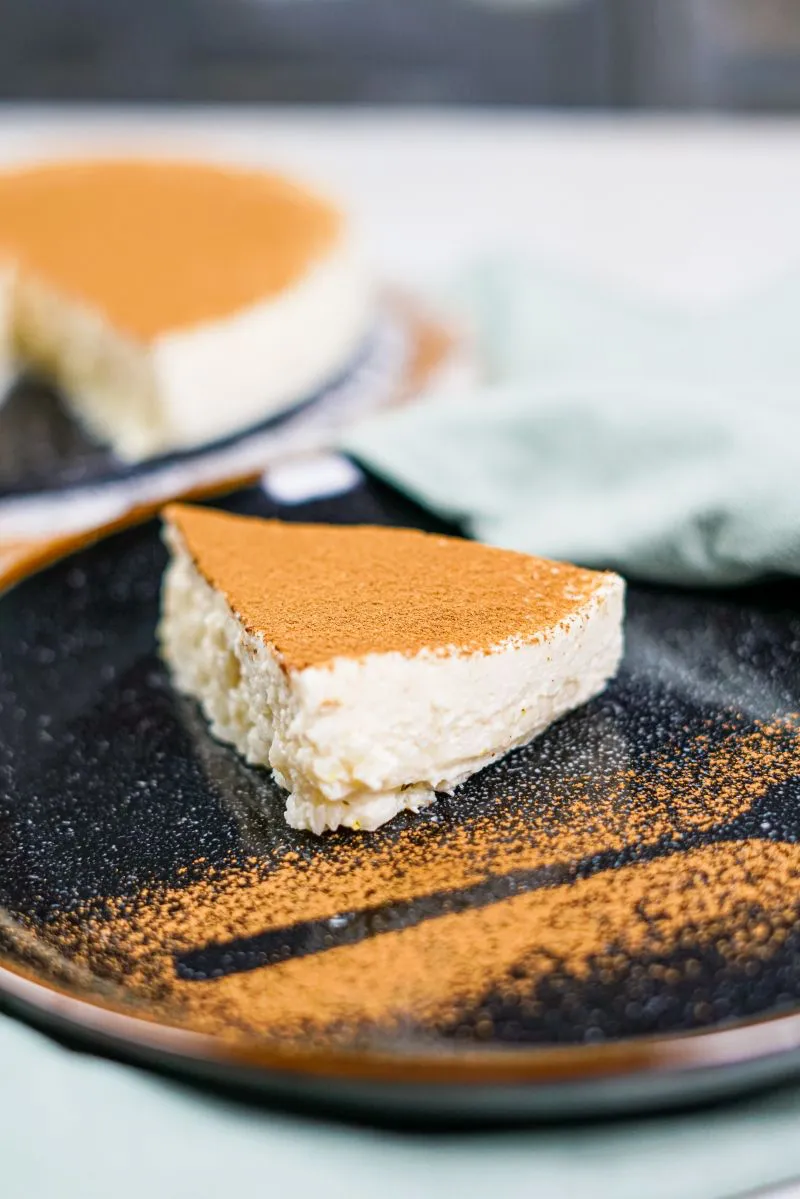
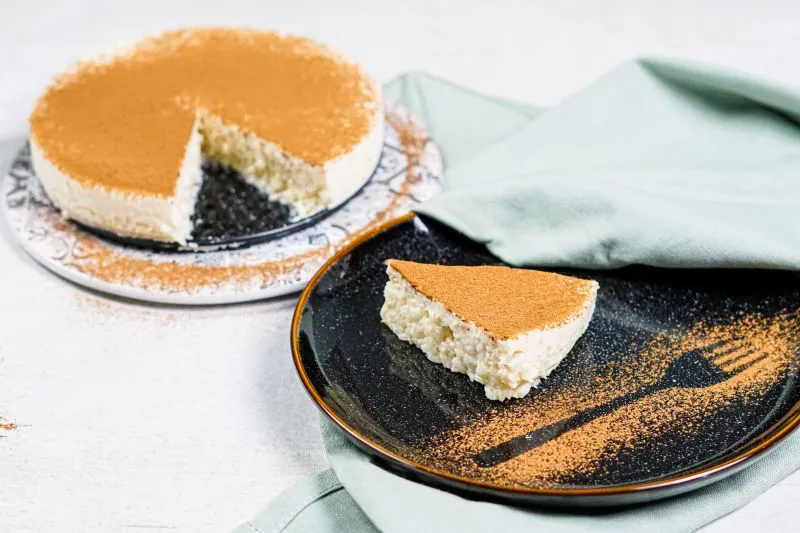
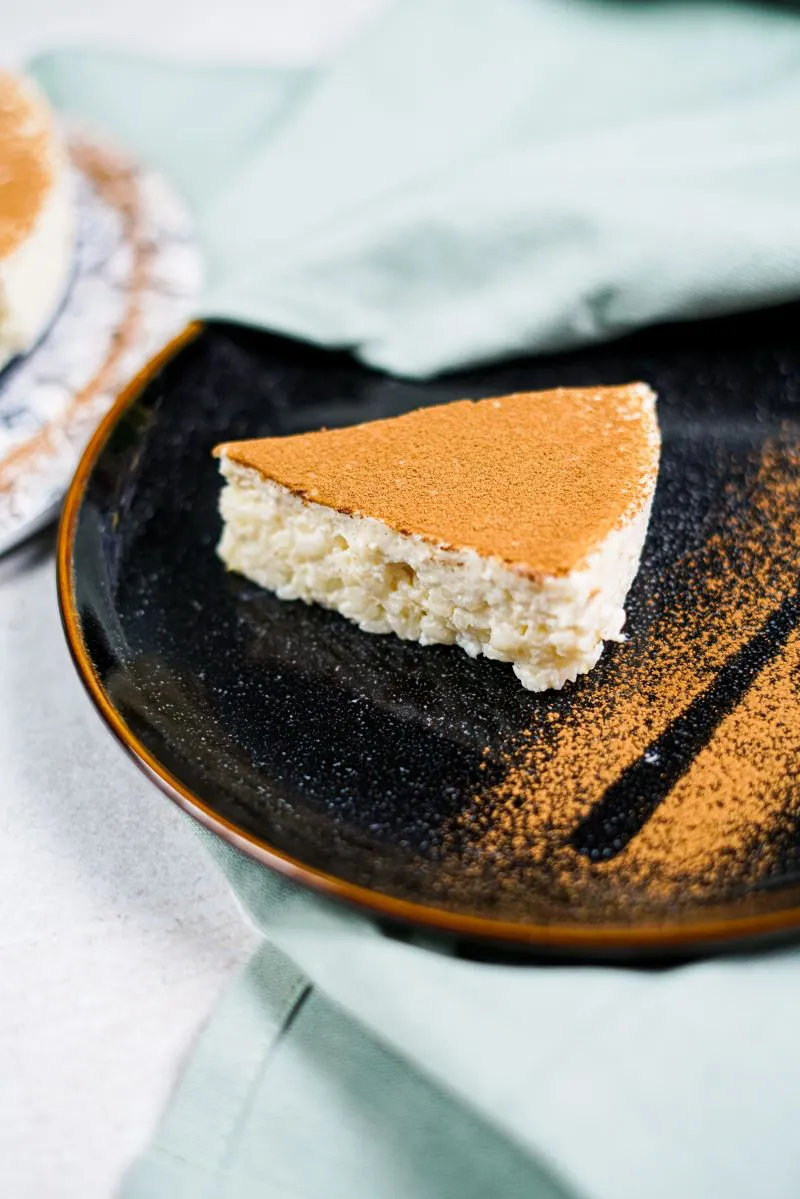
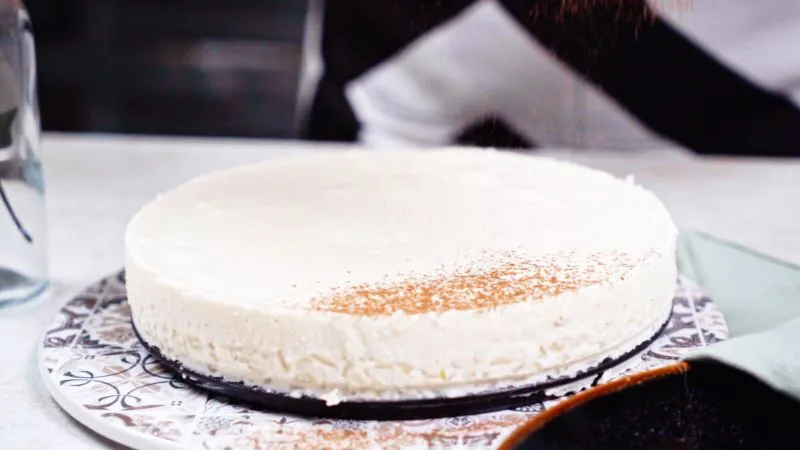
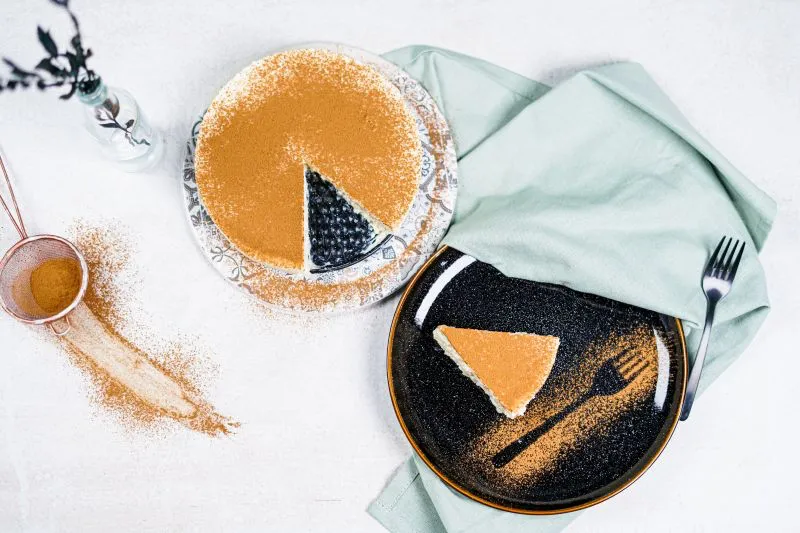
To serve, run a thin knife around the edge before you release the springform collar. Dust the top with plenty of cinnamon. For those perfect, clean slices, use a sharp knife dipped in hot water (and wiped dry) between each cut. It makes a world of difference.
Troubleshooting Common Mistakes
I’ve seen it all, and trust me, I’ve made these mistakes myself. Here’s how to fix (or avoid) them.
- Problem: My cake is a soupy mess! This is almost always a gelatin issue. You either didn’t use enough, it wasn’t dissolved properly, or you added it to a boiling-hot base. Believe me, I’ve learned about overheating gelatin the hard way. I once turned an entire batch for a catering order into pudding soup because I was rushing. Unfortunately, it’s not really fixable, but now you know for next time!
- Problem: The texture is grainy. Two likely culprits here. Either your rice base was too warm when you folded in the cream, causing it to deflate and separate, or you over-whipped the cream. Patience during cooling and whipping only to medium peaks is the key.
- Problem: I scorched the bottom of the pan! It happens. The heat was too high or you got distracted from stirring. If you smell even a hint of burning, stop stirring immediately. Don’t scrape the bottom! Carefully pour the un-burnt pudding from the top into a clean pan and carry on. That burnt taste will ruin the whole batch if you mix it in.
A Few Final Pro-Tips
This dessert needs to be kept in the fridge and is best eaten within 3-4 days. After that, the texture starts to get a little watery. Oh, and it definitely does not freeze well, so just plan on enjoying it fresh.
And that’s it! It takes a bit of patience, but the result is a stunningly simple, incredibly delicious dessert that shows you know what you’re doing in the kitchen. Enjoy the process!
Inspiration:
Once your cake is perfectly chilled, the final flourish is all in the presentation. Don’t let a masterpiece go unadorned. Think about contrast in both texture and flavor:
- A tart fruit coulis: A drizzle of raspberry or passion fruit coulis cuts through the creaminess beautifully.
- A crunchy element: Toasted almonds, pistachios, or even a crumble of Biscoff cookies adds a much-needed textural surprise.
- A touch of spice: A final, light dusting of high-quality cinnamon or freshly grated nutmeg right before serving awakens the senses.
The first taste is with the eyes. A dish that holds its shape, that offers a clean, precise slice, promises a satisfying texture before it even reaches the palate.
Want to infuse your cake with a deeper, more complex flavor?
The secret is to steep aromatics in the milk *before* you even add the rice. Gently warm your milk with a cinnamon stick, a few cardamom pods, or a long peel of orange zest. Let it sit for 20 minutes off the heat, then strain. This technique embeds a subtle, elegant aroma throughout the entire cake, far more integrated than just stirring in a spice at the end. For a truly luxurious touch, use a split and scraped vanilla bean from a quality brand like Nielsen-Massey.
Classic Whole Milk: This is the gold standard for a reason. Its fat content (around 3.5%) is the key to a rich mouthfeel and unparalleled creaminess. The milk proteins also contribute to a stable, yet tender, set.
Canned Coconut Milk: For a tropical twist, full-fat coconut milk is a fantastic substitute. It brings its own distinct flavor and creates an incredibly dense, velvety texture. Brands like Chaokoh or Aroy-D are excellent choices. This option pairs wonderfully with lime zest and toasted coconut flakes.
- A texture that remains perfectly creamy for days.
- Slices that don’t weep or lose their shape after cutting.
The key? Let it cool completely before chilling. Rushing the pudding into the fridge while it’s still warm can cause condensation, leading to a watery cake. Patience is an ingredient here; an hour on the counter ensures the starches and gelatin begin their setting process correctly, guaranteeing a flawless structure.
That comforting aroma of simmering milk and rice isn’t just delicious; it’s practically a time machine. It evokes memories of childhood, of slow afternoons and the simple joy of a homemade treat. This cake isn’t just food; it’s a feeling of warmth and nostalgia, elegantly packaged into a modern dessert.
A word on gelatin alternatives: If you’re avoiding animal products, agar-agar is your best friend. Derived from seaweed, it creates a firmer set than gelatin. A good rule of thumb is to use half the amount of agar-agar powder as powdered gelatin called for in the recipe. Look for reliable brands like NOW Foods. Be aware that it sets very quickly as it cools, so you’ll need to work efficiently once you’ve added it to your pudding mixture.

According to food historians, rice pudding’s origins can be traced back to ancient India and China, where rice and sugar were first cultivated and combined for medicinal purposes.
From there, the recipe traveled the Silk Road, evolving in every culture it touched. The Spanish added cinnamon for their ‘Arroz con Leche’, while the English developed baked versions with nutmeg. This cake is your modern chapter in a story that’s thousands of years old.
The number one mistake: Under-stirring the rice. It’s tempting to walk away, but the initial 15-20 minutes of cooking require near-constant, gentle stirring. This isn’t just to prevent sticking; the friction helps the Arborio grains release their amylopectin starch, which is the very source of the pudding’s signature creaminess. Neglect this step, and you’ll get a grainy, separated texture instead of a cohesive, luscious one.
For a truly modern, ‘foodie’ twist, consider a savory version. Infuse the milk with parmesan and a bay leaf, use a high-quality chicken or vegetable broth for half the liquid, and finish with a pinch of saffron. Serve chilled in small, elegant wedges topped with prosciutto or sauteed wild mushrooms. It’s an unexpected and sophisticated appetizer that uses the exact same technique.


