The Apple Crisp Latte Recipe Baristas Don’t Want You to Know
Let’s be honest for a second. Most seasonal coffee drinks you buy are just a whole lot of sugar fighting with a little bit of coffee. After years behind an espresso machine, I’ve seen them all, and the biggest challenge is always finding that perfect balance.
In this article
And that was the exact puzzle with the apple crisp latte. On one hand, you have apple, with its bright, sharp acidity. On the other, you have coffee’s deep bitterness. If you’re not careful, they clash. It’s a flavor train wreck. Plus, apple’s delicate taste can get completely lost in a sea of milk and sugar.
After countless test batches in a bustling cafe, I figured it out. It’s not about one magic ingredient. It’s a series of small, smart choices that make all the difference. This isn’t just another recipe; it’s the full-blown technique I used to train my baristas. We’re going to build this drink from the ground up, focusing on the ‘why’ behind every step. The result? A balanced, genuinely delicious drink every single time.
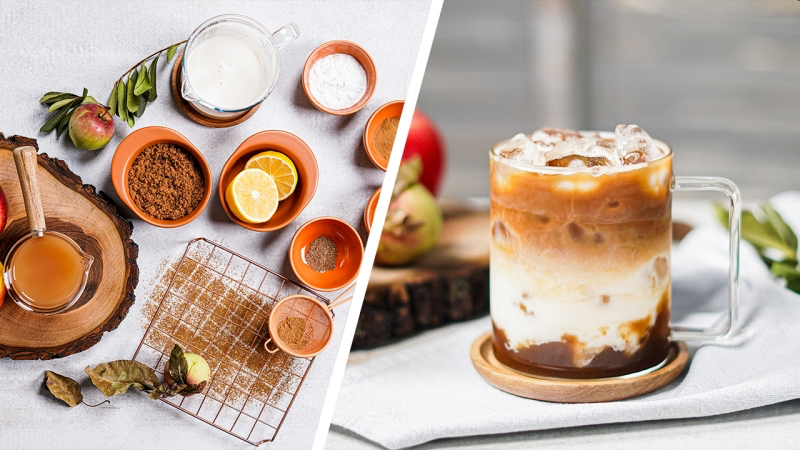
First Things First: The Apple-Spice Syrup Is Everything
The absolute heart of this drink is the syrup. A lot of online recipes end up with something that’s basically a thick, pulpy applesauce. That’s great on your morning oatmeal, but trust me, that chunky texture feels gritty and weird in a smooth latte. Not the vibe we’re going for.
The professional goal is a silky, pourable syrup that dissolves perfectly into the espresso and milk. We get there by cooking the apples down until they’ve given up all their flavor and then straining the whole thing. This separates the pure, concentrated flavor from the pulp, giving us a clean, incredible base to work with.
Choose Your Ingredients Like a Pro
The final drink is only as good as what you put into it. A few thoughtful choices here will pay off big time.
1. The Apples: This Is the Most Important Choice
Don’t just grab any old apple from the bottom of your fridge drawer. Different apples have totally different levels of sugar and acid. It matters!

- For a Super Tart, Bright Flavor: Granny Smith is the classic for a reason. Its powerful acidity cuts right through the creamy milk and sugar, giving you that vibrant, crisp apple taste.
- For a Sweeter, Mellow Vibe: If you’re after a flavor that’s more like warm apple cider or a baked apple, go for Honeycrisp, Fuji, or Gala. They have less of a bite and more natural sweetness.
- My Personal Recommendation: Honestly, the best results come from a blend. I swear by a mix of 70% Granny Smith and 30% Honeycrisp. You get that amazing tartness from the Granny Smith, but the Honeycrisp adds a layer of deep, rounded sweetness. It’s a flavor-layering trick we use all the time in the pros.
Oh yeah, good to know: You’ll want about one pound (around 450-500 grams) of apples. That’ll give you enough syrup for about 12-16 lattes.
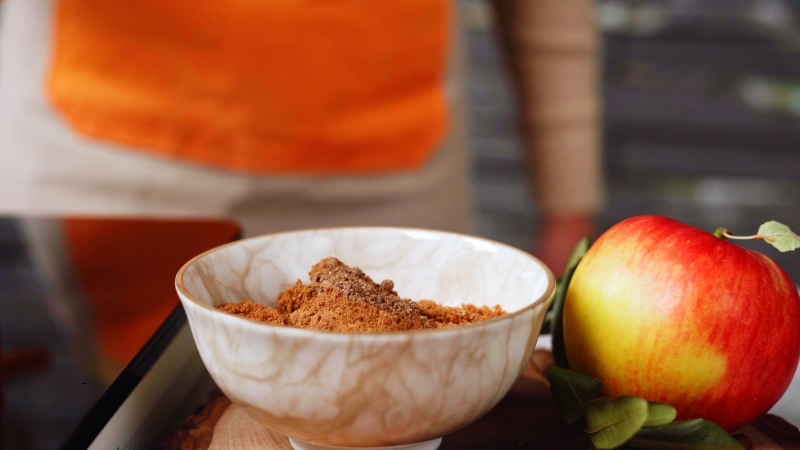
2. The Sugar: It’s About More Than Just Sweetness
Plain white sugar is fine, but it’s a missed opportunity. For a drink that’s supposed to taste like an “apple crisp,” we need more depth. That’s why I always reach for dark muscovado sugar. Its high molasses content gives you these amazing caramel and toffee notes that nail the flavor of a baked crumble topping. Plus, it gives the syrup a gorgeous amber color.
- Top Tier: Dark muscovado sugar. You can usually find it in the specialty baking aisle or online for about $8-10 a bag.
- Great Alternative: Dark brown sugar is a fantastic budget-friendly swap that gets you 90% of the way there in flavor. Don’t sweat it if you can’t find muscovado.
- In a Pinch: Light brown or demerara sugar will work, but the flavor will be much lighter—more caramel, less rich molasses.
For about 500g of apples, I use around 125g of sugar. It’s a good starting point, but feel free to adjust based on how sweet your apples are.
3. The Spices: Go Fresh for the Best Aroma
If you can, use whole spices. The aroma you get from freshly grated nutmeg versus the pre-ground stuff that’s been in your cabinet for a year is night and day.
- Cinnamon: One or two whole cinnamon sticks infuse a warm, sweet flavor without making the syrup cloudy like powder can.
- Nutmeg: Just a few scrapes from a whole nutmeg on a microplane grater adds that essential aromatic warmth.
- Optional Twists: Feeling fancy? A single star anise or a couple of whole cloves can add incredible complexity. But go easy—they can take over if you’re not careful.
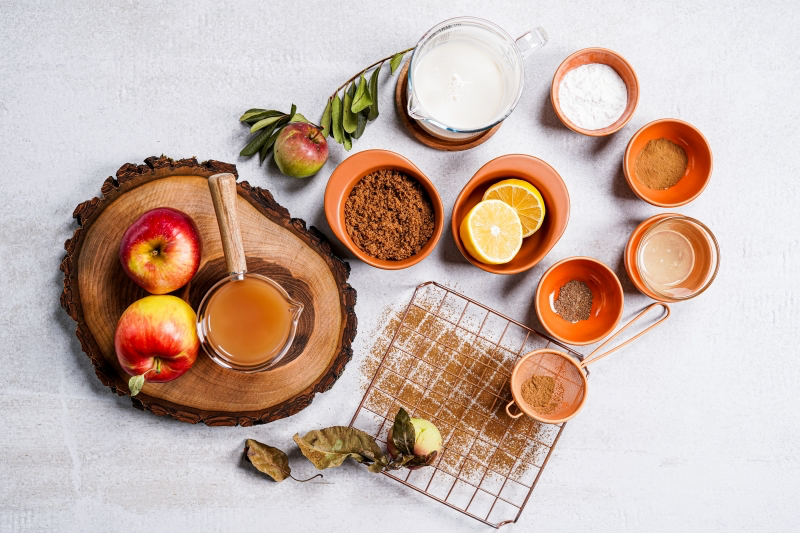
4. The Supporting Cast: Don’t Skip These
- Lemon Juice: A tablespoon of fresh lemon juice is non-negotiable. It does two things: stops the apples from turning an unappetizing brown while you chop them, and more importantly, its acid brightens up all the other flavors so the syrup doesn’t taste flat.
- Liquid: To help the apples break down, I use organic, unfiltered apple juice. It just adds another layer of apple-y goodness. Plain water works too, you’ll just have a slightly less intense apple note.
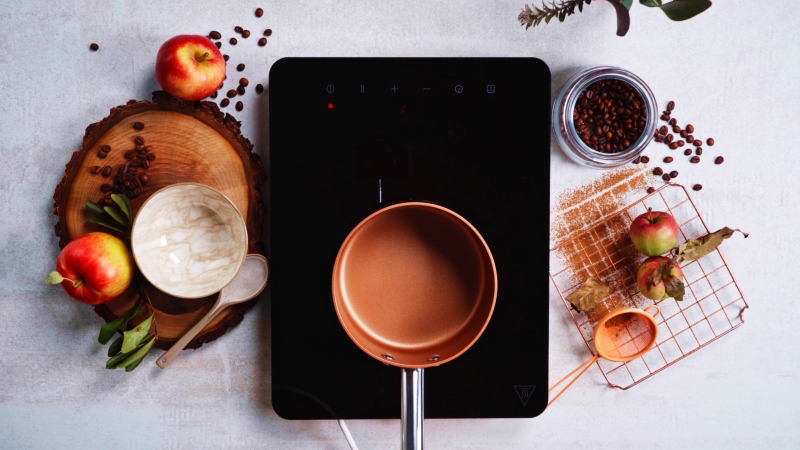
The Syrup-Making Process: Step-by-Step
This takes about 30-40 minutes, but most of it is just hands-off simmering. Be patient! Rushing it gives you a watery, sad syrup.
Here’s what you’ll need:
- A heavy-bottomed saucepan (this is key—it distributes heat evenly and prevents your precious sugar from scorching on the bottom)
- A wooden spoon or spatula
- A fine-mesh sieve
- A clean glass jar or bottle for storage
And the ingredients:
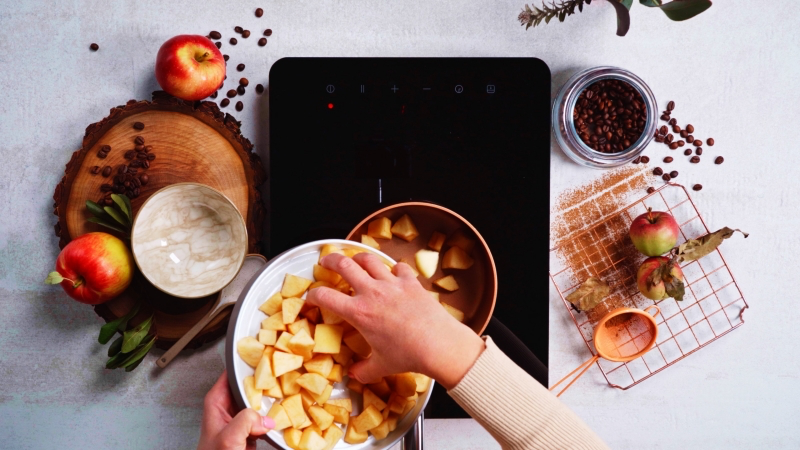
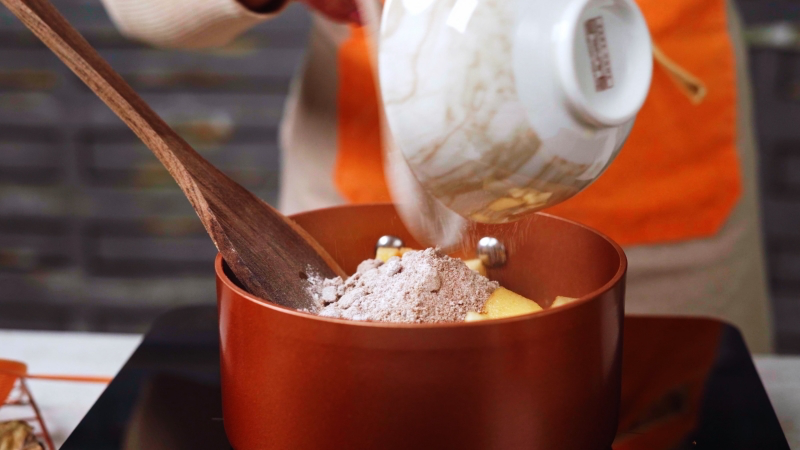
- 500g apples, peeled, cored, and roughly chopped
- 20ml fresh lemon juice (about 1 tbsp)
- 125g dark muscovado sugar
- 2 cinnamon sticks
- 1/4 tsp freshly grated nutmeg
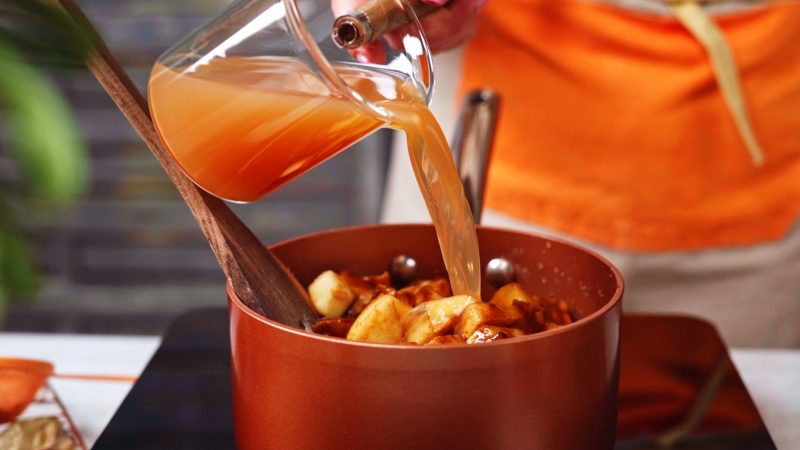
- 250ml (about 1 cup) unfiltered apple juice or water
Let’s do this:
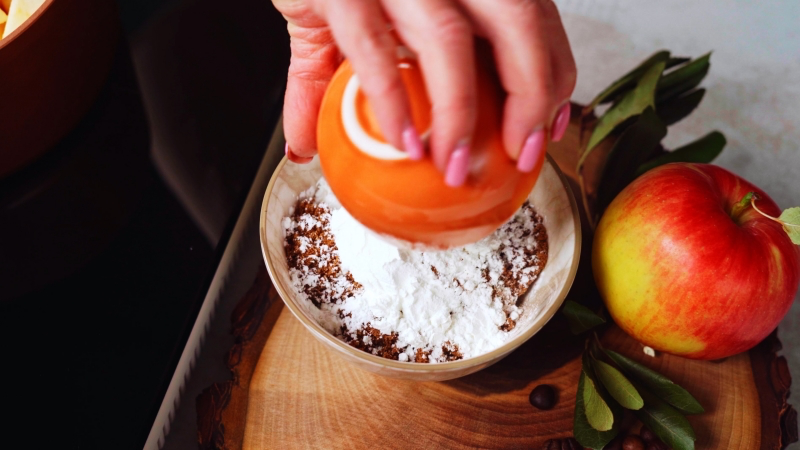
- Prep the Apples: Toss your chopped apples with the lemon juice in a bowl as you go. No browning here!
- Combine Everything: Dump the apples, sugar, spices, and apple juice into your saucepan. Give it a good stir.
- Bring to a Simmer: Set the pot over medium heat, stirring until the sugar dissolves. Let it come to a gentle simmer. Whatever you do, don’t let it boil like crazy, or the sugar can burn and turn bitter.
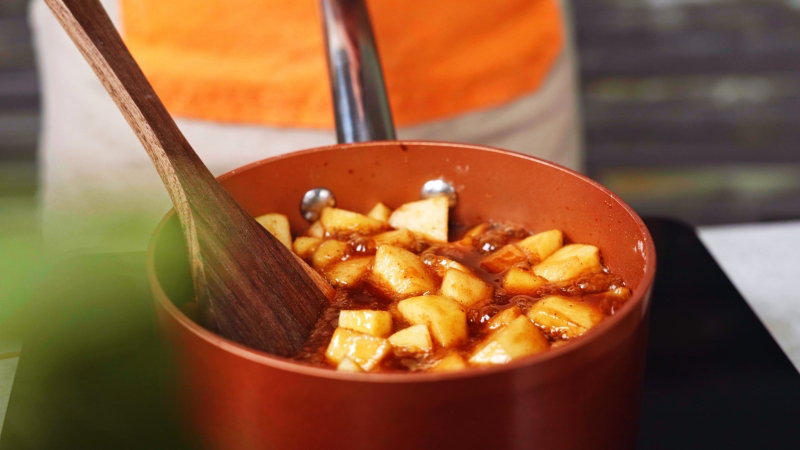
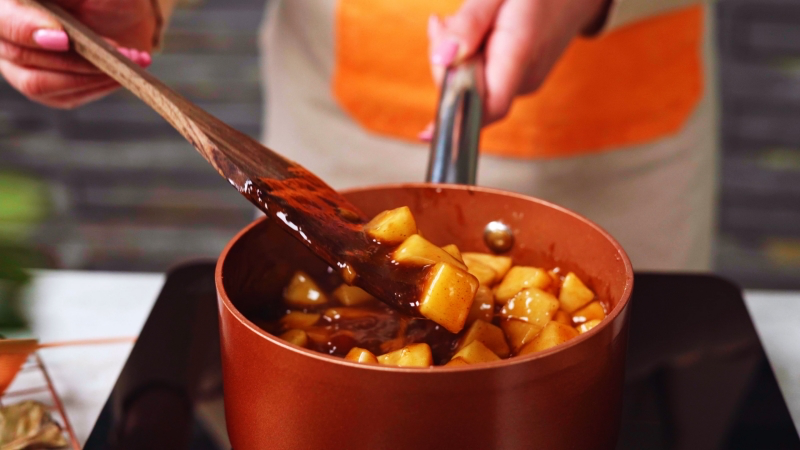
- Simmer Low and Slow: Reduce the heat to low and let it bubble away gently for 25-30 minutes. The apples will get super soft, and the liquid will thicken a bit. Your kitchen will smell incredible.
- Strain the Syrup: Place your fine-mesh sieve over a bowl. Carefully pour the hot apple mixture in. Use the back of a spoon to gently press the solids and squeeze out every last drop of that liquid gold. Don’t force the pulp through; we want clear syrup.
- Cool and Store: Let the syrup cool down. It will get thicker as it cools. Pour it into your clean jar. And hey, don’t throw away that leftover apple pulp! It’s amazing on toast or yogurt.
Quick Syrup Troubleshooting
Heads up! Hot sugar syrup is basically delicious lava. It’s incredibly hot and sticky, so be extremely careful when you’re pouring it.
- Syrup too thin? You probably just need to cook it a bit longer. Pour it back in the pot and let it simmer for another 5-10 minutes.
- Syrup too thick? You cooked it a little too long. No biggie. While it’s still warm, just whisk in a tablespoon of hot water at a time until it’s the consistency you like.
- Storage: To sterilize your jar, just wash it with hot, soapy water, then carefully fill it with boiling water. Let it sit for 5 minutes, then pour the water out. Done! Your syrup will last for up to 3 weeks in the fridge.
- Pro tip from my cafe days: Pour leftover syrup into an ice cube tray and freeze it. Each cube is a perfect single serving for a future latte. Just pop one out whenever you need it! After all that work, this recipe should give you about 1.5 cups (or 350ml) of syrup.
The Coffee: Finding the Right Partner
The coffee you use needs to complement the syrup, not compete with it. A bad pairing can make the whole drink taste sour or just plain weird.
A shot of espresso is definitely the gold standard here. Its concentrated flavor stands up to the milk and syrup perfectly. But don’t worry, you don’t need a thousand-dollar machine to make this work.
What Kind of Coffee Beans to Use?
You’re looking for beans with complementary flavors. Think chocolate, nuts, and caramel. Avoid anything too bright, acidic, or fruity (like a lot of African coffees), as that can amplify the apple’s tartness and make the drink taste sour.
My go-to is always a medium to medium-dark roast from Central or South America. Beans from places like Brazil, Guatemala, or Colombia are usually a safe and delicious bet.
Great Espresso Alternatives
No espresso machine? No problem. I get it.
- Moka Pot: This is your best bet. It uses steam pressure to brew a super-strong, concentrated coffee that’s very close to espresso.
- AeroPress: This little gadget is a champion. Just use a concentrated recipe—try using more coffee grounds with less water and plunging hard to create a strong shot.
- Strong Drip or French Press: If this is what you’ve got, just brew it stronger than usual. Use about 50% more coffee grounds than you normally would to make sure the coffee flavor doesn’t get lost.
The Milk: It’s All About That Velvety Texture
The secret to a cafe-quality latte is microfoam—that silky, velvety, liquid foam with bubbles so tiny you can’t even see them. It’s what makes the drink so smooth and delicious.
Which Milk Is Best?
- Whole Dairy Milk: This is the undisputed king for steaming. The balance of protein and fat is perfect for creating rich, creamy, and stable foam. It’s what pros use by default.
- Oat Milk: For a dairy-free option, oat milk is the clear winner. It steams beautifully and creates a creamy texture that’s shockingly similar to whole milk. A quick heads-up: look for a “barista series” version from brands like Oatly or Pacific Foods, often in a gray carton. The regular stuff doesn’t have the right fats to foam up properly and can fall flat.
- Soy Milk: A solid B-teamer. It foams up pretty well but can have a slightly more bubbly texture. Its flavor is also a bit more noticeable.
- Almond Milk: To be frank, this one is tough. It often creates a thin foam and has a tendency to curdle when it hits the acidic coffee. A barista-specific version is your only real hope here.
A common mistake to avoid: never re-steam milk. Once it’s been heated, the proteins are cooked. Trying to steam it again will just make it taste flat and burnt. Always start with fresh, cold milk!
Putting It All Together: The Grand Finale
Okay, time to assemble your masterpiece. The order you do things in actually matters.
How to Make a Hot Apple Crisp Latte
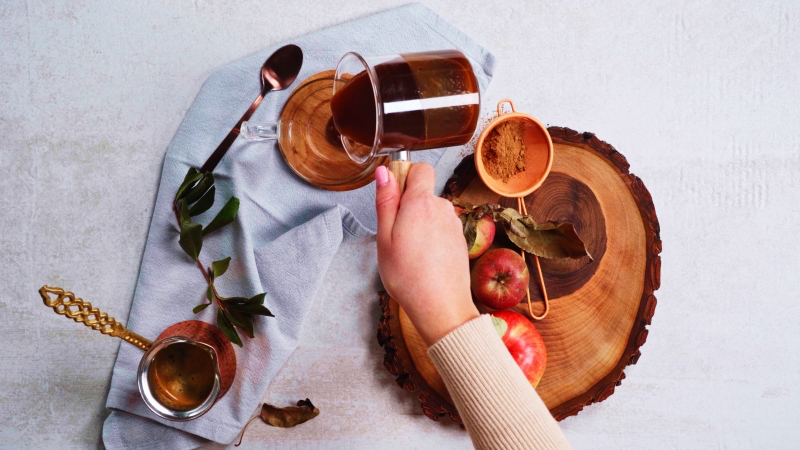
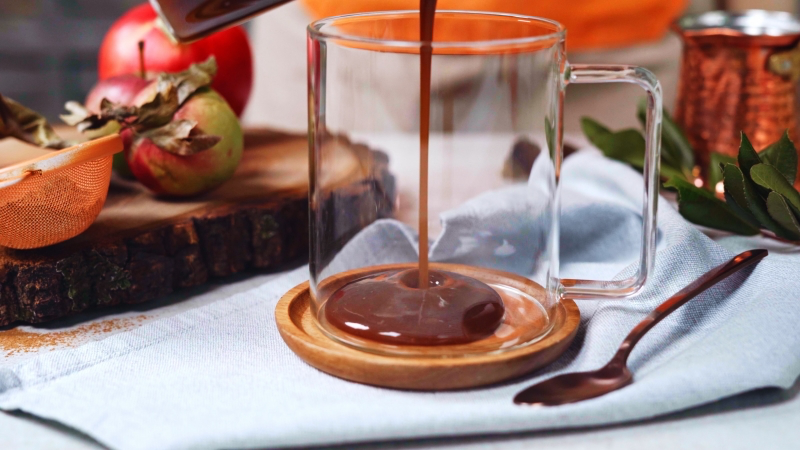
- Syrup First: Add 2-3 tablespoons of your amazing homemade syrup to the bottom of a 12oz mug.
- Espresso Next: Brew a double shot of espresso (or about 60ml of your strong coffee) right on top of the syrup. Give it a swirl to mix them together.
- Pour the Milk: Pour your perfectly steamed, velvety microfoam into the mug.
- Garnish and Serve: Drink it right away, or top it with a little something extra.
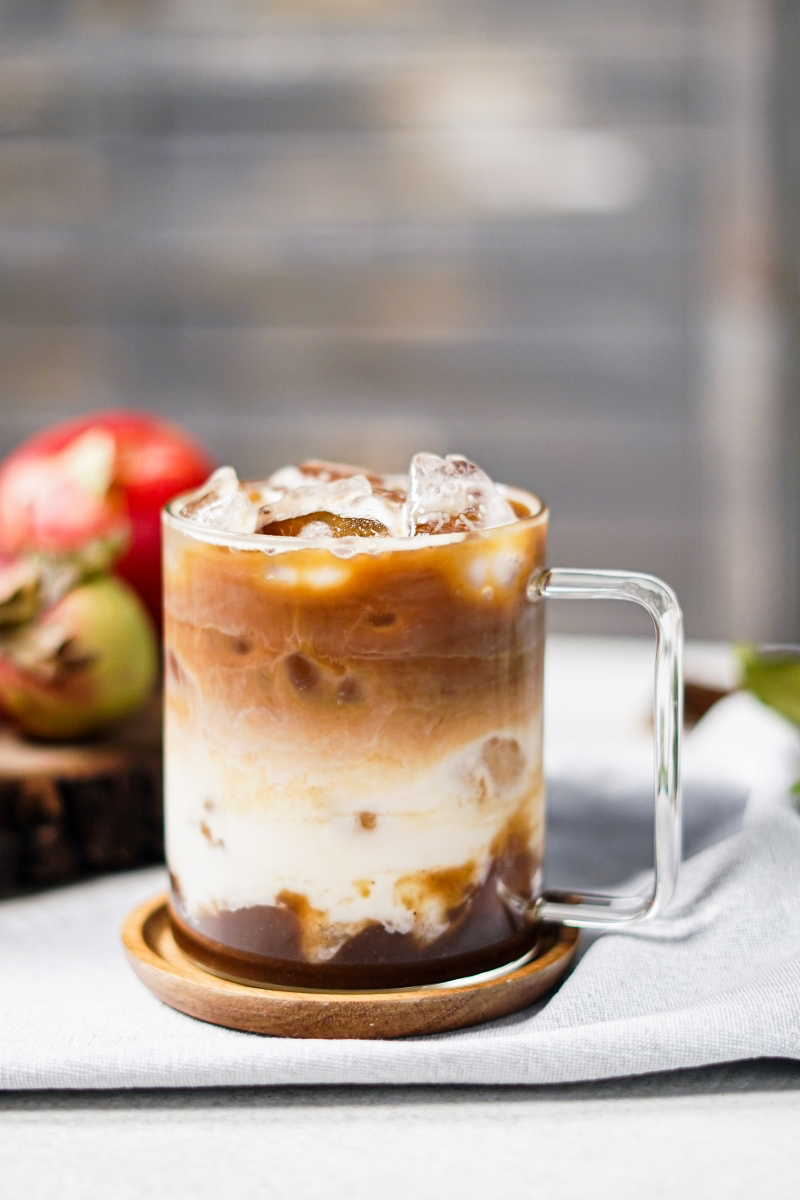
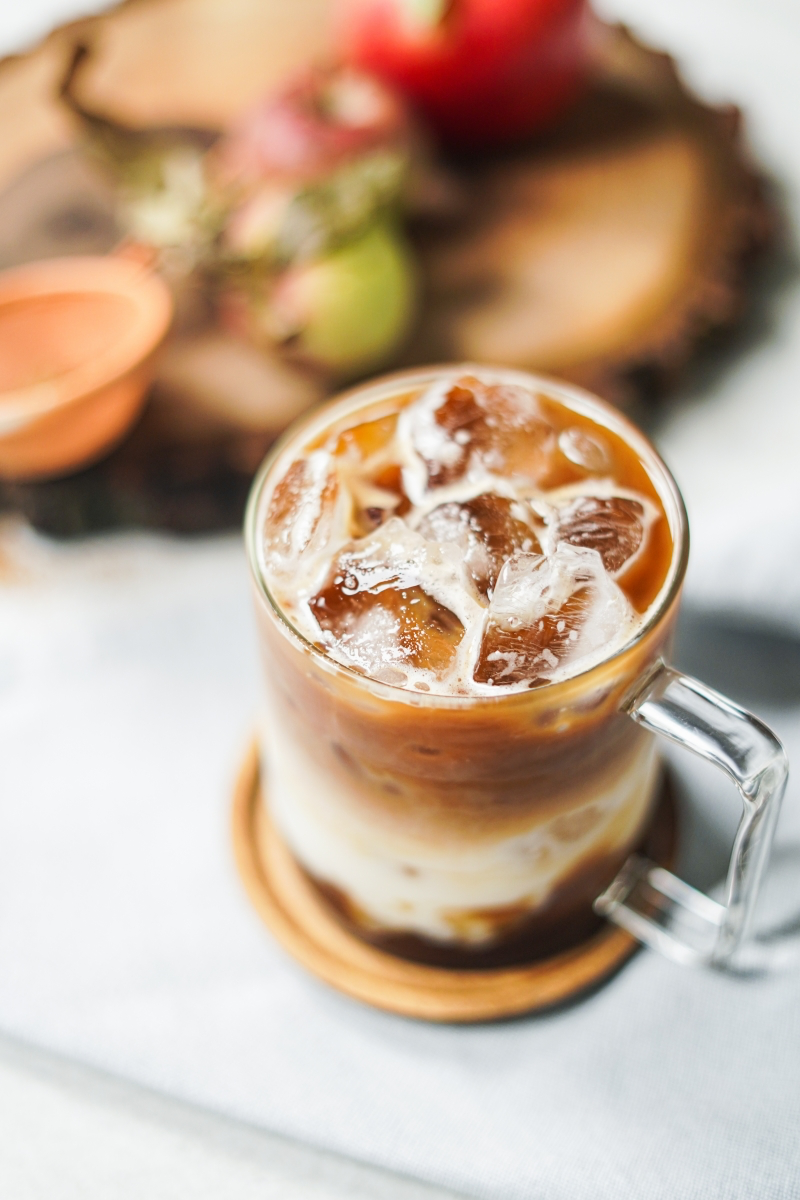
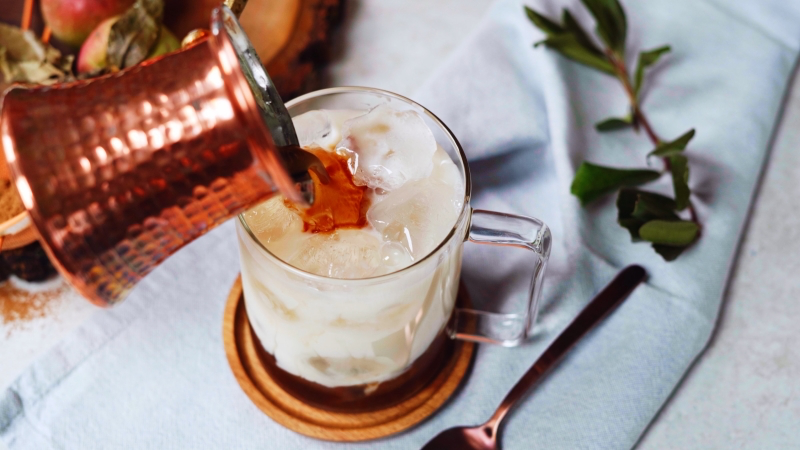
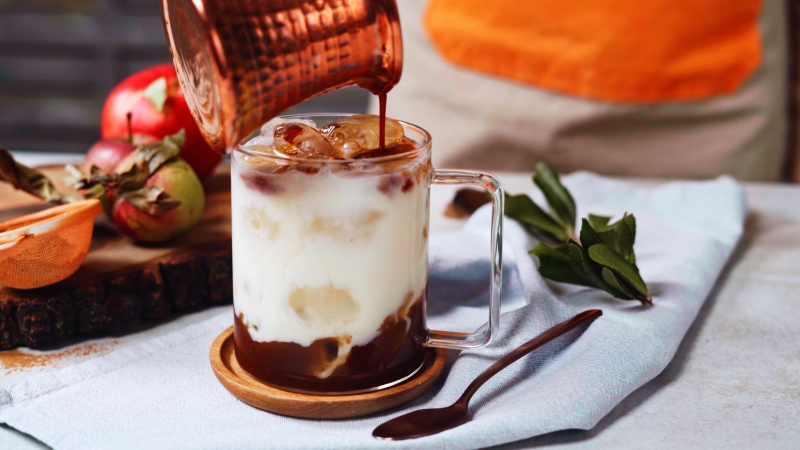
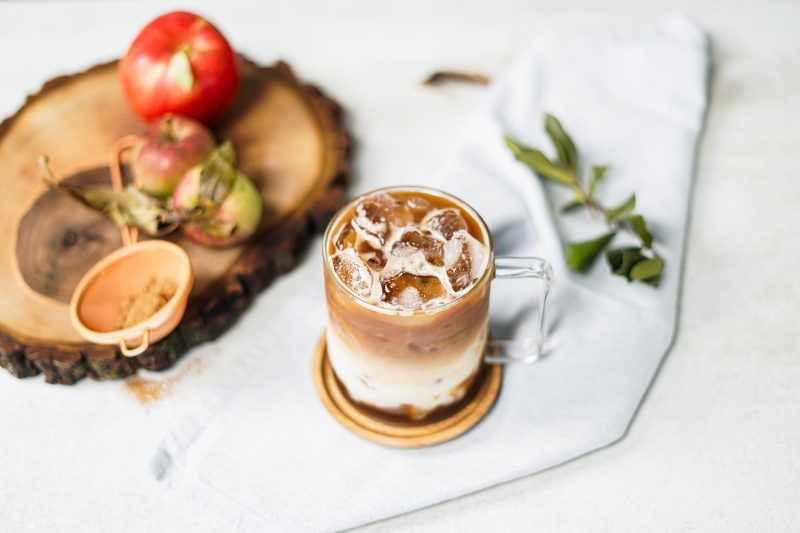
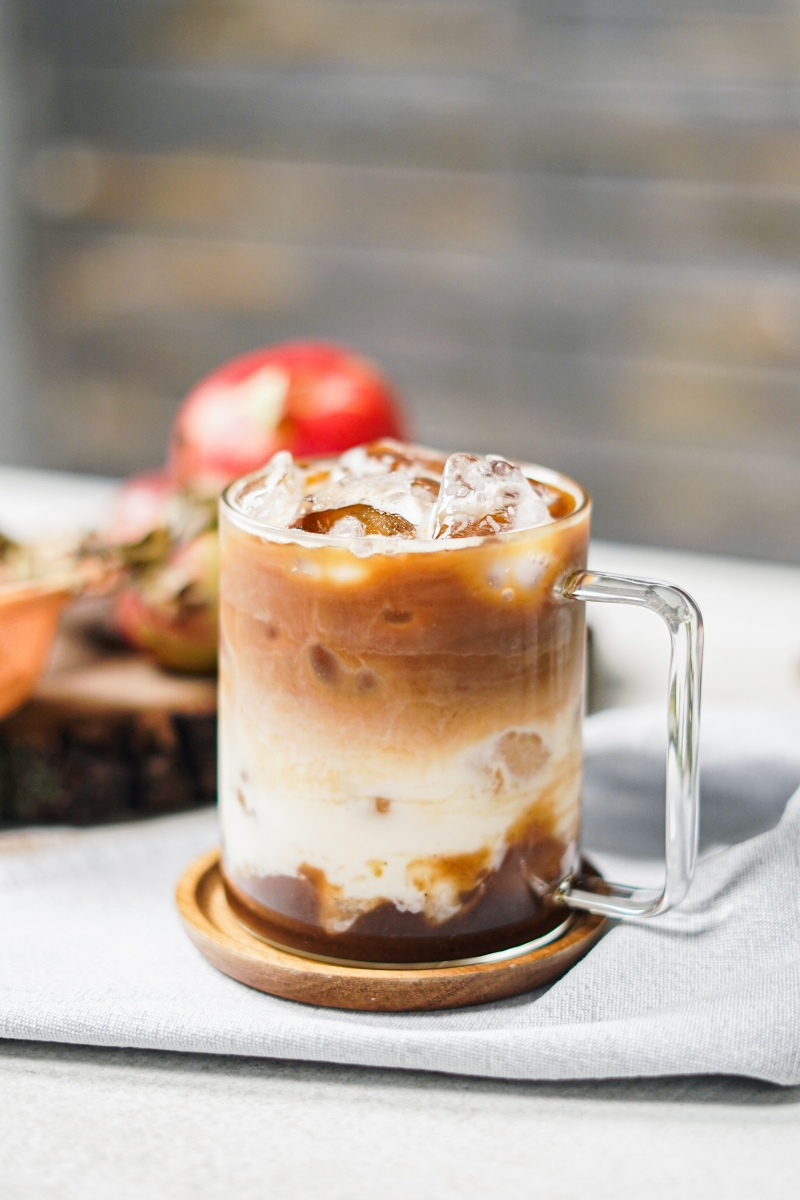
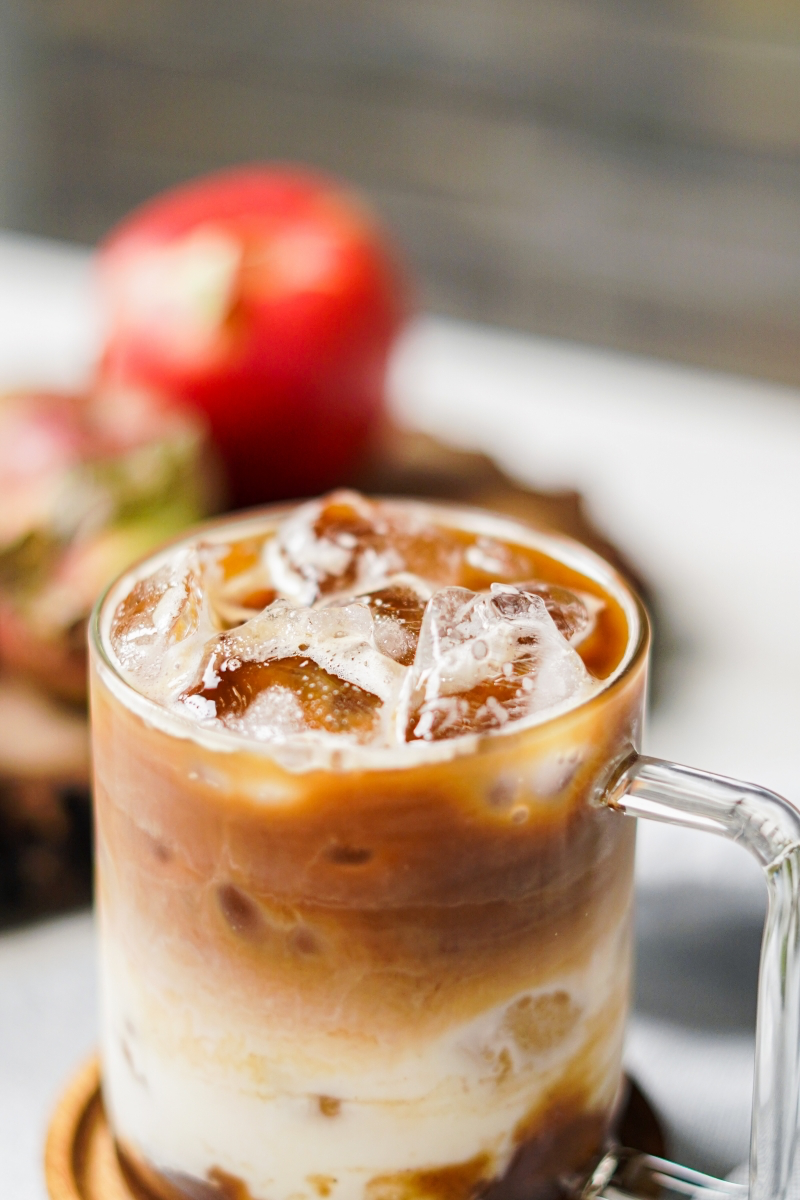
How to Make an Iced Apple Crisp Latte
The technique for an iced latte is a little different to keep it from getting watery.
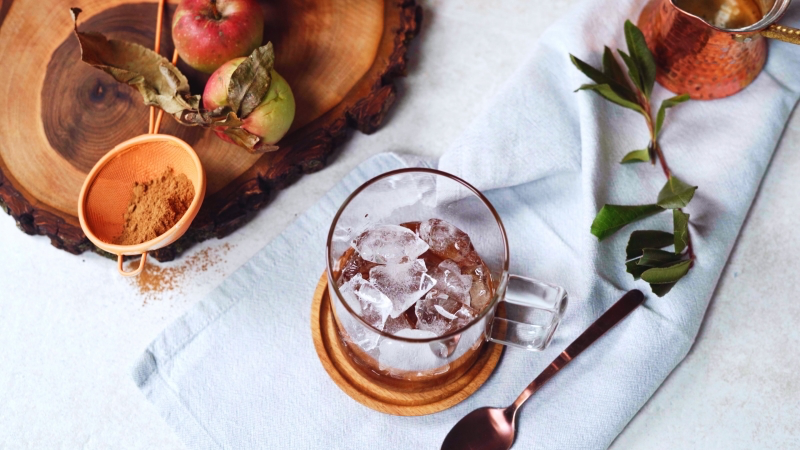
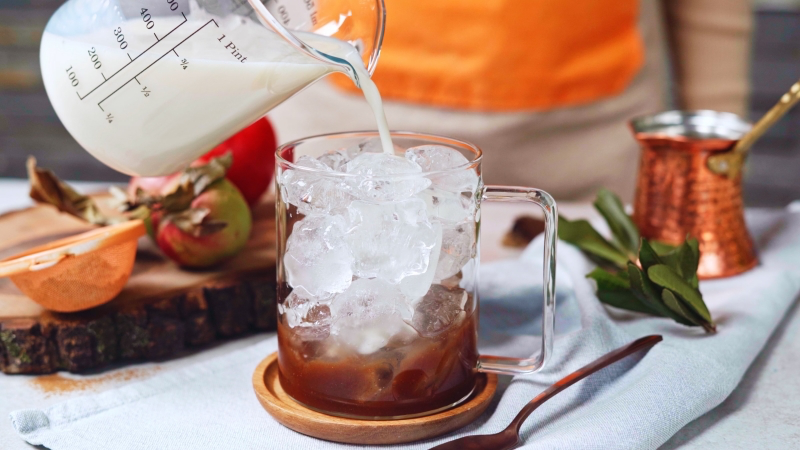
- Syrup and Milk: In a 16oz glass, stir together 2-3 tablespoons of syrup and about 180ml of cold milk.
- Add Ice: Fill the glass almost to the top with ice.
- Top with Espresso: Slowly pour your double shot of hot espresso over the top of the ice. It creates a gorgeous layered look.
- Garnish and Serve: Pop in a straw and give it to your lucky recipient. Just tell them to stir it up before they start sipping.
Level Up: Garnishes and Variations
A good garnish takes this from homemade to straight-up artisanal.
- The Simple Touch: A light dusting of cinnamon is simple and elegant.
- The Pro Garnish: Make a quick oat crumble. Mix 2 tablespoons of rolled oats, 1 tablespoon of brown sugar, a pinch of cinnamon, and 1 tablespoon of melted butter. Spread it in a thin layer on a parchment-lined baking sheet (this keeps it from sticking!) and bake at 350°F (175°C) for 5-7 minutes until golden. Sprinkle this over the foam for an authentic “crisp” texture.
- The Boozy Twist: For a cozy evening drink, add an ounce of spiced rum or bourbon. (Enjoy that one responsibly, of course.)
- The Decadent Version: Drizzle some high-quality caramel sauce over the top and add a tiny pinch of flaky sea salt. The salt makes everything taste more like itself.
Final Thoughts
Making a truly great seasonal latte is a craft. It’s all about paying attention to the little details. When you take the time to build each part with care—the syrup, the coffee, the milk—the result is so much more rewarding than just dumping some stuff in a cup. You get a drink that’s complex, balanced, and something you can be genuinely proud of.
Think of this recipe as your blueprint. Feel free to tweak it! Want it sweeter? Add more syrup. Like it punchier? Use a darker roast. The skills you learn here are foundational. Now you can go create anything. So, what’s YOUR twist on this? Did you try a different apple blend or come up with a crazy garnish? I’d love to hear about it in the comments!
Inspiration:
Oat Milk: Its natural creaminess and subtle sweetness complement the apple and spices without overpowering them. It steams beautifully, creating a velvety microfoam ideal for latte art. Brands like Oatly Barista Edition are specifically designed for this.
Almond Milk: A lighter option, but its nutty flavor can sometimes compete with the delicate apple notes. Choose an unsweetened version to control the final taste.
For a truly decadent latte that mimics whole milk, oat is the clear winner.
More than 60% of consumers say they look forward to seasonal food and beverage items.
This anticipation is precisely what chains like Starbucks and Dunkin’ tap into. The Apple Crisp Latte isn’t just a drink; it’s a seasonal event. By making it at home, you’re not just recreating a flavor, you’re capturing that cozy, autumnal feeling on your own terms, any day you wish.
Want to make your homemade latte look like it came from a high-end café?
It’s all in the final touch. A simple dusting of cinnamon is classic, but for extra flair, try a drizzle of a quality caramel sauce, like Torani’s, in a crosshatch pattern. For a textural surprise, add a sprinkle of crumbled shortbread cookies or a single, paper-thin dehydrated apple chip placed gently on the foam.
- Keep your homemade apple-spice syrup fresh and ready for up to two weeks.
- Enjoy consistent flavor in every single cup without starting from scratch.
- Make an impromptu latte for a guest in just minutes.
The secret? Proper storage. Once completely cool, pour the syrup into a clean, airtight glass bottle or jar. A repurposed olive oil bottle with a pour spout or a simple mason jar works perfectly. Keep it refrigerated, and the taste of autumn is always on hand.
A critical detail: The intensity of your coffee base is non-negotiable. A weak, watery drip coffee will be completely buried by the milk and apple-spice syrup, resulting in a drink that tastes more like sweet, warm milk. You need a concentrated, robust coffee flavor to stand up to the other ingredients. A double shot of a dark or medium-dark roast espresso, perhaps from a classic Italian brand like Lavazza or Illy, provides the perfect bitter backbone to balance the sweetness and acidity.
How do you make an iced version that isn’t a watery mess?
The key is to minimize dilution. Instead of pouring hot espresso over ice, let the shots cool for a minute first. Better yet, brew a batch of extra-strong coffee or cold brew concentrate ahead of time. Use 2-3 ounces of this chilled concentrate, add your apple syrup, then the milk, and finally the ice. This method ensures every sip is as bold and flavorful as the last.
Don’t let that fragrant apple pulp from the syrup-making process go to waste! It’s a flavor-packed bonus ingredient. Stir the pulp into your morning oatmeal or yogurt, blend it into a smoothie, or even use it as a filling for small hand pies or turnovers. You’re not just being sustainable; you’re getting two delicious fall treats from one effort.
Beyond cinnamon, other spices can add incredible depth to your apple syrup. Consider these variations:
- Spicy & Warm: Add a thin slice of fresh ginger and a whole star anise to the pot while the apples cook.
- Deep & Complex: A pinch of ground cardamom and a whole clove will lend an almost chai-like complexity.
- Extra Rich: Substitute half of the white sugar with dark brown sugar or a splash of pure maple syrup for a deeper, more caramel-like flavor profile.
A daily $5.50 latte from a coffee shop can add up to over $1,200 a year.
While the initial purchase of apples and spices might seem like an investment, a single batch of homemade syrup can yield 10-15 lattes. The cost per drink plummets to a fraction of the café price, offering a significant saving without sacrificing that premium, seasonal treat.
There’s more to this drink than just taste. It’s the sensation of cupping a warm mug on a chilly morning, the steam carrying the scent of baked apples and cinnamon. The first sip is a wave of creamy sweetness, immediately followed by the bright, acidic snap of apple and the deep, reassuring bitterness of good coffee. It’s a complete sensory experience that feels like wrapping yourself in your favorite cozy sweater.
For an evening twist, turn your apple crisp latte into a sophisticated nightcap. A small splash of a complementary spirit can elevate it beautifully. Try adding a shot of Calvados (an apple brandy from Normandy) to double down on the apple flavor, or a quality spiced rum like Kraken to enhance the warm spice notes. It’s the perfect dessert drink for a cool autumn night.


