My Fail-Proof Method for Truly Moist Gluten-Free Chocolate Cupcakes
I’ve spent years in the baking world, first in bustling professional kitchens and later running my own little bakery focused on treats for everyone, including those with allergies. And believe me, the one thing people ask for more than anything else is a genuinely incredible gluten-free chocolate cupcake. Not one that’s just “good for gluten-free,” but one that’s rich, moist, and so delicious you’d never know the difference.
In this article
Getting that perfect texture without gluten—the very thing that gives traditional cakes their structure—is a bit of a science project. It took me more failed batches than I’d like to admit to finally nail down a method that works every single time. So what you’re getting here isn’t just a recipe. It’s the technique, the ‘why’ behind it all, and the hard-won lessons from my flour-dusted kitchen.
First, Let’s Geek Out: The Science of a Great GF Crumb
To build an amazing gluten-free cupcake, you have to know what you’re missing. In regular flour, gluten creates a stretchy, elastic web that traps air bubbles, giving cakes that light, springy texture we all love. It’s the support system.
Without it, we have to build our own support system from scratch. We do this by picking specific ingredients that work together to mimic what gluten does. This method leans on a careful balance of a unique flour, special binders, and the right technique to pull it off.
Why Every Ingredient Matters (Seriously)
Every single ingredient here has a job to do. I learned the hard way that you can’t just swap things willy-nilly in gluten-free baking. Thinking all GF flours are the same was my first rookie mistake, and it led to some very sad, very dense cupcakes.
Coconut Flour: The Thirsty One
Let’s talk about coconut flour. This isn’t your typical flour; it’s made from dried coconut meat, making it super high in fiber. Think of it as the sponge of the flour world. It can absorb about four times its own weight in liquid, which is wild compared to regular flour. That’s why the amount of liquid in this recipe might look like a typo—it’s not! The batter is supposed to be much thicker than you’re used to. That’s totally normal and key to its success.
The Binders: Our Gluten Stand-Ins
Xanthan gum and acacia powder are our secret weapons. They’re called hydrocolloids, which is just a fancy way of saying they form a gel with water. This gel mimics gluten’s web, giving the cupcakes structure and preventing them from falling apart.
- Xanthan Gum: This stuff is powerful. Just a tiny bit adds chew and structure. But go overboard, even by a gram, and you’ll get a gummy, weird texture. A small bag from the baking aisle at a store like Target or Whole Foods might run you $8 to $12, but it will last you for ages.
- Acacia Powder (Gum Arabic): This one’s a bit more subtle. It helps create a lighter, airier crumb. You’ll probably have to order this one online or find it at a specialty health food store. Good to know: If you can’t find acacia powder, you can leave it out. The cupcakes will still be great, just a tiny bit denser. The acacia just gives them that extra oomph.
The Lift: Baking Soda + Acid
We’re only using baking soda to make these cupcakes rise. Baking soda needs an acid to work its magic and create those all-important air bubbles. In this recipe, the natural cocoa powder is our acid.
Heads up! This is SUPER important. You absolutely must use natural unsweetened cocoa powder, not Dutch-processed. Natural cocoa is acidic. Dutch-processed cocoa has been neutralized, meaning it won’t react with the baking soda. If you use it, your cupcakes will be flat, dense little hockey pucks. Trust me on this one; it’s a classic mistake that will ruin the whole batch.
Fats & Liquids: The Moisture Foundation
- Extra-Virgin Olive Oil: Using a liquid fat like oil gives you a moister, more tender cupcake than butter. Oil-based cakes also stay soft for days at room temperature. The key is to use a mild-flavored olive oil. Look for bottles labeled ‘light’ or ‘all-purpose’—not the super green, peppery kind you’d use for a fancy salad, as its flavor will be too strong. Avocado oil works great, too.
- Hot Water & Cocoa (Blooming): This is a pro technique called “blooming,” and it’s a game-changer for chocolate flavor. Mixing cocoa powder with hot water first dissolves it completely (no dry specks!) and releases deep, rich flavor compounds. You’re basically making a super-concentrated hot chocolate base.
The Sweetener: Powdered Erythritol
To keep these sugar-free, we’re using erythritol. It’s a sugar alcohol that behaves a bit differently than regular sugar.
- It’s about 70% as sweet as sugar, and the recipe is balanced for that.
- Unlike sugar, it doesn’t hold onto moisture, which is another reason we have so much liquid in the batter.
- This is not optional: You have to use powdered erythritol. The granulated kind doesn’t dissolve well and can leave your cupcakes with a gritty texture as they cool. You can buy it powdered (brands like Swerve or Anthony’s are great and cost around $10-$15 a bag online or in the keto aisle), or you can make your own by blitzing granulated erythritol in a high-speed blender until it’s a fine powder.
- By the way, some people notice a slight cooling sensation on their tongue from erythritol. It’s just a weird quirk of its chemistry and varies from person to person.
The Fail-Proof Method: A Step-by-Step Guide
Success here is all about precision. In gluten-free baking, winging it is a recipe for disaster. Follow these steps, and I promise you’ll be rewarded.
Get Your Stuff Ready (Mise en Place)
Before you even think about mixing, get everything out and measured. It makes the whole process so much smoother and prevents you from scrambling later.
- A Digital Kitchen Scale: I can’t stress this enough. For gluten-free baking, measuring by weight (grams) is the only way to get consistent results. Cups are just too inaccurate.
- Two medium bowls, one large bowl
- A fine-mesh sieve or sifter
- A whisk and a silicone spatula
- Electric mixer (a hand-held one is totally fine)
- Standard 12-cup muffin tin and paper liners
- Wire cooling rack
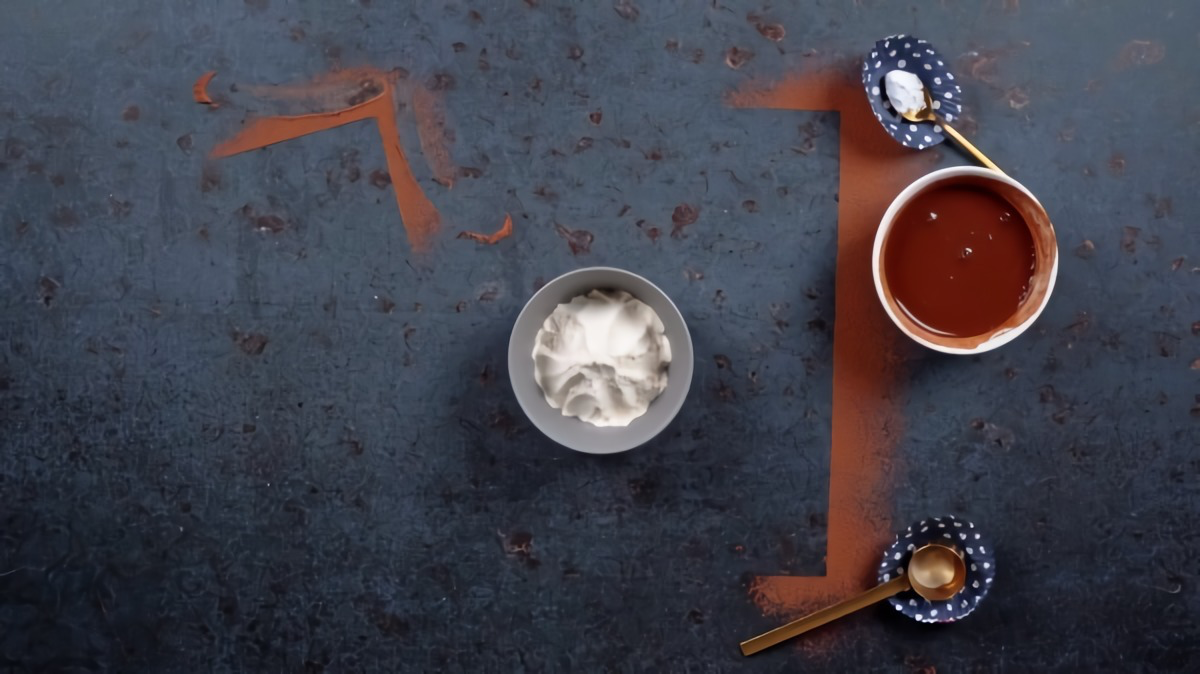
The Ingredient List
Yields: 12 cupcakes
Prep time: 15 minutes
Bake time: 22-25 minutes
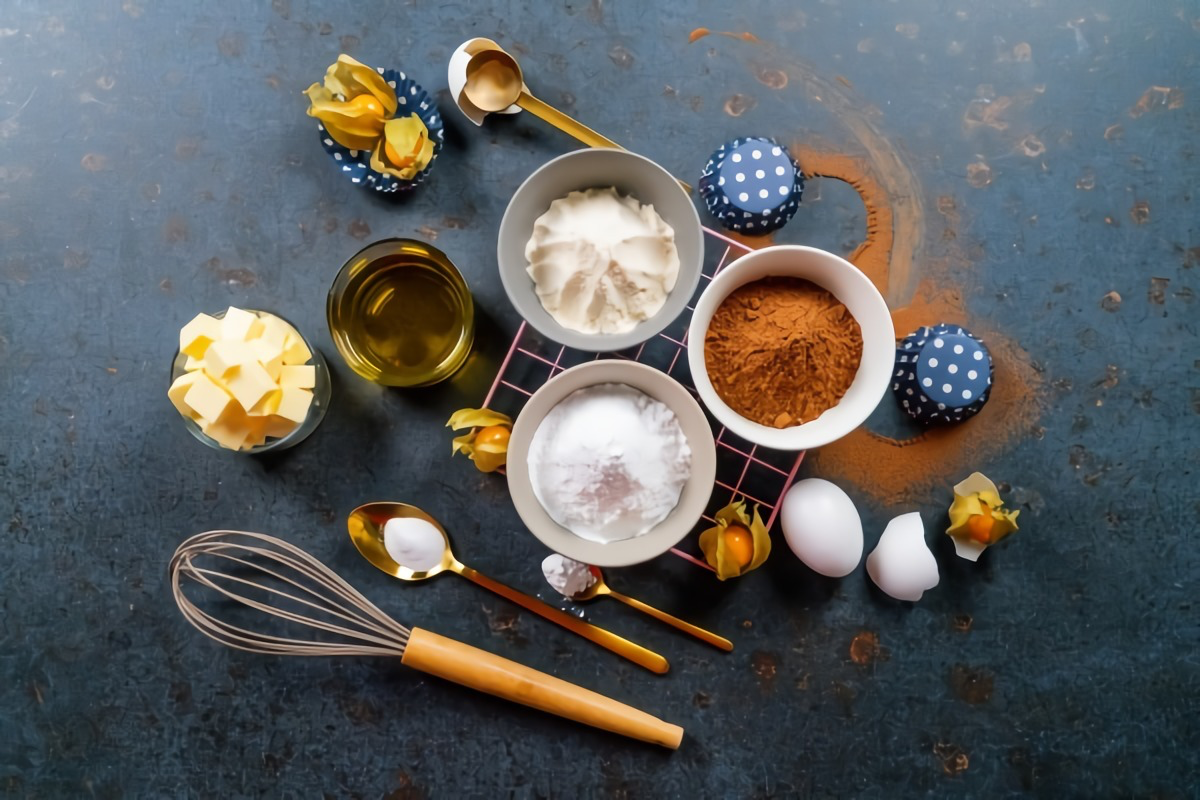
For the Cupcake Batter:
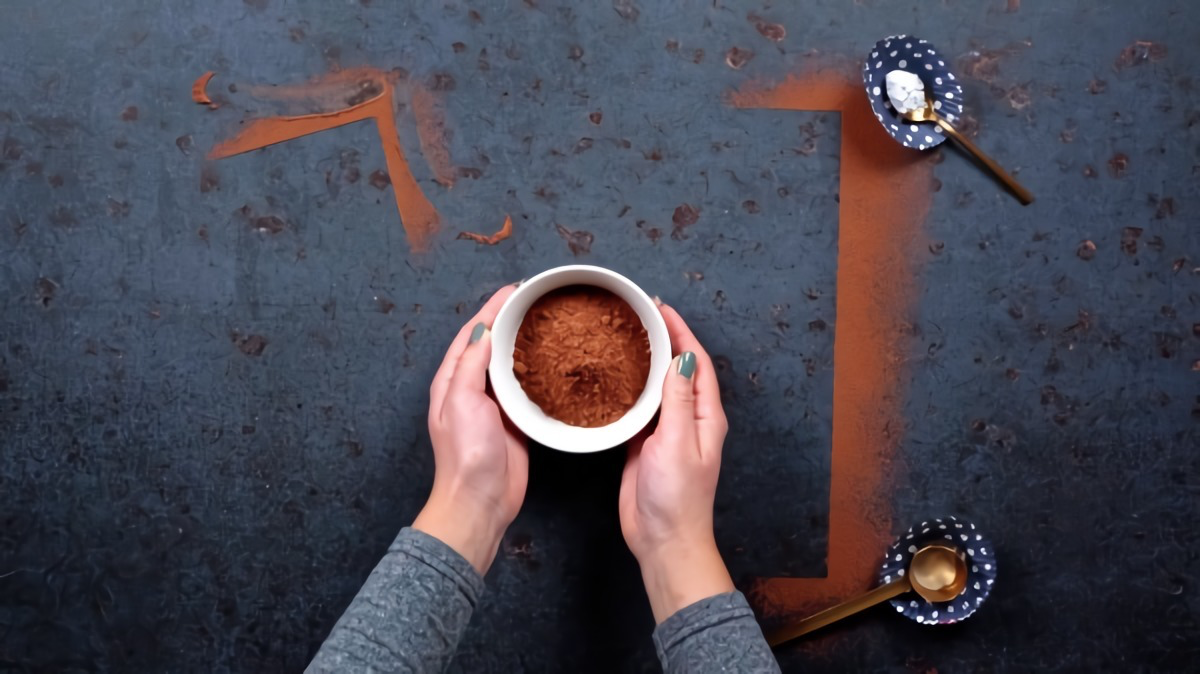
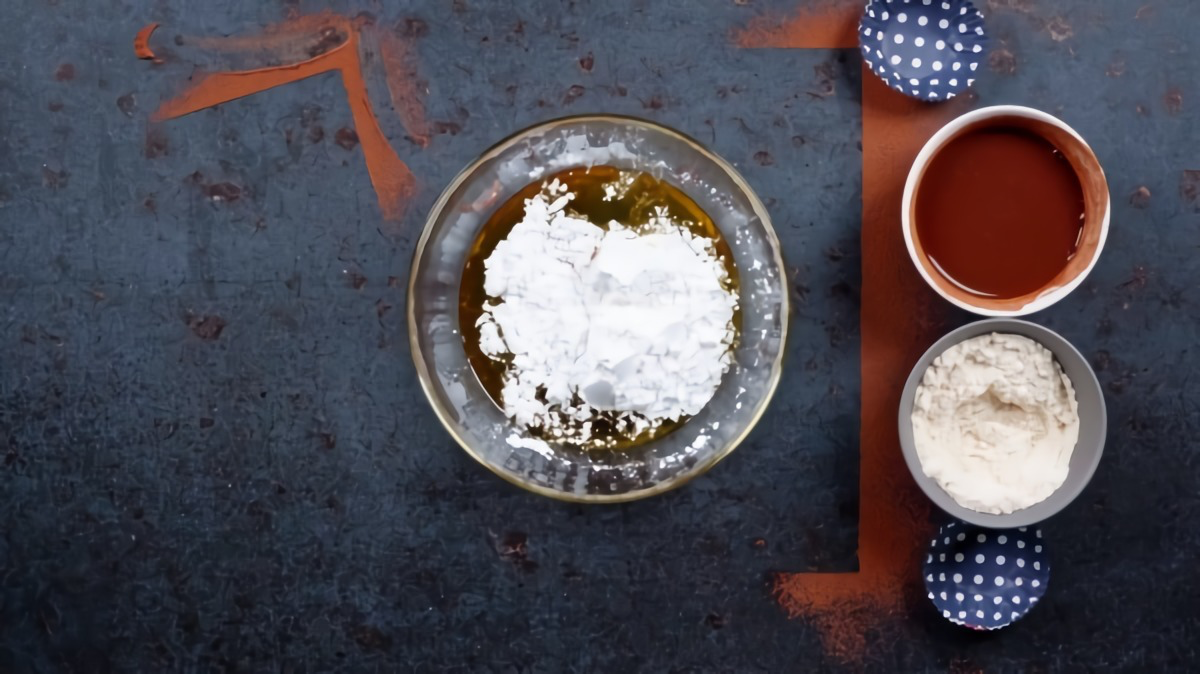
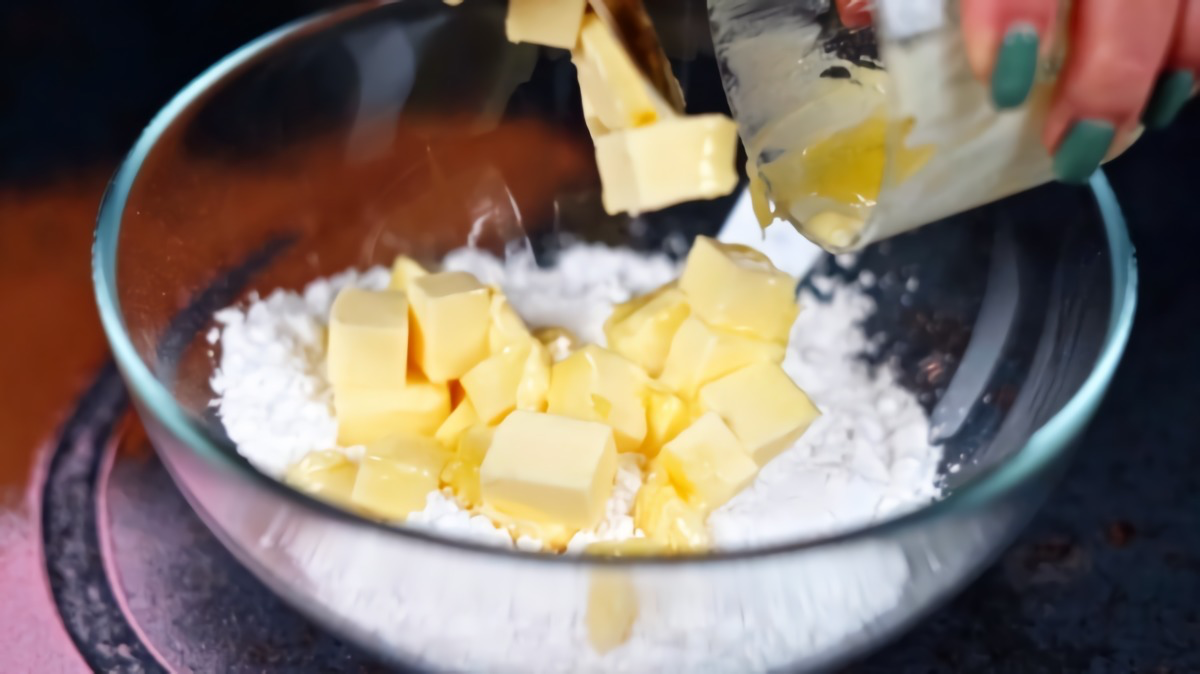
- Natural Unsweetened Cocoa Powder: 40 grams
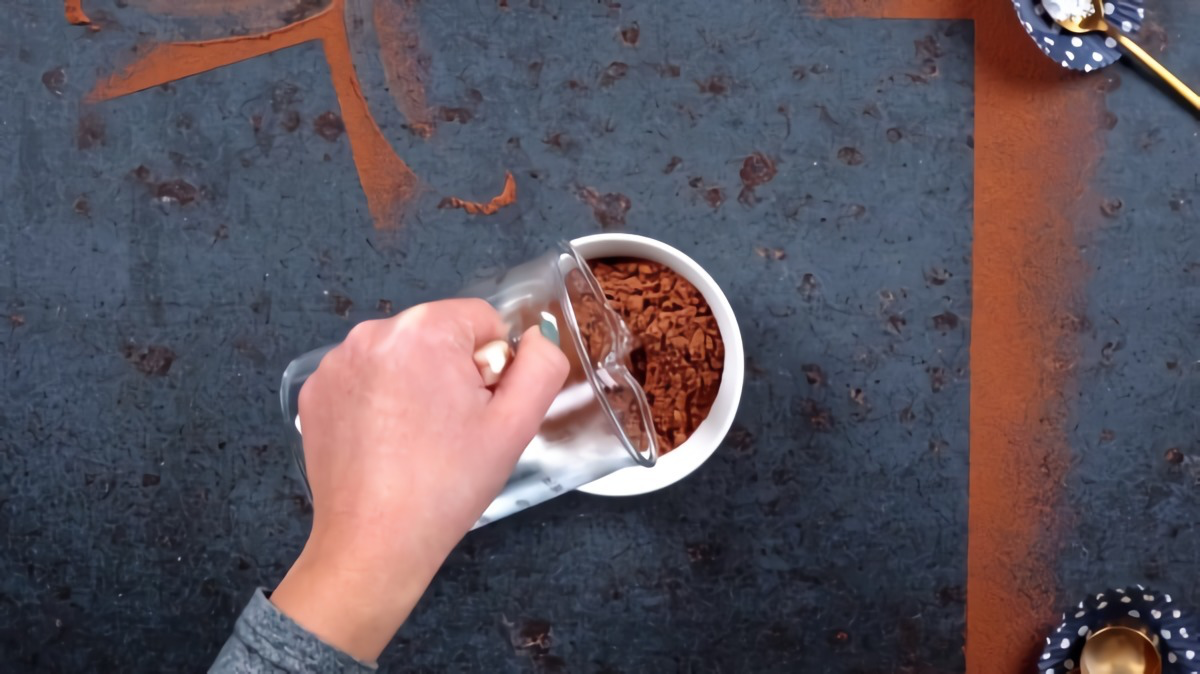
- Hot Water (not boiling, around 175°F / 80°C): 175 ml (175 grams)
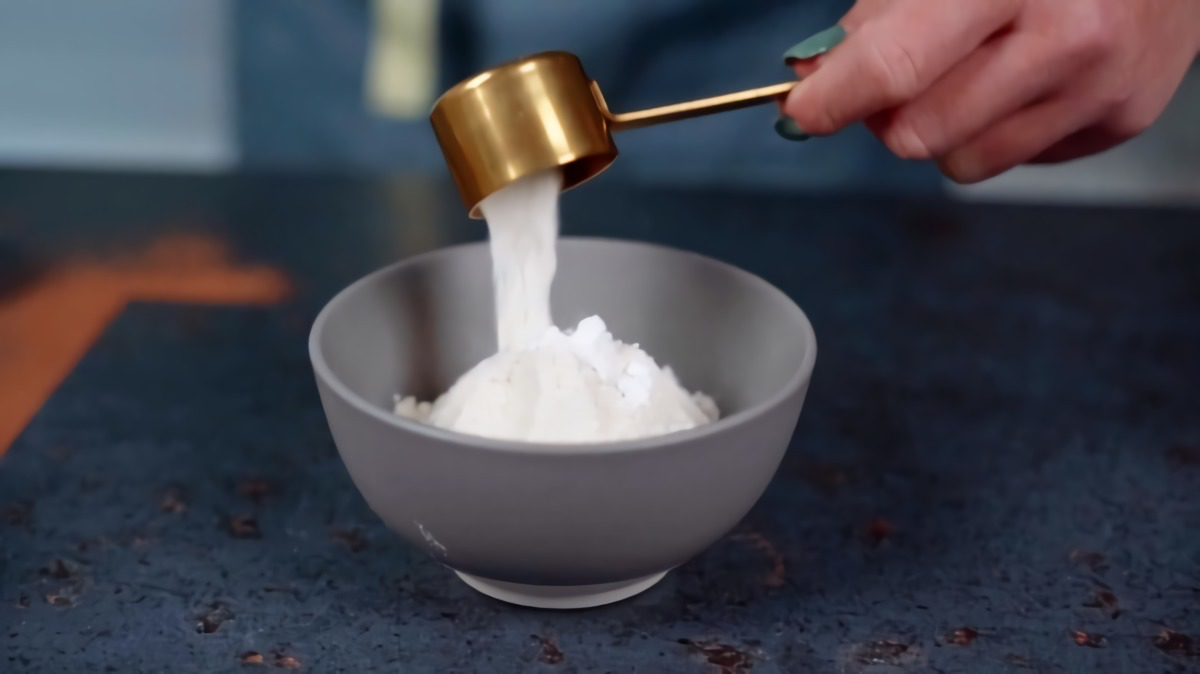
- Coconut Flour: 50 grams
- Baking soda: 1 teaspoon (about 5 grams)
- Xanthan Gum: 1/2 teaspoon (about 2 grams) — weigh this if you can!
- Acacia Powder: 1 tablespoon (about 6 grams)
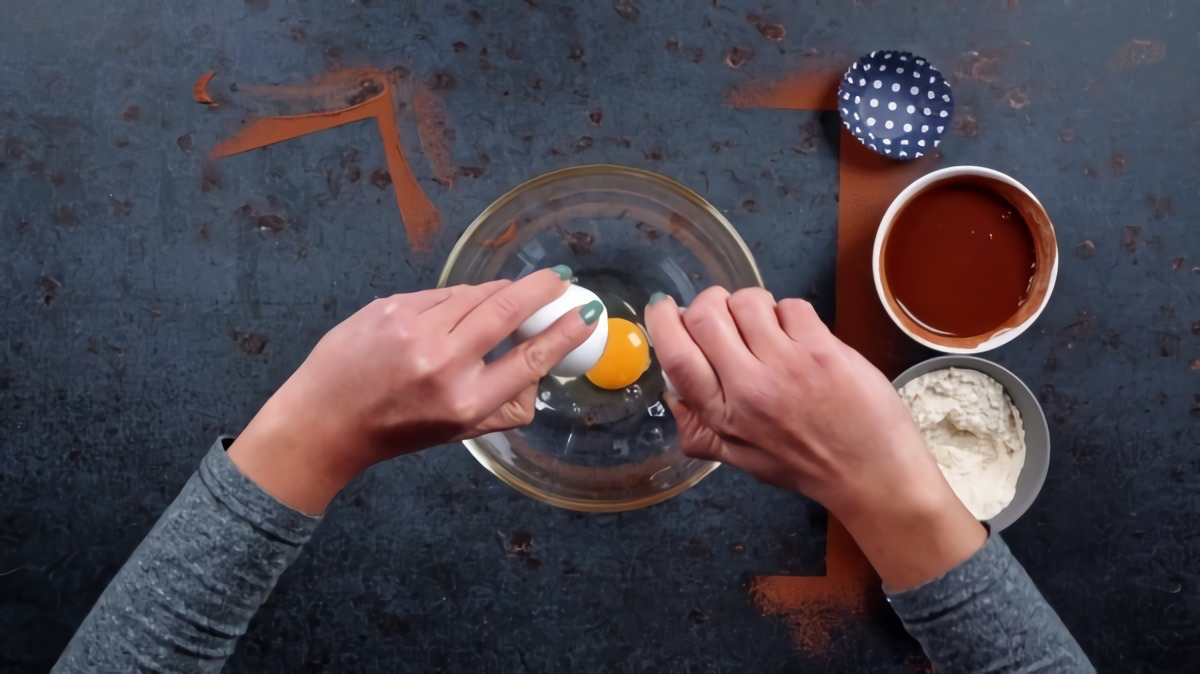
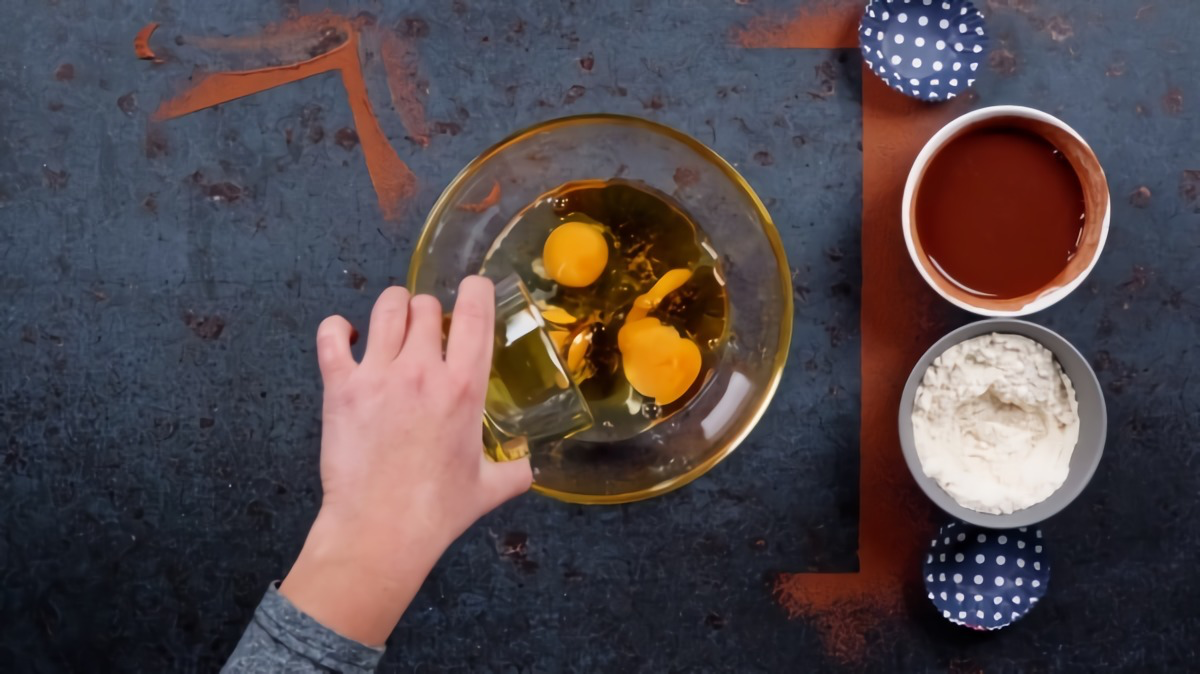
- Large Eggs, at room temperature: 3
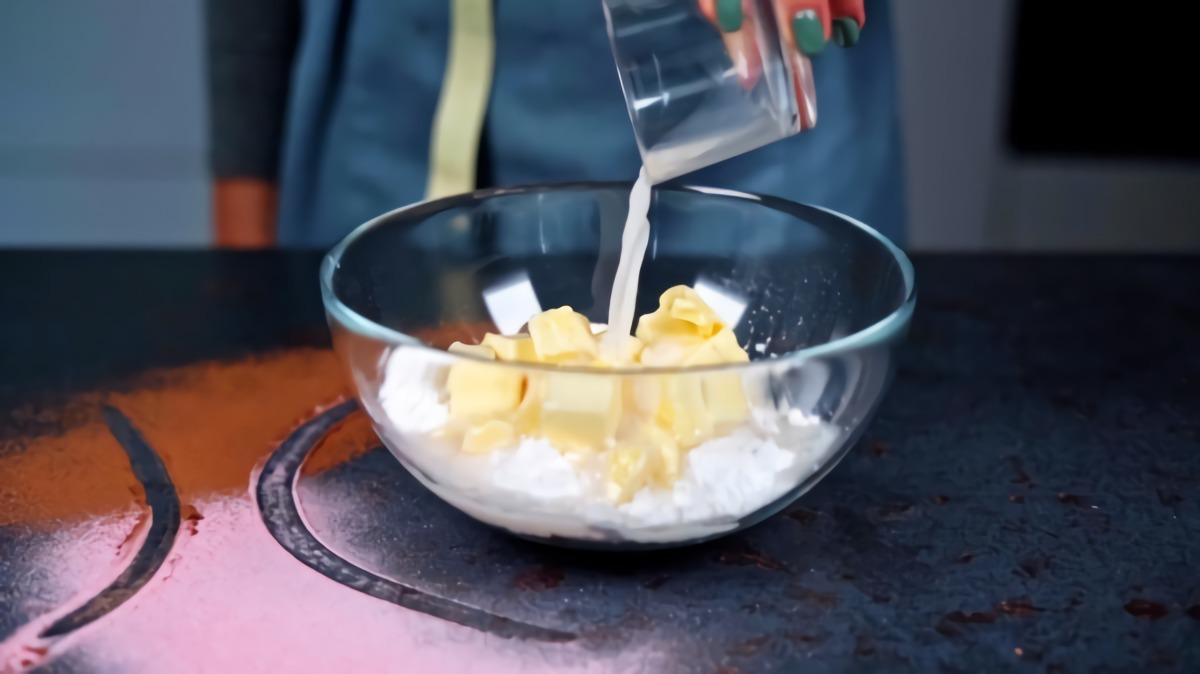
- Mild Extra-Virgin Olive Oil: 125 ml (115 grams)
- Powdered Erythritol: 130 grams
- Pure Vanilla Extract: 1 tablespoon (15 ml)
For the Buttercream Frosting:
- Unsalted Butter, softened to room temperature: 120 grams
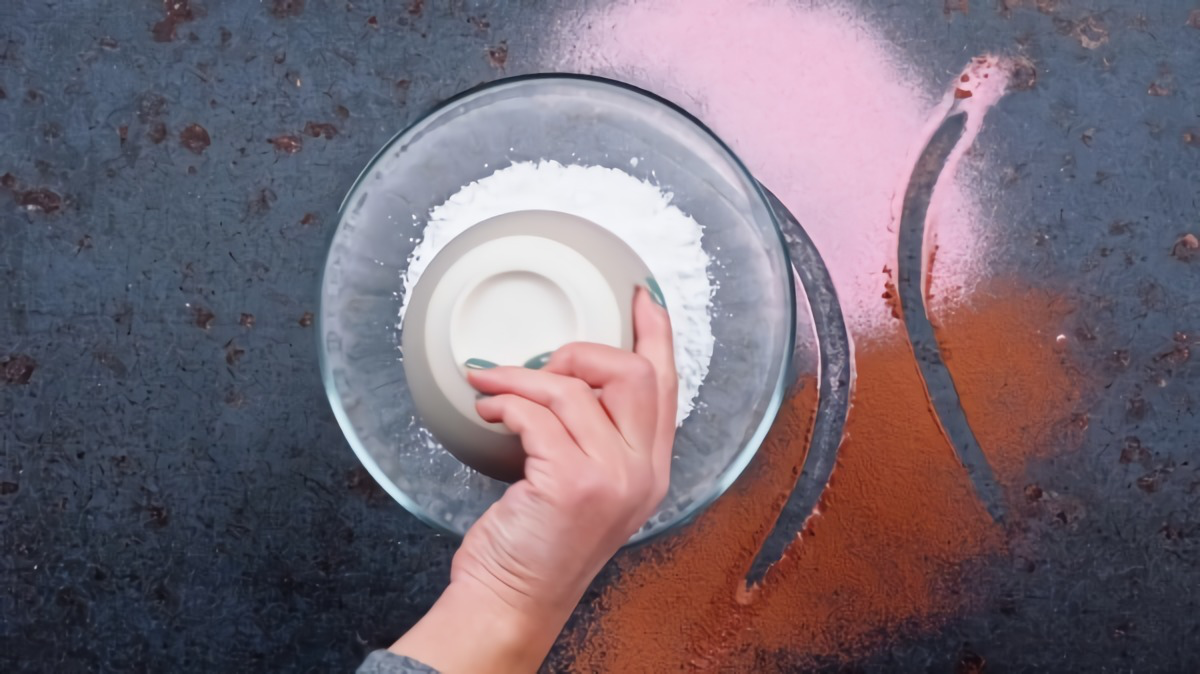
- Powdered Erythritol, sifted: 200 grams
- Full-Fat Canned Coconut Milk or Heavy Cream: 3 tablespoons (45 ml)
- Pure Vanilla Extract: 1 teaspoon (5 ml)
- A pinch of salt
Instructions: Let’s Make Some Cupcakes!
1. Prep the Oven & Pan: Move an oven rack to the middle position and preheat to 320°F (160°C). We use a lower temperature to help these bake up nice and even without cracking. Line your muffin tin with paper liners.
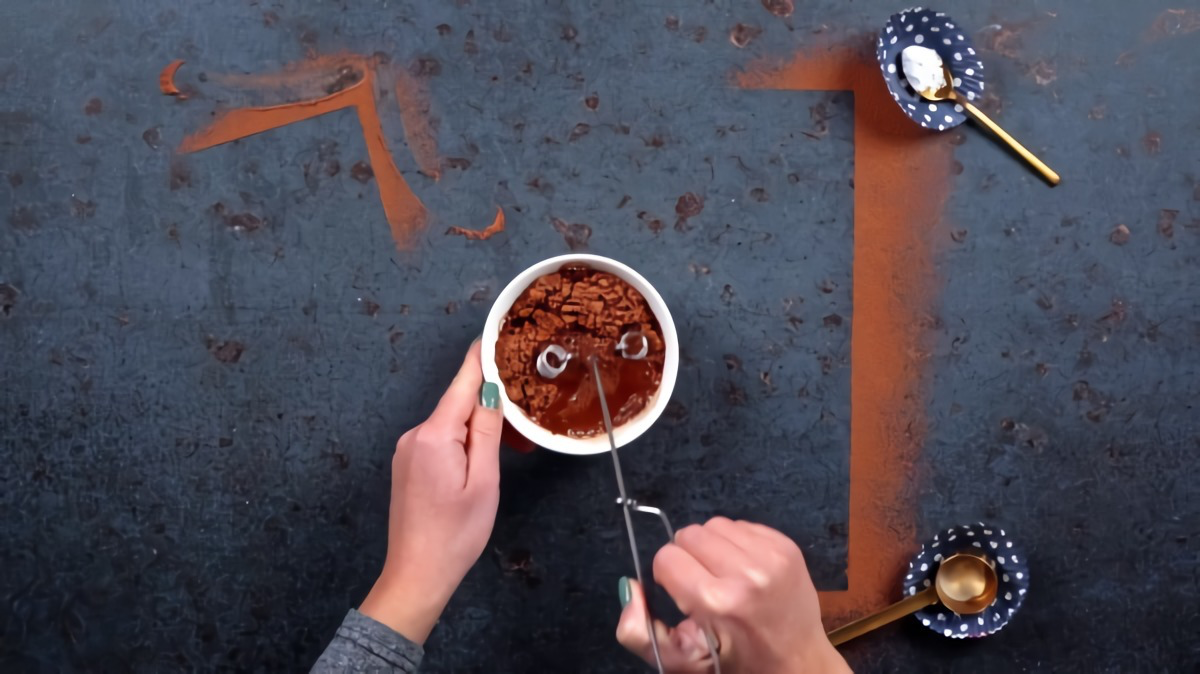
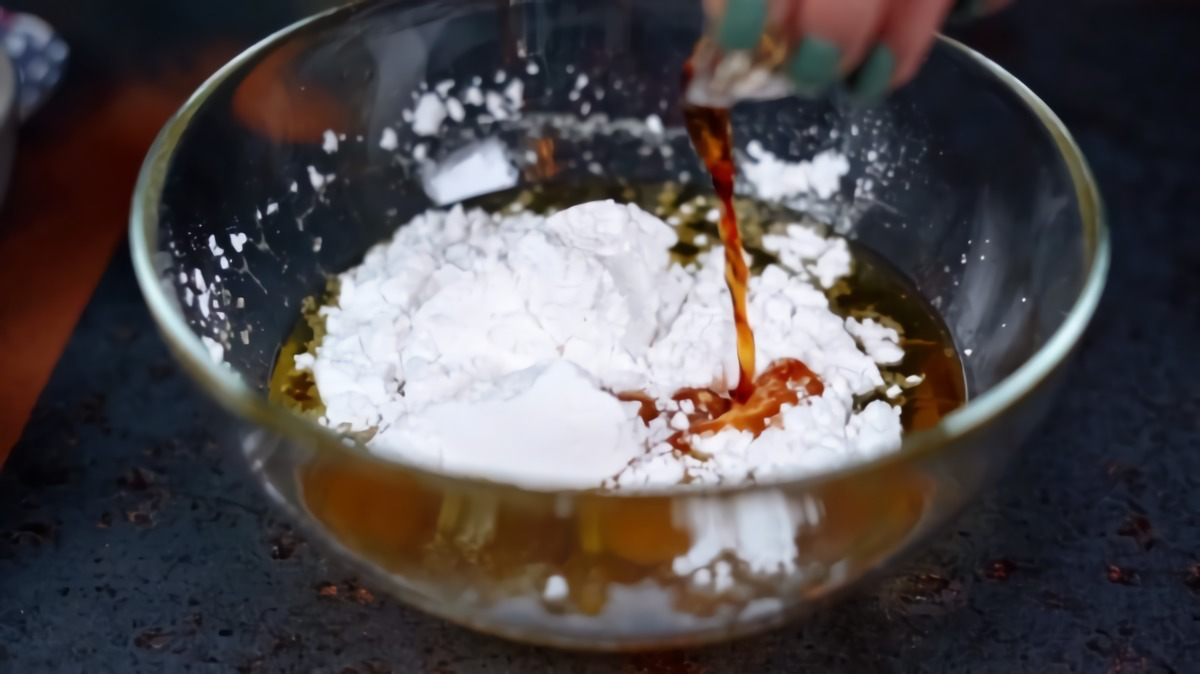
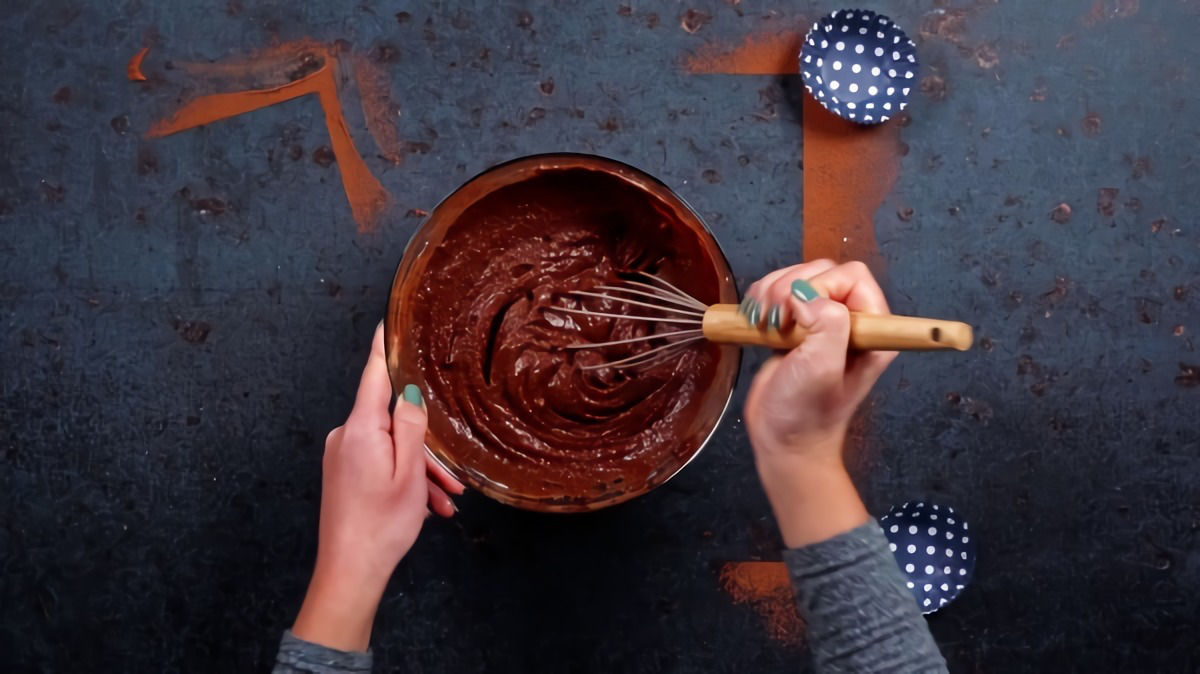
2. Bloom That Cocoa: In a medium bowl, whisk the 40g of cocoa powder with the 175ml of hot water until it’s a smooth, glossy paste. It’s going to smell amazing. Set it aside to cool down a bit.
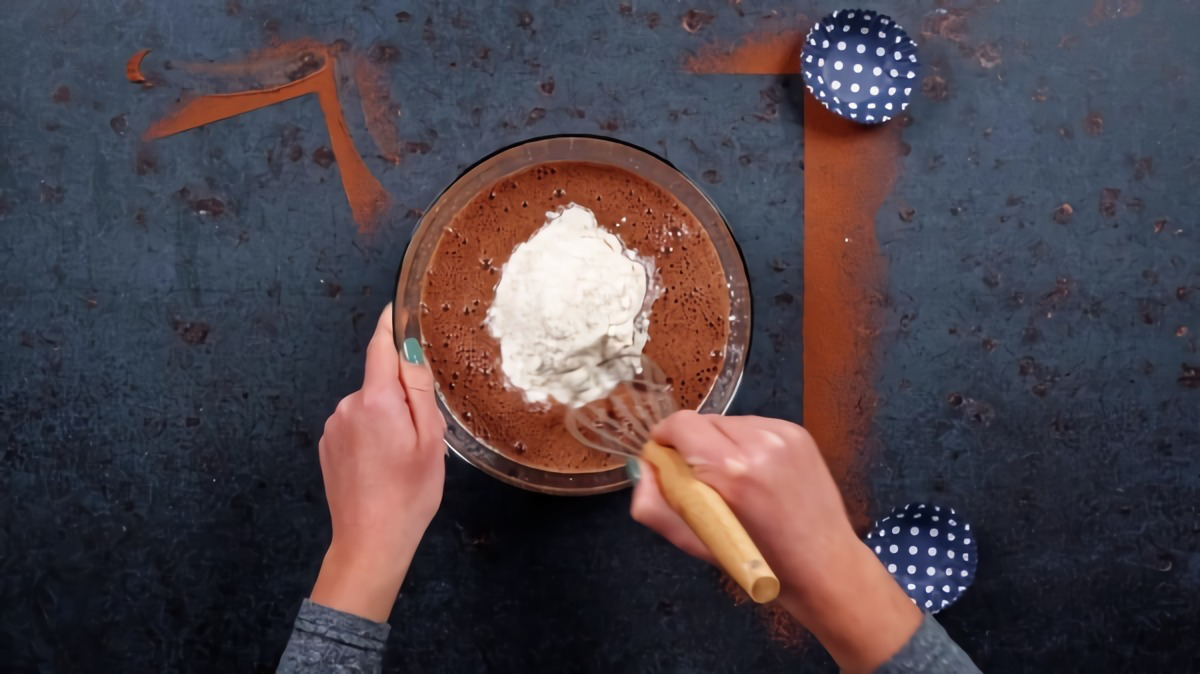
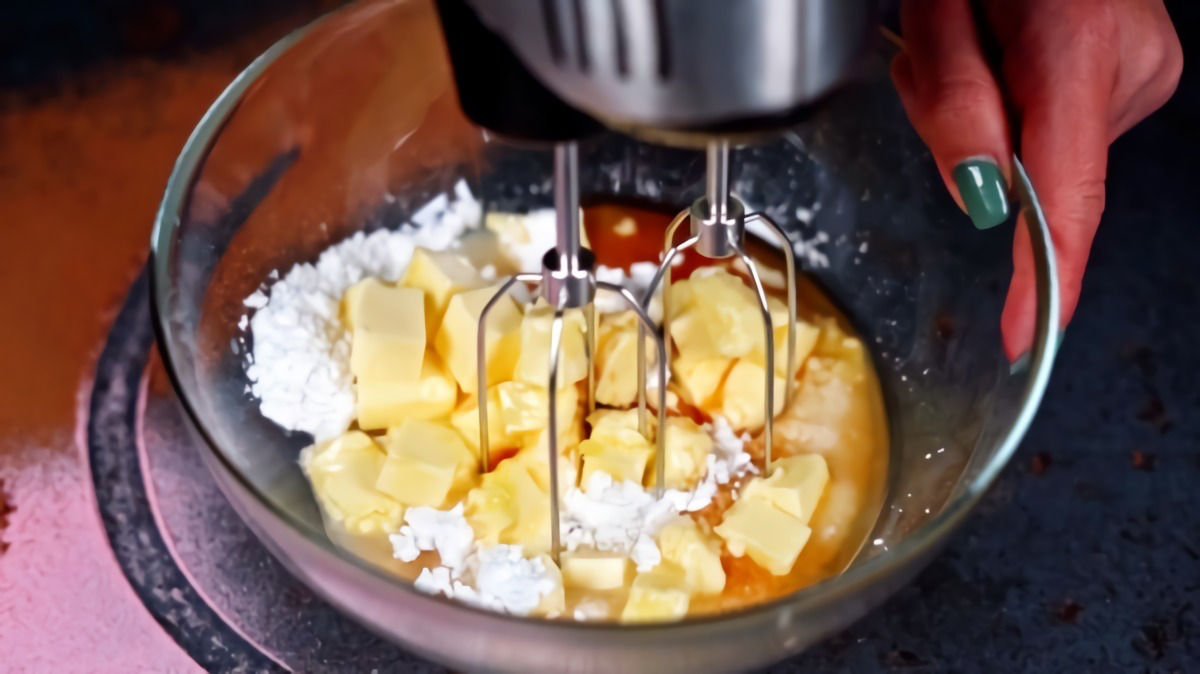
3. Sift the Dry Stuff: In another bowl, add the 50g coconut flour, baking soda, xanthan gum, and acacia powder. Sift them all together, or at the very least, whisk them like crazy for 30 seconds. This is crucial for making sure the binders are evenly spread out, which prevents gummy spots.
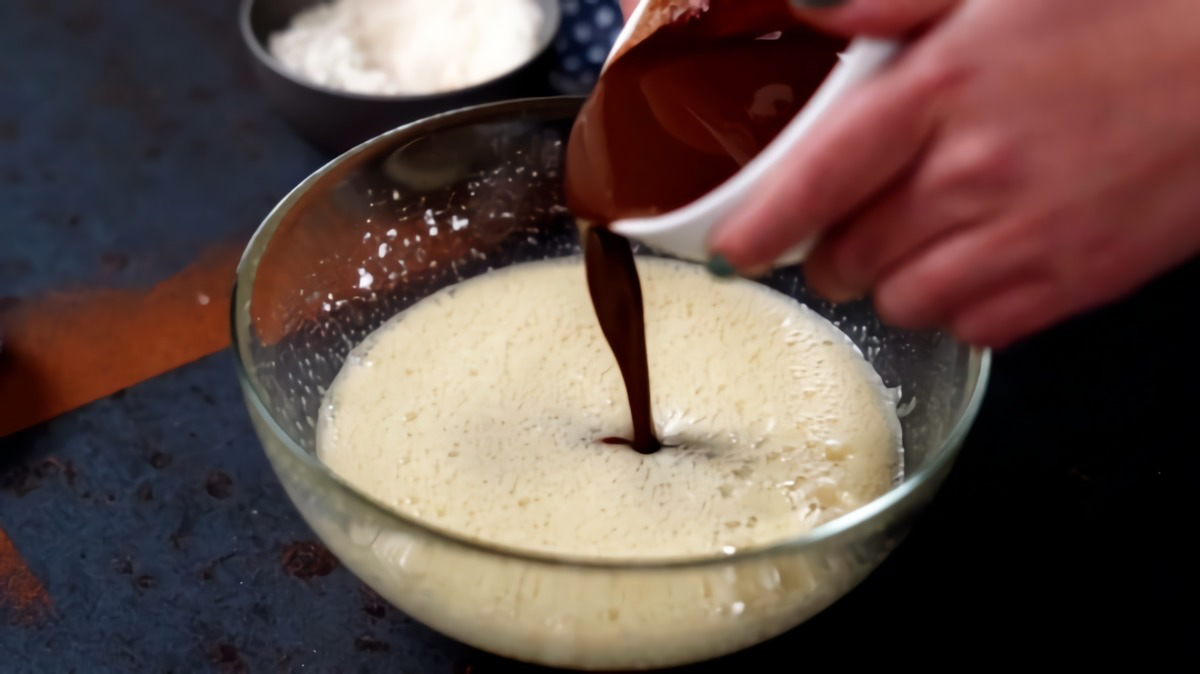
4. Mix the Wet Ingredients: In your large bowl, crack the 3 room-temperature eggs. (A quick tip on ‘room temperature’: We’re talking about 68-70°F or 20-21°C. Cold eggs can make the oil clump up, so just leave them on the counter for an hour before starting). Add the olive oil, powdered erythritol, and vanilla. Beat with an electric mixer for about 2 minutes until it’s lighter in color and well-combined.
5. Combine and Go! Pour the cooled cocoa mixture into the egg mixture and mix on low until just combined. Now, add all the sifted dry ingredients at once. Mix on low just until you don’t see any more dry flour, then stop. Scrape the bowl, and give it one last mix for no more than 20 seconds.
Let’s talk about what this batter should look like, because it’s probably not what you expect. A traditional cake batter is thin and pourable. This one? It’s thick, almost like a chocolate mousse. That’s exactly what you want to see! The batter thickens up FAST as the flour and gums absorb liquid, so you need to work quickly. This is not a batter you can mix and let sit.
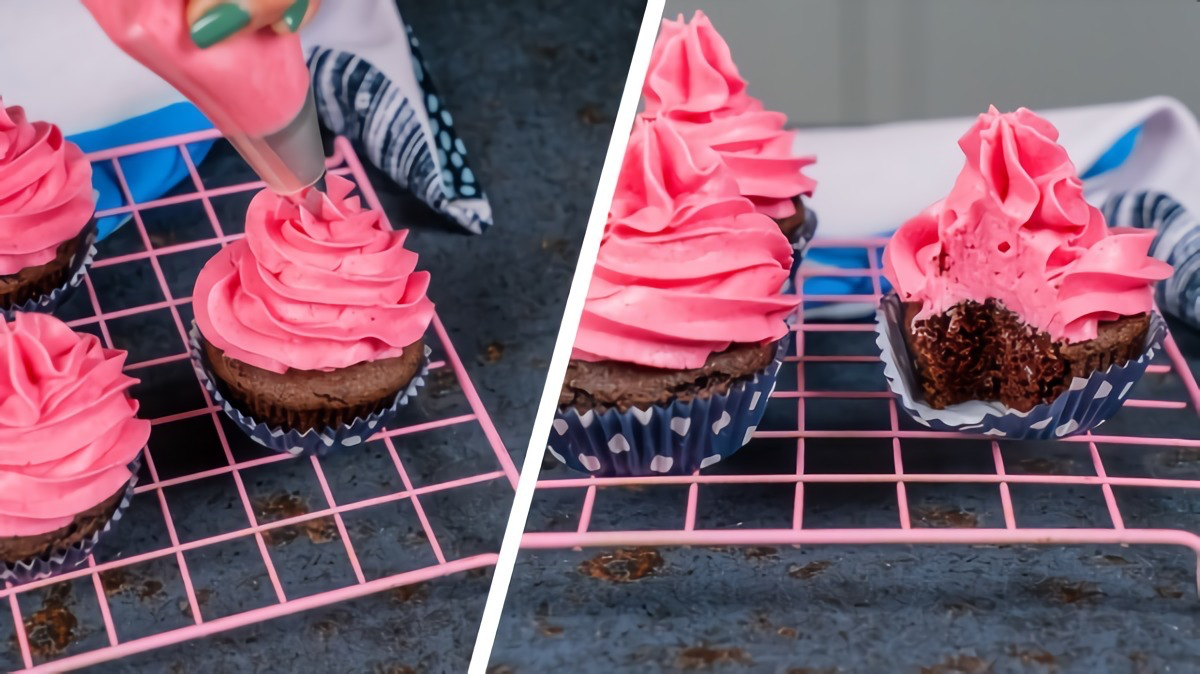
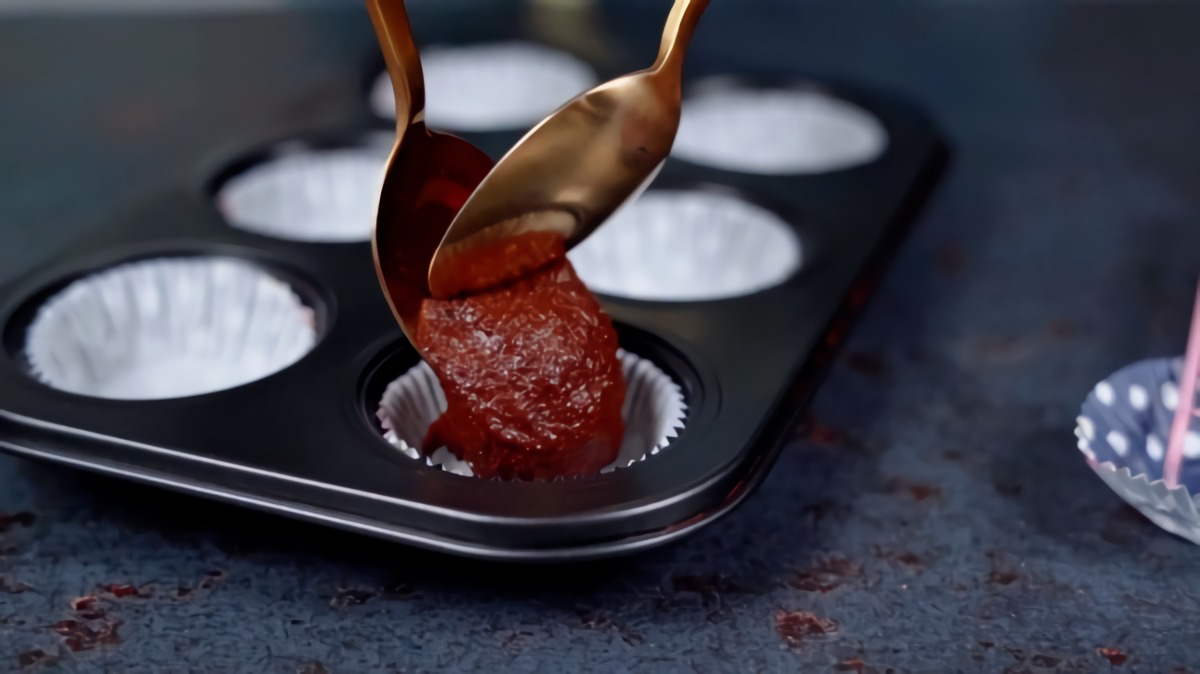
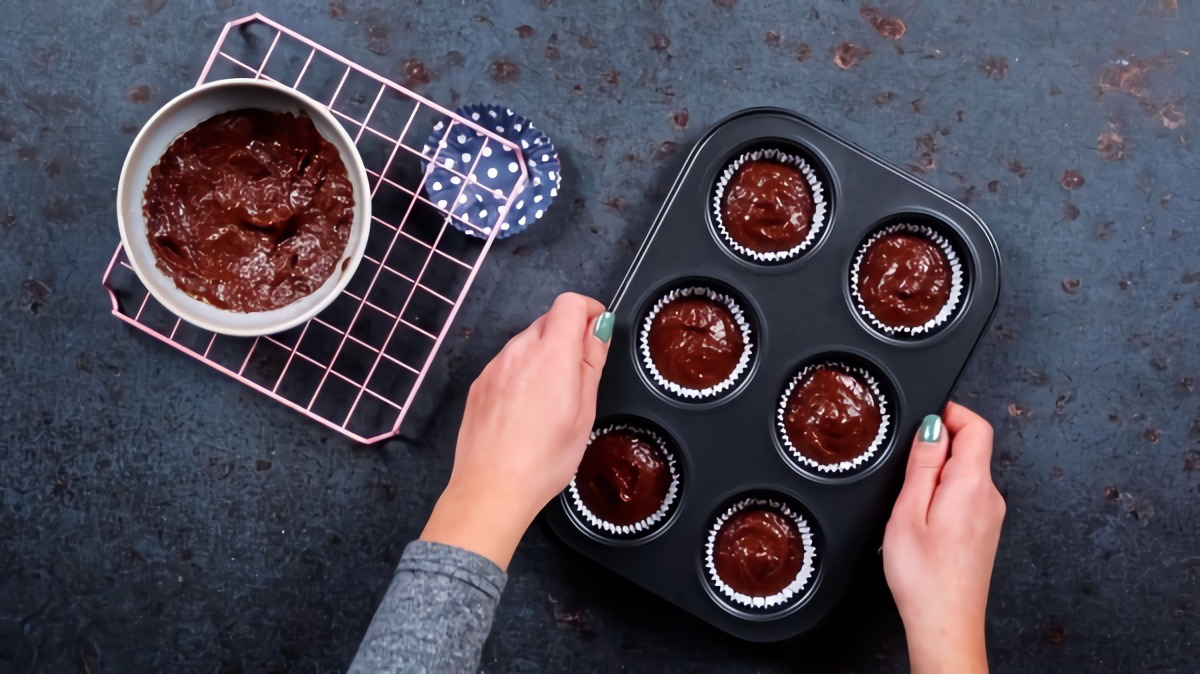
6. Fill ‘er Up and Bake: Immediately divide the batter between the 12 cupcake liners. An ice cream scoop is perfect for this. Fill them about two-thirds full. Pop the tin in the oven and bake for 22-25 minutes. To check if they’re done, gently press the top of a cupcake. It should spring right back. A toothpick should come out with a few moist crumbs, but no wet batter.
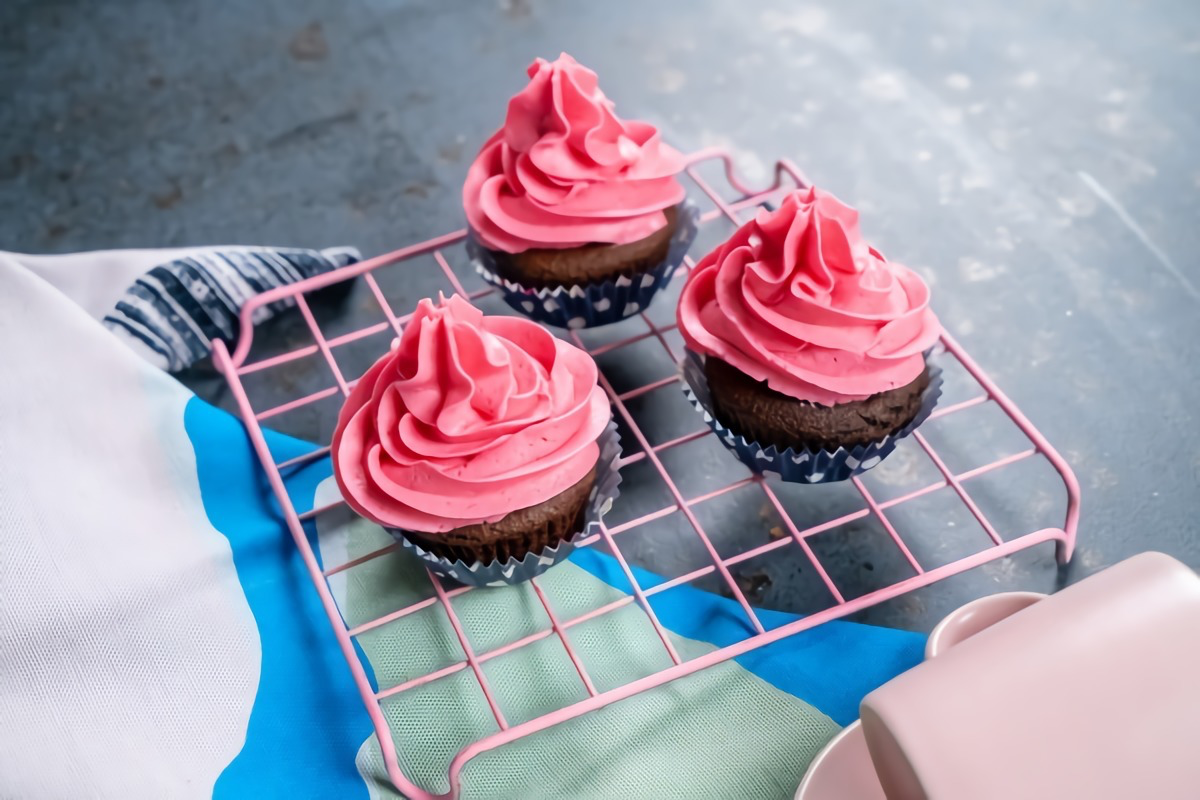
7. The All-Important Cool Down: This step is non-negotiable! As soon as they’re out of the oven, move the cupcakes from the hot tin to a wire cooling rack. If you leave them in the tin, they’ll keep cooking and the trapped steam will make the paper liners peel away. I’ve seen so many good cupcakes ruined this way. Let them cool completely before even thinking about frosting.
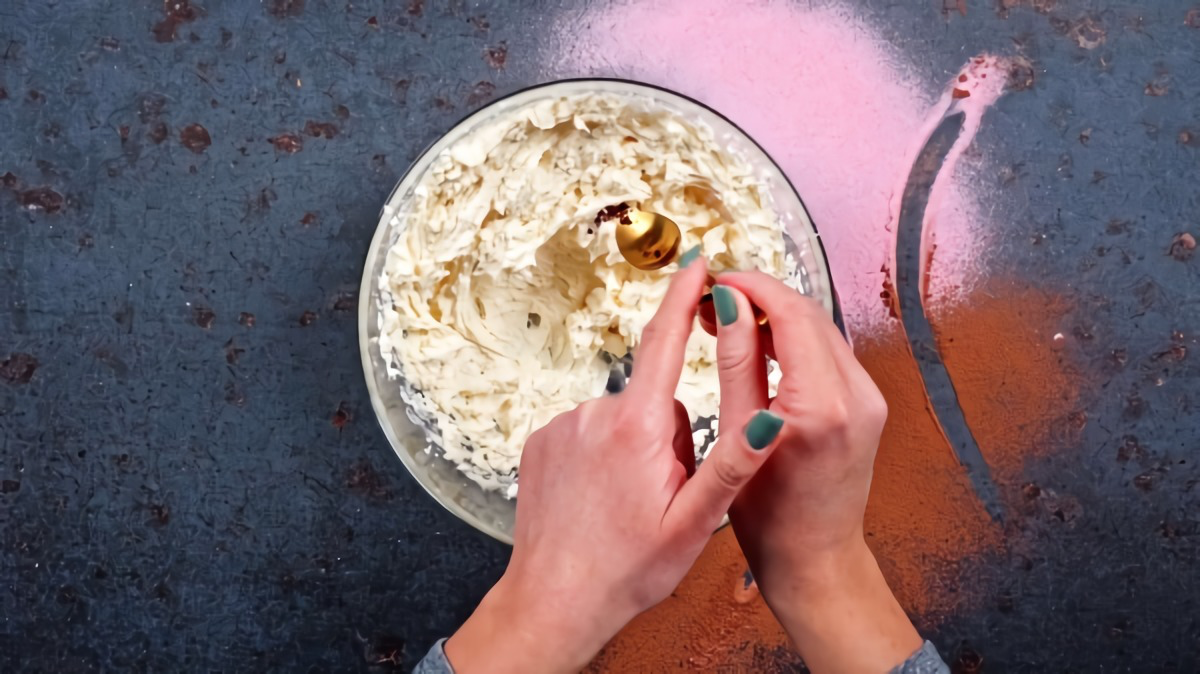
Instructions: The Dreamy Buttercream
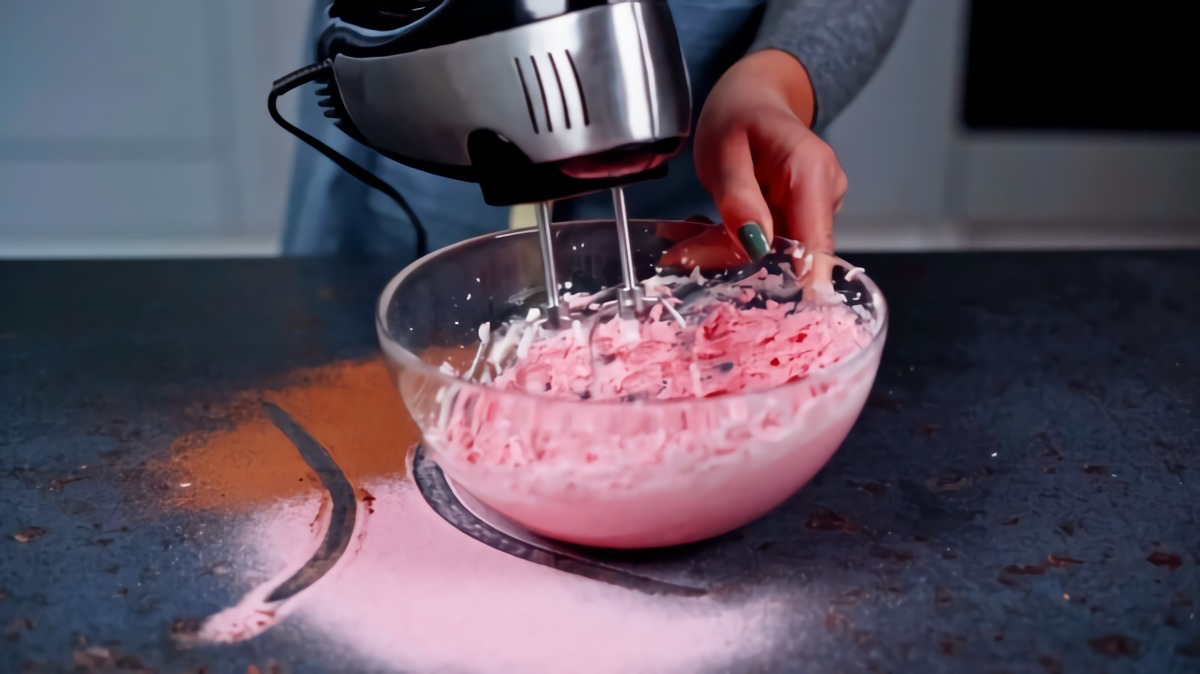
1. Whip the Butter: In a bowl, beat the 120g of softened butter with your electric mixer for 2-3 minutes until it’s super pale and fluffy. This beats air into it, which is the secret to light frosting.
2. Add Everything Else: Add half of the sifted powdered erythritol and mix on low. Then add the rest. It will get pretty stiff. Now add the 3 tablespoons of coconut milk (or cream), vanilla, and salt.
3. Whip It Good: Crank the mixer to medium-high and whip for another 3-4 minutes until it’s light, smooth, and spreadable. Pro-tip for the smoothest frosting: After mixing, let it sit for about 10 minutes. This gives the erythritol a chance to dissolve more fully. Then, give it one final, quick whip. It really helps cut down on any potential grittiness!
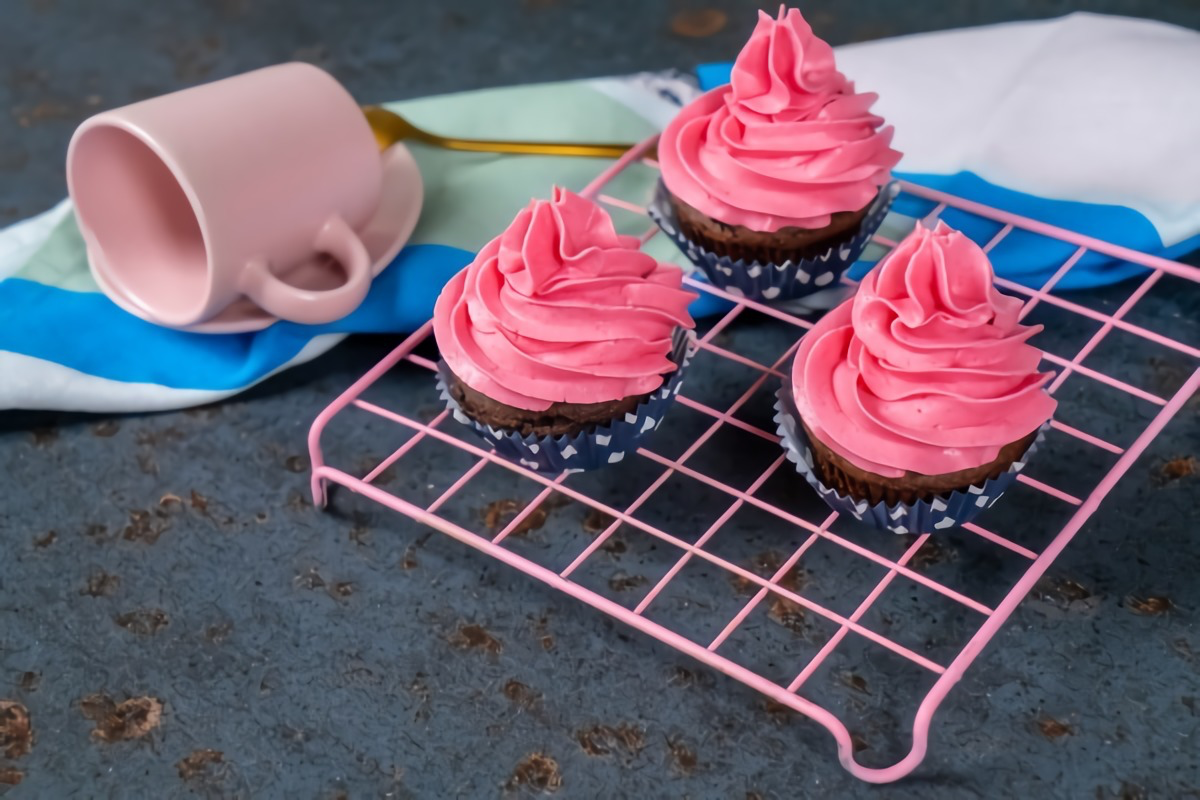
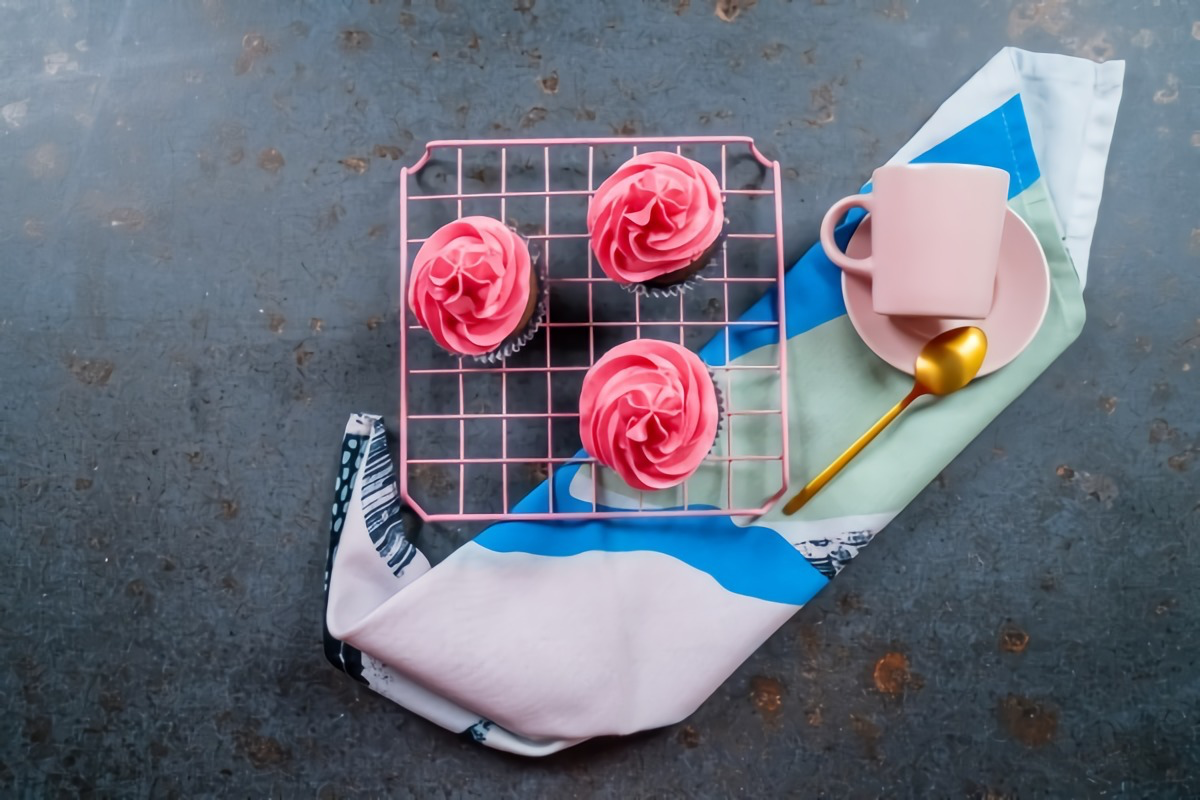
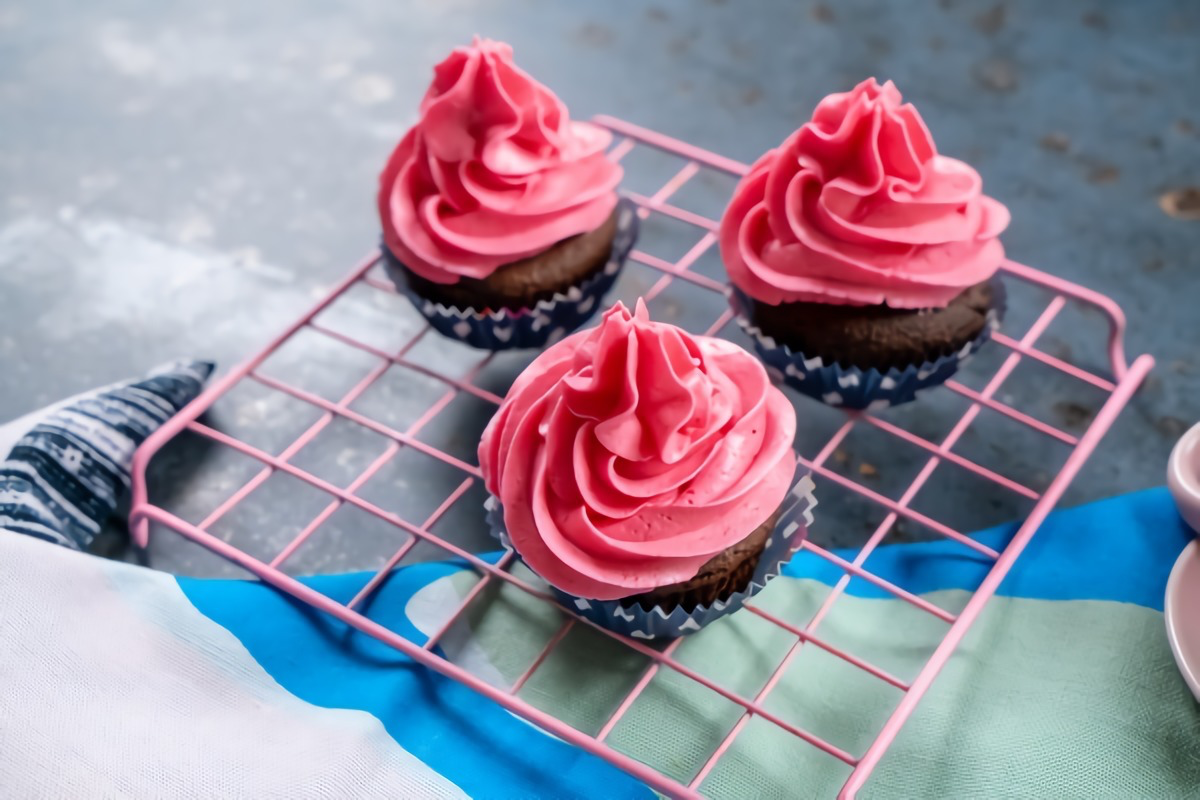
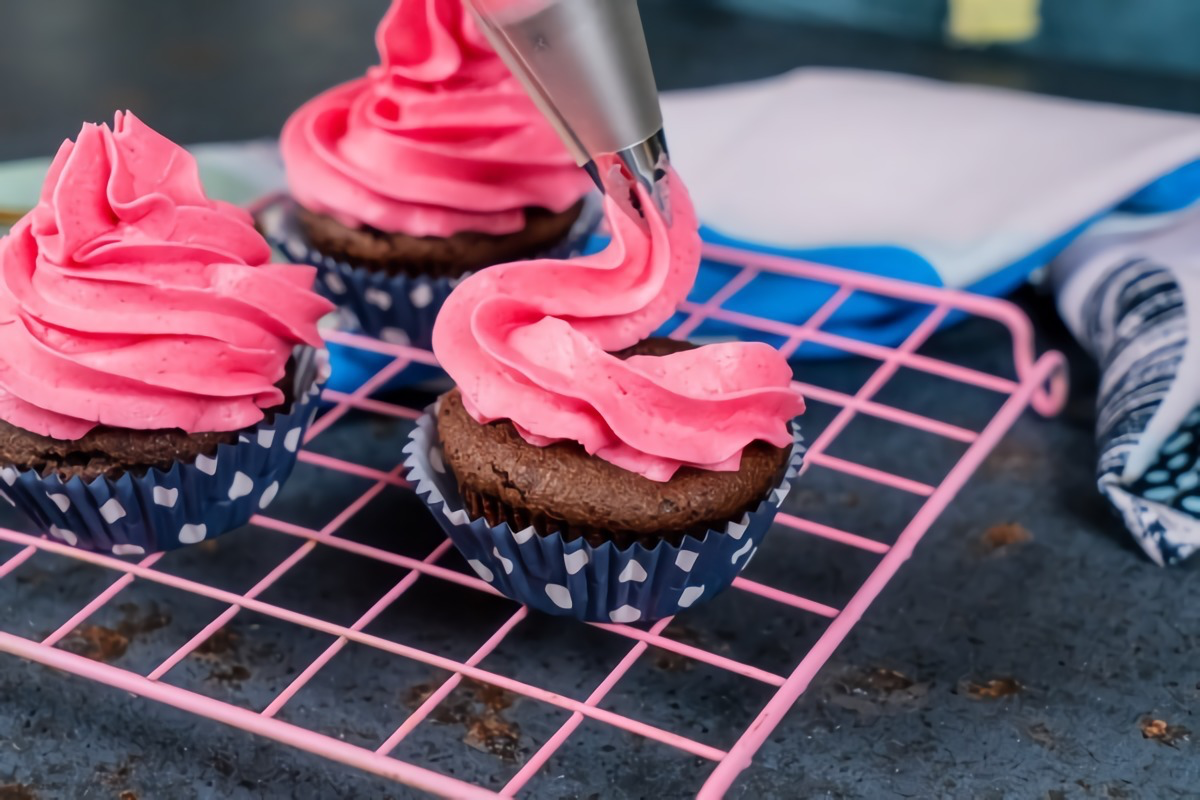
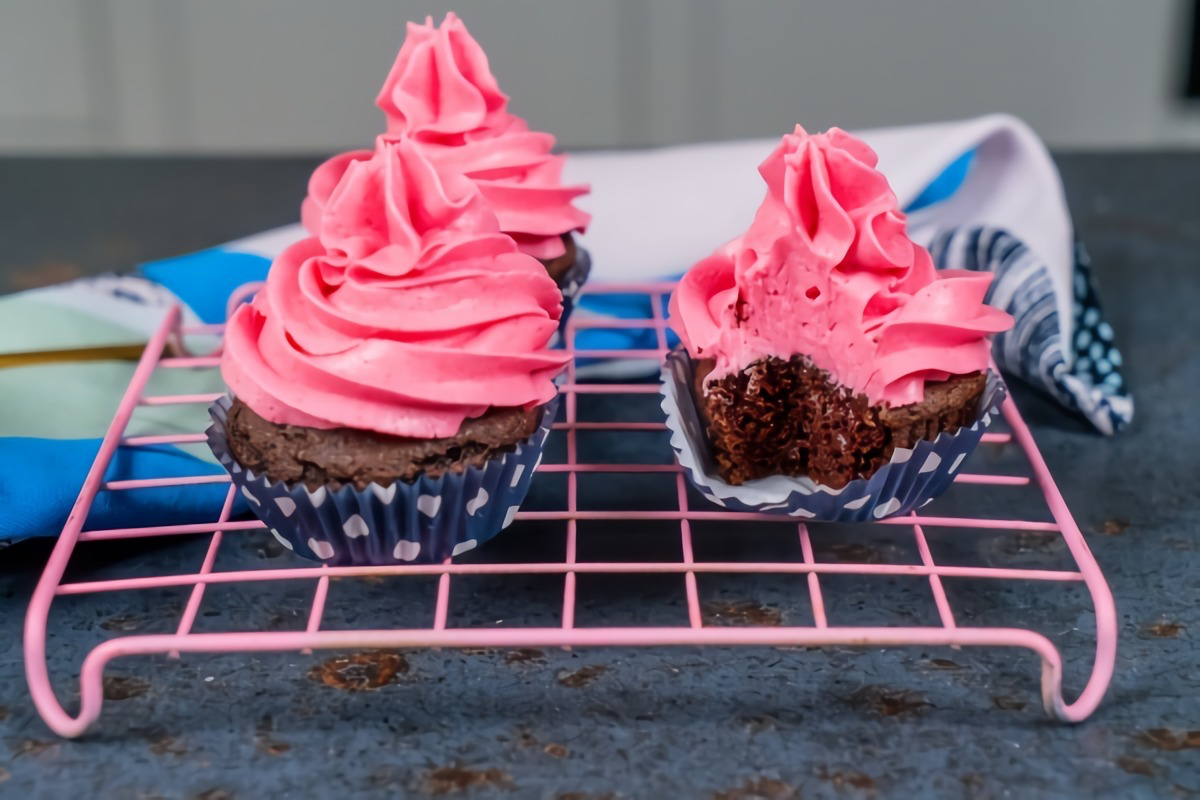
4. Frost Away: Once the cupcakes are totally cool, frost them however you like. Store them in an airtight container at room temperature. Thanks to the oil base, they stay perfectly moist without refrigeration for a couple of days.
Help! My Cupcakes Didn’t Work!
Even with the best method, things can go sideways. Here are a few common problems and how to fix them.
- Problem: They’re dry and crumbly.
Likely Cause: You either over-baked them or, more likely, your coconut flour measurement was off. Even an extra 5 grams can suck up all the moisture. Use a scale!
The Fix: Next time, check for doneness at the 22-minute mark and be super precise with your flour. - Problem: They have a gummy texture.
Likely Cause: Too much xanthan gum or you over-mixed the batter after adding the flour, which makes the gums work too hard.
The Fix: Measure the xanthan gum carefully and mix on low only until the flour is combined. - Problem: They sank in the middle.
Likely Cause: They were under-baked, or you opened the oven door too early, causing the delicate structure to collapse.
The Fix: Don’t peek for the first 20 minutes of baking, and trust the spring-back test to know when they’re done.
Variations, Storage, and Other Good Stuff
A few final thoughts and tips to set you up for success!
- Can I use regular sugar? Yes! This is the most common question I get. If you don’t need them to be sugar-free, you can replace the 130 grams of powdered erythritol with 130 grams of regular powdered sugar (confectioners’ sugar). The cupcakes will be slightly moister since sugar holds onto water better.
- What about other flours? Please don’t. This recipe is specifically balanced for coconut flour. Swapping it for almond flour or a GF blend would require a completely different amount of liquid and would likely fail.
- A Note on Cross-Contamination: If you’re baking for someone with celiac disease, you have to be vigilant. Make sure your cocoa powder, baking soda, and vanilla are certified gluten-free, as some brands have cross-contamination risks. Use clean bowls and utensils to be safe.
How to Store Your Masterpieces
You baked them, now how do you keep them fresh? It’s easy.
Unfrosted cupcakes can be stored in an airtight container at room temperature for up to 3 days. Need to keep them longer? They freeze beautifully! Just wrap them individually in plastic wrap, pop them in a freezer bag, and they’ll be good for up to a month. Just thaw at room temp.
Once frosted, they’re best kept in an airtight container on the counter for up to 2 days. The oil base keeps them nice and soft without refrigeration.
And there you have it. It takes a little attention to detail, but the reward is a batch of truly incredible chocolate cupcakes that everyone can enjoy. Happy baking!
Inspiration:
- A digital kitchen scale for precision.
- A fine-mesh sieve for lump-free flour and cocoa.
- A sturdy ice cream scoop for perfectly uniform cupcakes.
The secret to consistent results in gluten-free baking isn’t magic, it’s meticulousness. These three tools are your best allies.

When a recipe calls for room temperature ingredients, it’s not a suggestion—it’s a rule. Cold eggs or butter won’t emulsify properly with the other ingredients, leading to a clumpy batter and a dense, uneven crumb. Let your eggs and dairy sit on the counter for about 30-60 minutes before you begin.

The secret to a non-gritty texture: Let the batter rest. Gluten-free flours, especially those high in fiber like coconut or rice flour, absorb liquid more slowly than wheat flour. Allowing your batter to sit for 15-20 minutes before baking gives the flours time to fully hydrate, resulting in a smoother, moister cupcake.
More than just a trend, gluten-free eating is a necessity for many. It’s estimated that up to 6% of the global population may have a gluten sensitivity, not including those with celiac disease.

For an intensely rich topping, nothing beats a classic chocolate ganache. It’s simpler than you think:
- Finely chop 4 ounces (115g) of high-quality semi-sweet chocolate (like Ghirardelli or Callebaut) and place it in a heatproof bowl.
- Heat 1/2 cup (120ml) of heavy cream until it just begins to simmer.
- Pour the hot cream over the chocolate and let it sit undisturbed for 5 minutes.
- Whisk gently from the center outwards until completely smooth and glossy.
Let it cool until it reaches a thick but spreadable consistency before frosting your cupcakes.
My cupcakes came out with a sunken, crater-like center. What went wrong?
This is a classic gluten-free baking problem, often caused by one of two things. First, you might have over-beaten the batter, incorporating too much air which then collapses. Second, and more likely, the cupcakes were underbaked. The edges cook faster than the center, and if you pull them out too soon, the unset middle will fall as it cools. Always test with a toothpick in the very center—it should come out with moist crumbs, not wet batter.
Almond Flour: Creates a tender, moist, and slightly dense crumb with a rich, nutty flavor. It’s high in protein and fat, which contributes to moisture.
Coconut Flour: As the article notes, it’s extremely absorbent, creating a lighter, more cake-like texture but requires a lot more liquid. It has a subtle sweet, coconut flavor.
For a classic cupcake texture, a blend of multiple GF flours often works best, but if you’re choosing one, almond flour provides more forgiving moisture.
Did you know that Dutch-processed cocoa powder is washed with an alkaline solution to neutralize its acidity?
This process gives it a darker color and a milder, less bitter flavor than natural cocoa. Because it’s not acidic, it won’t react with baking soda. If your recipe (like this one) relies on baking powder for leavening, using a Dutch-processed brand like Valrhona or Droste can give your chocolate cupcakes a deeper, smoother, and more photogenic chocolatey hue.
- It deepens the chocolate flavor without making it taste like coffee.
- The hot liquid helps to ‘bloom’ the cocoa powder, releasing more flavor.
- It adds to the overall moisture of the final cupcake.
The secret? Replace the hot water or milk in your recipe with an equal amount of freshly brewed strong coffee or espresso.
Not all xanthan gums are created equal. For the most reliable results in creating that gluten-like structure, opt for a finely ground product from a reputable baking brand like Bob’s Red Mill. It disperses more easily, reducing the risk of slimy clumps in your finished cupcakes.
Chocolate is a wonderful base for a world of flavors. Instead of plain vanilla frosting, consider elevating your cupcakes with a complementary taste:
- Citrus Zest: A teaspoon of finely grated orange zest in the batter or frosting adds a bright, fresh counterpoint.
- Raspberry Kiss: Press a single fresh raspberry into the center of the batter before baking for a jammy surprise.
- Mint Infusion: Add a few drops of pure peppermint extract to your buttercream for a classic after-dinner mint combination.

Don’t overmix the batter: This is the cardinal rule for tender cakes, and it’s even more crucial in gluten-free baking. Once you combine the wet and dry ingredients, mix only until they are just incorporated. Overmixing can toughen the proteins present and make the binders (like xanthan gum) gummy.
According to a 2021 report from the Good Food Institute, the plant-based food market is booming, with sales of plant-based milks and eggs growing significantly.
This means getting great vegan substitutes is easier than ever! For these cupcakes, try replacing the eggs with a commercial egg replacer like Ener-G or by using ‘flax eggs’ (1 tbsp ground flaxseed mixed with 3 tbsp water per egg). For dairy, a full-fat oat milk like Oatly works beautifully, and a vegan butter block from Miyoko’s Kitchen or Melt is perfect for the frosting.
Patience is a virtue, especially during cooling. Let your cupcakes sit in the pan for only 5 minutes before transferring them to a wire rack to cool completely. Leaving them in the hot pan for too long will cause them to continue steaming, which can make the paper liners peel away and the bottoms become soggy.
American Buttercream: Sweet, dense, and sturdy. Made by creaming butter and powdered sugar. It’s fantastic for piping and holds its shape well, but can be intensely sweet.
Cream Cheese Frosting: Softer, with a delightful tangy flavor that beautifully cuts through the richness of a chocolate cupcake. It’s less sweet but doesn’t hold intricate piped shapes as well in warm conditions.
For these rich gluten-free cupcakes, the tang of a cream cheese frosting is often the perfect balance.
A beautiful cupcake doesn’t require complex pastry skills. Focus on simple, elegant touches:
- A simple swirl of frosting applied with the back of a spoon.
- A dusting of high-quality cocoa powder or powdered sugar.
- A few chocolate shavings, easily made by running a vegetable peeler along the side of a chocolate bar.

A cup of all-purpose flour can weigh anywhere from 120g to 150g depending on how it’s scooped. Gluten-free flours have even greater density variations.
This is why a digital scale is your most important tool. Measuring by weight (grams) instead of volume (cups) is the only way to guarantee you’re using the exact amount of flour the recipe developer intended, eliminating the single biggest variable in baking success.
- An intensely rich, brownie-like flavor.
- A fudgier, denser crumb that stays moist for days.
- A beautiful, glossy top on the finished cupcake.
The trick? Use melted chocolate in your batter in addition to cocoa powder. Replace about a quarter of your recipe’s fat (oil or butter) with an equal weight of melted and cooled 70% dark chocolate.
Gluten-free baked goods are notorious for drying out quickly. To preserve that perfect moist crumb you worked so hard for, proper storage is key. Once completely cool, place the unfrosted cupcakes in an airtight container. Don’t store them in the refrigerator, as the cold air will dry them out faster. They are best kept at room temperature for up to 2 days. For longer storage, freeze them (unfrosted) in a single layer in a freezer-safe container or bag for up to 3 months. Thaw at room temperature before frosting and serving.
Looking to manage costs?
Buying pre-made gluten-free flour blends can be expensive. Consider creating your own versatile mix at home by buying the individual components in bulk. A classic all-purpose blend is 60% medium-grain flours (like brown rice or sorghum flour) and 40% starches (like potato starch and tapioca starch). Whisk them together in a large batch and store in an airtight container for future baking projects.
The luxurious, melt-in-your-mouth sensation of chocolate is due to the unique properties of cocoa butter. It remains solid at room temperature but melts right around 34°C (93°F), which is just below human body temperature.


