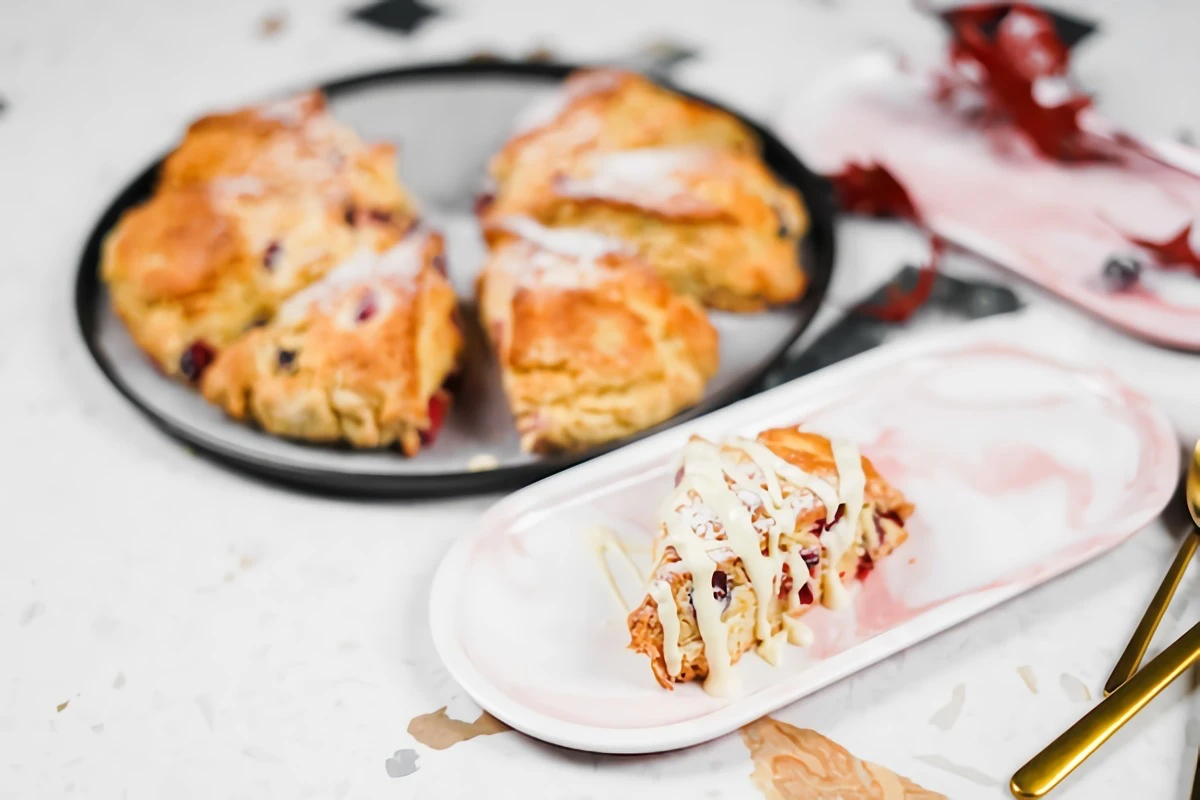
The Only Cranberry Orange Scone Recipe You’ll Ever Need
I’ve baked more scones than I can count. Seriously. From chaotic hotel kitchens to quiet afternoons testing recipes, I’ve seen it all. I’ve seen the scones that could double as a paperweight, the ones that melt into a single flat cookie on the baking sheet, and the ones that are… well, just right. Perfectly tender, flaky, and bursting with flavor.
In this article
So, what’s the big secret? It’s not some magical ingredient you have to hunt down. It’s all about technique.
It’s about understanding what’s actually happening inside that shaggy mound of dough. This guide isn’t just a recipe; it’s a brain dump of everything I’ve learned so you can skip the trial and error. We’re going to get into the why behind each step, so you can make bakery-quality scones every single time. Let’s do this.
First Things First: Know Your Ingredients
Baking is basically delicious science. Before you even grab a bowl, you need to know what each player on the team does. Most baking fails happen when you swap something out without understanding its job. This is lesson number one.

Flour: The Foundation
Flour provides the structure, but you need the right kind. The key is protein content, because protein creates gluten. Gluten is awesome for chewy bread, but it’s the arch-nemesis of a tender scone.
- All-Purpose Flour: This is my go-to. It has a moderate protein level that gives the scones enough structure to hold together without getting tough. It’s reliable and you can find it anywhere.
- Pastry or Cake Flour: These are lower in protein and can make an incredibly delicate, almost cake-like scone. The only catch? The dough can be a bit flimsy and harder to work with. If you use it, just be extra gentle.
- Bread Flour: Just don’t. It’s packed with protein designed for gluten development. You’ll end up with a tough, chewy scone no matter what you do.
Quick tip: How you measure flour matters. A lot. Don’t just scoop your measuring cup into the bag—this packs the flour down, and you can accidentally add 25% more than you need, which is a one-way ticket to dry-scone-city. Instead, fluff the flour with a fork, spoon it into your cup, and level it off. Or even better, use a kitchen scale. They’re a game-changer for consistency and you can grab a decent one online for $15-$25.
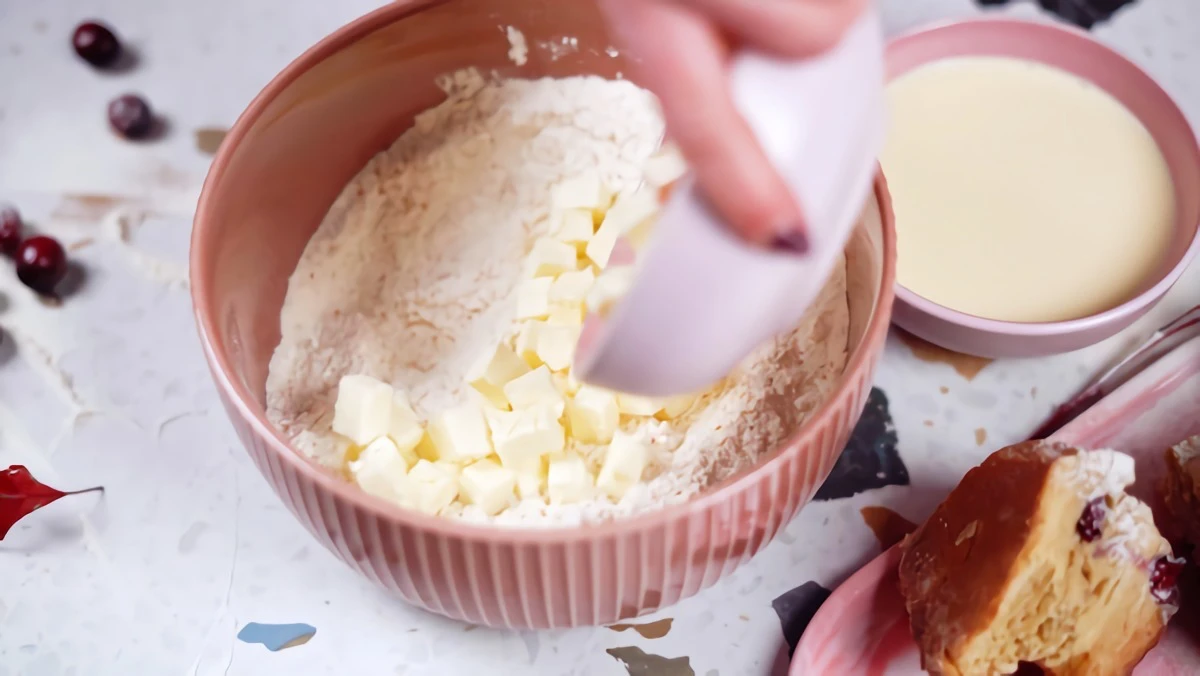
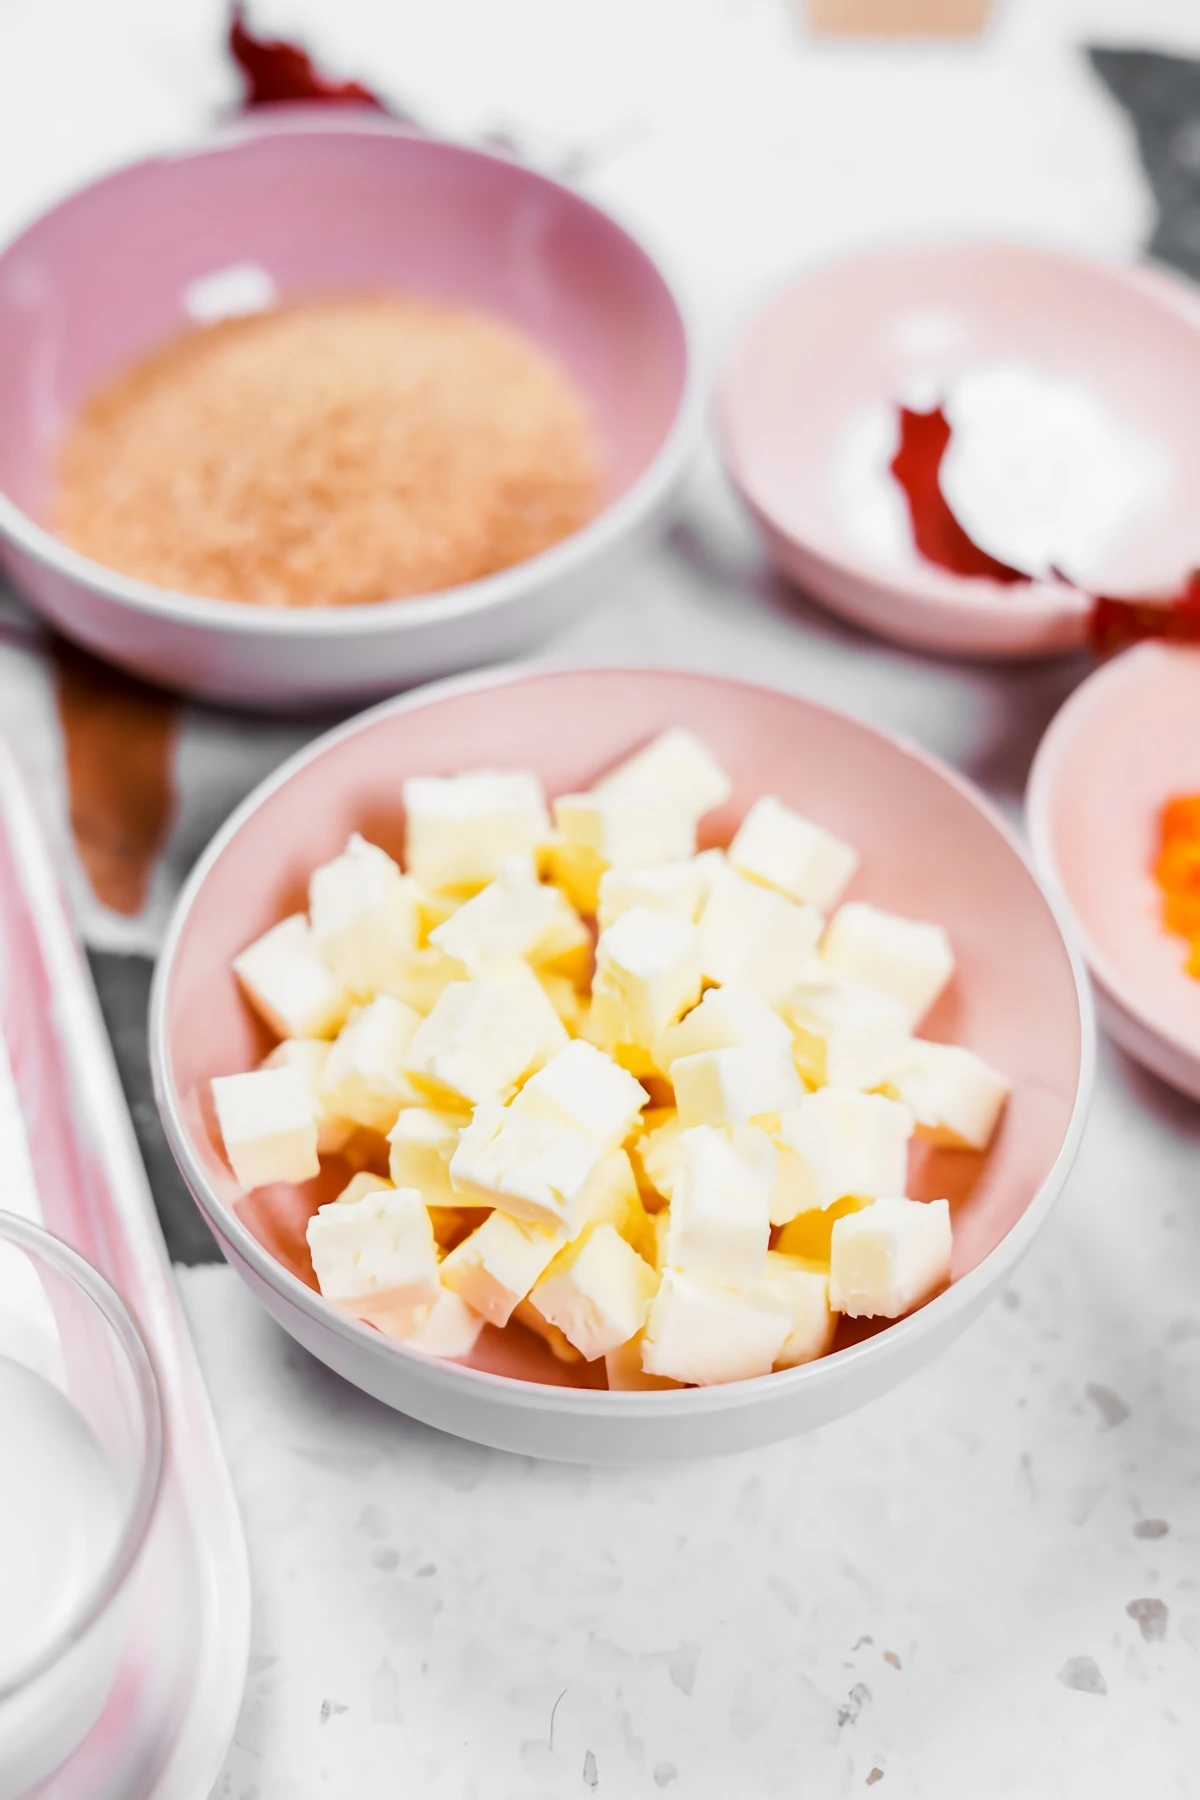
Fat: The Secret to Flakiness
This is the single most important part of getting a flaky scone: the fat must be COLD. We’re talking about butter here. When you cut little pieces of cold butter into flour, they get coated. In the hot oven, the butter melts and releases steam, which creates tiny pockets of air. That’s what flakiness is!
If the butter is warm, it just melts right into the flour, and you get a dense, tough texture instead. My favorite trick is to grate a frozen stick of butter on a box grater directly into my flour. It creates perfect little shards that stay cold and distribute beautifully.
And by the way, if you only have salted butter, that’s totally fine. Just reduce the amount of added salt in the recipe from 1/2 teaspoon to 1/4 teaspoon to keep things balanced.
Liquid: The Tenderizer
The liquid in scones brings everything together and gets the leavening agent working. What you choose really changes the final result.
Heavy cream is my top choice for a rich, super tender scone; its high fat content helps keep the crumb soft and satisfying. Buttermilk is another fantastic option—its acidity reacts with the baking powder for an extra lift and adds a subtle tang that tastes amazing with the sweet orange. If all you have is regular milk, it’ll work in a pinch, but your scones will be a bit leaner and less tender due to the lower fat content.
Good to know: Out of buttermilk? You can easily make a substitute. Just add half a tablespoon of lemon juice or white vinegar to half a cup of regular milk. Let it sit for 5-10 minutes, and you’re good to go!
Leavening: The Lift
Scones are a type of quick bread, so they use baking powder, not yeast, for their rise. Most baking powders today are double-acting, which means they start working once they get wet and then give a second, bigger push when they hit the oven’s heat. This is great because it means your dough can rest for a bit before baking without losing all its power.
Heads up! Always check the expiration date on your baking powder. To test if it’s still active, drop half a teaspoon into some hot water. If it fizzes up like crazy, it’s good. If not, it’s time for a new can.
Flavor: The Cranberry and Orange
For the orange flavor, you want to use only the zest—that bright orange outer layer of the peel where all the fragrant oils live. A microplane is the best tool for this, as it avoids the bitter white pith underneath.
As for the cranberries, you’ve got choices:
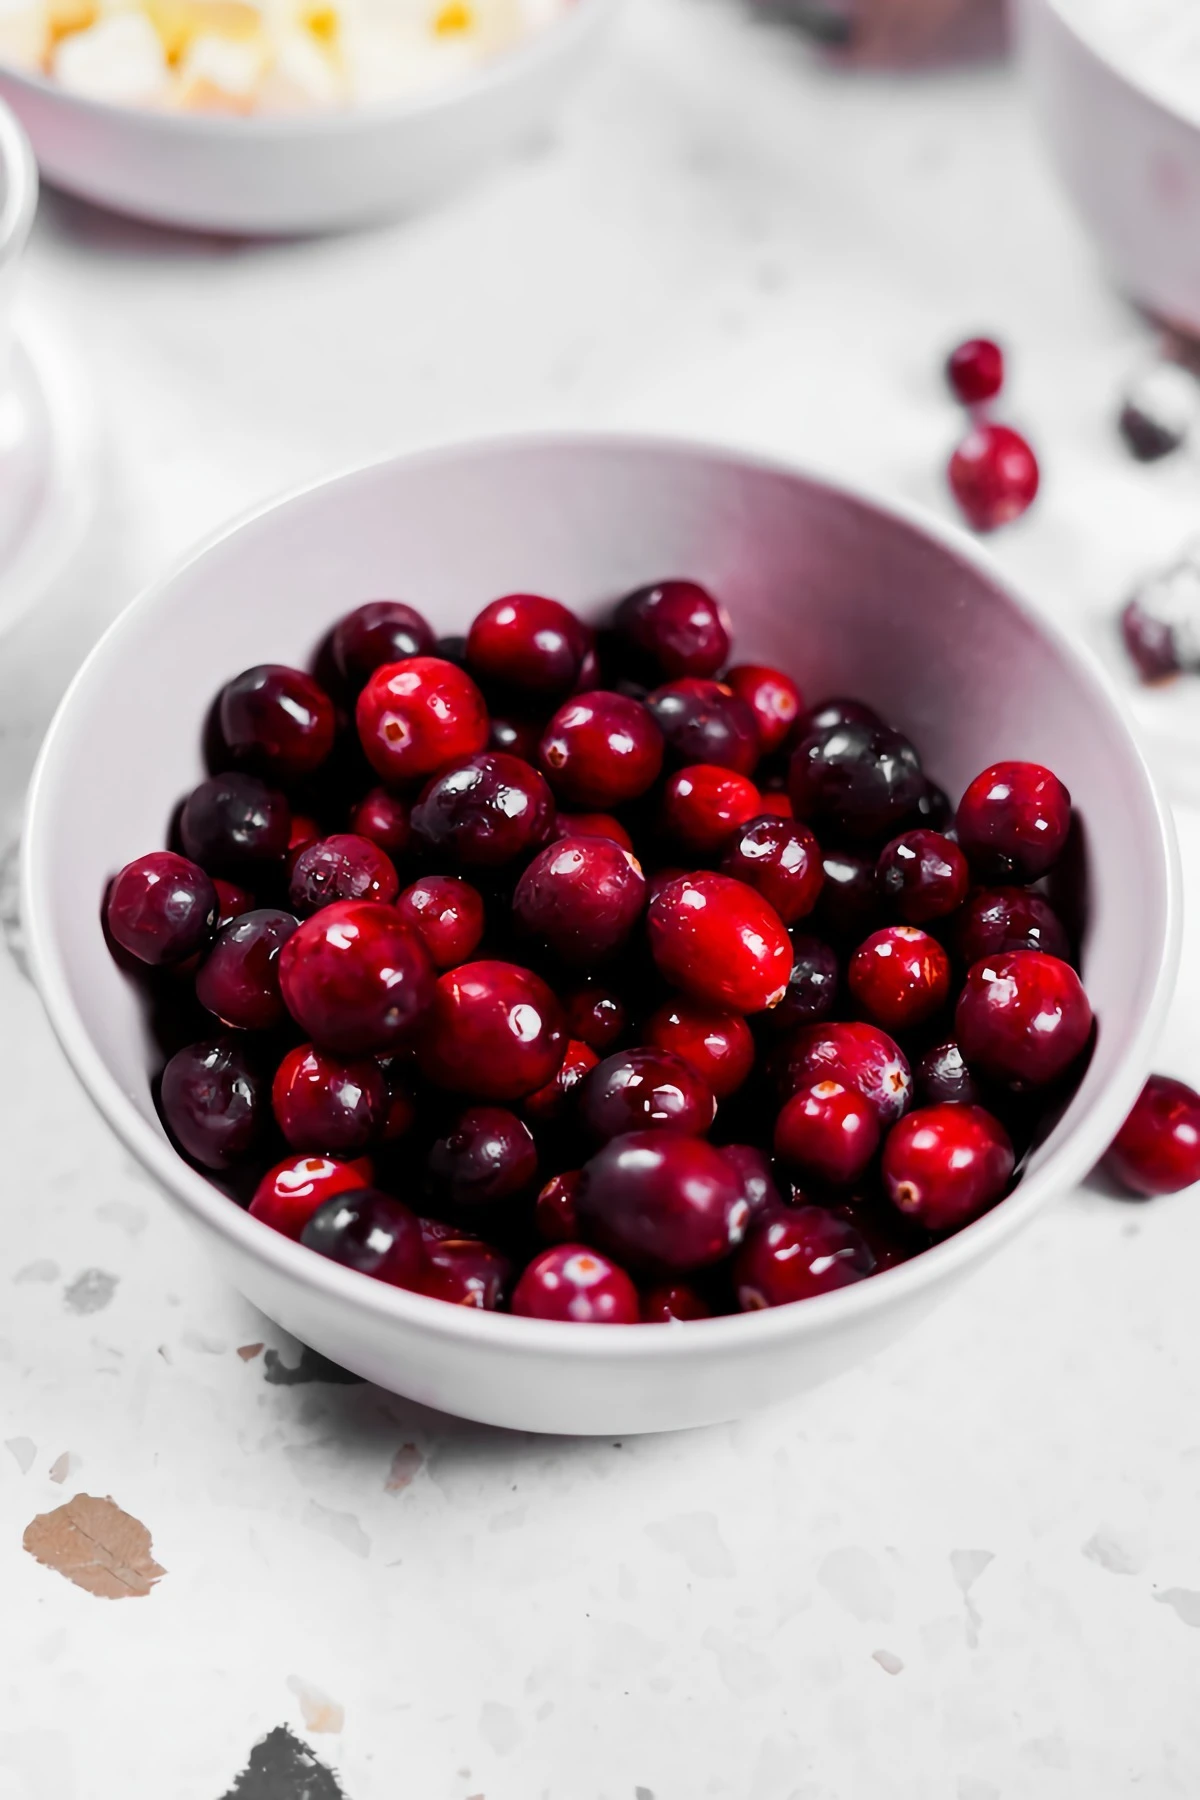
- Frozen Cranberries: My personal favorite. They hold their shape beautifully and their chilly temperature helps keep the dough cold. Don’t thaw them! Just toss them in straight from the freezer.
- Fresh Cranberries: Also a great choice, giving a brighter, tarter pop of flavor.
- Dried Cranberries: These are common, but they can sometimes pull moisture from the scone. If you use them, I’d suggest soaking them in hot water for about 15 minutes, then draining and patting them dry before adding them in.
The Foolproof Recipe & Method
This recipe uses grams because, honestly, it’s the best way to get consistent results. Every pro kitchen I’ve worked in measures by weight.
Yields: 8 scones
Prep time: 20 minutes
Chill time: 30 minutes
Bake time: 18-22 minutes
What You’ll Need
- A digital kitchen scale
- Large and small mixing bowls
- Whisk & a pastry brush
- Microplane or fine grater
- Pastry blender or just your fingertips
- Bench scraper (A large chef’s knife or even a sturdy, clean ruler will work in a pinch!)
- A sharp knife or a 2.5-inch round biscuit cutter
- Baking sheet lined with parchment paper (available at any grocery store)
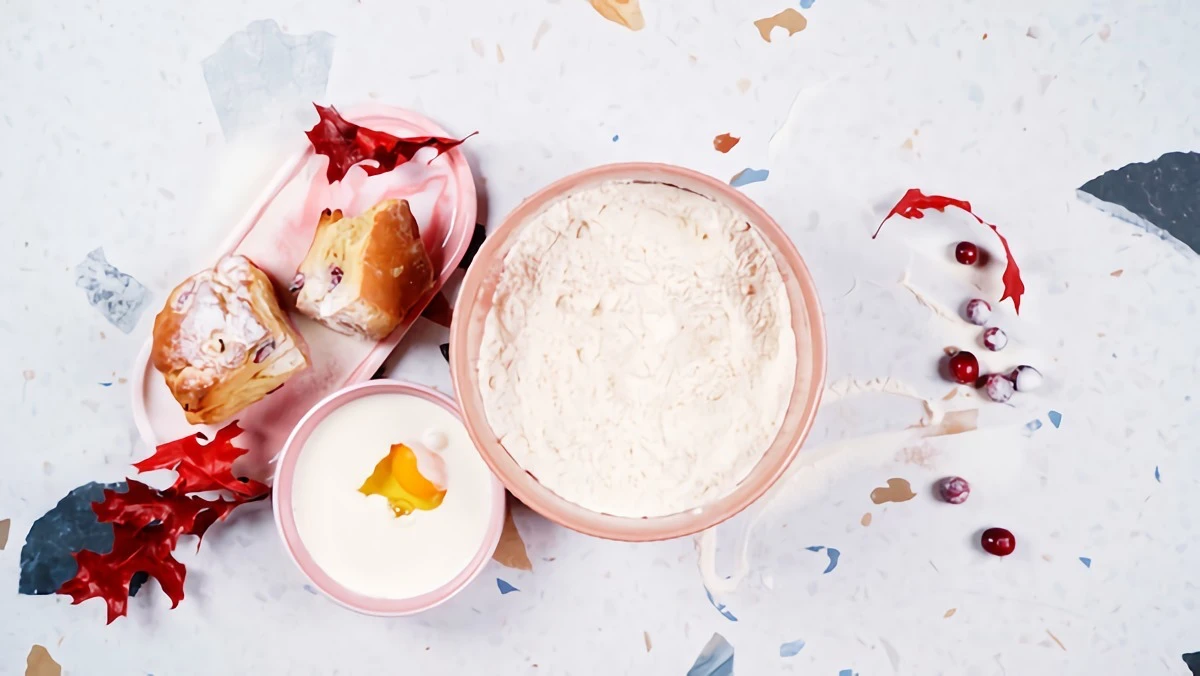
The Ingredients List
- Dry Stuff:
- 300g (about 2 1/2 cups) All-Purpose Flour
- 75g (about 1/3 cup + 1 tbsp) Granulated Sugar
- 15g (about 1 tbsp) Baking Powder
- 4g (about 1/2 tsp) Fine Sea Salt
- Zest of one large orange
- The Fat:
- 115g (8 tbsp or 1 stick) Unsalted Butter, very cold or frozen
- The Wet Stuff:
- 1 large Egg
- 120ml (1/2 cup) Heavy Cream (or buttermilk)
- 5ml (1 tsp) Vanilla Extract
- The Star of the Show:
- 150g (about 1 1/4 cups) Frozen Cranberries
- For the Finishing Touch:
- 1 tbsp Heavy Cream for brushing
- Coarse sugar for sprinkling (optional, but recommended!)
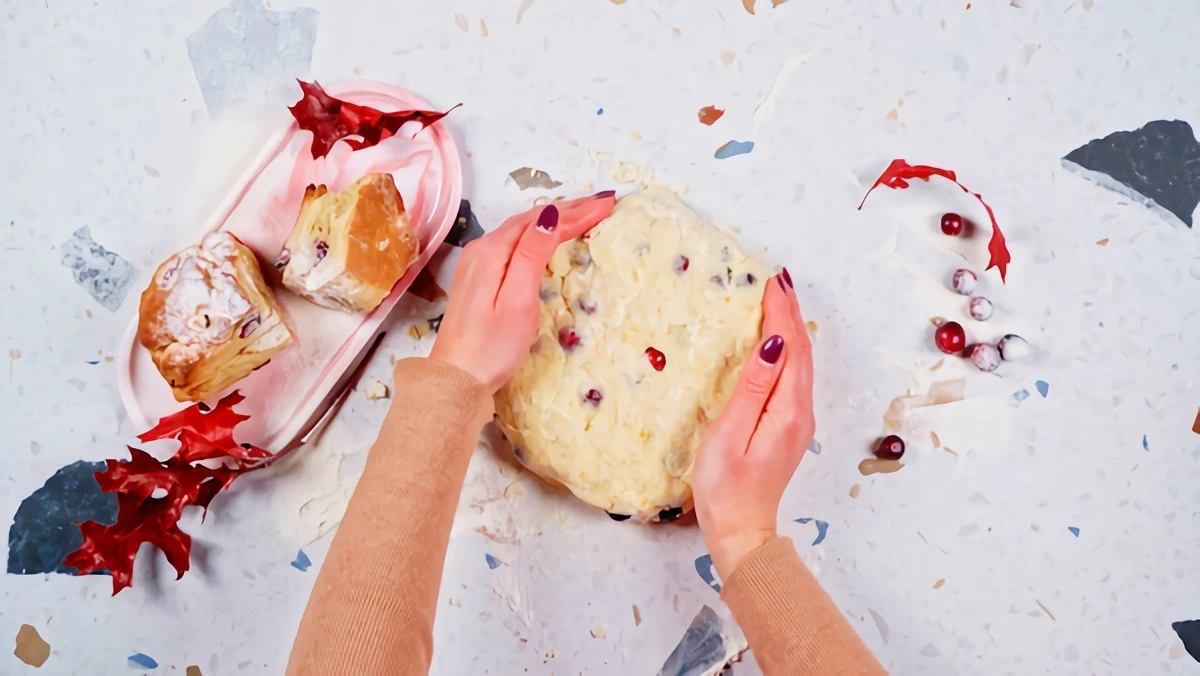
- Sprinkle the frozen cranberries over the dough.
- Fold the dough like a business letter: fold the right third over the middle, then fold the left third over the top.
- Gently pat it down, rotate it 90 degrees, and fold it like a letter one more time (no more cranberries needed).
- Problem: My scones are tough and dense.
Cause: You probably over-mixed the dough after adding the liquid.
Solution: Mix just until the dough comes together. A shaggy, messy dough is what you want. Trust the folding process to bring it all together. - Problem: My scones spread out and are flat.
Cause: Your butter was too warm, or you skipped the final chill. An oven that isn’t hot enough can also be the culprit.
Solution: Use frozen, grated butter. Always, always chill the shaped scones for 30 minutes before baking. And maybe invest in an oven thermometer to check your true temperature. - Problem: My dough is a sticky mess or way too dry.
Cause: This is super common! Differences in humidity, flour brands, or even how you measured can throw things off.
Solution: It’s an easy fix! If the dough is too wet and sticky, add more flour one tablespoon at a time. If it’s too dry and won’t come together, add more cream one TEASPOON at a time until it forms a shaggy mass. - Problem: The cranberries bled and turned my dough purple.
Cause: The berries got bruised or broken during mixing.
Solution: Use frozen cranberries and add them during the gentle folding step, not in the main mixing bowl. This keeps them intact. - Enjoy fresh, warm scones on any busy weekday morning.
- Achieve an even flakier texture as the frozen butter creates steam pockets in the hot oven.
- Lock in the peak flavor of your citrus zest and cranberries for up to three months.
- Swap the orange for lemon zest and the cranberries for wild blueberries or chopped pistachios.
- Introduce warm spices like a teaspoon of ground cardamom or ginger for a cozy, autumnal twist.
- Add a handful of high-quality white chocolate chips, like those from Callebaut, for pockets of creamy sweetness.
- For a sophisticated, nutty flavor, try making a brown butter glaze instead of the standard orange one.
The Step-by-Step Guide to Scone Perfection
The magic is in the method. Don’t rush these steps—this is what separates a decent home-baked scone from a truly great one.

Step 1: Get Your Station Ready
First, line a baking sheet with parchment paper. Measure everything out. Zest your orange. Cut your butter into small cubes and pop it back in the fridge (or just leave it in the freezer if you’re grating it). In a small bowl, whisk the egg, cream, and vanilla together, then put that in the fridge, too. The theme here is COLD.
Step 2: Mix the Dry Ingredients
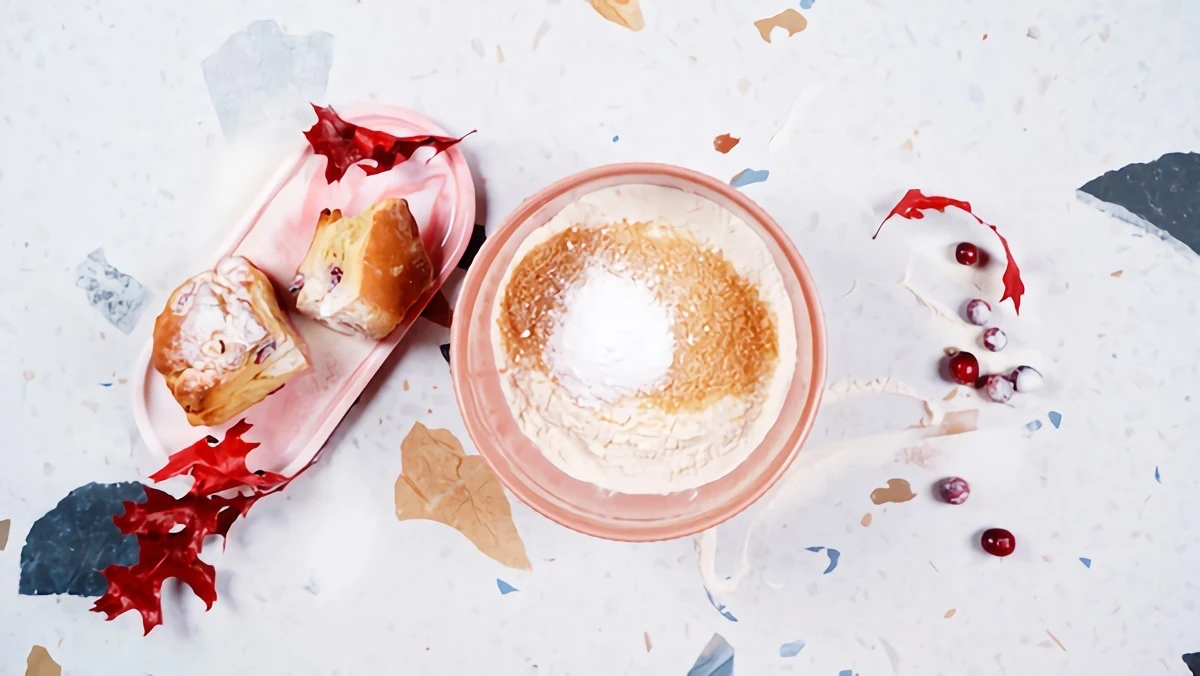
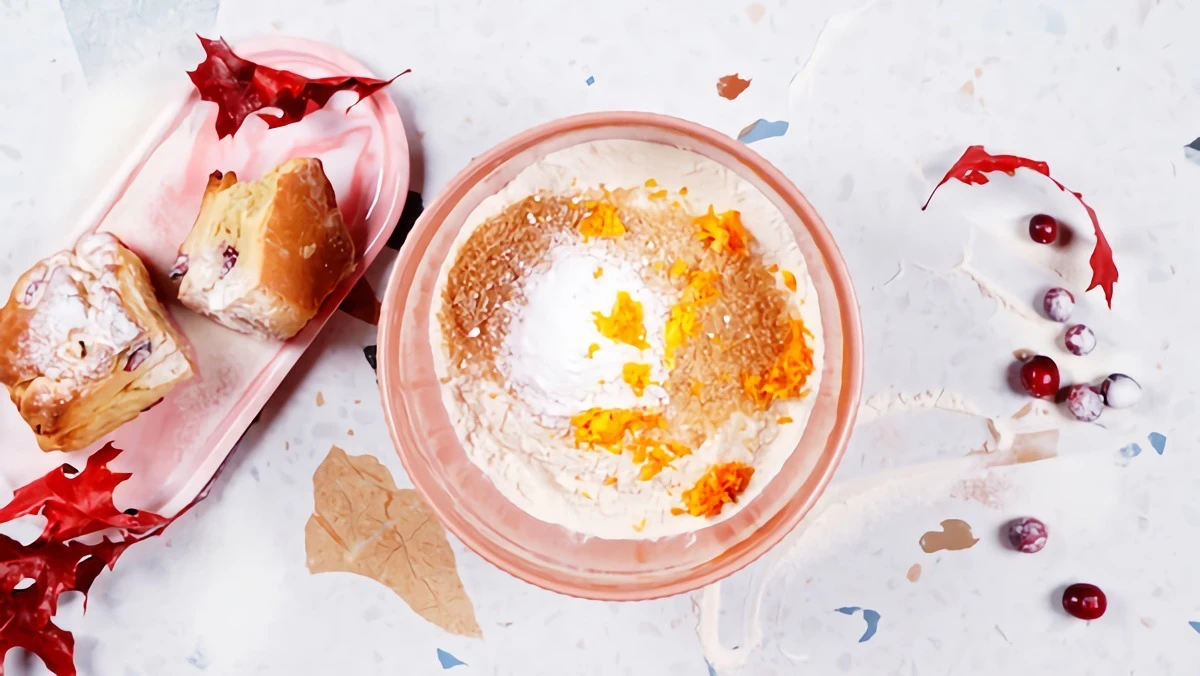
In your large bowl, whisk the flour, sugar, baking powder, salt, and orange zest together. This does more than just mix; it aerates the flour and makes sure everything is evenly distributed. You’ll smell that amazing orange scent—that’s a good sign!
Step 3: Cut in the Butter
Add your cold butter cubes (or grate the frozen butter) into the flour. Now, work it in. You can use your fingertips to quickly press the butter into flat, flaky pieces, a pastry blender, or even a food processor. The food processor is fastest, but be careful—a few too many pulses and you’ll have paste. You want a crumbly mix with visible, pea-sized pieces of butter left. Those pieces are not a mistake; they’re the goal!
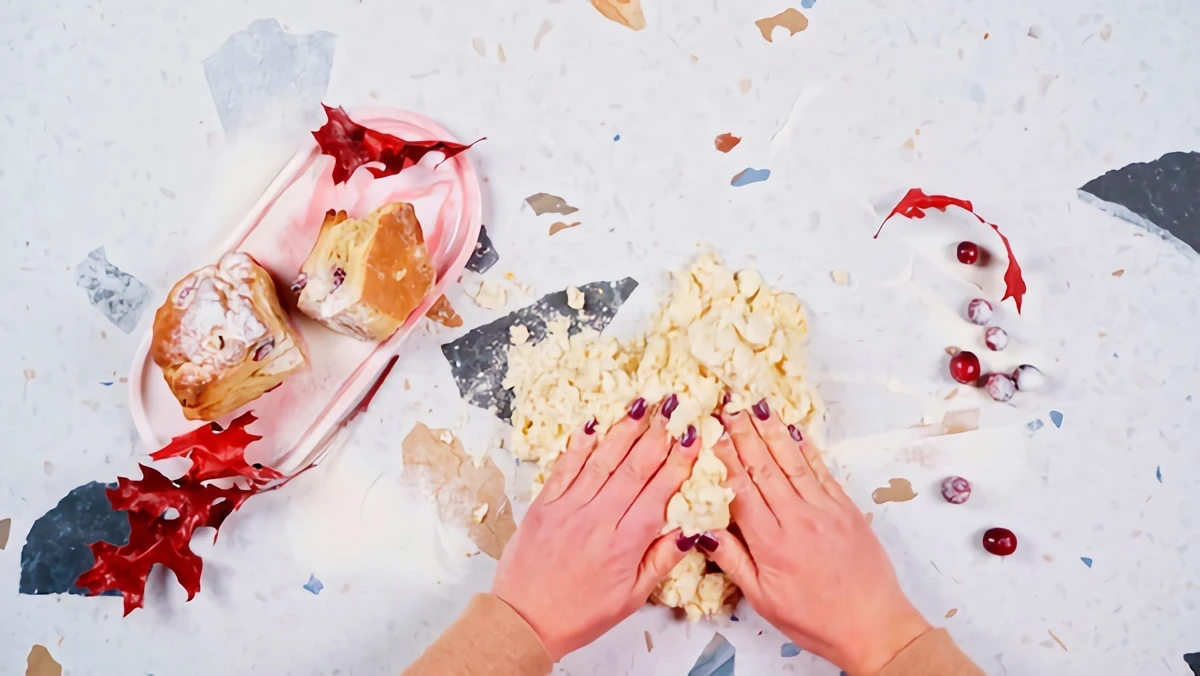
Step 4: Gently Form the Dough
Make a well in the center of your flour mixture and pour in the cold cream mixture. Use a fork to gently stir until a shaggy, messy dough just starts to form. It should look unfinished. Perfect. Stop right there. Over-mixing is the number one cause of tough scones.
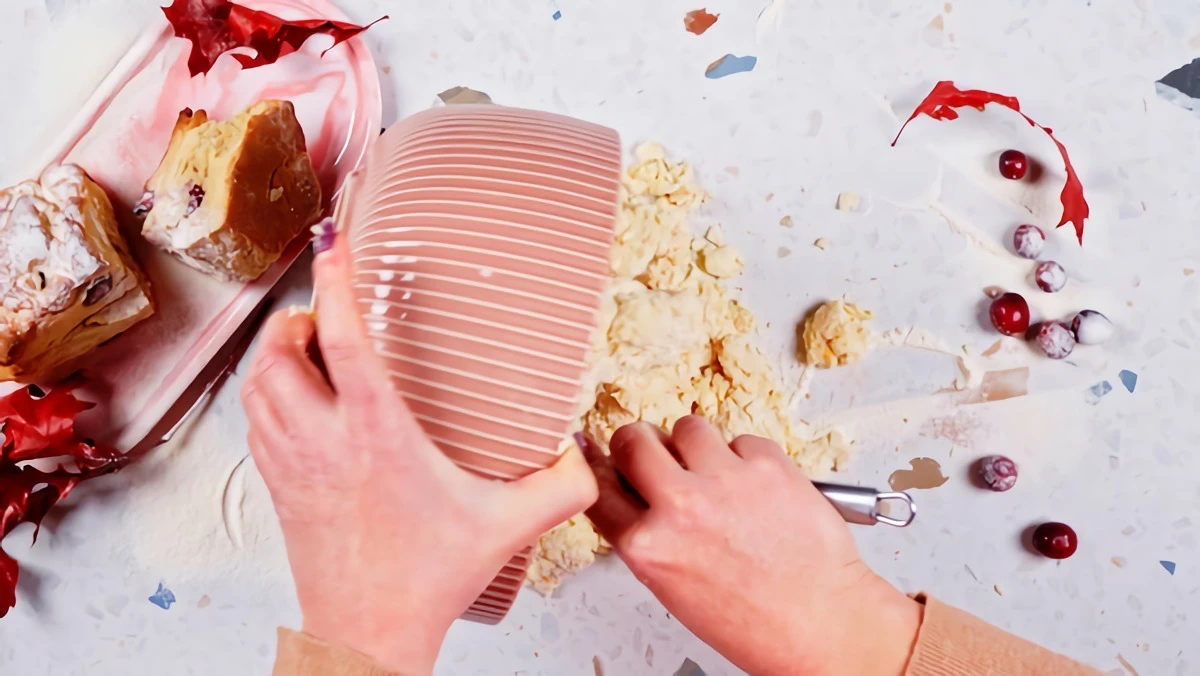
Step 5: The Secret Fold for Flaky Layers
Turn the crumbly dough out onto a lightly floured counter. Use your hands and a bench scraper to press it into a rough rectangle. Now for the magic trick, a pastry technique called lamination:
This creates the amazing layers that will puff up in the oven. If you’re curious, try making a batch without this fold sometime. The difference in the rise and texture is night and day.
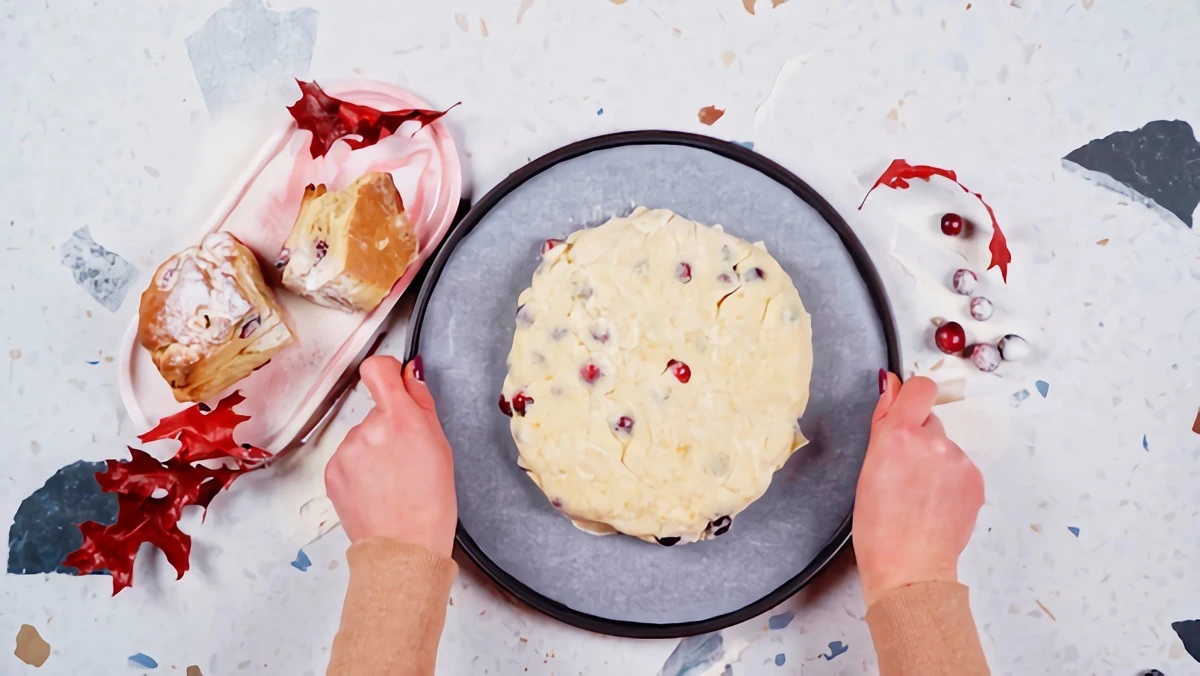
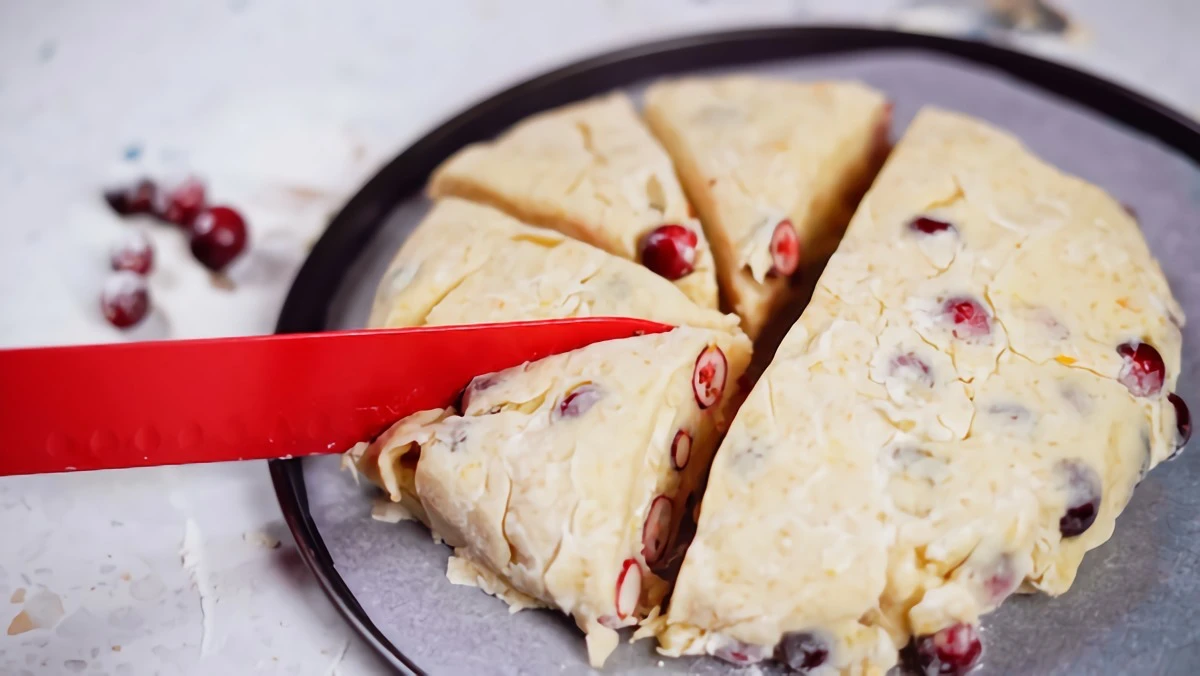
Step 6: Shape and Cut
Gently pat the dough into a circle about 1 to 1.5 inches thick. Don’t use a rolling pin; it compresses the layers. You can either cut the circle into 8 wedges with a sharp knife (no waste!) or use a round biscuit cutter. A common mistake I see is twisting the cutter—don’t do it! Press straight down and pull straight up. Twisting seals the edges and stops the scone from rising tall.
Step 7: The All-Important Chill
Place your cut scones on the prepared baking sheet, leaving some space between them. Now, put the whole tray in the fridge or freezer for at least 30 minutes. This is NOT an optional step. It re-chills the butter and lets the gluten relax, which means a higher rise and less spread in the oven.
Pro-Tip: You can freeze the unbaked scones solid at this stage, then pop them in a freezer bag. Bake them straight from frozen whenever you want fresh scones—just add 3-5 minutes to the baking time.
Step 8: Time to Bake
Preheat your oven to 400°F (200°C). A hot oven is critical. Too cool, and the butter melts before the scone sets, leading to greasy, flat discs.
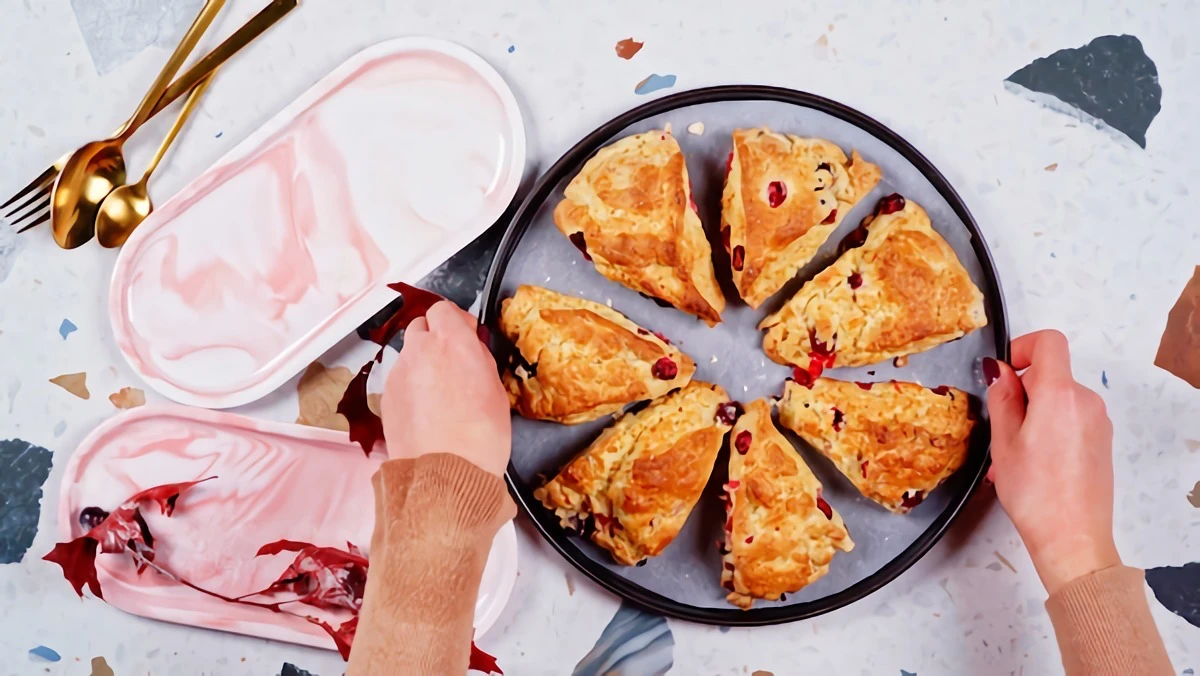
Pull the scones from the fridge, brush the tops with a little cream, and sprinkle with coarse sugar if you’re using it. Bake for 18-22 minutes, until they’re risen high and a beautiful golden brown.
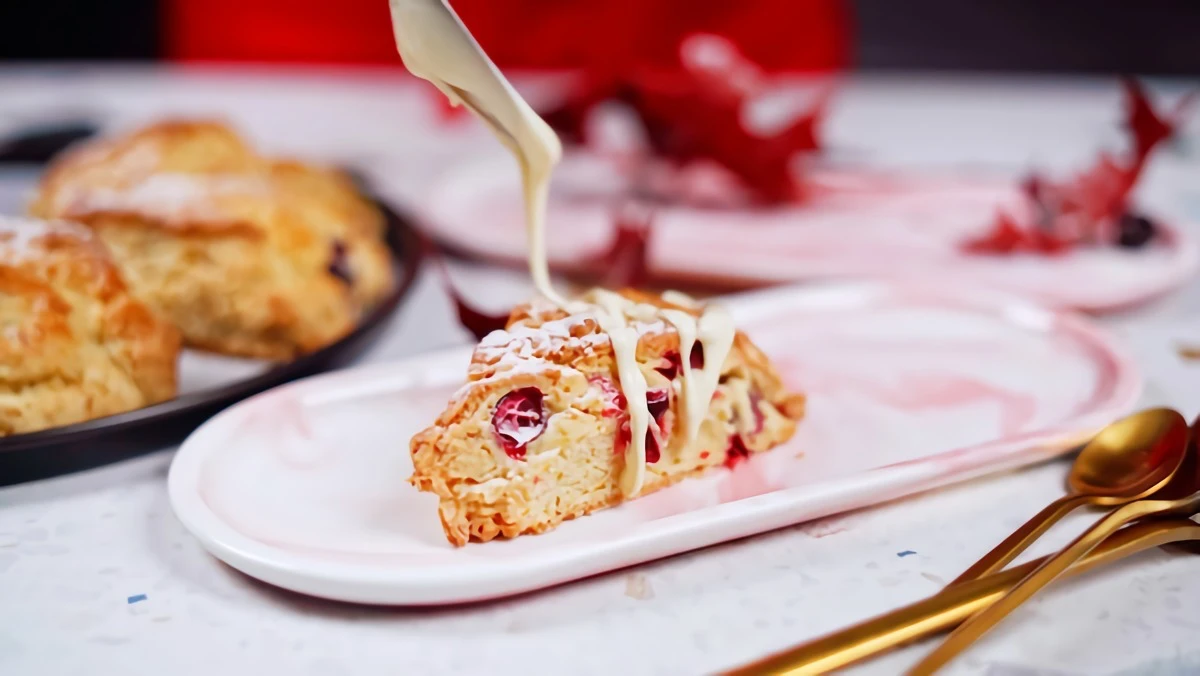
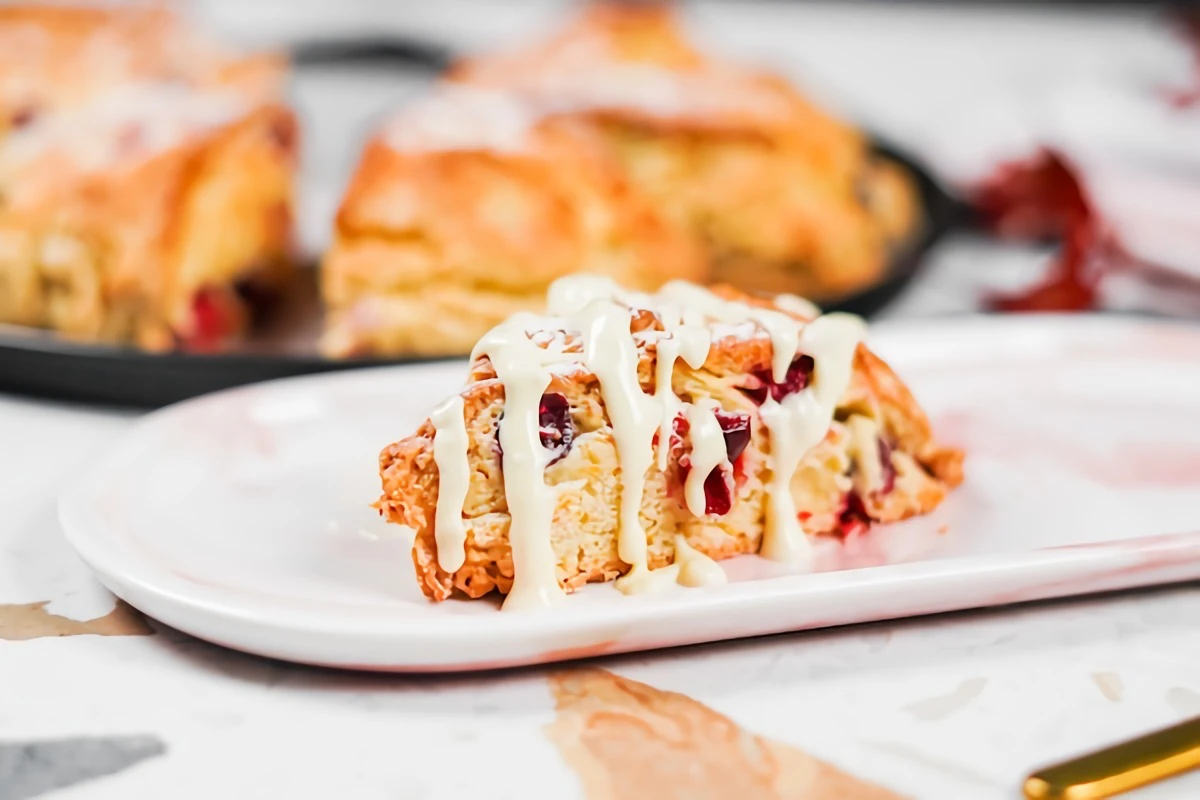
Step 9: Cool and Serve (with a Glaze!)
Move the scones to a wire rack right away. If you leave them on the hot pan, the bottoms will get soggy. They are best served warm, about 20-30 minutes out of the oven.
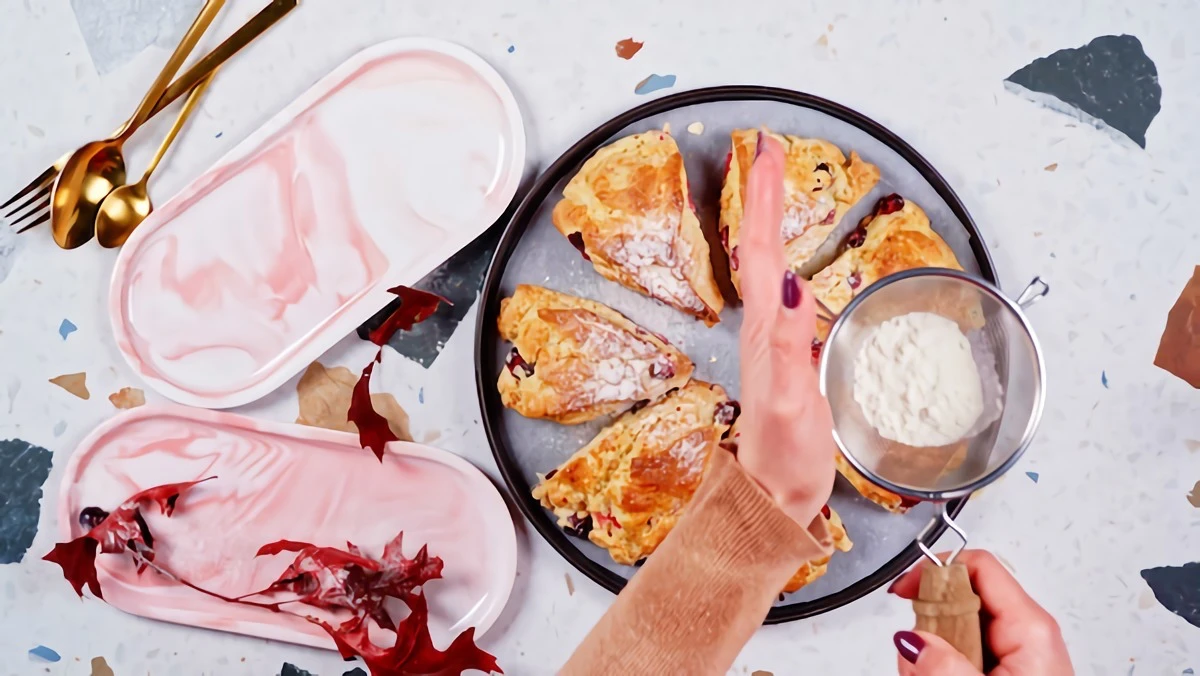
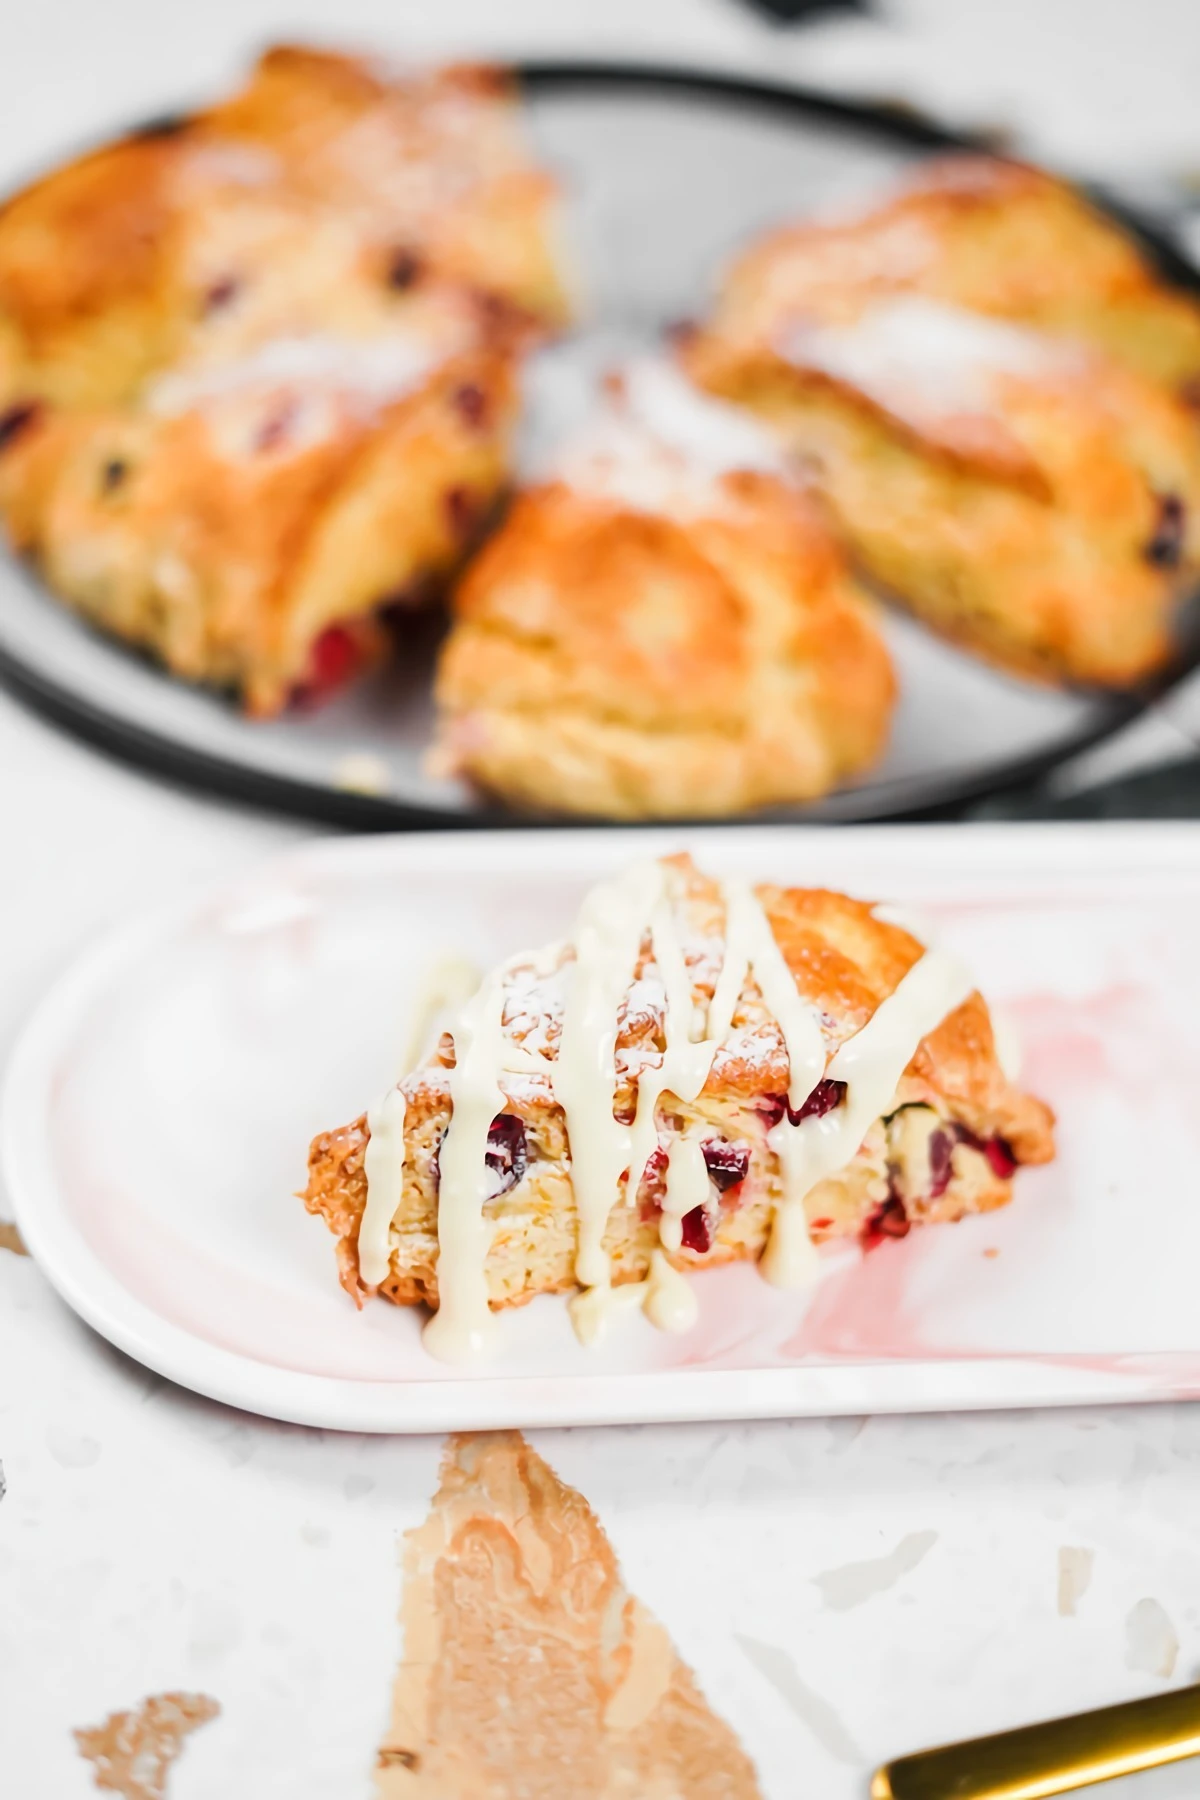
And if you want to take them over the top? Whisk up a simple orange glaze. Just mix 1 cup (120g) of powdered sugar with 2-3 tablespoons of fresh orange juice until it’s smooth and pourable. Drizzle it over the warm scones. So good.
Common Scone Problems & How to Fix Them
Even with the best recipe, things happen. Here are the most common issues and how to solve them.
Final Thoughts & Storage
Heads up on allergens: This recipe contains wheat, dairy, and eggs. While you can find gluten-free and dairy-free substitutes, they behave very differently, and I can’t promise the same results without specific testing.
Scones are at their absolute peak the day they’re baked. If you have leftovers, keep them in an airtight container at room temperature for a day or two. To bring them back to life, warm them in a 300°F (150°C) oven for 5-7 minutes. Please, never use a microwave—it will make them rubbery and sad.
Mastering scones is one of the most rewarding things you can learn in the kitchen. It’s all about feeling the dough and understanding the process. Once you nail it, you’ll be making these for years to come.
Inspiration:
Fresh Cranberries: They deliver a bright, tart pop of flavor but release more moisture. If you use them, chop them coarsely and be prepared for a slightly wetter dough that might need a dusting of extra flour.
Dried Cranberries: These offer a concentrated sweetness and chewy texture without affecting the dough’s hydration. They are much easier to work with for beginners.
For the best of both worlds, try rehydrating dried cranberries in a tablespoon of warm orange juice for 10 minutes before mixing them in.
The Maillard reaction, the chemical process responsible for the browning and flavor of baked goods, accelerates significantly above 285°F (140°C).
That gorgeous golden-brown finish on your scones isn’t just for looks; it’s a flavor explosion. Ensuring your oven is fully preheated is the non-negotiable first step to achieving that deep, toasted, nutty taste. A pale scone is an underdeveloped scone!
My orange glaze is always too thin or lumpy. What am I doing wrong?
The secret is patience and adding liquid drop by drop. Start with sifted powdered sugar (a fine-milled brand like C&H or Domino works wonders) and add your orange juice one teaspoon at a time. Whisk thoroughly after each addition. It will seem impossibly thick at first, but will suddenly transform into a perfectly smooth, opaque glaze. Stop as soon as it’s pourable but still thick enough to coat a spoon.

The trick? Freeze the dough. Shape your scones, place them on a parchment-lined tray, and freeze until solid. Transfer to a sealed freezer bag. You can bake them directly from frozen; just add 3-5 minutes to the baking time.

Your cranberry orange scone is more than a pastry; it’s an experience. The bright, citrusy aroma pairs beautifully with a robust black tea like an English Breakfast or Earl Grey, whose tannins cut through the richness. For coffee lovers, a light-roast single-origin from Ethiopia with its own fruity notes will complement the scone without overpowering it. It’s a moment of simple, delicious ritual.
Get the Zest Right: For that vibrant citrus aroma, you want only the outermost colored part of the orange peel. The white pith underneath is bitter and can impart an unpleasant taste. A high-quality Microplane zester is your best friend here, as it effortlessly shaves off only the oil-rich zest, giving you all the flavor and none of the bitterness.
Think of this recipe as a launchpad for your creativity. Once you master the technique, the flavor possibilities are endless:
According to King Arthur Baking, the biggest scone mistake is overmixing after adding the liquid, which develops gluten and results in a tough, bread-like texture.
This is why the recipe emphasizes a ‘shaggy’ dough. Mix only until the flour is just moistened. It should look messy and unfinished. This minimal handling is the true secret to the tender, melt-in-your-mouth crumb of a perfect scone. Trust the process and keep your hands off as much as possible!