Forget Store-Bought: The Vegan Mozzarella Recipe That Actually Works
Let’s be real for a second. For years, trying to find a good vegan mozzarella felt like a lost cause. As someone who’s spent a long time in professional plant-based kitchens, I’ve seen it all. We started with those early store-bought options that were, frankly, depressing. They were often rubbery, tasted like starch, and melted into a weird, oily puddle. They just weren’t mozzarella.
In this article
That disappointment sent me down a rabbit hole of testing… for years. I tried every base, binder, and flavor combo you can imagine. This recipe isn’t just a list of ingredients; it’s the culmination of all that trial and error.
I want to be super clear: this isn’t dairy. We can’t magically replicate milk proteins with cashews. But what we can do is create something absolutely delicious that fills that mozzarella-shaped hole in your heart. It’s soft, creamy, and mild, perfect for a Caprese salad, torn over a pizza, or just served with good olive oil and crusty bread. It’s the method I’ve shared with countless cooks, and it just works.
First, Why Bother? Cost, Time, and Flavor
Before we dive in, you’re probably wondering if it’s worth the effort. The answer is a resounding YES.
A single ball of a premium store-bought brand can easily set you back $8 to $10. Making it at home? You’re looking at maybe $4 to $5 in ingredients, and that’s if you’re buying everything new. The real star, psyllium husk powder, might seem like a weird investment at $8-$12 for a bag, but that bag will last you for at least 20 batches. The cost per ball drops dramatically over time.
As for the time commitment, don’t let the long soak time fool you. The total process takes about 8.5 hours, but the actual hands-on, active time is only about 15 minutes. Seriously. The rest is just waiting for the cashews to soak and the cheese to chill.
The Building Blocks of Great Vegan Cheese
A successful recipe is all about balance. In a pro kitchen, we need consistency, and that comes from understanding what each ingredient is doing. This cheese has four key players: the base, the binder, the acid, and the seasoning.
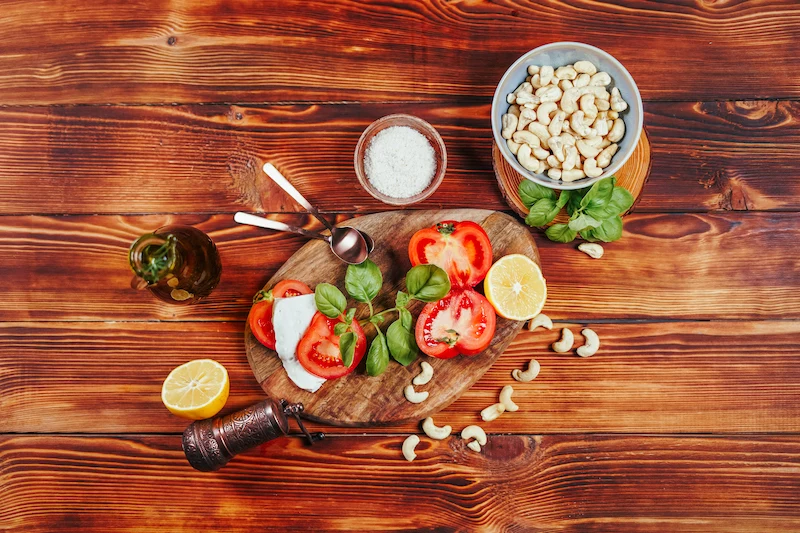
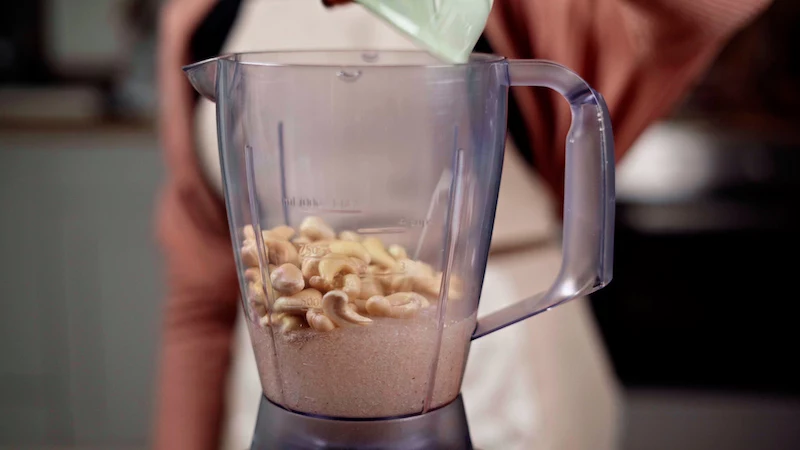
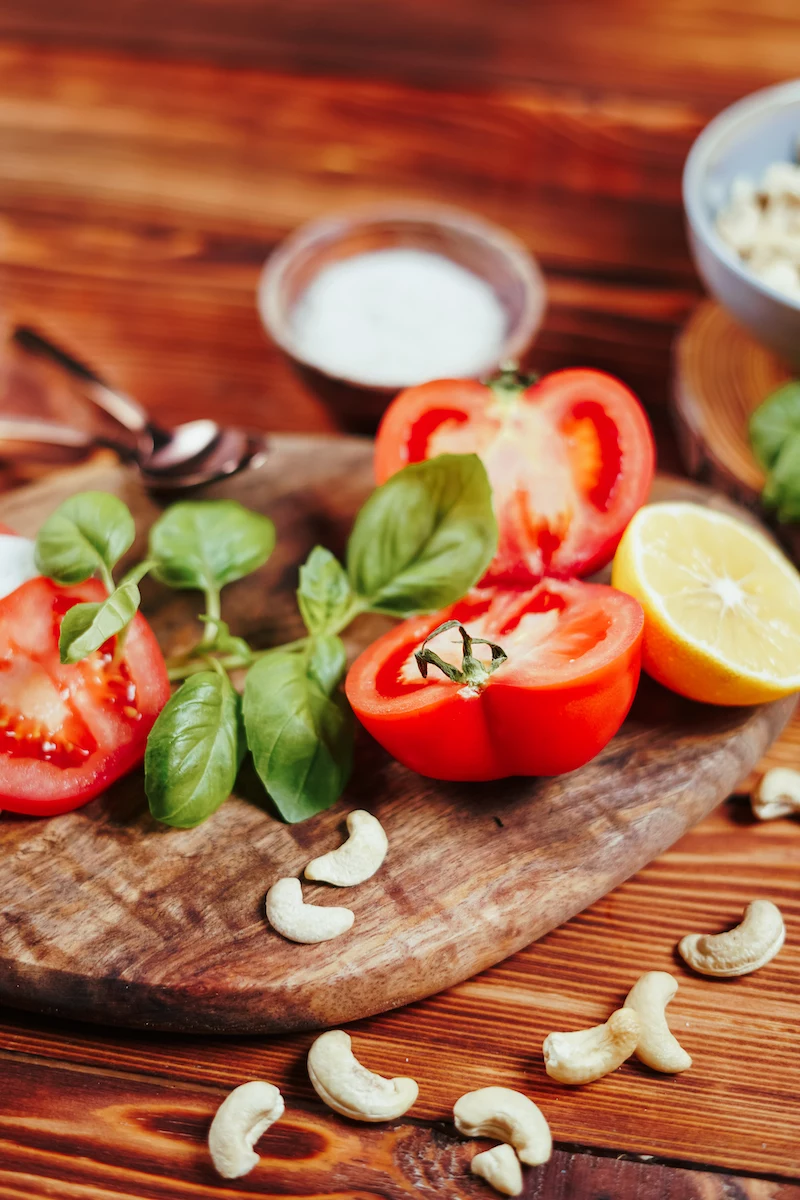
1. The Base: Raw Cashews
I always come back to raw cashews, and for good reason. They have a high fat content (around 44%), which is the secret to a rich, creamy mouthfeel that other nuts just can’t touch. They also have a wonderfully neutral flavor, so our cheese tastes like cheese, not like nuts. And, by the way, make sure they are RAW and UNSALTED. Roasted or salted cashews will create a gritty texture and turn your recipe into a salt bomb. Trust me on this.
The soaking step is non-negotiable. It softens the nuts for a super-smooth blend and helps break down phytic acid, making them easier to digest. It’s a win-win.
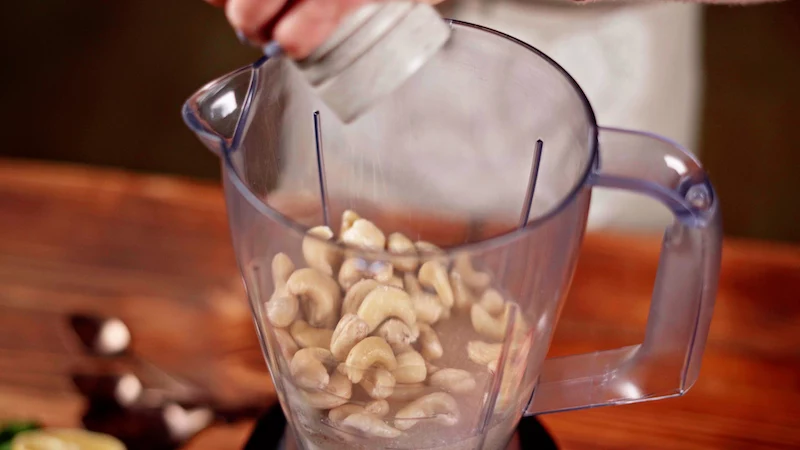
2. The Binder: Psyllium Husk Powder
This is the magic ingredient. Psyllium husk is a type of soluble fiber that forms a gel with water, giving our cheese its structure. Unlike something like agar-agar, which can create a firm, almost brittle texture, psyllium results in a soft, delicate, sliceable body.
Heads up! You absolutely MUST use psyllium husk POWDER, not the whole husks. The powder dissolves completely, giving you a smooth cheese. The whole husks will leave you with a gritty, unpleasant mess. I learned that the hard way during a dinner service once. It was not fun.
Good to know: You can find psyllium husk powder in the health food aisle of most major grocery stores, at specialty shops like Whole Foods, or easily online from places like Amazon.
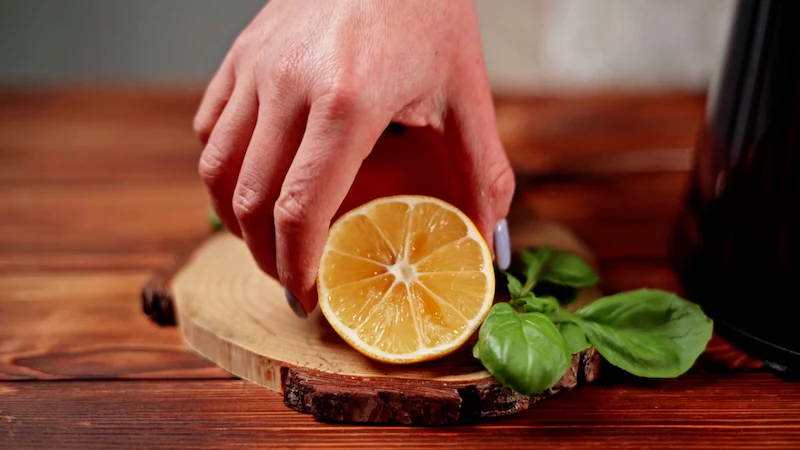
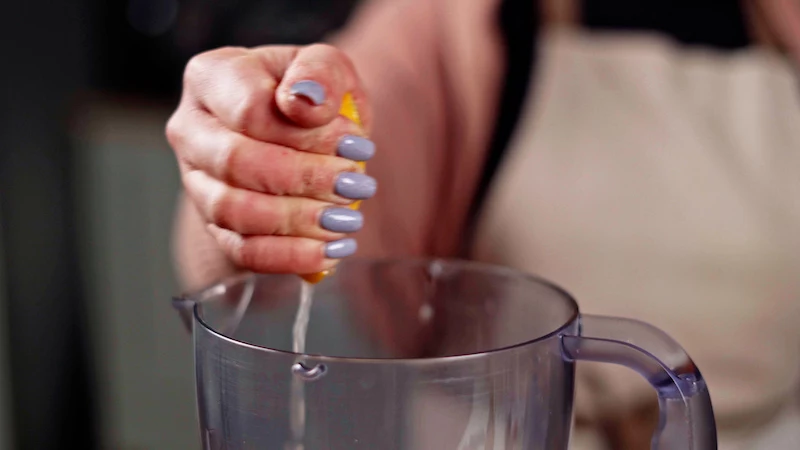
3. The Acid: Fresh Lemon Juice
Traditional mozzarella gets its classic tang from lactic acid. We mimic that with fresh lemon juice. It adds a crucial brightness that cuts through the richness of the cashews. And yes, fresh is best. Bottled lemon juice often contains preservatives that can give it a slightly metallic or ‘off’ taste that you can definitely detect in the final product.
4. The Seasoning: Salt
Salt isn’t just about making things salty; it’s a flavor amplifier. It makes the lemon juice tangier and the cashews creamier. Without enough salt, the cheese will taste totally flat. Use a fine sea salt or kosher salt so it dissolves easily.
The Right Tools for the Job
You can get by with basic tools, but if you want that truly silky, professional-grade texture, a couple of items make a huge difference.
- A High-Speed Blender: This is the MVP. A powerful blender (think Vitamix or Blendtec) doesn’t just mix; it pulverizes the cashews into a perfectly smooth cream. A standard blender can work, but you’ll need to soak your cashews longer (overnight is a must) and blend for much longer, giving your motor breaks so it doesn’t overheat. Even then, you might still have a little grit.
- Digital Scale: In cheese making, precision is everything. Measuring by weight (grams) is far more accurate than by volume (cups). It’s the only way to guarantee consistent results every single time.
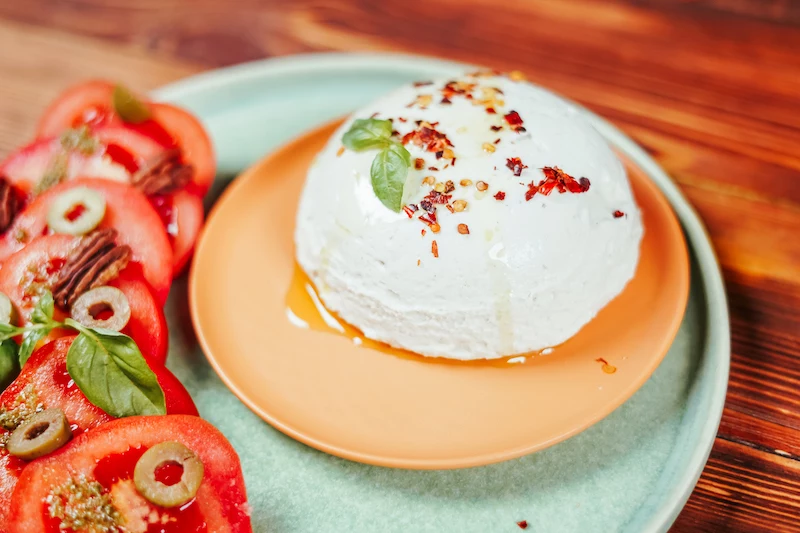
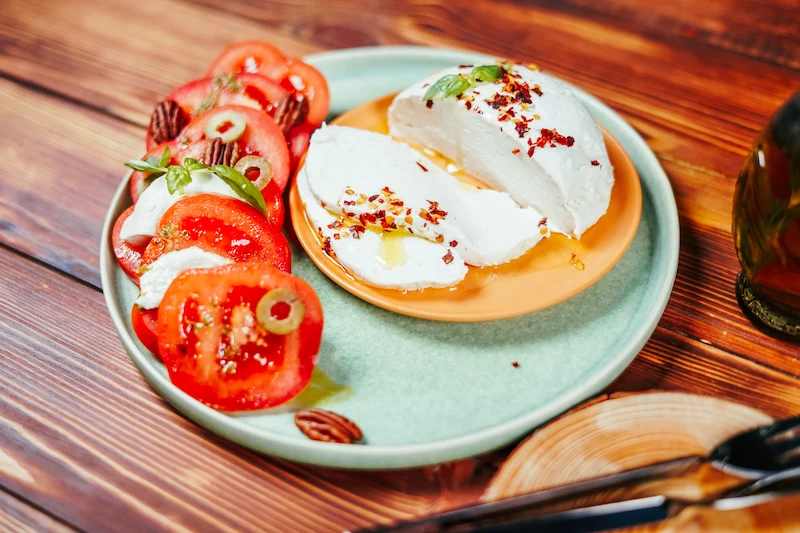
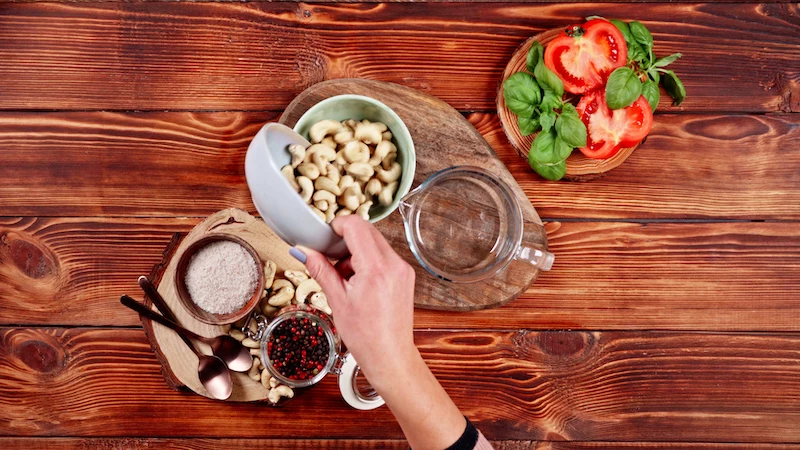
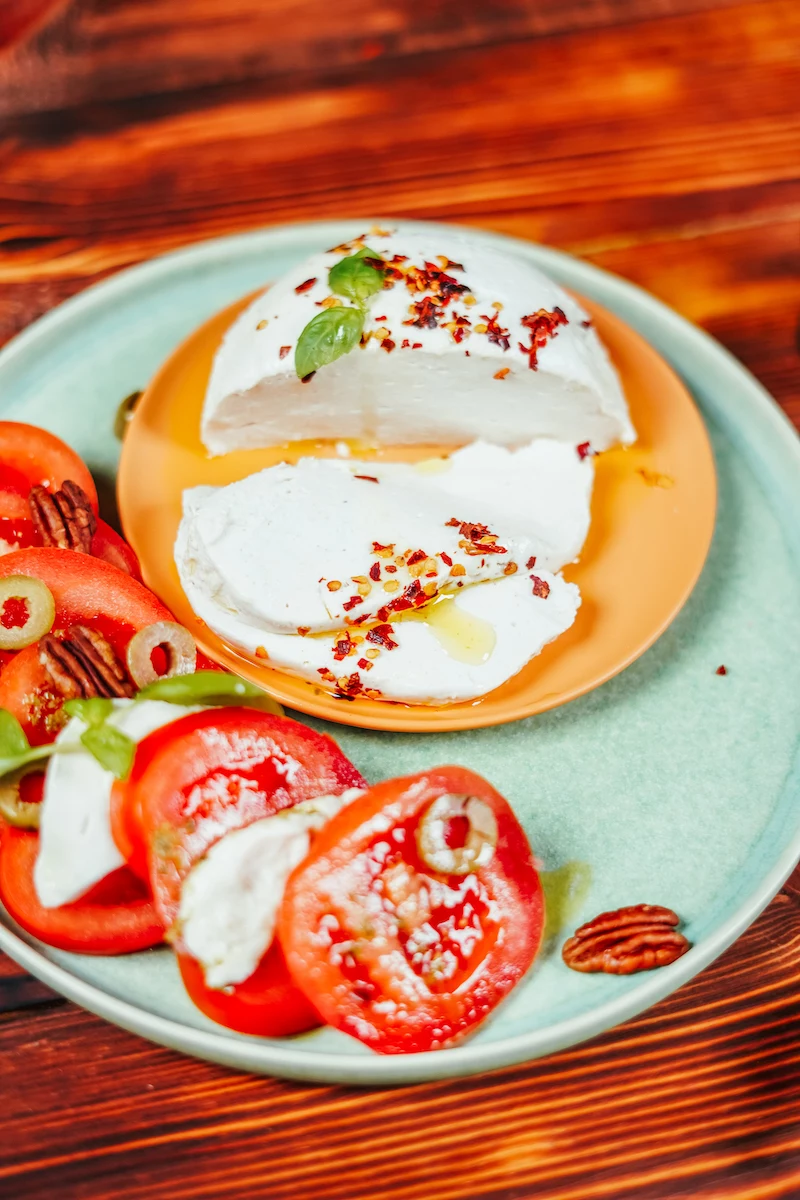
- Small, Round Bowls: The container you chill the cheese in will determine its final shape. I use small 8- to 12-ounce glass or ceramic bowls with a rounded bottom to get that classic mozzarella ball look.
The Recipe: How to Make It Happen
Okay, let’s get to it. This recipe makes one generous ball of cheese, roughly 8 ounces (or 225g). That’s perfect for one large Caprese salad or a 12-inch pizza.
Your Shopping List:
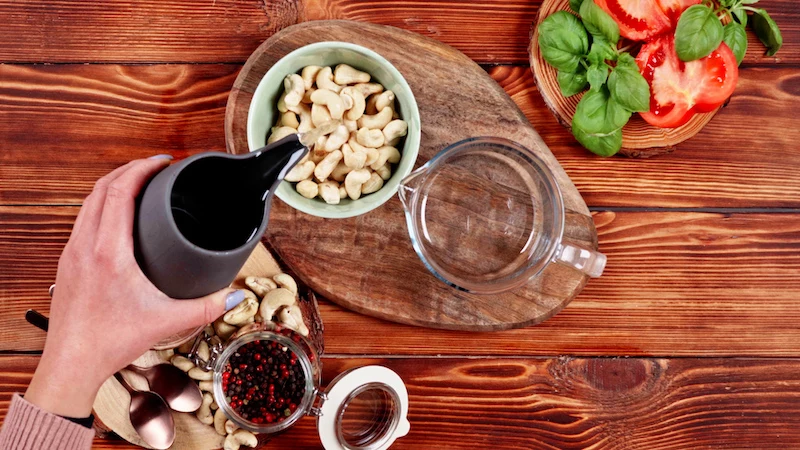
- Raw, Unsalted Cashews (150g): Around $4-5 for this amount.
- Psyllium Husk Powder (30g): About $8-12 for a bag that will last you ages.
- Fresh Lemon
- Fine Sea Salt
Ingredients:
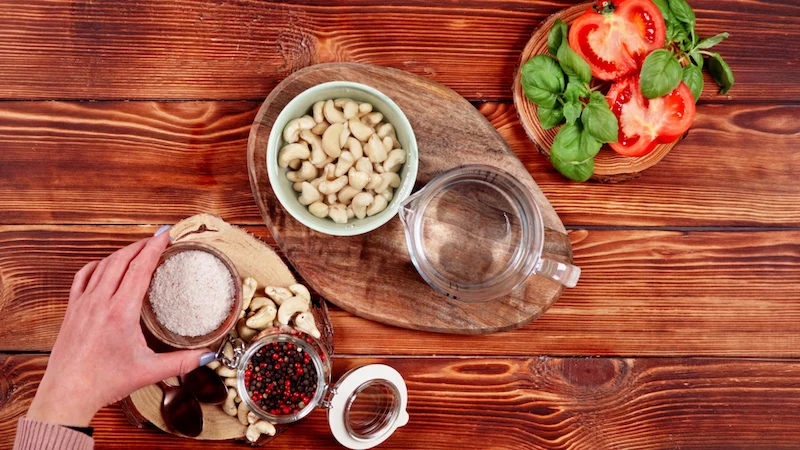
- 150g raw, unsalted cashews
- 30g (about 3 tablespoons) psyllium husk powder
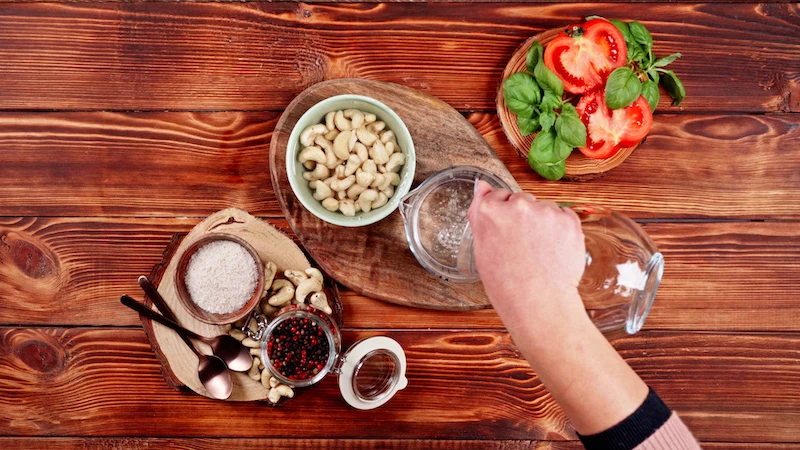
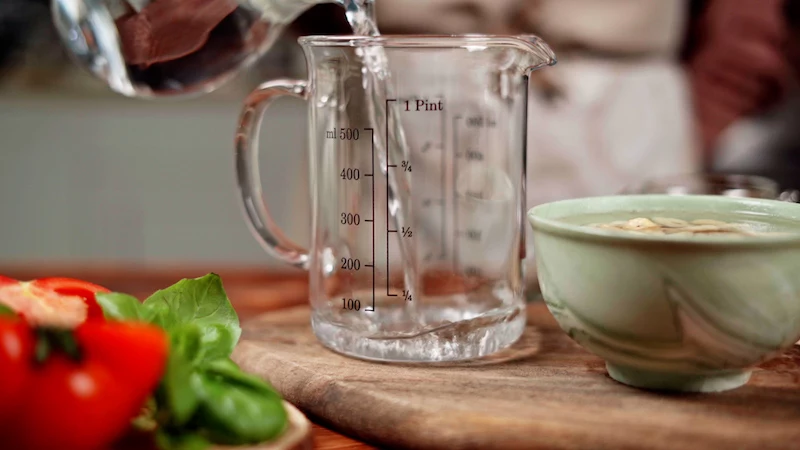
- 400ml lukewarm water (around 100°F / 38°C)
- 20ml (about 4 teaspoons) fresh lemon juice
- 5g (about 1 teaspoon) fine sea salt
Step 1: The Soak
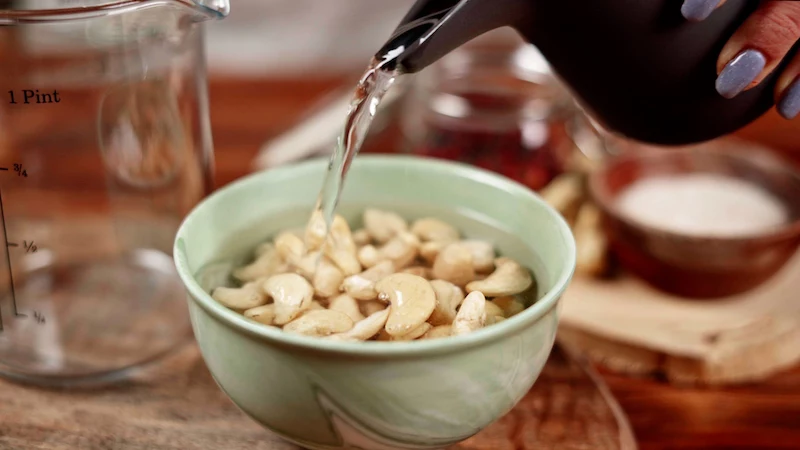
You’ve got two options here. For the absolute best, creamiest result, go with the cold soak. Place 150g of cashews in a bowl, cover with cold water, and refrigerate for at least 8 hours or overnight. If you’re in a hurry, you can do a hot soak: cover the cashews with boiling water and let them sit for 30 minutes. It works, but the texture is just a tiny bit less perfect. After soaking, DRAIN the cashews and toss the soaking water.
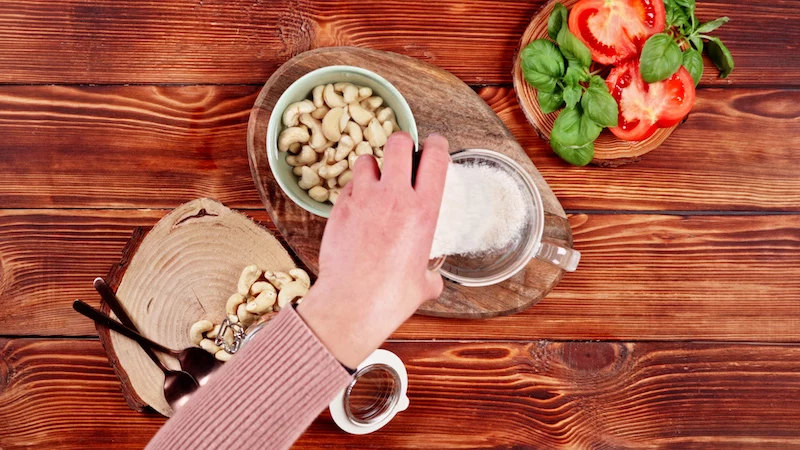
Step 2: Activate the Binder
In a small bowl, whisk together the 400ml of lukewarm water and the 30g of psyllium husk powder. Stir it vigorously for 30 seconds. It will turn into a thick, weird-looking gel almost instantly. Let it sit for 5 minutes to fully hydrate.
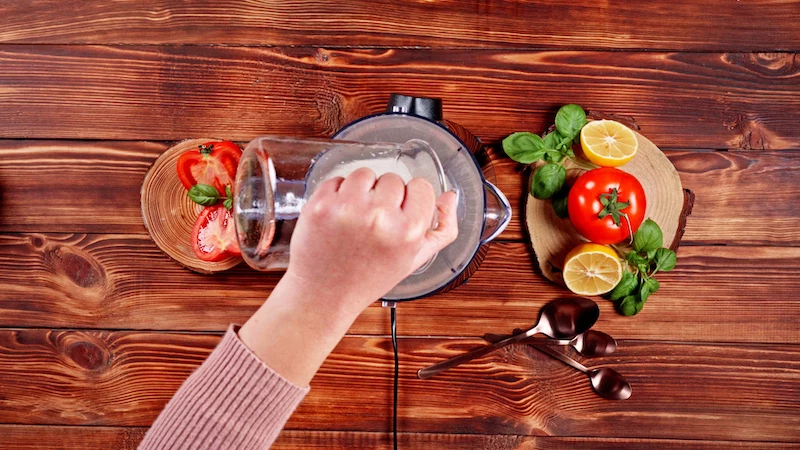
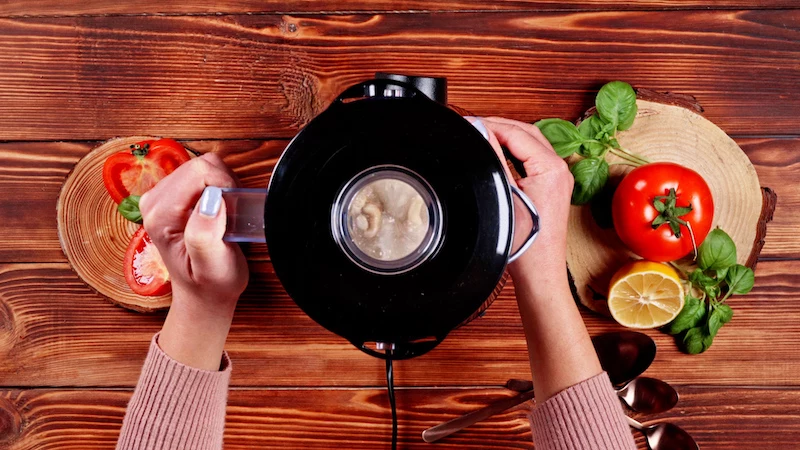
Step 3: The Blend
Toss the drained cashews, the psyllium gel, the lemon juice, and the salt into your high-speed blender. Start on low, then quickly ramp it up to the highest speed. Blend for a full 60 to 90 seconds. The sound will change from gritty to a smooth, high-pitched whir. The mixture will get thick and warm—that’s a good sign! Scrape down the sides and blend for another 15 seconds to be safe.
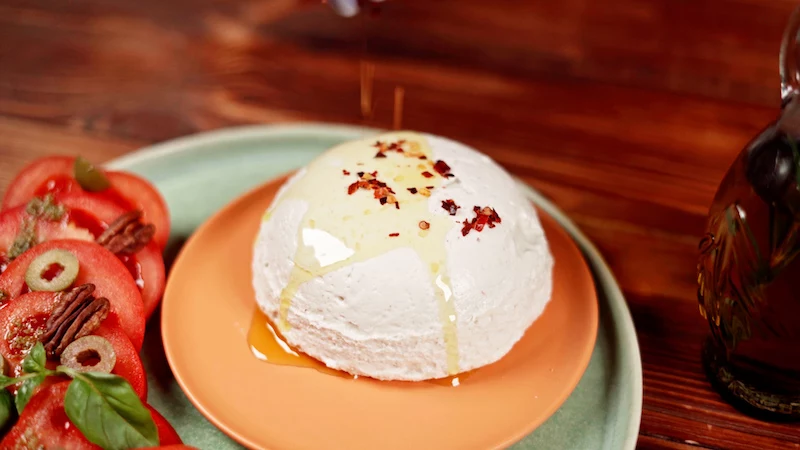
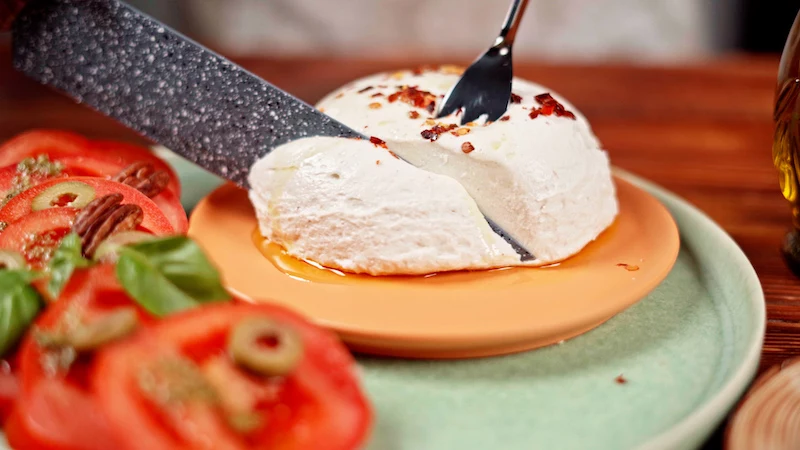
Step 4: Shape and Chill
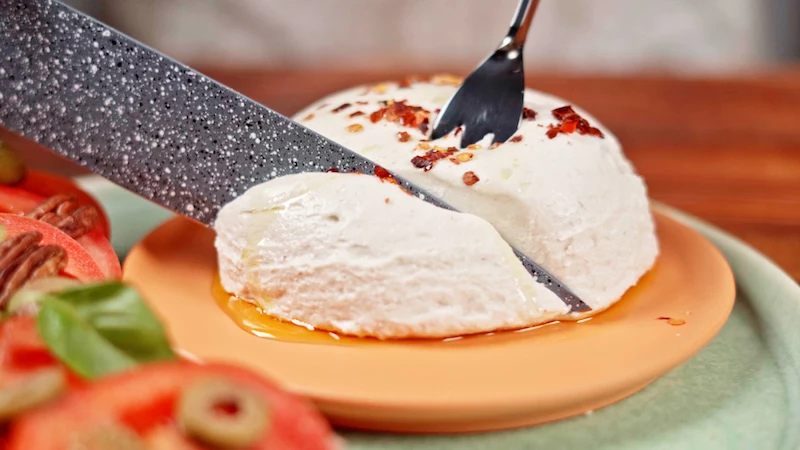
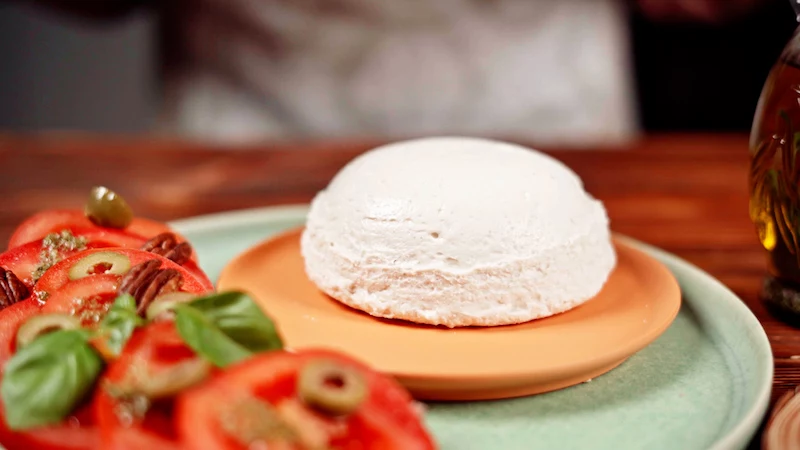
Work fast! Pour the thick mixture into your rounded bowl(s). It will have the consistency of a very thick pudding. Smooth the top with a spatula and place it in the fridge, uncovered, for at least 3 hours. Leaving it uncovered helps a slight ‘skin’ to form, just like the real deal.
Step 5: Serving and Storing
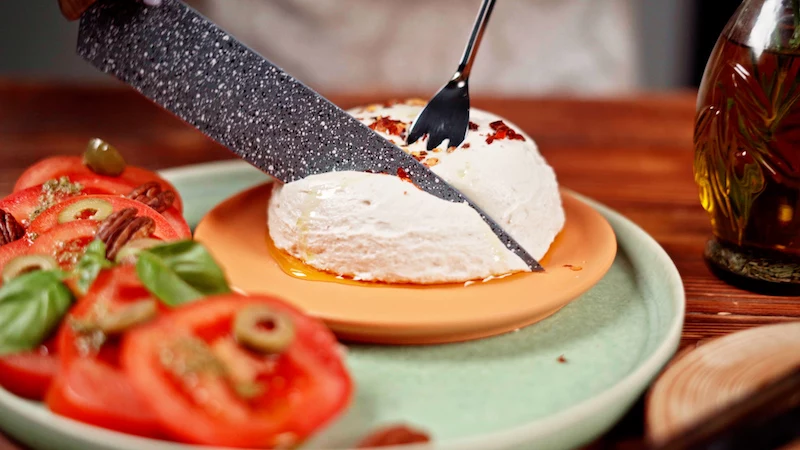
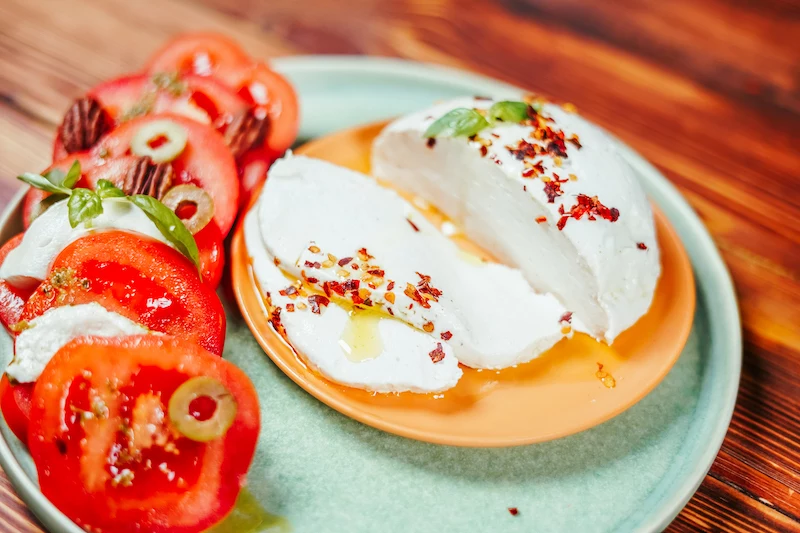
To serve, just run a knife around the edge of the bowl and flip it onto a plate. It should pop right out. To store it, I highly recommend placing the cheese ball in an airtight container with a simple brine (2 cups of cold water + 1/2 tsp salt). This keeps it from drying out. It’ll last for about 5 days in the fridge, but honestly, it’s at its best in the first 3 days.
Oh yeah, quick tip: If you’re in a hurry, you can use the warm mixture straight from the blender as an incredible, creamy pasta sauce. No chilling required!
Common Problems and How to Fix Them
- My cheese is gritty! Your cashews weren’t soaked long enough, or your blender isn’t quite powerful enough. Next time, try the overnight soak. You can save a gritty batch by pouring it through a fine-mesh sieve before chilling.
- It didn’t set! It’s just pudding. This is a binder issue. You might have used whole husks instead of powder, or your powder might be old. Unfortunately, you can’t save it as a mozzarella ball, but don’t throw it out! Use it as a creamy spread or pasta sauce.
- It tastes bland… It needs more salt or acid! The flavors are more muted when the mix is warm. Don’t be afraid to add another pinch of salt or a splash of lemon juice next time. A tablespoon of nutritional yeast can also add a nice savory, cheesy flavor.
Ready to Get Fancy? Some Fun Variations
Once you nail the basic recipe, you can start playing around. Here are a few ideas:
- Smoked Mozzarella: Add 1/2 teaspoon of smoked paprika or a couple of drops of liquid smoke to the blender. Amazing on pizza.
- Herbed Mozzarella: Add a tablespoon of finely chopped fresh basil or oregano to the blender. Perfect for that Caprese salad.
- A Firmer, Grate-able Block: This is for when you need something you can actually shred. In the blender, reduce the psyllium to 20g and add 30g of tapioca starch. After blending, you have to do one extra step: pour the mixture into a small non-stick saucepan over medium-low heat. Stir it constantly with a spatula. In about 3-5 minutes, it will thicken dramatically and start to pull away from the sides of the pot, forming a stretchy blob. That’s when you know it’s ready. Scrape it into your container and chill as usual.
- Soft ‘Burrata’ Style: Pour half of the finished mixture into your bowl. To the remaining half in the blender, add 2 tablespoons of olive oil and 2 tablespoons of water and give it a quick 10-second pulse. Pour this looser cream into the center of the bowl, then top with the rest of the standard mix. Chill. The result is a firm outside with a gloriously soft, rich center.
Enjoy the process! There’s something incredibly satisfying about making your own cheese from scratch. Embrace it for what it is—a fantastic, handcrafted alternative that proves just how amazing plant-based food can be.
Inspirational Gallery
The Blender’s Power Play: Let’s be frank, the texture of this mozzarella hinges on your blender. A standard blender can work, but for that truly silky, professional-grade creaminess, a high-speed model is your best friend. Machines like a Vitamix or Blendtec are designed to pulverize the cashews so completely that no grit remains, resulting in a flawless, smooth mouthfeel that’s worth the investment for any serious home cook.
Psyllium isn’t just a binder; it’s a game-changer. Unlike cornstarch, which can turn gummy, or agar, which can be rubbery, psyllium creates a uniquely soft, stretchy, and slightly chewy texture that mimics the protein structure of real mozzarella in a way other gelling agents simply can’t.
Ready to customize? Once you’ve mastered the basic recipe, the fun begins. Try these flavor infusions:
- Smoky: Add 1/4 teaspoon of liquid smoke or smoked paprika to the blend.
- Herbed: Mix in finely chopped fresh basil or dried oregano after blending, just before chilling.
- Truffled: A few drops of quality black or white truffle oil will make it unbelievably decadent.
My mozzarella turned out grainy. What went wrong?
This is almost always due to one of two things: insufficient soaking or insufficient blending. Raw cashews need at least 8 hours in cold water (or a 15-minute boil in a pinch) to soften completely. After that, blend for longer than you think you need to. Scrape down the sides of the blender and blend again until the mixture is flawlessly smooth before you add the psyllium husk.
The Salt Matters: Don’t just use any table salt. The subtle flavor of this cheese means the quality of your salt will shine through. A flaky sea salt like Maldon or a clean-tasting kosher salt will provide a pure flavor without the chemical notes of iodized salt, elevating the final product from good to great.
- Perfect for a last-minute decision to make cheese.
- Softens cashews in just 15 minutes.
The secret? The quick soak method. Simply cover your raw cashews with boiling water, let them sit for 15-30 minutes, then drain and rinse. While an overnight soak is ideal for creaminess, this trick works wonders when you’re short on time.
Psyllium Husk Powder: Creates a soft, pliable, and slightly stretchy texture. It’s high in fiber and absorbs water to form a gel. Best for a fresh mozzarella feel.
Tapioca Starch: Creates a very stretchy, almost gooey melt. It’s the secret to many commercial vegan cheeses designed for pizza. Use this if a powerful ‘cheese pull’ is your main goal.
For this recipe’s fresh, sliceable ball, psyllium is the star.
According to a 2023 market report, the global vegan cheese market is projected to grow by over 12% annually, reaching nearly $7 billion by 2030.
This isn’t just a niche trend; it’s a full-blown culinary movement. By making your own, you’re not just saving money, you’re participating in a global shift towards more creative, plant-based eating, right from your own kitchen.
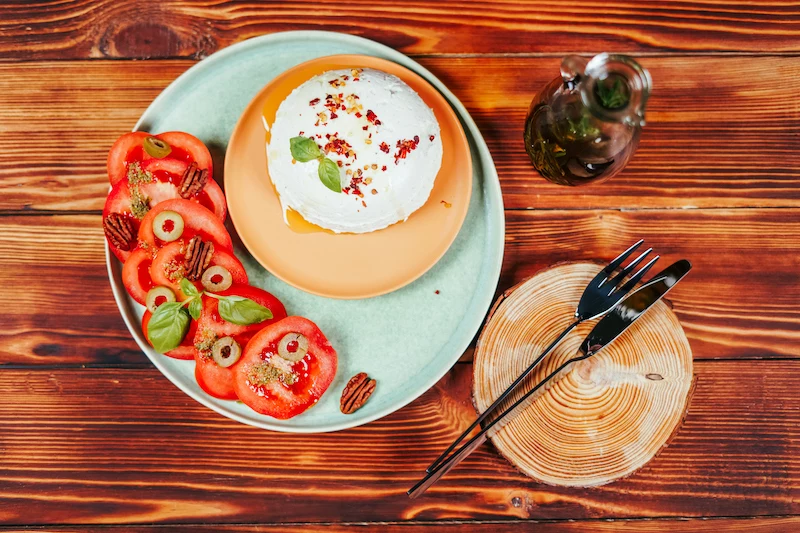
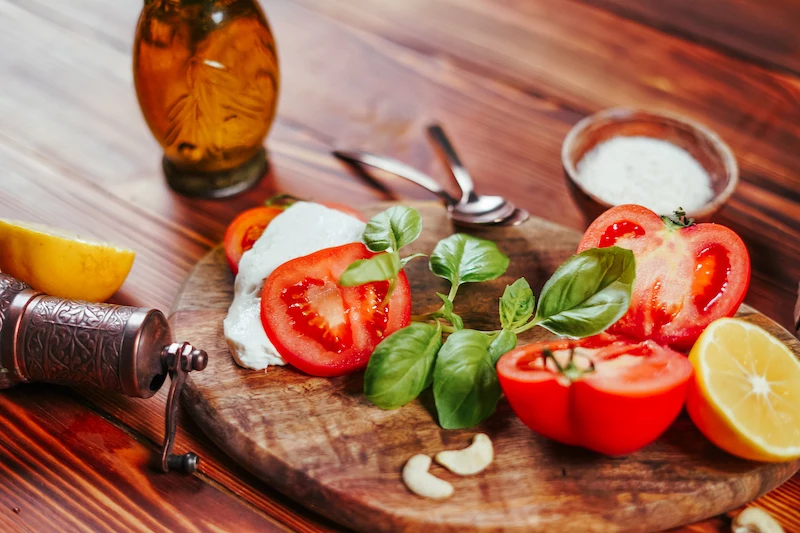
The beauty of this mozzarella lies in its simplicity, making it a perfect canvas for other flavors. Don’t just think of Caprese salad. Try it:
- Torn over a Neapolitan-style pizza right after it comes out of the oven.
- Layered into a vegan lasagna for creamy pockets of goodness.
- Melted inside a grilled cheese sandwich with pesto and sun-dried tomatoes.
- Served alongside grilled peaches with a balsamic glaze in the summer.
A note on chilling: Patience is a virtue. Once your mozzarella is shaped and in its ice bath, it needs to be refrigerated for at least 3-4 hours to fully set and develop its flavor. Rushing this step will result in a softer, less cohesive cheese that’s difficult to slice. The cold is what truly finalizes the texture.
Can I make this recipe nut-free?
Yes, you can achieve a similar result using raw sunflower seeds as a substitute for cashews. The flavor will be slightly more earthy and less neutral, and the color might be a bit darker. You’ll need to be extra diligent with blending to ensure a smooth texture, but it’s a fantastic alternative for those with nut allergies or on a tighter budget.
To keep your mozzarella fresh, store it submerged in a light brine. Just like traditional mozzarella, this prevents it from drying out and helps it maintain its soft texture. Simply place the ball in an airtight container and cover it with cool water mixed with a pinch of salt (about 1/4 tsp per cup of water). It will keep beautifully in the fridge for up to 5 days.
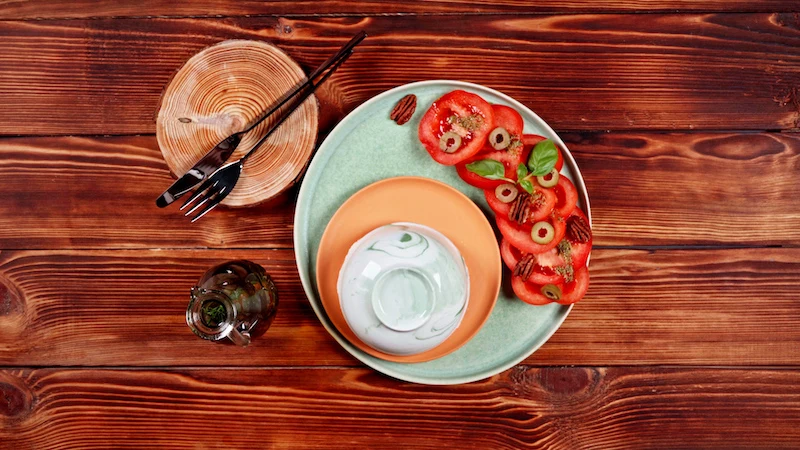
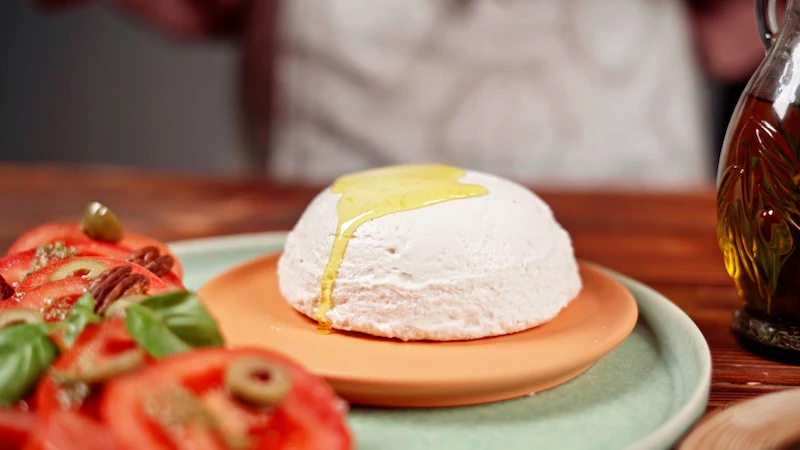
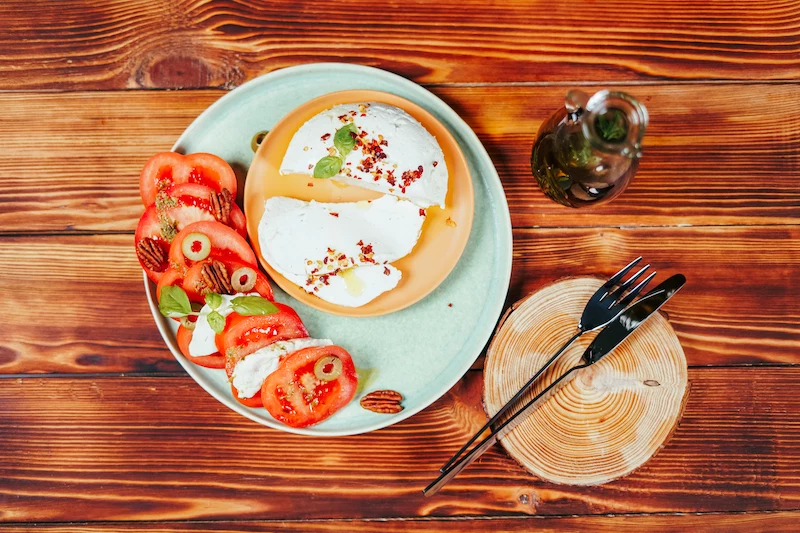
The Caprese, Reimagined: To truly honor your homemade cheese, build a visually stunning Caprese salad. Use heirloom tomatoes of different colors—red, yellow, even purple—for a vibrant base. Instead of perfect slices, gently tear the mozzarella to create rustic, appealing textures. Drizzle generously with a high-quality, extra-virgin olive oil and finish with whole, fresh basil leaves and a crack of black pepper.
Important tip: When you add the psyllium husk powder to the blender, be ready to work fast. It begins to thicken almost instantly upon contact with liquid. Blend for just 15-20 seconds—only until it’s incorporated—then immediately pour it into your bowl to shape. Over-blending at this stage can make the mixture too stiff to handle.

- Reduces plastic packaging from store-bought alternatives.
- Gives you full control over ingredient sourcing and quality.
- Uses whole foods with minimal processing.
Beyond the amazing flavor, making your own vegan cheese is a powerful act of sustainable cooking. You’re consciously opting out of a long supply chain and bringing food production back into your home.
Cashews: The classic choice. They offer a rich, buttery flavor and a high-fat content that results in an exceptionally creamy texture. Their neutral taste makes them a perfect base.
Macadamia Nuts: The luxury option. Even higher in fat, they create an incredibly rich and smooth cheese. They are pricier, but for a special occasion, they produce a result that is second to none.
For everyday use and the most authentic texture, cashews remain the gold standard.
Did you know? The acid in this recipe (lemon juice or apple cider vinegar) does more than add flavor. It helps to ‘culture’ the cashew cream, providing that subtle, tangy bite characteristic of fresh cheese and balancing the richness of the nuts.
That moment when you serve a dish with your homemade mozzarella and a guest says,
Don’t throw away your soaking water just yet! While the recipe calls for fresh water for blending, the leftover cashew-soak water is full of starch. Some frugal chefs use it to add a bit of creaminess to soups, sauces, or even to water their plants (once cooled, of course).
Your psyllium husk will likely come from a brand like Bob’s Red Mill, Anthony’s Goods, or Now Foods. Look for ‘psyllium husk powder’ rather than the whole husks, as the powder dissolves more smoothly, preventing any gritty texture in your final cheese. One bag will last you dozens of batches, making it a very economical ingredient over time.


