Finally, Broccoli Cheddar Soup That Isn’t Grainy or Weird
I’ve spent years in professional kitchens, and I’ve seen countless food trends come and go. But some things are forever. Broccoli cheddar soup is definitely one of them. It’s the king of comfort food for a reason. When it’s good, it’s rich, velvety, and just… perfect. But when it’s bad? It can be a watery, grainy mess. And honestly, the difference between amazing and awful isn’t some secret ingredient. It’s all about technique.
In this article
My first real kitchen job was at a little bistro where soup was a daily religion. The head chef, a tough-as-nails but brilliant mentor, taught me that soup is a construction. Every step builds on the last. He used to say, “The soup tells you what it needs. You just have to learn to listen.” That’s what this is all about. This isn’t just a recipe; it’s a guide to understanding what’s happening in the pot so you can nail it every single time.

Heads up: Plan for about 20 minutes of prep time and around 40 minutes of cooking. The whole thing comes together in just over an hour.
The Secrets Are in the Science (But Don’t Worry, It’s Easy)
Great cooking isn’t magic; it’s just a little bit of applied science. Once you get these few things down, you’ll be the one in control, not just hoping for the best.
First up is the heart of any creamy soup: the roux. This is just a fancy name for cooking fat and flour together to thicken things up. When you heat the flour in the liquid, its starches swell and create this amazing network that makes your soup thick and smooth. The ratio is key. The pros use a 1:1 ratio of fat to flour by weight. A simple digital kitchen scale (you can grab one online for like $15) is your best friend here. For a big pot of soup, we’re talking 60 grams of butter and 60 grams of flour.
But I get it, not everyone has a scale. If you absolutely have to use cups, aim for about 4 tablespoons of butter and a slightly scant 1/2 cup of all-purpose flour. Just know that measuring cups can be a bit wonky. Cook this mix for just two or three minutes until the raw flour smell is gone. We want a “blond” roux—no browning, which would give it a nutty flavor that’s great for gumbo, but not for this soup.
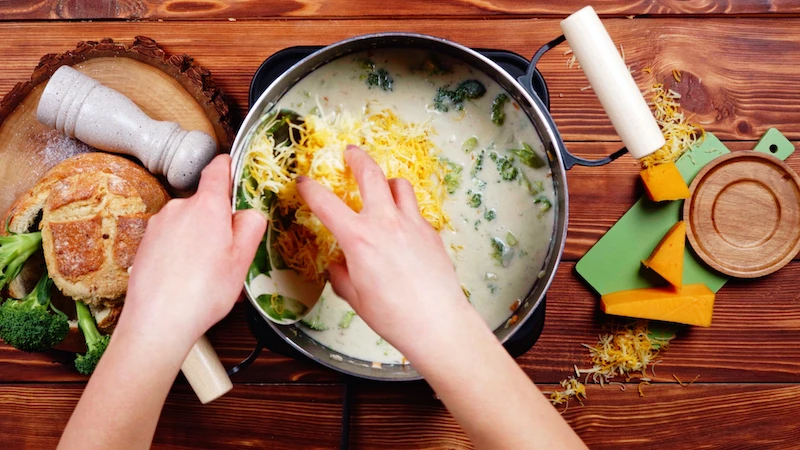
The other big secret is avoiding the dreaded “break,” where the cheese gets greasy and the soup turns grainy. This happens when you add cheese to a liquid that’s too hot. The proteins in the cheese freak out, tighten up, and squeeze out all the fat. To prevent this, you ALWAYS take the soup off the heat before stirring in the cheese. Gentle, residual heat is all you need for a perfect melt.
Let’s Talk Ingredients (This Is Where It Gets Good)
The Cheese: Your Most Important Decision
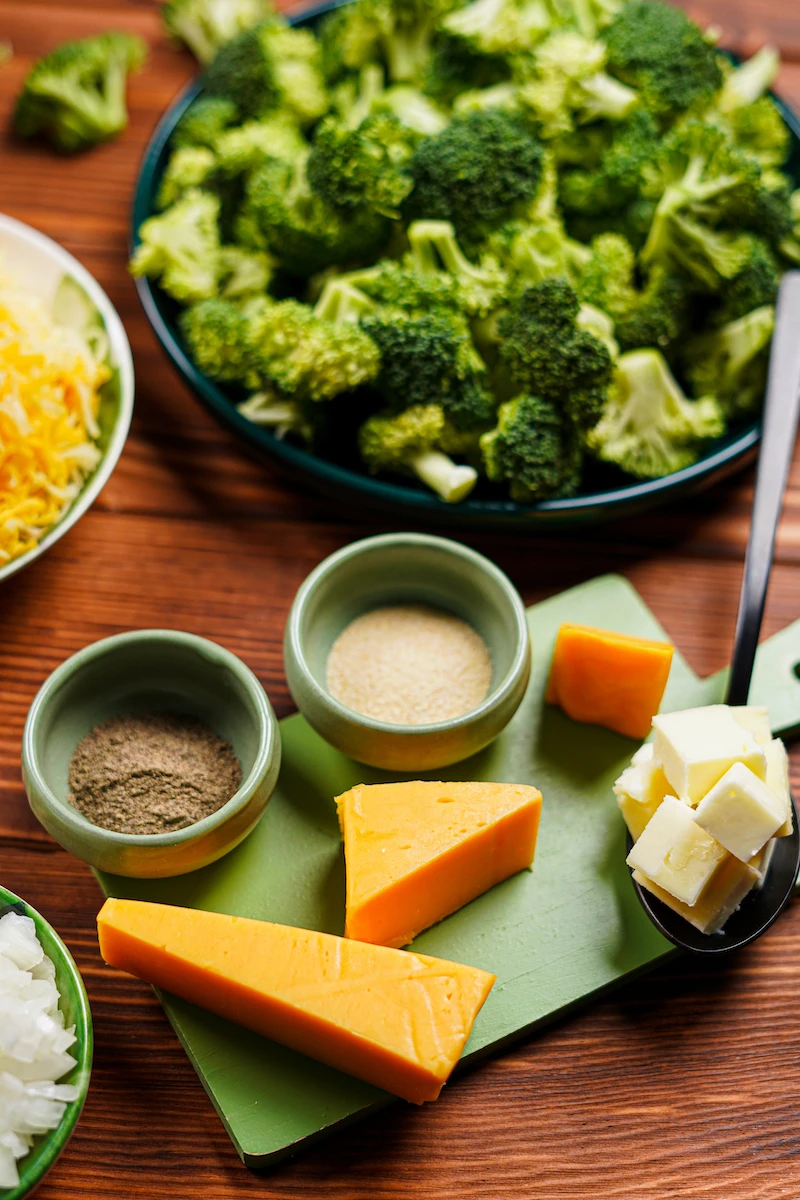
Okay, lean in. This is the most important part. You need a good melting cheese, like a medium or sharp cheddar. Mild cheddar gets lost, and extra-sharp can sometimes get a little gritty.
And here’s the one thing you absolutely can’t skip: buy a block of cheese and grate it yourself. Seriously. That pre-shredded stuff in bags is coated with powders like cellulose or potato starch to stop it from clumping. Those same powders will ruin the texture of your soup, making it feel mealy. Grating your own cheese takes two minutes and is the single biggest upgrade you can make. A solid block of Tillamook or Cabot sharp cheddar, which you can find at any major grocery store for around $5-$8, is perfect for this.
Want to get a little fancy? My personal favorite move is to use about 75% sharp cheddar for that classic flavor, and 25% Gruyère. Gruyère is an alpine cheese that adds this incredible nutty, complex flavor and melts like an absolute dream. It just takes the soup to another level.

The Broccoli: Use the Whole Thing!
Don’t be a broccoli snob and throw away the stems! They have a wonderful, sweet flavor. The trick is to just peel the tough outer layer off the stalk with a vegetable peeler. Then, chop up that tender inner core and toss it in with your onions and carrots at the beginning, since it needs a bit more time to soften up. You can add the more delicate florets later. It’s less waste and more flavor. Win-win.
By the way, can you use frozen broccoli? Absolutely. It’s a great budget-friendly shortcut. Just skip the fresh broccoli prep and toss in about a pound of frozen florets during the last 10-15 minutes of simmering. They cook much faster, so don’t add them too early.
The Step-by-Step Guide to Perfect Soup
This will make a generous batch, about 2 quarts, which is enough for 4-6 people. You’ll want a heavy-bottomed pot or a Dutch oven to prevent scorching, a whisk, and a box grater.

What You’ll Need:
- 4 Tbsp Unsalted Butter (60g)
- 1 large Yellow Onion, chopped
- 1 large Carrot, finely chopped
- 1/2 cup All-Purpose Flour (60g)
- 4 cups (950ml) Low-Sodium Chicken or Vegetable Broth, warmed
- 2 cups (475ml) Whole Milk, warmed
- 1 large head of Broccoli (about 1-1.5 lbs), stems peeled and chopped, tops cut into florets
- 8-9 oz Sharp Cheddar Cheese, freshly grated from a block
- 1/2 tsp Dry Mustard Powder
- Pinch of Cayenne Pepper or Nutmeg (your call!)
- Salt and Freshly Ground Black Pepper
- 1/4 cup Heavy Cream (Optional, for pure luxury)
The Process:
- Prep Your Station: This is what chefs call “mise en place.” Chop your veggies, grate your cheese, and gently warm your broth and milk in a separate pot or in the microwave. Trust me, this makes cooking way more relaxing.
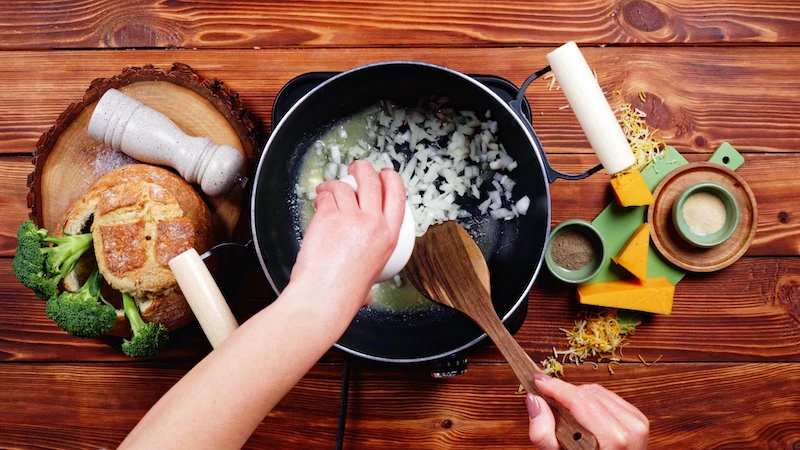
- Sweat the Aromatics: In your big pot, melt the butter over medium-low heat. Add the onion, carrot, and the chopped broccoli stems. Cook for 8-10 minutes, stirring occasionally, until they’re soft but not browned. We’re coaxing out their sweetness.
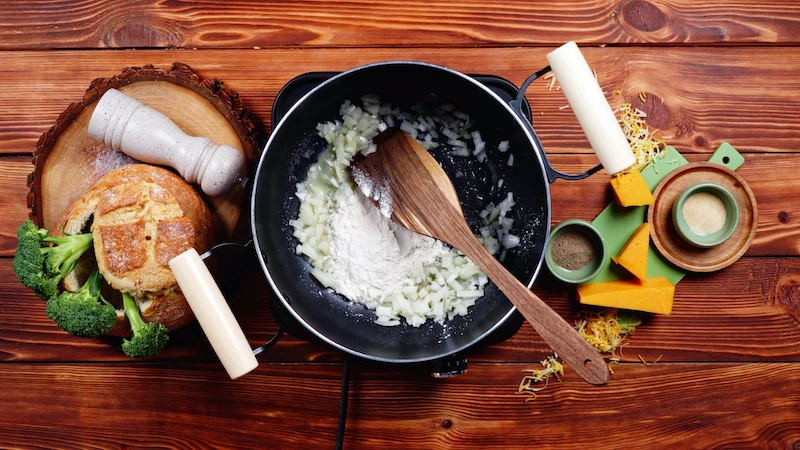
- Make the Roux: Sprinkle the flour over your softened veggies. Stir it constantly for about 2 minutes. It’ll coat everything and should smell a little toasty.
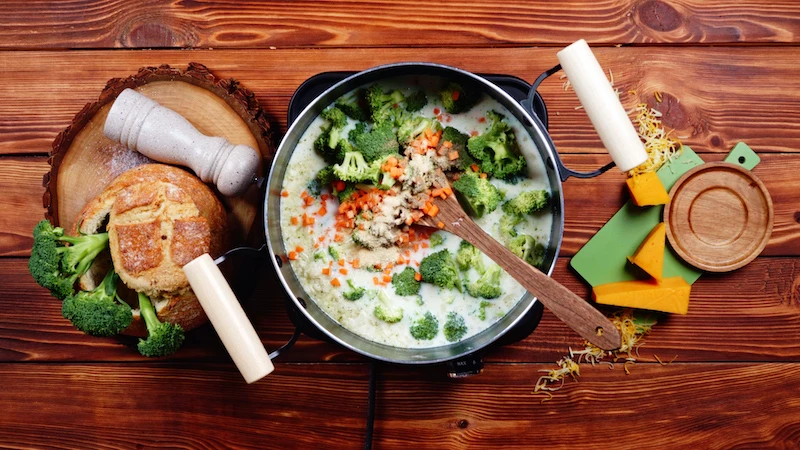
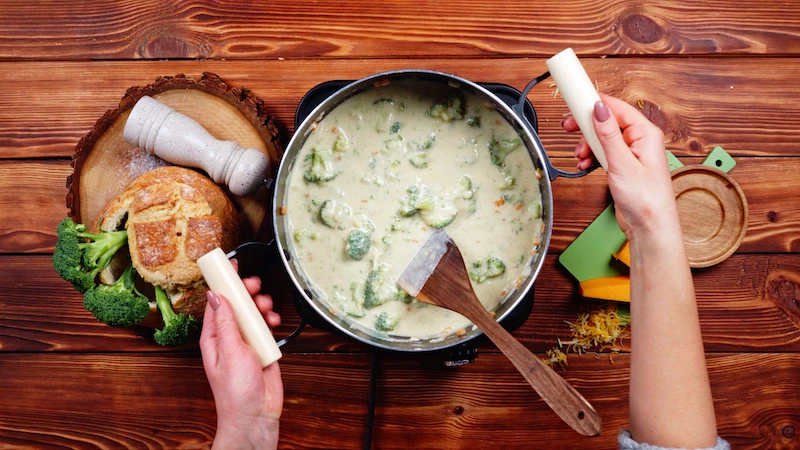
- Build the Base: Now, gradually pour in your warm broth and milk, about a cup at a time, whisking constantly. This is the secret to a lump-free soup. Once all the liquid is in, bring it to a gentle simmer.
- Cook the Broccoli: Add the broccoli florets to the pot. Let everything simmer gently (no crazy boiling!) for 15-20 minutes, or until the florets are fork-tender. This is also when you’ll stir in the dry mustard and cayenne/nutmeg—they wake up the cheese flavor.
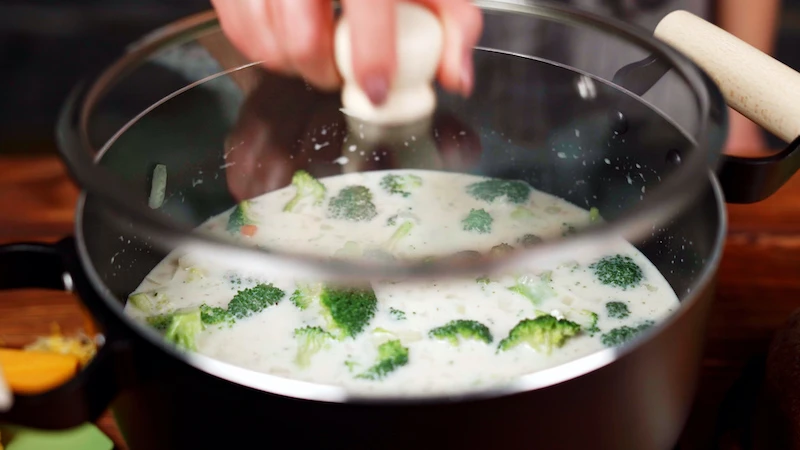
- The Critical Cheese Step: Turn the heat OFF. Let the soup cool for a minute. Add your freshly grated cheese in a few handfuls, stirring gently until it’s all melted and glorious. Taste it now and add salt and pepper as needed.
- Final Touch (Optional): If you want to go all out, stir in that splash of heavy cream now, while the pot is still off the heat.
Soup First-Aid: How to Fix Common Problems
Even the pros mess up sometimes. Here’s how to save your soup if something goes wrong.
- “Help, my soup is grainy!” This usually means the cheese was added when the soup was too hot and it broke. You can’t fully reverse it, but you can improve the texture a lot by using an immersion blender to smooth things out. Next time, make sure you turn off the heat first!
- “My soup is too thin!” Easy fix. In a small bowl, mix 1 tablespoon of cornstarch with 2 tablespoons of cold water to make a slurry. While the soup is simmering (BEFORE you add the cheese), whisk in the slurry and let it cook for a minute or two. It’ll thicken right up.
- “My soup is too thick!” Even easier. Just whisk in a little more warm broth or milk until it reaches the consistency you like.
- “Can I make this gluten-free?” Yes! Instead of the flour roux, use the cornstarch slurry trick mentioned above. You’ll need about 2-3 tablespoons of cornstarch mixed with cold water to thicken the full pot. Or, you can use a good all-purpose gluten-free flour blend in place of the regular flour—it works surprisingly well.
Serving and Storing Like a Pro
Serving this in a bread bowl is iconic for a reason. Go to a bakery and get a nice, round sourdough boule with a sturdy crust. A flimsy bread will just turn to mush. Cut off the top, hollow out the inside, and here’s a pro tip: brush the inside with a little melted butter and toast it in the oven for 5-7 minutes. It creates a barrier that keeps the bread from getting soggy too fast.
The soup keeps beautifully in the fridge for up to 4 days. When you reheat it, do it gently in a pot over low heat. Don’t let it boil, or you risk breaking that beautiful cheese emulsion. I wouldn’t recommend freezing it, though. Dairy-based soups tend to get a weird, grainy texture when they’re thawed.
And that’s it. It might seem like a lot of details, but once you do it once, you’ll see how simple the flow is. You’re not just making soup; you’re learning a craft. Be patient, pay attention, and soon you’ll be making incredible soup without even thinking about it.
Inspiration:

Block Cheddar: The undisputed champion. Grating your own cheese from a quality block of aged sharp cheddar (like Tillamook or Cabot) is the single best upgrade for your soup. It melts into a perfectly smooth, luscious liquid with a pure, rich flavor.
Pre-Shredded Cheddar: The convenient trap. Bags of pre-shredded cheese are coated in anti-caking agents like cellulose or potato starch. These starches are the enemy of a silky soup, often creating a gritty, clumpy texture. The extra five minutes it takes to grate your own is a worthy investment.

How do you achieve that perfectly smooth, restaurant-quality texture?
The answer is in the blend. An immersion blender is your best friend here; you can puree the soup directly in the pot until it reaches your desired consistency, leaving a few chunks for texture if you like. If using a countertop blender (like a Vitamix), work in small batches. Hot liquids expand dangerously when blended, so never fill the carafe more than halfway, and remove the small plastic cap from the lid, covering the hole with a folded towel to let steam escape safely.

A chef’s secret for amplifying the cheese flavor isn’t more cheese—it’s a touch of acid and spice.
Just before you add the cheddar, stir in a teaspoon of Dijon mustard and a pinch of cayenne pepper or a dash of your favorite hot sauce (like Frank’s RedHot). The mustard brightens the savory notes of the cheese, while the subtle heat adds a background warmth that makes the soup even more comforting and complex.
Don’t just serve soup, present an experience. The right garnish adds a final flourish of flavor and texture that takes it to the next level. Think beyond a simple sprinkle of cheese and consider:
- Homemade toasted croutons, rubbed with a garlic clove.
- Crispy, crumbled bacon or pancetta for a salty, smoky contrast.
- A swirl of crème fraîche for a tangy richness.
- Freshly snipped chives or thinly sliced scallions for a mild, oniony bite.

Don’t discard those broccoli stalks! They are packed with flavor and have a wonderful, tender texture when cooked. Simply use a vegetable peeler to remove the tough outer skin, chop the tender interior finely, and add them to the pot along with the onions. They will soften completely, adding body and extra vegetable goodness to your soup—a true zero-waste win.
Freezing leftover broccoli cheddar soup can be tricky, as dairy-based soups have a tendency to separate or “break” when reheated.
The key is to cool it completely in the refrigerator first, then freeze it in airtight containers. When you’re ready to enjoy it again, thaw it overnight in the fridge and reheat it *very gently* in a saucepan over low heat, stirring constantly. Never let it boil!


