Forget the Shortcuts: Here’s How to Make Real-Deal French Onion Soup
I’ve made French onion soup more times than I can count, in bustling restaurant kitchens and on my own quiet stove at home. I’ve tried the quick weeknight hacks and the slow, all-day weekend projects. And after all that, I can tell you one thing for sure: there are no real shortcuts to a truly great French onion soup. The magic isn’t some secret ingredient; it’s just patience.
In this article
So let’s be clear, this isn’t a 30-minute meal. A proper French onion soup is a process. It’s about coaxing humble, sharp onions into something unbelievably sweet, rich, and complex. We’re building layers of flavor from the ground up. So many recipes promise a fast result, but honestly, they deliver a thin, onion-flavored water that misses the whole point. My goal is to show you the traditional way, the techniques that matter, and the little details that take a soup from just okay to truly memorable.
Why Patience Pays Off: A Little Kitchen Science
To make an amazing soup, it really helps to know why you’re doing what you’re doing. This whole dish really hinges on one thing: the slow, magical transformation of onions.
When you slice an onion, you’re releasing those sharp compounds that make your eyes water. But when you apply low, steady heat, those compounds start breaking down. At the same time, the complex carbs in the onion turn into simple sugars. As you keep cooking, two incredible things happen. First, you get caramelization, which is the browning of those sugars—it creates deep, nutty, and sweet flavors. Second, you get the Maillard reaction, which is the same process that gives a seared steak or a loaf of bread its savory, roasted depth. It’s a reaction between amino acids and sugars, and it’s pure flavor.
This is exactly why you can’t rush it. If the heat is too high, the onions will burn on the outside before they’ve had a chance to sweeten up on the inside, leaving you with a bitter taste. And if you cover the pot to speed things up, you’re just steaming them. Steamed onions get soft, sure, but they don’t brown, so you miss out on all that Maillard goodness. You need slow evaporation and deep, even browning. This takes at least 45 minutes, and more often, over an hour. Trust your eyes and nose, not the clock.
Oh, and as the onions cook, a brown crust will form on the bottom of the pot. That stuff is called the fond, and it is flavor gold. Don’t you dare leave it behind. We’ll use a technique called deglazing—adding a liquid like wine—to scrape all that goodness back into the soup.
The Gear and Groceries You’ll Need
Before we start, let’s get our station set up. Having the right tools makes a huge difference.
The Right Equipment:
- A Heavy-Bottomed Pot: A 5 or 6-quart Dutch oven is your best friend here. Its heavy base spreads the heat out evenly, which is crucial for preventing scorching during that long caramelization process.
- A Sharp Knife or a Mandoline: Slicing the onions uniformly is key to them cooking evenly. If you have great knife skills, fantastic. If not, a mandoline is a game-changer for getting perfect slices quickly. But a serious heads-up: mandolines are dangerously sharp. I’ve seen more nasty kitchen cuts from those things than anything else. ALWAYS use the safety guard. Respect the tool.
- Oven-Safe Bowls: You absolutely need ceramic or porcelain bowls that can handle the broiler’s intense heat. Regular dinner bowls can crack from the temperature shock. The classic lion-headed bowls are cool, but any oven-safe crock will do. You can often find them for a couple of bucks each at thrift stores.
- A Baking Sheet: Always, always put your soup bowls on a sturdy baking sheet before they go in the oven. It makes them way easier to move and catches any cheese that gloriously bubbles over the side.
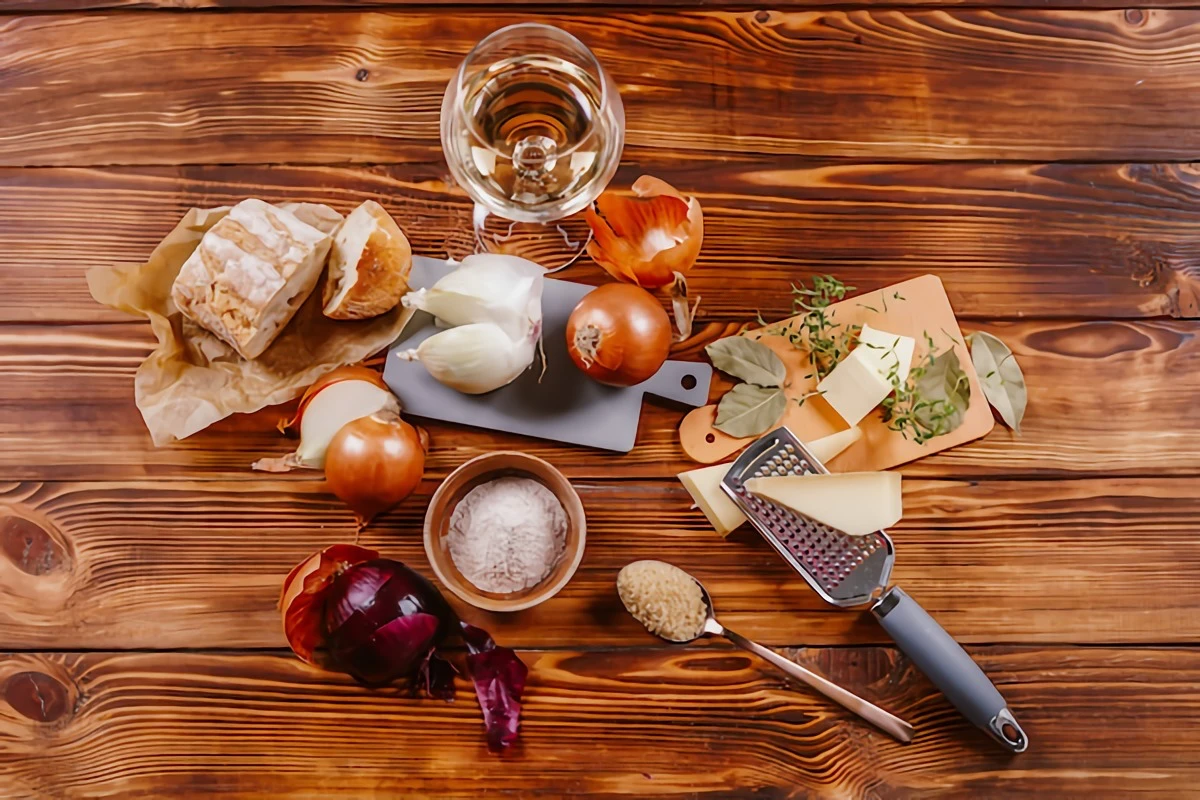
Your Shopping List (for about 6 servings):
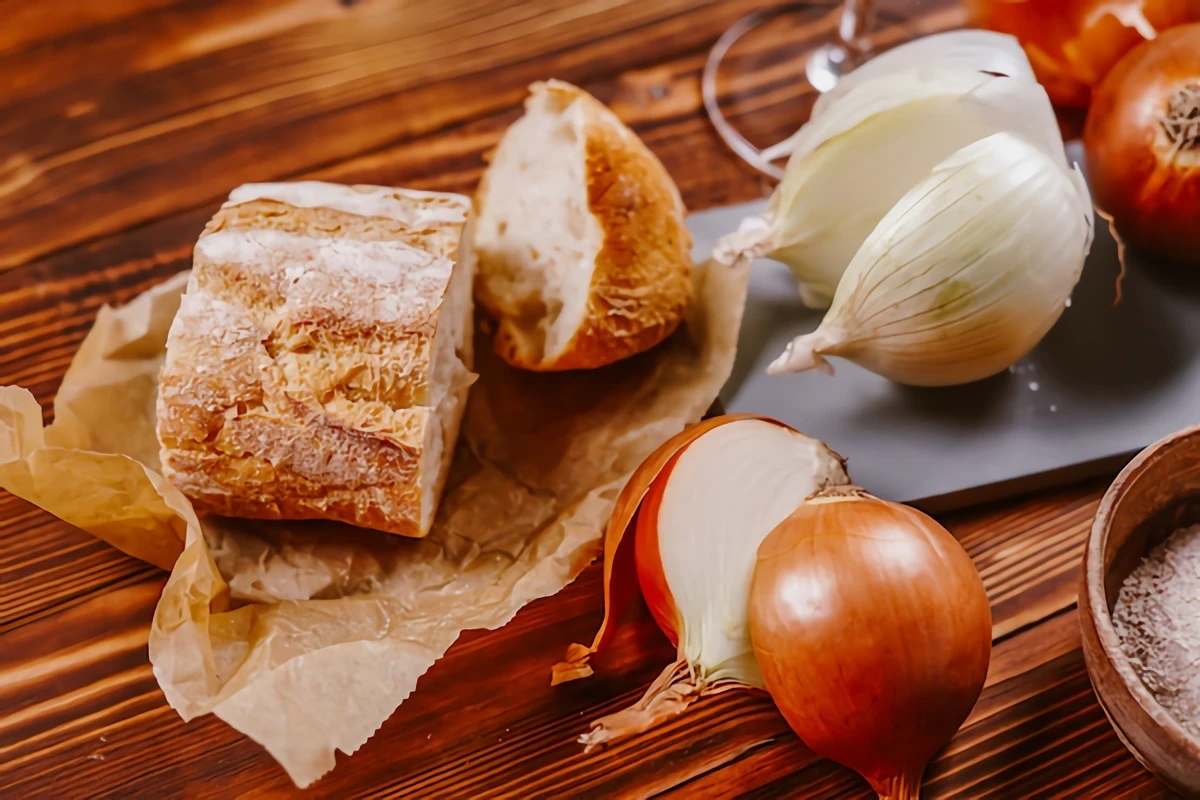
- Onions: You’ll want about 3 pounds of yellow onions, which is usually 5 or 6 medium-sized ones. They have the perfect balance of sweetness and punch. You can use sweet onions like Vidalia, but sometimes they can make the soup a bit too sweet. I’d skip red onions; they can give the soup a weird color.
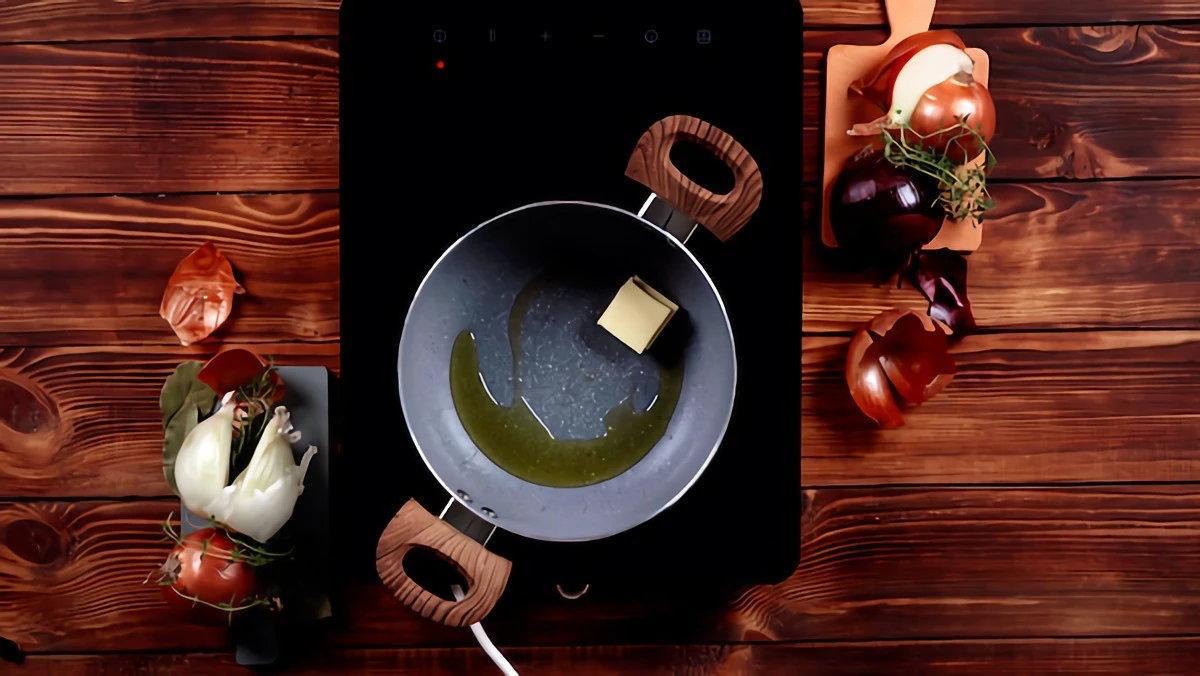
- Fat: 3 tablespoons of unsalted butter and 1 tablespoon of olive oil. The butter brings the flavor, and the oil helps prevent the butter from burning.
- Seasoning: 1 teaspoon of kosher salt to start, plus a 1/2 teaspoon of black pepper.
- A Little Helper: 1 teaspoon of granulated sugar. This isn’t to make it sweet; it just gives the caramelization a little kickstart.
- Thickener: 2 tablespoons of all-purpose flour. This helps give the finished soup a silky body.
- Deglazing Liquid: About 1 cup of a dry white wine (like a Sauvignon Blanc or Pinot Grigio) is classic. A half-cup of brandy or cognac also works beautifully for a warmer, deeper flavor. No alcohol? No problem. Just plan to use an extra cup of your beef broth for this step, and add a teaspoon of sherry or red wine vinegar at the very end to mimic the acidity.
- Aromatics: A few sprigs of fresh thyme and a bay leaf or two for that classic herbal background note.
- The Broth: This is where you don’t want to skimp. You need 2 quarts (8 cups) of a high-quality beef broth. Homemade is the ultimate goal, but for store-bought, I usually grab Better Than Bouillon or Kettle & Fire. Look for low-sodium versions and check the ingredients for gelatin—that’s a great sign of a rich, full-bodied broth.
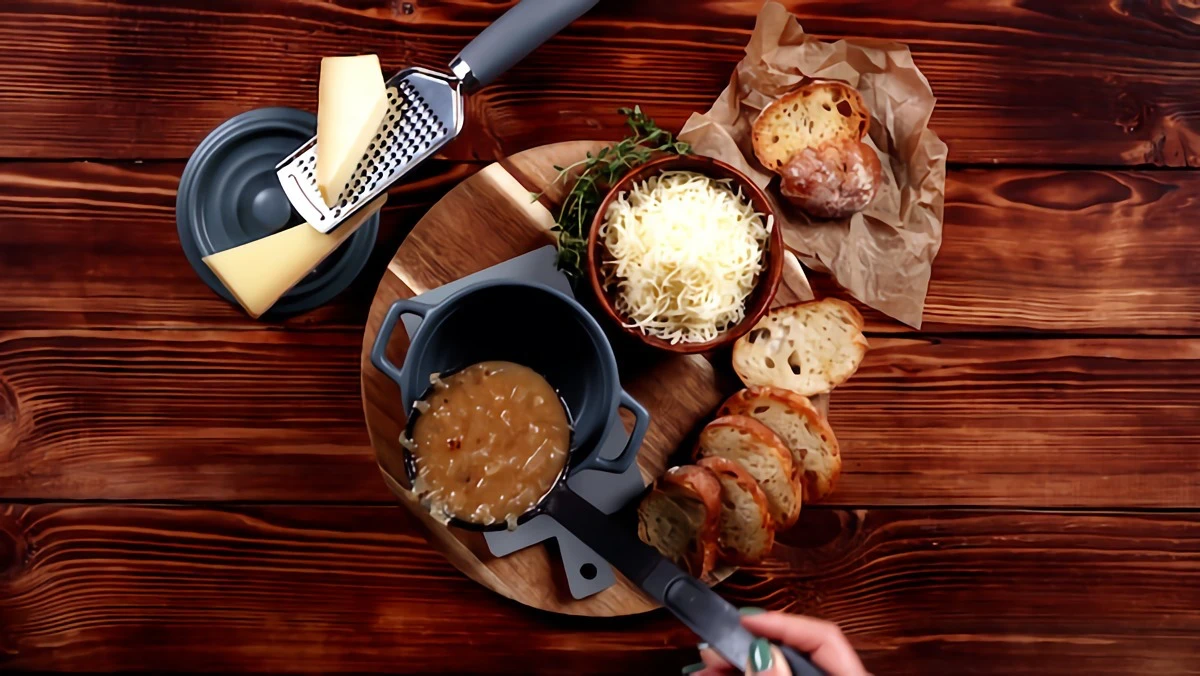
- Bread: A day-old baguette, sliced into 1-inch thick rounds. It has to be stale or toasted dry, otherwise it will dissolve into mush.
- The Cheese: About 8 ounces of Gruyère is the classic choice, and for good reason. Comté is another fantastic, slightly nuttier option. Please, grate it yourself. The pre-shredded stuff is coated in powders that stop it from melting smoothly.
A quick word on budget: This soup feels fancy, but it doesn’t have to break the bank. The onions are super cheap, maybe $4 for the whole batch. The real splurge is the cheese, where you can expect to pay between $10 and $15 for a good block of Gruyère. It’s 100% worth it. You can save money on the wine—a $10 bottle is perfectly fine for cooking.
Let’s Cook: The Step-by-Step Guide
1. Slicing the Onions
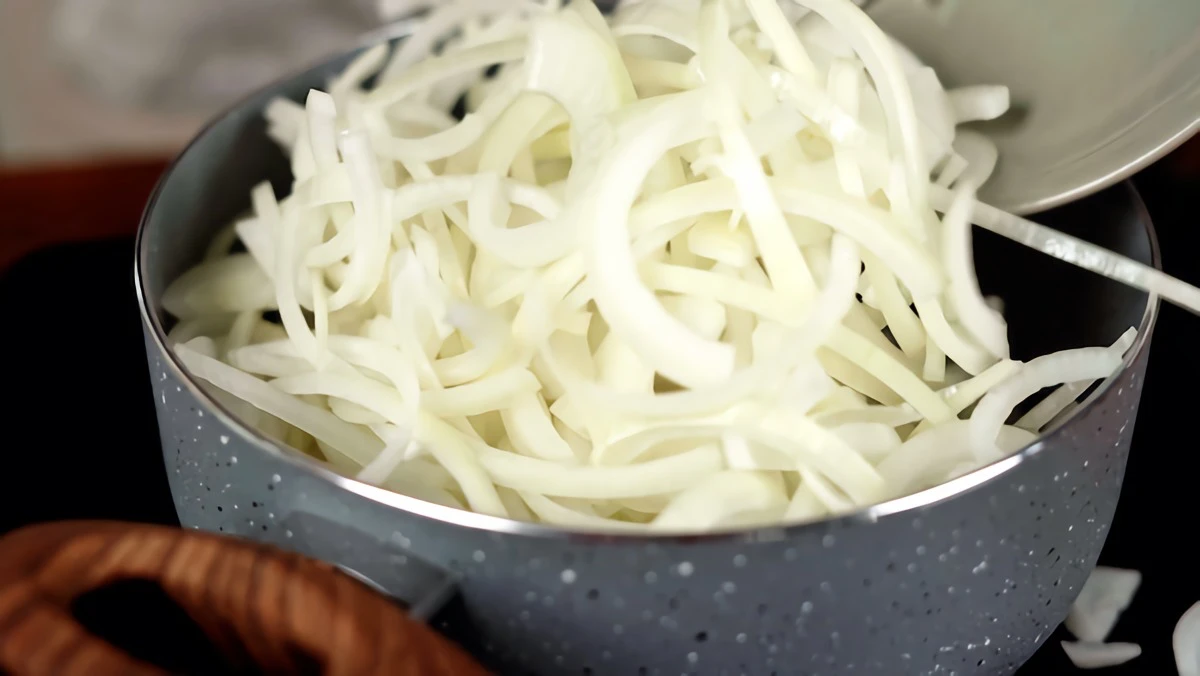
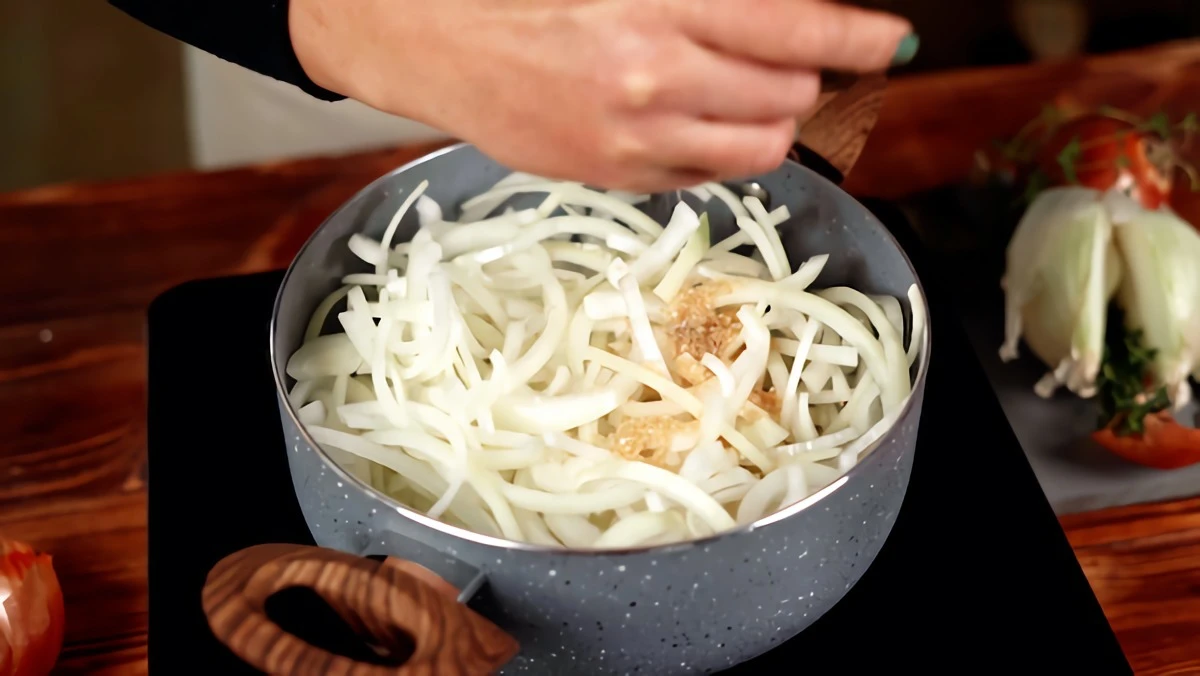
First things first, peel your onions and slice them thinly from pole-to-pole (root to stem). This helps them hold their shape a little better than slicing them into rings. Aim for about 1/8-inch thickness.
2. The Caramelization (The Patient Part)
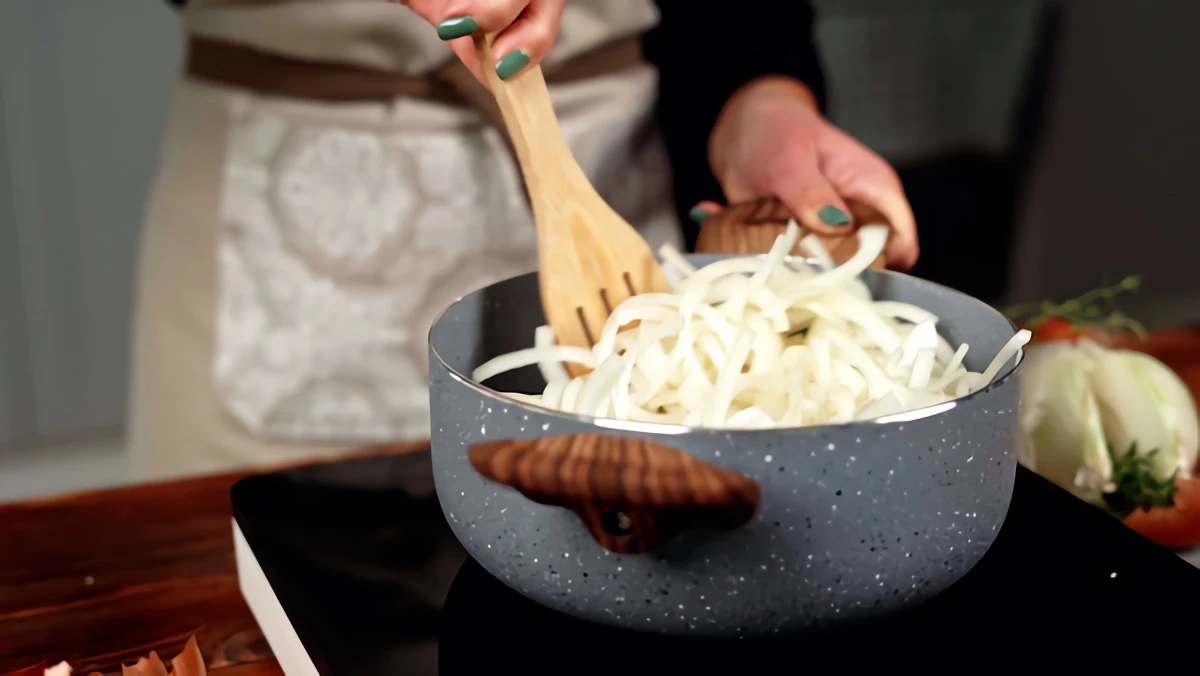
Get your Dutch oven on the stove over medium-low heat. Add the butter and olive oil. Once the butter is melted and foamy, toss in all of your sliced onions, the salt, and that optional teaspoon of sugar. Give everything a good stir to coat the onions in fat.
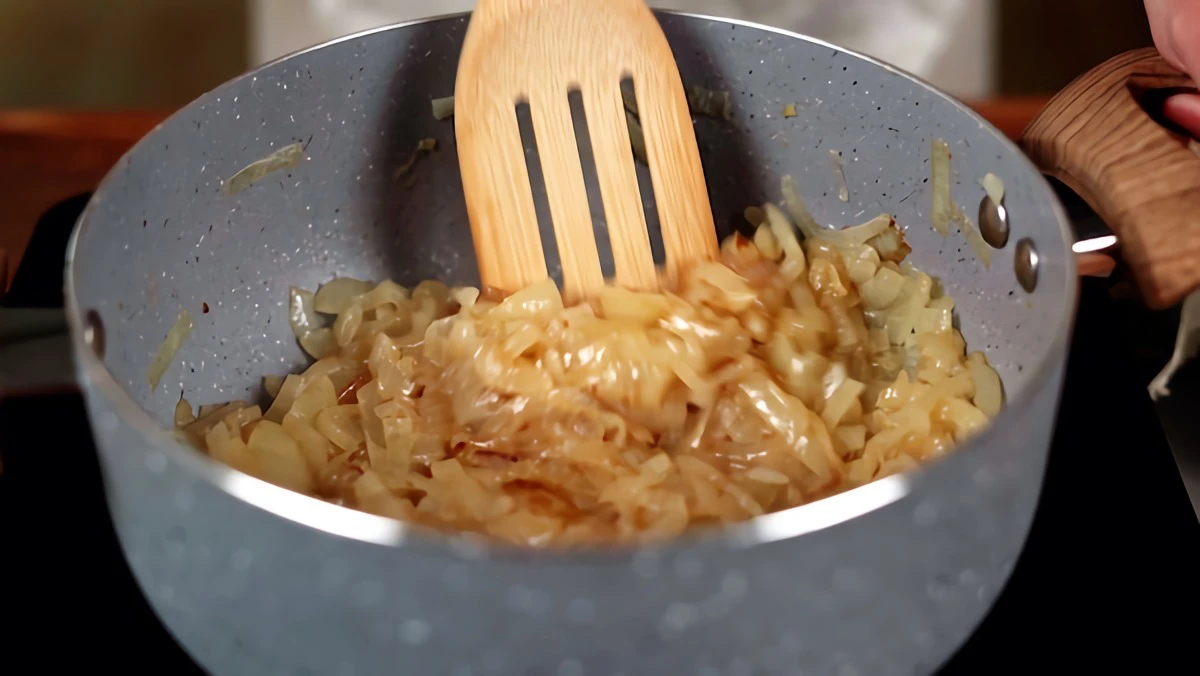
Now, settle in. You’re going to be cooking these, stirring every 10 minutes or so, for at least 45 minutes, but probably closer to an hour. This is the perfect time to put on a podcast or an episode of a show. For the first 20-25 minutes, the onions will release a lot of water and look like they’re just steaming. That’s totally normal. Let them do their thing. After the water evaporates, they’ll start to sizzle and color. Now you need to pay more attention. Stir more often, scraping the bottom of the pot. You’re aiming for a deep, rich, mahogany color and a smell that is intoxicatingly sweet. They’ll shrink down to almost nothing. Don’t get impatient here; this step is the soup.
Quick Tip: If at any point the onions seem to be browning too fast in one spot or look like they’re about to burn, toss in a tablespoon or two of water. It will instantly cool the pan and let you scrape up all those brown bits before they turn black and bitter.
3. Building the Base
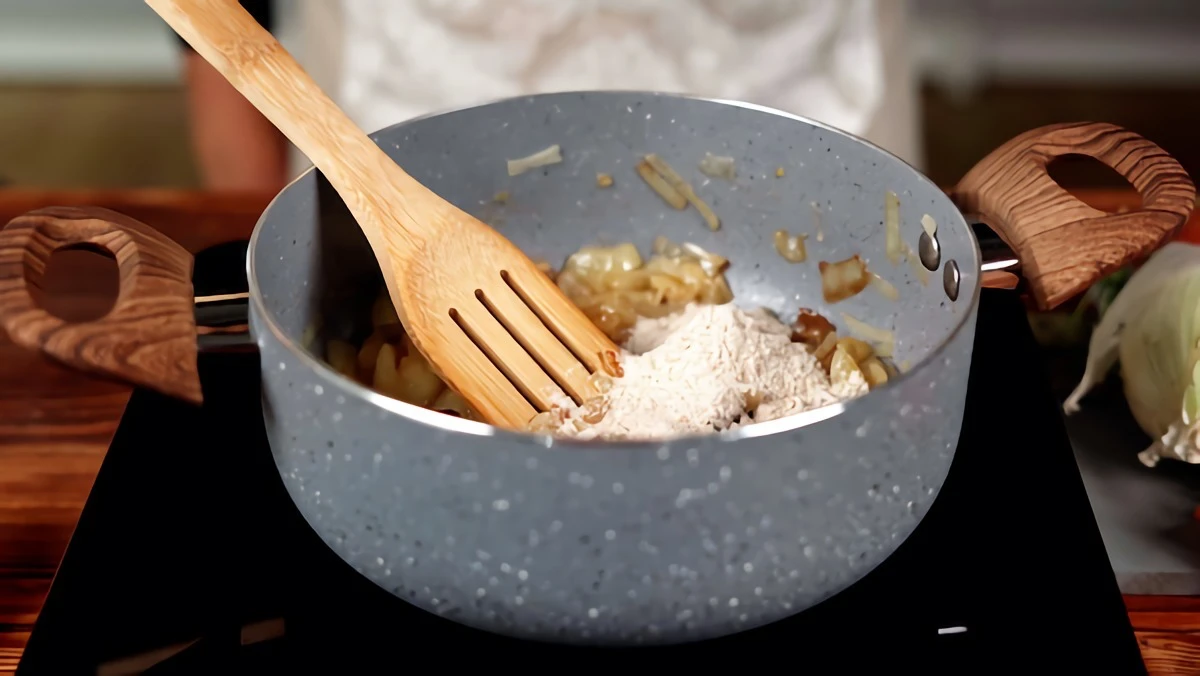
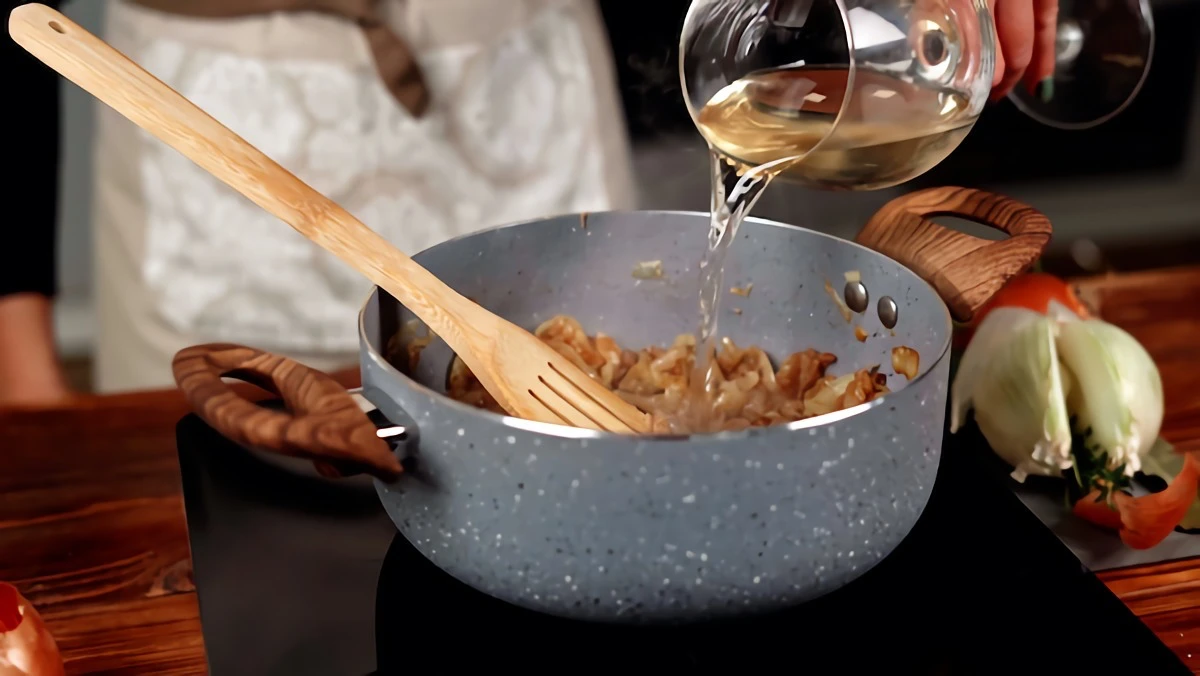
Once the onions are deeply caramelized and jammy, sprinkle the flour over them. Stir constantly for about 90 seconds to cook out that raw flour taste. Now, turn the heat up to medium-high and pour in your wine (or brandy). It will hiss and steam like crazy! This is the fun part. Use a wooden spoon to scrape vigorously at the bottom of the pot, lifting up all that fond we talked about. Keep stirring until the liquid has almost completely cooked away.
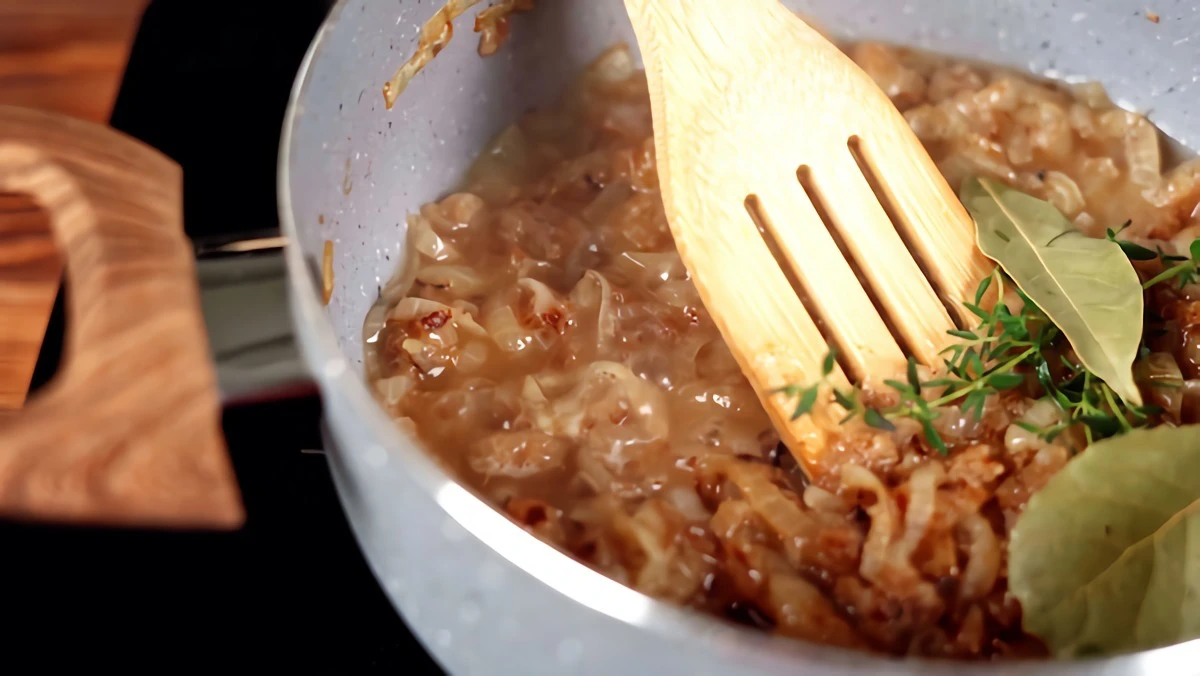
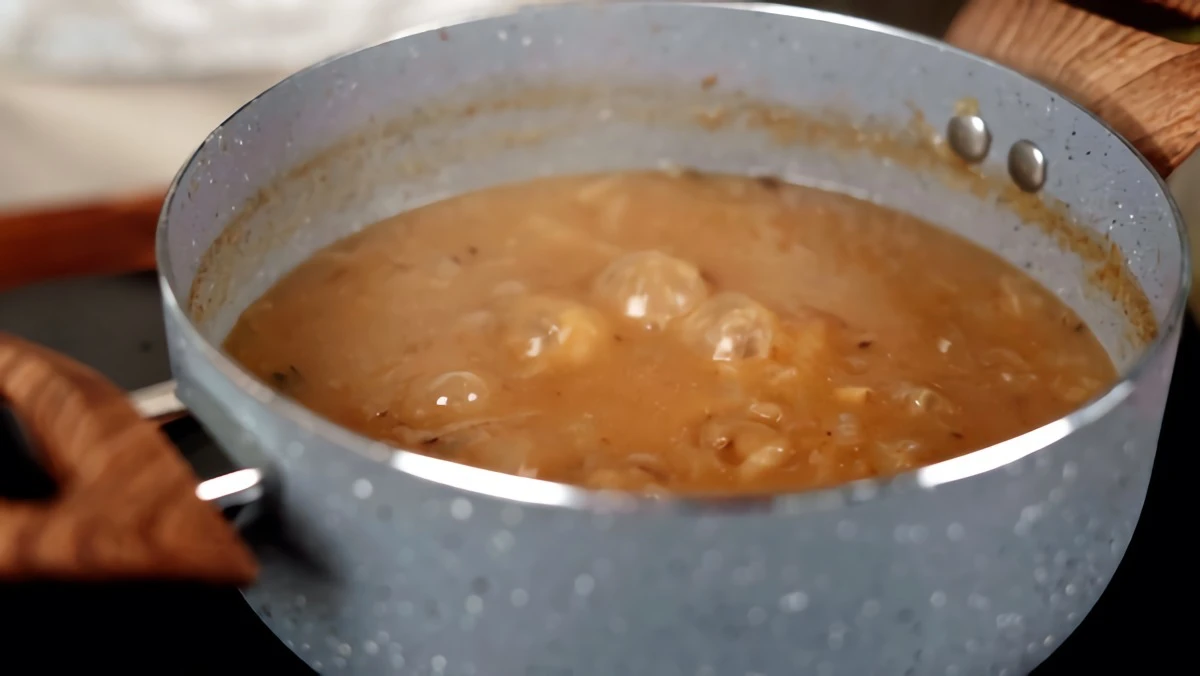
4. The Simmer
Pour in the hot beef broth (warming it up first prevents the pot from cooling down too much). Add your thyme sprigs and the bay leaf. Bring it to a boil, then immediately turn the heat down to low. Let it simmer gently, partially covered, for at least 30 minutes, though an hour is even better. This is when all the flavors get to know each other. Now’s the time to taste and adjust. Does it need more salt? Some black pepper? Be bold with your seasoning, as the bread and cheese will tone it down a bit. Fish out the thyme stems and bay leaf before serving.
Uh-oh, Troubleshooting: Is the soup tasting a little flat? A tiny splash of sherry vinegar or even balsamic can brighten it right up. Is it a bit too sweet? A dash of Worcestershire or soy sauce (my secret weapon) adds an umami kick that brings everything back into balance.
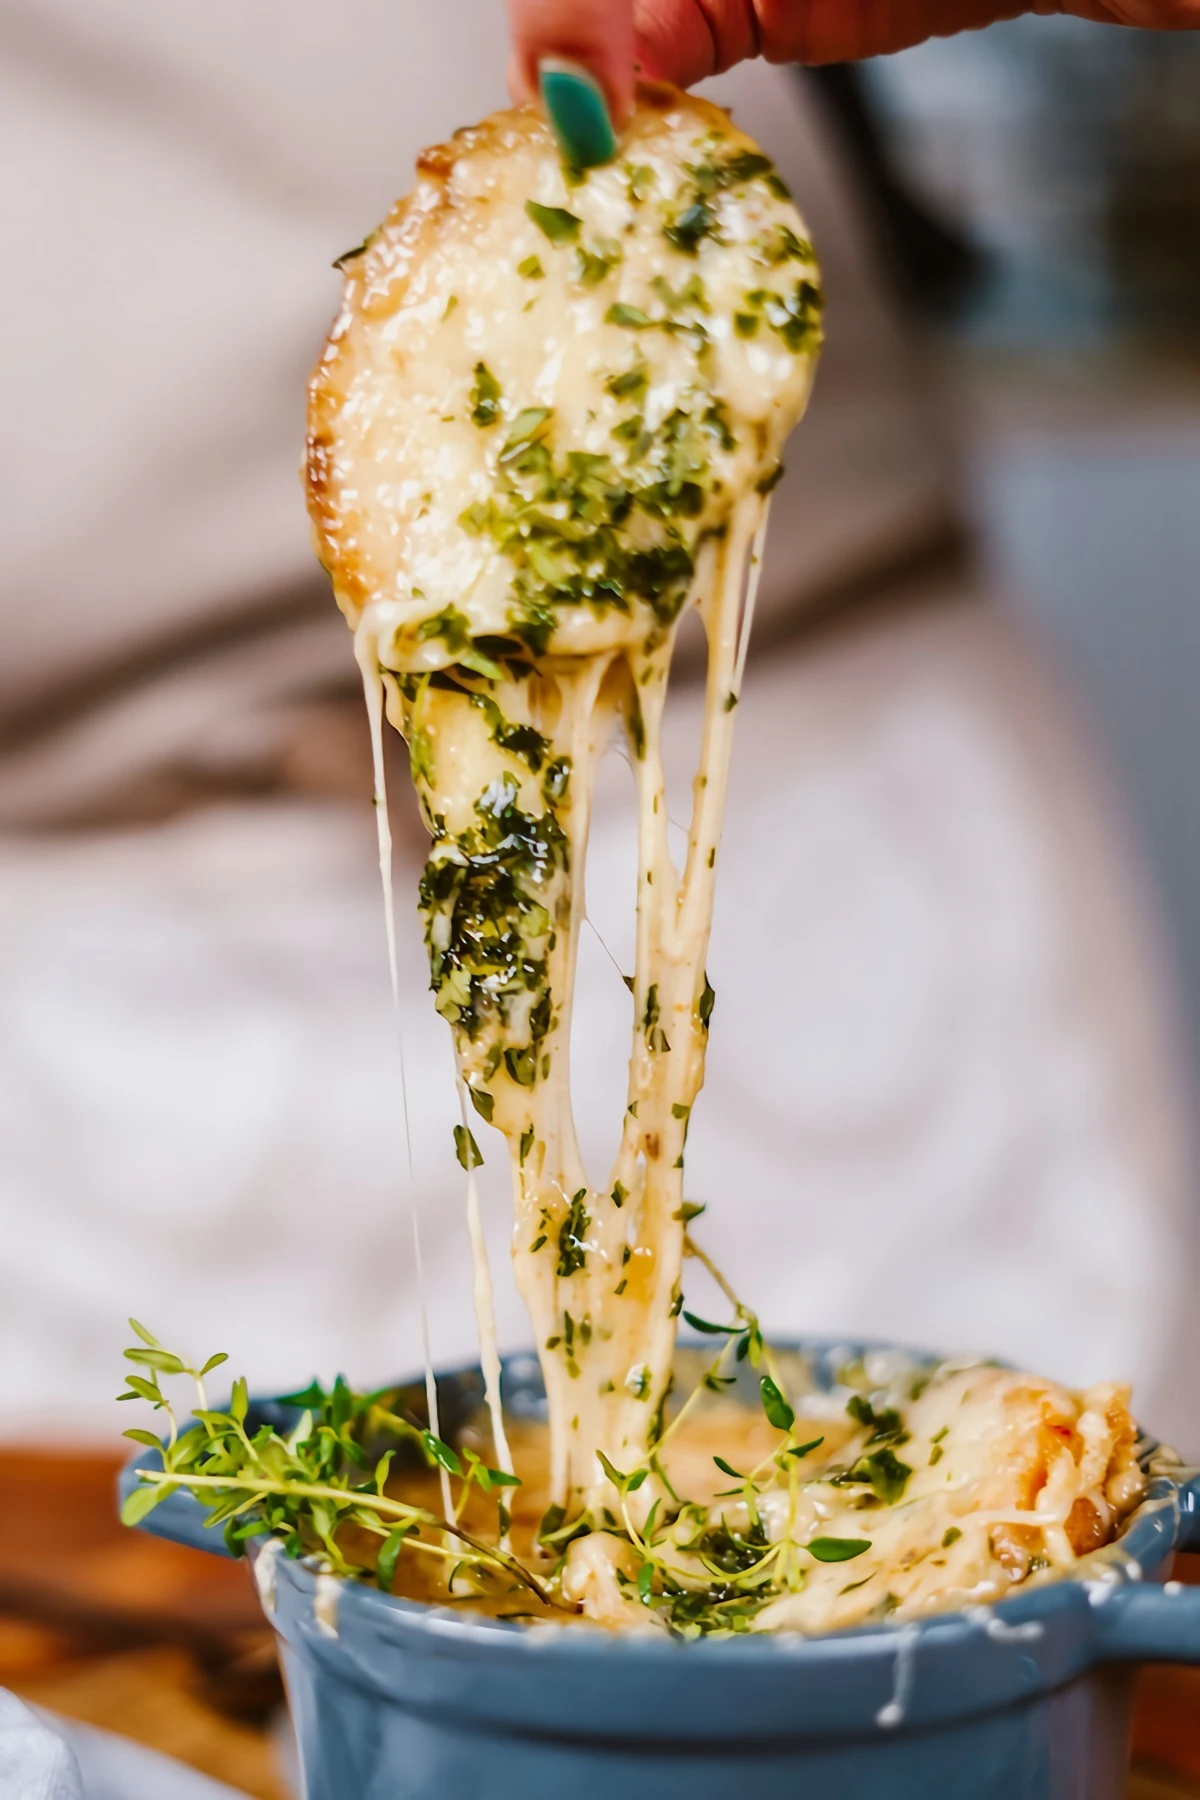
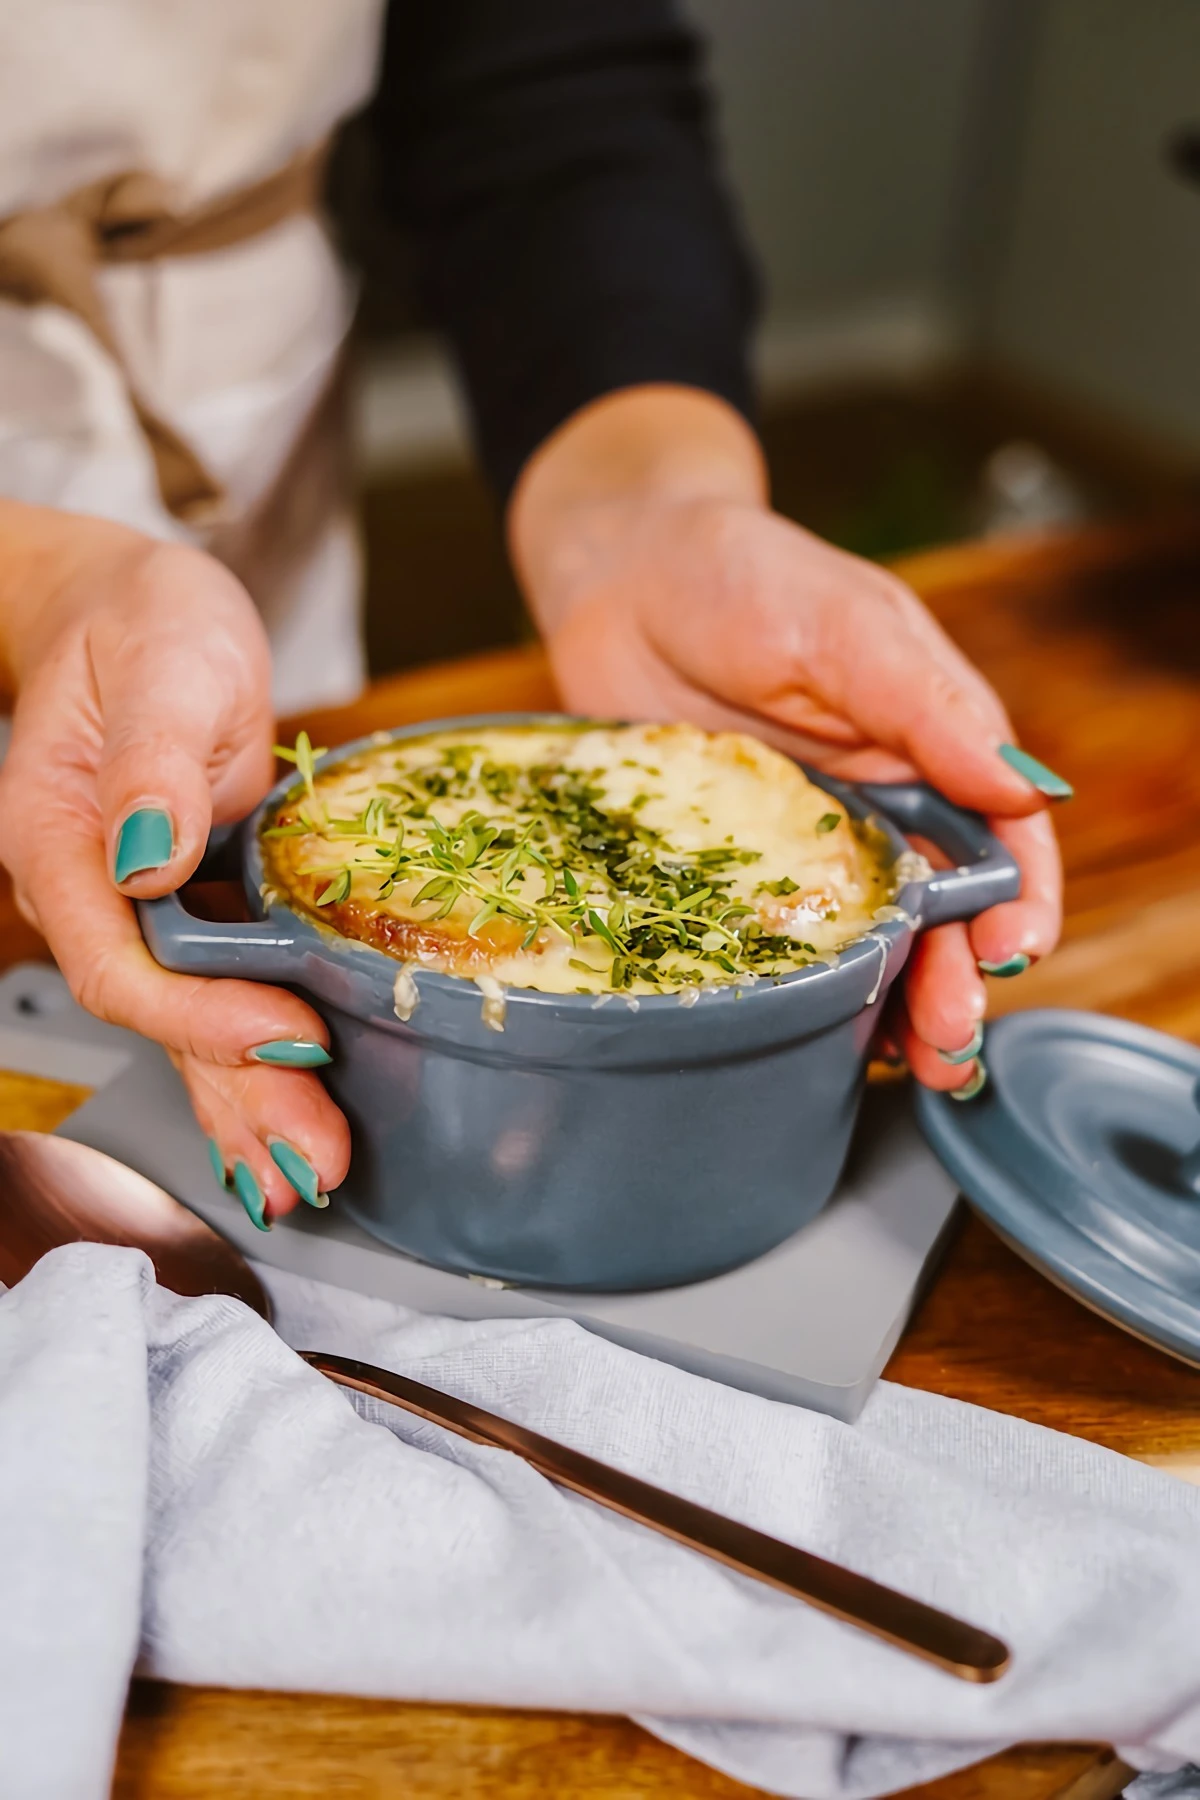
5. The Grand Finale: The Gratinée
Position an oven rack about 6 inches from the broiler and turn it on high. While it’s heating, toast your baguette slices until they’re completely dry and golden. Pro tip: rub a cut garlic clove over one side of the toast for an extra layer of flavor.
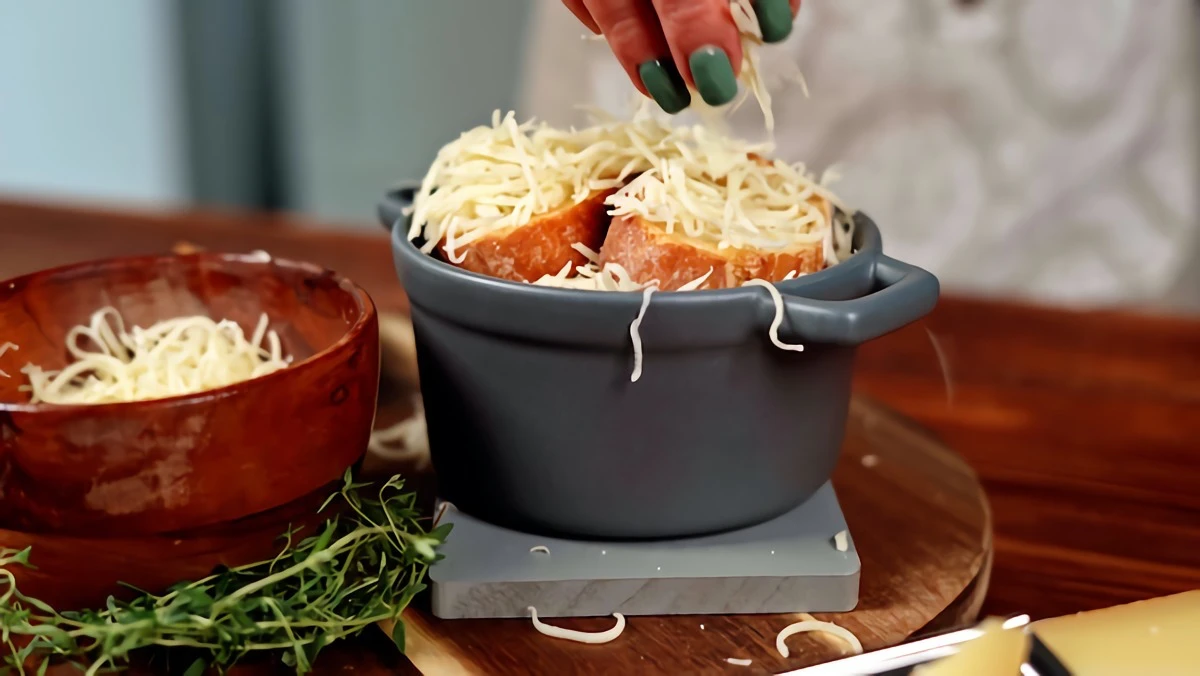
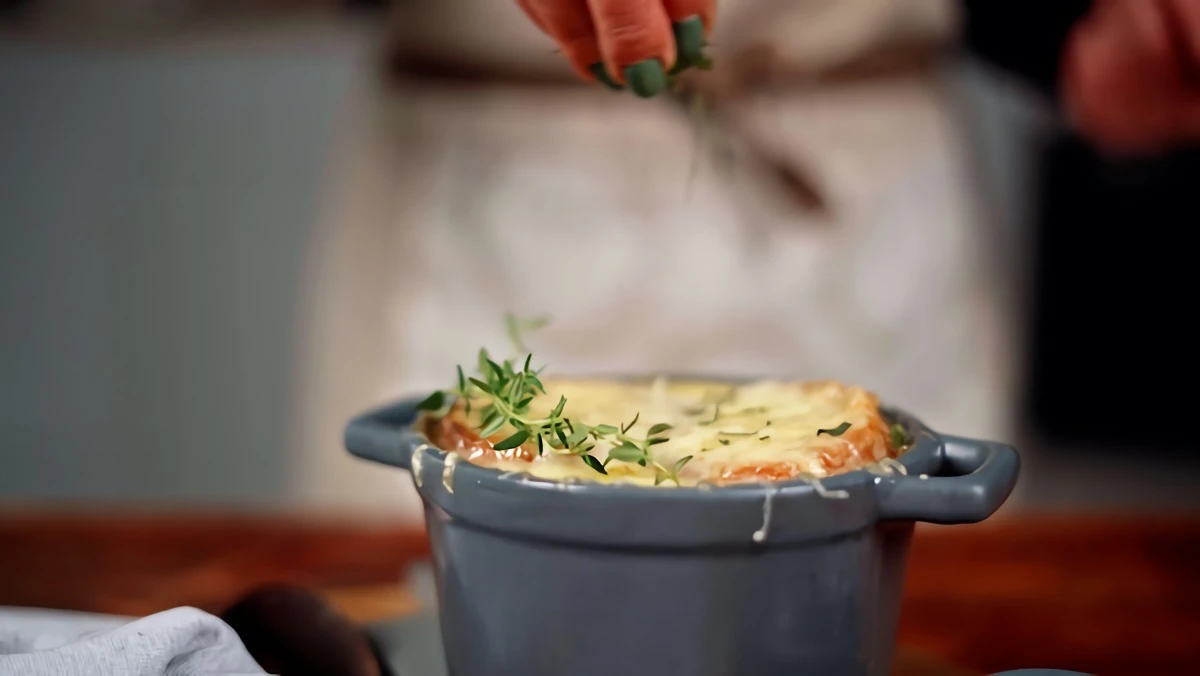
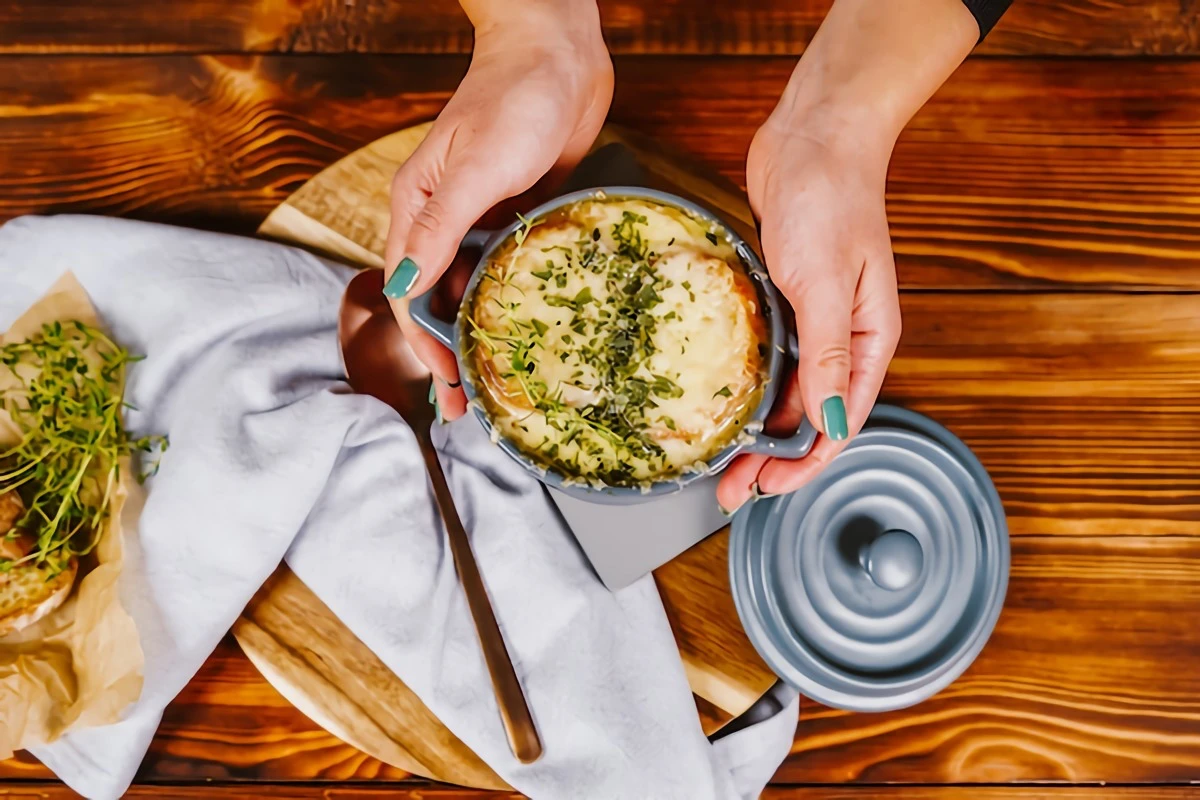
Ladle the hot soup into your oven-safe bowls, filling them about three-quarters of the way. Float one or two toasts on top and then generously pile on the grated Gruyère. Let it spill over the edges—those crispy, burnt-on-the-side cheese bits are the best part!
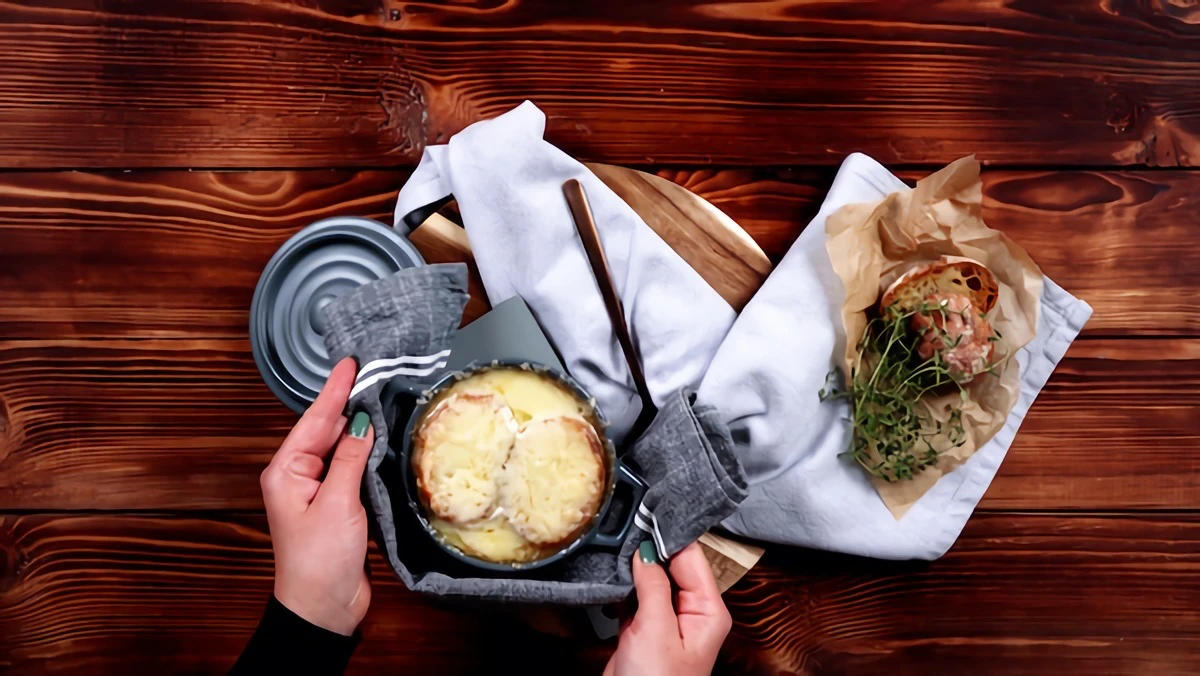
Carefully place the bowls on your baking sheet and slide them under the broiler. And I am not kidding: DO NOT WALK AWAY. The broiler is insanely fast. It will take 2-4 minutes for the cheese to melt, bubble, and turn golden brown. The second you see dark spots, pull it out. I once got distracted for literally 30 seconds and came back to a blackened, bitter mess. It’s heartbreaking. Let the bowls rest for at least 5 minutes before serving. They are dangerously hot.
Making It Ahead (and What to Do with Leftovers)
This soup is a fantastic make-ahead meal. The base soup, without the bread and cheese, actually tastes even better the next day. Just let it cool completely and store it in the fridge for up to 3 days. Reheat it gently on the stove, then you’re ready for the gratinée step.
By the way, if you happen to have a fully-topped leftover bowl, you can reheat it in a 350°F (175°C) oven for about 15-20 minutes. To be perfectly honest, the bread will be a little softer than it was on day one, but it’s still incredibly delicious. No one will complain.
Inspiration:
- Yellow Onions: The all-around winner. Their robust, slightly sulphurous flavor mellows into a deep, complex sweetness.
- Sweet Onions (like Vidalia): They caramelize faster due to higher sugar content but can sometimes result in a soup that’s a bit one-dimensionally sweet. Best used in a mix with yellow onions.
Legend attributes the soup’s modern form to the bustling Les Halles market in 19th-century Paris, where it was served to laborers and night-owls as a restorative, cheap, and fortifying meal.
Classic Gruyère: This is the go-to for a reason. An authentic Swiss Gruyère AOP offers a nutty, slightly sweet flavor and melts into a perfect, bubbly cap. Look for one aged at least 6 months.
Challenger Comté: A French cousin to Gruyère, Comté brings a more fruity and buttery profile. It creates an equally delicious, slightly more complex cheese topping. For the ultimate melt, a 50/50 mix of both is pure perfection.
What’s the best wine for deglazing?
You need a dry, crisp white wine to cut through the richness and lift the flavors with acidity. Think Sauvignon Blanc, Pinot Grigio, or an unoaked Chardonnay. A dry vermouth, like Noilly Prat, also works wonders. Avoid anything sweet; the onions have that covered.
Beyond the taste, making French onion soup is an act of sensory immersion. It’s the therapeutic rhythm of slicing onion after onion. It’s the soft sizzle that builds over an hour, and the rich, sweet perfume of caramelization that gradually fills every corner of your home, promising warmth and comfort long before the first spoonful is served.
The soul of the soup is the broth. While the onions provide the sweetness, a deep, rich beef broth provides the savory backbone. If you’re not making your own, invest in the best quality store-bought version you can find—look for low-sodium bone broths from brands like Kettle & Fire or Bonafide Provisions, which have a gelatinous body that creates a luxurious mouthfeel.
- A crisp, golden-brown surface.
- A chewy center that holds its structure in the hot broth.
- No mush, no disintegration, just pure textural delight.
The secret? Use day-old, sturdy bread. A fresh, soft baguette will dissolve instantly. Slices from a day-old rustic loaf or a crusty sourdough have lost enough moisture to toast beautifully and stand up to the soup.
Even the most patient chef can stumble. Three common pitfalls can compromise your final soup:
- Under-Caramelized Onions: Light tan is not enough. You’re looking for a deep, uniform mahogany brown. If they aren’t deeply colored, your soup will lack a profound, sweet depth.
- Forgetting the ‘Fond’: After deglazing, don’t forget to scrape up every last browned bit from the bottom of the pot. That’s concentrated flavor you can’t afford to lose.
- Skipping the Broil: Simply melting the cheese is a missed opportunity. Placing the crocks under a hot broiler is essential for that iconic browned, bubbly, and irresistibly crusty top layer known as the ‘gratinée’.
Onions are about 90% water. The process of caramelization is largely about slowly evaporating that water to concentrate the sugars.
This is why a wide, heavy-bottomed pot like a Le Creuset or Staub Dutch oven is ideal. The large surface area helps moisture evaporate efficiently, encouraging browning rather than steaming. Don’t crowd the pan!

The right vessel makes all the difference. For cooking, a 5 to 7-quart enameled cast-iron Dutch oven provides the even, sustained heat necessary for perfect caramelization. For serving, oven-safe porcelain crocks are non-negotiable. The classic lion’s-head bowls are not just for show; their thick walls keep the soup piping hot under the broiler and on the way to the table.
Just before serving, a final splash of spirits can elevate your soup from great to sublime. A tablespoon of good quality Cognac or Armagnac adds a layer of warmth and fruity depth that beautifully complements the beef broth. Alternatively, a dry Sherry can introduce a fascinating nutty note. It’s the final, sophisticated touch that deepens the entire flavor profile.
Have leftovers? For the best result, store the soup base separately from the cheese croutons. Reheat the soup on the stovetop, then pour it into a fresh oven-safe bowl, top with a new slice of bread and cheese, and run it under the broiler. This completely revives the dish, giving you that fresh-from-the-oven experience all over again.


