Tired of Soggy Squash? Here’s How to Cook It Right.
Let’s be honest, we need to talk about summer squash. For years, I wrestled with it. Zucchini, yellow squash… they were the vegetables that always seemed to promise so much but would often end up a watery, bland mess on the plate. My first attempts at a simple sauté were, frankly, just sad piles of mush.
In this article
- Why Your Squash Gets Watery (and How to Stop It)
- Picking the Best Squash: Your First Step to Success
- Your Go-To Cooking Methods: From Pan to Grill
- The Big Questions: Giant Zucchini & Freezing
- Leveling Up: Foolproof Gratins & Stuffed Squash
- For the Adventurous: Don’t Forget the Blossoms
- Two Recipes to Get You Started
- Final Touches & Flavor Ideas
- Inspirational Gallery
But here’s the secret I learned over two decades of cooking: its main weakness—all that water—is also its greatest strength. You just have to know how to work with it.
Cooking summer squash isn’t hard, but it’s incredibly easy to do poorly. The difference between a vibrant, flavorful side dish and a soggy disappointment comes down to a few key ideas. It’s all about controlling water, using the right amount of heat, and knowing when to pull it off the stove. This isn’t about some fancy recipe you’ll make once; it’s about giving you the skills to nail it every single time.
Why Your Squash Gets Watery (and How to Stop It)
Before you even chop anything, let’s get into what makes this vegetable tick. Summer squash—like zucchini, yellow crookneck, and those cute little pattypan varieties—is about 95% water. That’s the most important thing to remember. Think of it like a bundle of tiny water balloons held together by delicate walls. When you add heat, those walls break down and release all that water right into your pan.
This is exactly why cooking it low-and-slow is usually a disaster. The heat isn’t high enough to make the water evaporate, so the squash just ends up steaming in its own liquid. Overcooking is the final nail in the coffin, turning firm pieces into a soft, unappealing pulp.
Oh yeah, and salt plays a huge role here. Salt is a master at pulling water out of vegetables. If you salt your squash at the very beginning of a sauté, you’re basically creating a puddle in your pan on purpose. But you can use this to your advantage! A classic pro trick is to “sweat” the squash. By tossing shredded or thinly sliced squash with a bit of salt and letting it sit in a colander for 20-30 minutes, you can drain off a shocking amount of water before you even start cooking. This is a non-negotiable step for things like gratins or casseroles.
Picking the Best Squash: Your First Step to Success
You can’t make gold from lead, and you can’t make a great dish from a sad, limp squash. Freshness is everything. When I’m at the farmer’s market, I have a little checklist I run through.
Here’s what to look for:
- Go Small or Go Home: Smaller is almost always better. A zucchini or yellow squash that’s about 6-8 inches long will have fewer seeds, more flavor, and a much better texture. Those giant, baseball-bat-sized ones might seem like a bargain at $0.99/lb, but they’re mostly water and blandness. The smaller ones might be closer to $1.99/lb, and trust me, they’re worth it.
- Give It a Squeeze: It should feel surprisingly heavy and very firm. Any soft or mushy spots are a red flag that it’s old and starting to break down.
- Check the Skin: The skin should be smooth and a little glossy. Avoid anything with deep nicks, bruises, or wrinkly patches. A deep, rich green for zucchini and a bright, sunny yellow for yellow squash are what you want.
Once you get it home, store it unwashed in a plastic bag (bonus points if it has a few holes) in your fridge’s crisper drawer. It should hold up well for about 5 to 7 days. When you’re ready to use it, just give it a quick rinse under cool water and pat it completely dry before cutting. Don’t try to save a slimy squash—send it to the compost bin. The end result just won’t be worth it.
Your Go-To Cooking Methods: From Pan to Grill
Okay, you’ve got great squash. Now for the fun part. Mastering just a few core methods will let you cook squash perfectly for almost any meal.
1. Sautéing and Searing (The Quick Win)
If you need a delicious side dish in under 15 minutes, this is your move. The goal is a beautiful golden-brown sear on the outside while the inside stays tender-crisp.
Heads up! The two biggest mistakes are using a pan that isn’t hot enough and crowding it. Get a heavy pan (cast iron is perfect) screaming hot, then add your fat. I like olive oil, but clarified butter, ghee, or any high-heat oil like avocado or grapeseed works great. Let the oil get hot until it shimmers. Add your squash in a single layer with space between the pieces. If you have a lot, cook in batches! Let it sit for 2-3 minutes without touching it to get that deep brown color, then flip and sear the other side. And remember: salt it at the end of cooking, right before you take it out of the pan.

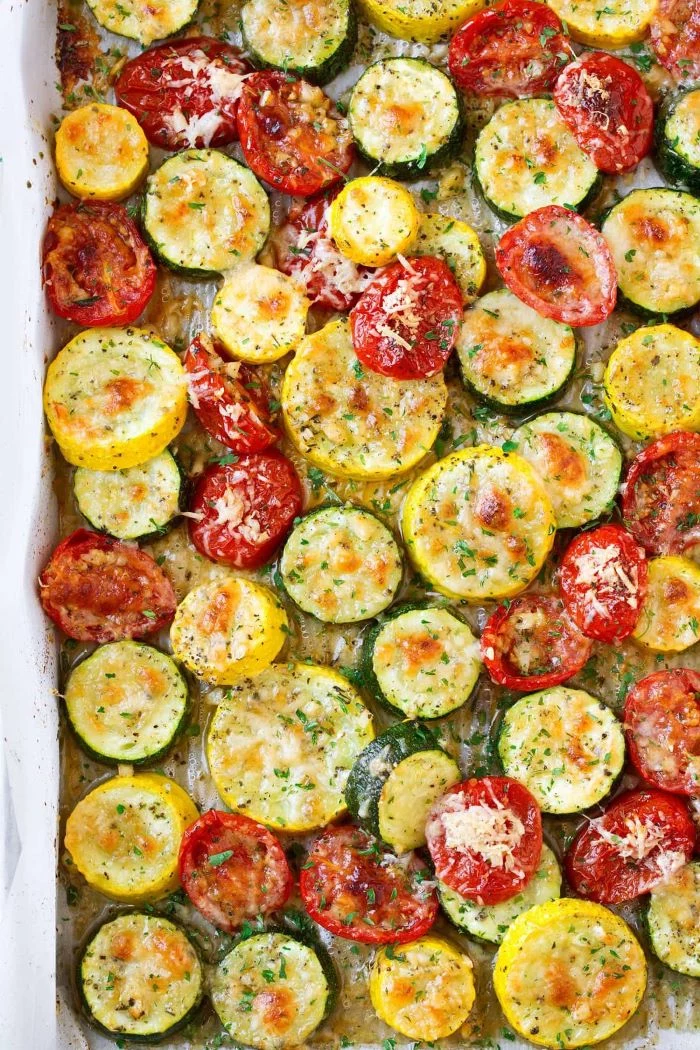
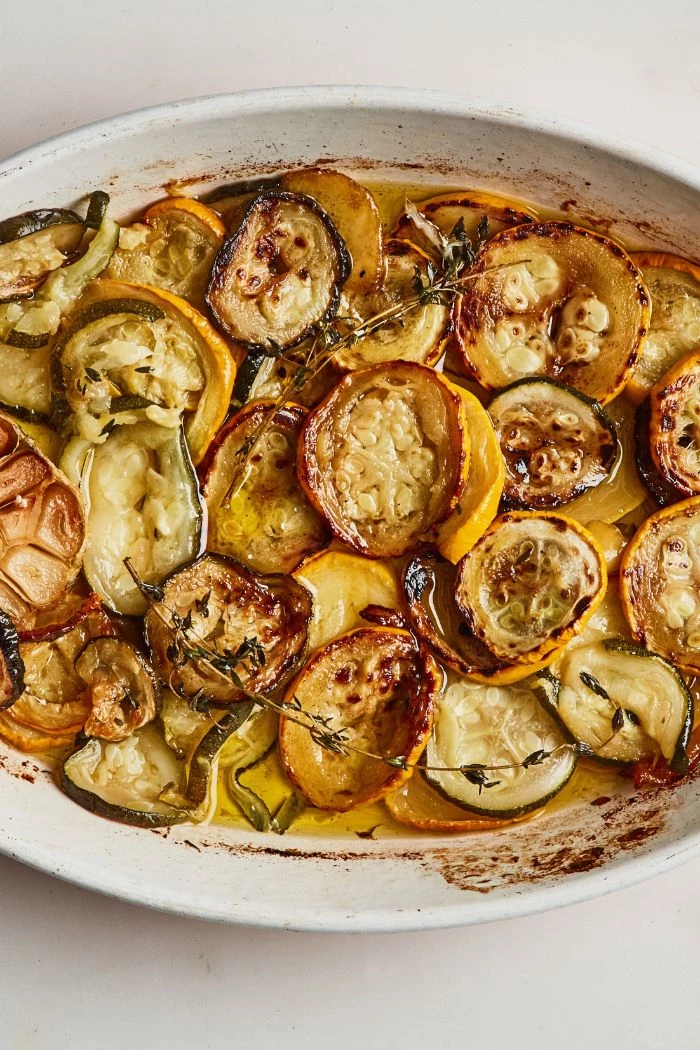
2. Roasting (The Hands-Off Hero)
Roasting is more forgiving and brings out the natural sweetness of squash. The trick is, again, high heat. Crank your oven to 400°F, or even 425°F. Anything lower will just sort of bake it into softness. Cut your squash into uniform 1-inch chunks, toss them with a good glug of olive oil and seasonings, and spread them in a single layer on a baking sheet. Roast for 20-30 minutes, flipping halfway, until the edges are caramelized and delicious.
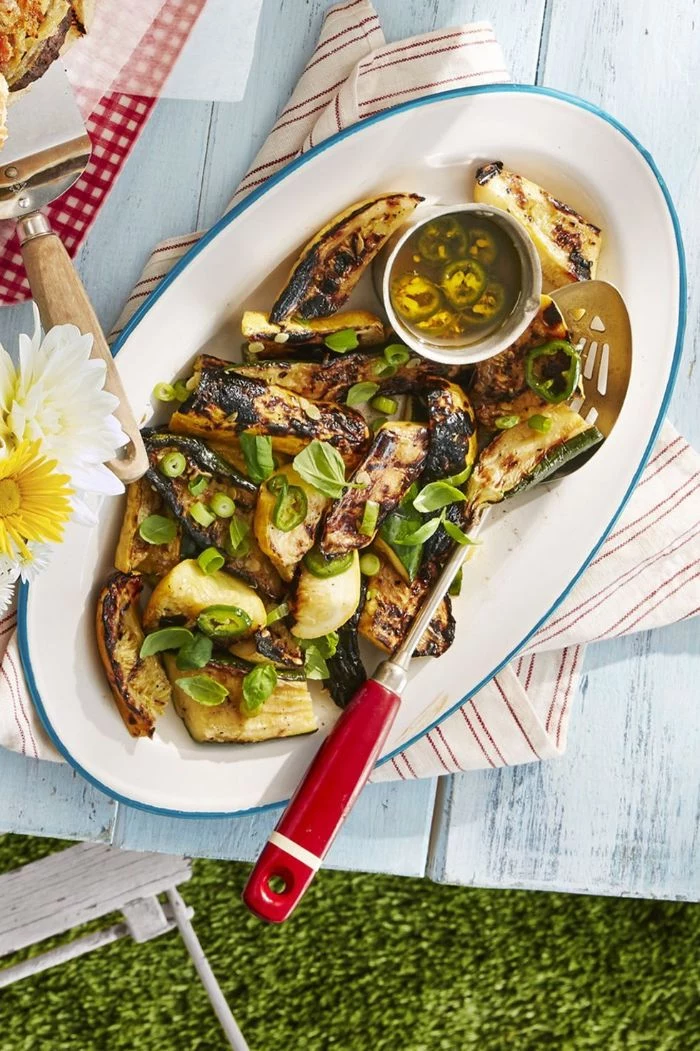
3. Grilling (For Smoky Summer Flavor)
Nothing beats the smoky char from a grill. The key here is cutting the squash so it won’t fall through the grates. I like to cut it into long, thick planks about a half-inch thick. Brush both sides generously with oil and season them. Get your grill nice and hot and place the planks directly over the heat for 3-4 minutes per side. You want clear grill marks and a tender-crisp bite. Don’t walk away—it goes from perfect to burnt in a flash.
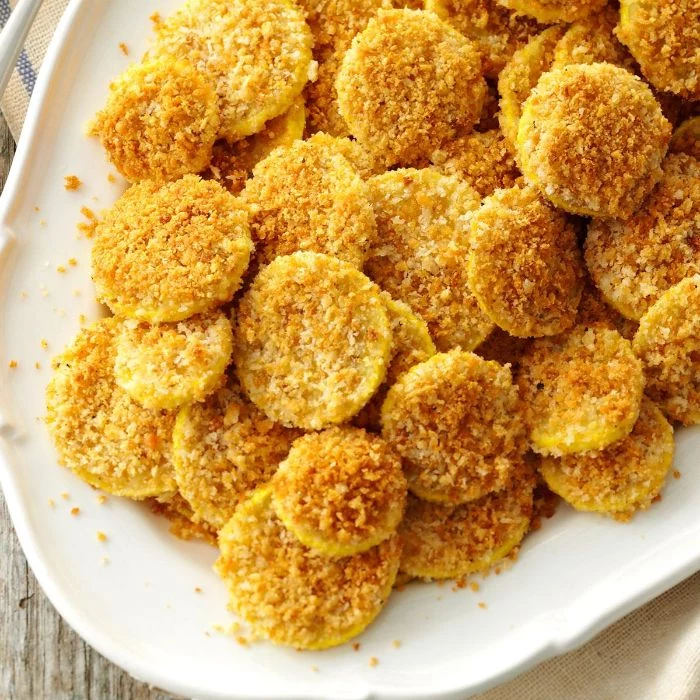
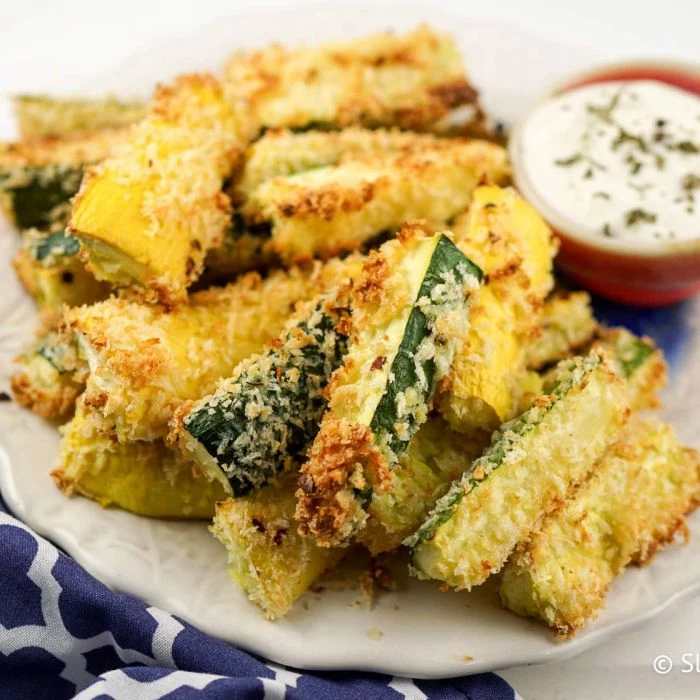
4. The Air Fryer Method (The Modern Favorite)
Of course, the air fryer works wonders here! It gives you a result that’s somewhere between roasting and deep-frying, with crispy edges and a tender inside. Just chop your squash into 1-inch pieces, toss with a little oil and your favorite spices, and cook at 400°F (200°C) for about 12-15 minutes. Make sure to give the basket a good shake halfway through for even cooking.
So, which one should you choose? Sautéing is your fastest option, perfect for a weeknight. Roasting is the best choice for hands-off cooking that develops a deep, sweet flavor. Grilling is all about that classic, smoky char. And the air fryer is your ticket to a quick, crispy side with minimal oil.
The Big Questions: Giant Zucchini & Freezing
Every gardener and farmers’ market shopper eventually faces two problems: what to do with a monstrous zucchini and how to preserve a bumper crop. I’ve got you.
Help! My Zucchini is a Monster!
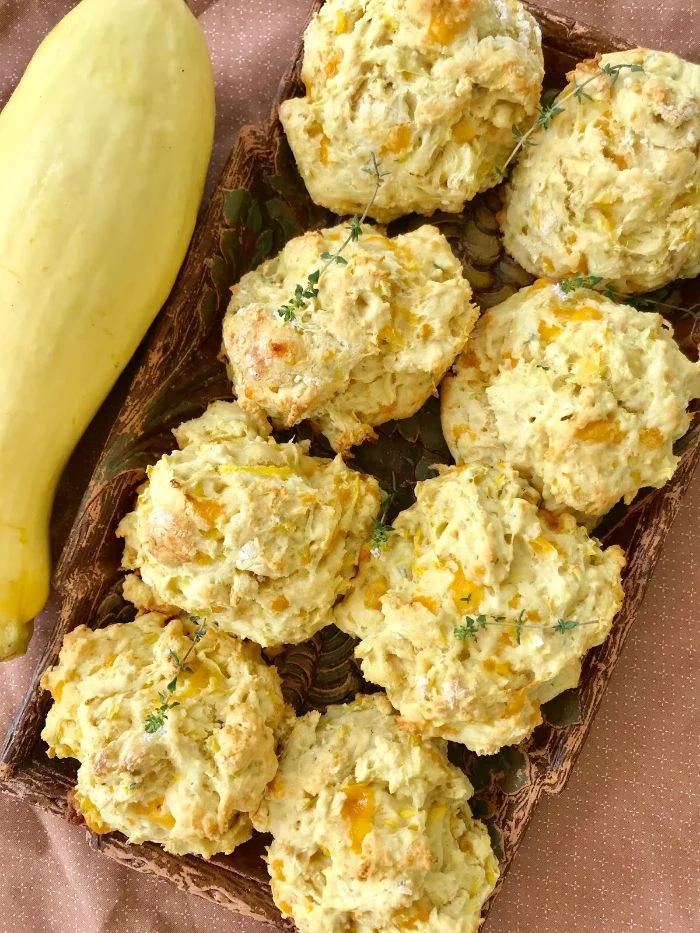
First, don’t try to sauté or grill these giants. The flavor is diluted and the texture is extra watery and often spongy. You’ll just be disappointed. Instead, these oversized squash are destined for other things. Their best use is as a filler or base. Grate them up and squeeze out the water to use in zucchini bread, muffins, savory fritters, or to bulk up soups and pasta sauces. They’re great for adding moisture and nutrients, just not for being the star of the show.
Can I Freeze This Stuff?
Yes, absolutely! Freezing is a great way to save that summer goodness for a winter soup. The best method is to shred it. Don’t bother with blanching. Just shred it, put it in a colander, and squeeze out as much water as you possibly can. Seriously, be ruthless. Then, pack the drained shreds into freezer bags in handy one or two-cup portions. When you thaw it, the texture will be very soft, so it’s not for a fresh sauté. But it’s perfect for stirring directly into chilis, stews, casseroles, and spaghetti sauce.

Leveling Up: Foolproof Gratins & Stuffed Squash
Ready to get a little fancier? These dishes are classics for a reason.
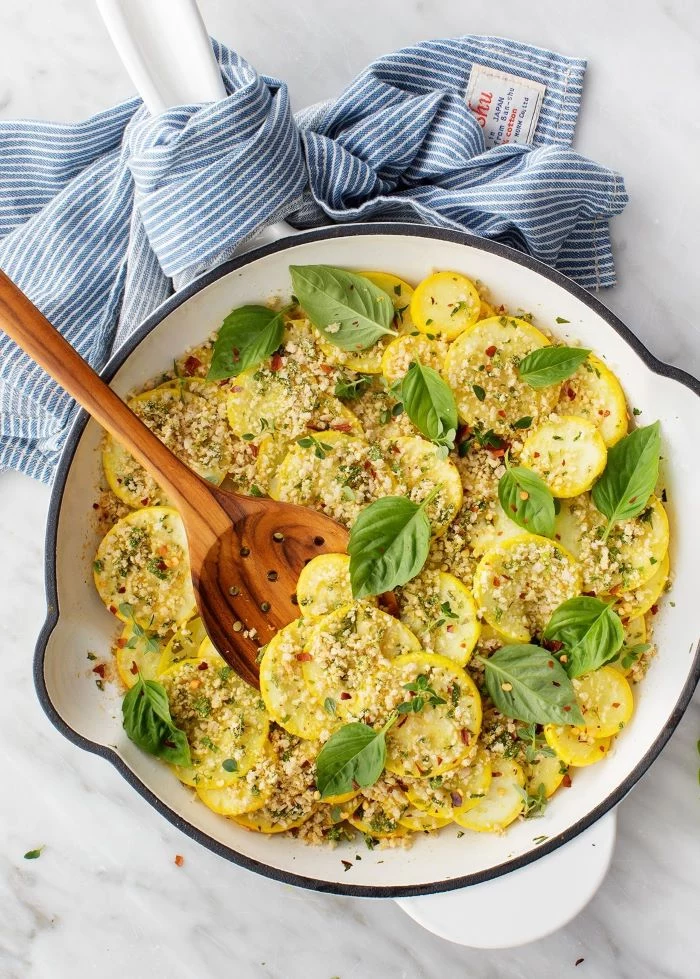
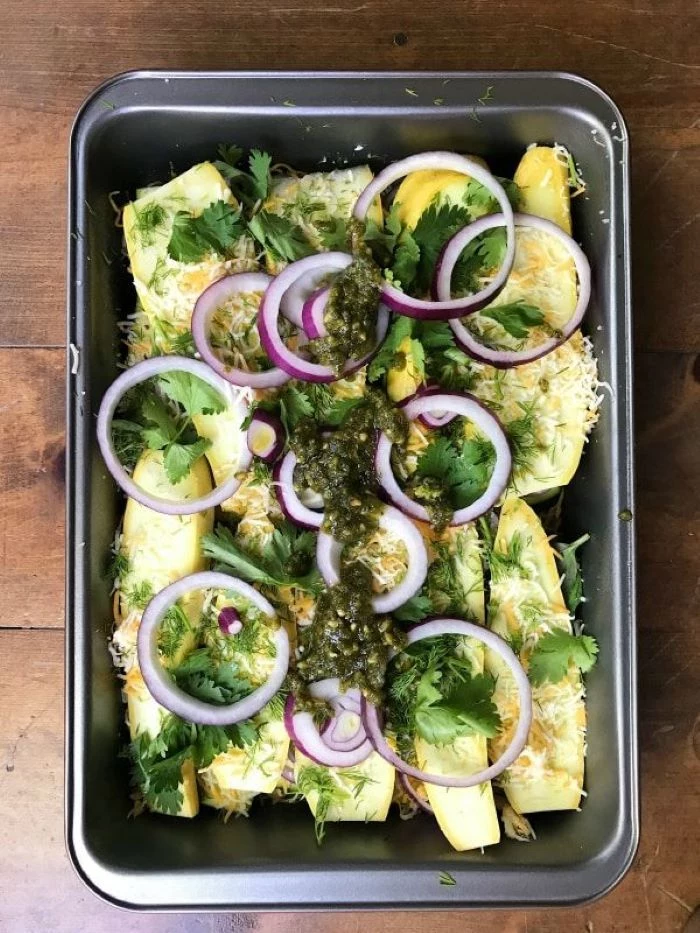
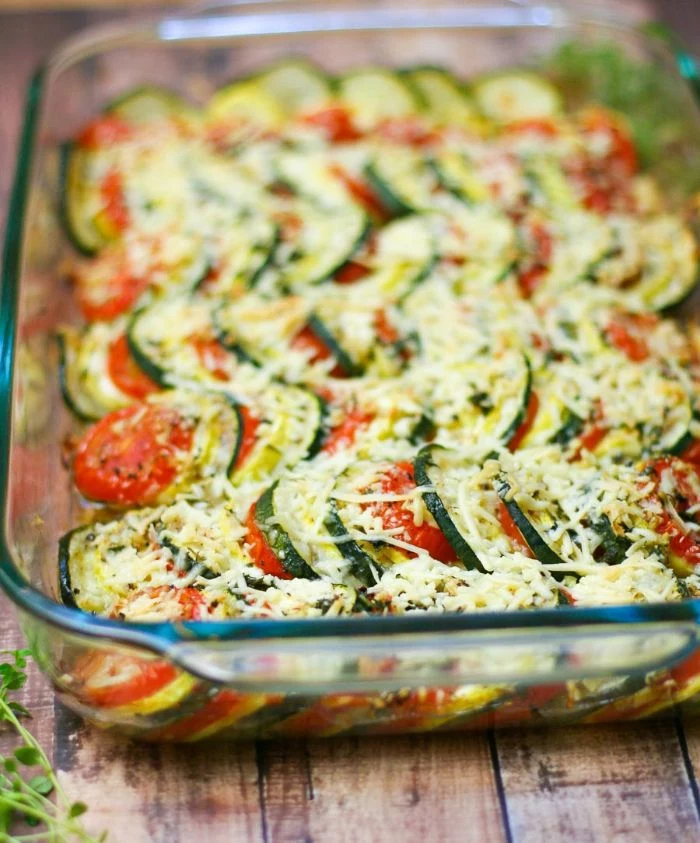
For a perfect, creamy squash gratin that isn’t a swimming pool, you MUST sweat the squash first (the salting-in-a-colander trick). After you drain and squeeze it, mix it with your creamy elements. For the filling, a good binder like breadcrumbs or a bit of flour helps absorb any extra liquid. Gruyère cheese is classic for its nutty flavor, but honestly, a good sharp cheddar works beautifully and is usually cheaper.
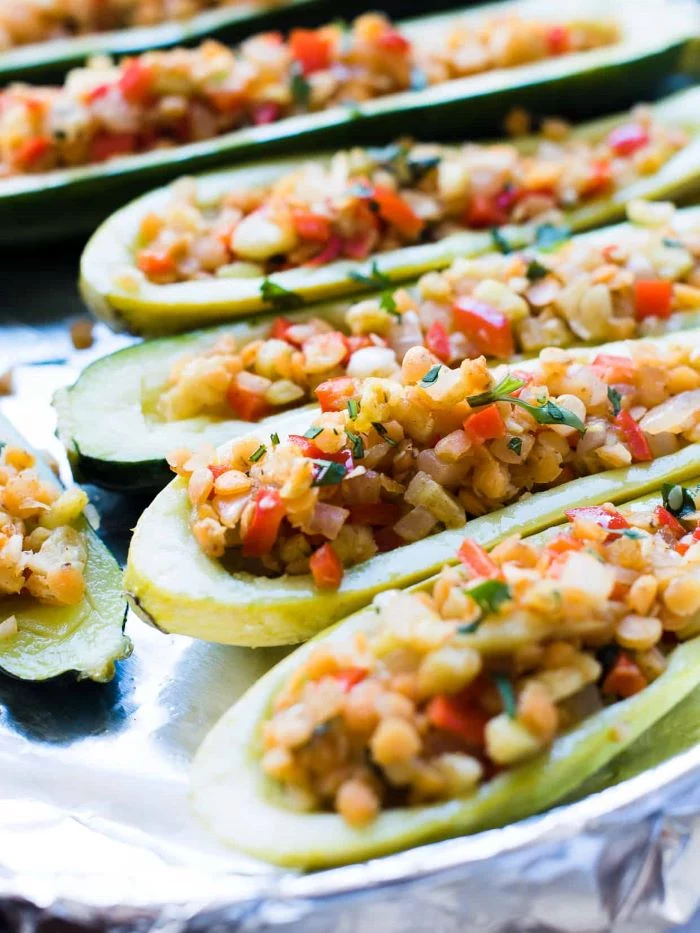
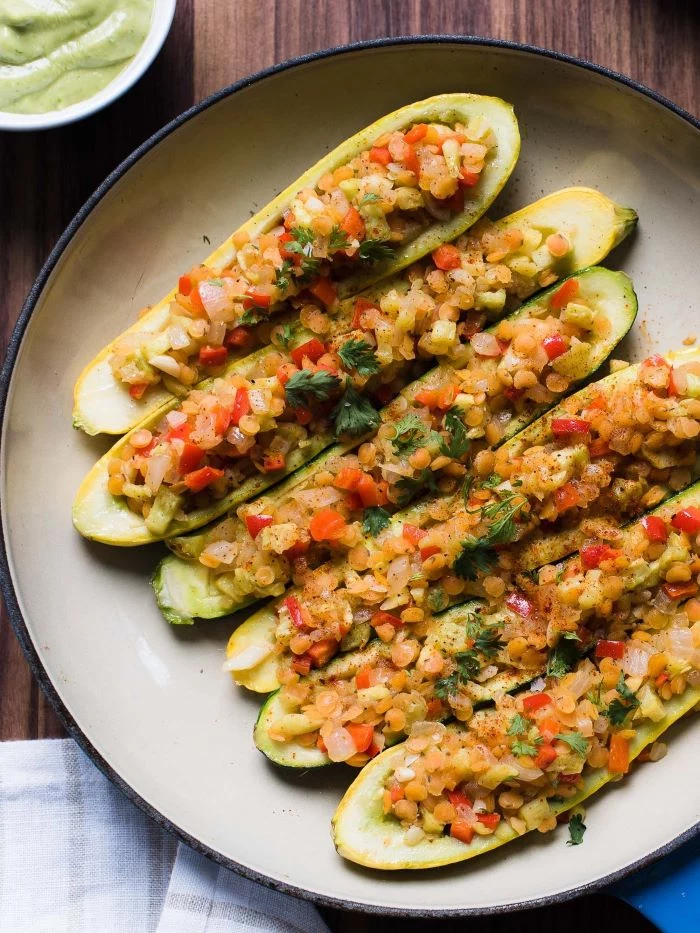
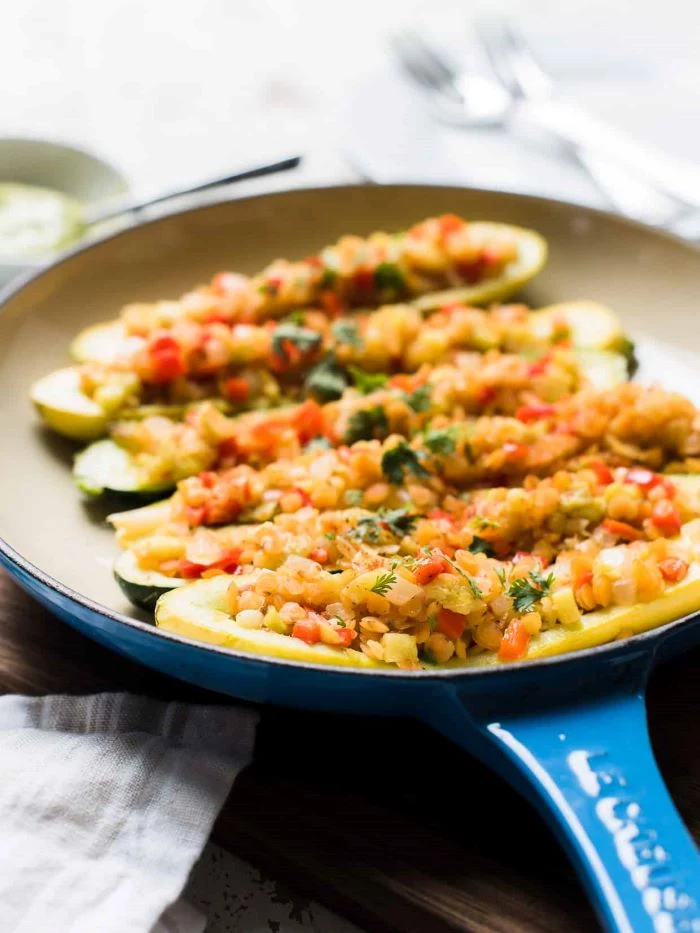
Stuffed squash is another winner. The pro move is to pre-bake the squash shells. Just cut the squash in half, scoop out the insides, brush with oil, and bake them for 10-15 minutes. This gives them a head start and firms them up. A quick tip: if you use the scooped-out flesh in your filling, sauté it separately first to cook off its moisture before mixing it with your grains or meat.
For the Adventurous: Don’t Forget the Blossoms
If you can find them at a farmers’ market, squash blossoms are a real treat. They can be a bit pricey—sometimes $5-7 for a small container—but they have an incredible delicate flavor. The classic way to cook them is stuffed with a soft cheese like ricotta mixed with herbs, then lightly battered and fried until golden. You can also just chop them up and toss them onto a pizza for the last minute of baking.
Two Recipes to Get You Started
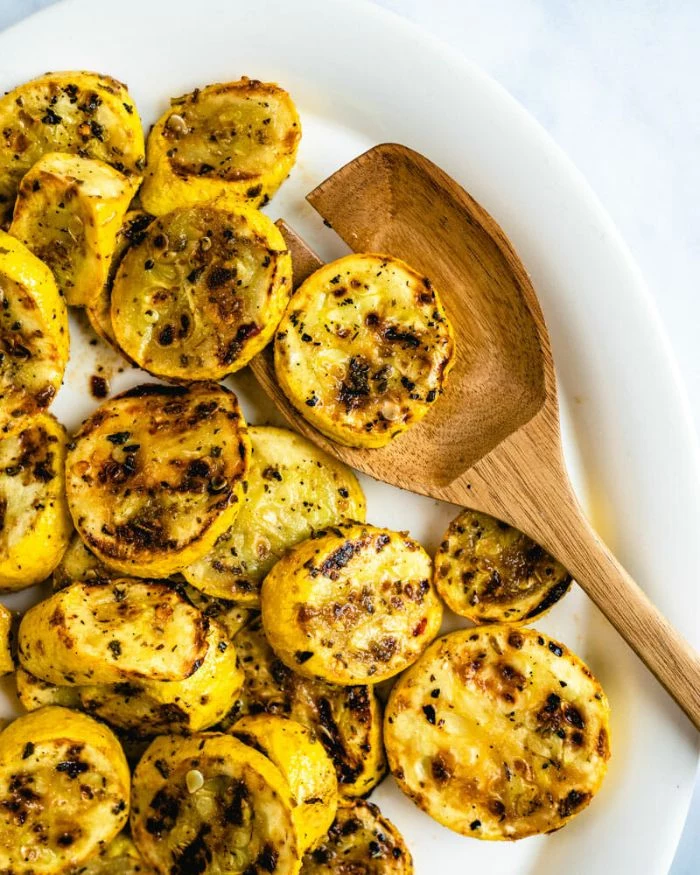
1. The Perfect 15-Minute Sautéed Squash
This is all about the searing technique. It’s my go-to side for just about anything.
- Total Time: About 15 minutes
- Serves: 4 as a side dish
- Goes Great With: Grilled chicken, pork chops, or a nice piece of fish.
- Ingredients: 2 medium summer squash, 2 tbsp olive oil, 2 cloves garlic (thinly sliced), 1 tbsp fresh parsley (chopped), salt, and black pepper.
- Instructions: Cut the squash into 1/2-inch thick rounds. Heat the oil in a large skillet over medium-high heat. Place the squash in a single layer and cook for 2-3 minutes without moving, until deep golden brown. Flip and cook for another 2 minutes. In the last 30 seconds, toss in the garlic. Remove from heat, season with salt and pepper, and top with fresh parsley.
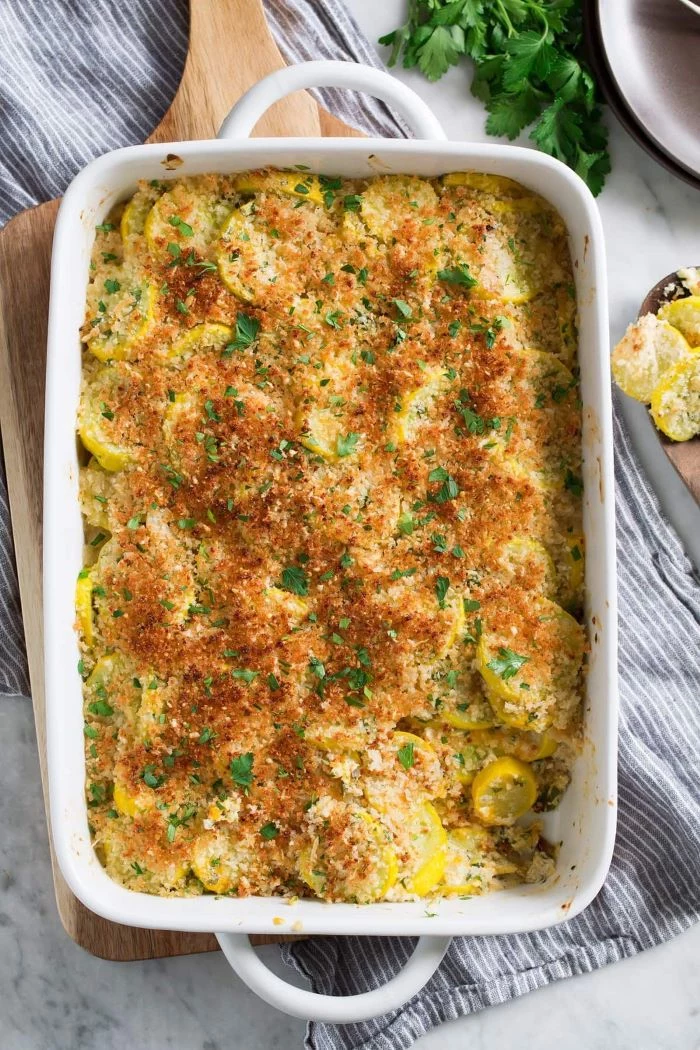
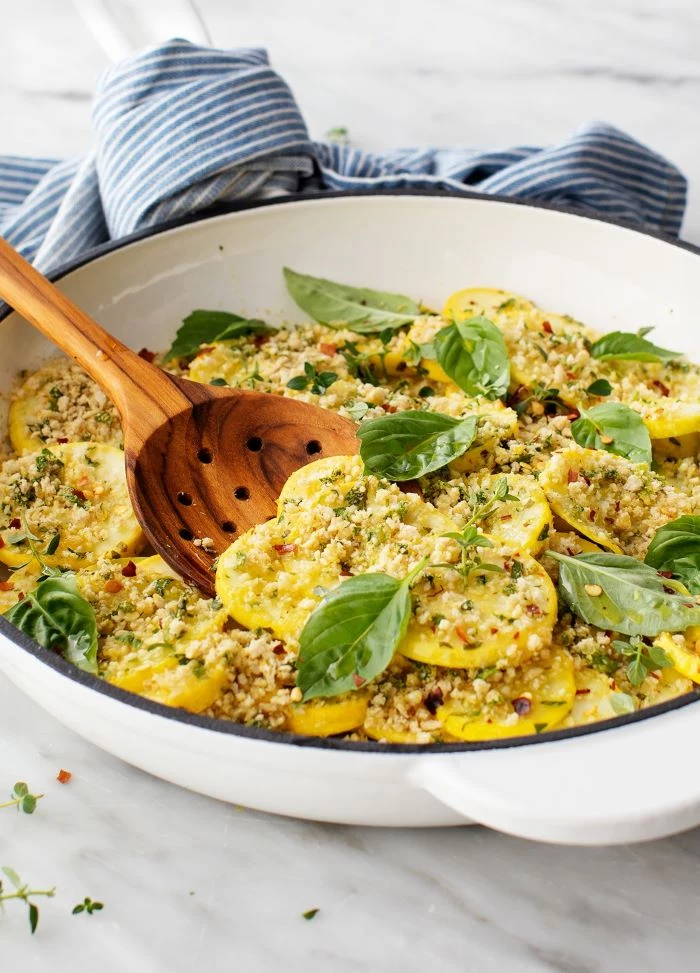
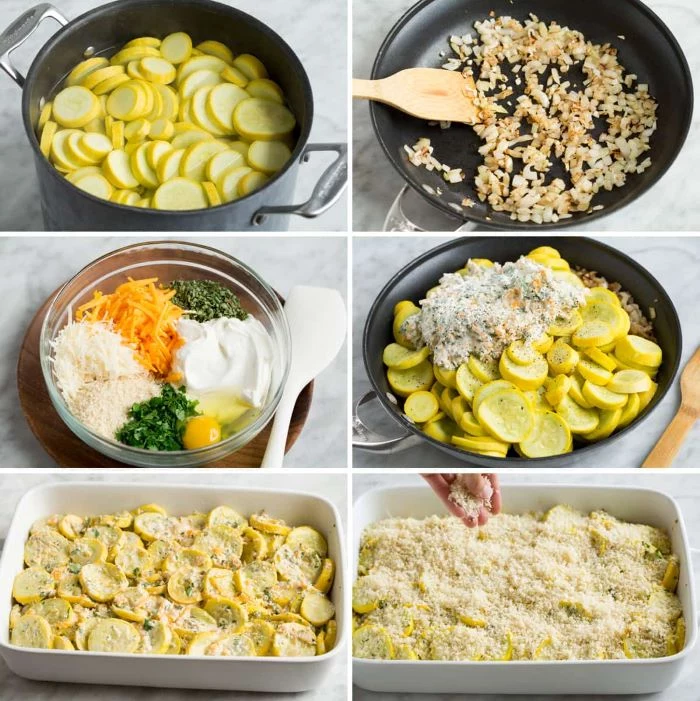
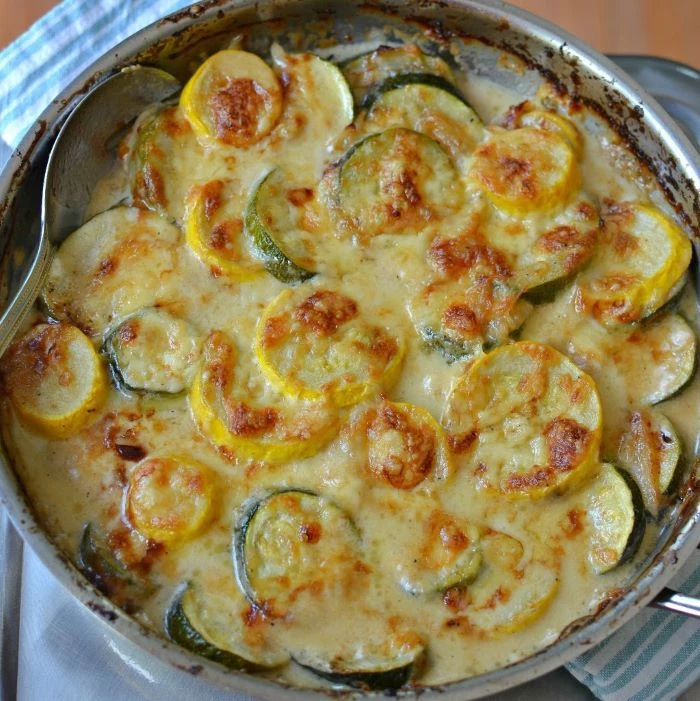
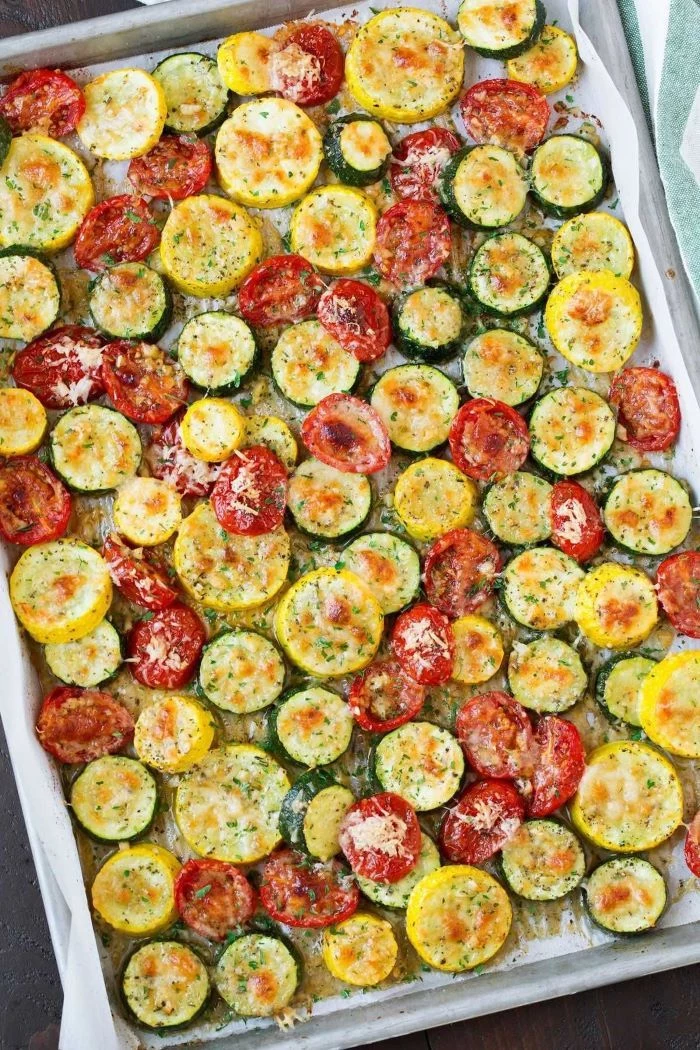
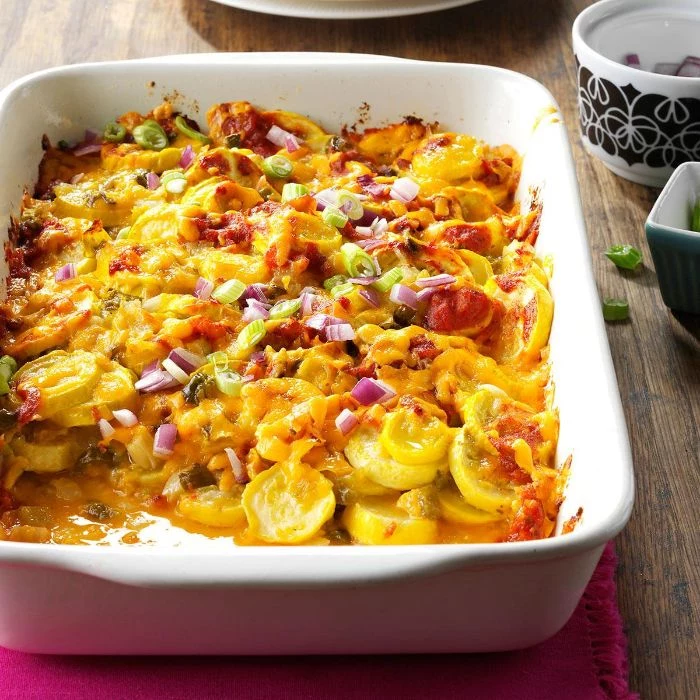
2. A Reliable Baked Squash Gratin
This uses the pre-salting method for a creamy, never-watery result.
- Total Time: Prep: 40 mins (includes salting time), Cook: 30 mins
- Serves: 6 as a side dish
- Goes Great With: Roasted meats or as a main dish at a potluck.
- Ingredients: 4 medium yellow squash (about 2 lbs), 1 tsp salt, 1 cup shredded Gruyère or sharp cheddar, 1/2 cup panko breadcrumbs, 2 tbsp melted butter, 1/2 cup heavy cream, 1 small onion (finely chopped).
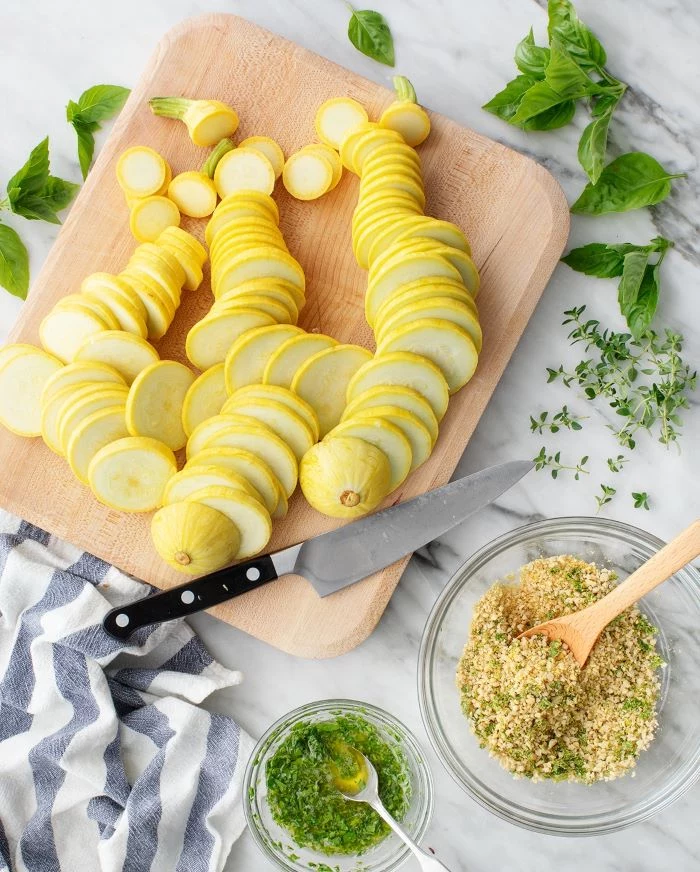
- Instructions: Preheat oven to 375°F (190°C). Slice squash 1/4-inch thick, toss with salt in a colander, and let sit for 30 minutes. Squeeze out the water. Sauté the onion until soft. In a bowl, combine the drained squash, onion, cream, and half the cheese. Transfer to a baking dish. Mix panko, butter, and remaining cheese, and sprinkle on top. Bake for 25-30 minutes until bubbly and golden.
Final Touches & Flavor Ideas
A quick safety note: if you’re using a mandoline for those paper-thin gratin slices, please, please use the hand guard. I’ve seen some nasty cuts from those things. Never use it when you’re rushed.
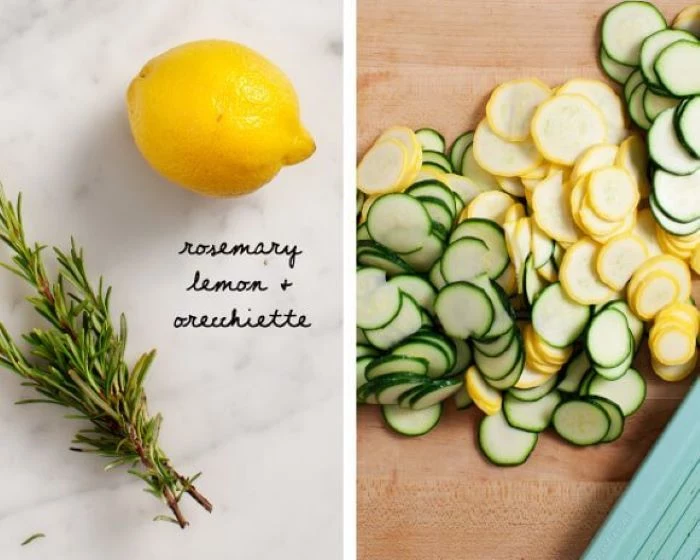
Finally, don’t be afraid to experiment with flavors! Beyond garlic, summer squash is a blank canvas. It loves fresh, grassy herbs like basil, mint, and oregano. For a little heat, a pinch of red pepper flakes is fantastic. And my all-time favorite trick? A big squeeze of fresh lemon juice right at the end of cooking. It wakes everything up and makes the flavors pop.
So go ahead. Approach that squash with confidence. A little heat and the right technique are all you need to turn it into something truly delicious.
Inspirational Gallery
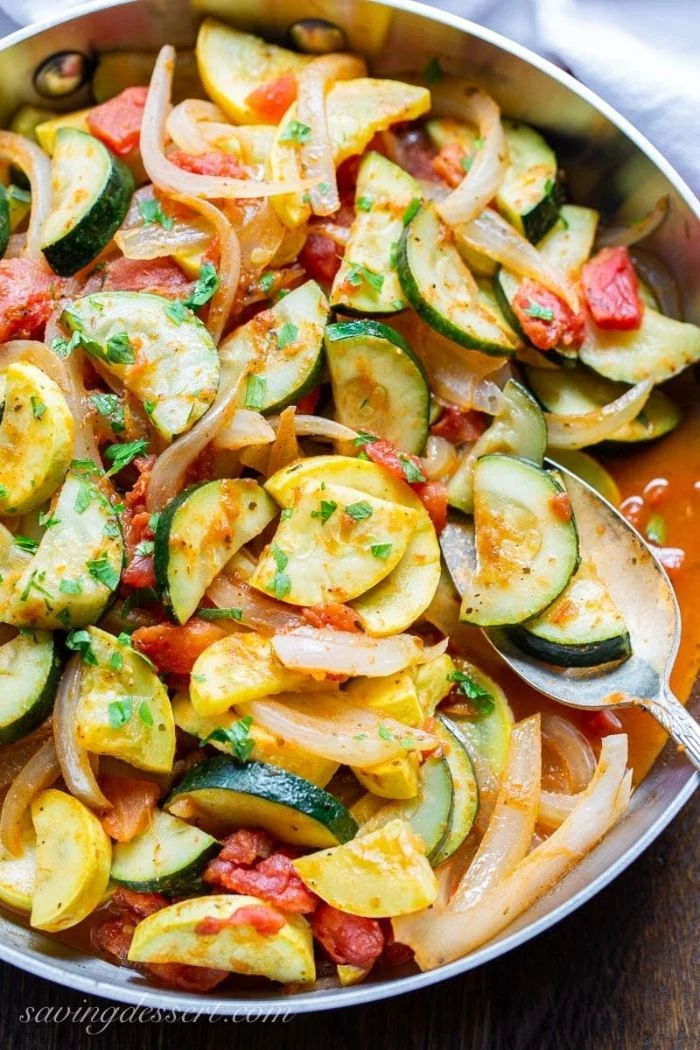
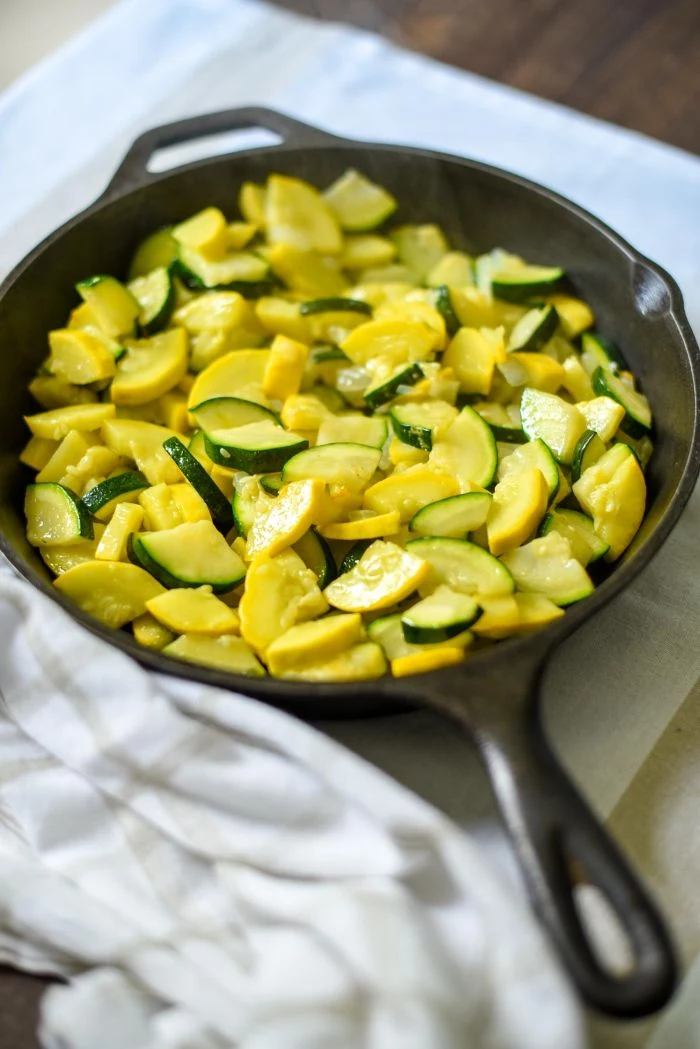
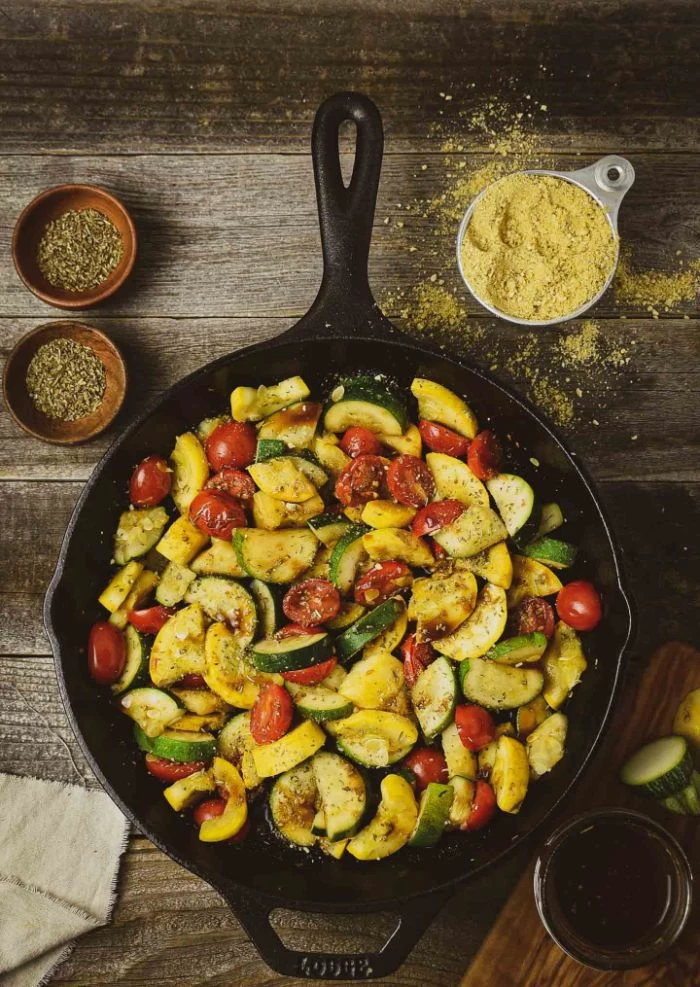
The single biggest mistake: Overcrowding the pan. Give your squash slices space to breathe! If they’re piled on top of each other, they’ll steam instead of searing, leading right back to that dreaded soggy texture. Cook in batches if you have to; the extra five minutes are worth it for that perfect golden-brown caramelization.

Summer squashes are technically fruits because they develop from the flower-producing part of a plant and contain seeds.


Can you really get squash crispy in an air fryer?
Absolutely, and it’s a game-changer. Toss 1-inch squash chunks with a tablespoon of olive oil and your favorite spices (smoked paprika is fantastic). Spread them in a single layer in the air fryer basket and cook at 400°F (200°C) for about 15-20 minutes, shaking halfway through. They come out beautifully browned and tender-crisp, not watery.
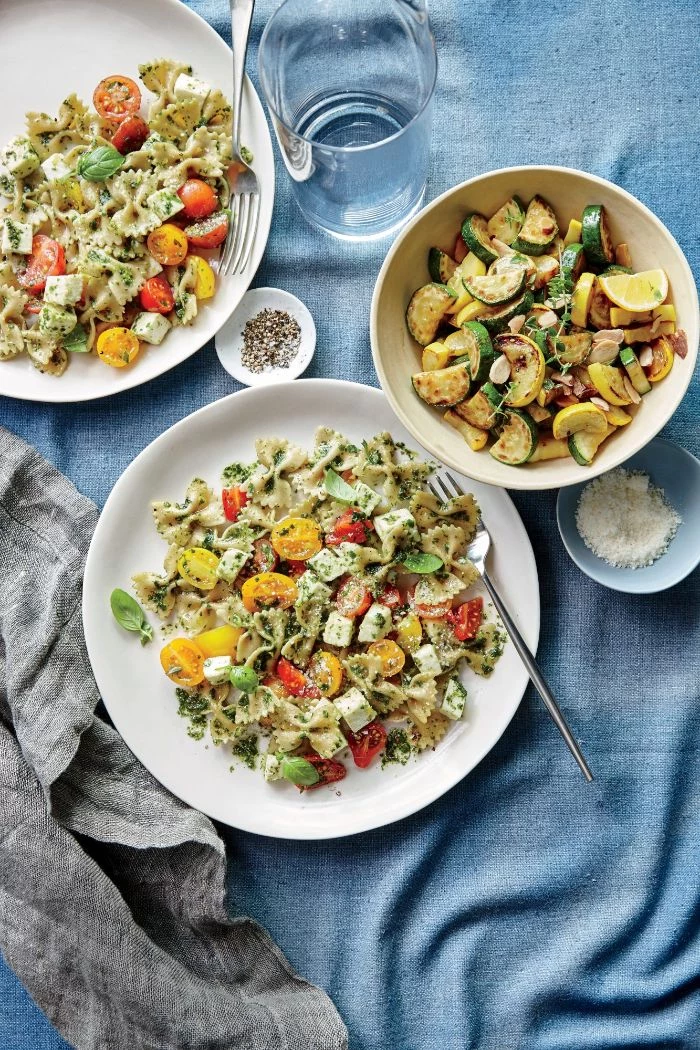
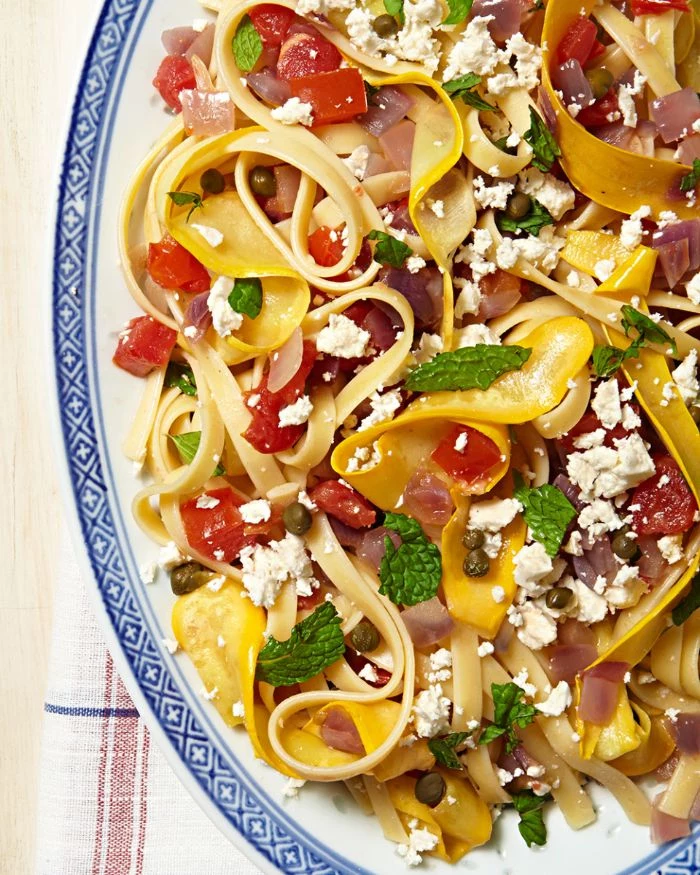
For a touch of elegance and a different texture, try making squash ribbons. It’s surprisingly easy and perfect for light salads or as a bed for grilled fish.
- Use a standard vegetable peeler or a Y-peeler.
- Hold the squash firmly and peel long, wide strips from top to bottom, rotating the squash as you go.
- Stop when you reach the seedy core.
- Toss the ribbons with lemon juice, quality olive oil, salt, and fresh mint.
Cast Iron Skillet: Delivers intense, even heat perfect for a hard sear that evaporates moisture quickly. A preheated Lodge skillet will give you those coveted dark, caramelized spots.
High-Quality Non-Stick: A great choice for beginners, as it’s more forgiving. You’ll still get good browning, but ensure the pan is very hot before adding the squash.
For maximum flavor, cast iron wins. For ease and cleanup, non-stick is a solid bet.
Don’t throw away the seedy core after making ribbons or zoodles! You can toss it into stocks, purée it into soups for a bit of body, or even chop it finely and mix it into meatballs or meatloaf for a hidden dose of vegetables and moisture.
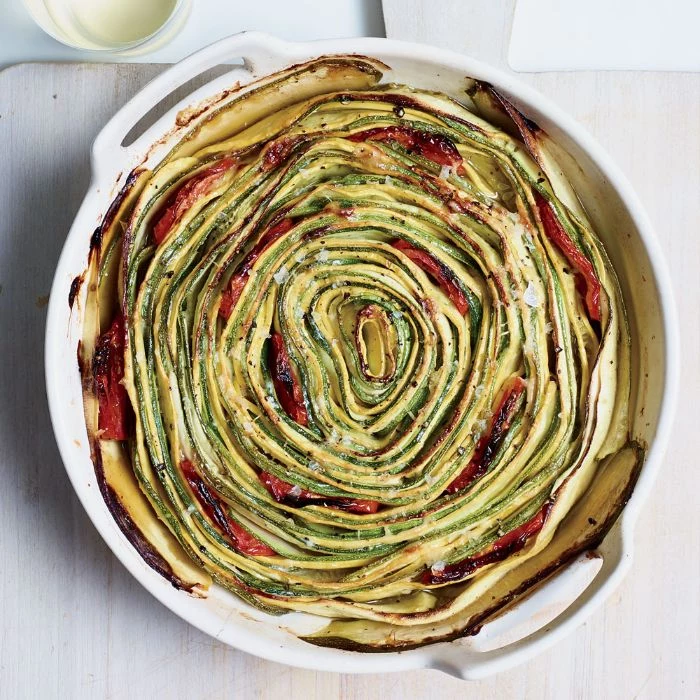
- Perfectly even slices every time.
- Drastically reduced cooking time.
- A professional, restaurant-quality look for your gratins.
The secret? A mandoline slicer. For paper-thin results perfect for casseroles, a Japanese mandoline like a Benriner is an invaluable kitchen tool. Just be sure to always use the safety guard.


Beyond basic salt and pepper, certain herbs are practically made for summer squash. They can elevate a simple sauté into something special.
- Fresh Mint: Adds a bright, cool contrast, especially with a squeeze of lemon.
- Dill: Its slightly anise-like flavor pairs beautifully, particularly with feta or yogurt.
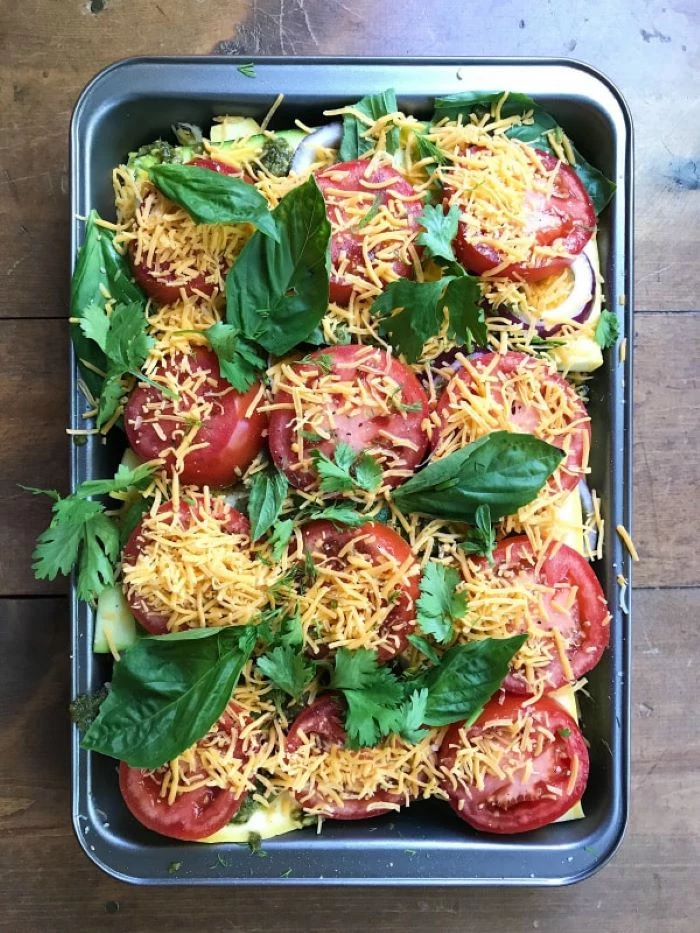
- Basil: The classic Italian choice, perfect for any tomato and squash combination.
According to the University of Illinois Extension, one zucchini plant can produce six to ten pounds of fruit during a single growing season.
This explains why gardeners are always trying to give it away! Learning to cook it well isn’t just a culinary skill; it’s a survival tactic for anyone with a green-thumbed friend or neighbor during the summer months.
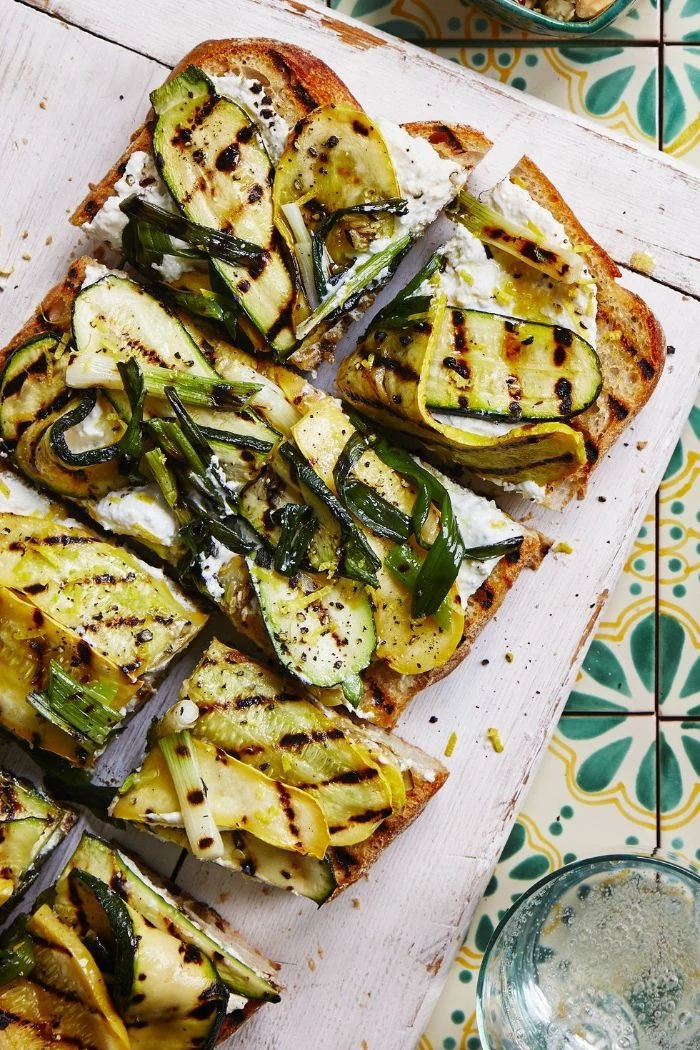
Take your grilling game beyond burgers. Thick planks or spears of zucchini and yellow squash are fantastic on the barbecue. Toss them in oil and seasoning, then grill over direct medium-high heat for 3-4 minutes per side, until you have distinct char marks and the center is just tender. A final squeeze of lime juice is all they need.
What about the squash blossoms? Are they edible?
They are not only edible but a delicacy! These vibrant orange flowers have a subtly sweet, squash-like flavor. The most popular way to prepare them is stuffed with herbed ricotta or another soft cheese, lightly battered, and quickly fried until golden. A true taste of an Italian summer.

Important: Don’t peel your summer squash! The skin is completely edible, full of nutrients, and helps the slices hold their shape during cooking. Just give them a good wash and you’re ready to go. Peeling is an unnecessary step that removes flavor and texture.
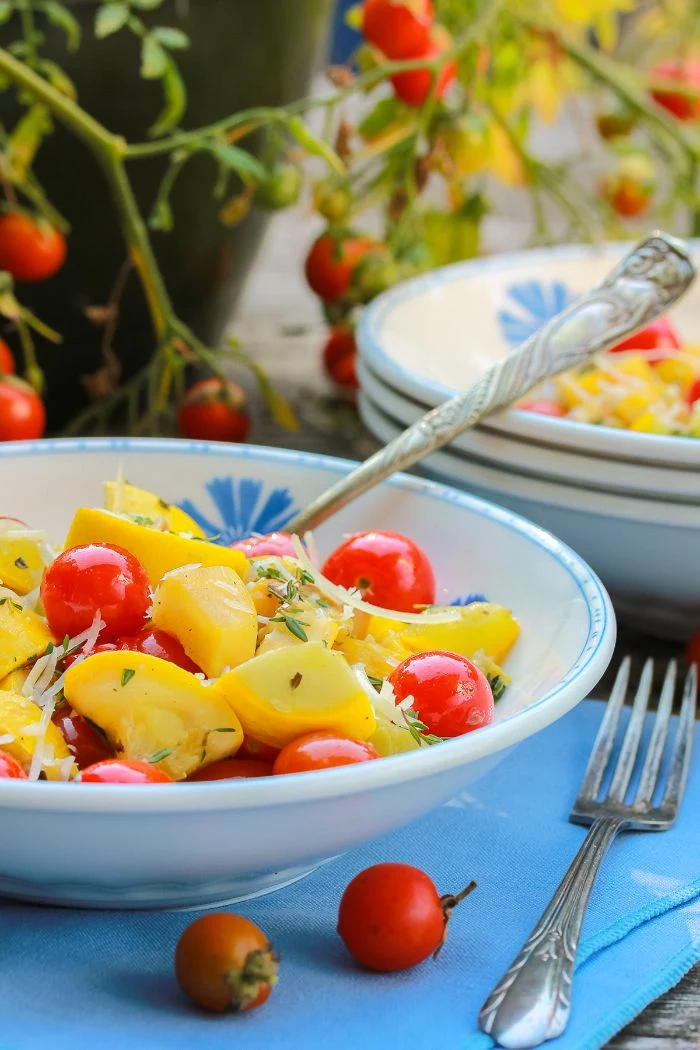
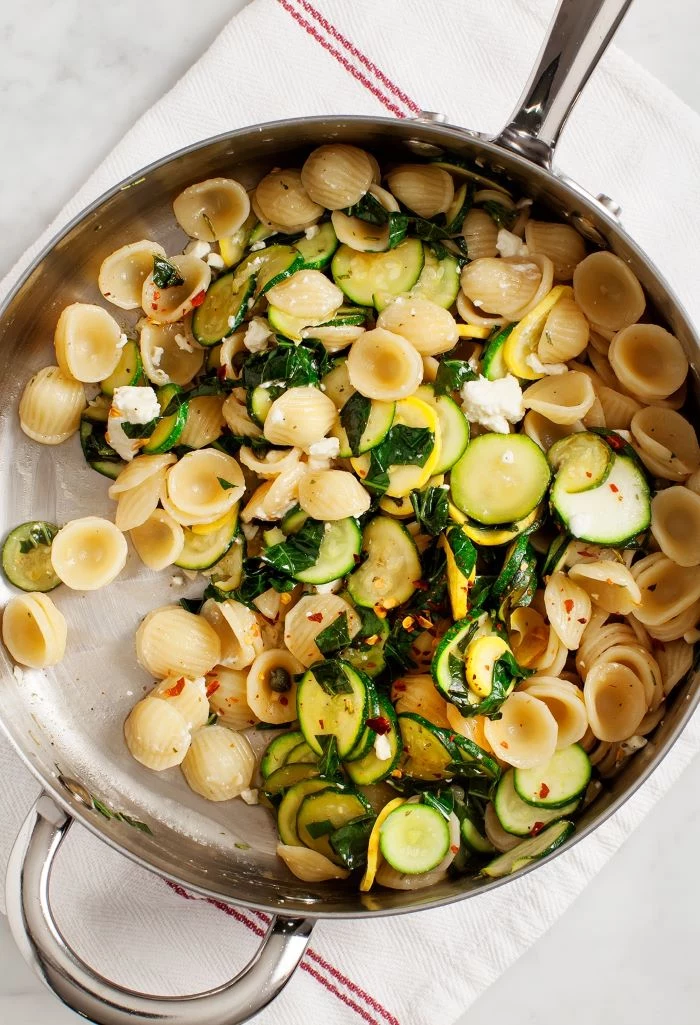
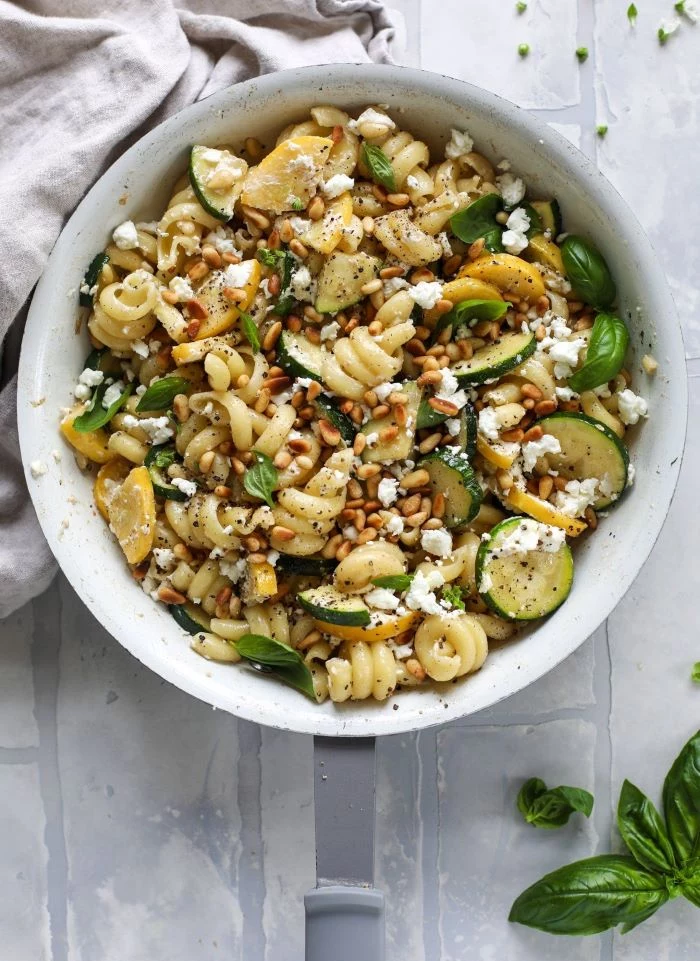
For an instant trip to the Greek isles, toss your hot, sautéed squash with a generous crumble of good quality feta cheese, a drizzle of extra virgin olive oil, fresh oregano, and a squeeze of lemon. The salty, briny cheese melts slightly and creates a simple, incredible sauce.
- Zucchini Noodles (Zoodles): Use a spiralizer to create pasta-like strands. The key is to cook them very briefly—a 1-2 minute sauté is enough—or serve them raw.
- Squash ‘Boats’: Halve zucchini lengthwise, scoop out the seeds, and fill with a mix of ground meat, breadcrumbs, and cheese before baking.
- Quick Pickles: Thinly slice squash and submerge in a brine of vinegar, sugar, salt, and dill. They’re ready in a few hours!
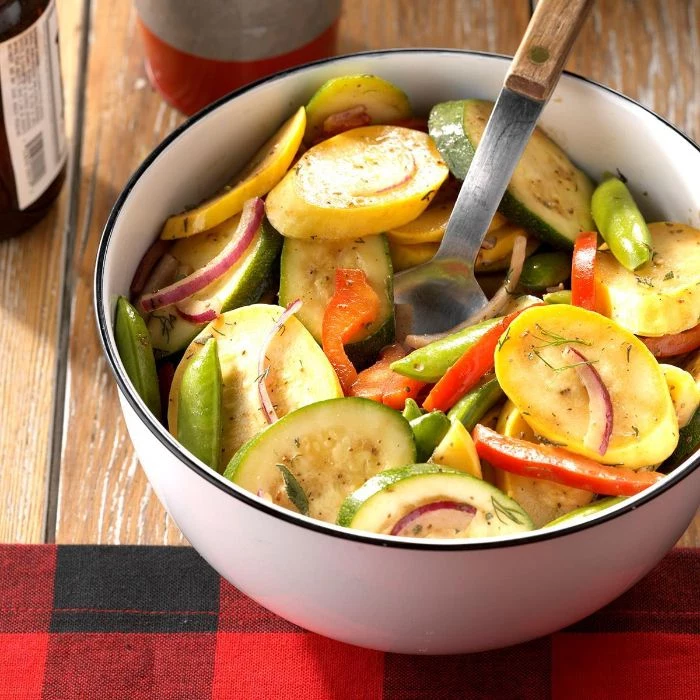
Round Coins: Best for a quick, high-heat sauté. The large surface area of each slice makes contact with the pan, promoting fast browning and evaporation.
Long Spears: Ideal for grilling or roasting. They are easy to flip and develop a great contrast between the charred exterior and the soft, creamy interior.
Choose your cut based on your cooking method for the best results.
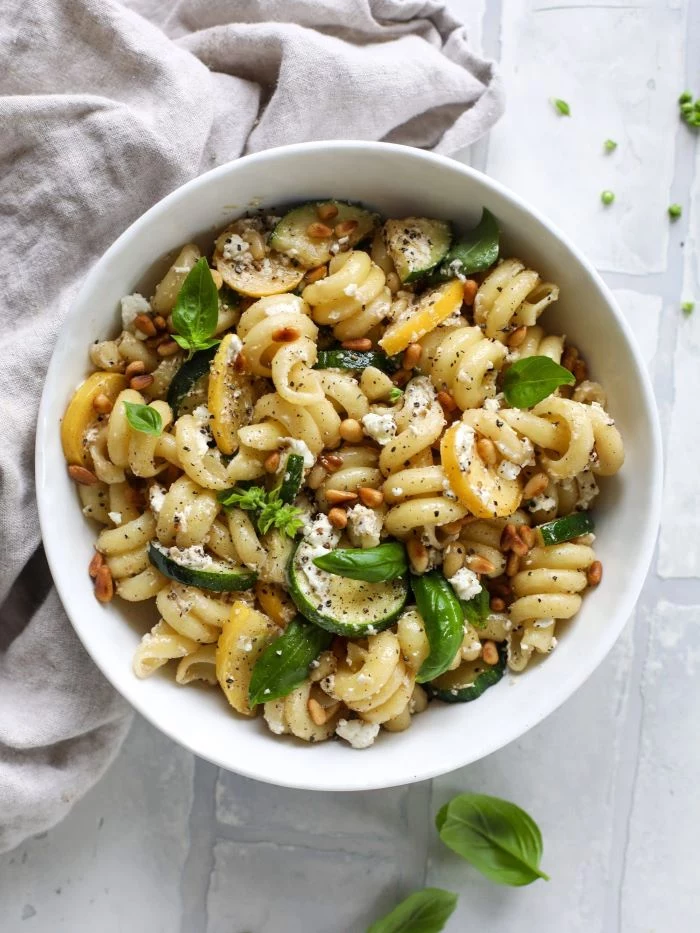
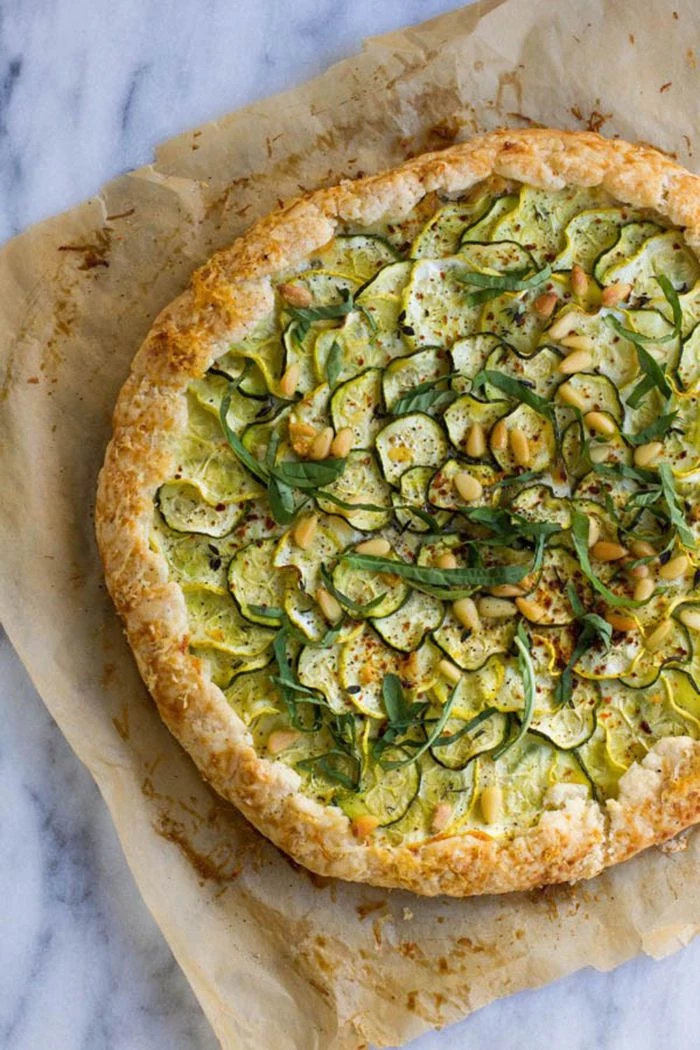
Don’t be afraid to finish your cooked squash with a textural crunch. Toasted pine nuts, slivered almonds, or crunchy breadcrumbs (panko fried in a little butter) can provide a delightful contrast to the soft vegetable and elevate the entire dish.
How should I store fresh summer squash before cooking?
Unlike winter squash, summer varieties have thin, delicate skin and shouldn’t be left on the counter. Store them unwashed in a perforated plastic bag in your refrigerator’s crisper drawer. Don’t cut it until you’re ready to use it. They’re best used within 3 to 5 days for optimal firmness.
Cheese is squash’s best friend, but move beyond basic mozzarella. Try these pairings for your gratins and bakes:
- Gruyère: Melts beautifully and adds a nutty, savory depth.
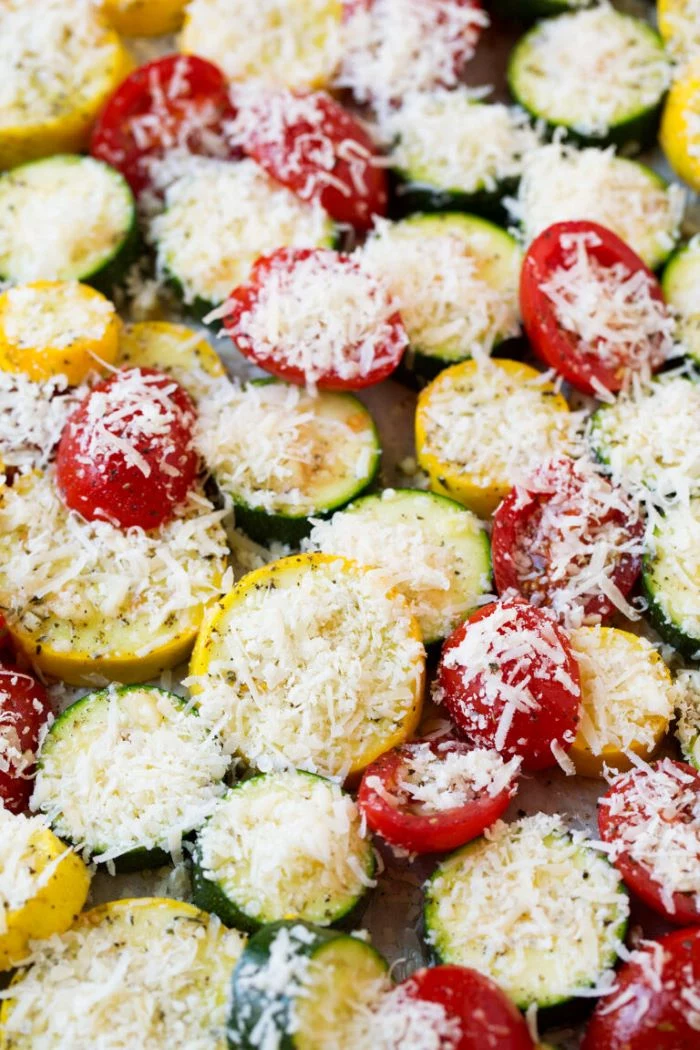
- Goat Cheese: Offers a tangy, creamy counterpoint when crumbled on top after baking.
- Parmigiano-Reggiano: Provides a salty, umami-rich crust that’s irresistible.
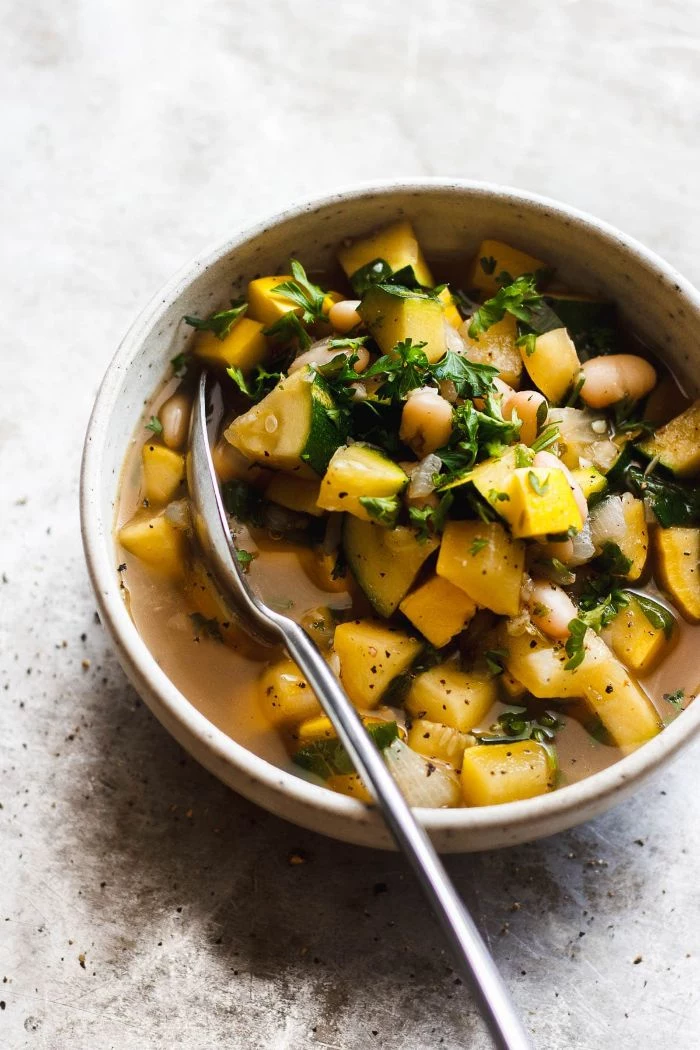
The problem: You have a bumper crop and can’t eat it all. The solution: Freeze it for winter soups and stews. Shred the squash using a box grater, squeeze out as much water as you can with your hands, then pack it into freezer bags in one or two-cup portions. It won’t work for a sauté, but it’s perfect for adding to sauces or chili.
- A bright, fresh flavor that cuts through richness.
- A beautiful golden-brown color without burning.
- A tender texture that isn’t mushy.
The secret? A combination of fats. Start searing your squash in a high-smoke-point oil like avocado or grapeseed, then add a knob of butter towards the end of cooking for flavor and browning.
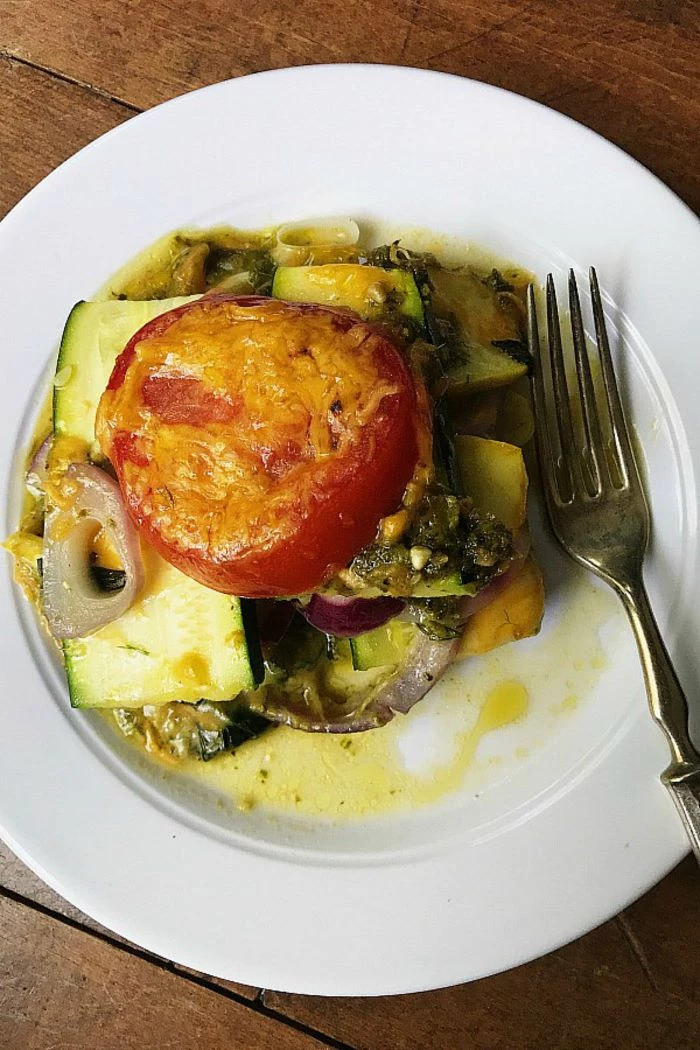
Those cute, round, or scalloped pattypan squashes aren’t just for decoration. Their shape makes them perfect for stuffing. Slice off the top, scoop out the center, and fill with anything from herbed quinoa and chickpeas to a savory sausage and breadcrumb mix. Bake until tender for a beautiful, self-contained meal.
While native to the Americas, the zucchini we know today was actually developed in Italy in the late 19th century. ‘Zucchino’ is Italian for ‘small gourd’.
This explains why it’s such a staple in Italian cuisine! The variety was likely bred from squashes brought back from the New World, refined near Milan into the versatile vegetable we use constantly in modern kitchens.
A crucial detail for sautéing: Make sure your pan and your fat (oil or butter) are fully heated *before* the squash goes in. You should hear a distinct sizzle the moment it touches the surface. If you don’t hear that sound, the pan isn’t hot enough, and the squash will start to release its water before it gets a chance to sear.
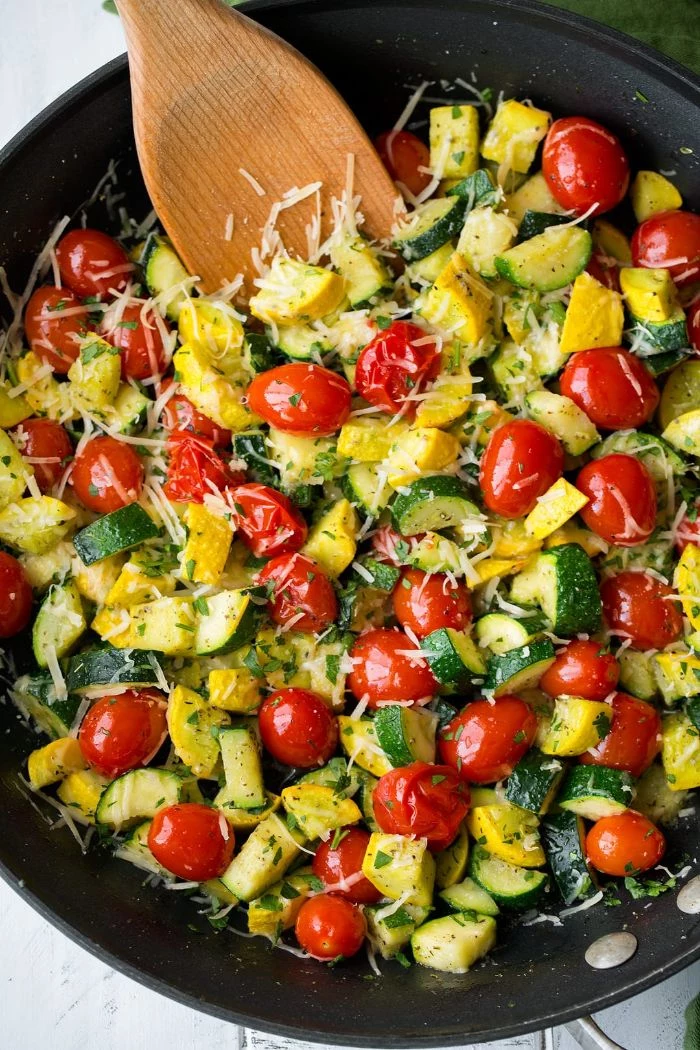
For an easy, professional-looking finish, simply shave a few curls of a hard cheese like Pecorino Romano or Parmigiano-Reggiano over the warm, cooked squash right before serving. A high-quality Microplane grater works wonders here. The residual heat will soften the cheese just enough to release its aroma.


