Finally, a Sourdough Starter Guide That Actually Works
I still remember my first crack at a sourdough starter. I was working in a small bakery, totally convinced I could outsmart nature and speed up the whole process. So, I put my little jar in a “warm” spot—right on top of the big proofing cabinet. By day three, it had a smell that was… not right. It wasn’t the pleasant tang I was hoping for; it was a nasty, rotten odor.
In this article
My mentor, a classic old-school baker, took one look, let out a chuckle, and tossed the whole thing in the bin. “You can’t force life,” he told me. “You just have to invite it in and give it a good home.”
That lesson has stuck with me for a long, long time. Making a sourdough starter isn’t about perfectly following a rigid recipe. It’s about cultivating a living colony of wild yeast and bacteria. It’s really an exercise in patience and just paying attention. Honestly, it’s not hard, but it does ask you to observe. In this guide, I’ll walk you through the very same process I use to teach new bakers, focusing on the ‘why’ behind each step, not just the ‘how,’ so you can learn to read what your starter needs.
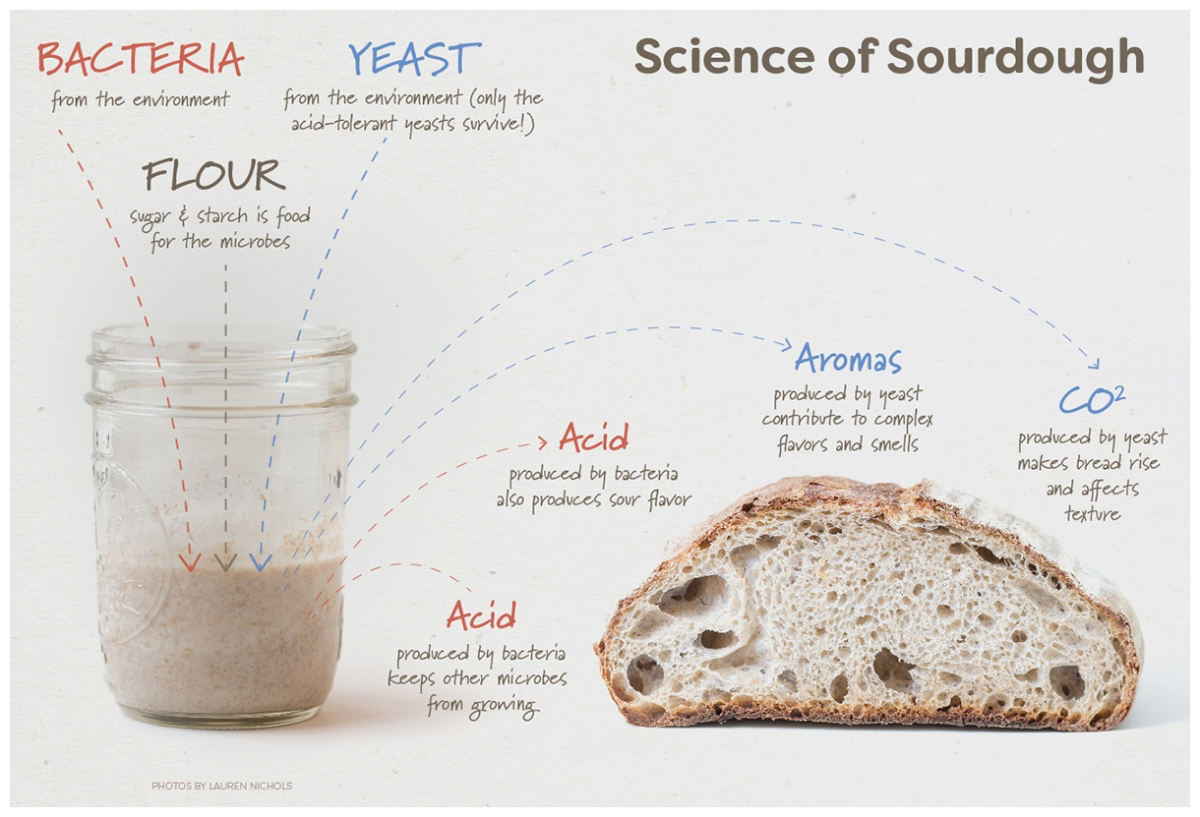
So, What’s Actually Happening in the Jar?
Before we start mixing, let’s quickly break down what we’re doing. A sourdough starter is basically a team of microorganisms working together. We’re building a happy home for two main players that are already hanging out all around us, especially on the outside of grains:
- Wild Yeasts: These little guys are the life of the party. They eat the simple sugars in the flour and burp out carbon dioxide (CO2). That CO2 is what creates all the bubbles and makes your bread rise.
- Lactic Acid Bacteria (LAB): These are the good bacteria. They also eat sugars, but they produce lactic and acetic acids. These acids are what give sourdough its signature sour, tangy flavor. More importantly, they make the starter acidic, which protects it from any harmful microbes trying to move in.
This teamwork is everything. The bacteria create a safe, acidic environment for the yeast, and together they give your bread a lift and flavor that you just can’t get from a packet of commercial yeast. Every time you “feed” your starter, you’re just giving this little community a fresh meal. And because the microbes come from your specific flour and your kitchen, every starter is completely unique!
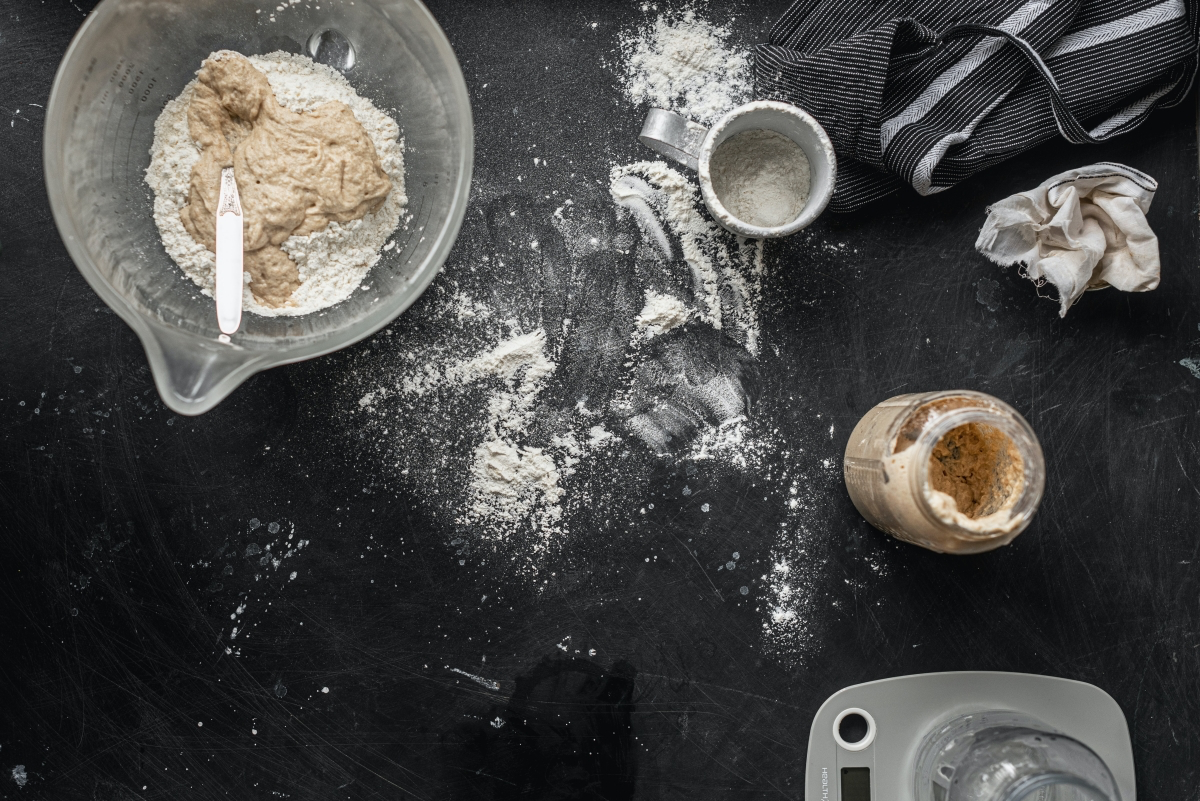
Gathering Your Gear
You really don’t need a bunch of fancy equipment. For ages, bakers just used simple crocks and their hands. But a few modern tools make the whole thing a lot more reliable.
The Essentials
You only need a few things, and they’re all pretty cheap.
- A Digital Kitchen Scale: This is my one non-negotiable tool. Baking is all about ratios, and measuring by weight (grams) is way more accurate than using cups. A simple one, like those from Etekcity or Ozeri, costs about $15 on Amazon and is worth every single penny.
- A Couple of Glass Jars: A standard quart-sized (around 1 liter) wide-mouth mason jar is perfect. Glass is great because you can see all the bubbly action. I recommend getting two; it makes transferring your starter to a clean home each day a breeze. You can find Ball jars for just a couple of bucks each at most grocery stores.
- A Small Spatula: A silicone spatula works best for scraping down the sides of the jar and getting everything mixed up with no dry spots.
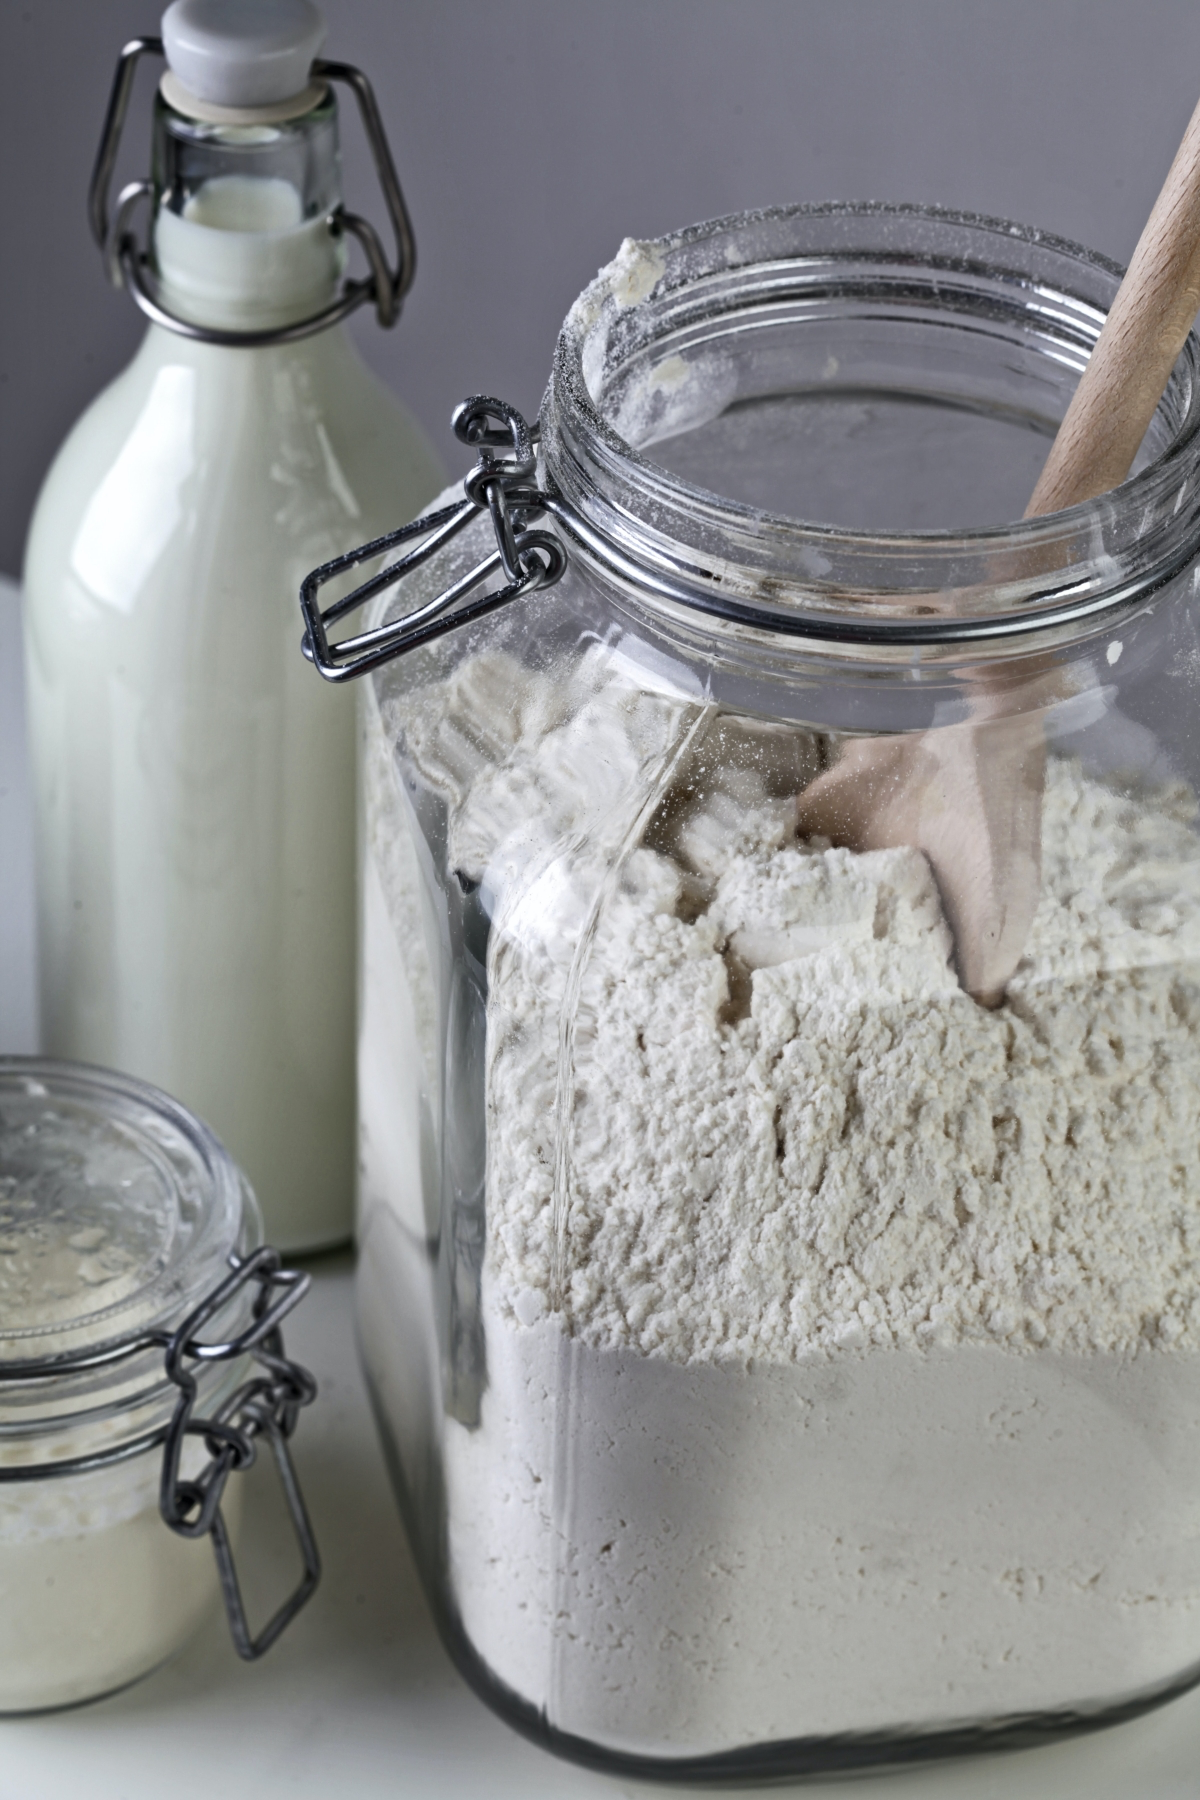
Choosing Your Flour and Water
Your starter has two ingredients. Let’s make them count.
For flour, I always, always recommend starting with a whole-grain flour. Whole wheat or, my personal favorite, whole rye flour contains all the parts of the grain, which are loaded with the natural microorganisms and nutrients needed to get things going. Once your starter is strong and active, you can switch to regular unbleached all-purpose or bread flour for feedings. Good to know: Bleached flour is a no-go, as the bleaching process can harm the very microbes we’re trying to grow. A bag of quality stuff like King Arthur or Bob’s Red Mill will run you about $5.
For water, the quality can make a surprising difference. Most tap water contains chlorine to keep it safe, but that same chlorine can inhibit our little yeast and bacteria friends. To be safe, use filtered water. If tap is your only option, no worries! Just leave a pitcher of it out on the counter overnight. The chlorine will evaporate, and it’ll be good to go. Spring water also works beautifully.
The Starter Journey: A Day-by-Day Guide
Forget those “perfect starter in 7 days” promises. The truth is, most starters take about 10 to 14 days to get strong enough for baking. It all depends on your flour, your water, and the temperature in your kitchen. Your goal isn’t to hit a specific day, but to see specific signs of life.
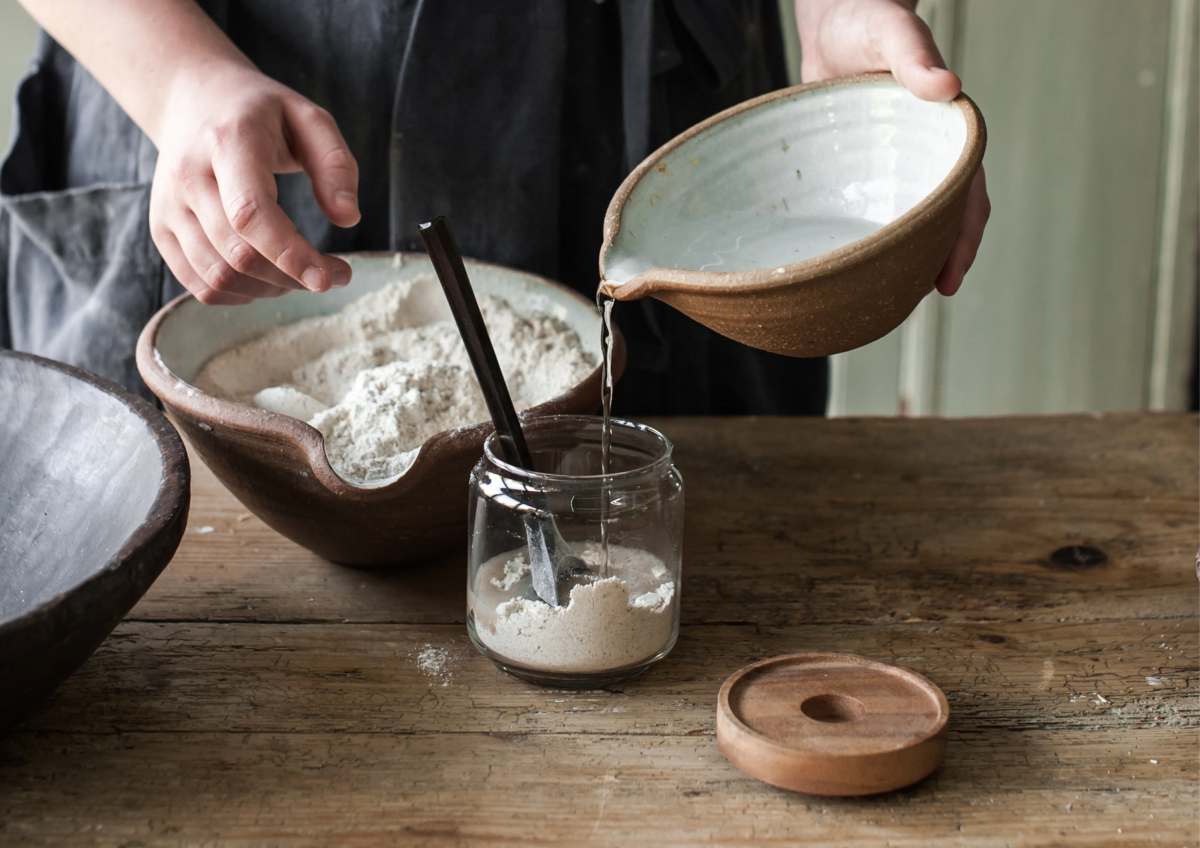
Day 1: The Mix
In a clean jar on your scale, mix 60 grams of whole wheat or rye flour with 60 grams of room-temperature filtered water. Stir it until it’s a smooth, thick paste with no dry lumps. Scrape down the sides, then cover the jar loosely (just rest the lid on top or use a coffee filter and rubber band). Put it somewhere with a stable, warm-ish temperature, like a spot on your counter out of direct sunlight. A temp between 75-80°F (24-27°C) is ideal.
Quick tip: After you mix it, pop a rubber band around the jar right at the starter’s fill line. It’s a super satisfying and clear way to see how much it grows!
Day 2: Just Watch
Do nothing. Seriously. Don’t touch it, don’t feed it. Just let it sit. You might see a tiny bubble or two, but maybe not. This 48-hour rest lets the flour fully hydrate and gives the microbes a chance to wake up.
Day 3: First Feeding & Funky Smells
By now, you should see some bubbles and maybe a slight rise. It might also smell a bit funky, kind of like old cheese or gym socks. Don’t panic! This is a totally normal phase where some early bacteria are active. Stir it down, then in a new, clean jar, combine 60 grams of your starter (discard the rest for now), 60 grams of whole grain flour, and 60 grams of water. Mix, scrape, cover, and put it back in its spot.
Days 4-5: The Lag Phase
You might notice the activity dies down a bit. This is another moment where beginners often freak out, but it’s completely normal. The initial burst of bacterial activity is fading, and the “good guys” (the yeast and lactobacilli) are starting to take over and build their community. Just keep repeating the feeding process once a day: discard all but 60 grams, and feed it with 60g flour and 60g water.
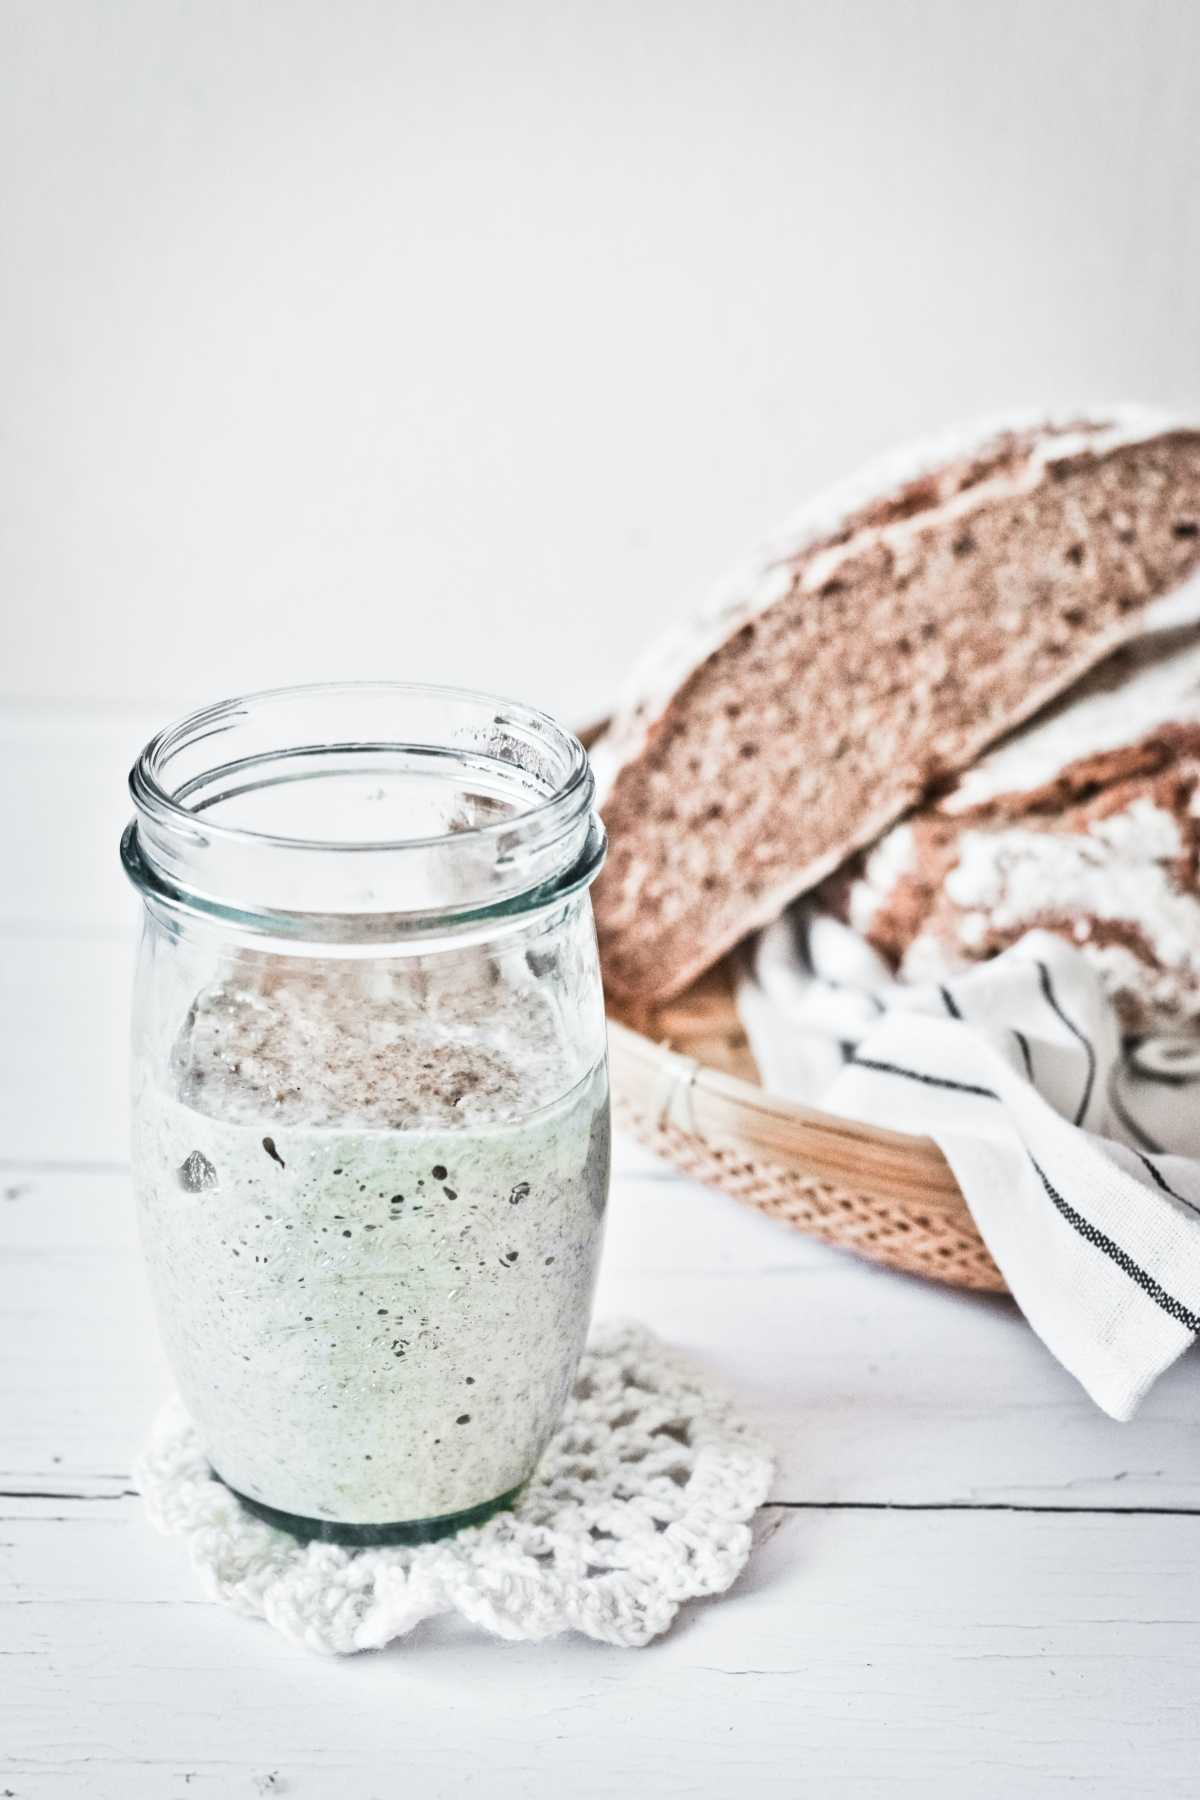
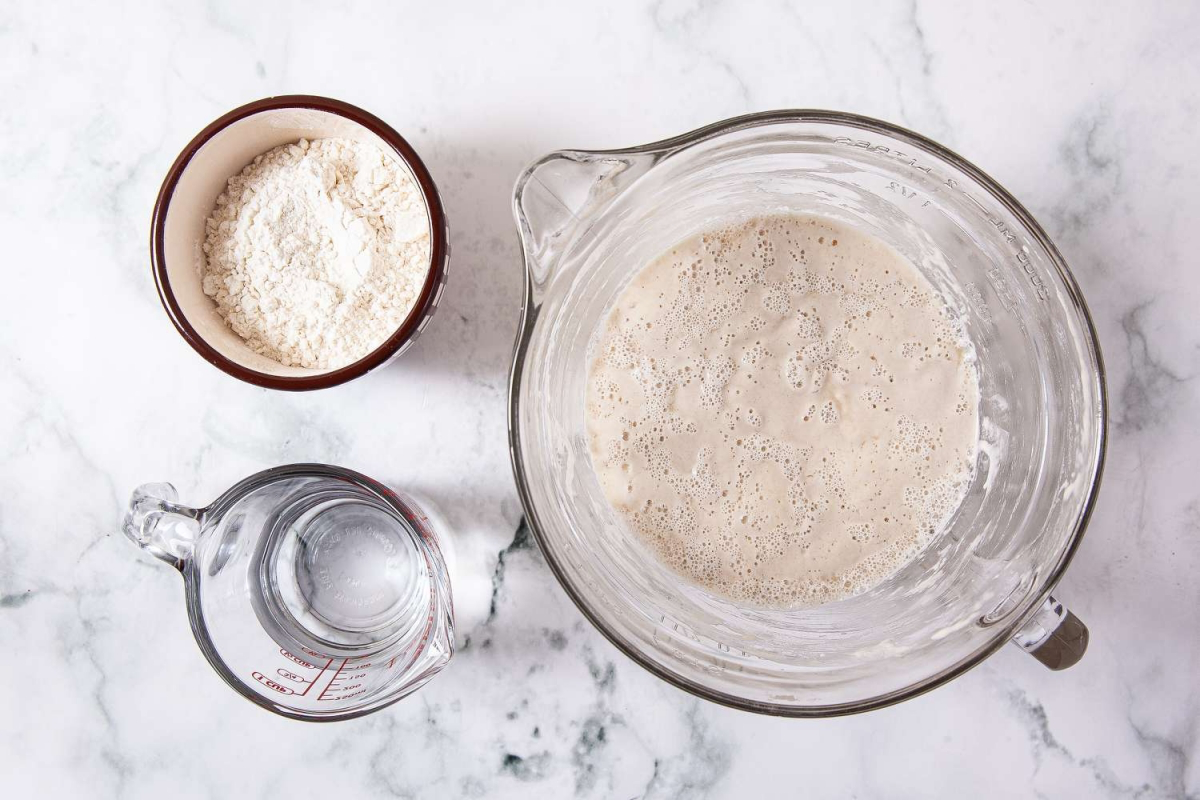
Days 6-9: Getting into a Rhythm
Sometime during this period, you should see a real shift. The smell will change from funky to pleasantly tangy, yeasty, and maybe even a little fruity. The starter should start rising and falling predictably after each feeding. It might double in size a few hours after you feed it. Keep up the daily feedings and observations.
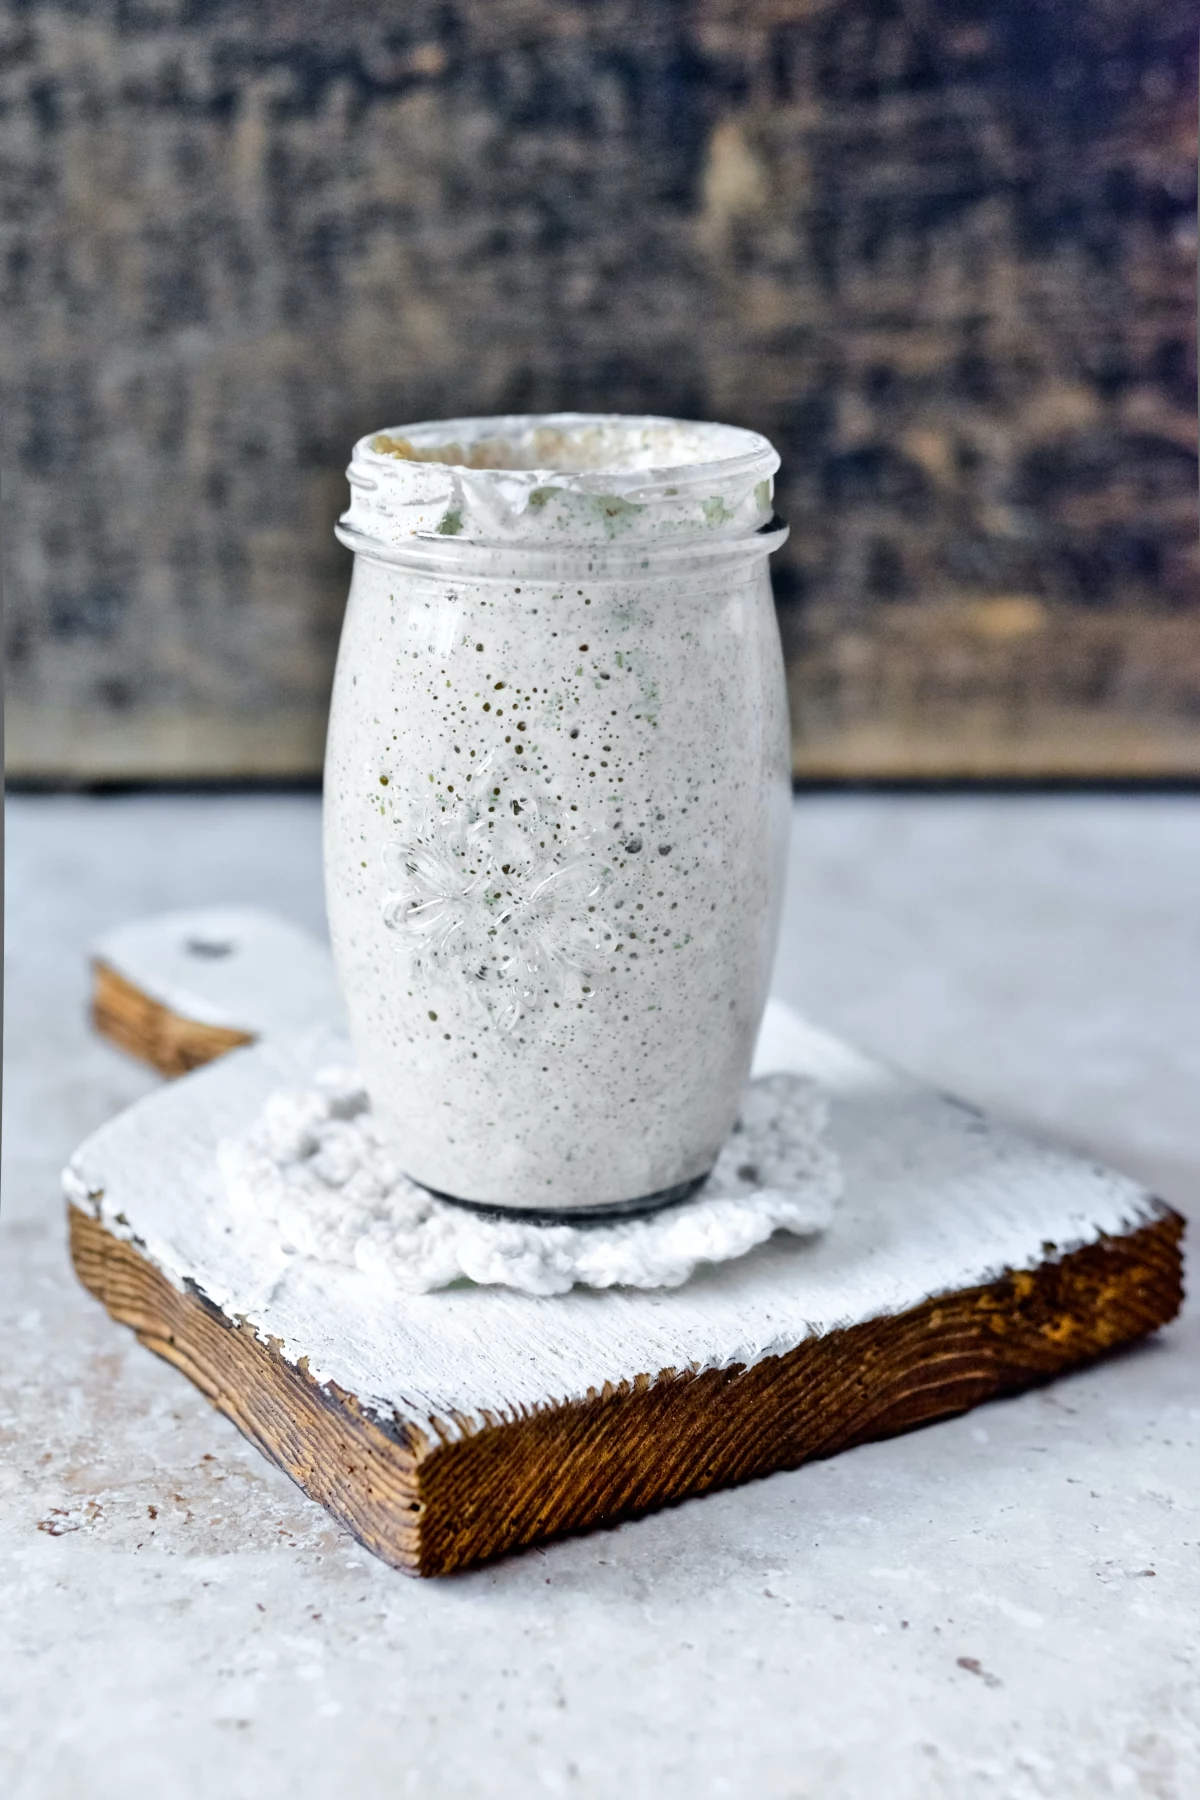
Day 10 and Beyond: Looking for Peak Activity
Now, we’re looking for the signs that it’s mature and ready for baking. The timeline isn’t as important as these signs. A strong, ready-to-use starter will reliably double (or more) in volume within 4 to 8 hours of being fed.
The Big Question: Is It Ready to Bake With?
So how do you know for sure? There are a few key signs, but one test is legendary for a reason.
First, run through this mental checklist:
- It predictably doubles in size a few hours after you feed it.
- The texture is bubbly and airy, almost like a web when you pull it with a spoon.
- The smell is pleasantly tangy and yeasty, not like stinky socks or vinegar.
If you’re nodding along, it’s time for the final boss: The Float Test.
It’s simple. Grab a glass of water. Take a small spoonful of your starter when it’s at its peak (at the top of its rise, full of bubbles) and gently drop it into the water. If it floats, congratulations! It’s full of gas and has the power to make your bread rise. If it sinks, it just needs a little more time and a few more consistent feedings to build strength.
Help! My Starter is Being Weird
Every starter has its quirks. Here are some common freak-outs and what to do.
“What’s this dark liquid on top?”
That’s called “hooch,” and it’s basically starter-booze. It’s a sign your starter is hungry. No big deal. You have two options: you can pour it off for a milder-tasting loaf, or you can stir it right back in for a tangier, more sour flavor. Then, just feed it as usual.
“It smells like nail polish remover!”
This is a sign of being very hungry. That acetone smell means the yeast is running out of food and getting stressed. It’s begging for a feeding. If you see this, give it an extra feeding or two over the next day to get it back in balance.
“There are no bubbles and my house is cold.”
Yeast is sluggish in the cold. If your kitchen is chilly, you need to find a cozy spot for your starter. Here’s a great trick: put the jar in your oven with JUST the light on (make sure the oven itself is OFF!). This creates a perfect little proofing box that’s just warm enough to encourage activity.
“Is this mold?!”
Hooch can be dark gray or brown, but it’s just a liquid. Mold is fuzzy and will be pink, orange, green, or black. If you see any colorful, fuzzy spots, there’s no saving it. Don’t even risk it. Toss the whole thing out and start over. It’s a bummer, but it’s only a little flour and water.
What to Do With All This Discard?
Okay, the idea of throwing away a chunk of your starter every day feels super wasteful. I get it. But reframe it: don’t think of it as “discard,” think of it as a bonus ingredient! This unfed starter is packed with flavor.
You can collect the discard in a separate jar in the fridge for up to a week. Use it to make amazing pancakes, waffles, or crackers. You can even toss it into pizza dough or flatbread recipes. It adds a delicious, complex tang to almost anything.
Long-Term Care: Keeping Your Starter Alive and Happy
Once your starter is active and strong, you don’t have to feed it every day unless you want to. You have options.
If you bake several times a week, you can keep it on your counter and feed it once or twice a day. But for most of us, the refrigerator is our best friend. After a feeding, let it sit out for an hour or two, then pop it in the fridge. This puts it into a sleepy, dormant state. You’ll only need to pull it out and feed it once a week to keep it healthy.
When you’re ready to bake, just take it out of the fridge, give it a feeding, and let it get bubbly and active on the counter. Depending on how long it’s been, it might need two or three feedings over 12-24 hours to be fully awake and ready to bake a great loaf of bread.
Inspirational Gallery
Rye vs. All-Purpose Flour: For kick-starting your starter, whole-grain flours like rye or whole wheat are a powerhouse. They contain more natural microorganisms and nutrients, often leading to faster activation. Think of Bob’s Red Mill Dark Rye as an accelerant.
All-Purpose or Bread Flour: These are perfect for long-term maintenance once the starter is established. They provide a cleaner, less sour flavor profile and a more predictable rise. King Arthur’s Unbleached All-Purpose is a reliable choice for daily feedings.
Many bakers start with rye and transition to all-purpose flour after the first week.
A single gram of a mature sourdough starter can contain up to 50 million yeasts and 5 billion lactobacilli bacteria.
This incredible density of life is what makes your starter so resilient. When you feed it, you’re not just adding flour; you’re providing food for a thriving microscopic city in a jar. This symbiotic community works together to leaven your bread and protect it from spoilage.
Beyond the jar and flour, a few tools make the process nearly foolproof. A digital kitchen scale, like the Escali Primo, is non-negotiable for accuracy—baking is a science of ratios, after all. A small silicone spatula helps you mix thoroughly and scrape down the sides of the jar, ensuring no dry bits of flour are left behind. Lastly, good quality, non-chlorinated water is crucial, as chlorine can inhibit or kill the delicate wild yeasts you’re trying to cultivate.
My starter seems sluggish and isn’t bubbling much. What’s going on?
This is a common worry, especially in the first week. The most likely culprit is temperature. Wild yeast loves a cozy environment, ideally between 75-80°F (24-27°C). If your kitchen is cool, try placing your jar in the oven with only the light on. Another factor could be your feeding schedule or ratio. Ensure you’re refreshing it consistently and using the correct proportions of flour and water. A sluggish starter is rarely a dead starter; it’s usually just cold or hungry!
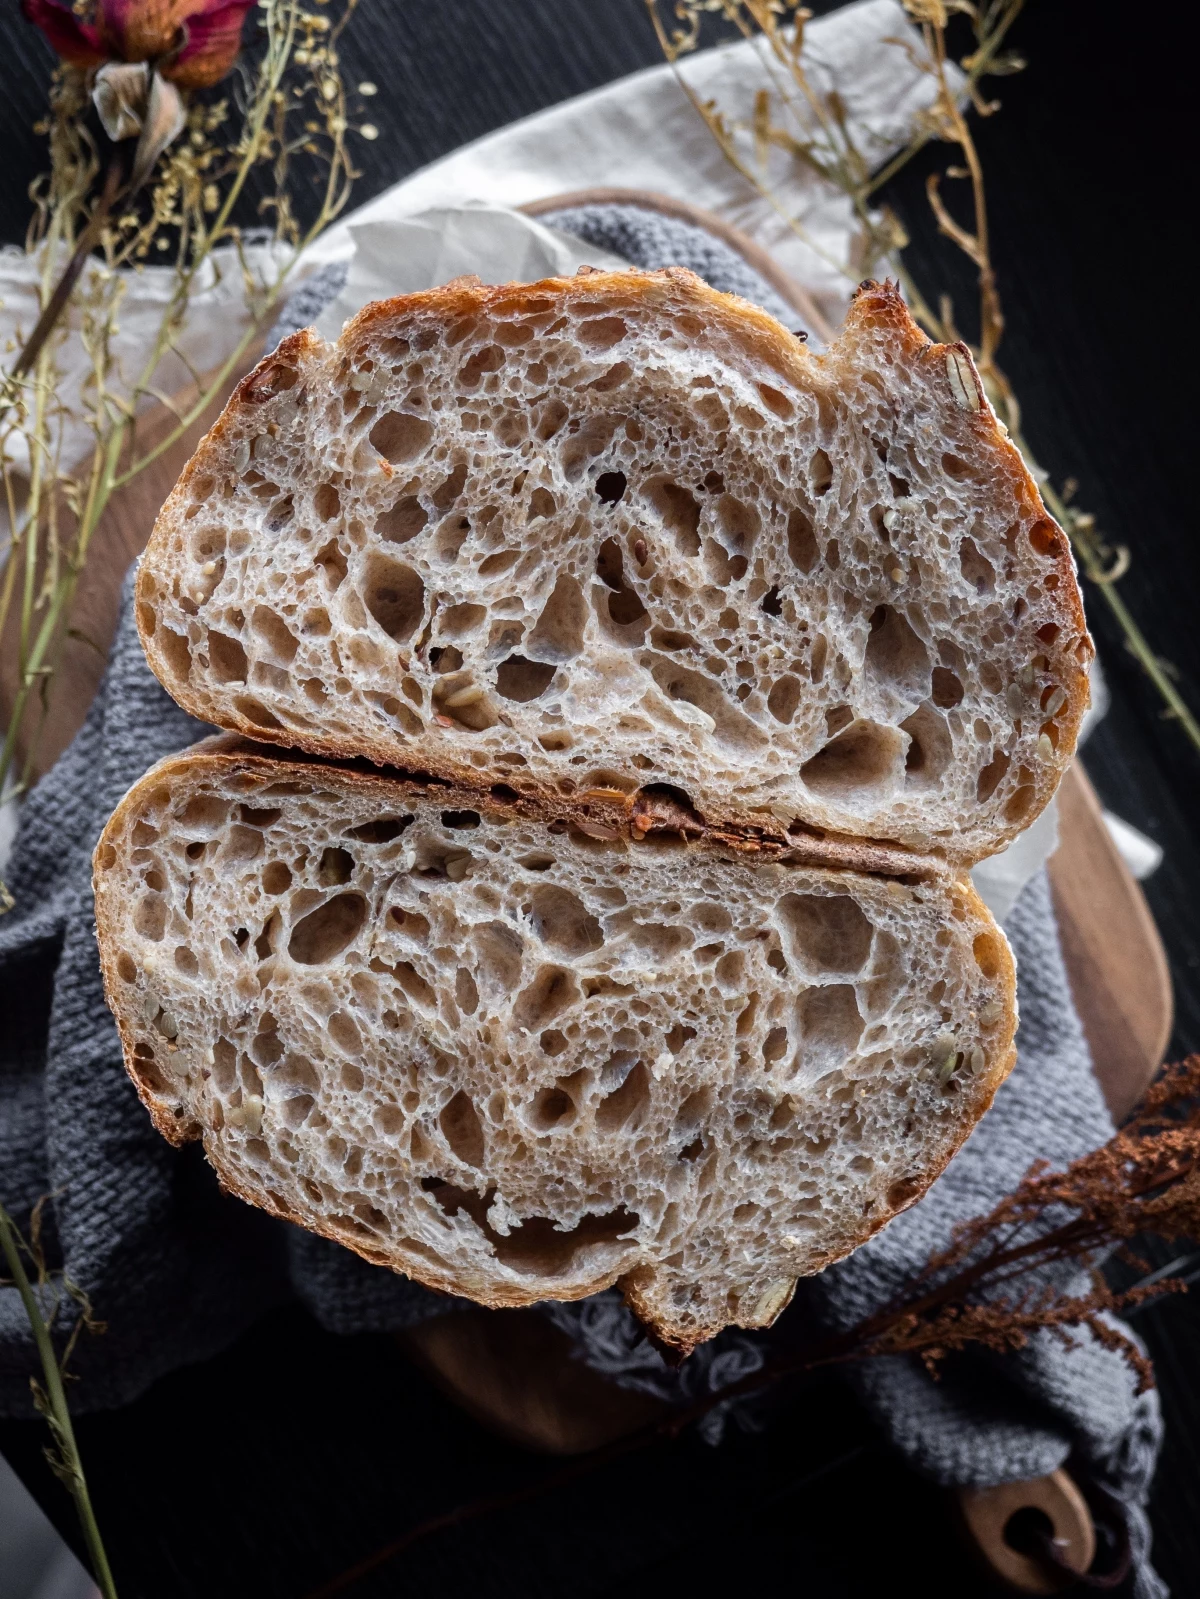
- A perfectly airy, open crumb.
- A beautiful, high rise in the oven.
- Confidence that your dough won’t fall flat.
The secret? The float test. Before you mix your dough, drop a small spoonful of your active starter into a glass of water. If it floats, it’s full of CO2 gas and ready to leaven your bread. If it sinks, it needs more time or another feeding.
Don’t just toss your sourdough discard! This unfed portion of your starter is a flavor-packed ingredient in its own right. Use it to add a delicious tang and tender texture to pancakes, waffles, and crêpes. Or, mix it with a little flour, oil, and herbs, then spread it thin on a baking sheet for incredibly crispy, addictive crackers. It’s the most sustainable—and delicious—way to manage your starter.
Important point: The water you use matters more than you think. Tap water often contains chlorine, which is added to kill microbes. Since your starter is a culture of beneficial microbes, chlorinated water can seriously hinder its development or even kill it. Always use filtered, bottled, or tap water that has been left out on the counter for several hours to allow the chlorine to dissipate.
Ready to take a break from daily feedings? You have two main options for putting your starter on pause.
- Refrigeration: For short breaks (a week to a month), feed your starter, let it sit at room temperature for an hour or two, then place it in the fridge. This slows fermentation way down. To revive it, you’ll need 2-3 feedings at room temperature.
- Drying: For long-term storage, spread a thin layer of active starter on parchment paper. Let it dry completely until it’s brittle, then break it into flakes and store in an airtight container. It can last for years!
The term ‘levain’ is often used interchangeably with ‘sourdough starter,’ but there’s a subtle distinction. A ‘starter’ is the mother culture you maintain indefinitely. A ‘levain’ is typically a portion of that starter that you build up with a specific feeding schedule and flour combination, created specifically for the loaf you’re about to bake.
Learning to read your starter’s aroma is a key skill. A young starter might smell starchy or even a bit like old socks for a day or two—that’s normal! A healthy, active starter should have a pleasantly tangy, yeasty smell, sometimes with fruity or floral notes. If it smells extremely acidic, like vinegar or nail polish remover, it’s just very hungry and needs to be fed. The only smell to worry about is a genuinely rotten or moldy odor, especially if accompanied by orange or pink streaks.


