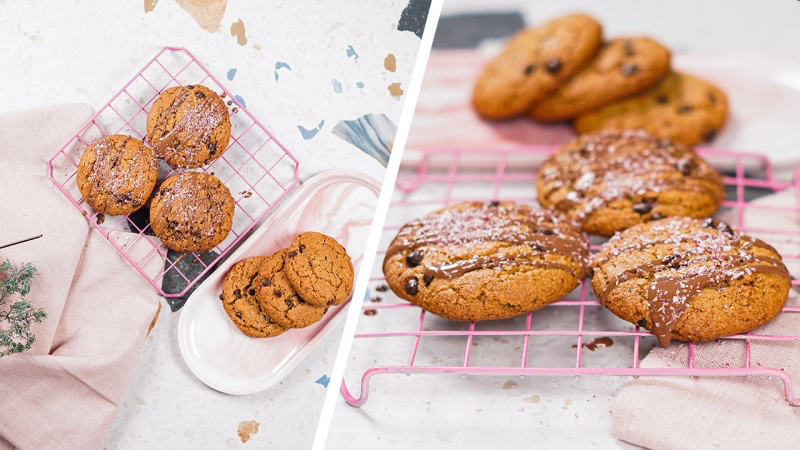
My Fail-Proof Recipe for Gluten-Free Holiday Cookies That Actually Taste Amazing
I’ve been around the baking block for a long time, and I’ve seen the holiday rush from every angle. Over the years, one thing has become crystal clear: more and more people need delicious treats that skip the gluten and dairy. And honestly, for a while there, the results were… let’s just say, disappointing. Gritty, dry cookies that would crumble if you looked at them funny? No, thank you.
In this article
It took a whole lot of trial and error in my own kitchen to finally crack the code. This guide isn’t just another recipe—it’s the collection of all my hard-won secrets for creating holiday cookies that are soft, chewy, and genuinely incredible. The kind of cookies that make everyone happy, whether they have dietary restrictions or not.
We’re going to make a simple, beautiful holiday cookie. But more importantly, I’m going to pull back the curtain and show you why it works, so you can bake with total confidence.
First Things First: My Single Most Important Tip
If you’re in a hurry or only remember one thing from this whole guide, let it be this: chill your dough for 30 minutes before baking. Seriously. It’s the ultimate game-changer. This one step prevents the cookies from spreading into greasy, sad pancakes on the baking sheet. Trust me on this. It’s the difference between a good cookie and a great one.
The Go-To Recipe & Your Shopping List
Okay, let’s get down to business. Before you do anything else, it helps to see the big picture. Here’s what you’ll need and the basic game plan.
Yields: About 2 dozen (24) cookies
Time Commitment: Plan on about an hour from start to finish. That’s roughly 15 minutes for prep, 30 minutes to chill the dough (don’t skip it!), and 10-12 minutes for baking.
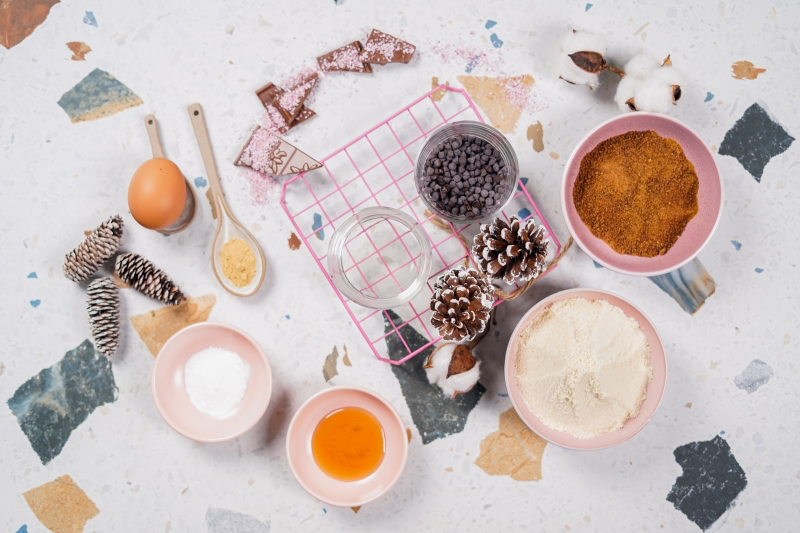
Ingredients You’ll Need:
- 2 cups (around 224g) super-fine blanched almond flour. Good to know: A bag will probably run you between $10 and $15. I’ve found the best deals on big bags at places like Costco or online from brands like Anthony’s Goods. Bob’s Red Mill is another great option you can find in most supermarkets.
- 1/2 cup melted unrefined coconut oil. Make sure it’s cooled down a bit!
- 1/2 cup coconut sugar.
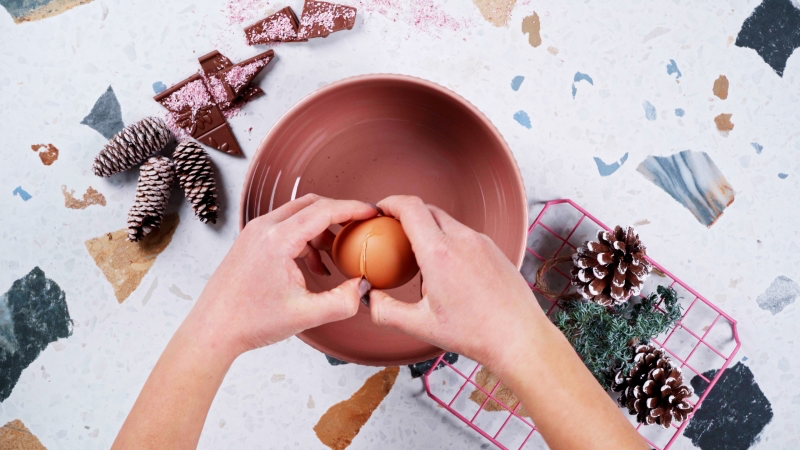
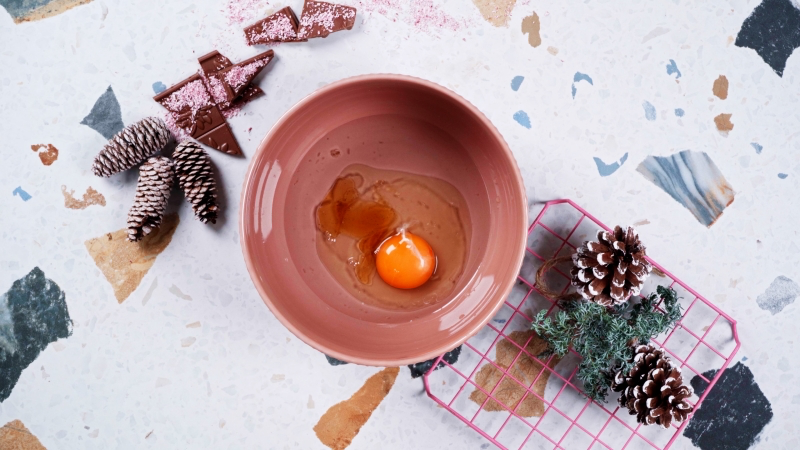
- 1 large egg.
- 1 teaspoon vanilla extract.
- 1 teaspoon ground ginger.
- 1/2 teaspoon baking powder.
- 1/4 teaspoon fine sea salt.
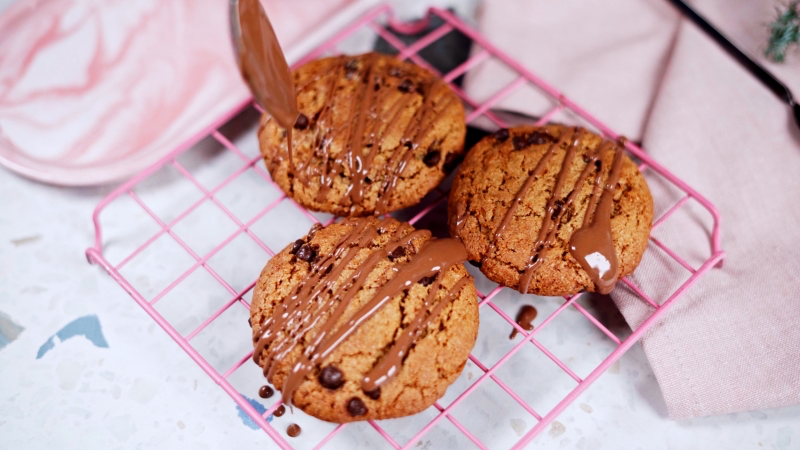
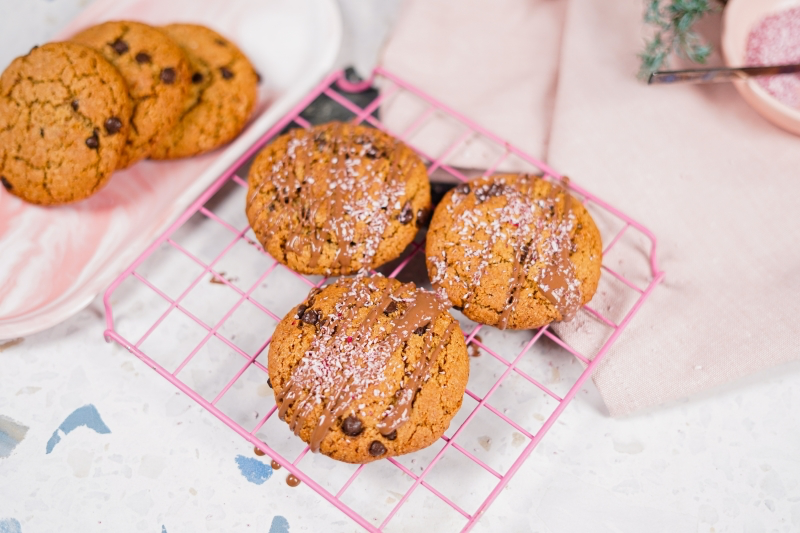
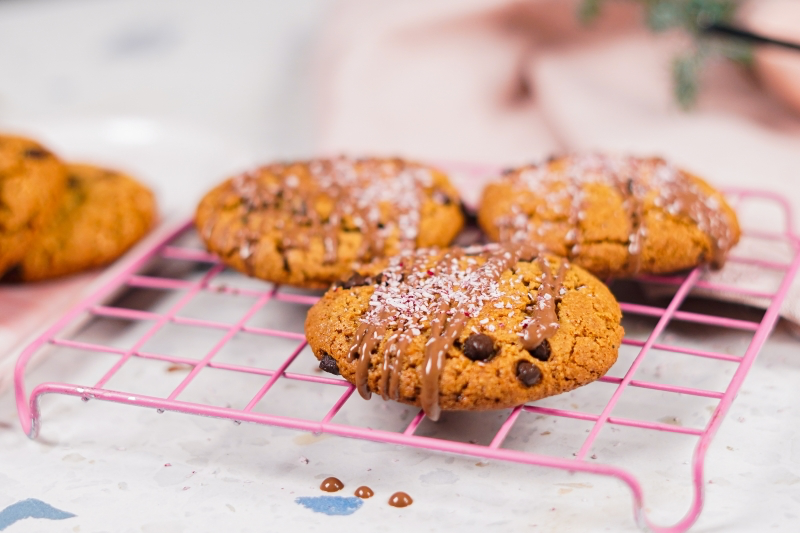
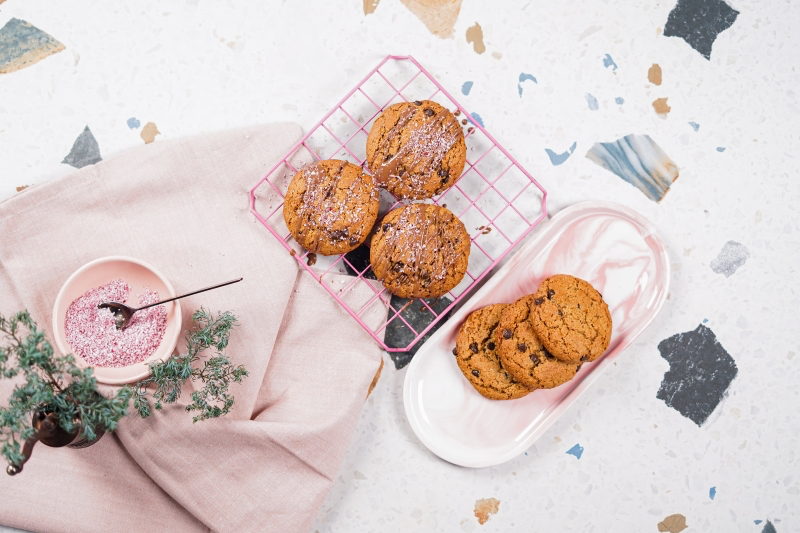
- 1/2 cup dairy-free chocolate chips. Enjoy Life is a go-to brand that’s pretty easy to find and is free from most major allergens.
The Step-by-Step Method:
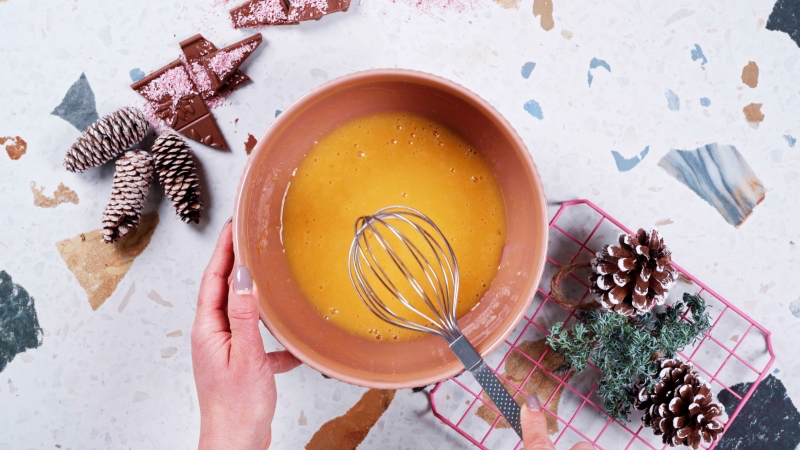
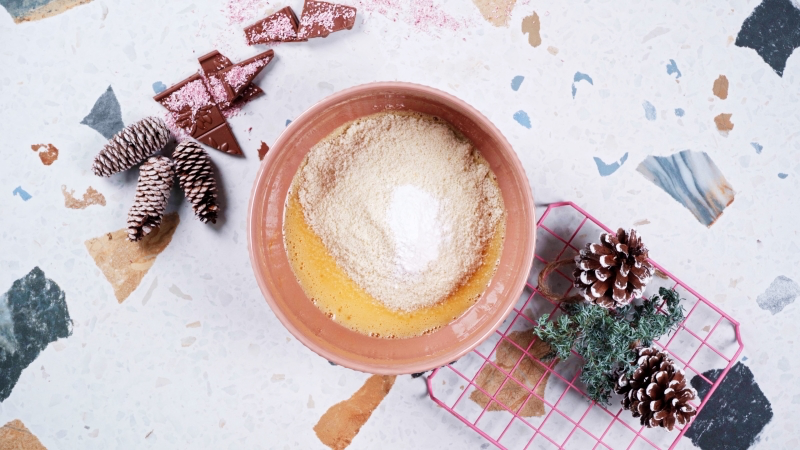
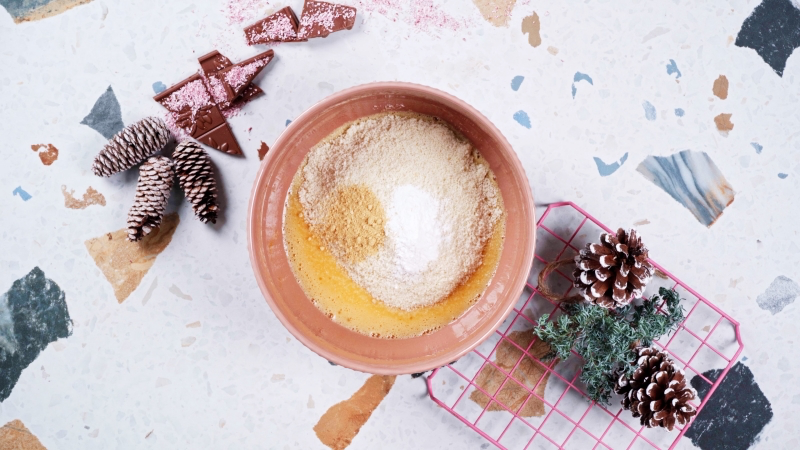
- Combine the wet ingredients. In a large bowl, whisk together the slightly cooled melted coconut oil, the egg, and the vanilla extract. Go for about 30 seconds until it’s smooth and uniform. You’re creating a stable base for the dough.
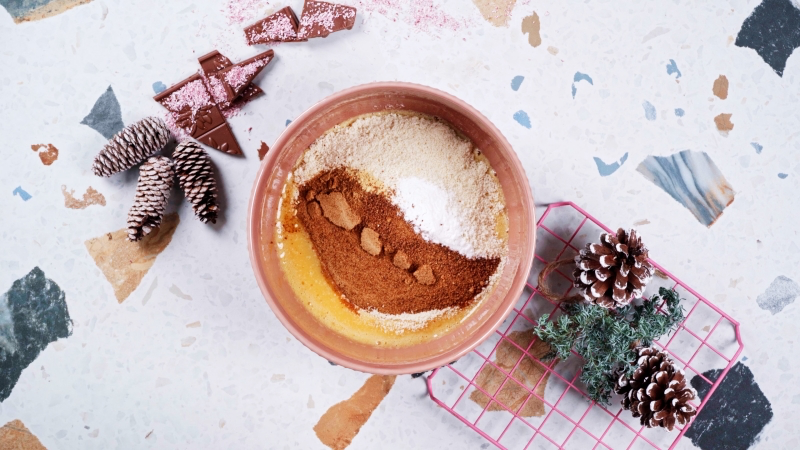
- Combine the dry ingredients. In a separate, medium-sized bowl, use a whisk to mix the almond flour, coconut sugar, ground ginger, baking powder, and salt. This breaks up clumps and makes sure you don’t get a random, spicy bite of ginger.
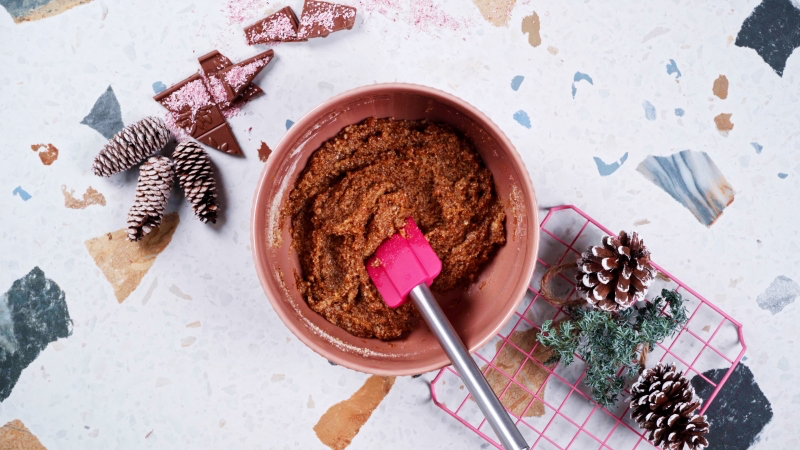
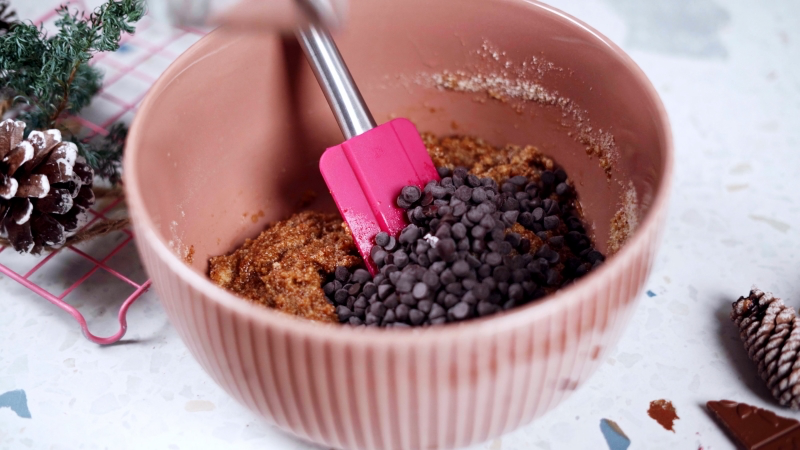
- Mix ’em together. Pour the dry ingredients into the wet ingredients. Using a silicone spatula, fold them together just until you no longer see dry flour streaks. Stop right there!
- Fold in the chocolate. Gently fold in your dairy-free chocolate chips.
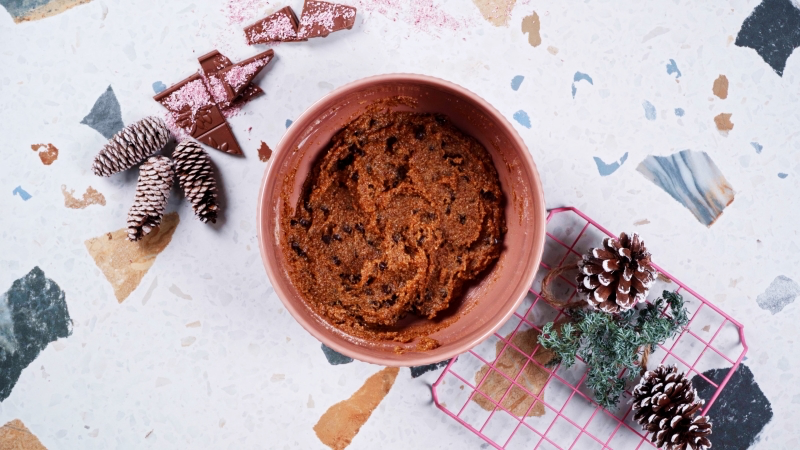
- Chill out! Cover the bowl and pop it in the refrigerator for at least 30 minutes.
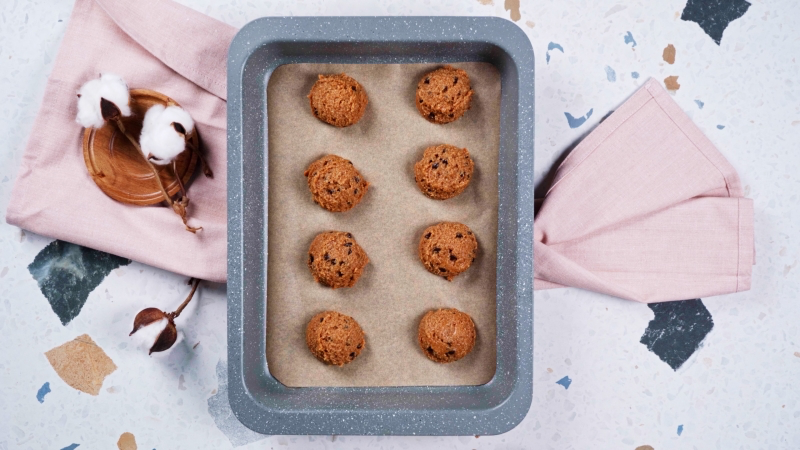
- Prep for baking. While the dough is chilling, preheat your oven to 350°F (180°C) and line a large baking sheet with parchment paper.
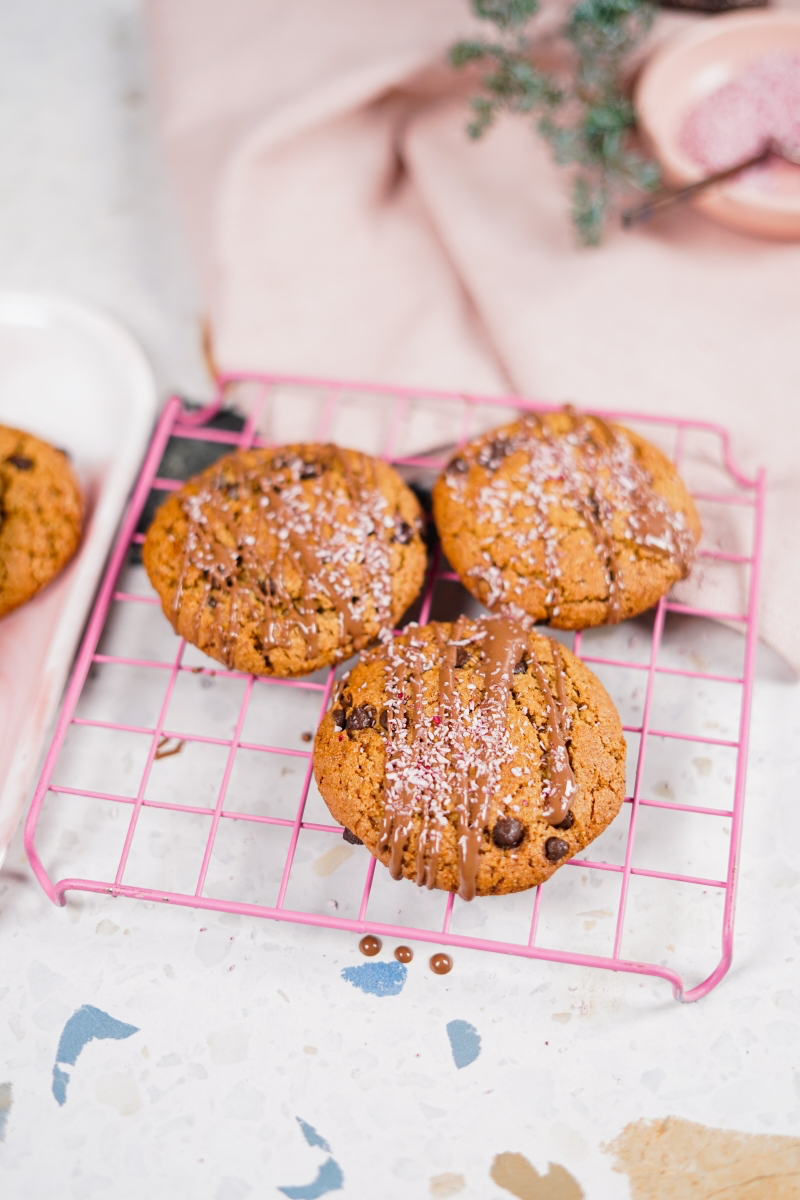
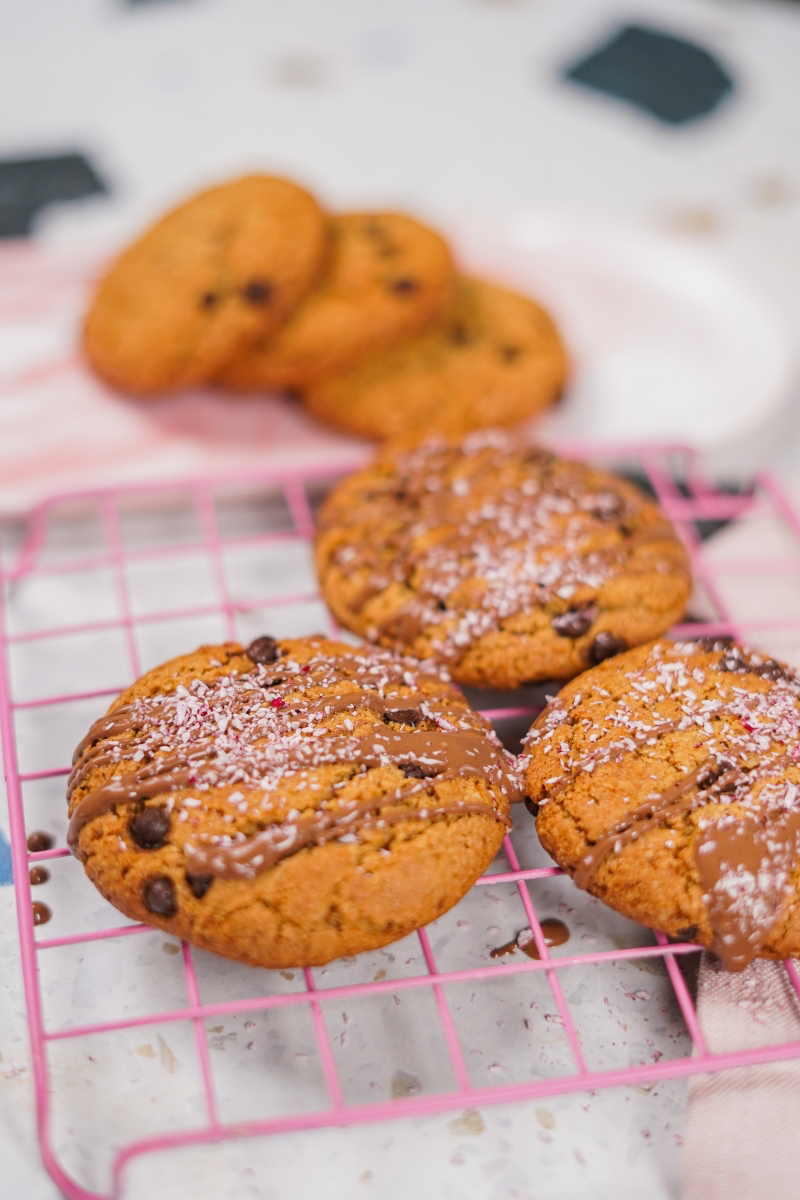
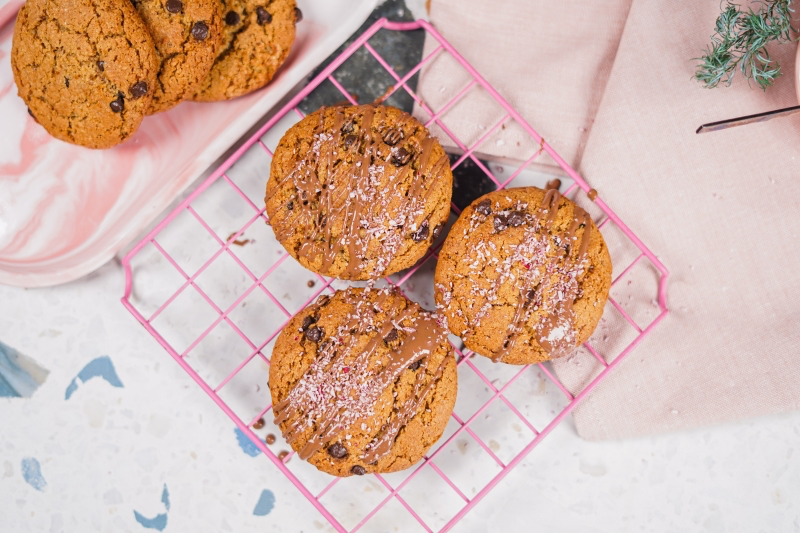
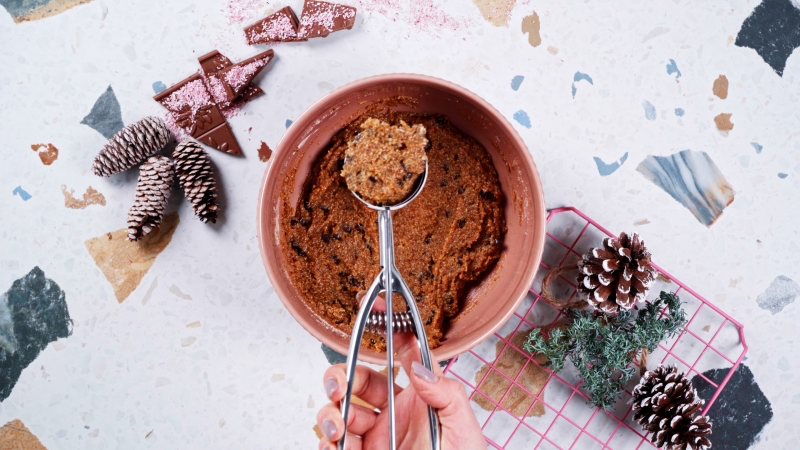
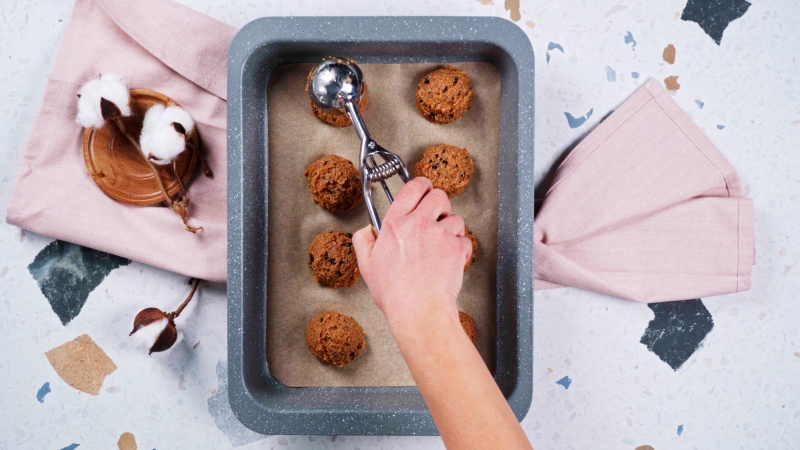
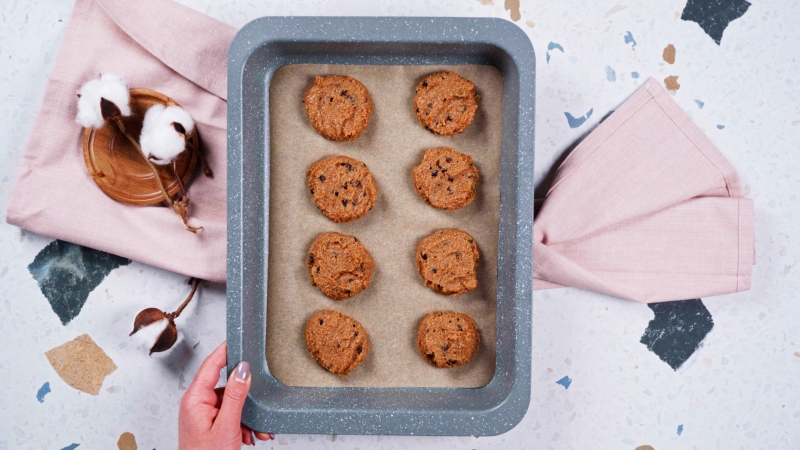
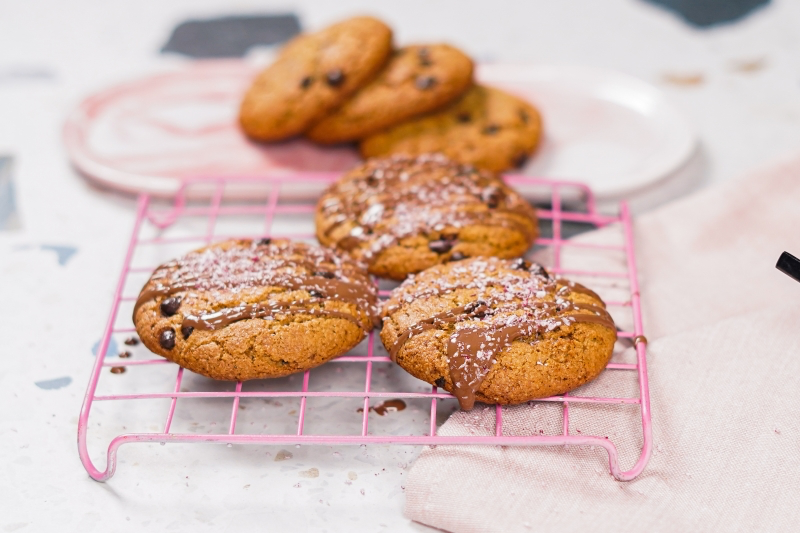
- Scoop and bake. Use a 1.5-tablespoon cookie scoop to portion the chilled dough onto your prepared baking sheet, leaving about 2 inches between each cookie. Gently press each ball down a little with your fingers or a spatula. Bake for 10-12 minutes, until the edges are lightly golden and the centers look set.
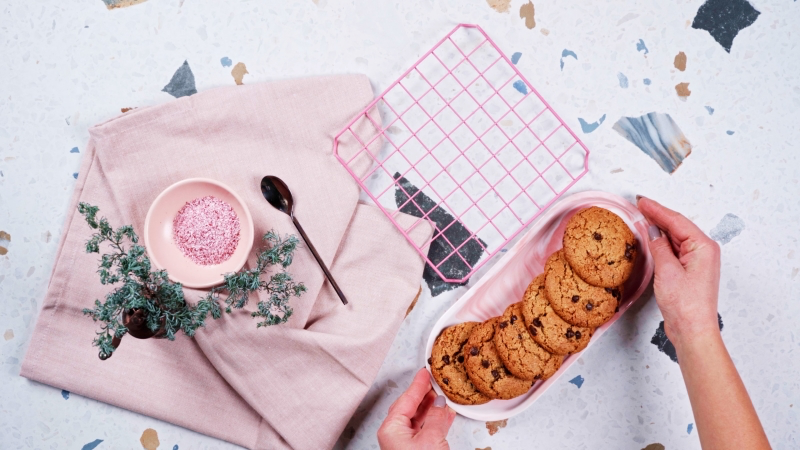
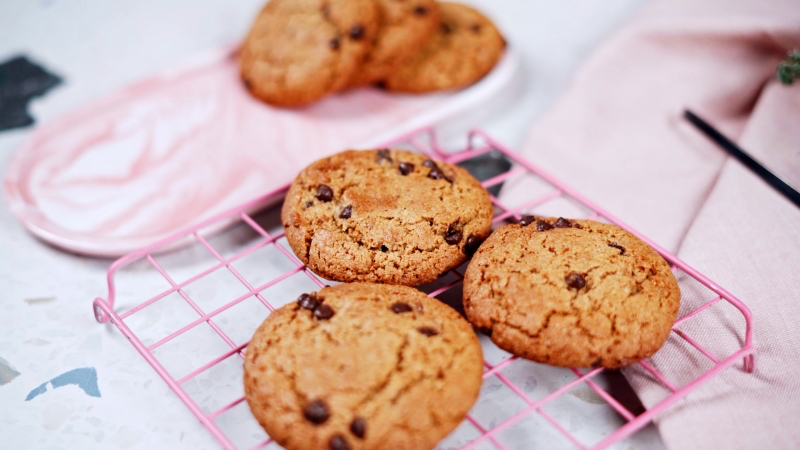
- Cool completely. This part is critical. Let the cookies cool on the baking sheet for 5-10 minutes before carefully moving them to a wire rack to cool the rest of the way.
The Baker’s Deep Dive: Why These Ingredients Work
Understanding what your ingredients are doing is the key to becoming a better baker. With gluten-free stuff, you can’t just swap things willy-nilly. Here’s the breakdown.
The Flour: All About Almond
This recipe is built around almond flour for a reason. It’s basically just super-finely ground almonds, which means it has a good amount of fat and protein. This combo is what gives you a moist, tender cookie and prevents that sandy texture that plagues so many gluten-free baked goods. We use blanched almond flour (skins removed) for a finer texture, but unblanched will work in a pinch—your cookies will just be a bit denser and flecked with brown.
A common mistake: Don’t just scoop almond flour out of the bag and pack it into a measuring cup. You’ll use way too much! If you don’t have a kitchen scale (which is a baker’s best friend), use the ‘spoon and level’ method: spoon the flour into your measuring cup until it’s overflowing, then use the back of a knife to level it off.
The Fat: The Magic of Coconut Oil
Since we’re not using butter, we need a fat that brings both flavor and structure. Unrefined coconut oil is perfect because it has a subtle coconut-y flavor that works beautifully with the spices. If you really don’t like coconut, no worries—just use refined coconut oil. It has a neutral flavor, and the cookie’s texture will be the same.
And remember, you want the oil melted but not piping hot. If it’s too hot, it can start to scramble the egg or make the final cookie greasy. Just barely liquid is what you’re aiming for.
The Sweetener: The Sugar Showdown
We use coconut sugar because it has a lovely, rich caramel flavor, almost like brown sugar. It also helps keep the cookies chewy. By the way, if you don’t have coconut sugar, packed light brown sugar is an excellent substitute and the results will be nearly identical. You can use regular white sugar, but just know your cookies will turn out a bit crispier and won’t have that same depth of flavor.
The Binder: The Power of an Egg
The egg is a little powerhouse, adding protein for structure, fat for richness, and helping everything bind together. For a vegan version, a ‘flax egg’ is your best bet here. Just mix one tablespoon of ground flaxseed with three tablespoons of water and let it sit for about 10 minutes to get gelatinous.
Heads up! The flax egg version is still delicious, but it won’t spread as much and the texture will be a bit more dense and cake-like. Still totally worth it, just different!
Troubleshooting Like a Pro
Even with a great recipe, things happen. Here’s how to fix the most common issues.
- My cookies are super greasy. What went wrong? Ah, the dreaded oil slick. This is almost always from one of two things: your coconut oil was too hot, or you overmixed the dough. I once ruined an entire batch for a party because I got distracted and kept mixing. It was a disaster! That’s how I learned to stop mixing the SECOND the dough comes together.
- Help! My cookies spread into thin, crispy wafers. The culprit here is warm dough. If the fat is too soft when it hits the hot oven, it just melts and spreads instantly. The fix is simple: chill that dough! A 30-minute stay in the fridge is all it takes to solidify the fat and give you a thicker, chewier cookie.
- Why are my cookies so crumbly? This usually points to overbaking, even by just a minute or two. Gluten-free cookies don’t brown like traditional ones, so watch for edges that are just set and golden. Also, make sure you’re letting them cool completely before you try to move them. I once watched an assistant crumble an entire tray of perfect cookies because he was too eager. Patience is key!

Get Creative: Fun Flavor Riffs
Once you’ve nailed the basic recipe, this dough becomes your playground.
- Spice it up: For a warmer, more festive flavor, add 1/2 teaspoon of cinnamon and 1/4 teaspoon of nutmeg or allspice to the dry ingredients.
- Add some zest: A teaspoon of finely grated orange zest tossed in with the wet ingredients is an incredible pairing with the chocolate and ginger.
- Try different mix-ins: Swap the chocolate for dairy-free white chocolate chips, chopped dried cranberries, or toasted pecans. If you use dried fruit, you might want to pull back on the sugar just a bit.
- Slice-and-Bake Style: For perfectly uniform round cookies, form the dough into a log on parchment paper, roll it up tightly, and chill it for at least two hours. Then you can just slice off rounds and bake as directed. So easy!
A Final Word on Safety & Storage
If you’re baking for someone with a serious allergy or celiac disease, you have to be vigilant about cross-contamination. Use sparkling clean bowls and utensils, and always double-check that your ingredients are certified gluten-free. And obviously, since this recipe’s base is almond flour, it’s a no-go for anyone with a nut allergy. Always be upfront about your ingredients!
As for storage, these cookies keep beautifully. They’ll stay fresh in an airtight container at room temperature for up to five days. You can also freeze them for up to three months—just place them in a freezer-safe bag with parchment paper between the layers. They’ll be ready for a holiday treat emergency whenever you need them.
Inspiration:
Almond Flour vs. Coconut Flour: While both are fantastic gluten-free options, they are not interchangeable. Almond flour, used in this recipe, is rich in healthy fats and creates a moist, tender cookie. Coconut flour is extremely absorbent, requiring much more liquid, and yields a cakier, denser result. For that perfect chewy texture, stick with blanched almond flour.

A packed cup of almond flour can weigh up to 20% more than a spooned-and-leveled one, drastically altering your cookie’s texture.
This is why many experienced gluten-free bakers swear by a digital kitchen scale. For this recipe, 224g is the target. It’s the single best way to guarantee consistent, perfect results every single time you bake.
Looking for a simple, dairy-free icing that actually sets?
- Start with 1 cup of powdered sugar.
- Whisk in 1-2 tablespoons of oat milk or almond milk until you reach a thick but pipeable consistency.
- Add 1/2 teaspoon of vanilla and a tiny squeeze of lemon juice to cut the sweetness and help it harden.
It’s the perfect glossy finish for your holiday creations.
The right chocolate matters: For a deep, rich flavor without dairy, look for chips with a high cacao percentage (60-70%). Brands like Enjoy Life or Hu Kitchen are specifically designed to be free from common allergens, ensuring your cookies are safe and delicious for everyone.
The magic of holiday baking isn’t just in the taste, but in the scent. The warm, spicy aroma of ginger mingling with sweet vanilla and toasty almonds creates an instant feeling of comfort and celebration that fills the entire house. It’s the official fragrance of the season.
My gluten-free cookies still spread too much, even after chilling?
Check your coconut oil temperature. If it was too warm when mixed in, it can melt the coconut sugar and begin to dissolve the dough’s structure before it even hits the oven. Let the melted oil cool to a lukewarm, liquid state—not hot—before adding it to your dry ingredients for perfect, high-rising cookies.
- A perfectly soft, chewy center.
- Crisp, golden-brown edges.
- A cookie that holds together beautifully.
The secret? Don’t overbake. Gluten-free flours like almond can go from perfectly done to dry in under a minute. Pull your cookies from the oven when the edges are just set and the centers still look slightly underdone. They will finish baking to perfection on the hot pan.
Need an egg-free or vegan version? You can easily substitute the egg with a ‘flax egg’.
- Mix one tablespoon of ground flaxseed meal with three tablespoons of water.
- Let the mixture sit for about 5-10 minutes, or until it forms a gel-like consistency.
This swap works perfectly in this recipe, adding moisture and excellent binding power without compromising the texture.
To keep your gluten-free cookies fresh, proper storage is key. Let them cool completely, then place them in an airtight container at room temperature. Because they’re made with almond flour’s healthy fats, they tend to stay moist longer than many wheat-based cookies. For the best texture, enjoy them within 3-4 days.
Blanched almond flour is made from almonds that have had their skins removed, resulting in a finer texture and lighter color perfect for delicate baked goods.
Unblanched flour, often called almond meal, contains the skins. This makes it slightly coarser and better suited for more rustic recipes like hearty breads or pie crusts, but less ideal for these refined holiday cookies.
A note on vanilla: Using pure vanilla extract, not imitation vanilla flavoring, makes a world of difference. The flavor is richer, more complex, and lacks the chemical aftertaste of artificial versions. It’s a small upgrade that elevates your cookies from simply ‘good’ to truly ‘gourmet’.
Melted Coconut Oil: Creates a chewier, denser cookie with slightly crisp edges. This is the ideal choice for the recipe’s intended texture.
Creamed Vegan Butter (e.g., Miyoko’s Kitchen or Melt): Can be substituted, but will produce a slightly softer, cakier, more puff-pastry-like cookie.
For that classic holiday chew, melted coconut oil is the clear winner.
Can I freeze the dough to bake later?
Absolutely! This dough freezes beautifully. Roll it into a log, wrap it tightly in plastic wrap, and then in a layer of foil to prevent freezer burn. It can be frozen for up to 3 months. When you’re ready for fresh cookies, just slice and bake from frozen, adding a couple of extra minutes to the baking time.
Elevate the holiday spice blend beyond just ginger. Try adding a pinch of cardamom for a floral, complex note, or a dash of allspice for extra warmth. A tiny grating of fresh nutmeg right into the dough can also transform the aroma, making your kitchen smell even more incredible.

According to a 2021 study, nearly one-third of U.S. households have at least one member who actively avoids gluten.
Baking with dietary needs in mind is more than a trend; it’s an act of modern hospitality. Offering a delicious, thoughtfully prepared treat means everyone at the holiday gathering feels included, cared for, and able to indulge in the festivities.
- Perfectly uniform cookies that bake evenly.
- A faster, cleaner way to portion dough.
- A professional-looking final result.
The tool? A small cookie scoop. Using a scoop ensures every ball of dough is the same size, eliminating guesswork and messy hands. A 1.5-tablespoon scoop is the ideal size for achieving the yield and bake time in this recipe.
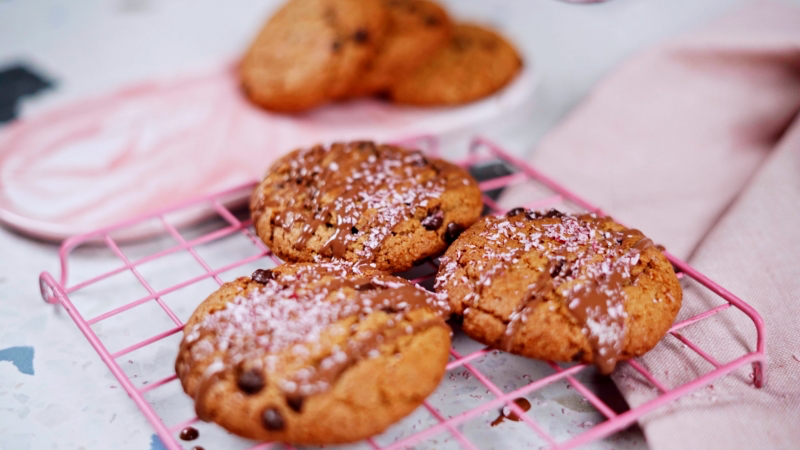
Want to decorate with festive colors without using artificial dyes? Nature provides a beautiful palette for your dairy-free icing.
- Pink/Red: A tiny bit of beet powder or Suncore Foods’ Red Radish powder.
- Green: Matcha or spirulina powder. A little goes a long way!
- Yellow: A pinch of turmeric.
Mix these natural powders directly into your icing for a vibrant, plant-based look.
Always use parchment paper. This is non-negotiable for most gluten-free cookies. It prevents sticking without adding extra grease and ensures even heat distribution on the bottom of the cookies, helping them brown perfectly without burning. Silicone mats like a Silpat work well too, but parchment often yields a slightly crisper cookie edge.
This simple dough is a fantastic base for creativity. Try pressing a thumbprint into the center of each dough ball before baking, then filling the indentation with raspberry chia seed jam for a gluten-free twist on a classic holiday thumbprint cookie.
When gifting your gluten-free goodies, presentation is everything. Consider these easy, charming ideas:
- Stack cookies carefully in a wide-mouth mason jar tied with baker’s twine.
- Slide them into clear cellophane bags sealed with a festive ribbon.
- Line a small, reusable tin box with parchment paper for a classic touch.
- Always add a small tag noting they are ‘Gluten-Free & Dairy-Free’ for your recipient’s peace of mind.
Don’t underestimate the power of salt. Fine sea salt doesn’t just add a salty taste; it’s a flavor enhancer. In gluten-free baking, where alternative flours can sometimes have a mild, flat taste, a proper amount of salt is crucial. It sharpens the vanilla, deepens the chocolate notes, and makes the entire cookie taste more complex and complete.
Holiday Budget Tip: If you go through a lot of almond flour, consider making your own. Simply buy raw, blanched, slivered almonds in bulk (often cheaper per ounce) and pulse them in a high-speed blender or food processor until they reach a fine, flour-like consistency. Just be careful not to over-blend, or you’ll end up with almond butter!


