Tired of Bland Pumpkin? Here’s How to *Actually* Cook With It
I can still smell my first professional kitchen in the fall. It wasn’t just cinnamon and spice—it was the deep, earthy aroma of sugar pumpkins roasting on sheet pans, their natural sugars slowly turning to caramel. For a young cook, that was a lightbulb moment. Pumpkin wasn’t just for carving; it was a serious, versatile ingredient.
In this article
So many of us get stuck on pumpkin pie or maybe a simple soup. But to really get the most out of it, you have to understand the ingredient itself. This isn’t just a list of recipes. I’m going to walk you through the real-deal techniques we use in professional kitchens to get consistently delicious results, every single time. We’re starting from the ground up, so you’ll get the ‘why’ behind every step.
First Things First: Picking the Right Pumpkin
Success starts with your main ingredient, right? And here’s the honest truth: not all pumpkins are created equal. Those big, bright orange Jack O’Lantern pumpkins you see everywhere are basically all water and stringy fiber. They’re grown for size and looks, not flavor. If you try to cook with one, you’re going to end up with a watery, bland mess. For your kitchen projects, just walk on by.

The Best Pumpkins for Cooking and Baking
You want to look for smaller, denser varieties that are often labeled as “sugar pumpkins” or “pie pumpkins.” They pack way more flavor and have a much better texture. Here are a few of my go-to choices:
- Sugar Pie Pumpkin: This is the classic for a reason. It’s small, round, and has a sweet, firm flesh that’s incredibly reliable. It’s my top pick for pies and purees when I want that quintessential pumpkin flavor.
- Long Island Cheese Pumpkin: Don’t let the name throw you off. It’s shaped like a flattened wheel of cheese and has a lovely tan skin. Inside, the flesh is a vibrant orange, totally stringless, and wonderfully sweet. It’s a dream for making silky-smooth soups or for just roasting as a side dish. You’ll likely find these at a local farmers’ market, as they’re less common in big chain grocery stores.
- Kabocha Squash: Often called a Japanese pumpkin, this one is a personal favorite. It has a tough, dark green skin, but the flesh inside is incredible. When cooked, it’s dry and flaky, which is a good thing! That low moisture content makes it perfect for things like gnocchi or as a simple roasted side where you don’t want any sogginess. The flavor is intensely nutty and sweet.
Fresh Puree vs. Canned: An Honest Kitchen Secret
Okay, let’s have a frank discussion. While I absolutely love the process and flavor of roasting a fresh pumpkin, I’m going to let you in on a little pro secret: high-quality canned pumpkin puree is fantastic. In many situations, it’s actually more consistent than what you might make from scratch.
The big brands use specific pumpkin varieties and steam them to get the water content just right. For delicate custards like in a pie or cheesecake, that consistency is a huge advantage. So, when should you go fresh? I pull out a fresh pumpkin when its flavor needs to be the undeniable star, like in a simple roasted soup or as a standalone side dish. The caramelization you get from roasting adds a depth that canned stuff just can’t match.
But if you’re short on time or making a classic pie, a can of 100% pure pumpkin (and I mean puree, NOT pre-spiced pie filling) is a perfectly professional choice. Seriously, no shame in that game. Plus, a fresh sugar pumpkin might run you $4 to $7, while a can of puree is usually just $2 to $3, so it’s a smart budget move, too.
How to Make Your Own Amazing Pumpkin Puree
Decided to go fresh? Awesome. Here’s how we do it in the kitchen to get a smooth, flavorful puree that isn’t a watery disappointment.
What You’ll Need:
- A heavy, sharp chef’s knife
- A stable cutting board (Quick tip: Place a damp paper towel underneath it to stop it from slipping. This simple trick has prevented so many accidents I can’t even count.)
- A big metal spoon or an ice cream scoop
- A baking sheet
- A food processor, blender, or a food mill (a handy tool that purees and strains at the same time)
The Process (Start to Finish: about 1.5 hours):
- Preheat and Prep: Get your oven cranking to 400°F (200°C). You want high heat to roast and caramelize the pumpkin, not just steam it in its own skin.
- Cut the Pumpkin: This can be the trickiest part. Here’s a safety hack I swear by: microwave the whole pumpkin for 3-5 minutes first. It softens the skin just enough to make cutting WAY easier. Then, carefully poke the tip of your knife into the top near the stem and press down firmly to cut it in half.
- Scoop the Guts: Use your spoon or scoop to scrape out all the seeds and stringy bits. Really scrape the walls clean for a smoother final product. (Don’t toss the seeds! Clean them up and roast them later for a great snack.)
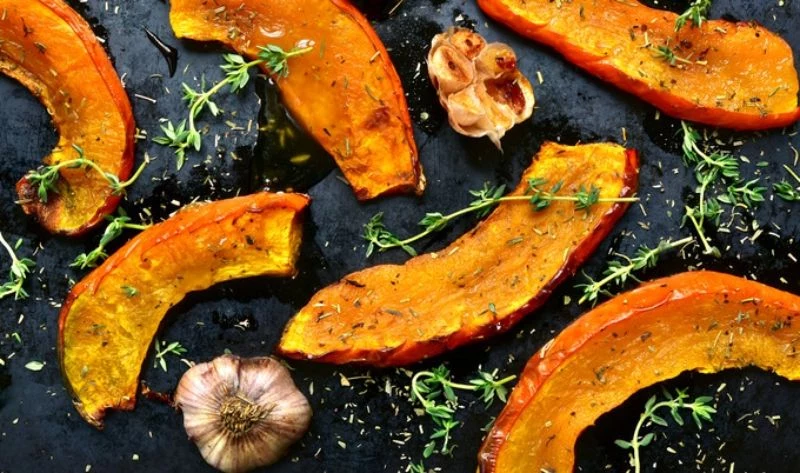
- Roast for Flavor: Place the pumpkin halves cut-side down on the baking sheet. I prefer roasting them dry to concentrate the sugars, but you can add a splash of water to the pan if you like. Roast for 40-60 minutes. You’ll know it’s done when a fork can easily pierce the flesh.
- Cool and Scoop: Let the pumpkin cool down enough so you can handle it without burning yourself. The flesh should pull away from the skin easily. Scoop it all into a bowl. A 3-pound sugar pumpkin will typically give you about 2 cups of thick puree.
- Get it Smooth: Transfer the cooked flesh to your food processor and blend until it’s perfectly smooth. If it looks a little watery, here’s a pro trick: line a sieve with a coffee filter or cheesecloth, set it over a bowl, and let the puree drain in the fridge for an hour. This removes excess water and leaves you with a thick, rich, perfect puree.
Let’s Talk Sweets: Perfecting the Pumpkin Classics
Now that you have amazing puree, let’s dive into the sweet stuff. And the foundation for almost everything is a great spice blend.
My Go-To Pumpkin Spice Blend
Store-bought is fine, but making your own is a total game-changer. The flavor is so much fresher and you can control the balance. To really level up, gently toast the whole spices (like cinnamon sticks and cloves) in a dry pan for a minute until they’re fragrant, then grind them.
House Blend Recipe:
- 3 tablespoons ground cinnamon
- 2 teaspoons ground ginger
- 2 teaspoons ground nutmeg (freshly grated is a must!)
- 1 teaspoon ground allspice
- 1 teaspoon ground cloves
Just mix these together and keep them in a sealed jar. It’s a perfect balance of warm, spicy, and complex.
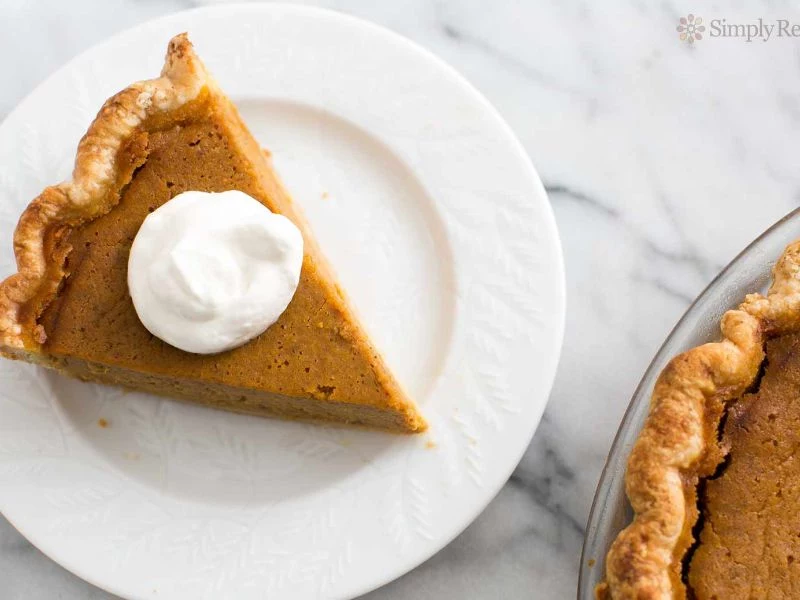
Recipe 1: The Ultimate Pumpkin Pie
A truly great pumpkin pie comes down to two things: a flaky, crisp crust and a silky, perfectly set filling. We’re going to tackle the two most common problems head-on: the dreaded soggy bottom and the cracked top.
Good to know: Total time is about 4 hours, but most of that is baking and cooling. Plan on 30 mins prep, 1 hour baking, and at least 2 hours cooling.
First, The Crust (No More Soggy Bottoms!):
The secret is to blind bake your 9-inch pie crust. This means partially baking it before you add the filling. Line your crust with parchment paper, fill it with pie weights or dried beans, and bake at 375°F (190°C) for 20 minutes. Then, remove the weights and paper and bake for another 5-7 minutes until the bottom looks dry. This creates a waterproof seal.
Next, The Filling (So Smooth, No Cracks):
- 1 (15-ounce) can pumpkin puree (or 1 ¾ cups of your homemade thick puree)
- ¾ cup packed dark brown sugar
- 2 teaspoons of your house pumpkin spice blend
- ½ teaspoon salt
- 2 large eggs, plus 1 extra yolk (the yolk adds richness and helps it set)
- 1 (12-ounce) can evaporated milk (it has less water than cream, for a firmer custard)
Whisk the pumpkin, sugar, and spices. Lightly beat the eggs and yolk, then whisk them in gently—too much air can cause cracks! Slowly whisk in the evaporated milk until smooth. Pour it into your cooled, pre-baked crust.
The Two-Temp Trick: Bake at 425°F (220°C) for 15 minutes. This high heat helps set the edges quickly. Then, reduce the heat to 350°F (175°C) and bake for another 40-50 minutes. The pie is done when the center has a slight jiggle, like Jell-O. Cool it on a wire rack for at least two hours. Patience is key! Putting a hot pie in the fridge is a guaranteed way to make it crack.
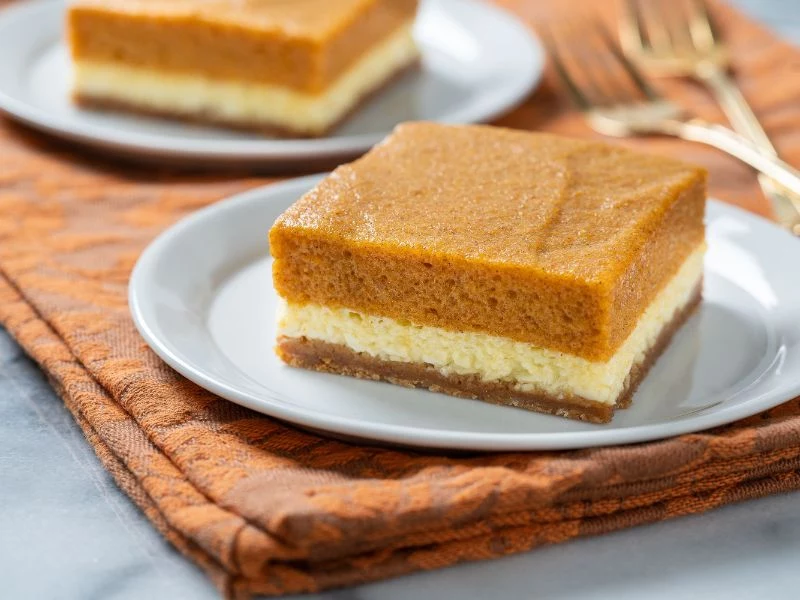
Recipe 2: A Showstopper Pumpkin Cheesecake
Cracked cheesecake is a baker’s nightmare. The secrets to avoiding it are a gentle water bath and a slow, patient cooling process. This recipe has a tangy cheesecake base and a light, airy pumpkin chiffon top.
Good to know: This one needs to set overnight. Plan for about 1 hour of active time, 30 mins baking, and at least 6 hours (or overnight) to chill.
Start with a crust made from 1 ¾ cups of gingersnap cookie crumbs, which pair beautifully with pumpkin. Press it into a 9-inch springform pan and bake for 10 minutes at 350°F (175°C).
For the layers, you’ll make a simple baked cream cheese base first. Then, you’ll make a pumpkin chiffon topping. This involves making a cooked pumpkin custard, dissolving in some bloomed gelatin (that just means letting gelatin powder soften in cold water for 5 minutes so it dissolves smoothly), and then folding in a fluffy meringue made from beaten egg whites. Pour that glorious chiffon over your cooled cheesecake base and let it set in the fridge overnight. It sounds complicated, but just follow the steps and you’ll have a dessert that looks and tastes like it came from a high-end bakery.
Moving on to Savory Pumpkin Dishes
Pumpkin’s earthy sweetness is absolutely incredible in savory dishes. The trick is to balance it with salt, herbs, and a little bit of fat.
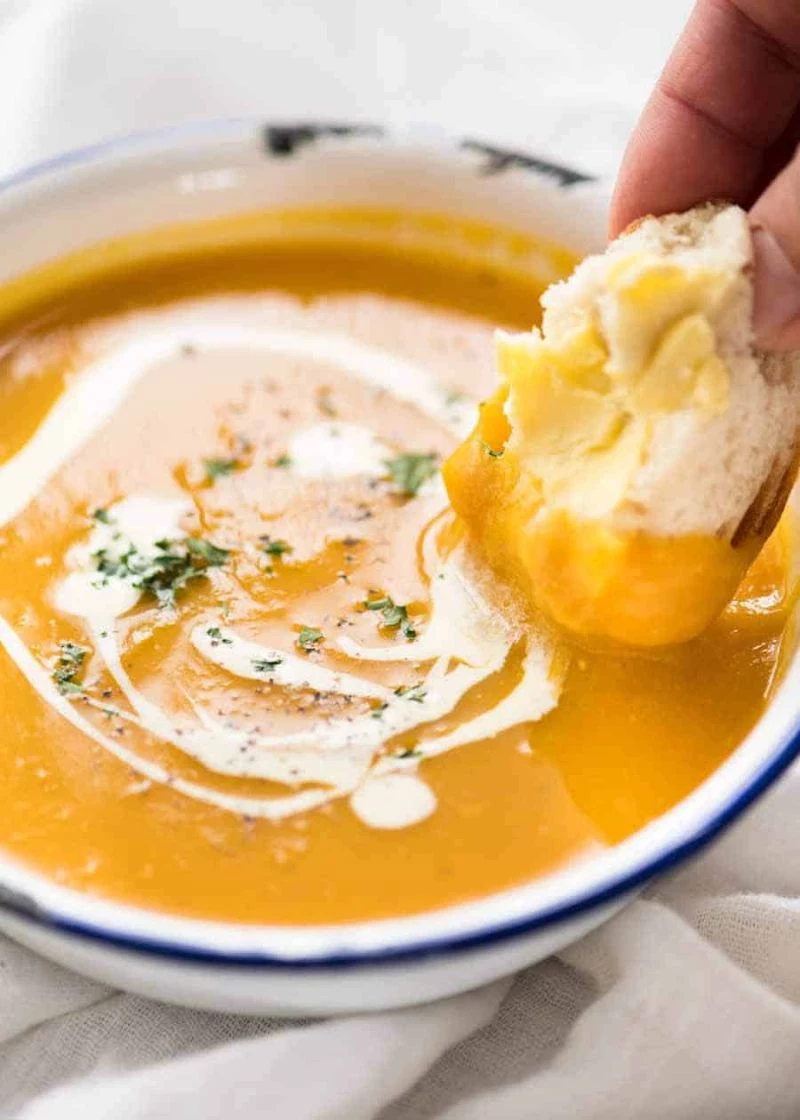
Recipe 3: The Creamiest Roasted Pumpkin Soup
The secret to a soup with unbelievable depth? Roasting the vegetables first. It’s a non-negotiable step for amazing flavor.

Good to know: Total time is about 1 hour and 15 minutes.
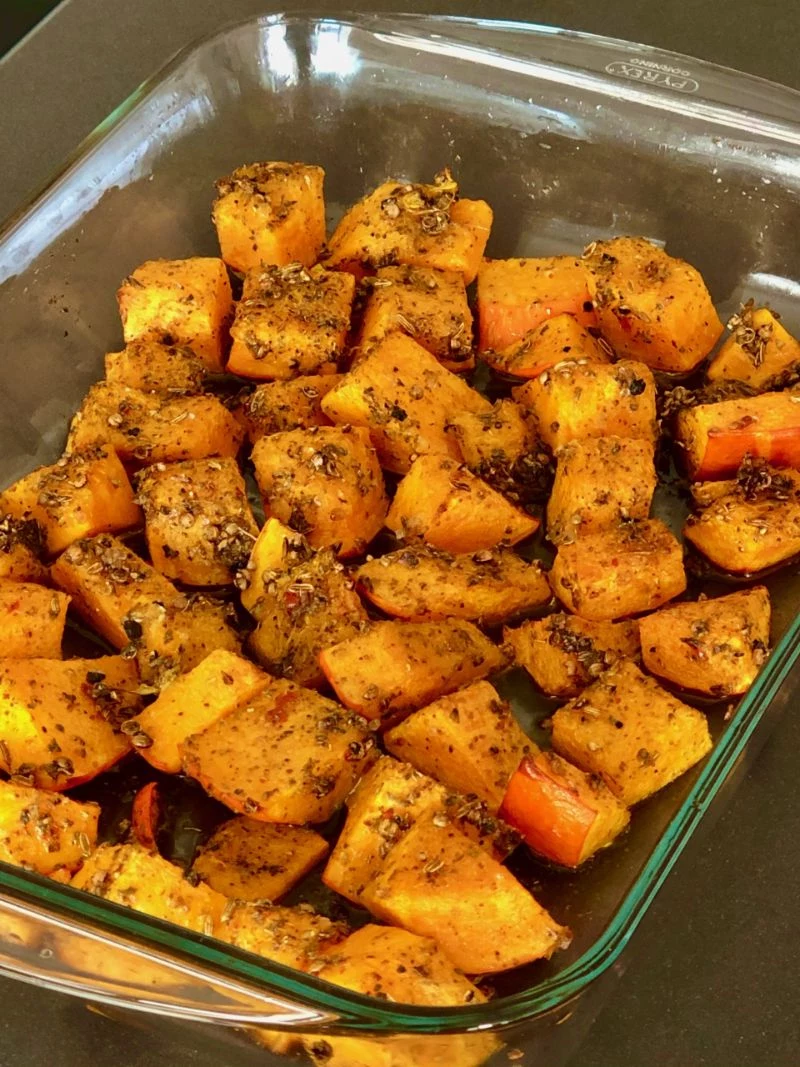
Toss chunks of a 3-pound sugar pumpkin, a large chopped onion, and a few garlic cloves with olive oil, salt, and pepper. Roast at 400°F (200°C) for 30-40 minutes until everything is tender and caramelized at the edges. The smell alone is worth it.
Transfer all those roasted goodies to a pot, add about 4 cups of broth, and simmer for 10 minutes. Then, use an immersion blender to puree it right in the pot until it’s velvety smooth. (Heads up! If using a regular blender, work in batches and don’t fill it more than halfway, as hot liquids expand). Stir in a half-cup of heavy cream or full-fat coconut milk, gently heat it through, and taste for seasoning. Serve it topped with toasted pumpkin seeds or a drizzle of chili oil for a perfect finish.
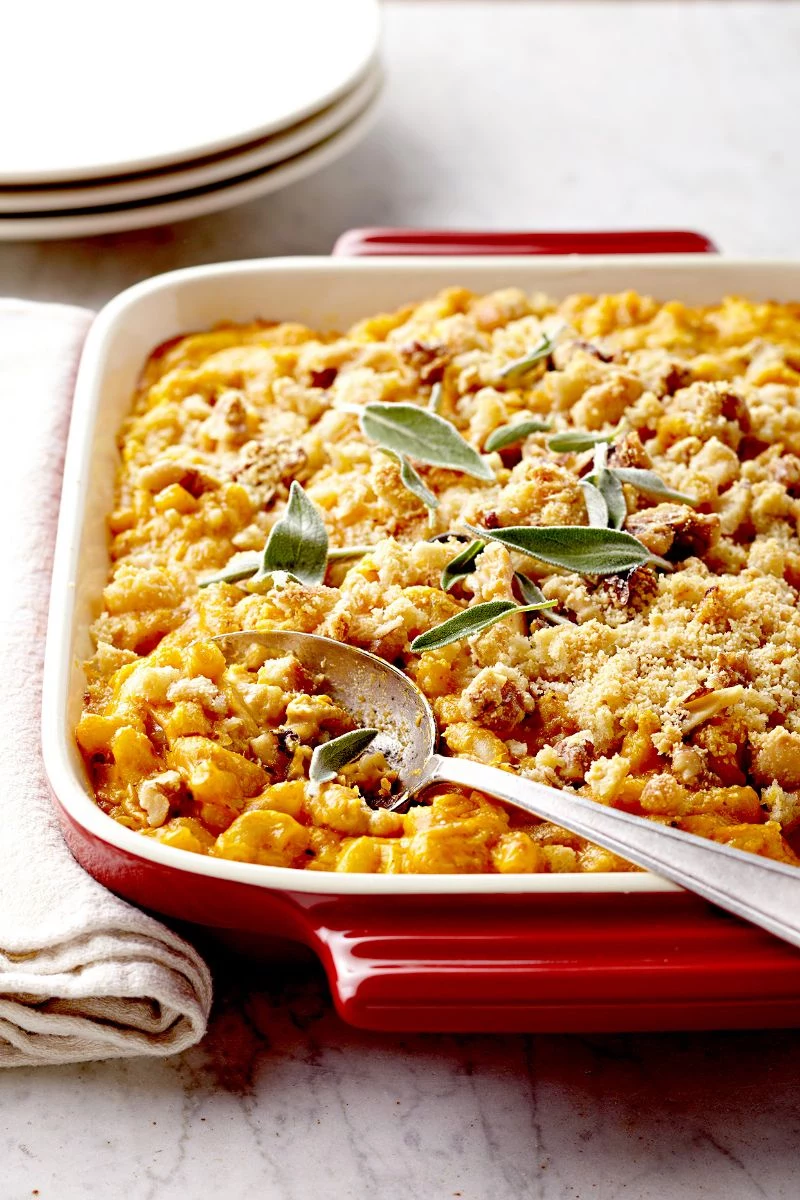
Recipe 4: Next-Level Pumpkin Mac and Cheese
This isn’t a gimmick, I promise. Pumpkin adds a gorgeous color, a silky texture, and an earthy note that cuts through the richness of the cheese. It’s a game-changer.
Good to know: Total time is about 1 hour.
You’ll start by making a classic cheese sauce. Melt 4 tablespoons of butter, whisk in ¼ cup of flour and some seasonings, and cook for a minute. This is your roux. Slowly whisk in 3 cups of warm milk until it thickens into a beautiful Béchamel sauce. Take it off the heat and stir in 1 cup of pumpkin puree, followed by a mix of shredded sharp cheeses like Gruyère and sharp cheddar. Fold in a pound of cooked pasta (something like shells or cavatappi is great), pour into a baking dish, top with buttery panko breadcrumbs, and bake at 375°F (190°C) for about 30 minutes until bubbly and golden. Let it rest for 10 minutes before you dig in. You won’t regret it.
A Few Final Words of Advice
Honestly, cooking with pumpkin is all about learning to manage its texture and complement its unique flavor. Don’t be afraid to play around. Try adding about a cup of puree to a large pot of your favorite chili—it adds a subtle sweetness and a wonderfully creamy body.
My Favorite 5-Minute Fall Treat
Short on time? Stir 2 tablespoons of pumpkin puree and a pinch of your spice blend into your morning oatmeal or a bowl of plain Greek yogurt. You get all the cozy fall flavor with practically zero effort. It’s my go-to quick breakfast in the autumn.
A Quick Note on Safety and Storage
Always be extra careful when cutting hard squash. A sharp knife is much safer than a dull one because it won’t slip as easily. You can store whole, uncut cooking pumpkins in a cool, dark place for up to two months. Once you’ve made puree, it’ll last in the fridge for about five days, or you can freeze it for months. I like to freeze it in ice cube trays, then pop the cubes into a freezer bag for perfectly portioned amounts for future recipes.
These techniques are your foundation. The real fun begins when you know them well enough to start making them your own. Trust your instincts, pay attention to the details, and enjoy one of the best flavors the season has to offer.
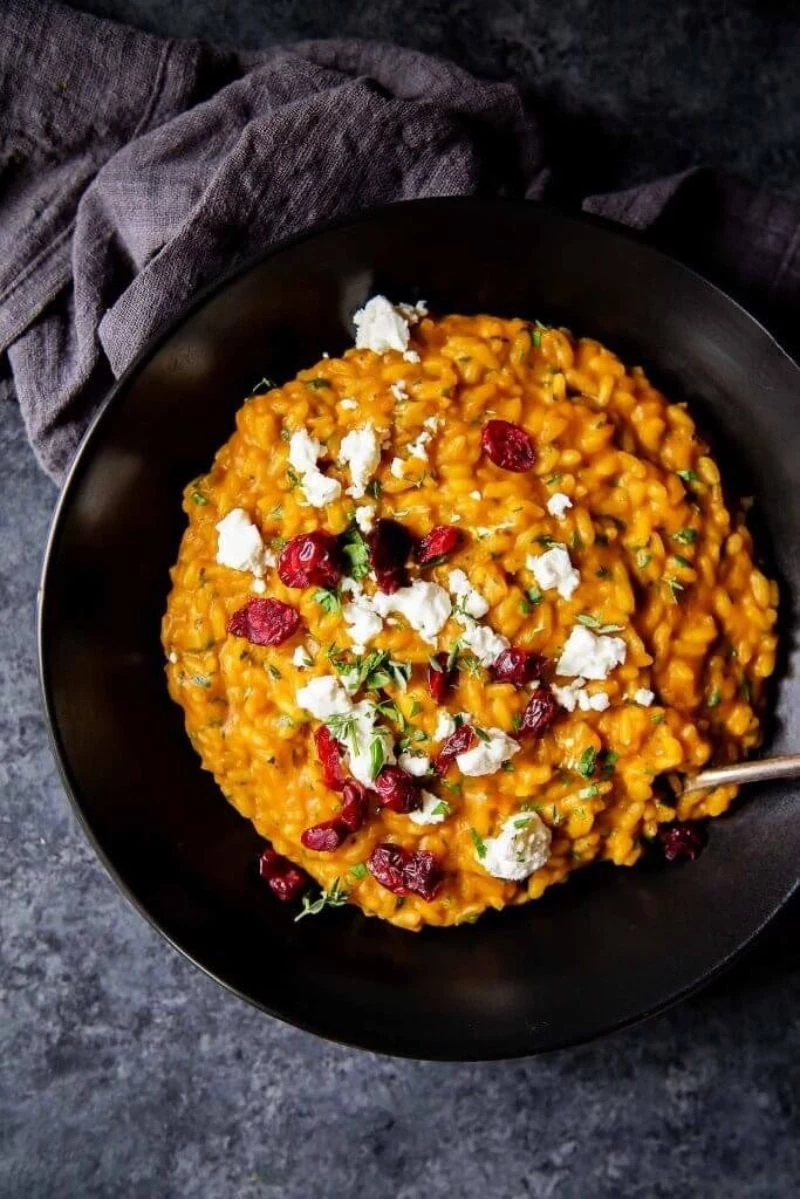
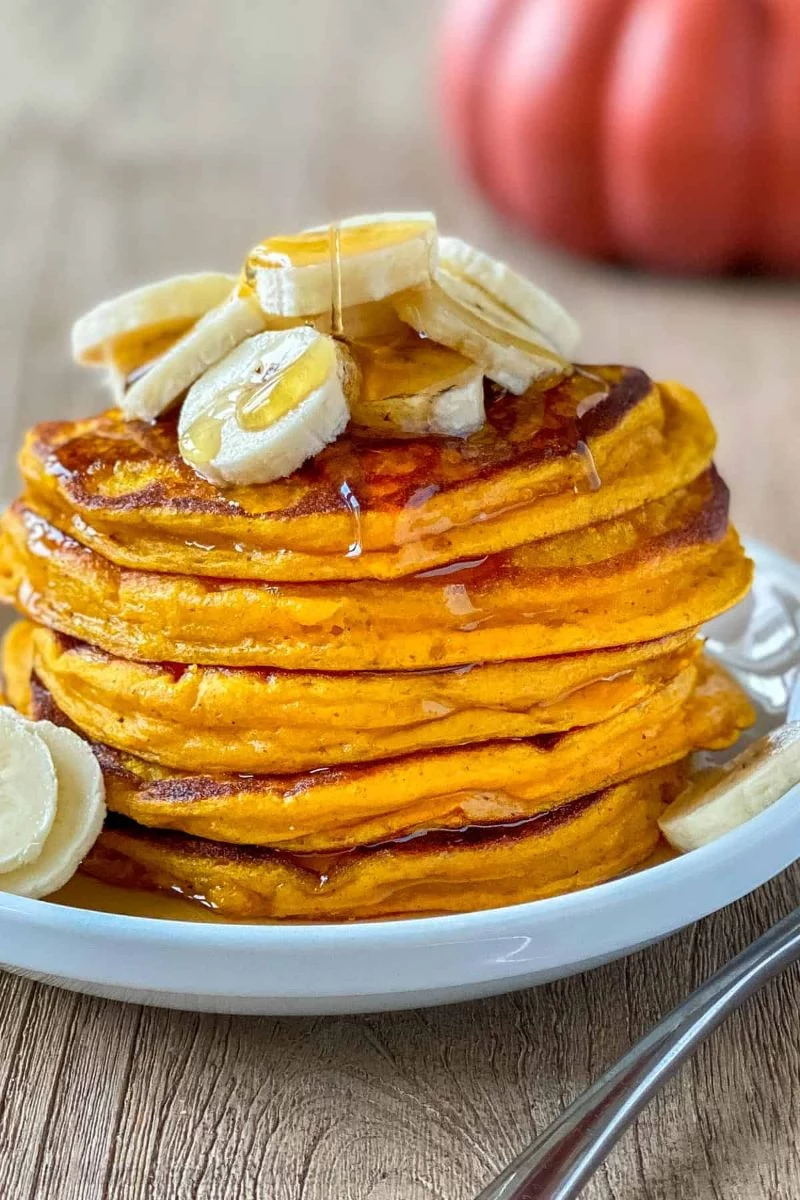
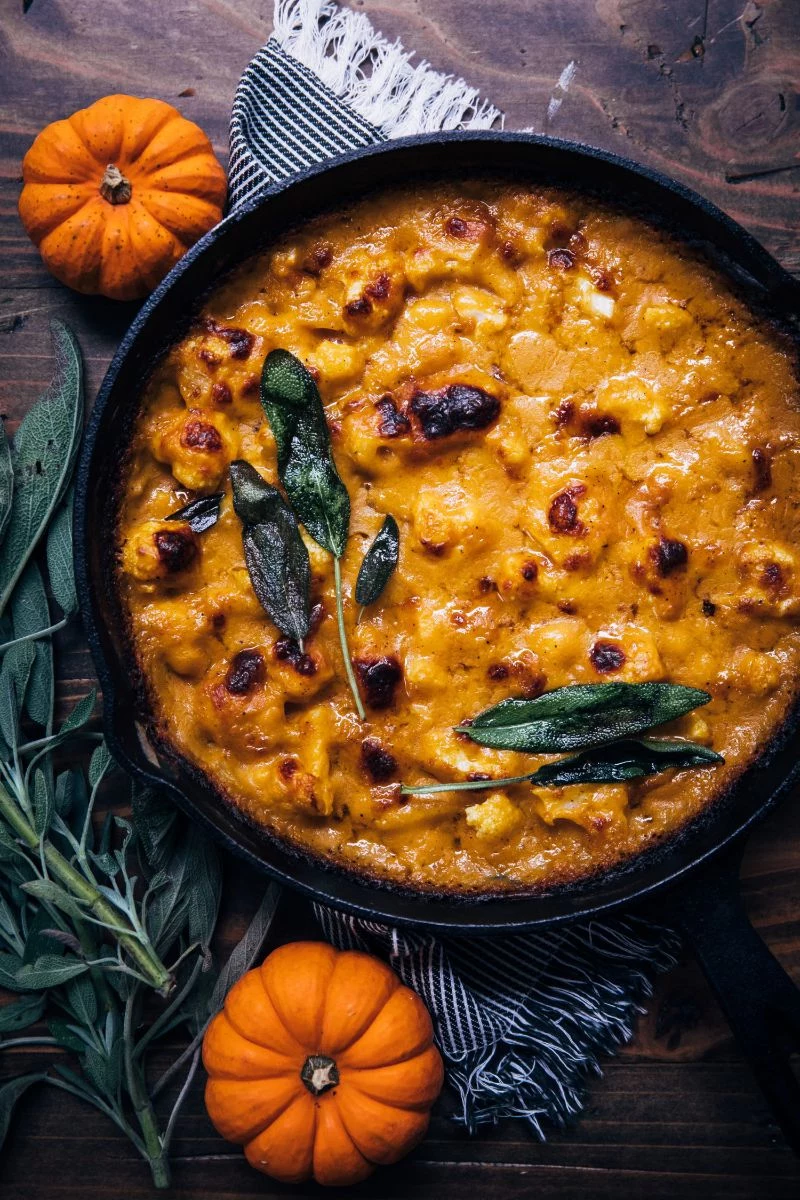
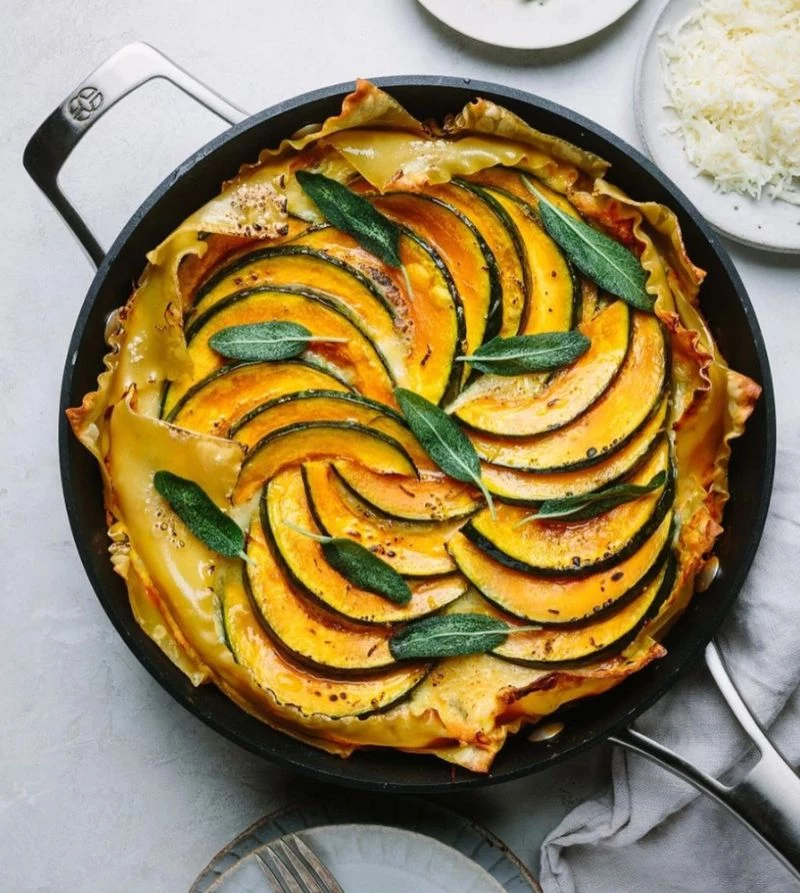
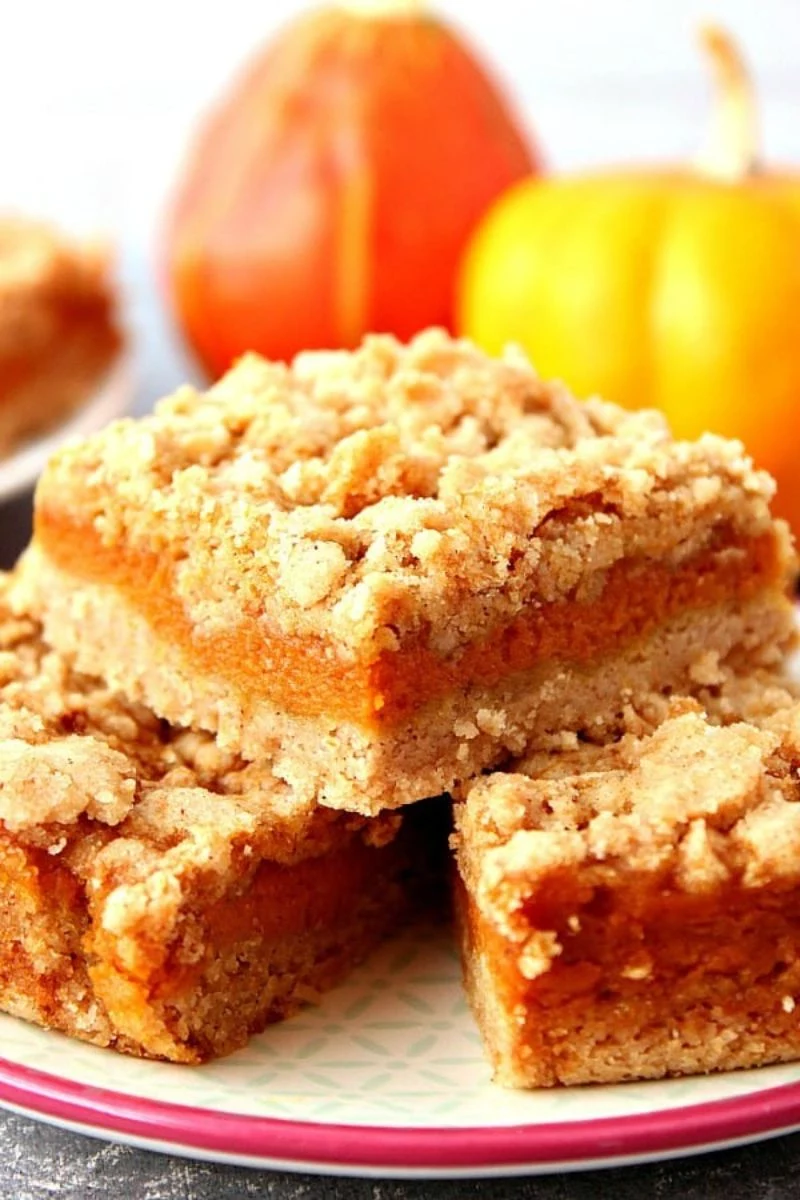
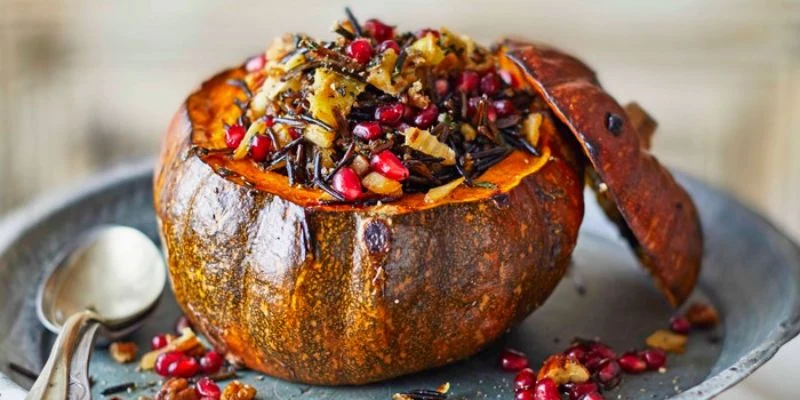
Inspirational Gallery
A single cup of cooked pumpkin can provide over 200% of your recommended daily intake of Vitamin A.
This isn’t just about carving jack-o’-lanterns; pumpkin is a nutritional powerhouse. Vitamin A is crucial for vision, immune function, and cell growth. Swapping sweet potatoes for pumpkin in a mash or roast is an easy way to get a serious boost of this essential nutrient, all while enjoying that sweet, earthy flavor.
Food Processor: Using a machine like a Cuisinart or Vitamix will give you an incredibly smooth, velvety puree. This is the secret to silky pumpkin pies and creamy, restaurant-quality soups.
Potato Ricer or Food Mill: For a more rustic, slightly fibrous texture that’s perfect for hearty stews, gnocchi, or savory pancakes, pressing the cooked pumpkin through a ricer is the way to go. It keeps some of the pumpkin’s natural structure intact.
For baking, the processor is king; for savory dishes, either can work depending on the desired result.
Ready to move beyond the classic cinnamon-nutmeg combo? The earthy sweetness of pumpkin is a fantastic canvas for more adventurous flavors. Try adding a pinch of ground cardamom and a bit of orange zest to your next pumpkin bread batter. For savory dishes, think about the warmth of smoked paprika or the subtle, anise-like fragrance of ground fennel seed in a pumpkin gratin.
How do I get that perfectly smooth, non-watery pumpkin pie filling every single time?
The professional secret is to drain your homemade puree. After you’ve blended the roasted pumpkin, line a fine-mesh sieve with a layer of cheesecloth or a clean coffee filter, set it over a bowl, and let the puree sit in the refrigerator for at least an hour, or even overnight. You’ll be shocked at how much water drains out. This step concentrates the flavor and guarantees a firm, luscious texture in your pies, custards, and cheesecakes.
- Adds a nutty, toasted, and deeply complex aroma.
- Gives any dish an instant flavor of sophistication.
- Turns a simple ingredient into something memorable.
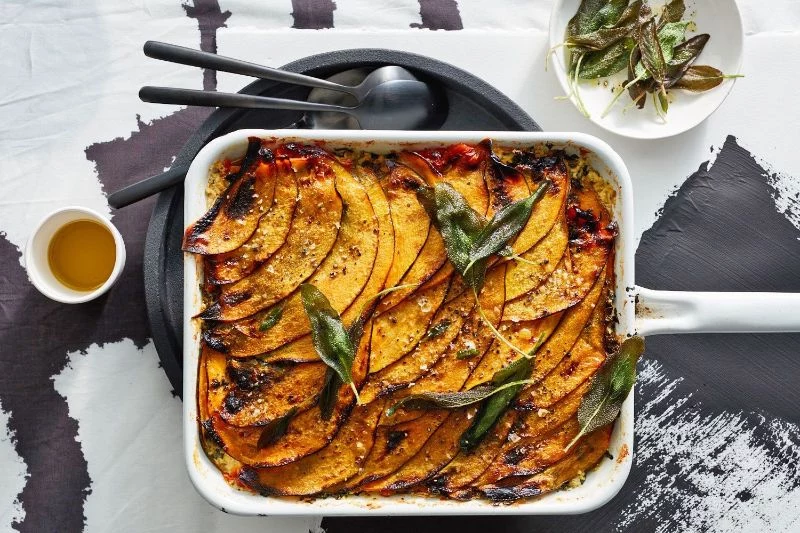
The secret? Brown butter. Simply melt unsalted butter in a light-colored pan over medium heat. Let it foam, then watch as brown specks form at the bottom and a nutty fragrance fills the air. Drizzle this liquid gold over roasted pumpkin slices or use it as the base for a savory pumpkin and sage pasta sauce.
Don’t toss those seeds! Once separated from the pulp and rinsed, they are culinary gold. For a perfect snack:
- Toss the dry seeds with a little olive oil, smoked paprika, cumin, and a pinch of cayenne pepper for a savory, spicy crunch.
- For a sweet version, try melted butter, a sprinkle of cinnamon, and a dusting of brown sugar before roasting.
- Spread them in a single layer on a baking sheet and roast at 300°F (150°C) for 15-20 minutes, or until golden and crispy. They’re an amazing topping for the soups and salads seen in this article.

For some varieties, like Kabocha or Delicata squash, the skin is completely edible.
There’s no need to peel them! Just give the outside a good scrub, slice, and roast as you normally would. The skin becomes tender and adds a pleasant, slightly chewy texture and extra nutrients. It’s a time-saver and a great way to reduce kitchen waste.
Important note on canned pumpkin: If you’re using canned puree in a pinch, be sure to grab ‘100% pure pumpkin’ and not ‘pumpkin pie filling.’ The latter is pre-sweetened and spiced, which will throw off your recipe completely. Brands like Libby’s are a consistent and reliable choice for pure pumpkin puree when fresh isn’t an option.
Think globally with your pumpkin pairings. In Italy, you’ll find it stuffed into ravioli with amaretti cookies and Parmesan. In Thailand, it’s a star in rich, red curry made with coconut milk. And in the Middle East, a savory dip called Mutabal Shawandar bil Tahini often uses pumpkin instead of beets, blended with tahini, lemon, and garlic. It’s a world of flavor waiting to be explored.


