Forget Soggy Sandwiches: How to Plan a Picnic That Actually Works
I’ve been planning outdoor meals for years, both for big catering gigs and just for my own family, and I’ve learned one thing the hard way: a great picnic has almost nothing to do with fancy recipes. It’s all about smart planning.
In this article
I’ll never forget one of my early attempts. I was trying to impress a client and packed this beautiful, creamy potato salad and some delicate sandwiches on soft bread. Sound familiar? By the time we got to the park a couple of hours later, the sandwiches were a soggy tragedy and the salad was… concerningly lukewarm. It was a humbling lesson, to say the least. That day taught me that a successful picnic isn’t about what you want to eat, but what can realistically survive the journey.
So, let’s get real. Forget those picture-perfect spreads you see online that would wilt in five minutes. The real skill is in choosing, prepping, and packing food that stays fresh, safe, and delicious hours after you’ve left your kitchen. It’s a little bit of science and a little bit of strategy. In this guide, I’ll walk you through the pro techniques that make sure your food shows up looking as good as it tastes.

First Things First: Keeping Your Food Safe
Before we even dream about what food to pack, we have to talk about temperature. This is the single most important part of a safe picnic, and it’s not something to mess with.
In the food world, we’re obsessed with something called the “Temperature Danger Zone.” It’s the temperature range where nasty bacteria (the kind that cause food poisoning) have a party and multiply like crazy. Food safety experts all agree: this zone is between 40°F and 140°F (that’s 4°C to 60°C).
Here’s the rule of thumb: perishable food can only be in this danger zone for two hours, tops. And heads up! If it’s a hot day—over 90°F (32°C)—that window shrinks to just one hour. After that, even if it looks and smells perfectly fine, you’re taking a risk. Honestly, this is the one rule you just can’t bend.
Your Cooler is Your Best Friend
So, how do you beat the heat? With a solid cooler strategy. And no, you don’t need to spend a fortune.
A classic Coleman cooler, which you can find for around $50 at places like Target or Walmart, will do a great job for a day trip. If you’re a serious camper or need things to stay cold for multiple days, you could invest in a roto-molded brand like Yeti or RTIC, which can run you $250 or more. But for a simple picnic, basic is totally fine.
Here’s how to pack your cooler like a pro:
- Pre-Chill Everything. Your cooler’s job is to keep things cold, not make them cold. The night before, stick all your food, drinks, and even the cooler itself in the chilliest part of your house. I sometimes throw a sacrificial bag of ice in the cooler overnight just to get it frosty.
- Use Two Coolers (If You Can). This is a classic catering trick. One cooler is for drinks, and the other is for perishable food. The drink cooler will be opened constantly, but the food cooler stays shut, keeping everything inside safely chilled.
- Ice, Ice, Baby. Block ice is your friend. It melts way slower than cubed ice. An easy hack is to freeze water in a few large Tupperware containers. Then, use cubed ice or frozen gel packs to fill in the gaps. A quick tip: a full cooler stays colder longer because there’s less air to heat up.
- Time-Saving Hack: Use frozen juice boxes or water bottles as ice packs. They help keep everything cold, and once they thaw, you’ve got ready-to-go drinks for the kids (or yourself).

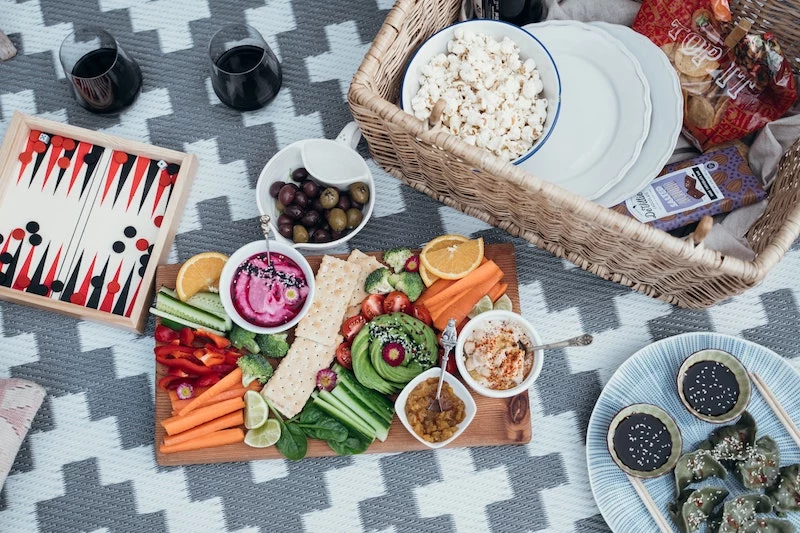
Building Food That Lasts
The second enemy of a good picnic is, of course, sogginess. A perfect dish can turn into a sad, mushy mess if it’s not built to travel. The secret is choosing ingredients that hold their own.
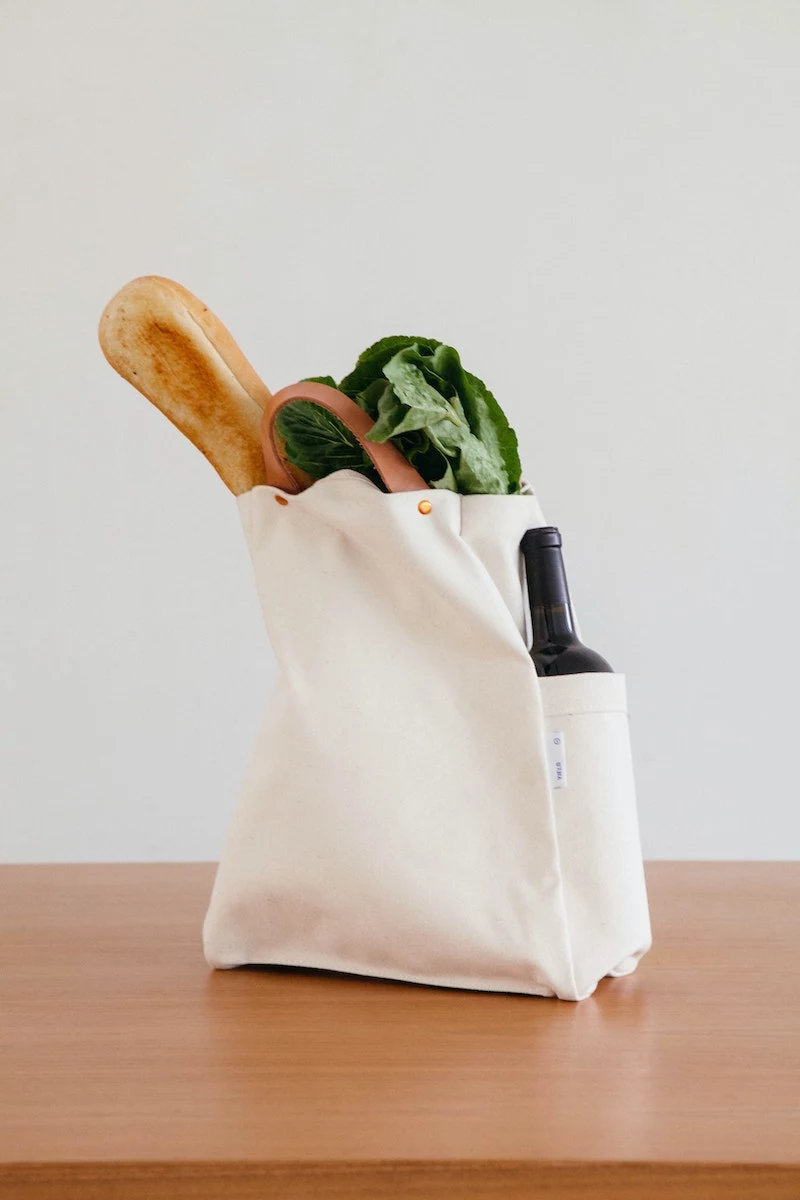
The Art of the Travel-Proof Sandwich
Ah, the classic sandwich. So easy to get wrong. The problem is always moisture seeping into the bread. But there’s a fix.
First, choose a sturdy bread. That soft, squishy sandwich loaf is just asking for trouble. Instead, go for something with a bit of backbone. A crusty baguette, a dense sourdough, or a chewy ciabatta are all fantastic choices because they stand up to moisture. Think of them as the foundation of your house—it needs to be solid.
Next—and this is the most important part—create a moisture barrier. If you only do one thing, do this. Before adding any fillings, spread a thin layer of fat on the inside of the bread, from crust to crust. Unsalted butter is the traditional choice, but mayonnaise or a thick pesto works great, too. This simple step creates a waterproof seal that keeps the bread from getting soggy.

Finally, layer your ingredients smartly. Put the driest stuff, like cured meats and sliced cheese, right up against that fat barrier. The wettest ingredients, like tomatoes and pickles, go in the very center. Better yet, pack sliced tomatoes and lettuce in a separate little container and add them right before you eat. It’s one extra step that pays off big time.
Salads That Don’t Go Sad and Limp
Let’s be frank, creamy, mayo-based salads like potato or tuna are a bit risky in the heat and tend to get texturally weird. A much better bet is to build your salad from heartier ingredients.
Grain-based salads are a game-changer. Things like quinoa, farro, or even couscous are perfect because they absorb dressing without turning to mush. In fact, they usually taste even better after the flavors have had a chance to hang out for a while.
My go-to vinaigrette is super simple: three parts good olive oil to one part lemon juice (or vinegar), a spoonful of Dijon mustard, and a pinch of salt and pepper. Shake it up in a jar, and you’re done.
And have you heard of the salad-in-a-jar? It’s popular for a reason—it just works. Here’s a can’t-fail recipe to try:
- Layer 1 (Bottom): Pour in your vinaigrette.
- Layer 2: Add hard stuff like chickpeas or chopped carrots.
- Layer 3: Add your grains, like cooked quinoa.
- Layer 4: Add cherry tomatoes and crumbled feta cheese.
- Layer 5 (Top): Pack in your delicate greens, like spinach or arugula.
Keep it upright, and when you’re ready to eat, just give it a good shake. Perfectly dressed, crisp salad every time.
A Few More Pro Tips for a Flawless Picnic
Over time, you learn what works and what really, really doesn’t. Here are a few more things to keep in mind.
What About Hot Food?
Most picnics are built around cold food, but sometimes you just want a warm soup or some chili. It’s totally doable! The key is a good quality, pre-heated Thermos. Fill the Thermos with boiling water and let it sit for about 10 minutes to heat up the inside. Then, dump the water out and immediately fill it with your piping hot food. It should stay safely warm for hours.

Foods to Maybe Leave at Home
While we’re at it, here are a few things that often cause more trouble than they’re worth:
- Bananas: They get bruised easily and make everything else in the bag smell like, well, bananas.
- Delicate Fish: Things like flaky tilapia or delicate shrimp salads are a food safety gamble and don’t travel well.
- Anything Needing Complicated Assembly: If it requires a lot of chopping or careful arranging on a wobbly blanket, it’s probably not worth the hassle.
Don’t Forget the Gear!
Forgetting one key item can put a damper on the whole day. I keep a dedicated “picnic box” with all the non-perishable stuff so I can just grab it and go. Plan for about 30 minutes of prep the night before and maybe 20 minutes of packing in the morning.
Here’s a quick checklist:
- A small, sharp knife with a cover and a lightweight cutting board.
- Serving spoons, a bottle opener, and a corkscrew. (The corkscrew is the one everyone forgets!)
- Plenty of napkins and some wet wipes for sticky fingers. They’re a lifesaver.
- And a trash bag. Always practice the “leave no trace” rule and pack out everything you packed in.
And that’s pretty much it. A little bit of planning transforms a picnic from a logistical headache into what it’s supposed to be: a simple, delicious meal enjoyed in the great outdoors.


