The No-Fail Guide to a Jaw-Dropping Mirror Glaze
I’ll never forget the first time I saw a real-deal mirror glaze. It was in the hushed, early-morning chaos of a professional pastry kitchen where I was just a rookie. The head chef, a guy who lived and breathed pastry, pulled a tray of perfectly smooth dome cakes from the deep freezer. He took this pitcher of deep red, glossy liquid and poured it over one. It was mesmerizing. The glaze settled into a perfect, glass-like sheet with zero bubbles or thin spots. It was absolute perfection.
In this article
He turned to me and just said, “You’re up tomorrow.” My stomach dropped. That’s when I realized this wasn’t just a cool party trick; it was a serious skill that demanded respect.
So, after years of pouring hundreds of these glazes—from classic chocolate to wild, colorful galaxy designs—I’ve learned a thing or two. And I’ve seen every mistake in the book. This guide is everything I wish I knew back then. We’re not just following steps; we’re going to get into the why behind it all. Because once you understand that, you can make a stunning glaze every single time.
Let’s Talk Time & Money
Heads up! This isn’t a quick 30-minute project. You need to plan ahead.
- Active Time: About 45 minutes to an hour for making the glaze and pouring it.
- Passive Time: This is the big one. Your cake needs to be frozen solid, which means at least 8 hours, but preferably overnight. Then, the glaze itself needs to cool. All in all, this is a two-day affair, but trust me, it’s worth it.
The Science Behind That Incredible Shine
A mirror glaze looks like pure magic, but it’s really just food science doing its thing. Every single ingredient has a crucial job, and if one is off, the whole thing can go sideways. It’s a delicate dance between sugar, fat, and protein.
The Backbone: Gelatin
Gelatin is what gives the glaze its structure. When it’s warm, it’s a liquid, but as it hits the frozen cake, it cools and sets into that soft, shimmering coat. You have to “bloom” it first by soaking it in cold water. This lets it dissolve perfectly. If you dump dry gelatin powder into hot liquid, you’ll get nasty clumps. No one wants a lumpy glaze.
Good to know: You might see recipes call for a specific “bloom strength,” like “200 bloom.” Honestly, don’t sweat this. It’s just a measure of setting power. The standard Knox gelatin you find in any grocery store works perfectly fine for this. Just be sure to measure it by weight with a scale, not by volume with a spoon!
The Gloss & Stability: Sugar and Glucose
Sugar and glucose syrup (or light corn syrup) are the dynamic duo for shine and smoothness. Using both together prevents the sugar from forming gritty crystals. Glucose syrup, which you can find in the baking aisle at most supermarkets or craft stores for about $5-$8, is the key to that flexible, high-gloss finish that sugar alone just can’t achieve.
The Canvas: Condensed Milk
Sweetened condensed milk is what makes the glaze opaque. Without it, your colors would look thin and watery. The milk solids create a white base that makes colors pop. Think of it as the primer before you paint.
The Body: White Chocolate
Okay, this is important. The quality of your white chocolate is a make-or-break element. You need real white chocolate with at least 30-32% cocoa butter. This gives the glaze a rich body and helps it set with a creamy texture, not a rubbery one.
A common mistake is using white chocolate chips meant for cookies. Those often contain stabilizers and less cocoa butter, so they won’t melt or set correctly. For great results, look for brands like Callebaut or Valrhona at specialty baking stores. If you’re at the supermarket, a high-quality bar like Ghirardelli or Lindt will do the job beautifully. Just stay away from the baking chips!
The Boss: Temperature
Temperature is, without a doubt, the single most important factor. It controls the glaze’s thickness (viscosity).
- Too hot (over 98°F / 37°C): The glaze will be way too thin and just slide off your cake, leaving a sad, transparent mess.
- Too cold (below 88°F / 31°C): It’ll be thick like sludge. You’ll get clumps, drag marks, and a thick, ugly layer.
The sweet spot is usually between 90-95°F (32-35°C). At this temperature, it flows like a dream but still has enough body to cling to the cake.
Setting Yourself Up for Success
In pro kitchens, we live by the rule of “mise en place,” which just means “everything in its place.” For a mirror glaze, this is non-negotiable. Once you start, things move fast. Get everything ready to go before you even turn on the stove.
Your Must-Have Tools
- Digital Kitchen Scale: I’m going to say it again: pastry is science. Measuring in grams is the only way to guarantee it works every single time. A good scale costs about $15-$25 on Amazon and is the best investment you can make for your baking.
- Immersion (Stick) Blender: This is the secret to a silky-smooth glaze without adding air bubbles. A regular blender or whisk will just whip air into it, and you’ll be fighting bubbles for ages.
- A Tall, Narrow Container: For blending. This lets you keep the blender head fully submerged, which is key to preventing those dreaded air bubbles.
- Digital Thermometer: You absolutely need one. An instant-read thermometer is your best friend here.
- Fine-Mesh Sieve: Your defense against any lumps or bubbles that sneak in. You’ll use this a few times.
- Wire Rack & Rimmed Baking Sheet: You’ll set your cake on the rack over the baking sheet. This catches all the drips and keeps your counter clean.

Prepping the Cake
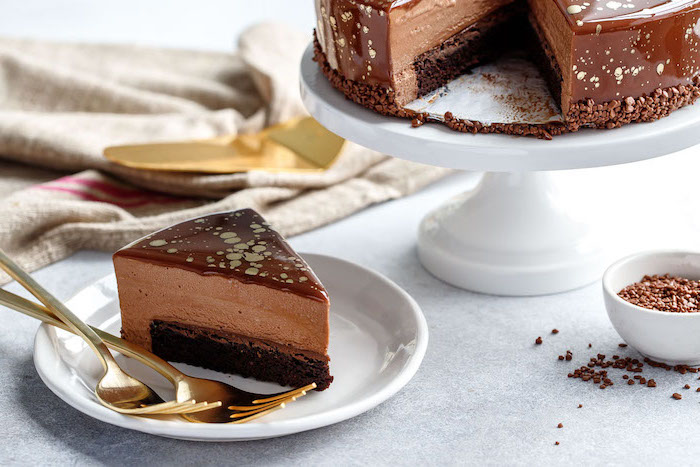
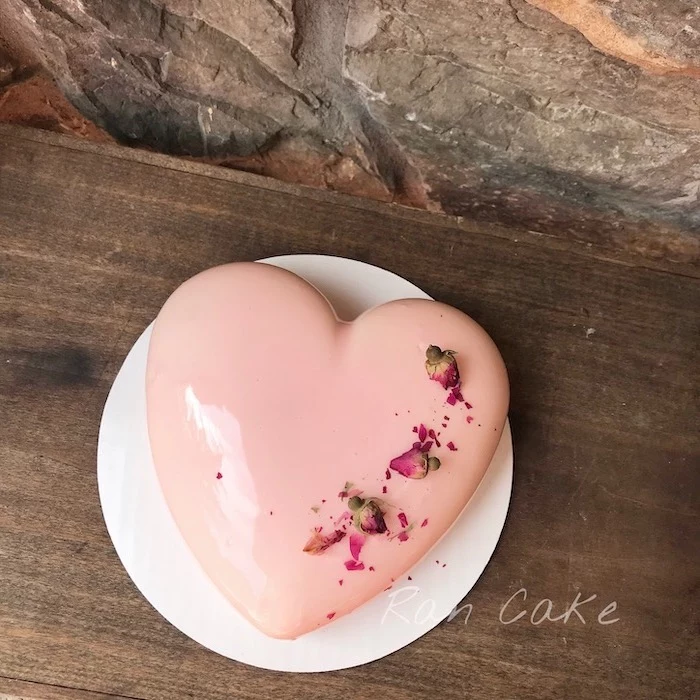
A mirror glaze hides nothing; in fact, it highlights every imperfection. Your cake needs to be perfectly smooth. The ideal base is a mousse cake (or entremet) frozen solid in a silicone mold. That flawless, frozen surface is what helps the warm glaze set instantly for a razor-sharp finish.
You can glaze a buttercream cake, but it’s trickier. The buttercream has to be perfectly smooth and frozen until it’s hard as a rock—we’re talking at least 3-4 hours in a good, cold freezer. If it’s even a little bit soft, the glaze will melt it. Disaster.
The Go-To White Chocolate Mirror Glaze Recipe
This is my tried-and-true base recipe. Measurements are in grams for accuracy. Follow it to the letter, and you’ll be golden.
Ingredients:
- 150g Water
- 300g Granulated Sugar
- 300g Glucose Syrup (or light corn syrup)
- 200g Sweetened Condensed Milk
- 20g Powdered Gelatin (standard grocery store kind is fine)
- 120g Cold Water (for blooming gelatin)
- 350g High-Quality White Chocolate (30%+ cocoa butter), chopped fine
- Gel Food Coloring (a concentrated gel like AmeriColor or ChefMaster works best)
The Method, Step-by-Step
- Bloom the Gelatin: Pour the 120g of cold water into a small bowl. Sprinkle the gelatin powder evenly over the top. Don’t stir! Just let it sit for 5-10 minutes. It will absorb the water and turn into a solid, jiggly mass.
- Make the Syrup: In a saucepan, combine the 150g of water, sugar, and glucose syrup. Heat it over medium heat until it comes to a boil, then let it cook until it hits 217°F (103°C) on your thermometer. This makes sure all the sugar is dissolved.
- Combine Everything: Put your finely chopped white chocolate in your tall blending container. Pour the sweetened condensed milk over it. Once the syrup hits the right temp, immediately pour the hot syrup over the chocolate and milk.
- Melt the Gelatin: Add the bloomed gelatin mass directly into the hot mixture. The heat will melt it completely. Just let everything sit for a couple of minutes to let the chocolate get nice and soft.
- Blend It Smooth: Now, grab your immersion blender. Submerge the head completely before you turn it on. Tilt the container and blend on low speed, keeping the blender on the bottom to avoid sucking in air. You’ll see it transform into a glossy, smooth liquid in just a minute or two.
- Strain and Color: Pour the glaze through your fine-mesh sieve into a clean bowl. This is your final check for lumps and bubbles. Now’s the time to add your gel color. Just a few drops will do. Stir gently with a spatula—don’t whisk!
- The Waiting Game: Now, you have to let the glaze cool to that perfect pouring temperature of 90-95°F (32-35°C). Stir it gently now and then to keep a skin from forming. Be patient and trust your thermometer.
By the way, you can absolutely make the glaze ahead of time! Once it’s blended and strained, just press a piece of plastic wrap directly onto the surface (to prevent a skin) and pop it in the fridge. It can be stored for up to 5 days. When you’re ready to use it, just reheat it gently in the microwave in 5-10 second bursts, stirring in between, until it’s back to that perfect pouring temp. Just make sure to strain it one last time before you pour.
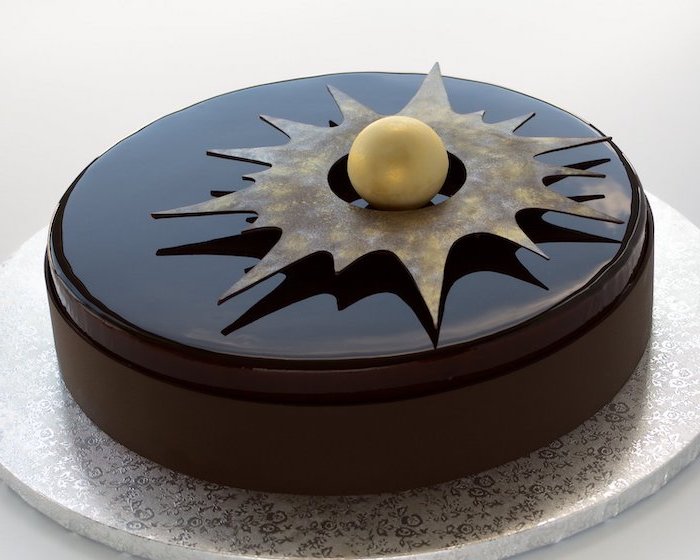
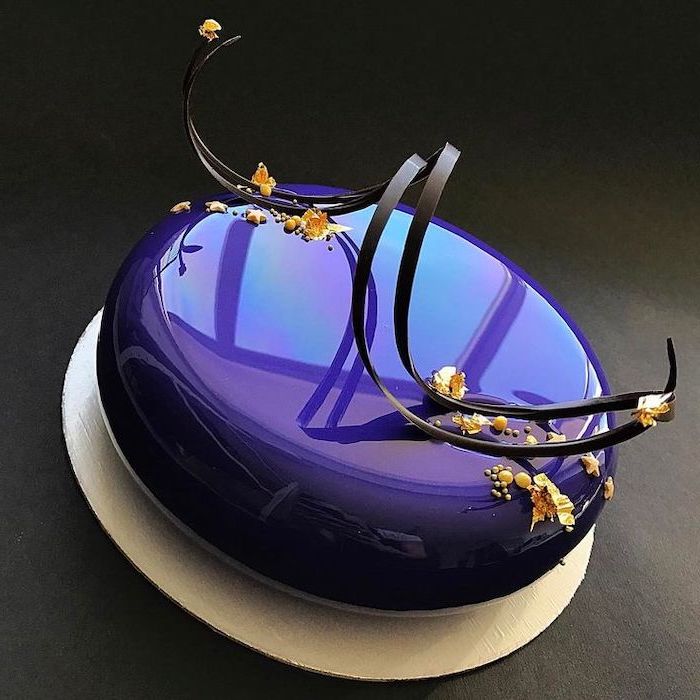
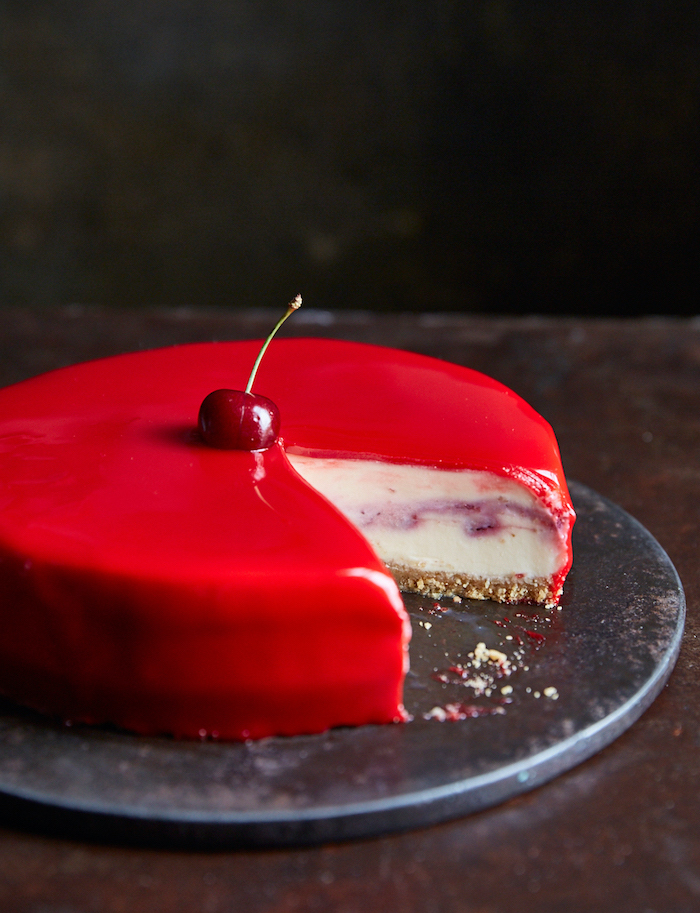
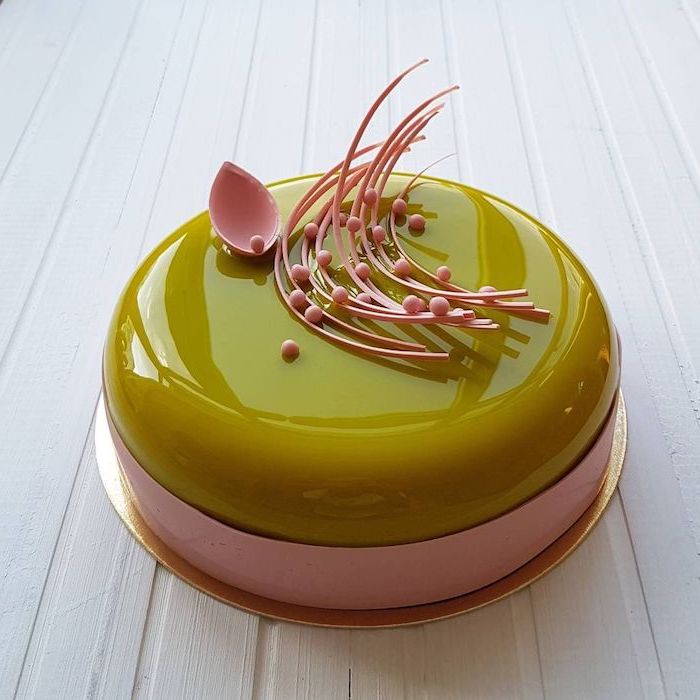
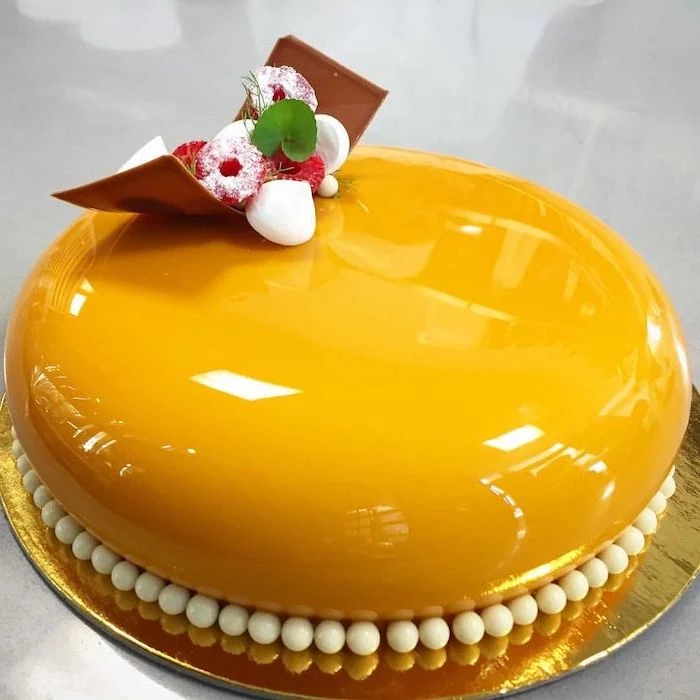
The Pour: It’s Showtime!
Your cake should be frozen solid. Place it on something small and stable, like a can of beans, on top of your wire rack and baking sheet setup. This gives the glaze room to flow down the sides cleanly.
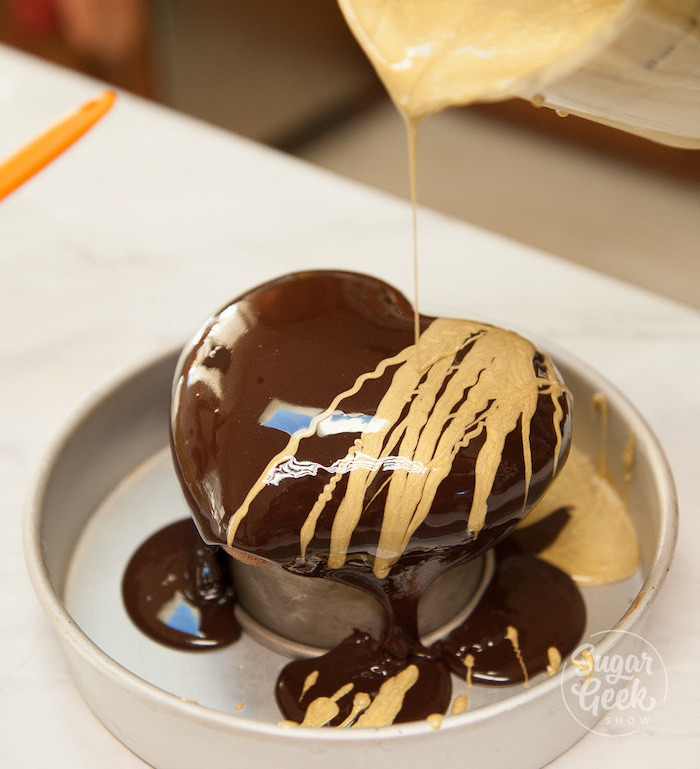
Start pouring confidently right in the center of the cake with a steady, generous stream. Move in a slow spiral outwards until the glaze cascades over the edges. Use more than you think you need—the goal is to flood the surface so gravity can do the work. Whatever you do, DO NOT touch it with a spatula. You will ruin that perfect finish.
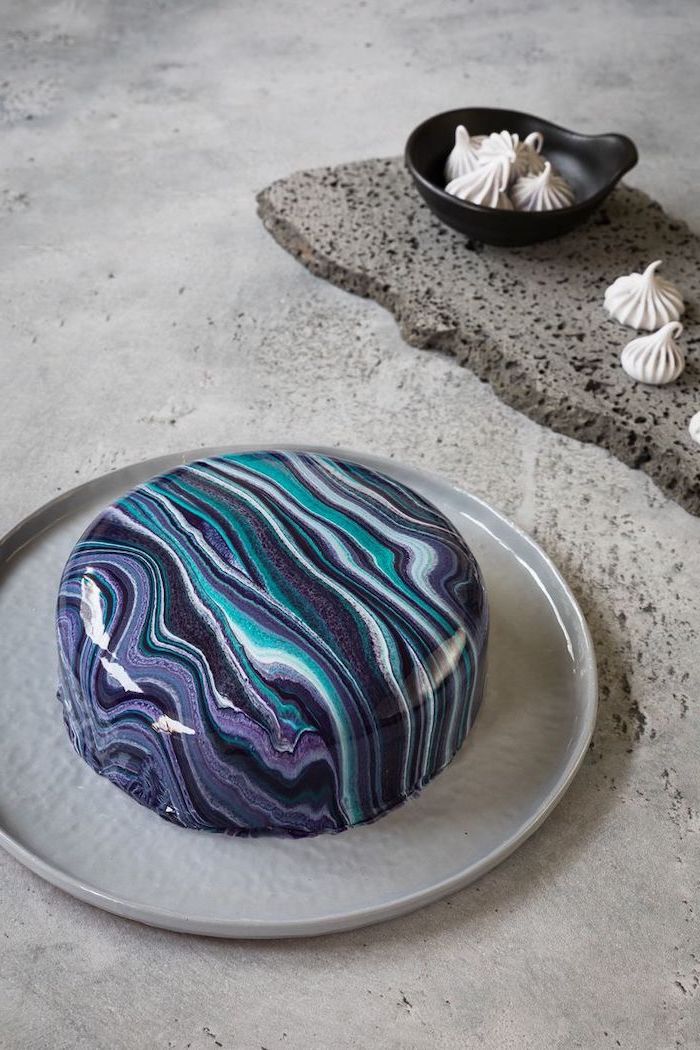
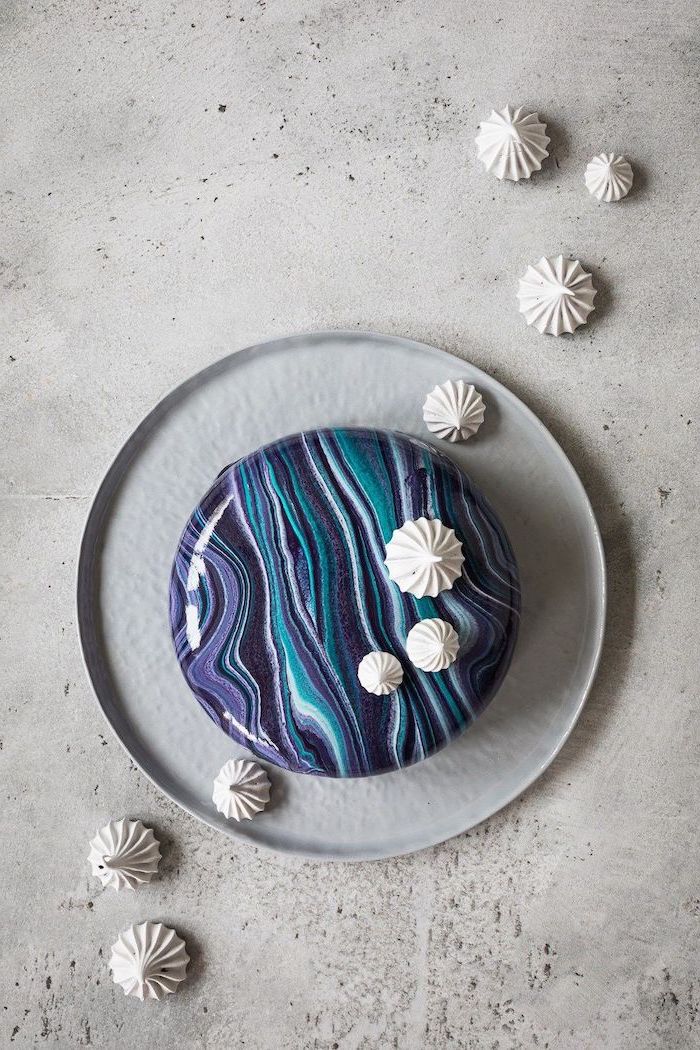
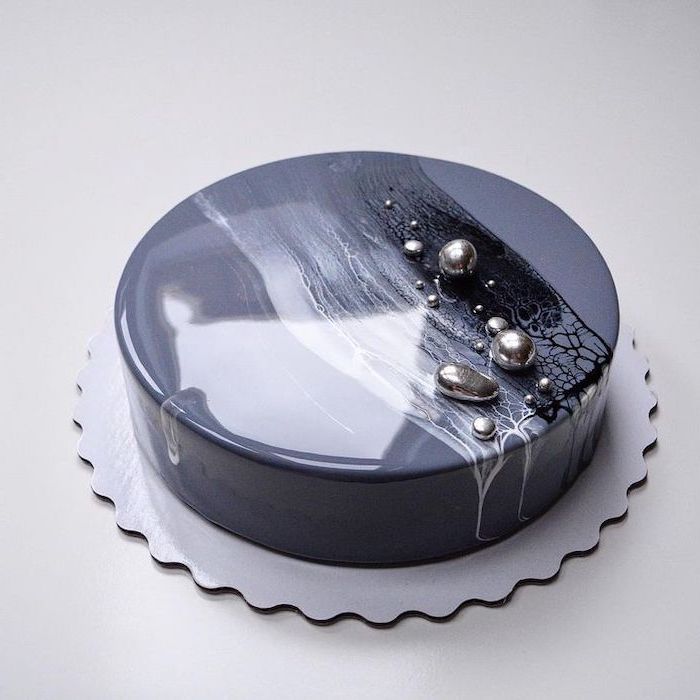
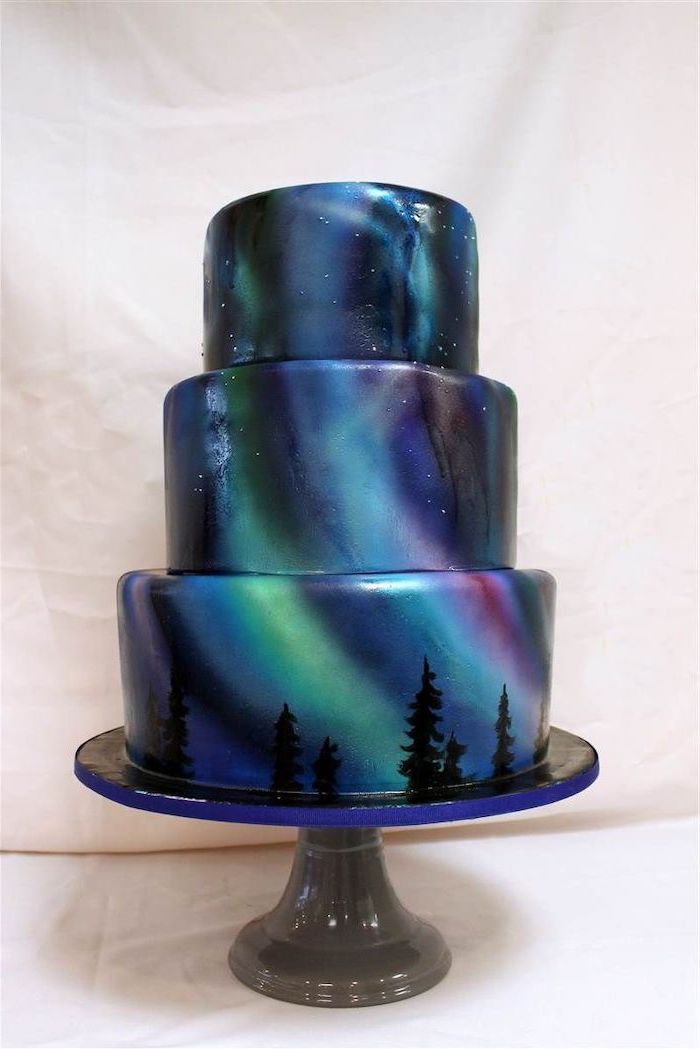
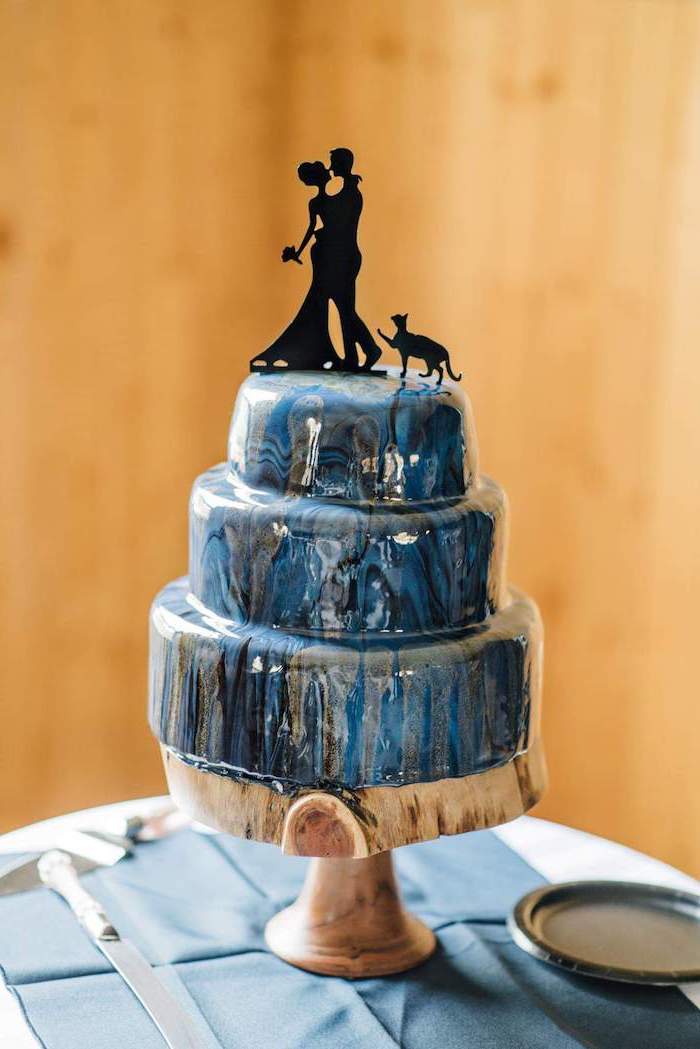
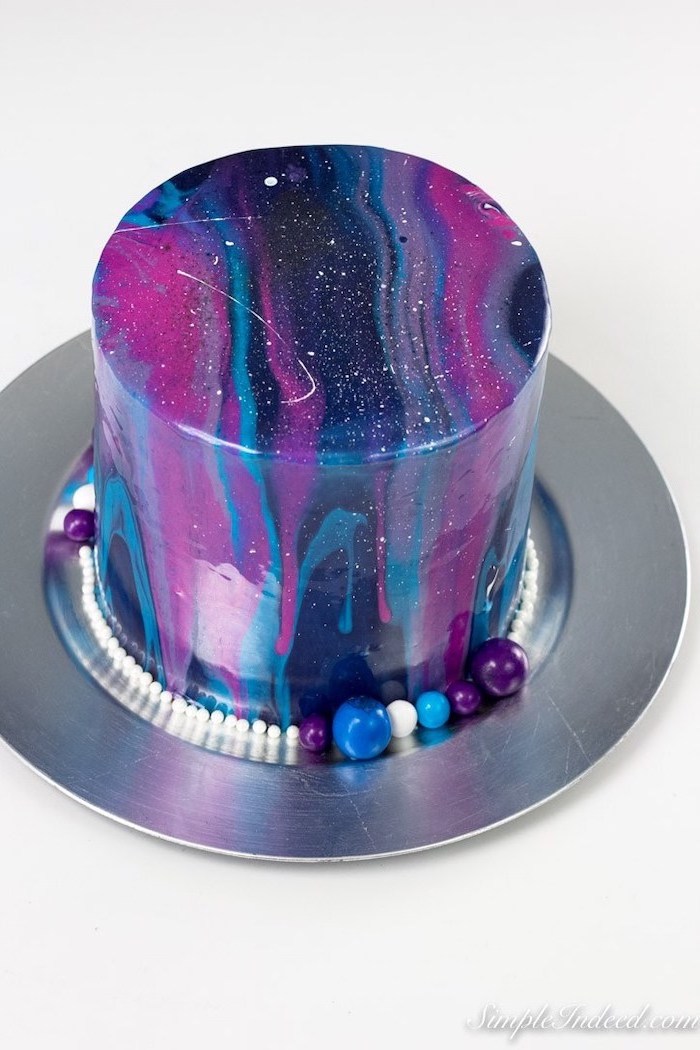
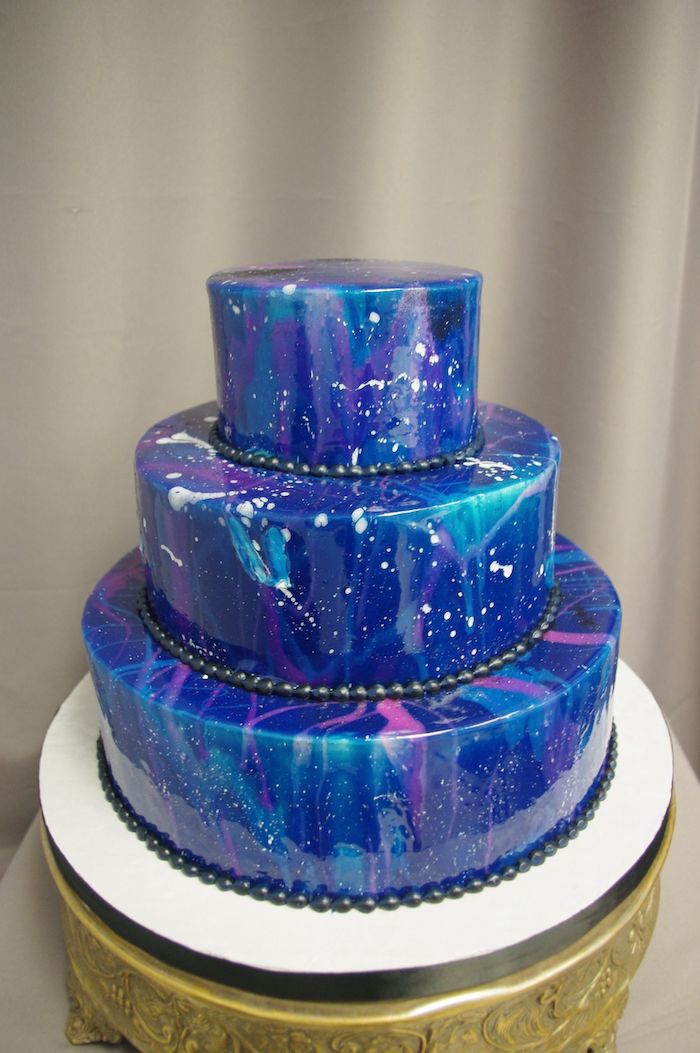
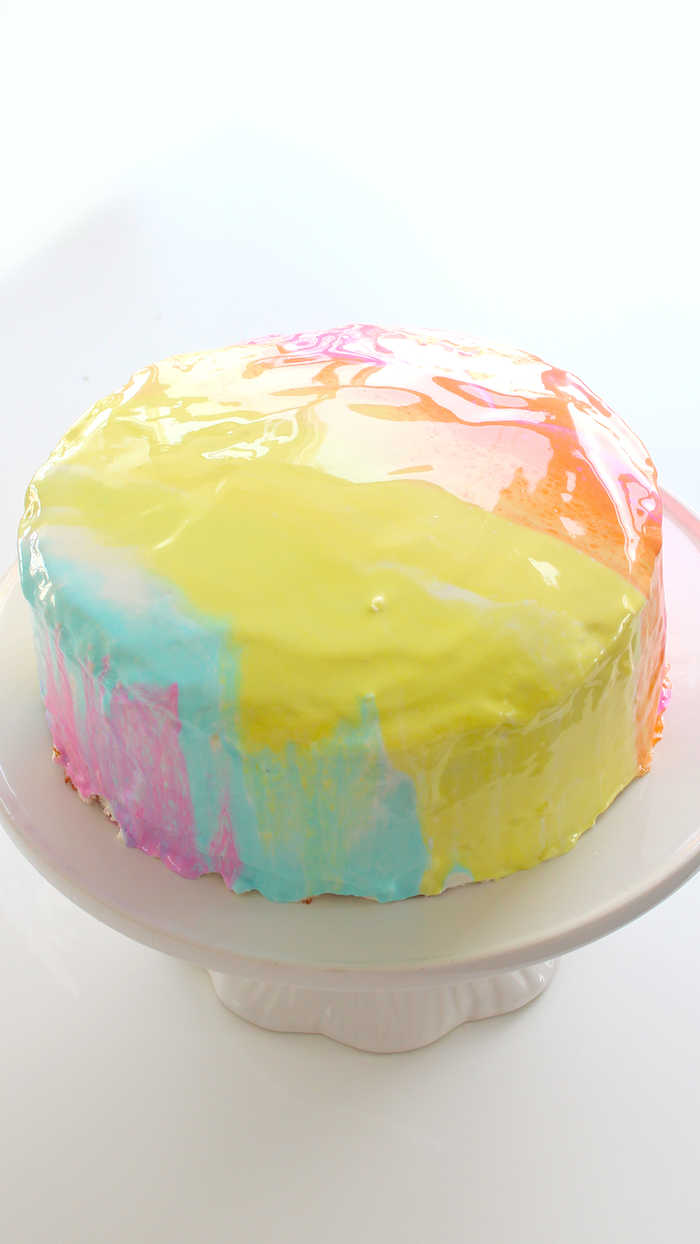
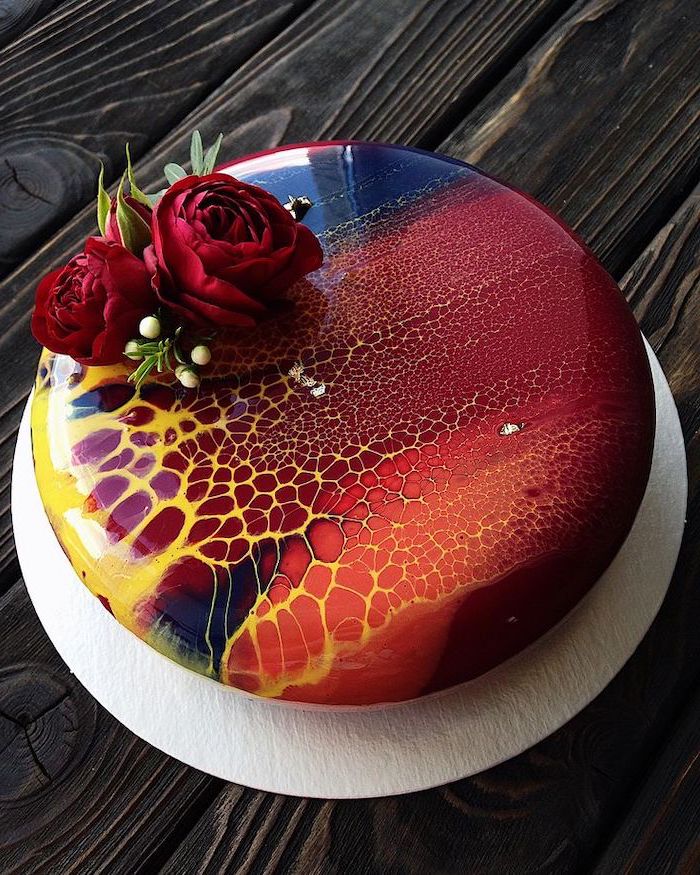
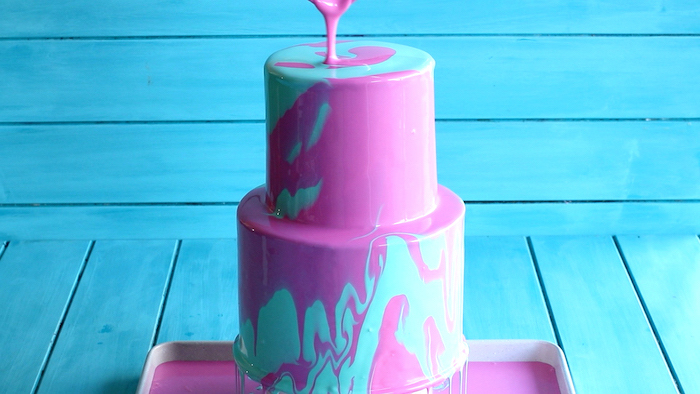
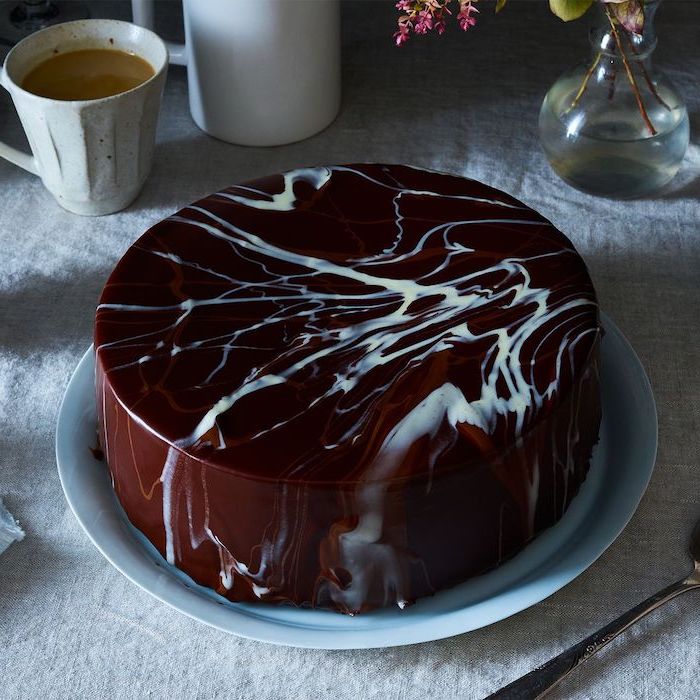
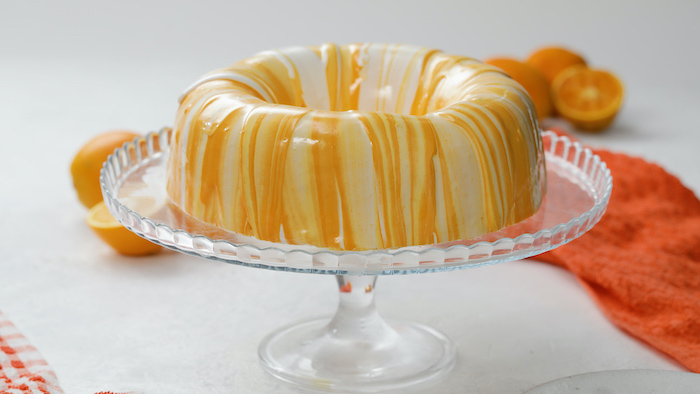
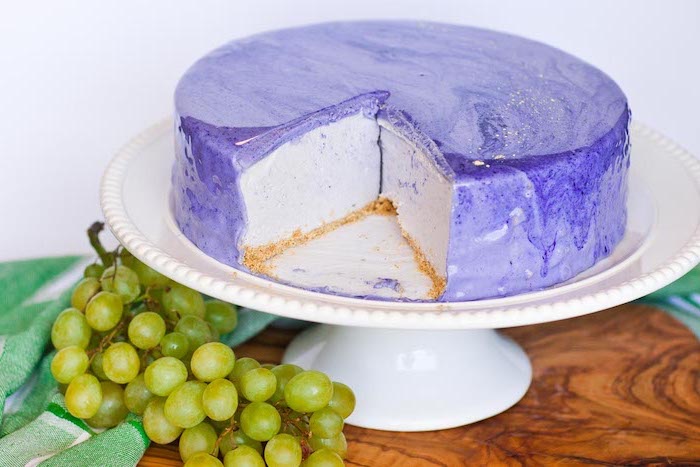
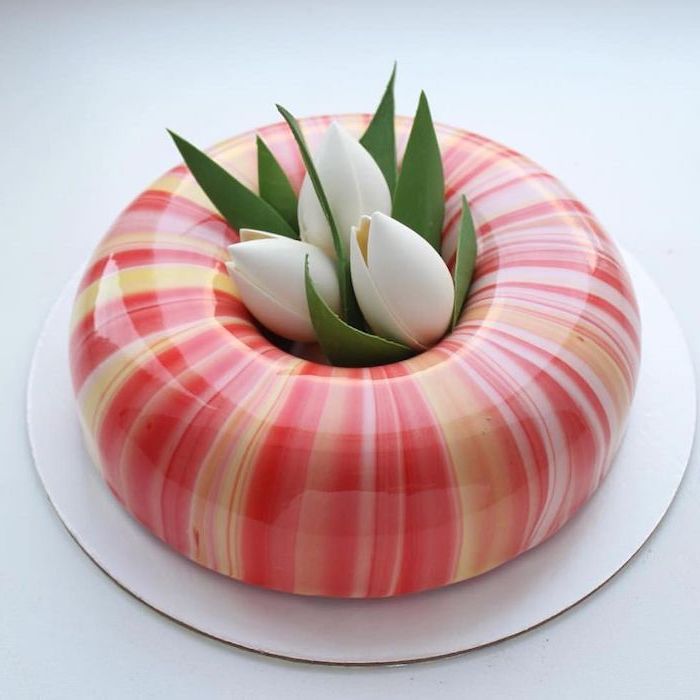
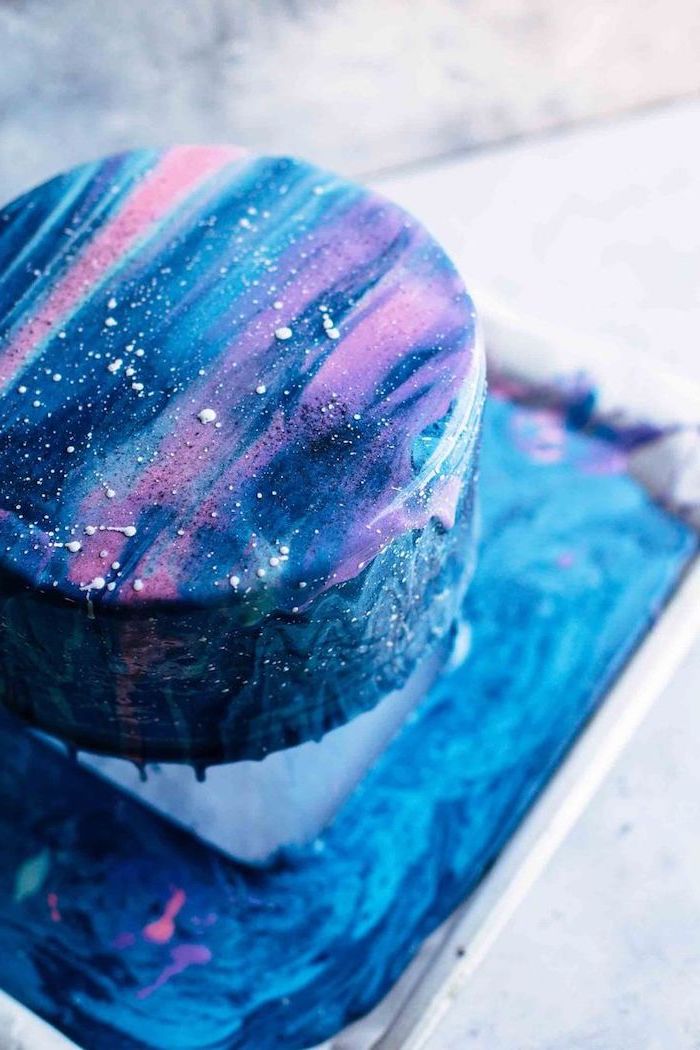
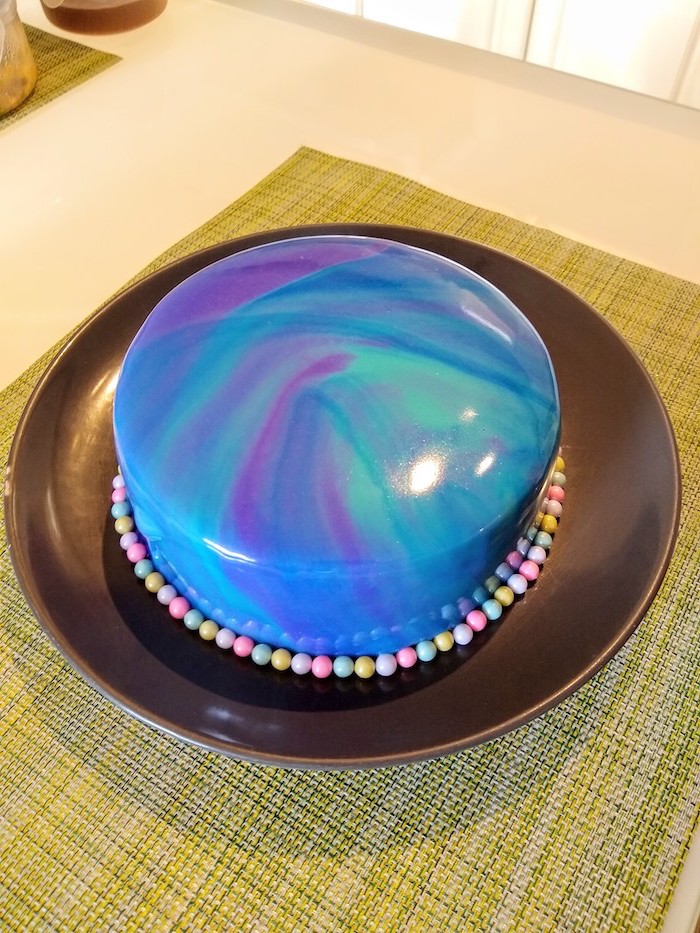
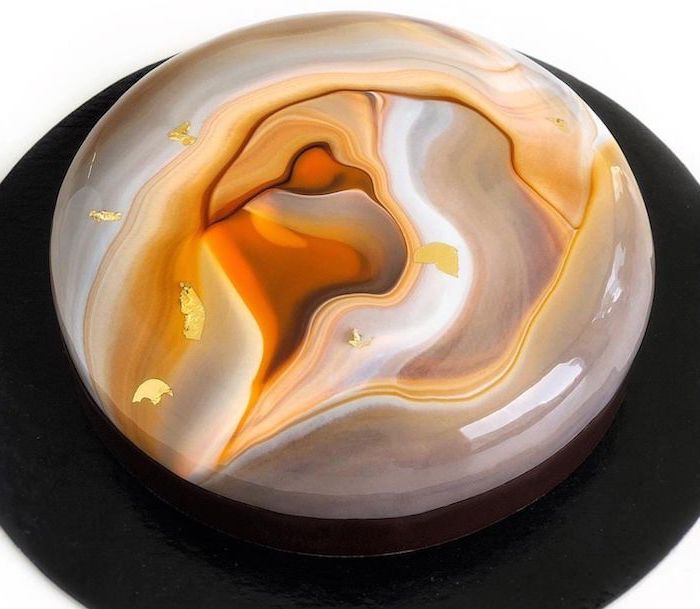
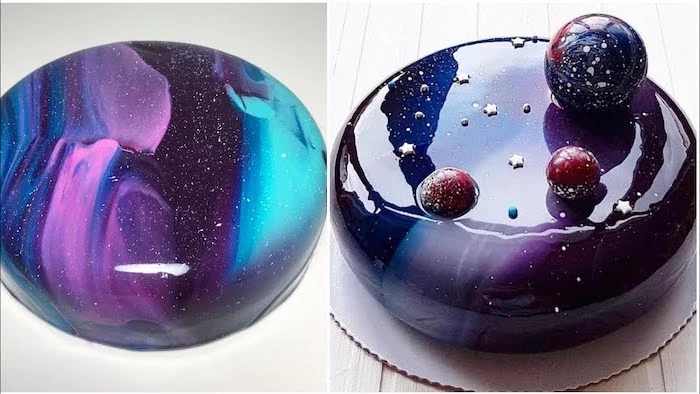
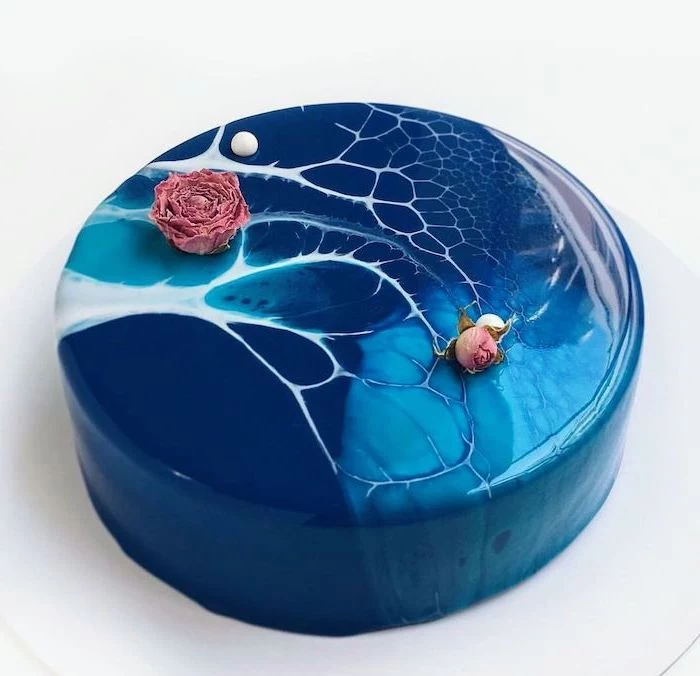
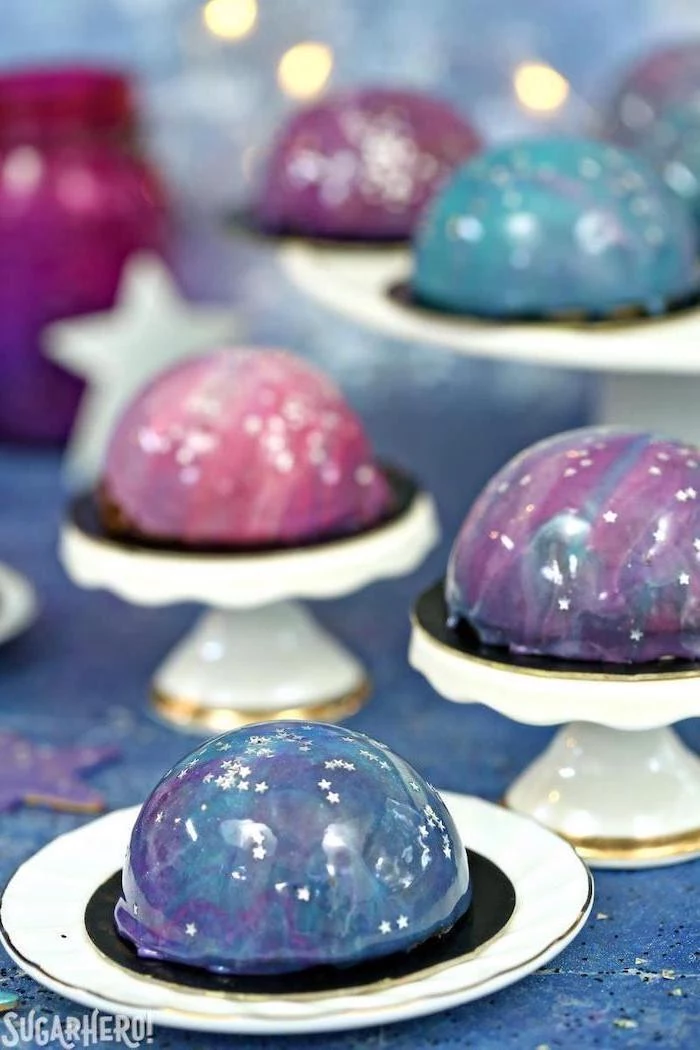
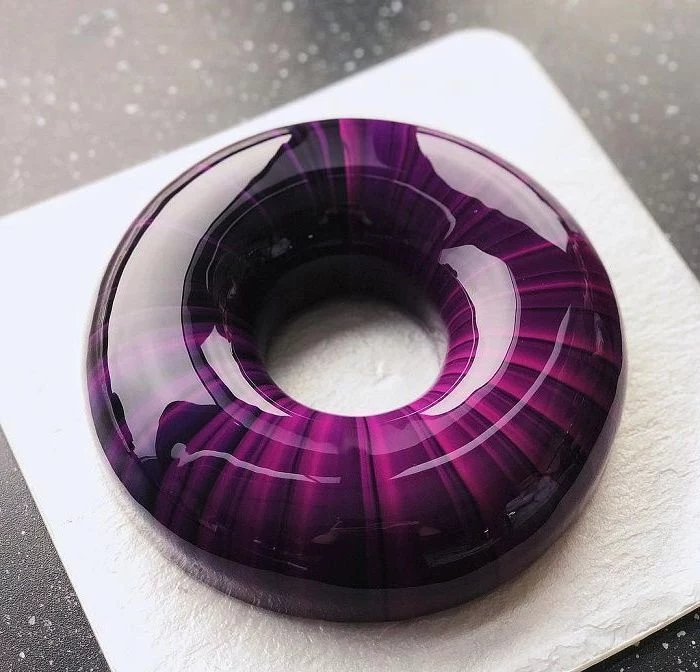
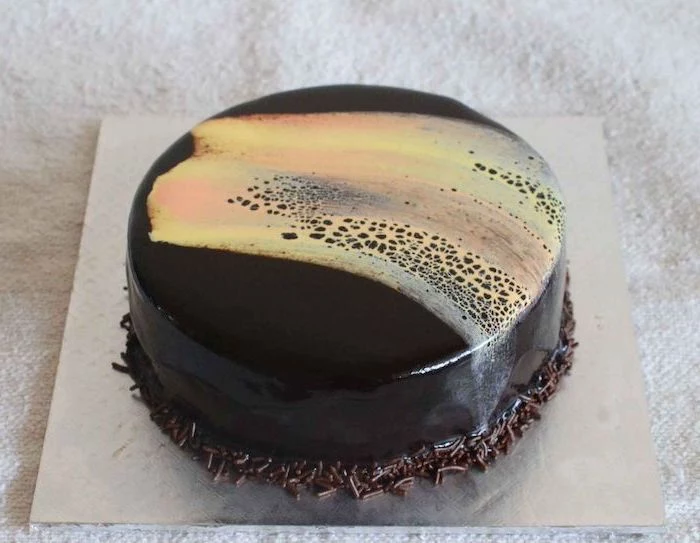
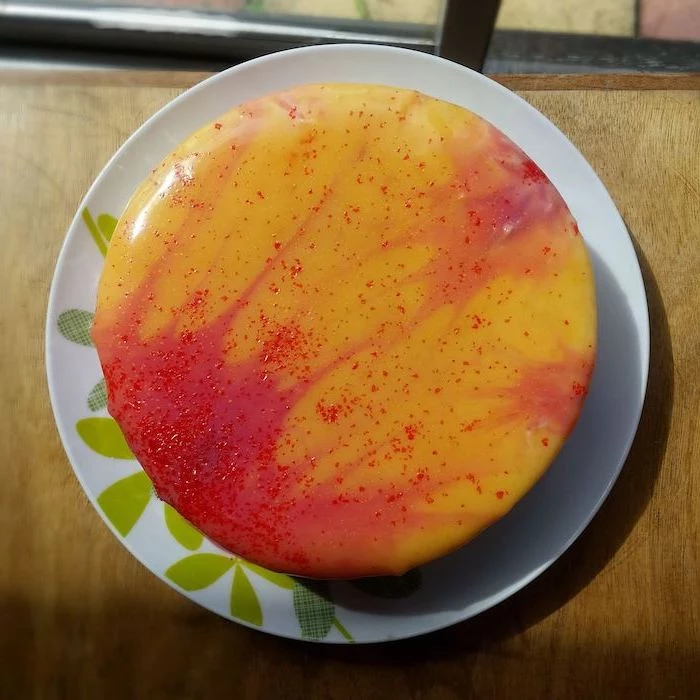
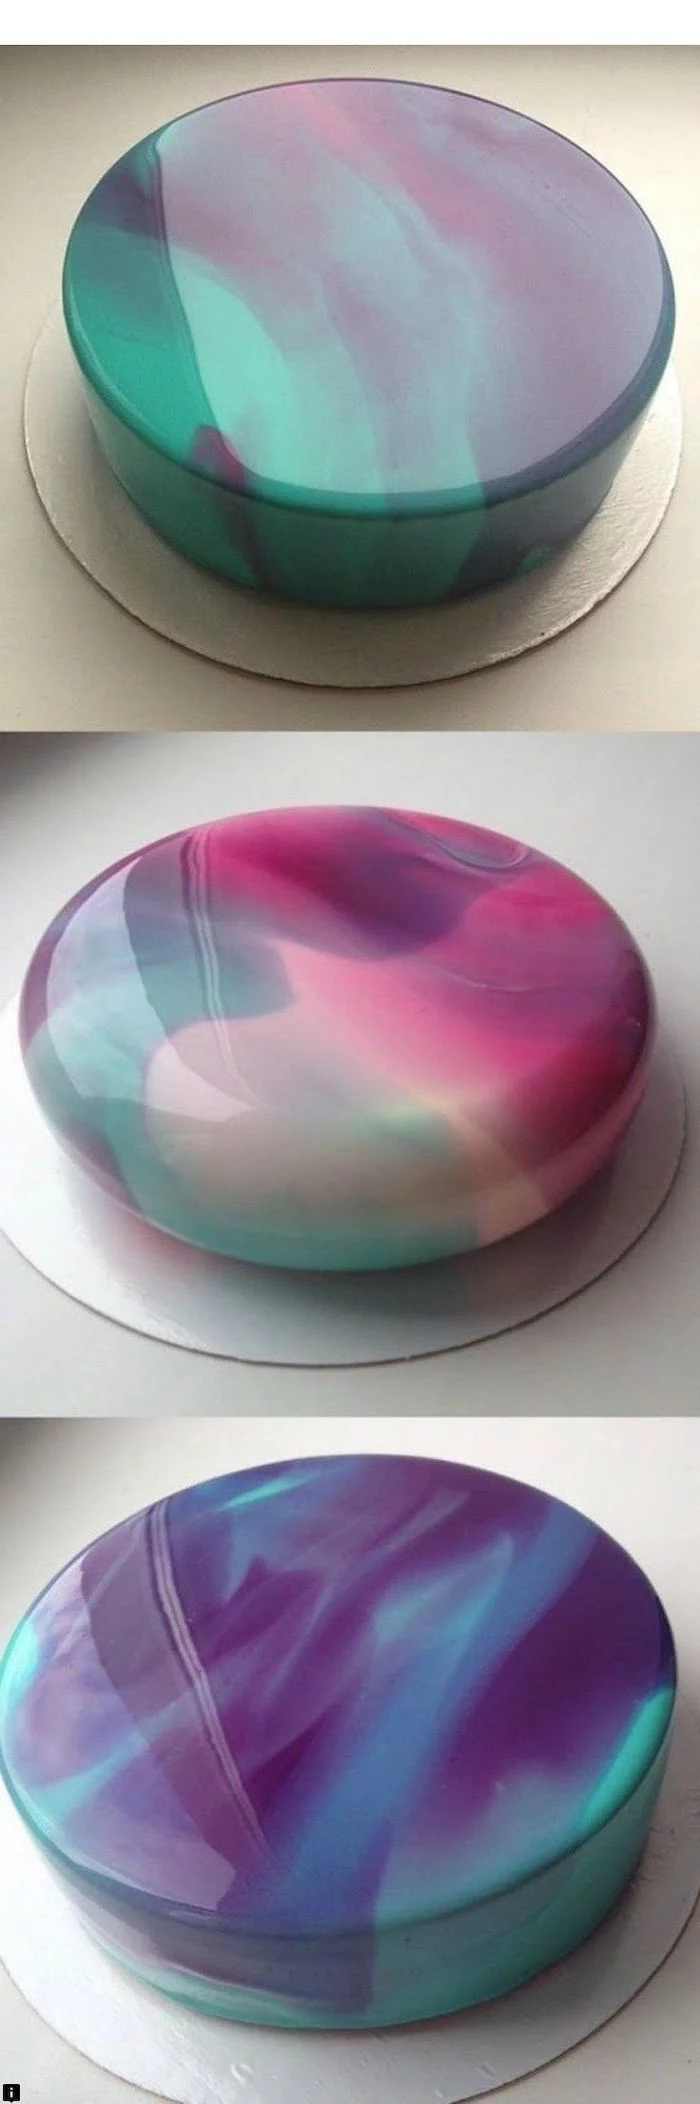
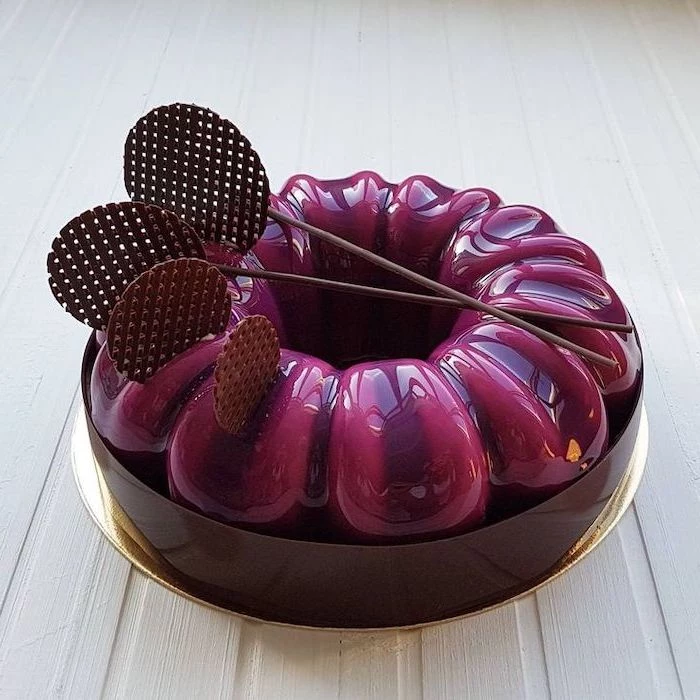
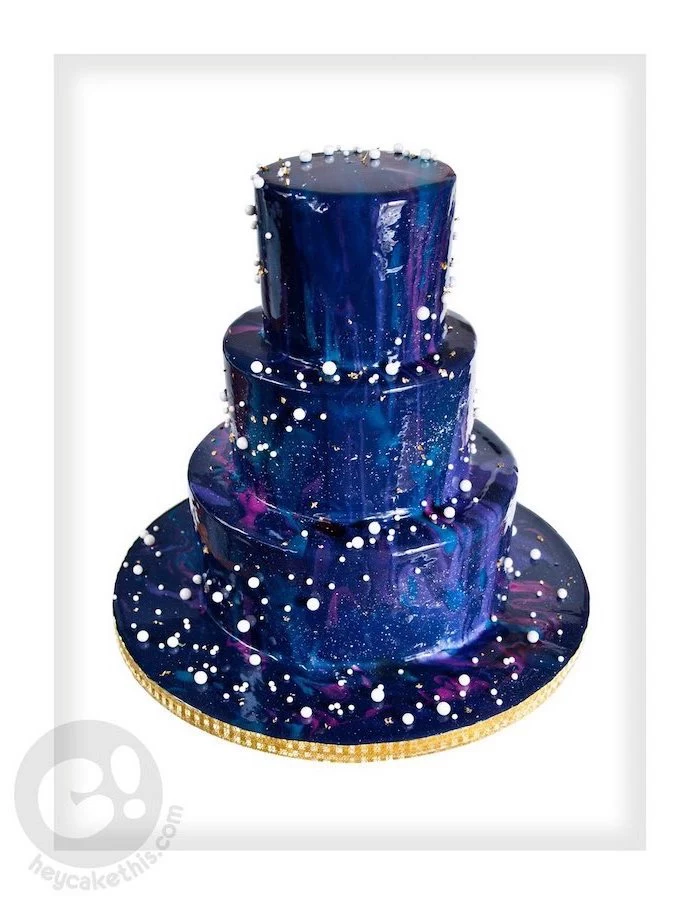
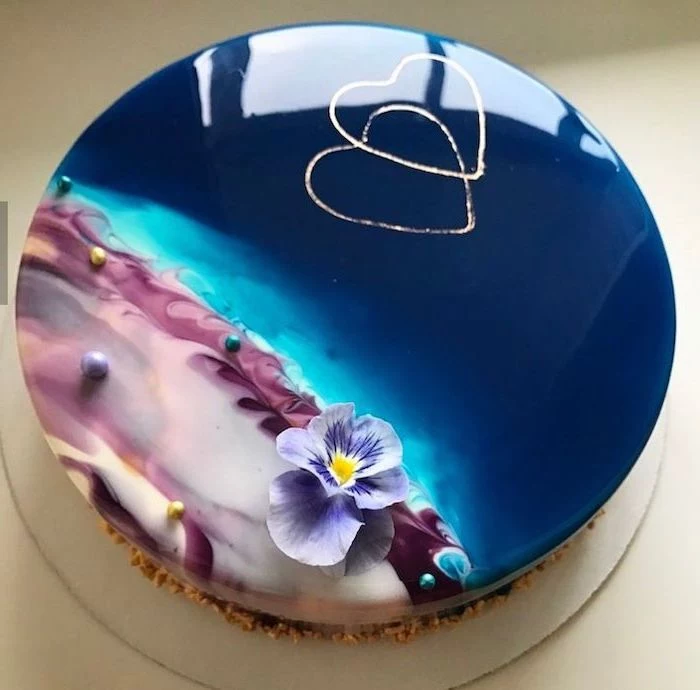
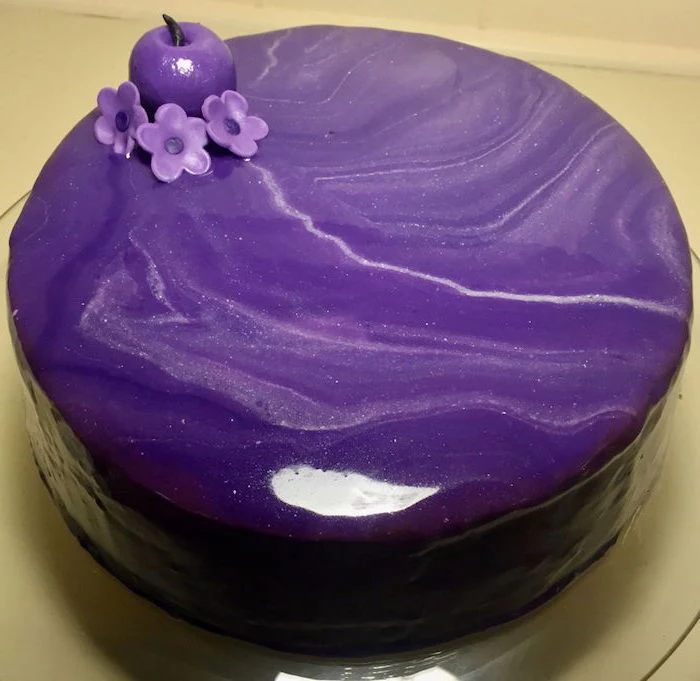
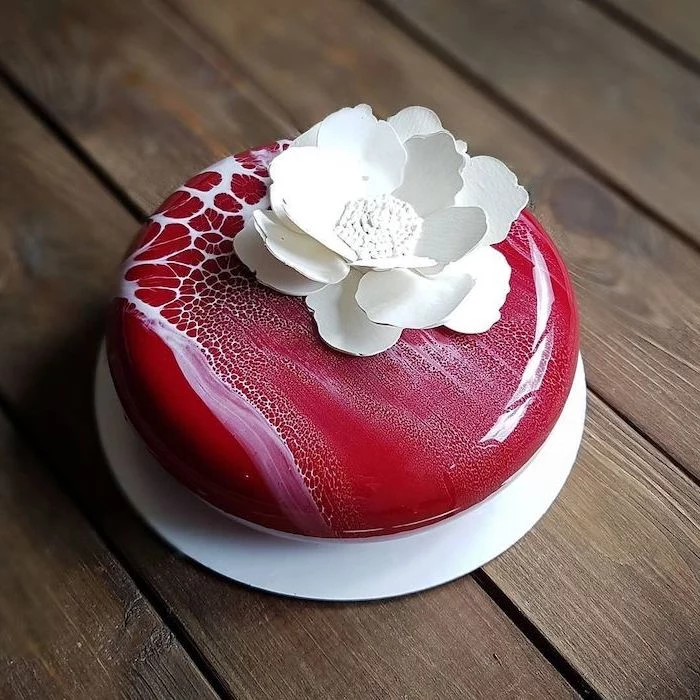
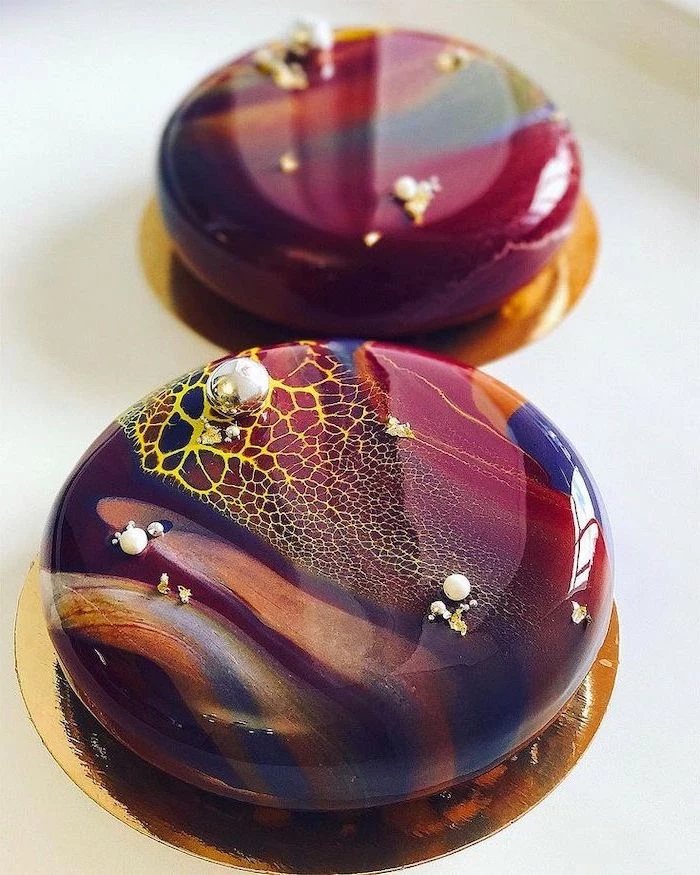
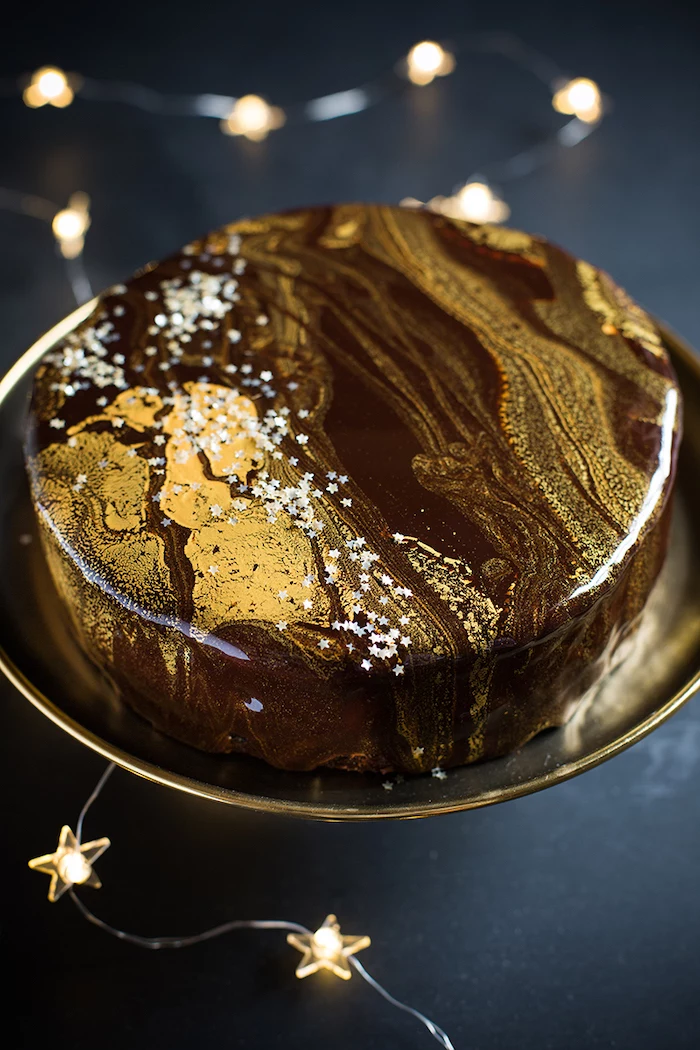
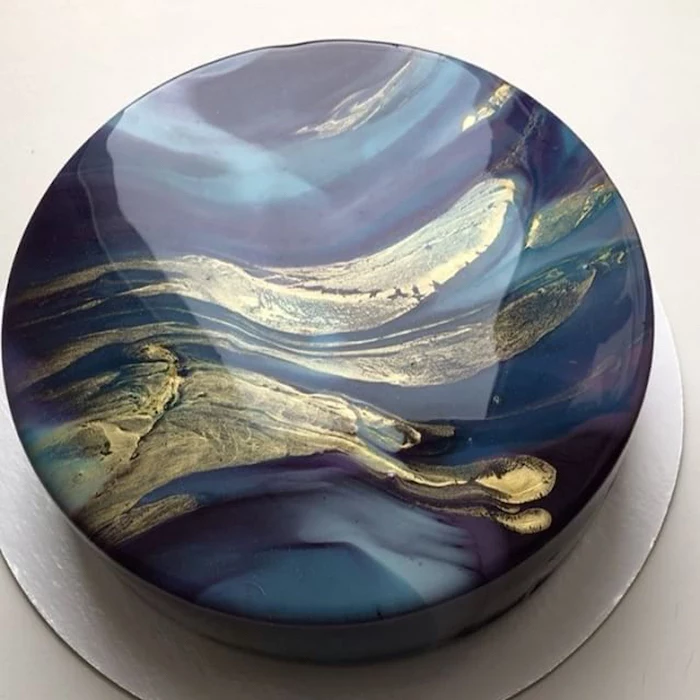
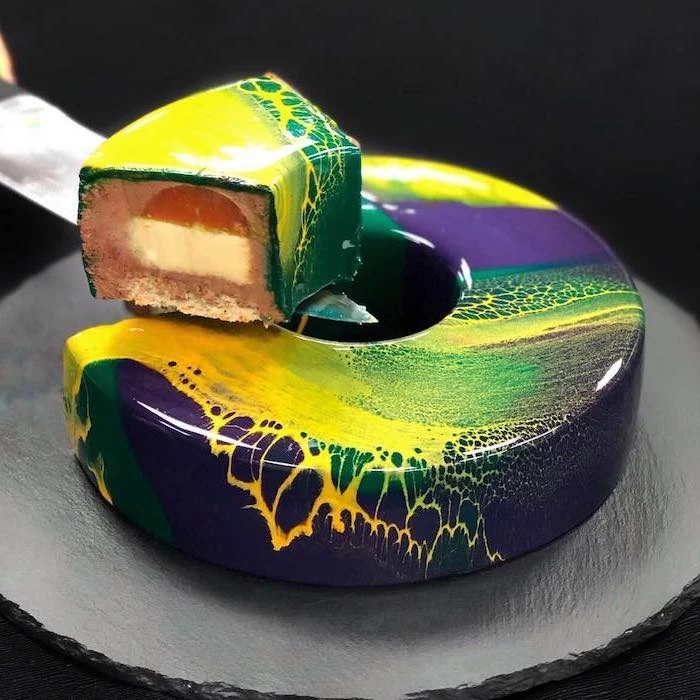
Want to Get Fancy? Marbled & Galaxy Effects
For a multi-color look, you’ll pour a few colors. Here’s how:
Prepare your colors in separate jugs. Pour your main background color (like white or dark blue) into a larger main pouring jug first. Then, gently pour stripes or pools of your other colors directly on top of that base. The key is to NOT stir them together! When you pour from the jug, the colors will flow out in beautiful, unpredictable patterns. That’s how the magic happens.
Once poured, let the cake sit for about 5-10 minutes for the excess to drip off. Before it fully sets, use a knife to scrape the drips from the bottom edge for a clean finish. Then, carefully move it to a serving plate.
Pro Tip on Saving Drips: Don’t throw away the glaze that dripped onto the baking sheet! You can totally reuse it. Carefully scrape it up, pour it into an airtight container, and store it in the fridge for up to a week. To reuse, just gently reheat it, strain it again, and bring it back to the 90-95°F pouring temperature. No waste!
Uh Oh… A Troubleshooting Guide for When Things Go Wrong
Trust me, my first attempts were a mess. Learning why things fail is how you get good at this. Here are the most common freak-outs and how to fix them.
Problem: My glaze is full of air bubbles!
The Cause: You probably lifted the immersion blender while it was on or just blended too aggressively, whipping air into it.
The Fix: Prevention is best—keep that blender submerged. But if it’s too late, let the glaze rest for 15-20 minutes to let the bubbles rise, then skim them off. Straining it a few more times through a fine-mesh sieve also works wonders.
Problem: The glaze is see-through and I can see the cake.
The Cause: You poured it when it was too hot. The glaze was too thin and couldn’t cling to the cake.
The Fix: Patience! Let it cool down to the 90-95°F sweet spot. Your thermometer is your best friend. Don’t eyeball it.
Problem: It’s thick and lumpy and won’t pour right.
The Cause: The opposite problem—you waited too long, and it got too cold. The gelatin and cocoa butter started setting up in the bowl.
The Fix: Gently reheat it. A microwave on low power in 5-second bursts (stirring each time) is perfect. Or you can set the bowl over a pot of warm water. Bring it back up to the right temp, give it one last strain, and you’re back in business.
Problem: The glaze just slid off or melted my buttercream!
The Cause: Your cake wasn’t frozen solid. Period. The warm glaze needs a rock-hard, frozen surface to set on contact.
The Fix: No shortcuts here. Your cake needs to be completely frozen. For a mousse cake, that’s overnight. For buttercream, it needs to be hard to the touch with zero soft spots. Give it that extra hour in the freezer; you won’t regret it.
A Quick Word on Safety & Storage
Working with hot sugar is no joke. A sugar burn is nasty because the thick syrup sticks to your skin. Please, keep kids and pets out of the kitchen, and have a bowl of ice water nearby just in case. Always pour the hot syrup away from your body.
So what do you do with your masterpiece once it’s done? After glazing, the cake should be stored in the refrigerator. The glaze will protect the cake and keep it fresh. It will last beautifully in the fridge for about 3-4 days. I wouldn’t recommend freezing a finished mirror-glazed cake, as thawing can sometimes cause condensation that ruins the perfect shine.
Final Thoughts
Mastering this technique is a journey. It forces you to slow down and pay attention to the little details. Your first try might not be perfect, and that is completely okay. I once made a batch for a special event and forgot to strain it… the lumpy mess was a very expensive lesson in humility.
So be patient, trust the science (and your thermometer!), and have fun with it. That moment you finally pour a perfect, glossy coat and see your own reflection staring back at you… that’s a feeling of victory you’ve truly earned.
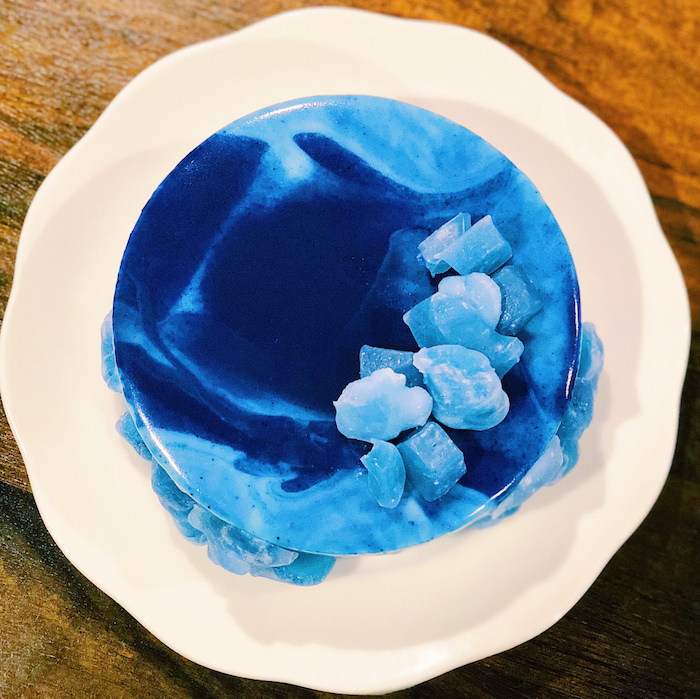
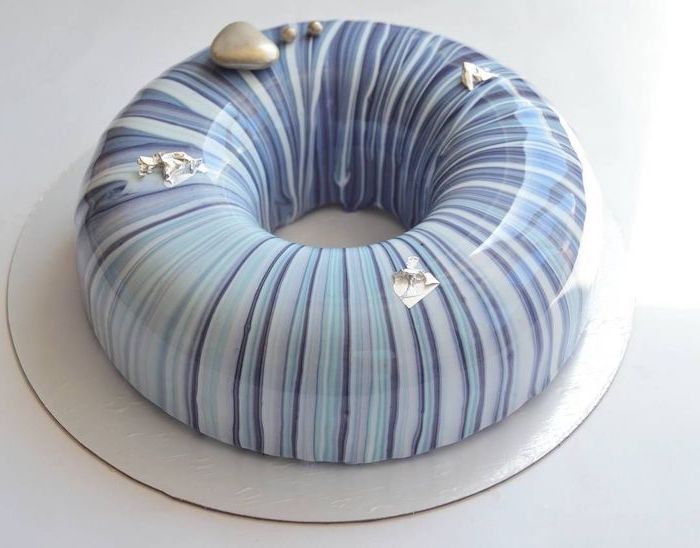
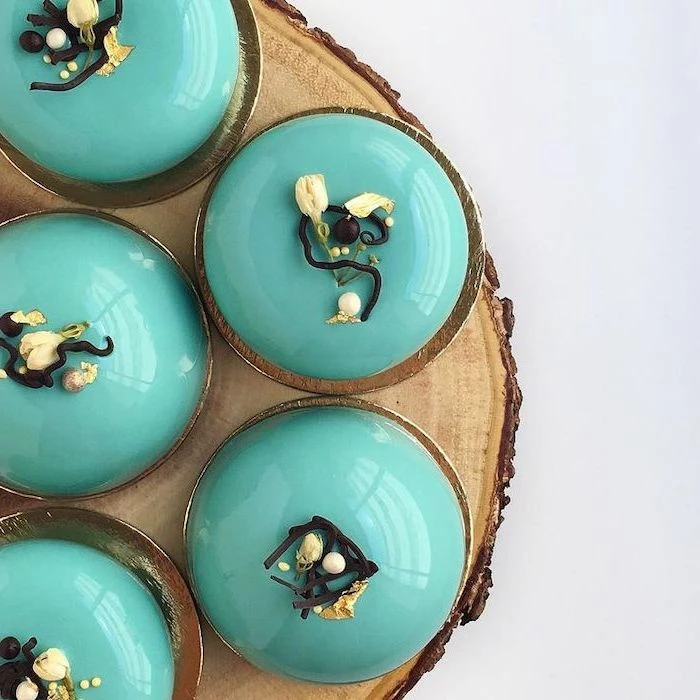
Inspiration Gallery
The single most critical factor for success? Temperature. Your glaze must be cooled to the precise temperature range, typically 32-35°C (90-95°F), before pouring. A kitchen thermometer isn’t a luxury here; it’s a necessity. Too hot, and the glaze will be thin and transparent. Too cold, and it will set too quickly, creating a thick, clumpy layer. This is the moment where patience pays off with a flawless finish.

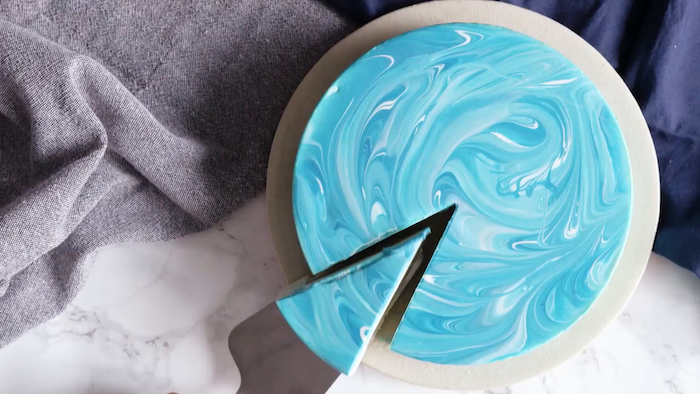
- A perfectly smooth, glass-like surface.
- Colors that stay vibrant and distinct.
- A clean, professional drip line.
The secret? It all starts with the cake. Your mousse or entremet must be frozen absolutely solid and be perfectly smooth. Any bumps, dents, or uneven spots on the frozen cake will be magnified by the glaze, not hidden.
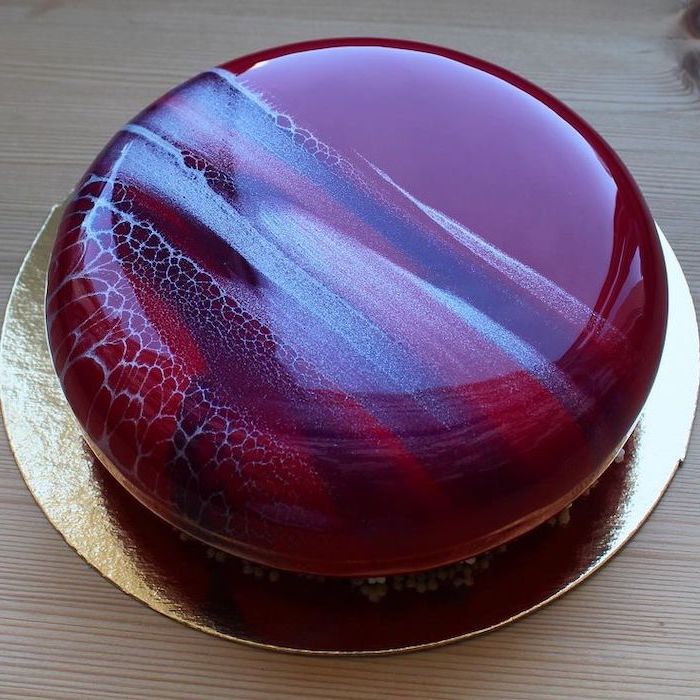
The shine in a mirror glaze comes from the gelatin setting into a perfectly smooth microscopic web, combined with the light-reflecting properties of sugar and glucose syrup.
This is why the recipe’s balance is so delicate. The glucose syrup not only adds sweetness but also prevents the sugar from crystallizing, which would turn your glossy mirror into a dull, grainy surface. It’s the invisible hero of that jaw-dropping sheen.
Can I make a vegan mirror glaze?
Absolutely, but you’ll need to swap out the key ingredient: gelatin. The best plant-based substitute is agar-agar, a gelling agent derived from seaweed. You’ll also need to use a vegan white chocolate and a plant-based condensed milk (often made from coconut or soy). The technique is similar, but agar-agar sets much faster and at a higher temperature, so you’ll need to work quickly once it’s ready to pour.
When it comes to the white chocolate base, quality is non-negotiable. Cheaper compound chocolates or baking chips often contain vegetable fats instead of cocoa butter. This can prevent the glaze from setting properly and may result in an oily or waxy texture. For a reliable and delicious result, invest in a good couverture white chocolate like Callebaut W2 or Valrhona Ivoire. The higher cocoa butter percentage creates a much smoother, more stable emulsion.
“Perfection is a lot of little things done right.” – Marco Pierre White
Gelatin Sheets: Favored by many professionals for their clean flavor and consistent gelling strength (measured in ‘bloom’). They need to be soaked in cold water, squeezed out, then dissolved.
Gelatin Powder: More widely available. It must be ‘bloomed’ by sprinkling it over a specific amount of cold water and letting it absorb before melting. Pay close attention to the recipe’s instructions, as using too much or too little water can throw off the glaze’s consistency.
For beginners, powder is often easier to measure precisely.
That dreaded moment: you pour your beautiful glaze and notice tiny air bubbles ruining the flawless surface. Here’s how to prevent them:
- When blending the initial mixture, keep the head of your immersion blender fully submerged to avoid incorporating air.
- Tilt the container while blending.
- Pour the finished glaze through a fine-mesh sieve at least twice.
- Let the glaze rest for a few minutes before pouring to allow any remaining bubbles to rise to the surface.
Don’t throw away that leftover glaze! Pour it into an airtight container, placing a piece of plastic wrap directly on the surface to prevent a skin from forming. It can be stored in the refrigerator for up to a week or frozen for a month. To reuse, simply reheat it gently in a double boiler or in short bursts in the microwave until it reaches the correct pouring temperature again. You may need to give it another quick blitz with an immersion blender to re-emulsify.
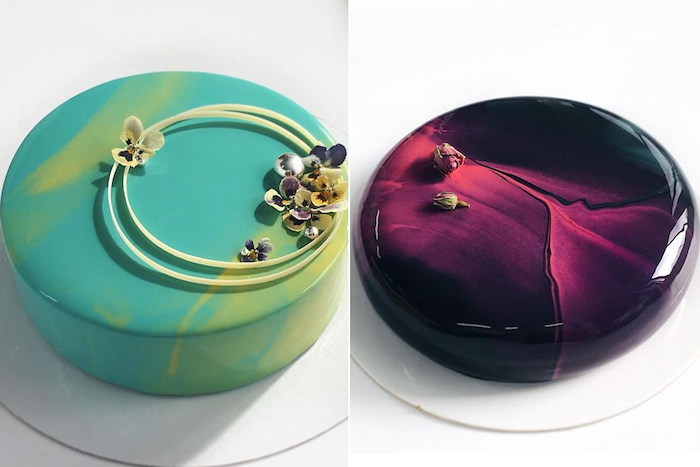
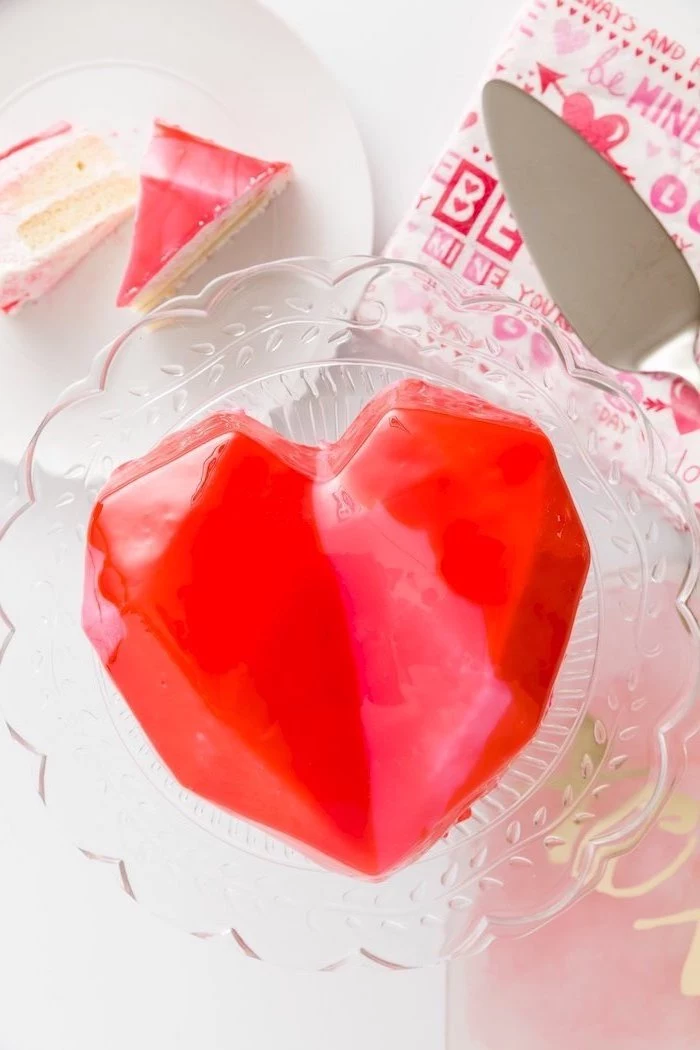
Creating the Marble Effect
The secret to stunning marble or galaxy designs lies in the pour. Prepare your base color (often white) in the main pitcher. Then, pour small amounts of your other colors (e.g., blue, purple, pink) directly into the pitcher in stripes or pools. Do NOT stir them together. When you pour the glaze over the cake, the colors will flow and blend naturally, creating a unique, organic pattern every time.
Gel Food Coloring: This is the industry standard. Brands like Americolor or Chefmaster offer highly concentrated color that won’t water down your glaze or affect its setting ability. A tiny drop goes a long way.
Powdered Food Coloring: An excellent choice, especially for vibrant, deep colors. For best results, mix the powder with a few drops of vodka or clear extract to make a paste before adding it to the glaze, ensuring it dissolves completely without clumps. We love The Sugar Art’s Master Elites for their intensity.
Thinking about flavor? A standard mirror glaze has a sweet, vanilla-like taste from the white chocolate and condensed milk. You can easily customize this. Try replacing a portion of the water with strong-brewed coffee for a mocha glaze, or add a high-quality fruit extract or a touch of citrus zest at the end of the process for a brighter flavor profile that complements the cake inside.
A common pitfall: an imperfect foundation. The glaze will only be as smooth as the surface it’s poured on. Before freezing, take the extra time to smooth the sides of your mousse or buttercream cake with a bench scraper or offset spatula. A perfectly level, smooth-as-glass surface is the canvas your glaze deserves.
- A digital kitchen scale for precise measurements.
- An immersion (stick) blender for a perfect emulsion.
- A reliable digital thermometer.
- A fine-mesh sieve.
- A wire rack placed over a baking sheet to catch drips.
Did you know? The modern entremet, often coated in a mirror glaze, was popularized in France. Pâtissiers like Cédric Grolet have become global superstars, known for their hyper-realistic fruit trompe-l’œil creations, almost all of which are finished with a flawless glaze.
Why did my glaze slide right off the sides of the cake?
This usually points to one of two issues. First, your glaze was likely too hot when you poured it, making it too thin to cling to the sides. The second, more common culprit, is condensation. If you take your frozen cake out of the freezer too early, a layer of frost or condensation will form on its surface. The glaze can’t adhere to this layer of water and will simply slip off. Bring the cake out just seconds before you’re ready to pour.
- Saves money on expensive ingredients like white chocolate.
- Allows you to use up leftover glaze from other projects.
- Creates completely unique color combinations.
The trick? The ‘double-glaze’ technique. Use a base layer of plain or leftover glaze to coat the cake first. Let it set briefly, then pour your main, more expensive patterned glaze over the top. The first coat acts as a primer, ensuring a perfect finish with less of the show-stopping glaze.
The moment of the pour is pure culinary theatre. It’s a single, confident motion. Start in the center of the cake and pour steadily, letting the glaze flow naturally outwards and down the sides. Don’t hesitate or stop and start. Trust gravity and the viscosity of your perfectly prepared glaze to do the work. It’s a moment of truth that is incredibly satisfying to watch.
Important: Once glazed, don’t put the cake back in the freezer! The extreme cold can cause the gelatin to crack or develop condensation, ruining the glossy finish. A mirror-glazed cake should be stored in the refrigerator, where it will thaw gently and be ready to serve. It’s best eaten within 2-3 days.
A study in the journal ‘Food Quality and Preference’ confirmed that a glossy, smooth finish on a food product significantly increases the consumer’s perception of its quality and flavor, even before they take a bite.
That incredible shine isn’t just for looks; it’s a powerful psychological cue that tells our brains,
Mousse/Entremet Base: This is the ideal foundation. Its perfectly smooth, frozen surface allows the glaze to flow evenly and set instantly into a glass-like sheet. The soft texture of the mousse also pairs beautifully with the gelatinous glaze.
Buttercream Base: This is trickier. The buttercream must be frozen solid and be flawlessly smooth. The challenge is that the fat in the buttercream can sometimes resist the glaze. A very thin ‘crumb coat’ of glaze can help the final layer adhere better.
For no-fail results, a mousse-based cake is the superior choice.
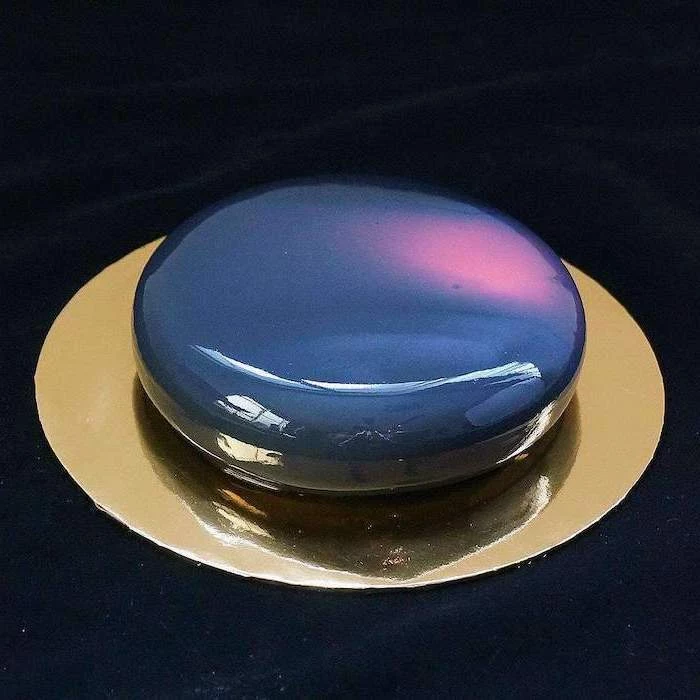
While chocolate and galaxy glazes are showstoppers, a recent trend in high-end pâtisserie is the minimalist glaze. Think a single, muted color—like sage green, dusty rose, or stone grey—poured to perfection. The focus shifts from wild patterns to the absolute flawlessness of the surface and the form of the cake itself. It’s a quiet confidence that speaks volumes.

My glaze looks dull, not shiny. What happened?
This often happens when the glaze is agitated after it has started to set. Once you pour, resist the urge to touch it, smooth it with a spatula, or move the cake too much. The shine develops as the glaze settles and sets undisturbed. One single, confident pour is the goal. Any touching after that will disrupt the surface and kill the gloss.
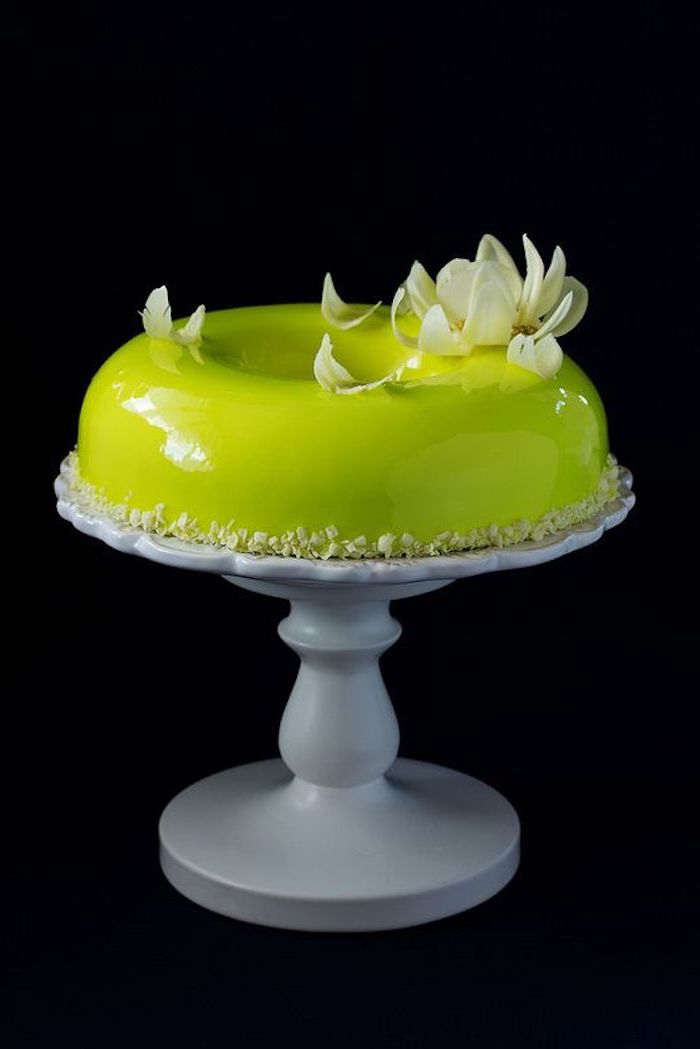
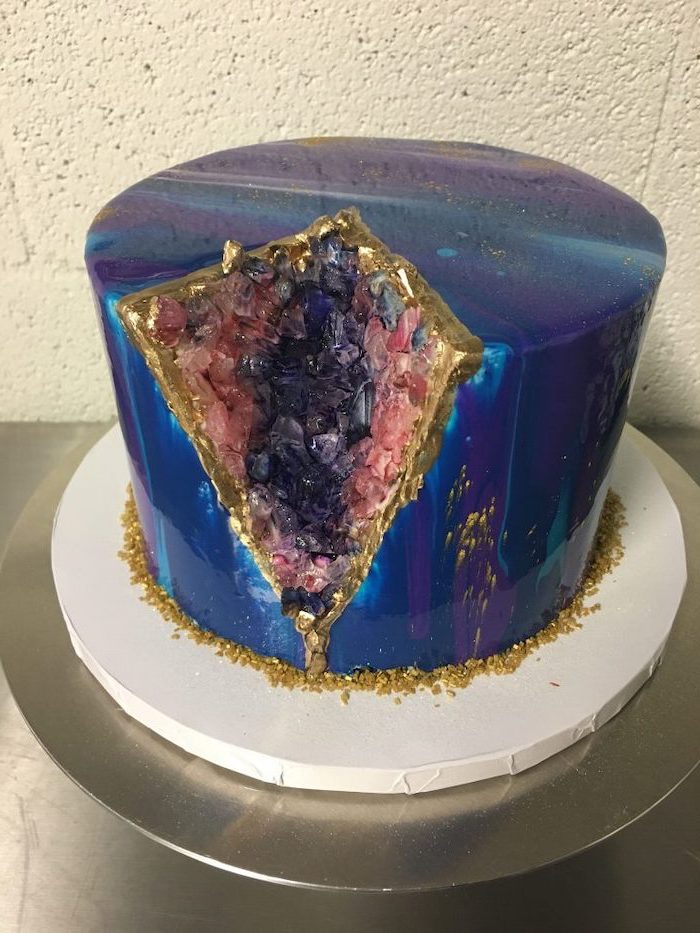
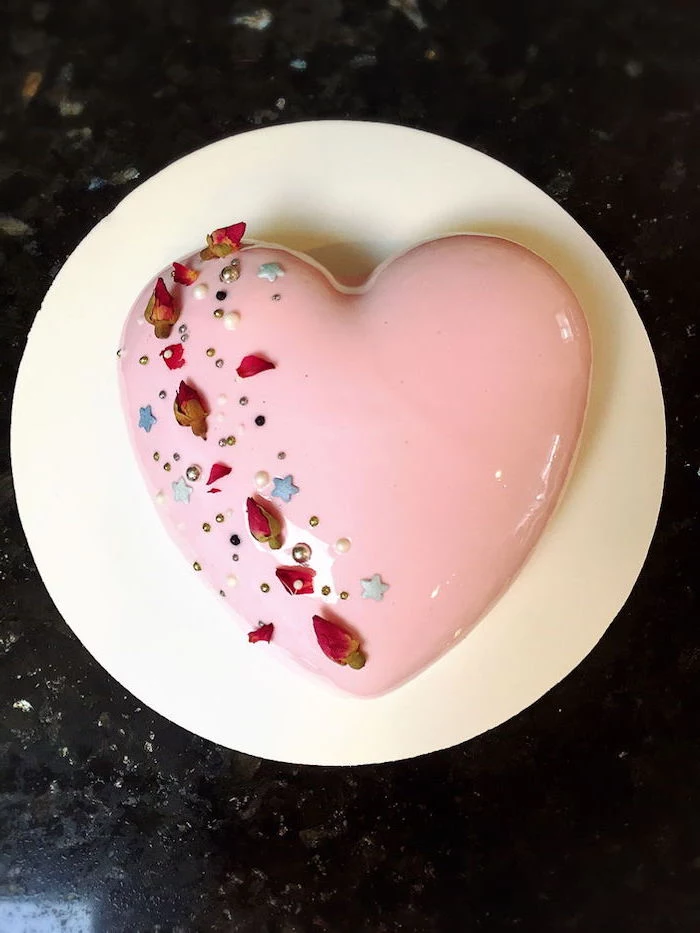
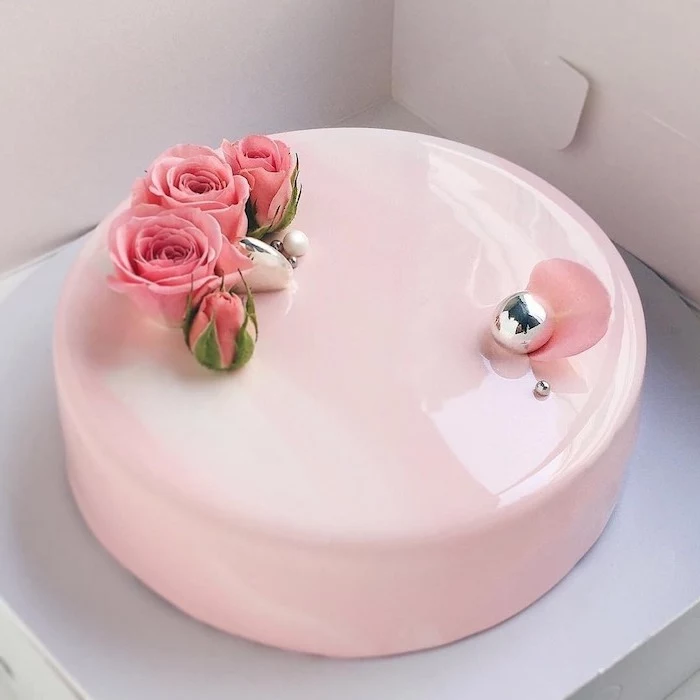
To finish your masterpiece, use tweezers for precise placement of decorations. A sprinkle of edible gold leaf, a few carefully placed chocolate pearls, or a delicate sugar flower can elevate your cake. Apply these elements after the glaze has set for a minute or two but is still slightly sticky. This ensures they adhere without sinking in or sliding off.
Not all sweetened condensed milk is created equal. Check the ingredients list. True condensed milk is made from just milk and sugar. Some cheaper brands contain other ingredients like corn syrup or palm oil, which can alter the final texture and stability of your glaze. For consistency, stick to trusted brands like Eagle Brand or Nestlé Carnation.


