Forget Store-Bought: Here’s How to Make Sushi That Doesn’t Fall Apart
Let’s Get Real About Making Sushi at Home
I’ve spent a huge chunk of my life in professional kitchens, and a lot of that time was dedicated to the art of sushi. The first thing I tell anyone who wants to learn is to forget what you see in fancy pictures. Your first roll will probably be a bit clumsy. Mine certainly were. That’s okay! Making sushi is a skill, not just a recipe, and like any skill, it takes a little practice.
In this article
This isn’t just a list of instructions. I’m going to walk you through the why behind each step, the stuff that actually makes a difference. We’re building a foundation here.
Heads up! From washing the rice to taking your first bite, you should probably set aside about two hours. A good chunk of that is just waiting for the rice to cook and cool, which is the perfect time to prep your fillings. The recipe below should make about 6-8 rolls, which is plenty for a hungry couple or a nice appetizer platter for four people.
Part 1: The Rice is Everything (Seriously)
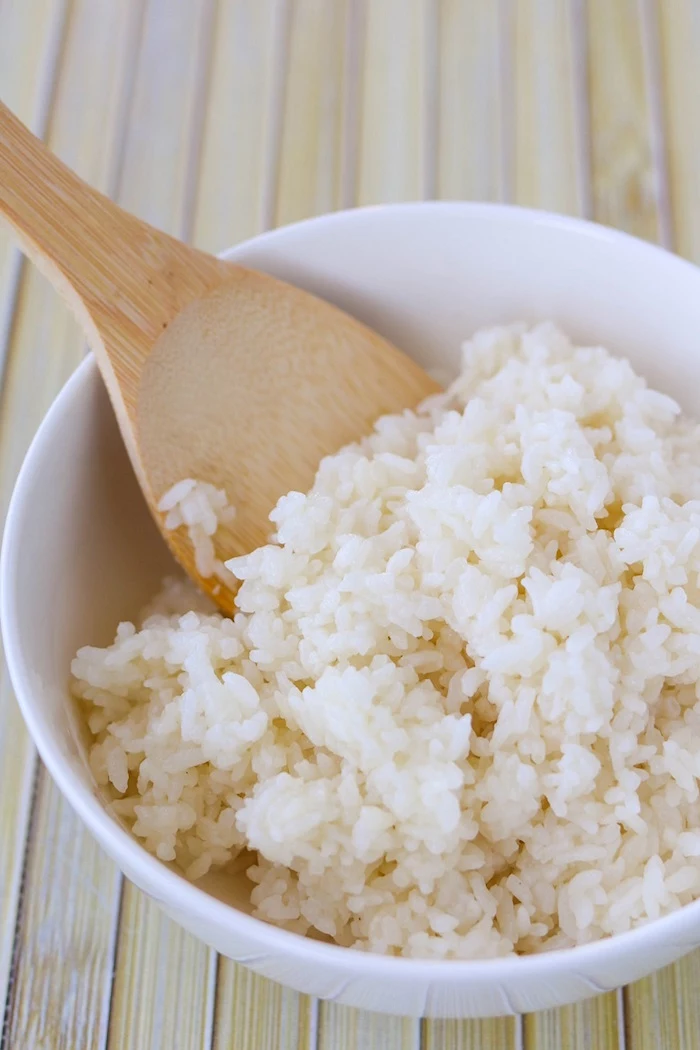
Before you even think about fish, we need to talk about the rice, or shari. Honestly, good sushi is about 80% rice. If the rice is bad, the whole thing is a bust. It needs the right flavor, the right texture, and the right temperature. No pressure, right?
Choosing the Right Stuff
You absolutely must use Japanese-style short-grain rice. This isn’t just a preference; it’s a non-negotiable. Its high starch content is what makes the grains sticky enough to hold together. Using something like Basmati or Jasmine is a classic rookie mistake—they just won’t work.
Here’s a quick shopping list to get you started, so you know what to expect price-wise:
- Sushi Rice: Look for bags specifically labeled “sushi rice.” A common 2lb bag from a brand like Nishiki will cost you about $5 to $8 and will last you for a few sushi nights. Calrose rice is a decent substitute if you can’t find anything else.
- Rice Vinegar: Make sure you grab the unseasoned kind. The seasoned stuff has sugar and salt already in it, and you want to control those flavors yourself. A good bottle from Mizkan or a similar brand is usually around $4 to $6.
- Nori (Seaweed Sheets): A pack of 10 sheets is typically $4 to $6. If it snaps when you fold it, it’s fresh.
- Sugar & Salt: You’ve probably already got this. Just plain white sugar and fine sea salt are perfect.
The Step-by-Step Rice Ritual
This is a process. Don’t rush it.
1. Wash That Rice: Measure out 2 cups of rice into a big bowl. Cover it with cold water and swirl it around with your hand. The water will get milky—that’s all excess starch. Pour out the cloudy water, being careful not to lose any rice. You’ll need to repeat this 5-7 times, until the water is mostly clear. Skipping this step is a recipe for gummy, sad rice.
2. Drain and Rest: After washing, drain the rice in a fine-mesh strainer and just let it sit for about 30 minutes. This helps the grains absorb a little moisture and cook way more evenly.
3. Time to Cook: A Japanese rice cooker is your best friend here. If you have one, just add the 2 cups of drained rice and 2 cups of fresh, cold water (a 1:1 ratio is a great starting point). If you’re on the stovetop, use a heavy-bottomed pot with a lid that fits tightly. Add the rice and water, bring it to a boil, then immediately drop the heat to the absolute lowest setting. Cover it and let it simmer for 15 minutes. And don’t you dare lift that lid! After 15 minutes, kill the heat and let it stand, still covered, for another 10 minutes to steam.
4. Make the Vinegar Seasoning (Sushi-zu): While the rice is doing its thing, mix up your seasoning. For 2 cups of rice, I use this classic ratio: 1/2 cup of rice vinegar, 2 tablespoons of sugar, and 2 teaspoons of fine sea salt. Gently warm it all in a small pot, stirring until everything dissolves. Don’t let it boil. Then just set it aside to cool.
5. The Art of Mixing: This is where the magic happens. Dump the hot rice into a large wooden or glass bowl (avoid metal, it can react with the vinegar). Pour the seasoning over the rice. Now, take a rice paddle and use a cutting motion, like you’re slicing through the rice at an angle, then folding it over. You want to coat every single grain without smashing them. While you’re mixing, use a fan or even a piece of cardboard to cool the rice down quickly. This gives it that signature gloss. Your rice is ready when it’s about body temperature—not hot, not cold.

Quick Tip: People always ask if they can make the rice ahead and stick it in the fridge. Please don’t! Refrigeration makes the rice hard and ruins the texture completely. Sushi is a same-day kind of meal. Plan accordingly!
Part 2: Your Tools of the Trade
You don’t need a lot of fancy gear, but the right tools make a world of difference. A basic kit with a bamboo mat, paddle, and rice will run you about $15-$20 on Amazon or at a local Asian market.
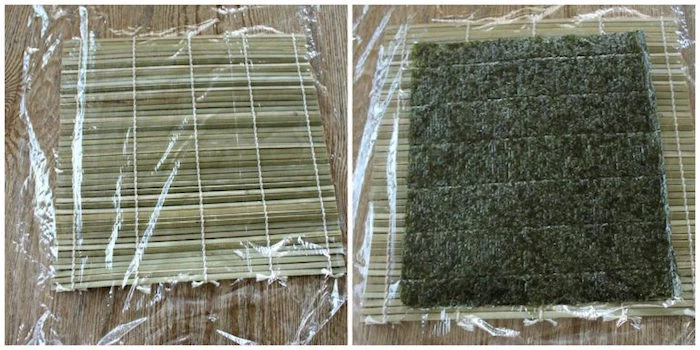
- Bamboo Rolling Mat (Makisu): This is your shaper. My #1 tip for beginners? Tightly wrap the mat in plastic wrap before you start. It stops rice from getting stuck in the cracks and makes cleanup a breeze. It’s absolutely essential for inside-out rolls. You can find one for about $3.
- A Legitimately Sharp Knife: A dull knife will crush your roll and tear the nori. You don’t need a fancy, single-beveled Japanese blade (though they are amazing). A sharp chef’s knife or a thin slicer works just fine.
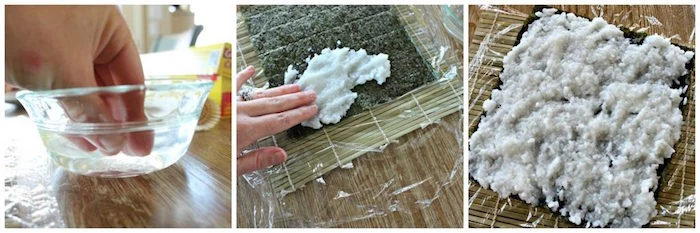
- Tezu (Hand-Dipping Water): This is just a small bowl with about a 1/4 cup of water and a splash of rice vinegar. Dip your fingers in it to keep the super-sticky rice from gluing itself to your hands.
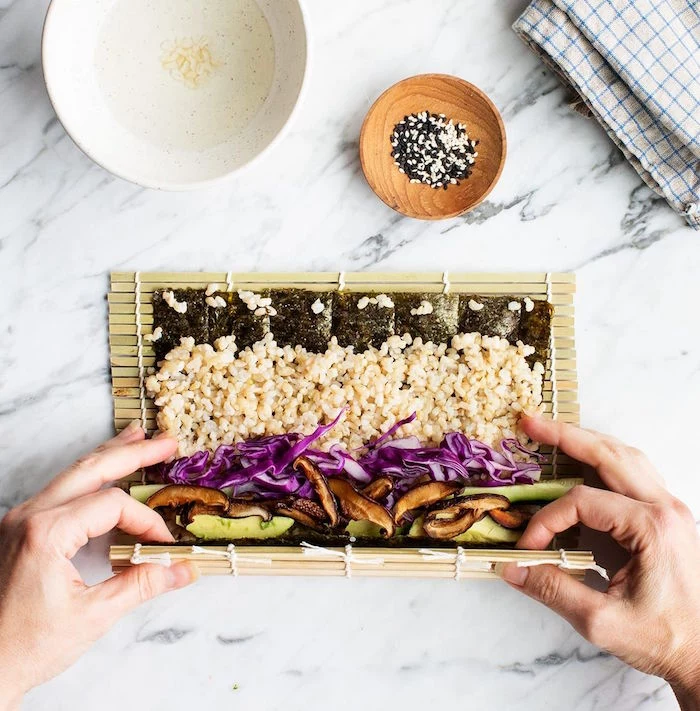
Part 3: Prepping Your Fillings
Here’s where you can get creative. The key is to have everything sliced and ready to go before you build your first roll.
A Very Important Note on Fish Safety
Okay, let’s talk about raw fish. The term “sushi-grade” is mostly a marketing thing, not a government regulation. It just means the seller thinks it’s safe to eat raw. The only way to be sure fish is safe from parasites is for it to be commercially flash-frozen. Your home freezer doesn’t get cold enough to do the job.
So, here’s the deal: You must buy your fish from a reputable fishmonger who can confirm it’s safe for raw consumption. Don’t be shy! Walk up to the counter and say, “I need about half a pound of tuna that’s safe to eat raw for sushi tonight.” They’ll know exactly what you mean. This will likely be the most expensive part of your meal, costing anywhere from $15 to $25 for a good 8oz portion. Never, ever use fish from the regular grocery counter or any freshwater fish raw.
Some Go-To Filling Ideas
- Tuna or Salmon: Look for a vibrant, translucent color. Slice it into long strips, about half an inch thick.
- Cucumber: Scrape out the watery seeds with a spoon, then cut the rest into thin matchsticks.
- Avocado: Use one that’s ripe but still firm. Slice it right before you roll to keep it from browning.
- Imitation Crab (Kanikama): The heart of the California roll. It’s pre-cooked and ready to go.
- Shrimp Tempura: A fantastic cooked option. You can buy it frozen and bake it, or fry your own. The crunch is so worth it.
Part 4: Let’s Get Rolling!
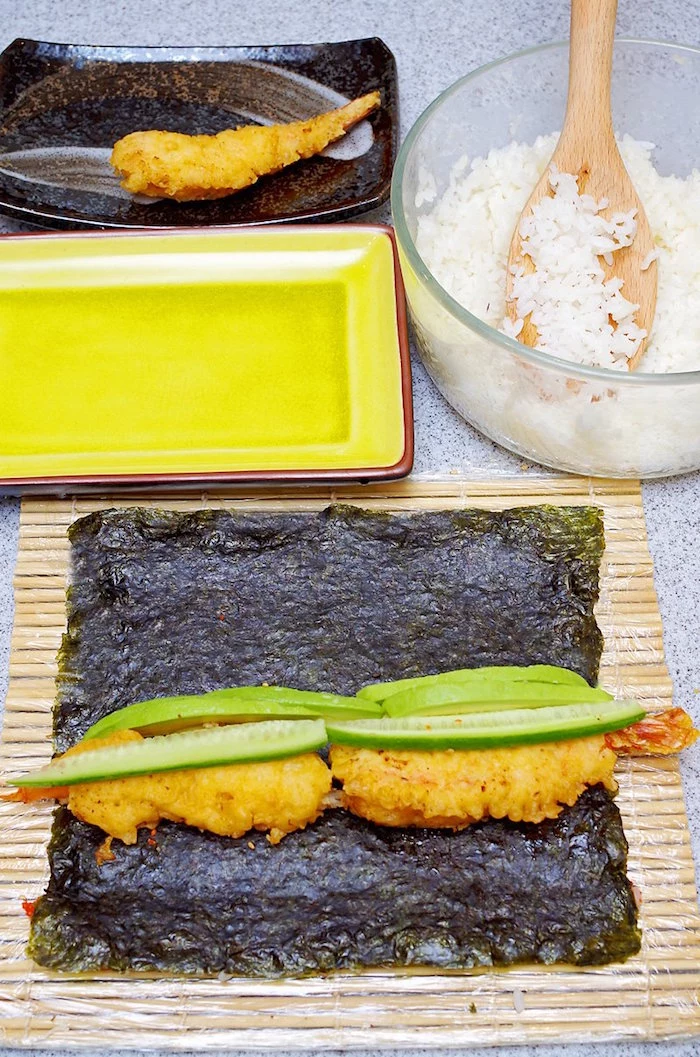
Okay, station check. You should have your plastic-wrapped mat, nori, bowl of rice, dipping water (tezu), and all your fillings lined up. Let’s break down the two main types of rolls.
First, you have the Hosomaki. This is your classic thin roll with the seaweed on the outside. It uses a half-sheet of nori and usually just one filling. It’s perfect for practicing.
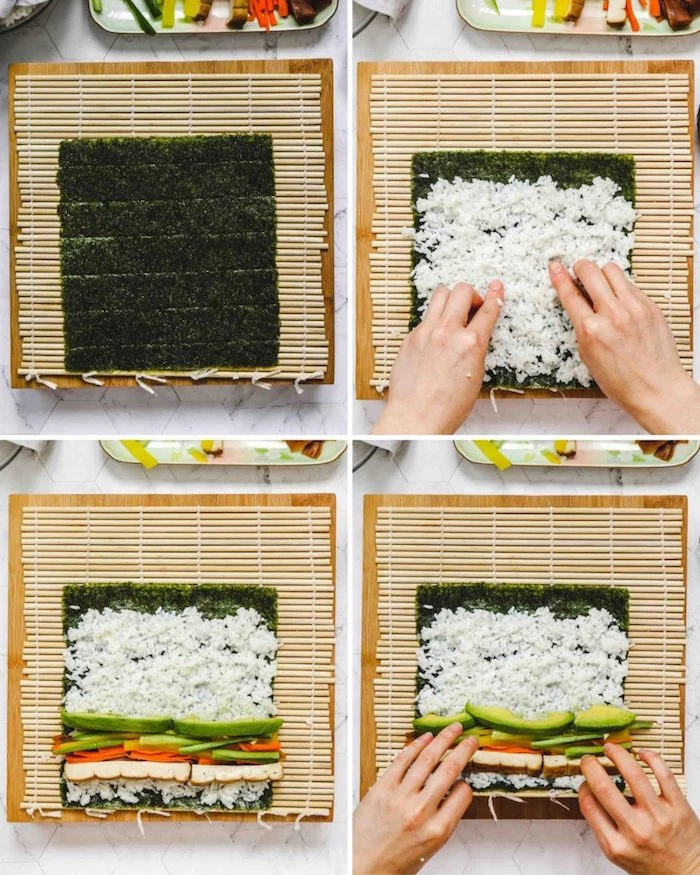
Then there’s the Uramaki, which is the inside-out roll (think California roll). The rice is on the outside, and it uses a full sheet of nori. It feels more advanced, but with a plastic-wrapped mat, it’s totally achievable.
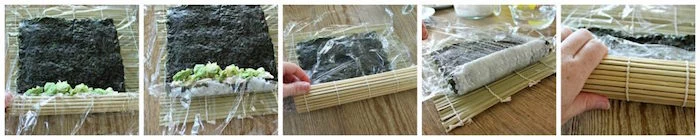
How to Roll a Hosomaki (Thin Roll)
- Lay a half-sheet of nori on your mat, shiny side down.
- Dip your fingers in the tezu water, then grab about half a cup of rice. Gently spread it over the nori, leaving a half-inch strip of bare nori at the top edge. Keep the rice layer thin—don’t smash it down!
- Place your filling (like a strip of cucumber) in a line across the middle of the rice.
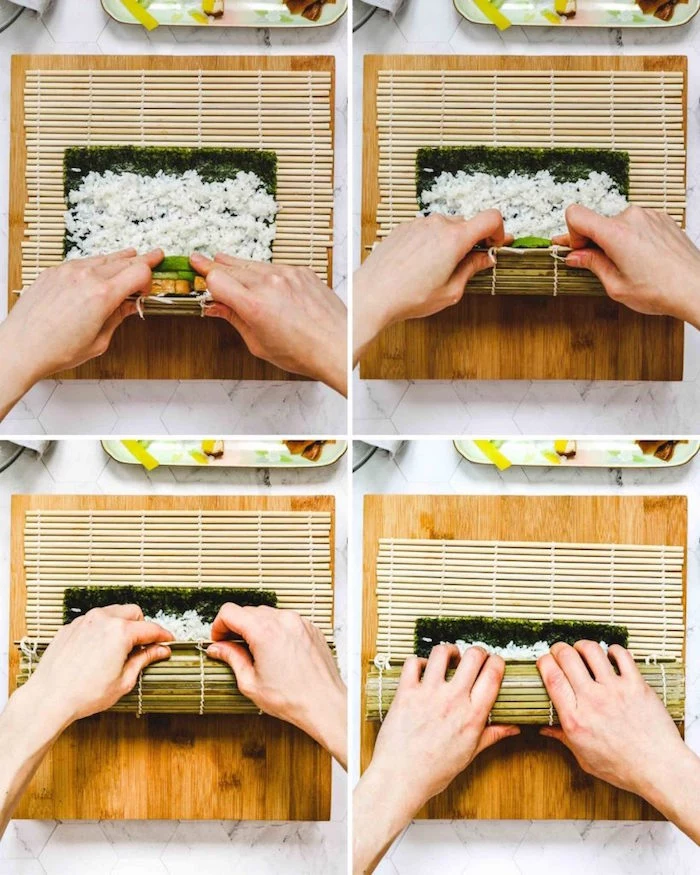
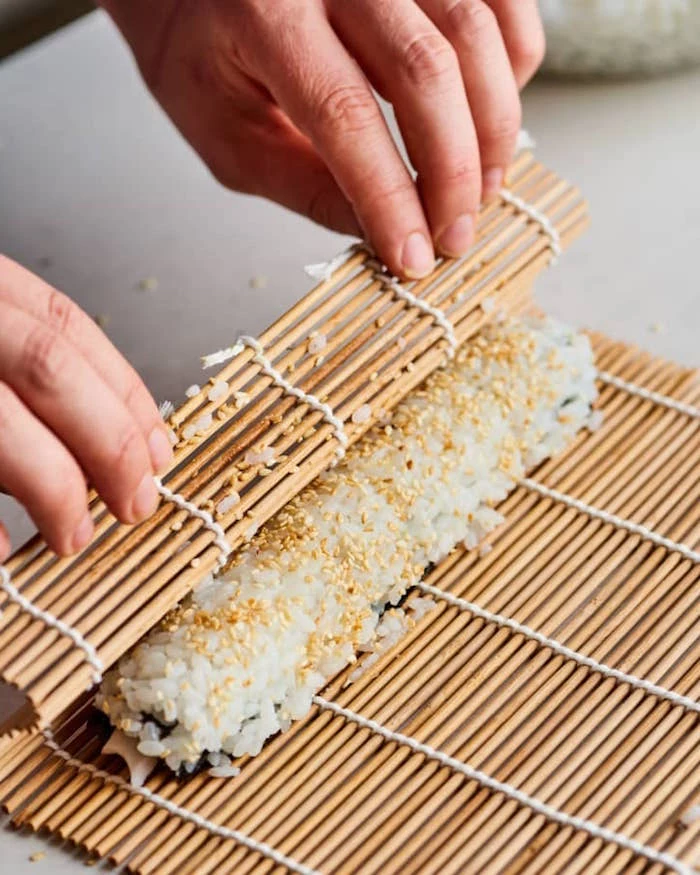
- Time to roll. Using your thumbs to lift the mat, roll the edge closest to you up and over the filling. Tuck it in snugly to create a tight core.
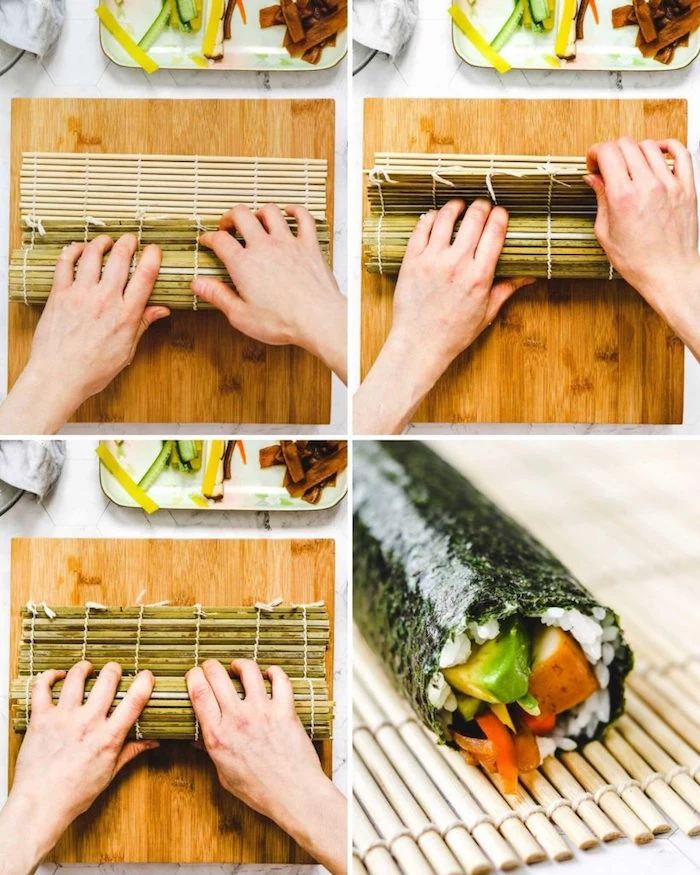
- Continue rolling forward, keeping gentle pressure, until you reach the bare nori edge. Give the whole thing a final, gentle squeeze with the mat to set the shape.
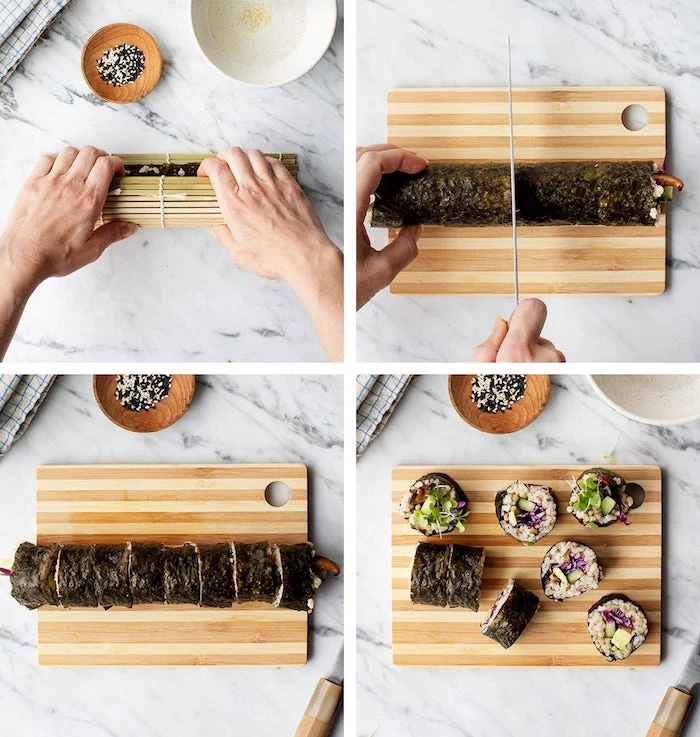
How to Cut Your Rolls Like a Pro
A perfect roll can be ruined by a bad cut. The secret? A wet knife. Before every single cut, dip the tip of your knife in water and let a drop run down the blade. This prevents sticking.
Place the roll on your board and slice it cleanly in half with one long, smooth pull. Don’t saw at it. Line up the two halves and cut them in half again. One more time, and you’ll have eight perfect, even pieces. It’s that simple.
Part 5: Don’t Forget the Sides!
Your beautiful rolls deserve the right companions. Don’t just grab any old soy sauce.
- Soy Sauce: A good quality, naturally brewed soy sauce makes a difference. To be honest, I often go for the less-sodium version, as it lets the flavor of the fish shine through without being a total salt bomb.
- Wasabi: That bright green paste you get in most restaurants? It’s usually horseradish, mustard, and food coloring. Real wasabi is a grated plant root, and it’s much more subtle and herbaceous. You can often find it in a tube or as a powder at Japanese markets. Both are great!
- Pickled Ginger (Gari): Those thin pink or beige slices aren’t meant to be eaten with the sushi. You eat a piece between different types of fish to cleanse your palate.
Part 6: When Things Go Wrong (Troubleshooting)
- My roll is falling apart! You probably didn’t get that first tuck tight enough. Really focus on tucking the mat over the filling to create a firm core before you continue rolling.
- My roll is bursting! The most common mistake of all: you overfilled it. Less is more. Be modest with your fillings, especially when you’re starting out.
- The nori is tearing when I cut it! Your knife is dull. Sharpen it, and remember to use that long, single-pull slice.
A Final Word… and a Quick Win
Making sushi is a process, and the joy is in that process. Be patient, pay attention, and have fun with it. Your tenth roll will be worlds better than your first.
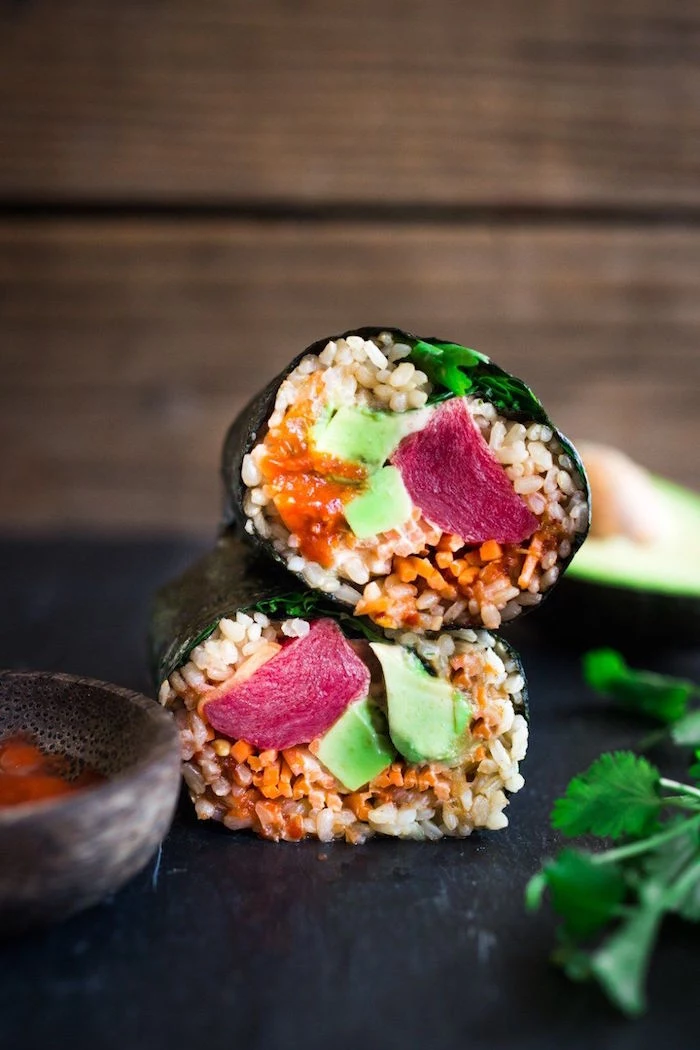
And by the way, if the rolling part feels overwhelming on your first try, don’t even worry about it. Just focus on making fantastic sushi rice. Then, you can scoop it into a bowl and artfully arrange your fish, avocado, and other toppings over it. This is called a Chirashi bowl, and it’s an amazing (and much easier) way to enjoy all the same flavors. There’s nothing better than sharing food you’ve made with your own hands. You’ve got this.
Inspirational Gallery
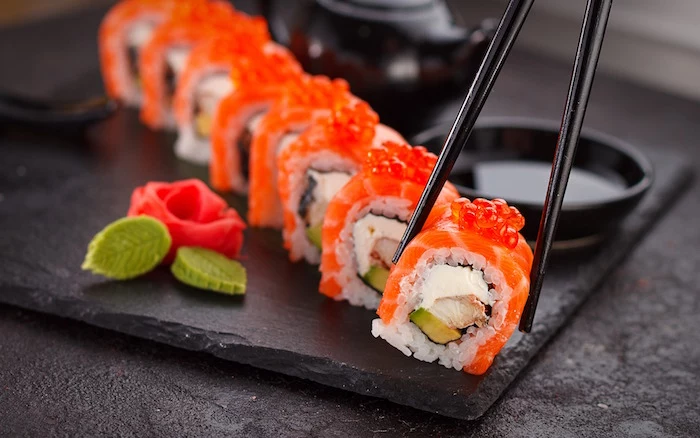
A razor-sharp knife is non-negotiable for clean cuts. A traditional Japanese yanagiba is the gold standard, but any long, thin blade will work if it’s perfectly sharpened. A dull knife will squash your beautiful roll, smearing the fillings and tearing the nori. Keep a damp cloth handy to wipe the blade between each cut to prevent rice from sticking.

- They don’t have to be perfect, especially at the start.
- They offer a fun, interactive way to eat.
- Everyone can customize their own.
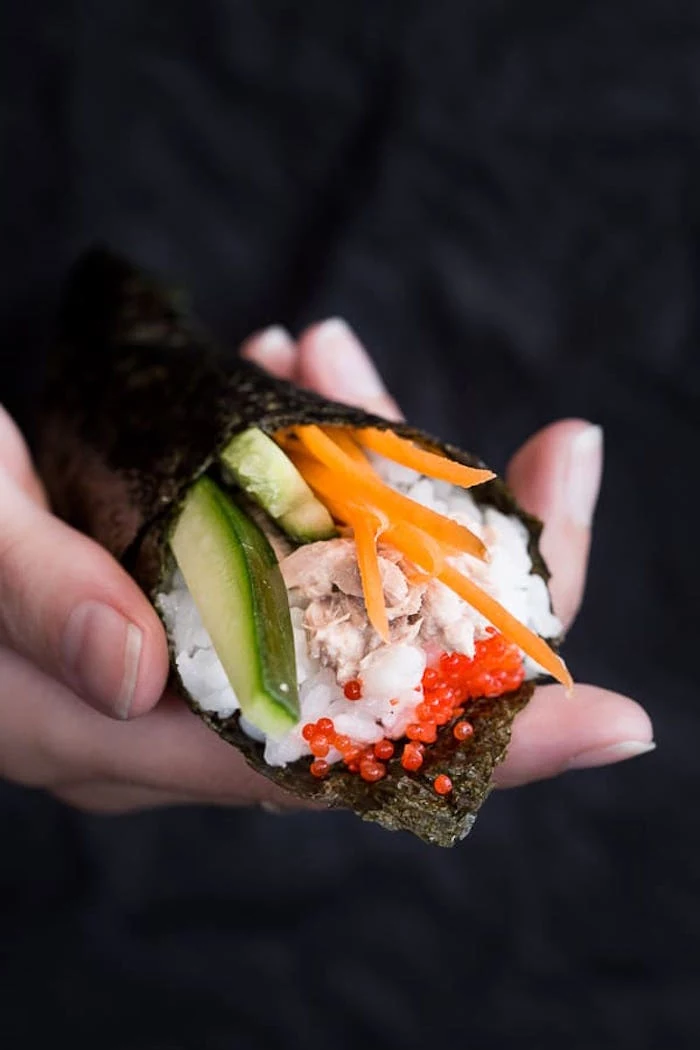
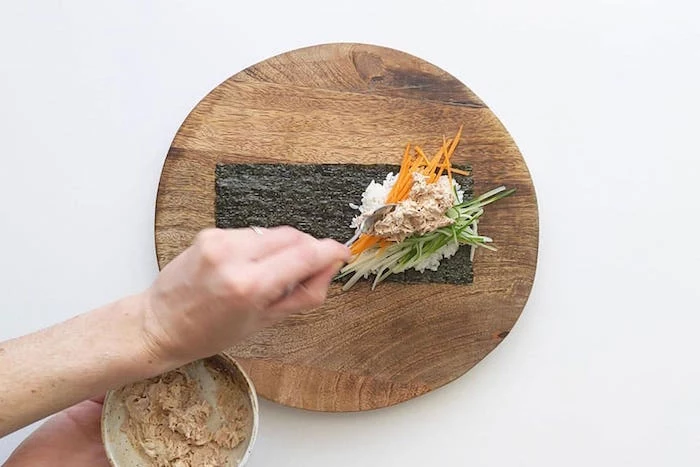
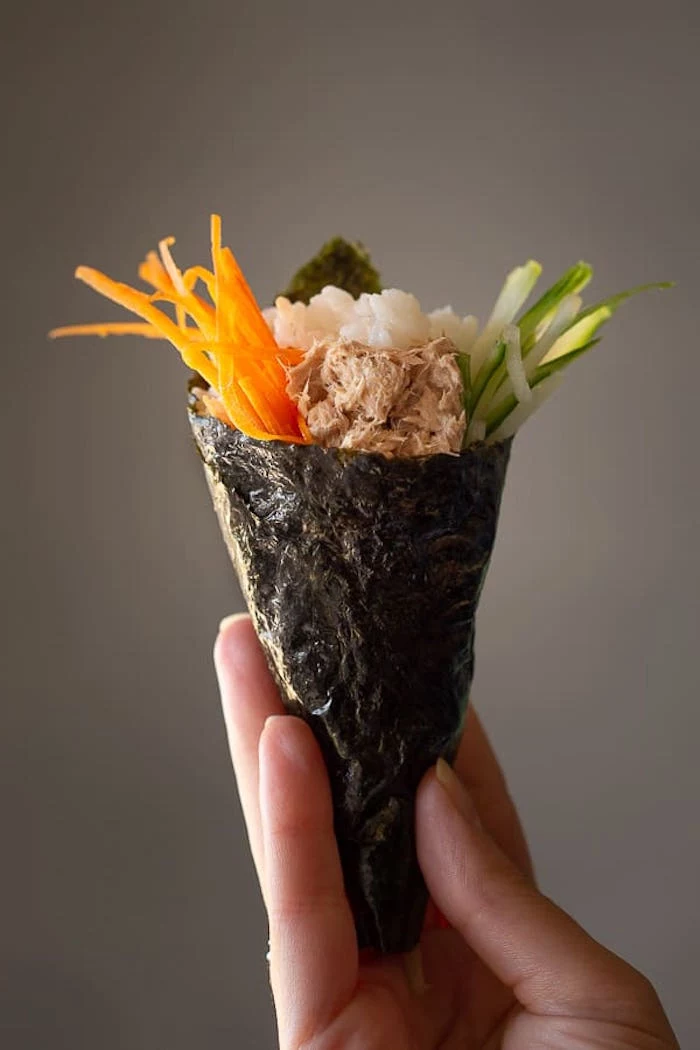
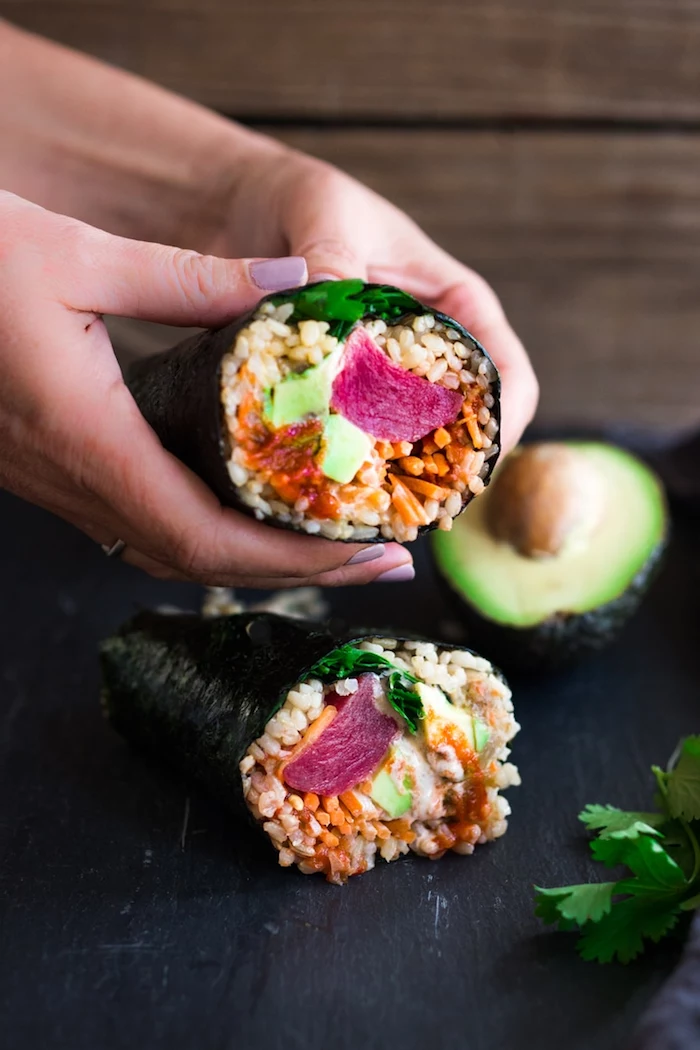
The secret? Temaki, or hand rolls! Simply take a half-sheet of nori, add a small amount of rice and your favorite fillings, and roll it into a cone shape. No mat required, and they’re meant to be eaten immediately.
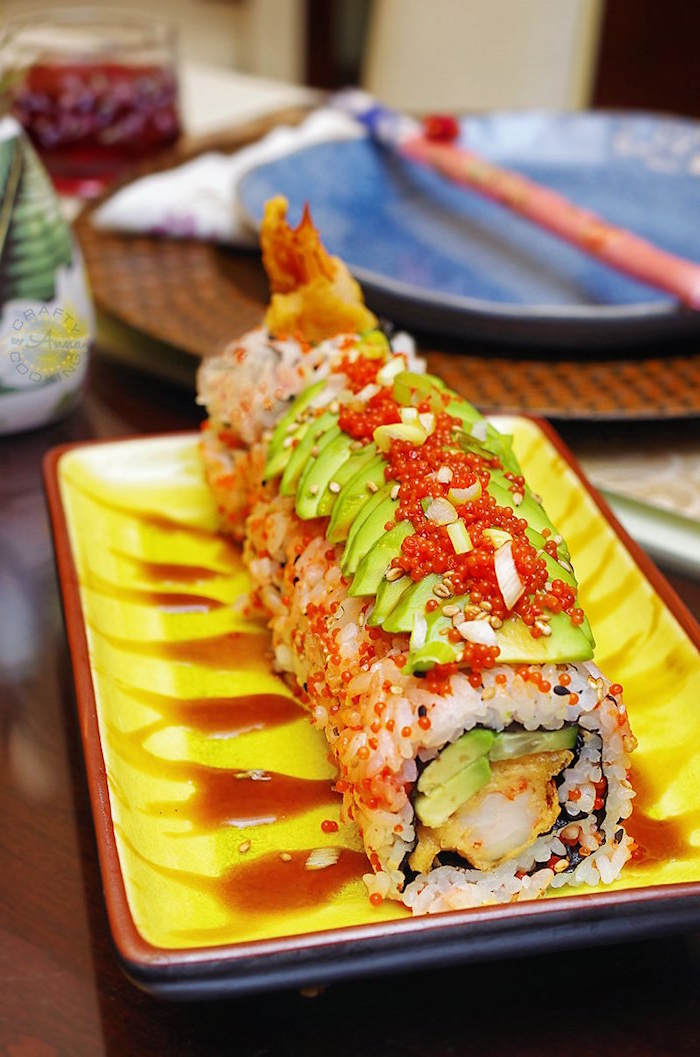
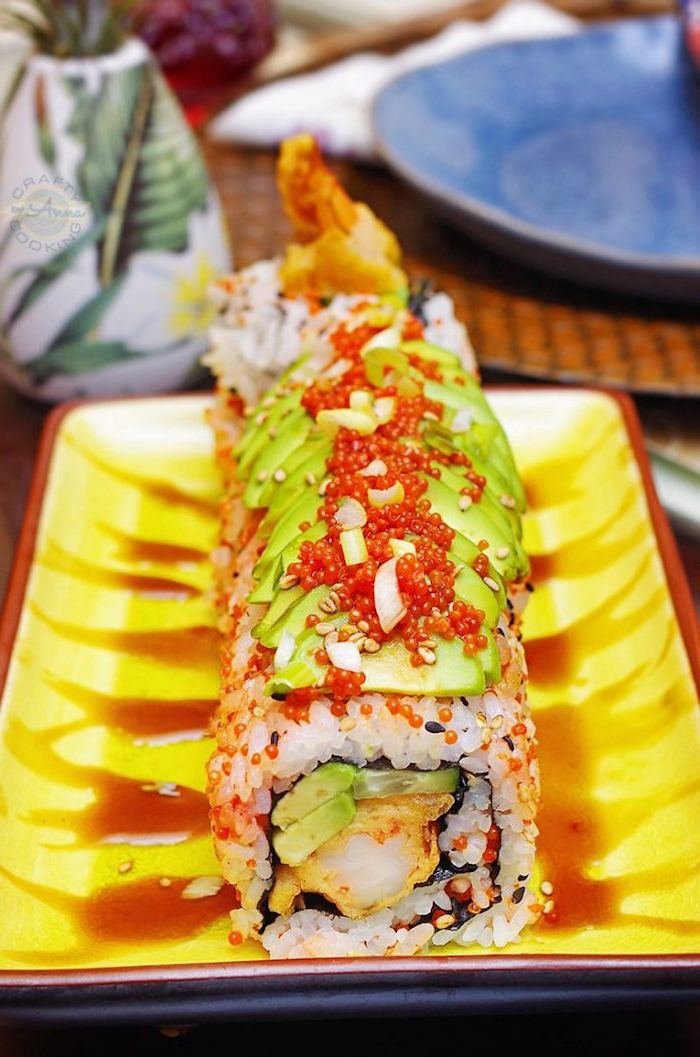
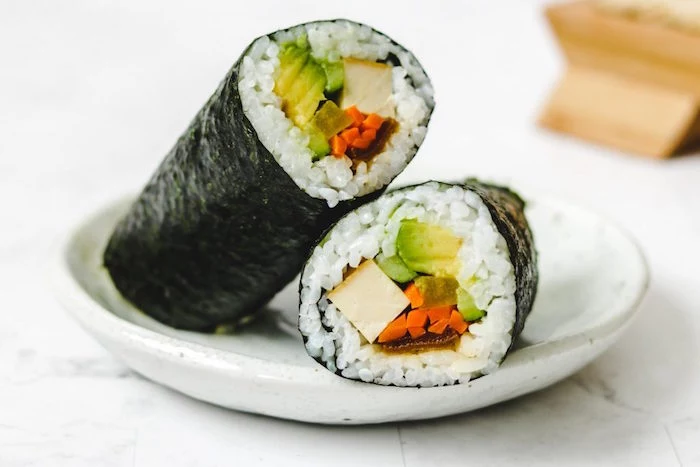
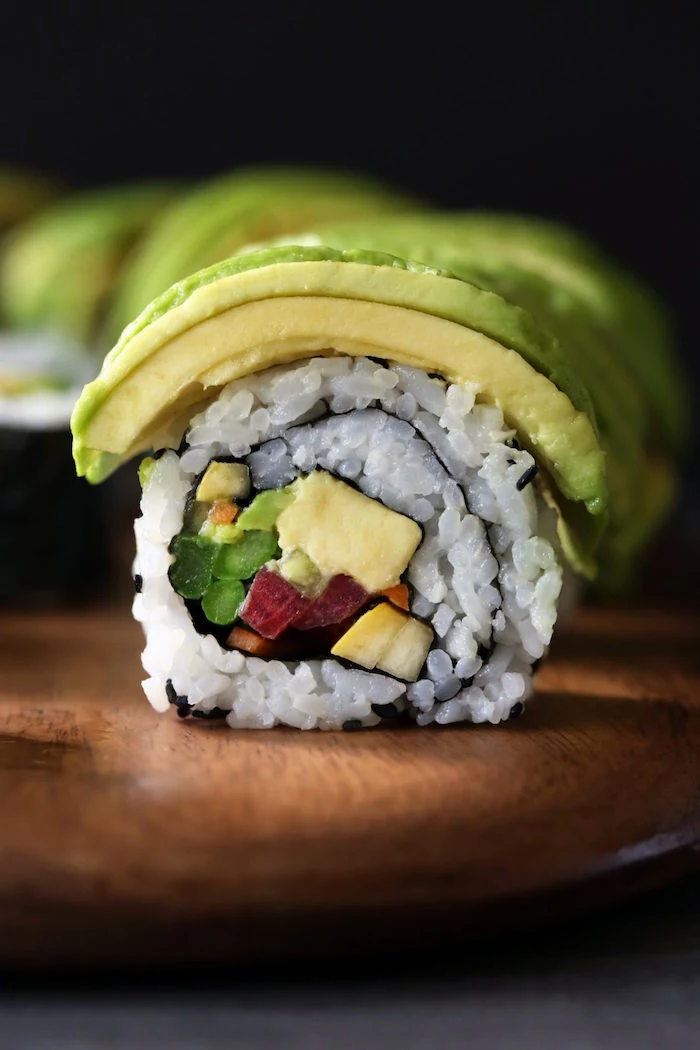
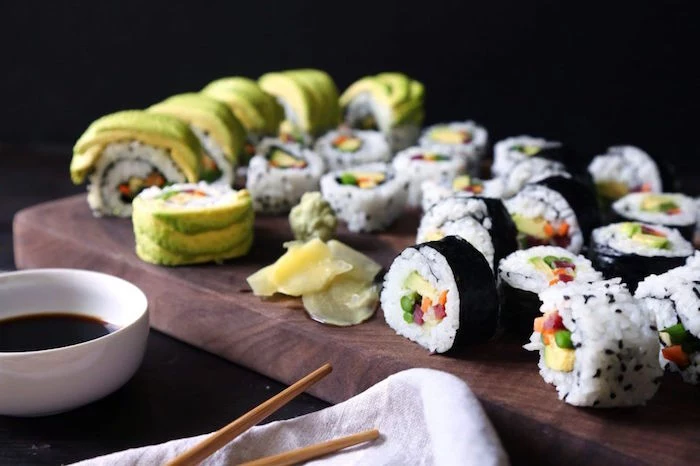
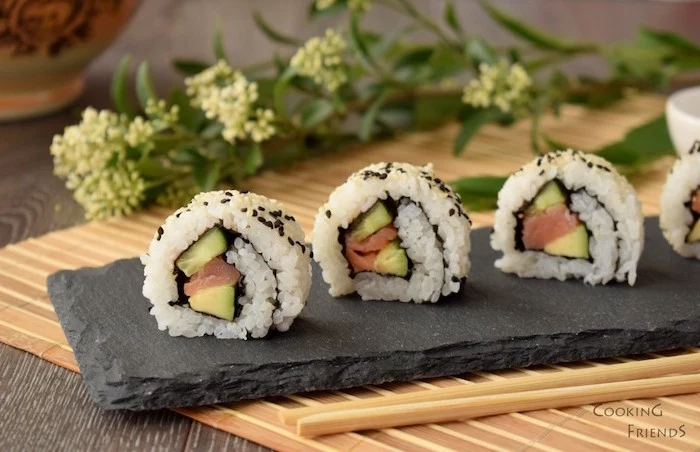
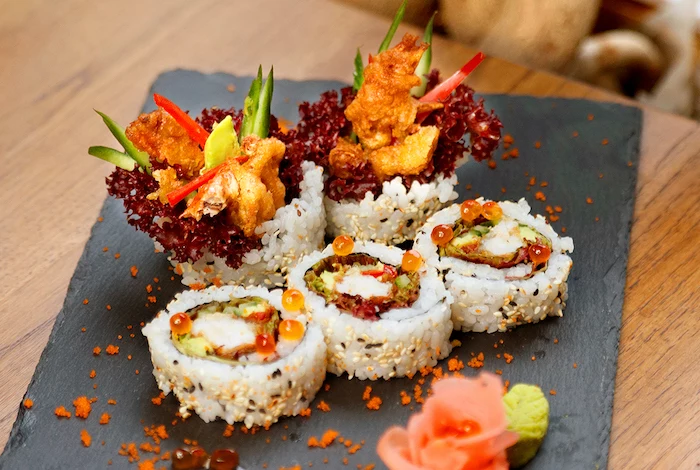
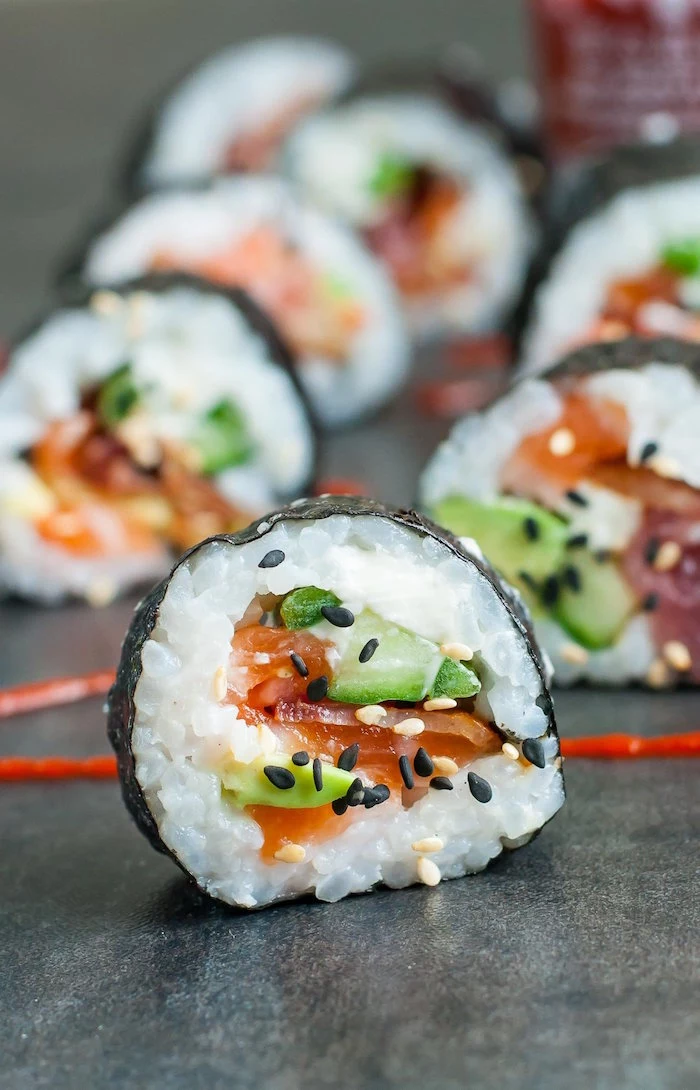
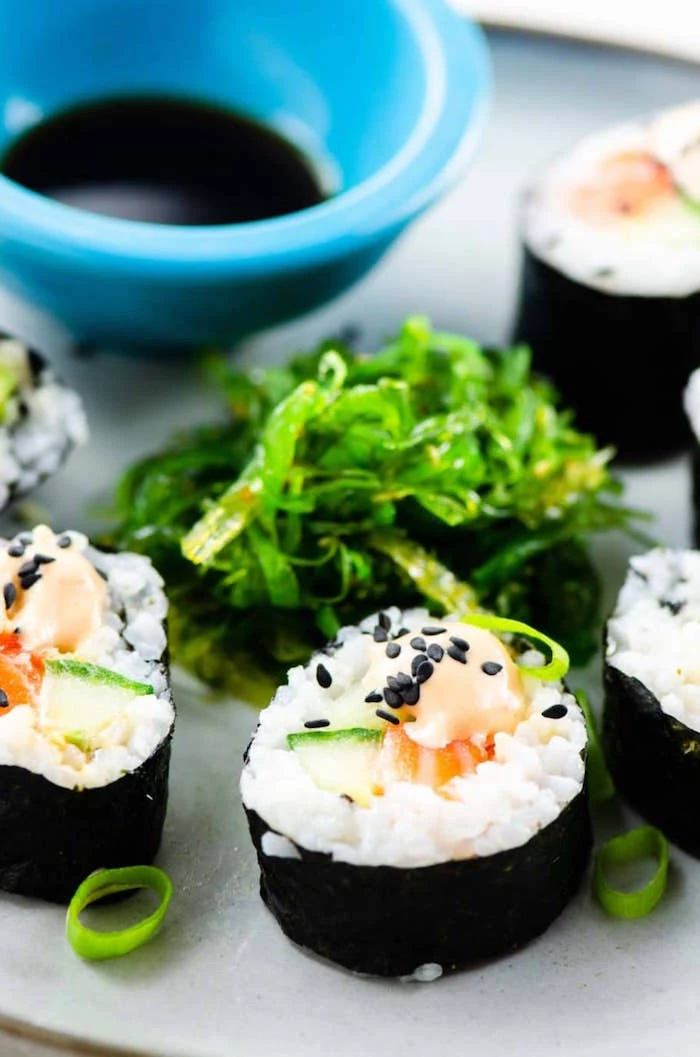
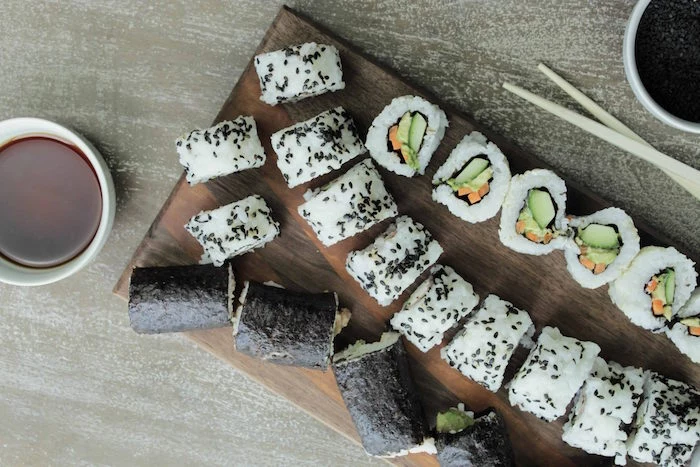
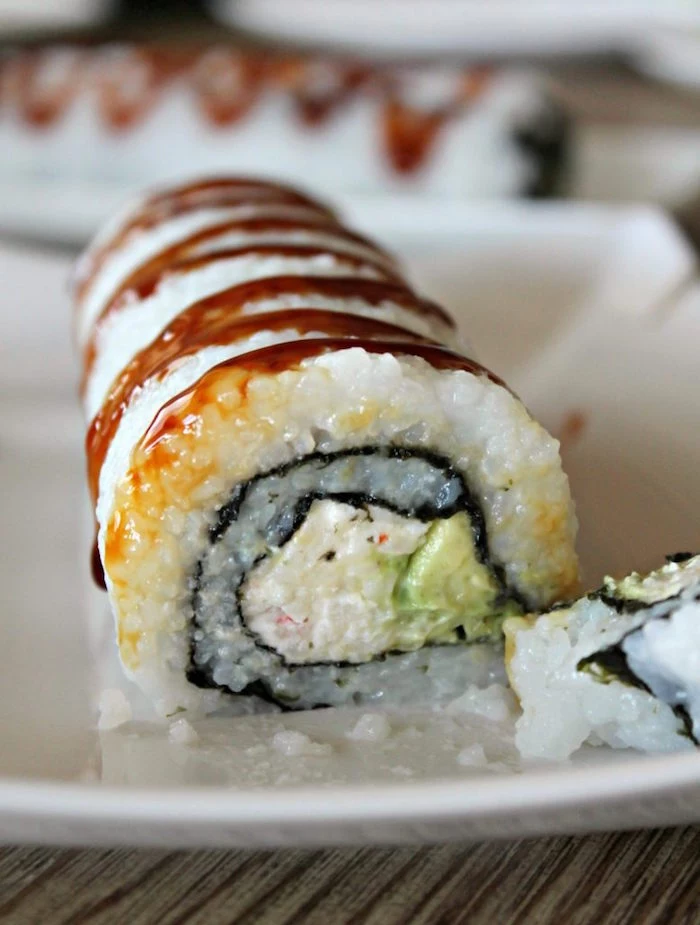
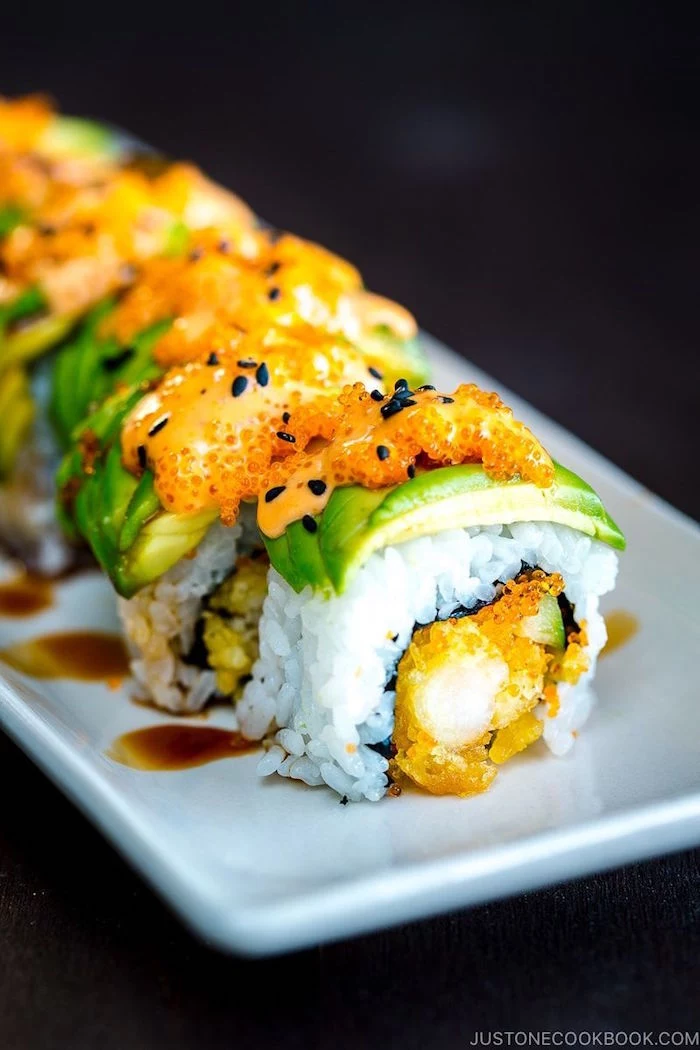
Uramaki (Inside-Out Roll): This is the style you see in a California or Spider Roll, with the rice on the outside and nori on the inside. It’s a bit trickier to master but allows for beautiful toppings like sesame seeds, tobiko (flying fish roe), or thin slices of avocado.
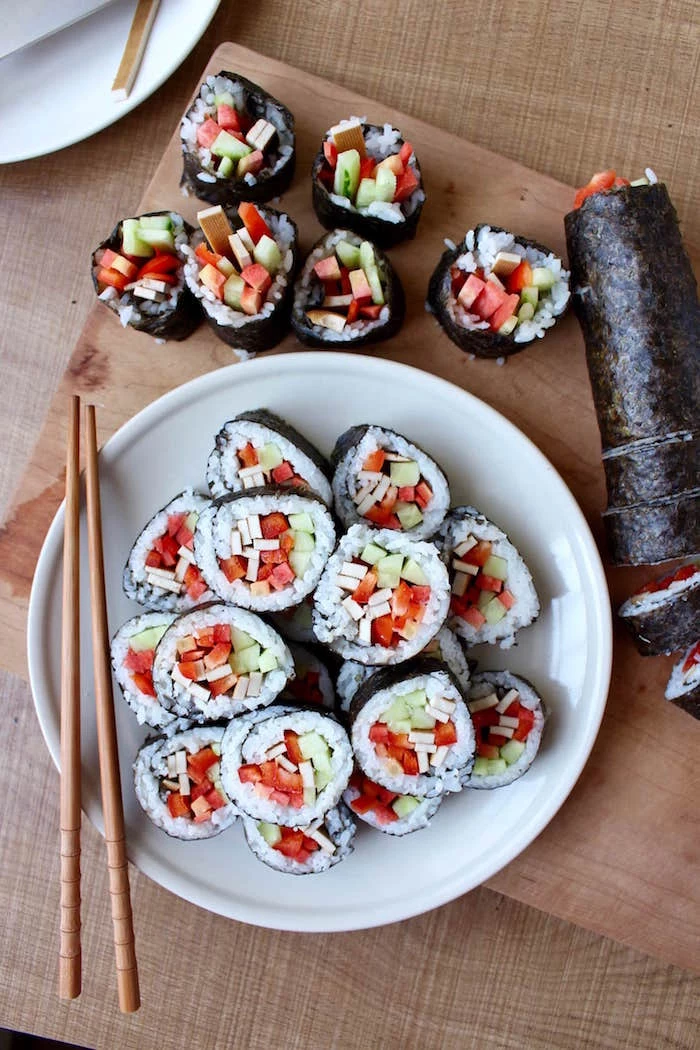
Maki (Traditional Roll): Here, the nori is on the outside, wrapping the rice and fillings. It’s the classic, easier-to-handle starting point for any budding sushi chef.
Start with Maki to perfect your rolling technique before moving on to the more delicate Uramaki.

Why is my roll falling apart when I slice it?
There are two likely culprits. First, you might be overfilling it. A thin, even layer of ingredients is key. Second, and more commonly, your rolling technique needs tightening. As you roll with your bamboo mat, use your fingers to gently but firmly tuck the edge of the nori over the fillings, creating a tight core. Then, continue rolling, applying even pressure to compact the cylinder.
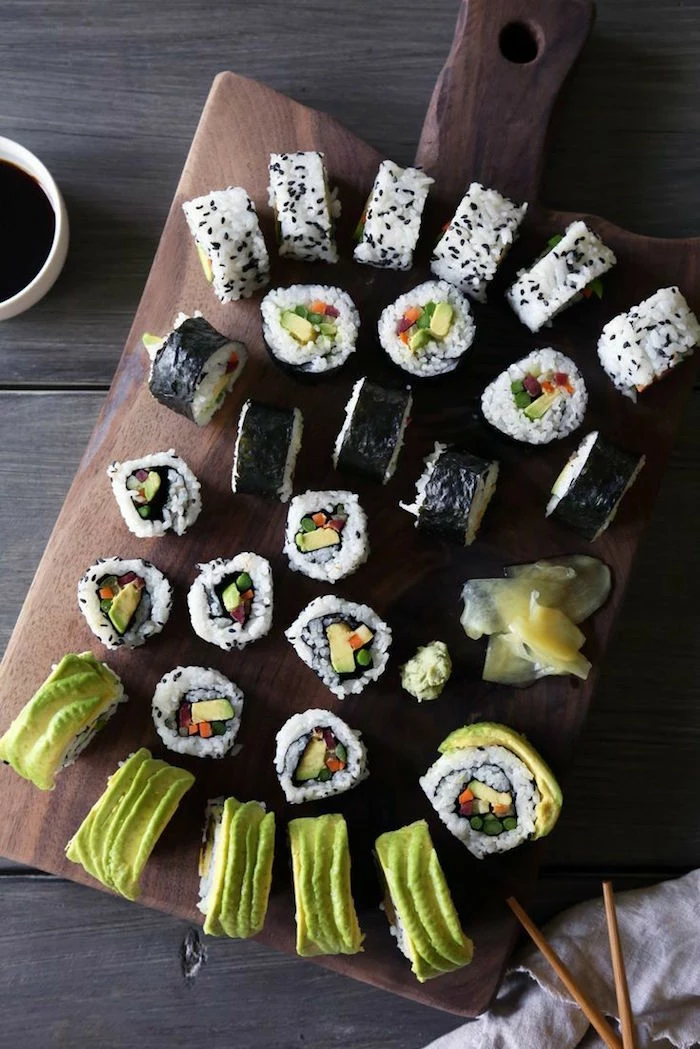
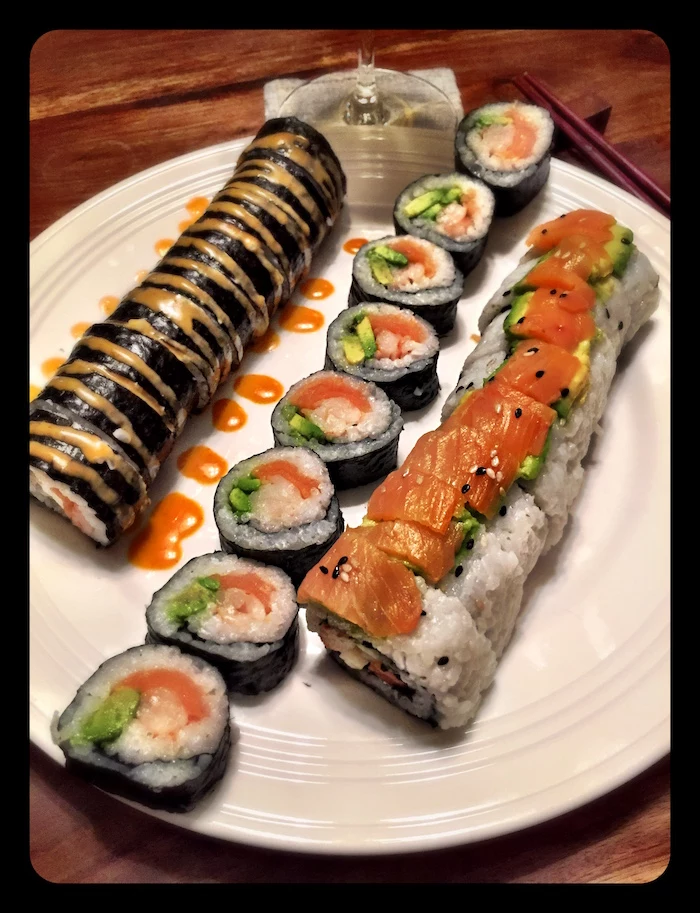
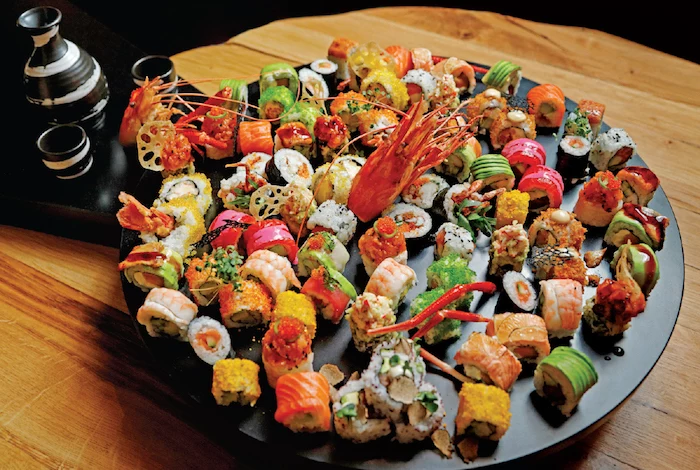
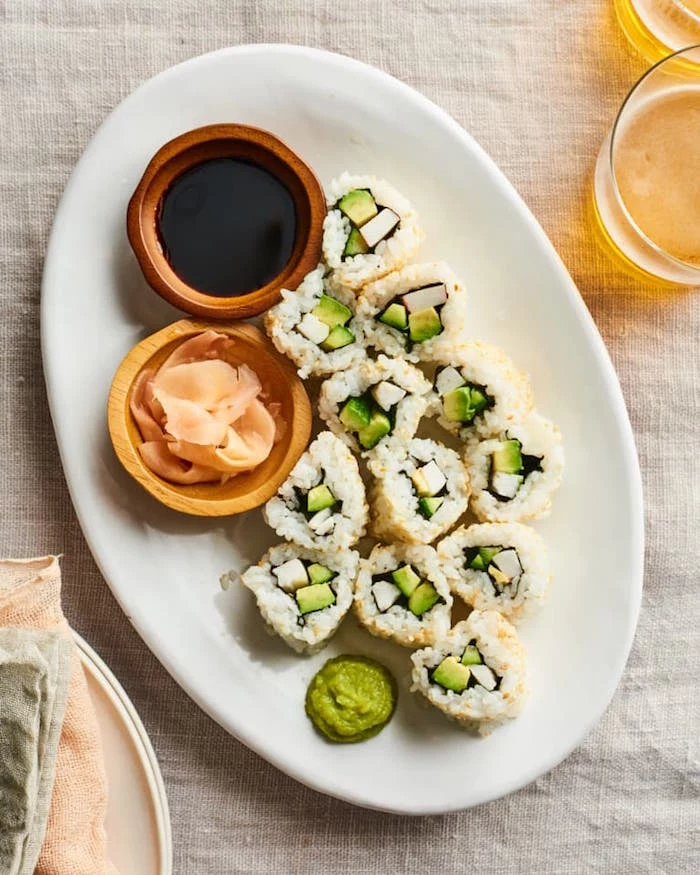
Presentation is half the fun. Don’t just pile your rolls on a plate; give them space to shine. Consider these simple plating elements for a professional touch:
- Contrast: Serve on a simple white plate, a dark slate board, or a rustic wooden platter to make the colors of the sushi pop.
- Garnish: A small pile of vibrant pink or natural gari (pickled ginger), a perfectly formed dollop of wasabi, and a tiny dish for soy sauce are essential.
- Arrangement: Line up your cut rolls neatly, or arrange them in a gentle curve. Less is more.


Did you know that most wasabi served outside of Japan isn’t wasabi at all? It’s typically a paste made from horseradish, mustard powder, and green food coloring.
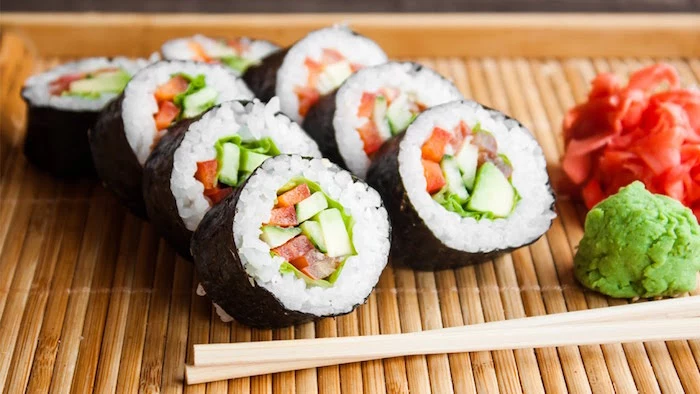
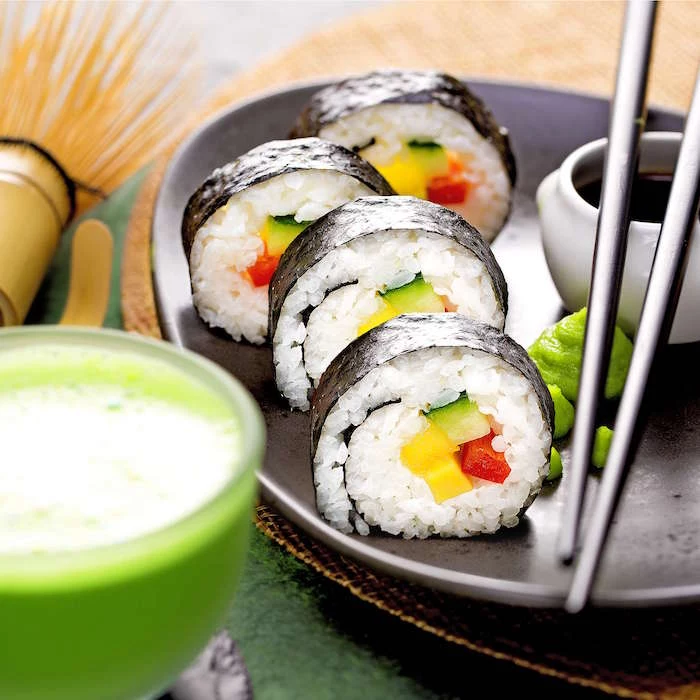
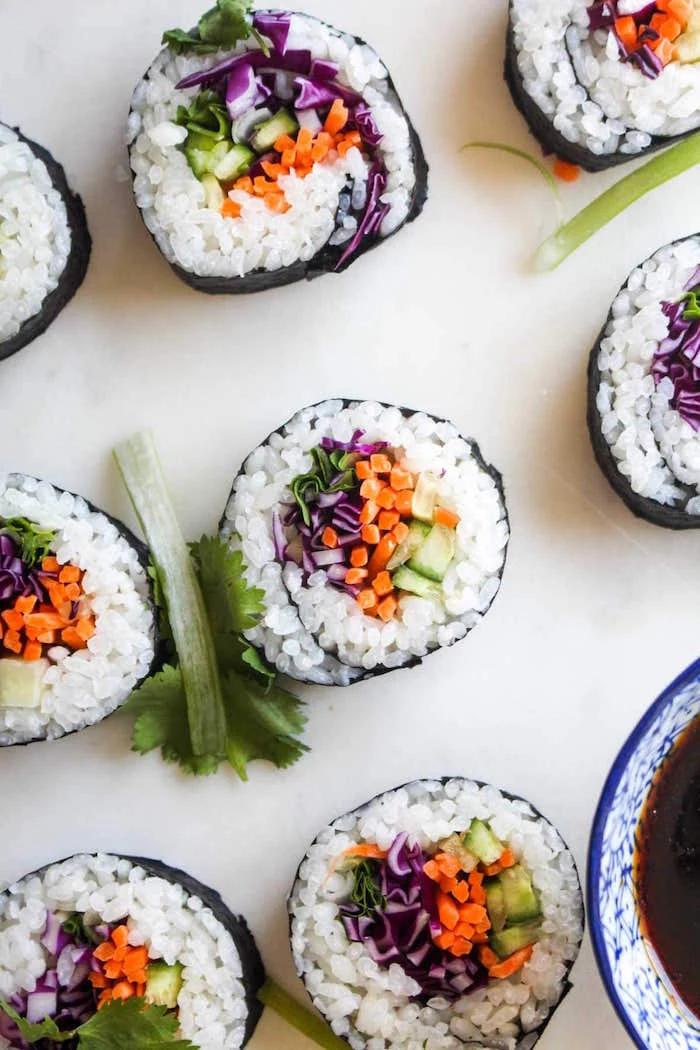
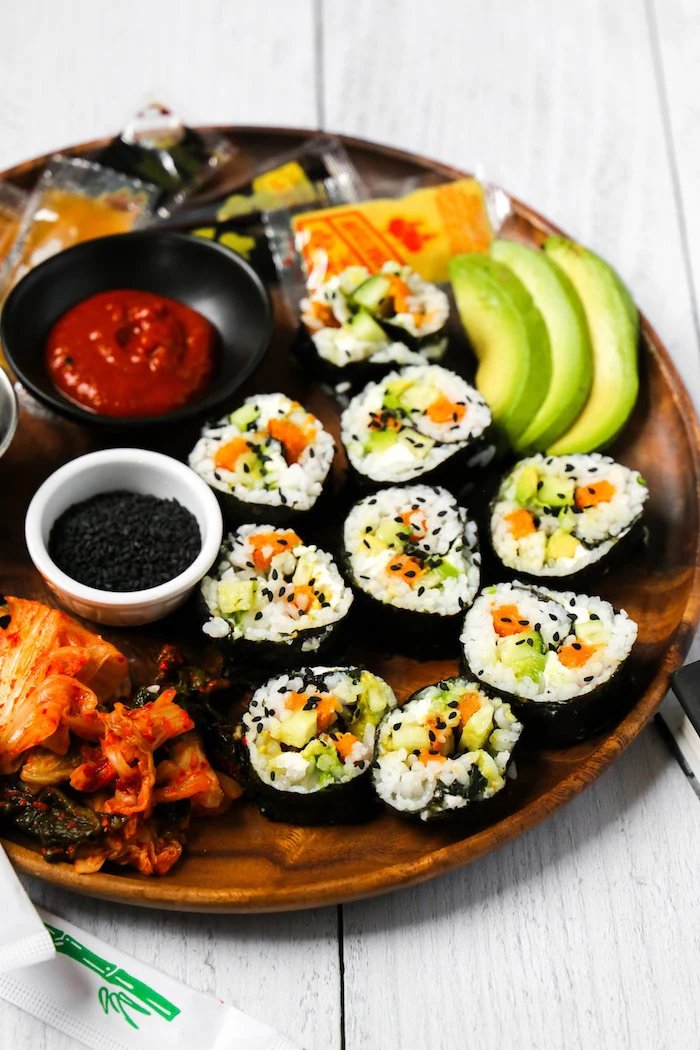
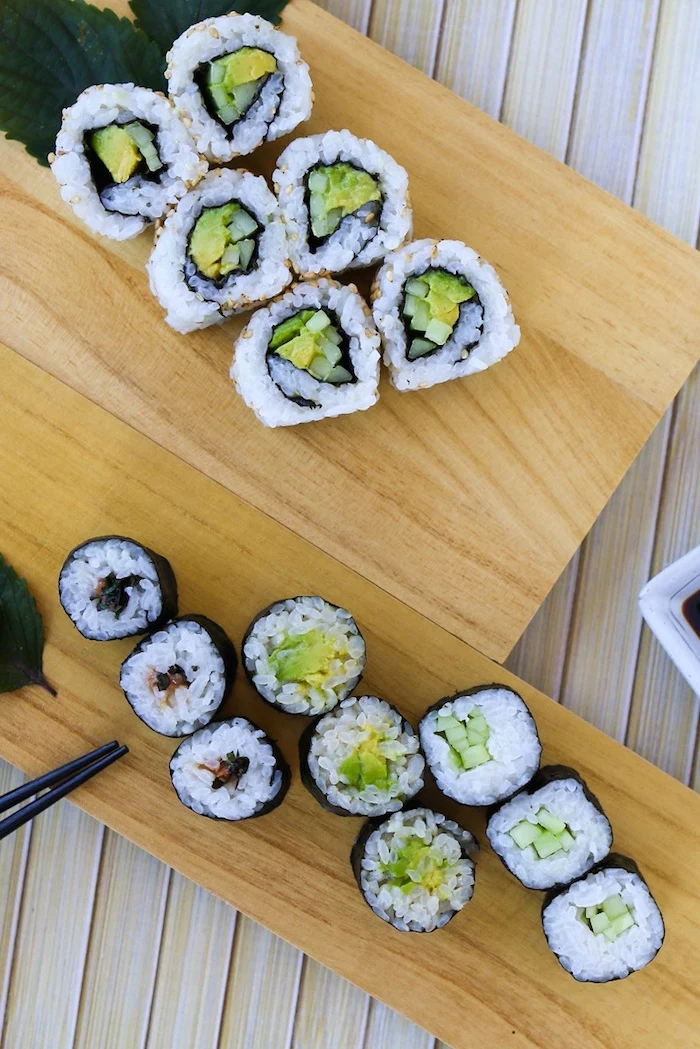
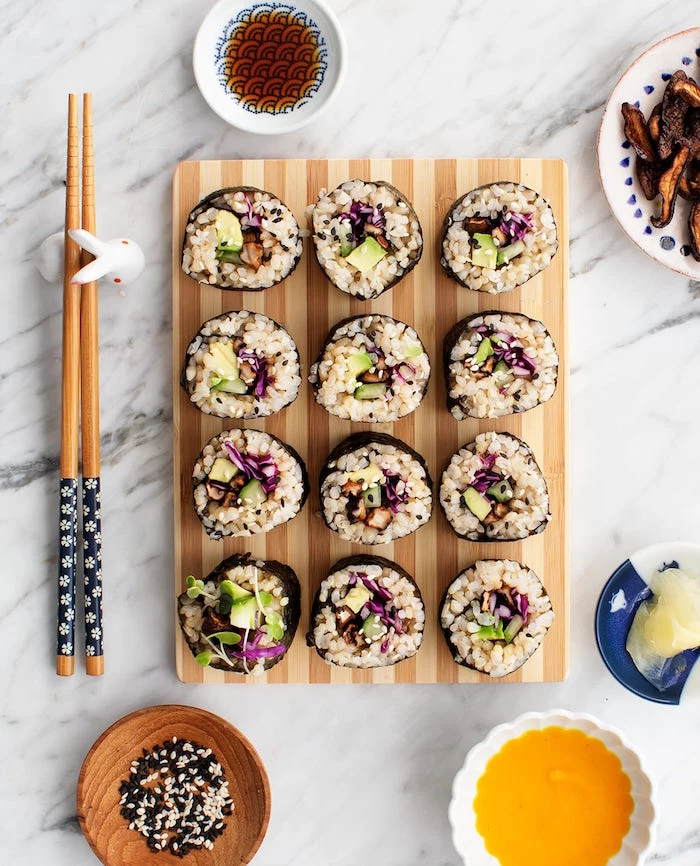
Think beyond fish. The beauty of homemade sushi is total creative freedom. Some of the most delicious and texturally interesting rolls are entirely vegetarian.
- Crunch: Cucumber, bell peppers, tempura-fried sweet potato, or asparagus.
- Creaminess: Avocado is a classic, but don’t overlook cream cheese or seasoned tofu.
- Flavor: Marinated shiitake mushrooms, pickled daikon radish (oshinko), or sweet egg omelet (tamago).

Don’t neglect your beverage pairing. The right drink can elevate your homemade sushi from a simple meal to an experience. A crisp, dry sake like a Junmai is the classic choice. For a non-alcoholic option, a brewed Japanese green tea, such as Sencha or Genmaicha, has a clean, slightly grassy flavor that cleanses the palate between bites without overpowering the delicate fish.
Can I make sushi rolls ahead of a party?
It’s best not to. Sushi is designed to be eaten fresh. The rice will start to harden in the refrigerator, and the nori will become tough and chewy as it absorbs moisture from the fillings. Your best bet is to prep all your ingredients—cook and cool the rice, slice the fish and vegetables—and then roll the sushi just before your guests arrive for the best texture and flavor.

Important point: The temperature of your rice matters immensely. It should be cooled to just above body temperature—around 32°C (90°F)—before you start rolling. If it’s too hot, it will be mushy and can even slightly cook the raw fish. If it’s too cold (like straight from the fridge), it will be hard and lack the subtle sweetness and perfect texture that defines good sushi.
Not all soy sauce is created equal. The one you choose can dramatically affect the final taste. For sushi, you want a high-quality, naturally brewed Japanese soy sauce (shoyu).
- Kikkoman: A globally available, reliable all-purpose choice with a balanced, salty-sweet profile.
- Yamasa: Often preferred by sushi chefs for its reddish hue and more complex, umami-rich flavor.
- Low Sodium: A great option if you’re watching your salt intake, allowing the fish’s flavor to shine through more clearly.

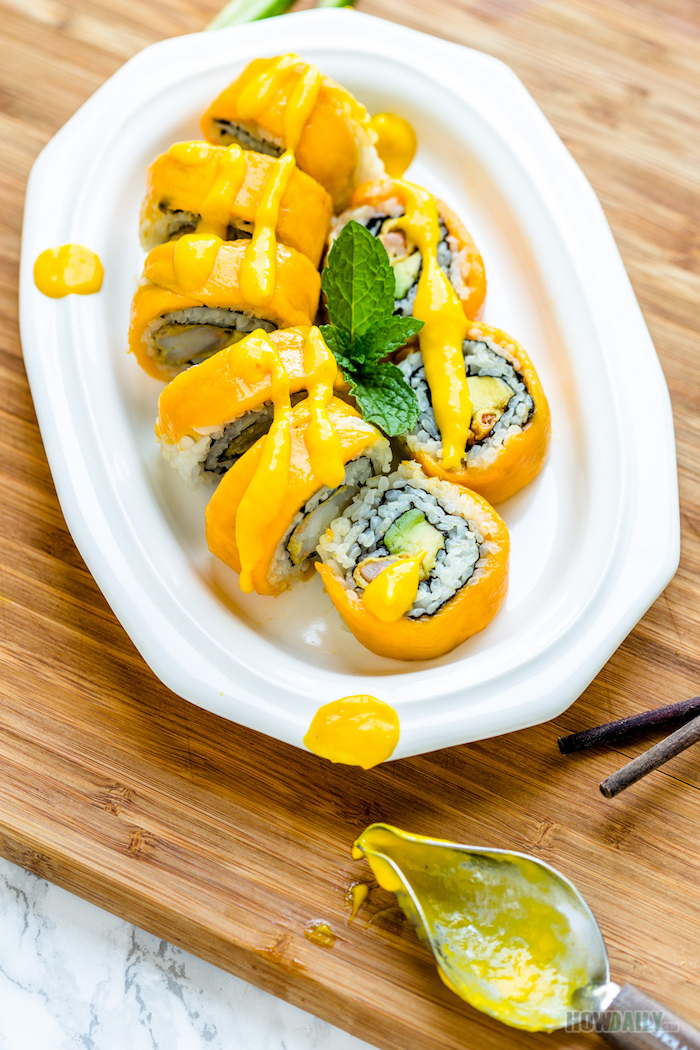
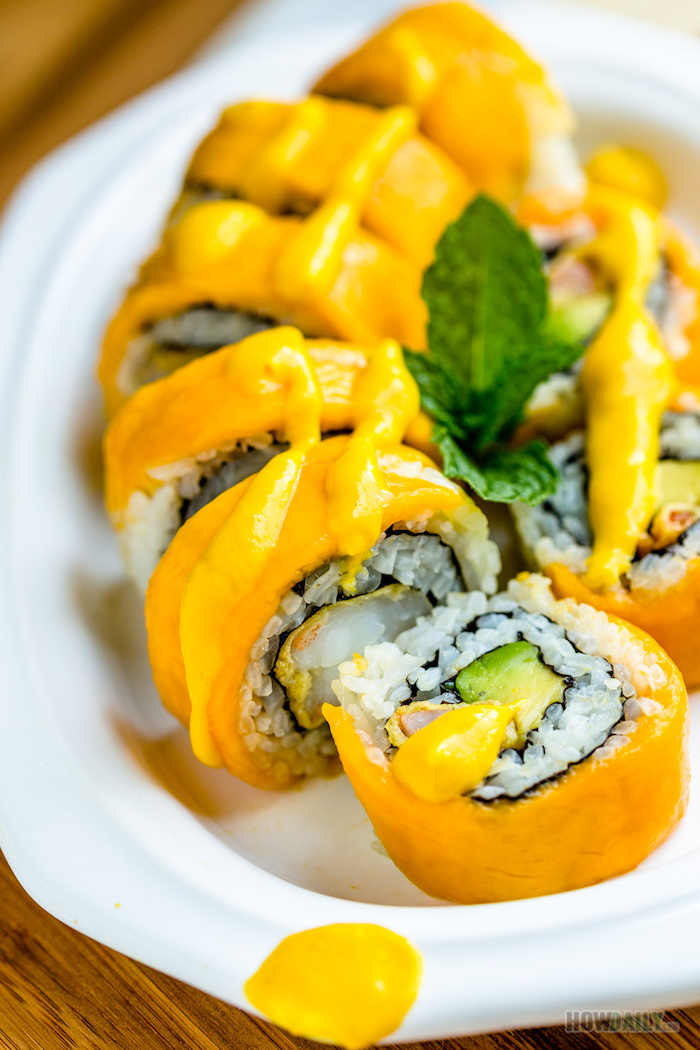
Want to recreate that creamy, zesty sauce from your favorite sushi restaurant? It couldn’t be simpler to make at home.
- Start with Japanese mayonnaise, like the popular Kewpie brand. It’s richer and creamier than its Western counterparts because it’s made with only egg yolks.
- Add a dash of Sriracha or another chili sauce. Start small and add more until you reach your desired heat level.
- A tiny squeeze of lime juice or rice vinegar can add a welcome touch of acidity to cut through the richness. Mix well and drizzle away!


Kewpie Mayo: Made with egg yolks, rice vinegar, and a touch of MSG, this Japanese staple is ultra-creamy, tangy, and rich in umami. It’s the secret ingredient for authentic-tasting spicy tuna rolls.
American Mayo: Typically made with whole eggs and distilled white vinegar, it has a milder, less tangy flavor profile and a looser consistency.
For that true sushi-bar taste, seeking out a bottle of Kewpie is well worth the effort.

- It protects your hands from sticky rice.
- It keeps the mat clean for future use.
- It allows for a smoother rolling motion.
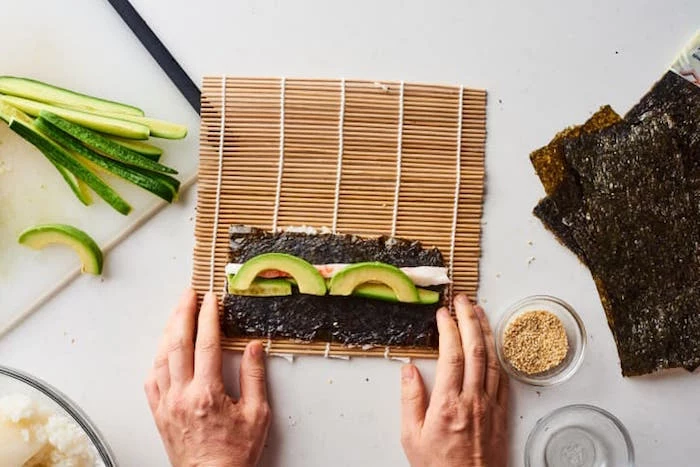
The secret? A simple layer of plastic wrap. Before you begin, wrap your bamboo rolling mat (makisu) tightly in plastic wrap. This is an absolute must when making Uramaki (inside-out rolls) to prevent the rice from getting hopelessly stuck in the bamboo slats.

The California Roll, one of the most popular styles in the world, wasn’t invented in Japan. It was created in the late 1960s in Los Angeles.
Chef Ichiro Mashita is credited with its invention. He substituted avocado for fatty tuna (toro) and hid the nori on the inside to appeal to American diners who were wary of seaweed. This single innovation was pivotal in popularizing sushi across North America.

Not in the mood for rolling? Try making a Chirashi bowl. The name means

Making sushi at home is the perfect opportunity to prioritize sustainability. The global demand for fish has put immense pressure on our oceans. When shopping, use the Monterey Bay Aquarium’s Seafood Watch guide (available online or as an app) to make ocean-friendly choices. It provides up-to-date recommendations on which fish are farmed or caught in ways that are healthier for marine ecosystems.

A single sheet of nori seaweed contains more Vitamin C than an equivalent weight of oranges.
Important point: Avoid pressing the rice onto the nori. The goal is a light, airy layer, not a dense, compacted brick. Use wet fingertips to gently spread the rice across the sheet, leaving a small border at the top edge. The grains should be a single layer deep. This light touch ensures a tender bite and allows the roll to be compressed perfectly without being tough.

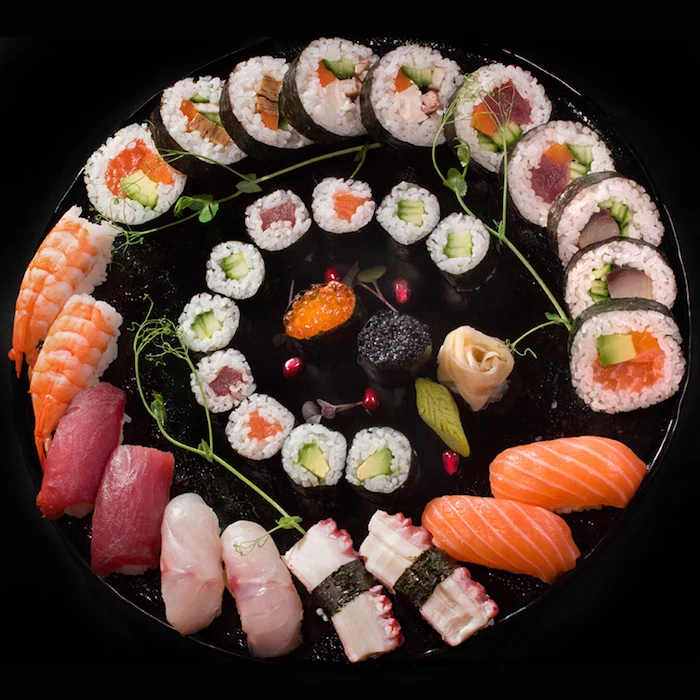
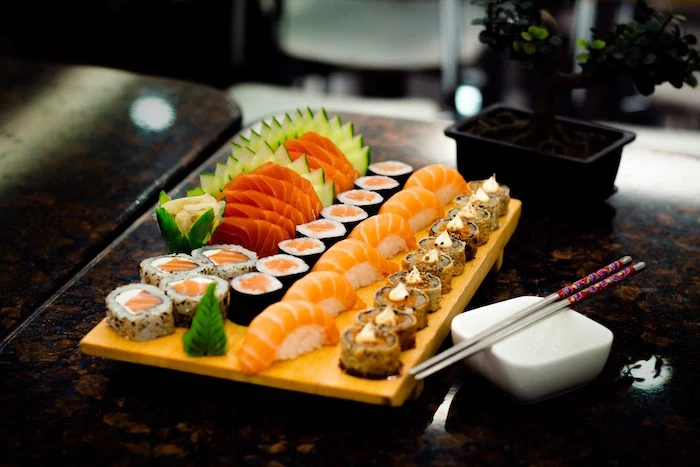
What’s the difference between Sashimi and Nigiri?
It’s all about the rice! Sashimi is simply expertly sliced, high-quality raw fish served on its own, often with daikon radish and a shiso leaf. It’s a pure celebration of the fish’s flavor and texture. Nigiri, on the other hand, is a slice of fish (or another topping) pressed by hand onto a small, oblong mound of seasoned sushi rice. Nigiri is a type of sushi; sashimi is not.

Pink Gari: The familiar pink pickled ginger is often colored with artificial dyes (like E124) to make it more visually appealing and uniform. The color is purely cosmetic.
Natural Gari: High-quality pickled ginger is naturally a pale yellow or off-white. If very young ginger is used, it can develop a faint pink tinge on its own during the pickling process, but it’s much more subtle.
Both serve the same purpose: to cleanse your palate between different types of sushi.
- Perfect for an impromptu dinner party.
- Incredibly budget-friendly.
- A great way to use pantry staples.
The secret? The humble canned tuna. Mix a can of well-drained tuna with a generous dollop of Japanese mayonnaise (Kewpie is best!), a dash of Sriracha, and some finely chopped green onions. You’ve just created a creamy, spicy tuna filling that tastes fantastic in a roll with some crunchy cucumber.
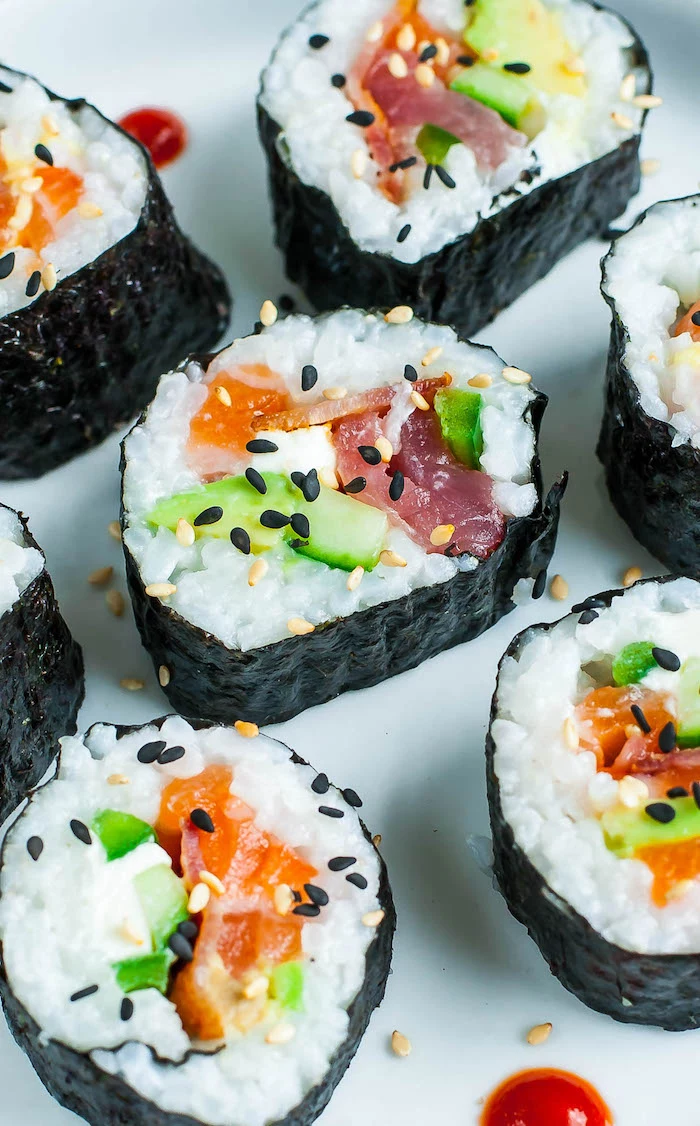
While the photos show beautiful rolls with tuna and salmon, don’t be afraid to start with more forgiving and affordable fillings. Imitation crab (surimi), cooked shrimp, and even smoked salmon are excellent, low-risk options for your first few attempts. This lets you focus entirely on perfecting your rice and rolling technique without the pressure of handling expensive, raw fish.