Finally, a Gluten-Free Mug Cake That Doesn’t Suck
Let’s be real: most gluten-free mug cakes are a massive disappointment. We’ve all been there. You’re craving something sweet, you want it now, and the promise of a two-minute cake seems like a dream come true. But what you often get is a dense, rubbery, or weirdly gummy puck of sadness. It’s enough to make you give up and just eat a spoonful of jam from the jar.
In this article
The thing is, a mug cake isn’t just a regular cake recipe shrunk down. The microwave is a totally different beast than an oven, cooking with steam from the inside out. Once you get your head around that, you can stop making hockey pucks and start making genuinely light, moist, and delicious little cakes. This isn’t about some secret, magic recipe. It’s about understanding the how and why so you can nail it every single time.
First, Why Most Mug Cakes Fail
To fix the problems, you gotta know what causes them. Baking is just kitchen chemistry, and in a mug cake, it’s a super-fast reaction. The three key players are your flour, your leavening agent (the stuff that makes it rise), and the cooking method itself.
In traditional baking, gluten creates a stretchy, springy structure that traps air. Gluten-free flours don’t have that. They’re mostly starch, and they need a little help to hold things together. That’s why good GF flour blends almost always include a binder like xanthan gum. It mimics what gluten does, preventing your cake from turning into a dry, crumbly mess.
And then there’s the microwave. An oven uses dry heat that cooks from the outside in. A microwave uses, well, microwaves to vibrate water molecules, creating a ton of steam that cooks everything at once. This is great for moisture, but it’s also why overcooking by even 10 seconds can turn a tender cake into a bouncy disaster. You have to accept that you’re not getting a golden-brown crust; you’re getting something more like a soft, steamed pudding. And honestly? That’s delicious in its own right.
The Actual Recipe: Let’s Make This Thing
Okay, enough theory. Here’s a super clear, no-fuss guide to get you started. From grabbing the ingredients to taking that first glorious bite, this should take you about five minutes. Seriously.
What You’ll Need:
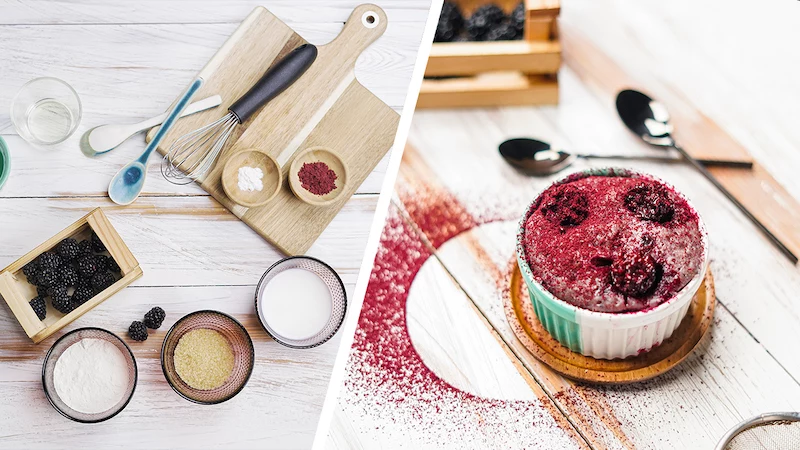
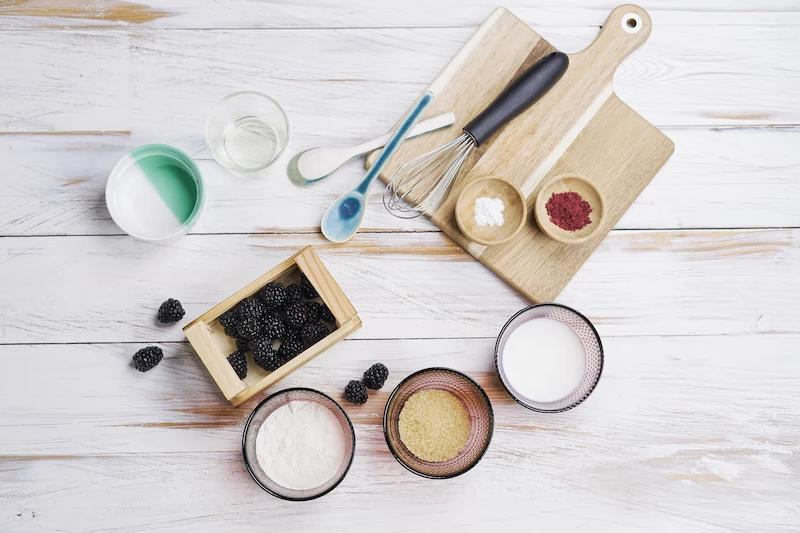
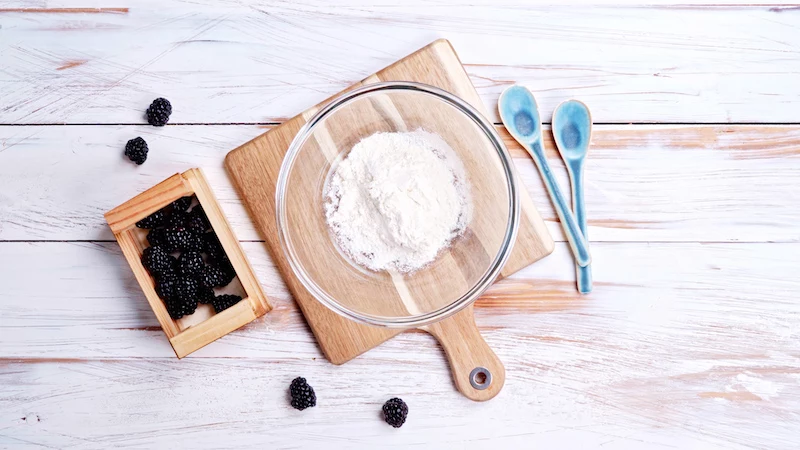
- Gluten-Free All-Purpose Flour: You’ll need 4 tablespoons. For the love of all that is holy, use a good blend that already contains xanthan gum. It just makes life easier. Brands like Bob’s Red Mill 1-to-1 or King Arthur Measure for Measure are fantastic and available at most big grocery stores for about $6-$8 a bag.
- Cane Sugar: 2 to 3 tablespoons, depending on how sweet you like it. Brown sugar also works and adds a nice hint of caramel.
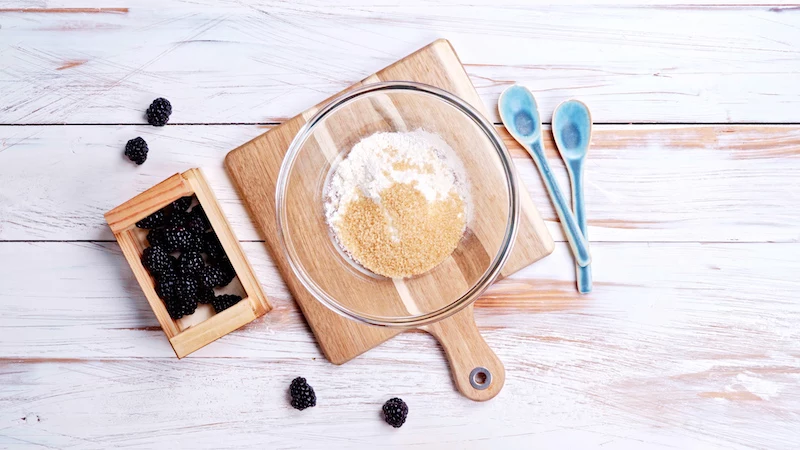
- Baking Powder: A precise 1/4 teaspoon. Make sure it’s fresh! Test it by dropping a little in hot water—if it fizzes like crazy, you’re good to go.
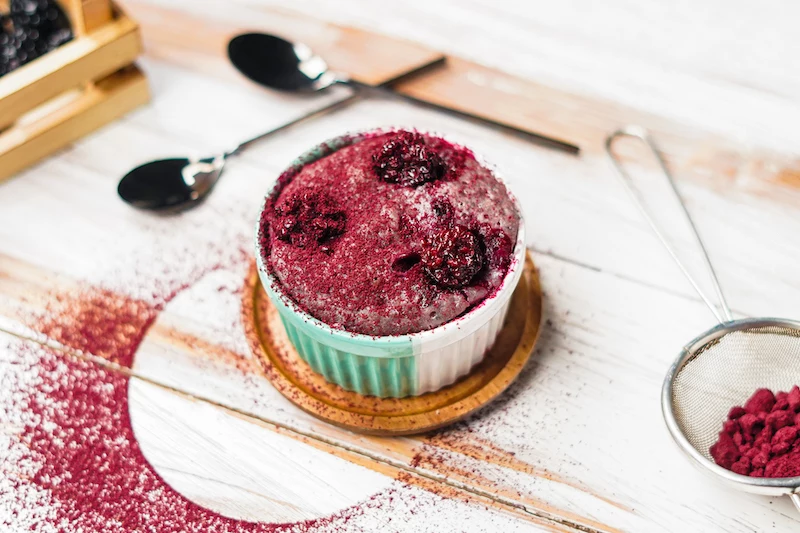
- Blackberry Powder (Optional but Awesome): 1 teaspoon. This adds an incredible depth of flavor and a beautiful purple-ish color. It can be a bit pricey (around $15 for a small jar online or at a health food store), but a little goes a long way. If you skip it, no big deal.
- Full-Fat Coconut Milk: 5 tablespoons. The kind from a can gives you the richest result. You can use other milks (almond, soy, dairy), but it might be a little less decadent.
- Oil: 1 tablespoon of a neutral oil like unrefined sunflower or avocado oil. Melted coconut oil or even light olive oil works, too. This is non-negotiable for a moist crumb!
- Fresh Blackberries: A small handful, which usually works out to about 1/4 cup or 5-6 big berries. Frozen works in a pinch, but don’t thaw them first or you’ll get soggy spots.
The Steps (It’s So Easy)
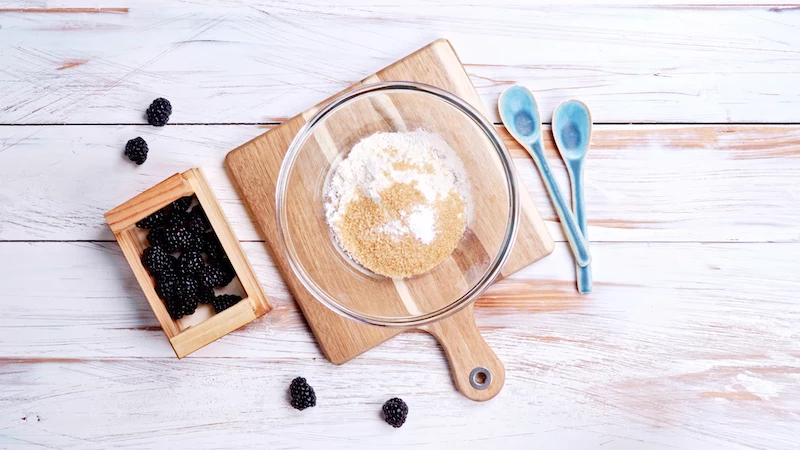
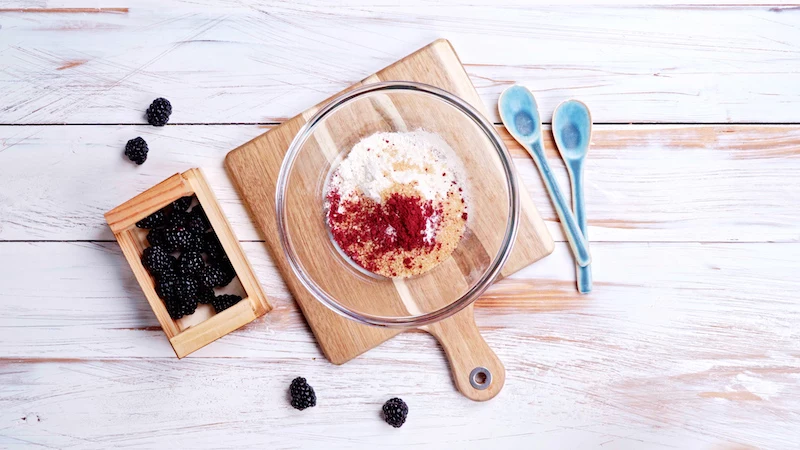
- Mix the Dry Stuff: In a standard 12 to 14-ounce ceramic mug (we’ll talk more about the mug in a sec), dump in your flour, sugar, baking powder, and blackberry powder if you’re using it. Take a fork and whisk it all together really, really well. You want to make sure that baking powder is evenly distributed so you don’t get bitter pockets.
- Add the Wet Stuff: Pour the coconut milk and oil right on top of the dry mix in the mug.
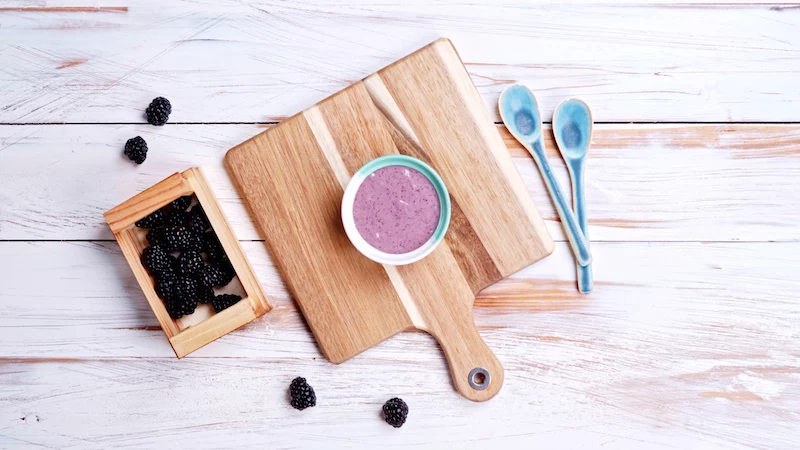
- Gently Combine: Now, stir it all together with the fork. This is the most important step! Stop mixing the second you no longer see dry streaks of flour. A few little lumps are totally fine, even good. If you overmix, your cake will be rubbery. The batter should be thick, kind of like a thick pancake batter.
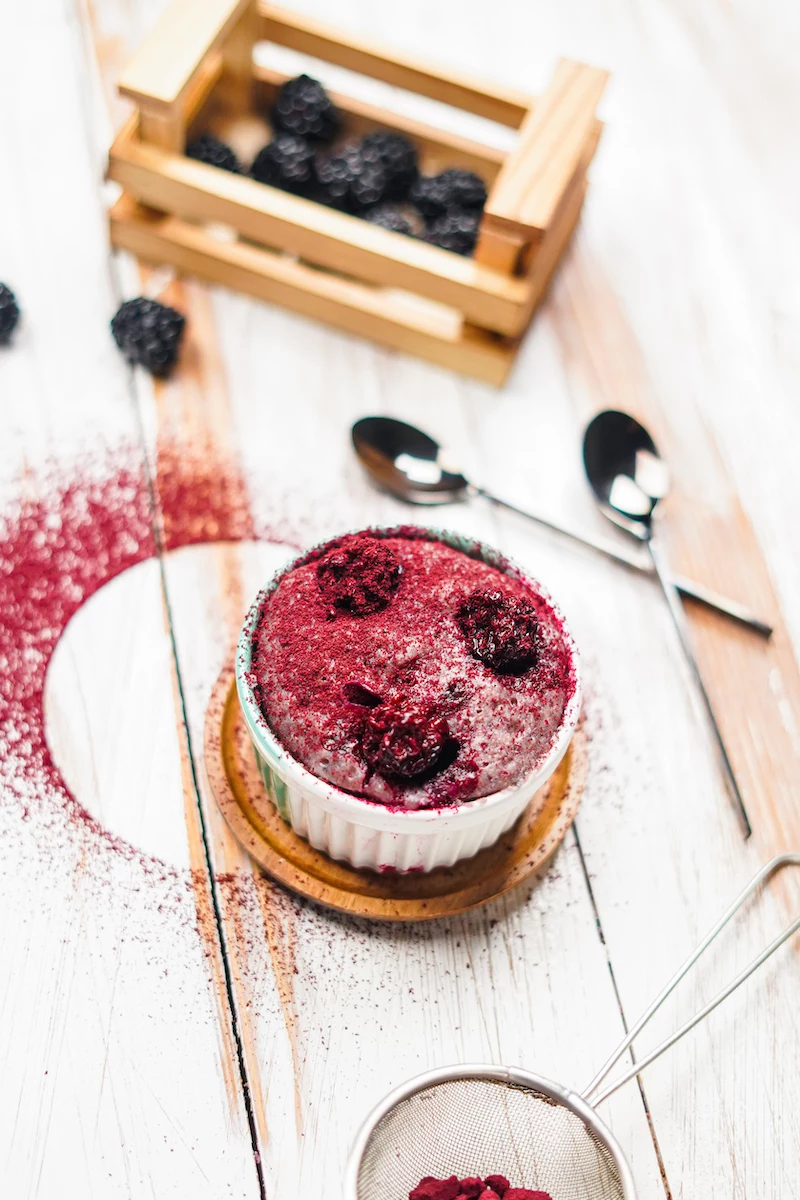
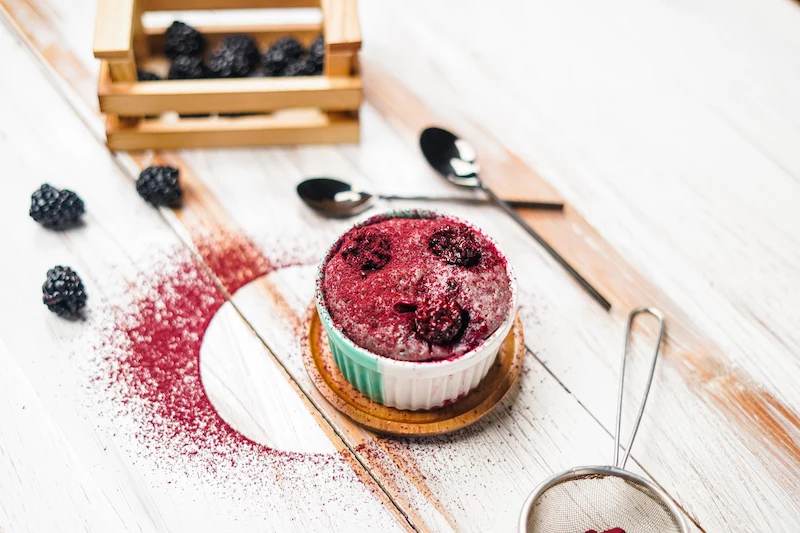
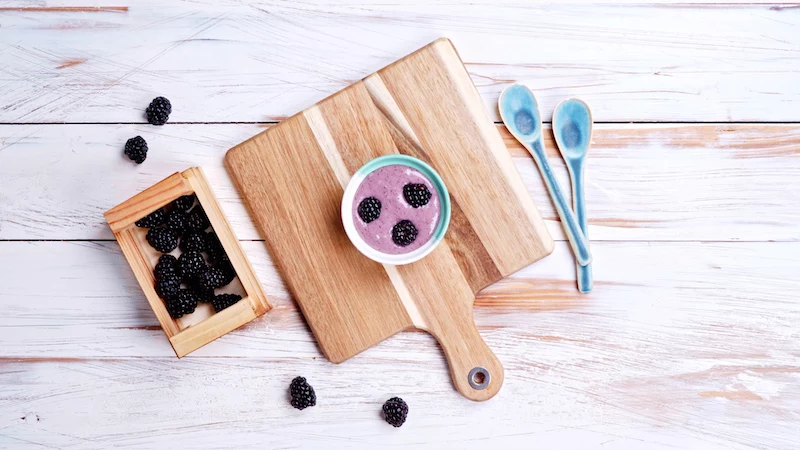
- Add the Berries: Gently press your fresh blackberries into the top of the batter. Don’t stir them in. This little trick helps keep them from scorching.
- Time to Cook: Pop it in the microwave and cook it. The timing depends heavily on your microwave’s power, which we’ll cover next.
Your Gear Matters: The Mug and the Microwave
The mug you choose is literally part of your baking equipment. A standard, 12-to-14-ounce mug with straight sides is your best friend here. If it’s too small, you’ll be cleaning up a volcanic eruption. If it’s too wide, it’ll cook too fast and dry out. I once saw someone use a tall, skinny, decorative mug, and the result was a rubbery disc on top and liquid batter on the bottom. So, stick to a classic shape. And a quick safety heads up: absolutely no mugs with metallic rims or designs! That’s a fire hazard waiting to happen.
As for cooking time, microwave wattage is everything. My times are for a 1000W model.
- For a 1200W microwave: Start checking at 75 seconds. It’ll be done fast.
- For a 1000W microwave: Aim for 90 seconds to 2 minutes.
- For an 800W microwave: You’ll probably need closer to 2 minutes and 15 seconds.
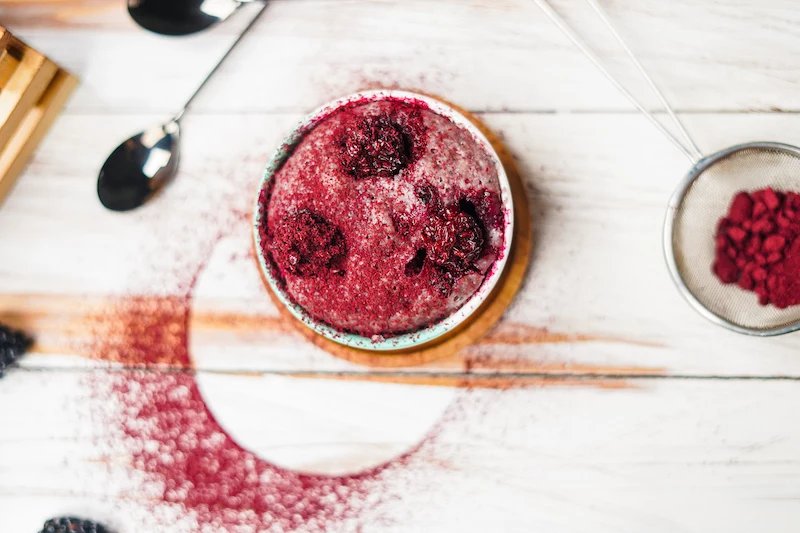
The cake is done when the top looks set and springs back when you gently touch it. When in doubt, you can use the classic toothpick test: stick it in the center, and it should come out clean or with a few moist crumbs, but no wet batter.
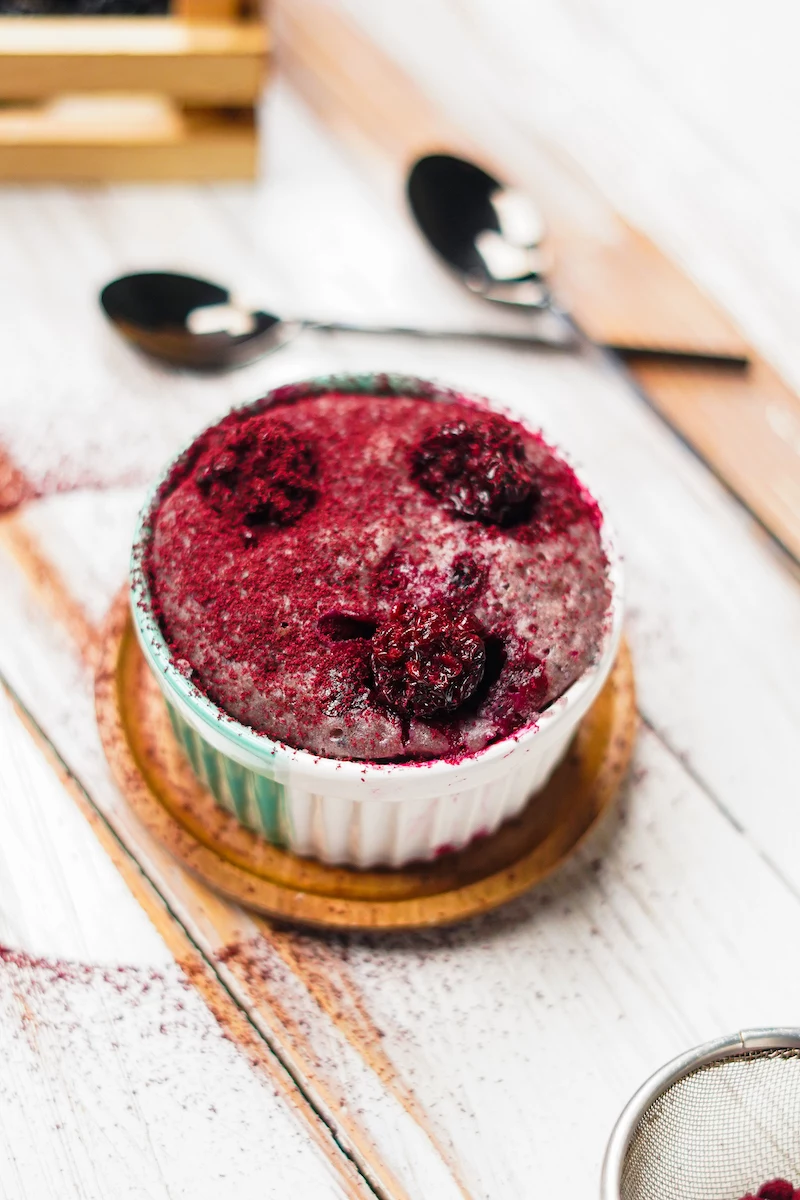
CRITICAL TIP: Let the cake rest in the microwave for a minute or two after it’s done cooking. The residual heat will finish cooking the very center perfectly. Don’t skip this!
Troubleshooting: What to Do When It Goes Wrong
Even pros have off days. If your cake isn’t perfect, here’s how to diagnose the issue.
- Problem: It’s rubbery and chewy. 99% of the time this is from overcooking or overmixing. Cut the cook time by 10-15 seconds next time, and be militant about not over-stirring the batter.
- Problem: It’s dry and crumbly. You probably cooked it too long or mis-measured your ingredients. Make sure you’re not packing the flour into the tablespoon. If it keeps happening, add an extra splash of milk or a teaspoon of oil.
- Problem: It exploded all over my microwave. Your mug was too small, or you got a little too excited with the baking powder. Use a level 1/4 teaspoon—a heaping measure will cause chaos.
- Problem: The middle is raw and soupy. This usually points to an oddly shaped mug or just not letting it rest after cooking. That one-minute rest is key for letting the center catch up.
Level Up: Variations and Pro-Tips
Once you’ve got the basic method down, the fun begins. This recipe is a fantastic base for experimenting.
- Chocoholic’s Dream: Toss in a tablespoon of chocolate chips with the blackberries. Or, for a full chocolate-berry experience, add a teaspoon of cocoa powder to your dry ingredients.
- Add Some Spice: A pinch of cinnamon or cardamom (about 1/8 teaspoon) is gorgeous with blackberries. A little lemon or orange zest is also amazing.
- Go Nuts: A tablespoon of chopped walnuts or pecans adds a great texture. Quick tip: toast the nuts in a dry pan for a few minutes first to really bring out their flavor.
- Time-Saving Hack: For a truly instant dessert, pre-mix the dry ingredients (flour, sugar, baking powder, berry powder) and store them in small Ziploc bags or jars. When the craving hits, just dump a packet into a mug, add the wet ingredients, and you’re two minutes away from heaven.
Finally, a quick but important note for anyone with celiac disease: “gluten-free” isn’t enough. You have to prevent cross-contamination. Use sparkling clean utensils, a clean mug, and ensure your ingredients are certified gluten-free, as some are processed in facilities with wheat. Be safe, have fun, and enjoy being able to whip up a genuinely satisfying dessert anytime you want.
Inspirational Gallery
The Flour Showdown: Not all gluten-free flours are created equal for a mug cake. A pre-made blend like Bob’s Red Mill Gluten Free 1-to-1 Baking Flour is your safest bet, as it already contains the necessary xanthan gum for structure. Using a single-ingredient flour like almond or coconut will drastically change the texture and liquid requirements. Almond flour creates a denser, moister cake, while coconut flour is extremely absorbent and can lead to a dry result if you don’t increase the liquid.

- A gooey, molten center every time.
- An extra burst of rich flavor.
- The perfect textural surprise.
The secret? Just before microwaving, drop a single square of good quality dark chocolate (like Lindt 70% Cacao) or a spoonful of Nutella right into the center of the batter. Don’t stir it in! As it cooks, it will sink slightly and create a lava-cake effect when you dig in.
My mug cake tastes weirdly eggy. What did I do wrong?
This is a classic mug cake pitfall! A whole egg is often too much for such a small batter, overpowering the other flavors and creating a spongy, omelet-like texture. For a richer, more cake-like result, try using only the egg yolk. For a vegan or egg-free version, a ‘flax egg’ (one tablespoon of ground flaxseed mixed with three tablespoons of water, left to sit for 5 minutes) works wonders.
Over 30% of US households now purchase plant-based milk.
This boom in dairy-free alternatives is great news for mug cake lovers. Swapping regular milk is simple. For a creamy, rich cake, oat milk is a fantastic choice. For a lighter cake with a neutral taste, unsweetened almond milk works perfectly. You can also easily substitute melted butter with an equal amount of melted coconut oil or a dairy-free butter spread for a fully vegan treat.
Think beyond chocolate. Your spice rack is a treasure trove for elevating a simple mug cake. Here are some quick ideas to try:
- Chai Spice: A pinch of cinnamon, cardamom, and ginger for a warm, aromatic kick.
- Espresso Boost: Half a teaspoon of instant espresso powder to deepen the chocolate flavor.
- Orange Zest: A little fresh orange zest pairs beautifully with a vanilla or chocolate base for a brighter taste.
The mug you choose actually matters. For the most even cooking, grab a standard-sized ceramic mug with straight sides. Tapered or V-shaped mugs can cause the bottom to overcook before the top is done. Avoid using mugs with very thick walls, as they can absorb too much heat and slow down the cooking process, requiring longer microwave times that risk turning your cake rubbery.
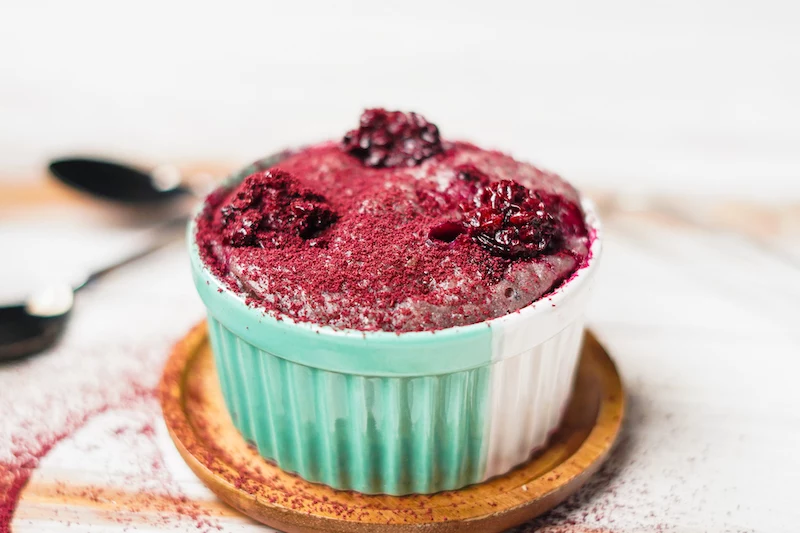
A moment of pure, unadulterated comfort, ready in less than five minutes.
Important point: Let it rest! The biggest mistake is eating it straight from the microwave. The cake is still cooking from residual heat. Letting it sit for just 60-90 seconds allows the structure to set, the flavors to meld, and prevents you from getting a mouthful of molten, lava-hot batter. This tiny bit of patience makes a huge difference in texture.


