Finally, Flourless Pancakes That Don’t Suck (A No-Fail Guide)
I’m going to be honest with you. For years, I chased the dream of a healthy pancake that actually tasted like, well, a pancake. I’ve seen it all in professional kitchens—the constant request for something delicious that also fits a specific diet. But so many flourless recipes are just… a letdown. They end up gummy, fall apart when you look at them wrong, or have the flavor profile of wet cardboard. It’s a super common frustration.
In this article
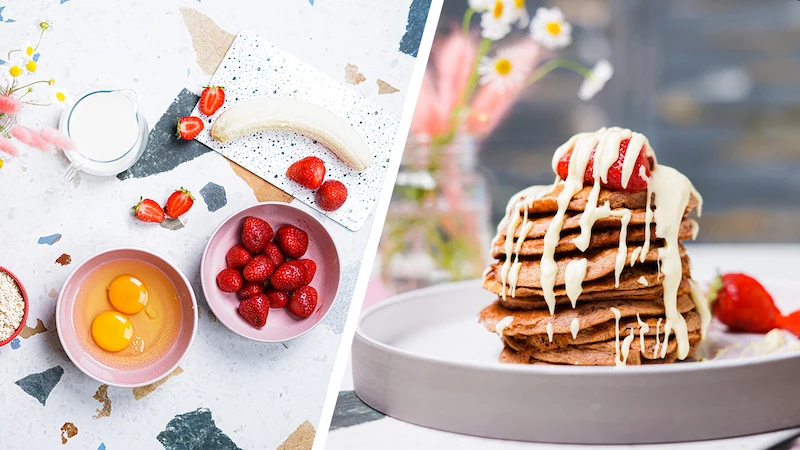
So, let’s fix that. This isn’t just another recipe dump. I’m going to walk you through the method and the ‘why’ behind it, the same way I’d teach a new cook on the line. We’re building a truly reliable flourless pancake from scratch using stuff you probably already have: rolled oats, some fruit, and eggs. The secret isn’t in a fancy ingredient; it’s in understanding how these simple things work together. Forget those sad, flat discs. Let’s make something you’ll actually be excited to eat.
By the way, this whole process is pretty quick. From grabbing your ingredients to stacking them on a plate, you’re looking at about 25 minutes total. The recipe makes about 12 to 15 small pancakes, perfect for a couple of people.
The Building Blocks: Why These Ingredients Are a Team
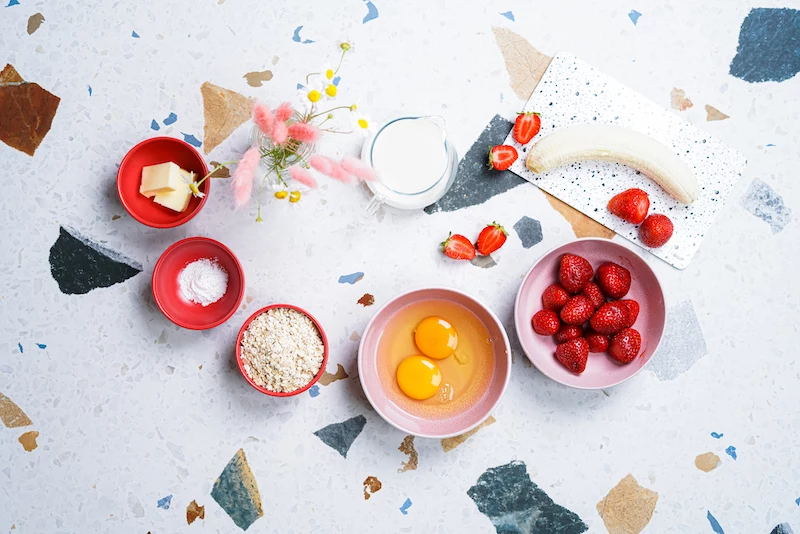
A great dish is all about teamwork, and every ingredient here has a specific job. In traditional pancakes, flour does all the heavy lifting for structure. Here, we’re using a clever combination of a few things to get that same result, but better.
Oats: The Unsung Hero of Structure
Oats are the absolute backbone of this recipe. They provide the bulk and structure that flour normally would, but they bring some unique benefits to the table. Oats are packed with a type of soluble fiber called beta-glucan. When you mix it with liquid, it creates this cool gel-like substance that helps bind the pancake and gives it a wonderfully soft, tender bite.
Now, not all oats are created equal for this task. Here’s the breakdown:
- Rolled Oats (Old-Fashioned): This is your best bet, hands down. They’ve been steamed and rolled flat, so they soak up liquid beautifully and blend into a batter with substance. This is what I always use.
- Quick Oats: These are rolled even thinner and cut up. They work in a pinch, but because they absorb liquid so fast, they can sometimes make the batter a bit gummy if you’re not careful.
- Steel-Cut Oats: Just don’t. Seriously. They’re too coarse and won’t soften up, leaving you with a gritty, unpleasant texture. Trust me on this one.
Good to know: Oats are naturally gluten-free, but they’re often processed in the same facilities as wheat. If you’re cooking for someone with celiac disease or a serious sensitivity, you absolutely have to buy oats that are specifically labeled “certified gluten-free.” It’s a simple safety step that’s non-negotiable in pro kitchens.
Fruit: Your Sweetener, Binder, and Moisturizer
The fruit here is doing way more than just adding flavor. A super ripe banana is the real workhorse. As a banana gets all spotty and brown, its starches convert to sugar, making it incredibly sweet (so you don’t need to add any other sugar!) and soft. Ripe bananas also contain pectin, which is a natural gelling agent that helps hold everything together.
For the recipe, we’re also using strawberries for that bright, fresh flavor and lovely pinkish color. They do have a lot of water, though, so the measurements are balanced to handle that. If you add too many, your batter will be too thin. Oh, and a great budget tip: frozen strawberries are often way cheaper than fresh and work perfectly. If you use frozen, just let them thaw a little; you can even use their juice as part of the liquid in the recipe.
Eggs: The Ultimate Glue and Lift
Eggs are mission-critical. When you cook them, their proteins solidify, which is what sets the pancake and stops it from turning into scrambled mush in the pan. The yolk also contains lecithin, a natural emulsifier that helps blend the fat and water, giving you a smooth, stable batter.
And let’s not forget the lift! Whisking or blending eggs traps air, which, combined with our next ingredient, makes the pancakes fluffy instead of like little hockey pucks.
Baking Powder: The Science of Fluff
This is what gives your pancakes that light, airy rise. Most baking powder you buy is “double-acting.” This just means it works in two stages: first, a little fizz happens when it gets wet in the batter, and second, a much bigger burst of gas is released when it hits the heat of the pan. That second burst is what inflates the pancake.
Heads up! Baking powder loses its power over time. A common reason for flat pancakes is old, dead baking powder. To test yours, drop about half a teaspoon into some hot water. If it fizzes up like crazy, you’re good to go. If not, it’s time to spend the $3 on a new can. It’ll save you a lot of breakfast heartbreak.
Liquid: Getting the Consistency Just Right
The oat milk in this recipe is just there to hydrate the oats and get the batter to the right consistency. Too thick, and you get a dry, heavy pancake. Too thin, and it’ll spread all over the pan and be impossible to flip. You can use pretty much any milk you like—dairy or plant-based. Just know that some are thicker than others, so you might need to add a splash more or less. You’re aiming for a batter that’s thick but can still be poured easily.
The Method: From Blender to Perfect Flip
Great ingredients are one thing, but technique is what really makes the difference. These are the little details that ensure every single pancake comes out looking and tasting amazing.
Step 1: Get Your Act Together First
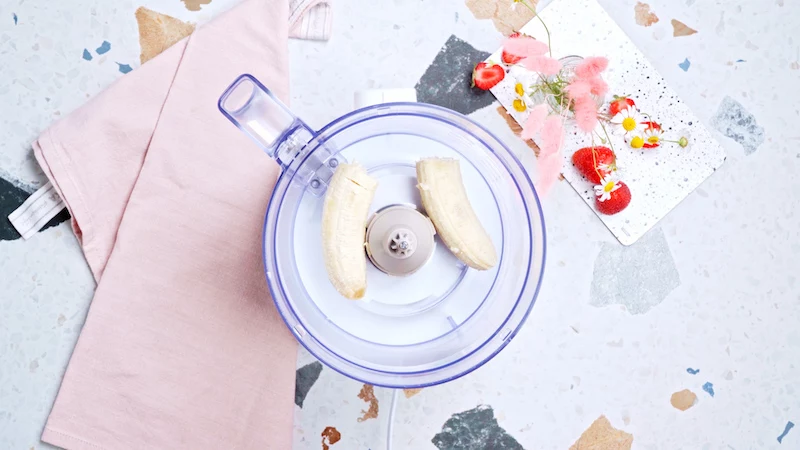
In the restaurant world, we live by a system called mise en place, a fancy French term that just means “everything in its place.” Before you even think about cooking, get all your stuff out. Measure your oats, wash your berries, peel the banana. It turns a potentially chaotic process into a calm, controlled one. It’s a total game-changer.
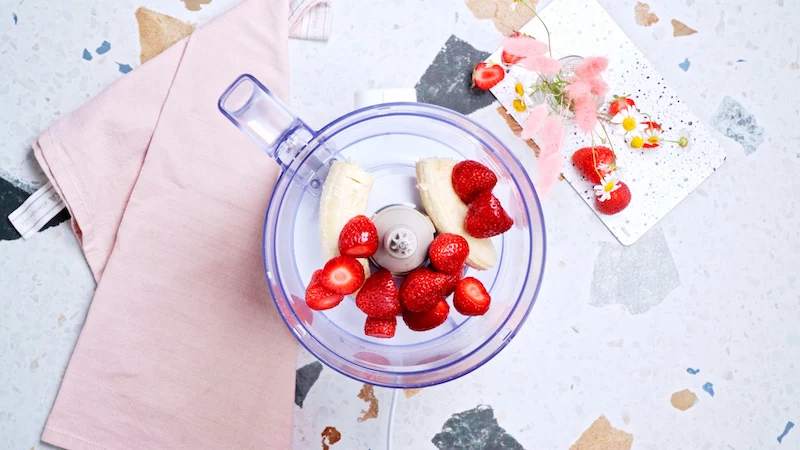
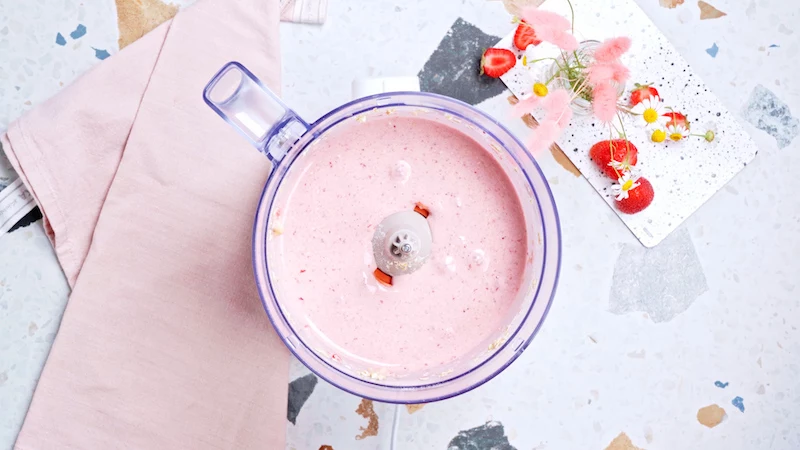
Step 2: The Blending Order Matters
A blender is your best friend here. For the smoothest blend, add your ingredients in the right order. Start with the liquids at the bottom—the eggs and milk. This helps the blades spin freely. Then add the soft stuff like the banana and strawberries, and finally, top it off with the dry ingredients like oats and baking powder. Blend on high for 30 to 60 seconds, until it’s totally smooth. But don’t go crazy! Once it’s smooth, stop. Over-blending can make the oats gummy.
Step 3: The 10-Minute Rest (It’s Not Optional!)
This is probably the most important step people skip, and it makes all the difference. You have to let the batter rest for at least 10 to 15 minutes. During this time, the oats are fully absorbing the liquid and that beta-glucan fiber is starting to form its gel. This makes the batter thicker, fluffier, and way easier to flip.
And I know what you’re thinking: “Can I just make the batter the night before?” The answer is a hard no. If you let it sit that long, the baking powder will lose all its fizz, and the oats can get unpleasantly mushy. That 10-15 minute rest is the magic window.
Step 4: Nailing the Pan Temperature
I have seen new cooks burn literally hundreds of pancakes before they learn to manage the heat. The wrong temperature is the #1 cause of failure.
- Too Hot: The outside burns before the inside cooks, leaving you with a charred, gooey mess.
- Too Cool: The pancake soaks up oil, takes forever to cook, and ends up pale and greasy.
You’re aiming for a steady medium heat. On my electric stove, that’s a 4 or 5 out of 10. The best way to check is the water drop test. Flick a few drops of water on the pan. If they evaporate instantly with a loud sizzle, it’s too hot. If they just sit there, it’s too cool. You want the drops to dance and skitter across the surface for a second or two before they disappear. That’s the sweet spot.
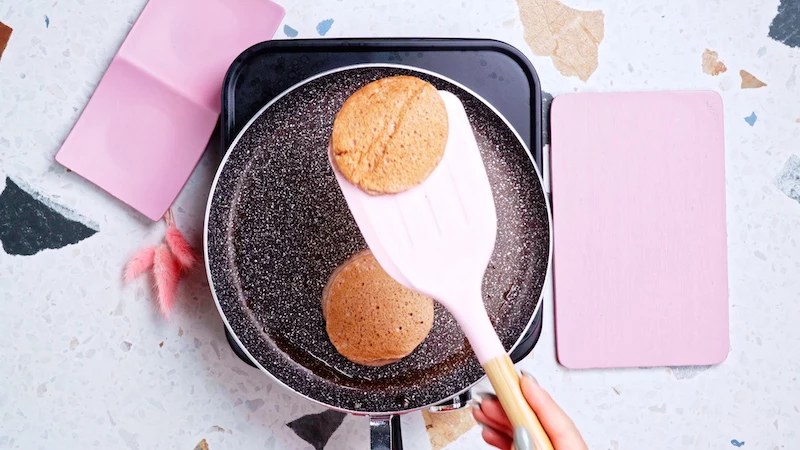
Step 5: Cooking and Flipping Like a Pro
Use a 2-tablespoon measure for consistently sized little pancakes. Now, watch for the signs—don’t just set a timer. The pancake will tell you when it’s ready to flip. Look for the edges to get a dry, matte look, and for bubbles to form and pop on the surface. Once you see that, use a thin spatula to flip with a quick, confident motion.
A common mistake is making these pancakes too big. Since they don’t have gluten holding them together, they’re a bit more delicate. Sticking to smaller 2 to 3-inch rounds makes them much easier to handle and far less likely to break on you. And whatever you do, DO NOT press down on the pancake with your spatula. You’re just squishing out all that air you worked so hard to create.
Making It Your Own & Fixing Problems
Once you nail the basic method, you can start playing around. Here’s how to adapt the recipe and troubleshoot common issues.
Flavor Tweaks and Dietary Swaps
Want to go vegan? You can easily swap the eggs for a “flax egg.” Just mix one tablespoon of ground flaxseed with three tablespoons of water and let it sit for about 10 minutes to get gelatinous. Be aware, the texture will be a bit denser, and the pancakes might take a minute or two longer to cook through since you lose the leavening from the egg.
Feel free to swap the fruit, too! Blueberries are amazing. You could also try a half-cup of unsweetened applesauce instead of the banana. And don’t forget the little things: a teaspoon of vanilla, a half-teaspoon of cinnamon, or a pinch of salt can make a huge difference in the final flavor.
Troubleshooting Guide
- Problem: My pancakes are gummy.
Likely Cause: You probably over-blended the batter or skipped the rest period.
The Fix: Blend just until smooth, and always let that batter rest for at least 10 minutes. - Problem: They fall apart when I try to flip them!
Likely Cause: The batter could be too thin, your pan isn’t hot enough, or you’re making them too big.
The Fix: Make sure you wait for those visual cues (dry edges, popping bubbles). If the batter seems watery, stir in another tablespoon of oats and let it rest for 5 more minutes. And remember, keep them small! - Problem: The outside is burnt but the inside is raw.
Likely Cause: Your pan is way too hot.
The Fix: Turn down the heat! Let the pan cool for a minute before the next batch.
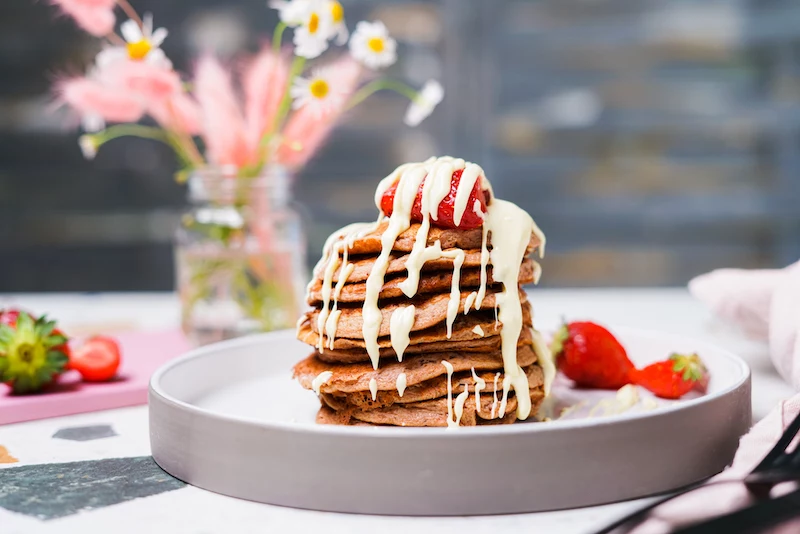
Serving, Storing, and a Quick Safety Note
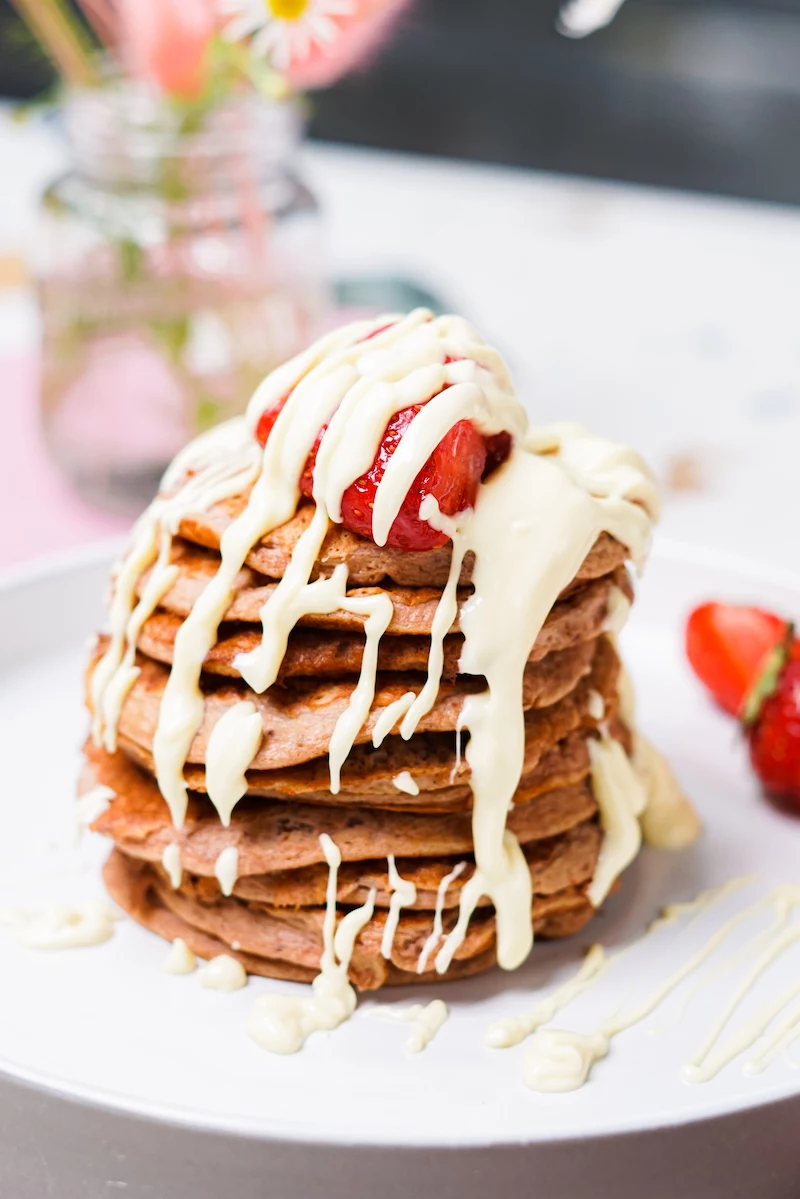
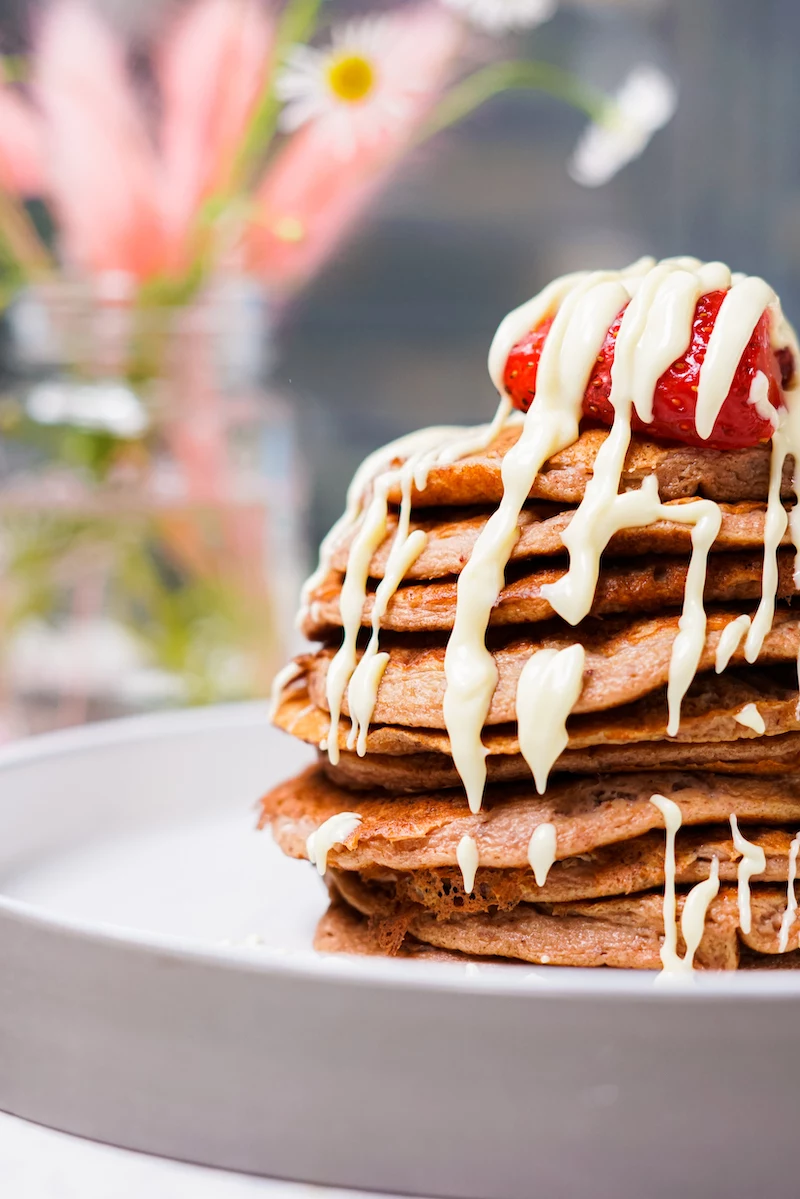
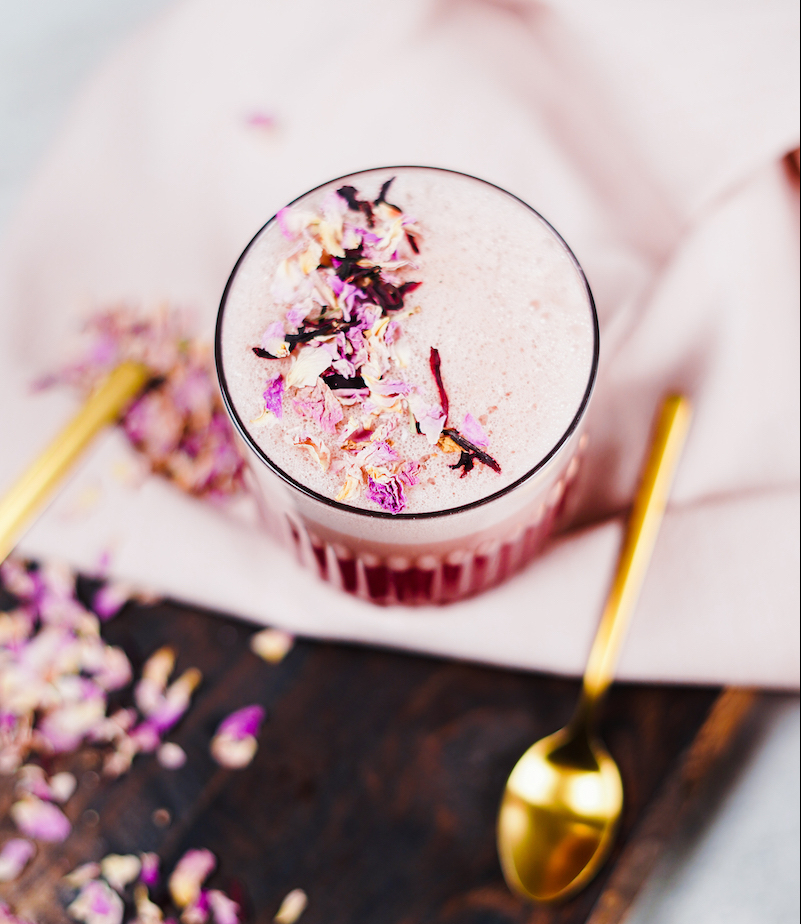
For toppings, you can go decadent with some melted chocolate (quick tip: add a tiny bit of coconut oil when melting to make it smooth and drizzly) or keep it simple with Greek yogurt and fresh berries. If you’re making a big batch, you can keep them warm on a wire rack in an oven set to its lowest temperature (around 200°F).
Leftovers store great in the fridge for up to 3 days, and they freeze beautifully. Just lay them on a baking sheet to freeze solid, then toss them in a freezer bag. They reheat perfectly in a toaster!
Want a time-saving hack for busy mornings? Pre-mix your dry ingredients—the oats, baking powder, and salt—and store the mix in an airtight jar. When you’re ready to cook, just dump it in the blender with your wet ingredients. It cuts the prep time in half.
Finally, a crucial note on safety. If you’re making these “baby pancakes” for actual babies or toddlers, please remember to cut them into small, safe pieces to prevent choking. Always supervise little ones when they’re eating.
The Go-To Flourless Oat & Fruit Pancake Recipe
Yields: About 12-15 small (3-inch) pancakes | Total Time: Approx. 25 minutes
A serving of 3-4 pancakes has roughly 200-250 calories and 8-10g of protein, making it a pretty balanced start to the day.
Ingredients
- 1 medium very ripe banana (about 1/2 cup mashed, or 120g)
- 1 cup fresh or frozen strawberries, hulled
- 2 large eggs
- 1/2 cup (60 ml) oat milk, plus a splash more if needed
- 1 cup (90g) rolled oats (use certified gluten-free if necessary)
- 1 teaspoon baking powder
- Pinch of salt
- Coconut oil or butter, for the pan
Instructions
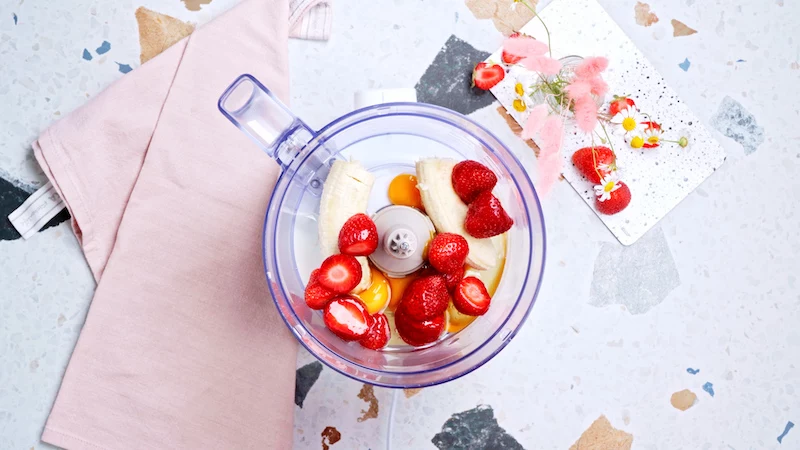
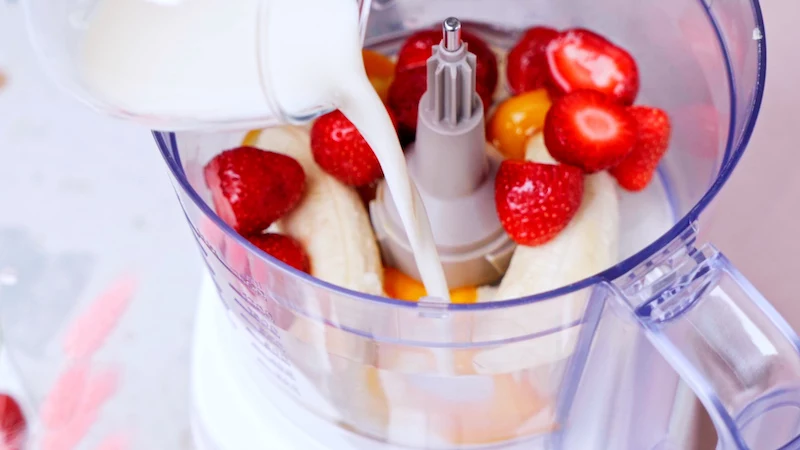
- Load the Blender: Add the oat milk and eggs to your blender first. Then add the banana, strawberries, rolled oats, baking powder, and salt.
- Blend Until Smooth: Secure the lid and blend on high for 30-60 seconds. You want a completely smooth, uniform batter.
- Let It Rest: Pour the batter into a bowl and let it sit at room temperature for 10-15 minutes. Don’t skip this! It will thicken up.
- Heat the Pan: Get a non-stick skillet over medium heat and add a little bit of coconut oil or butter.
- Cook the Pancakes: Pour the batter to form small, 2 to 3-inch pancakes. Cook for about 2-3 minutes on the first side, until the edges look dry and bubbles start to pop.
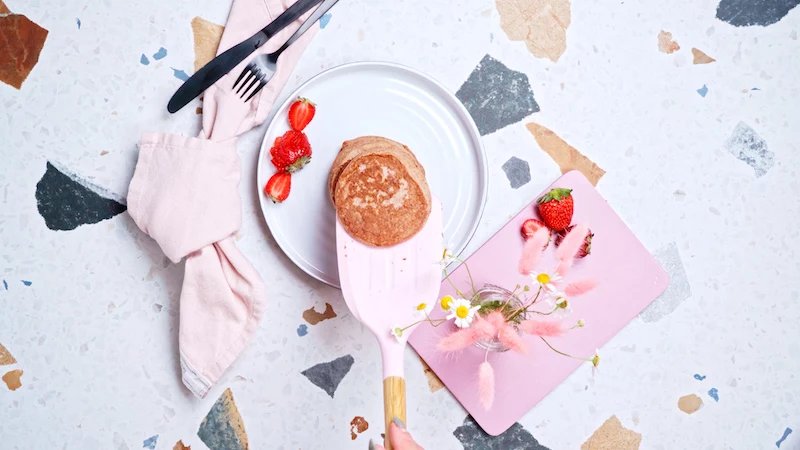
- Flip and Finish: Flip ’em and cook for another 1-2 minutes on the other side until golden and cooked through.
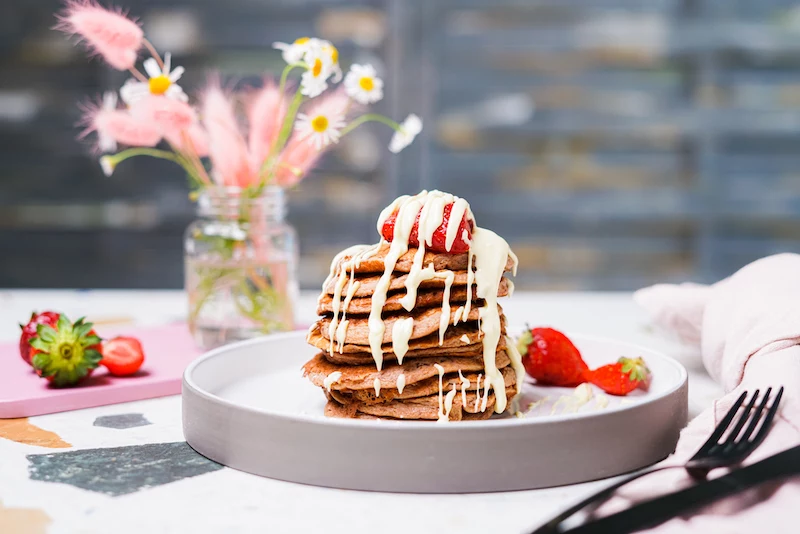
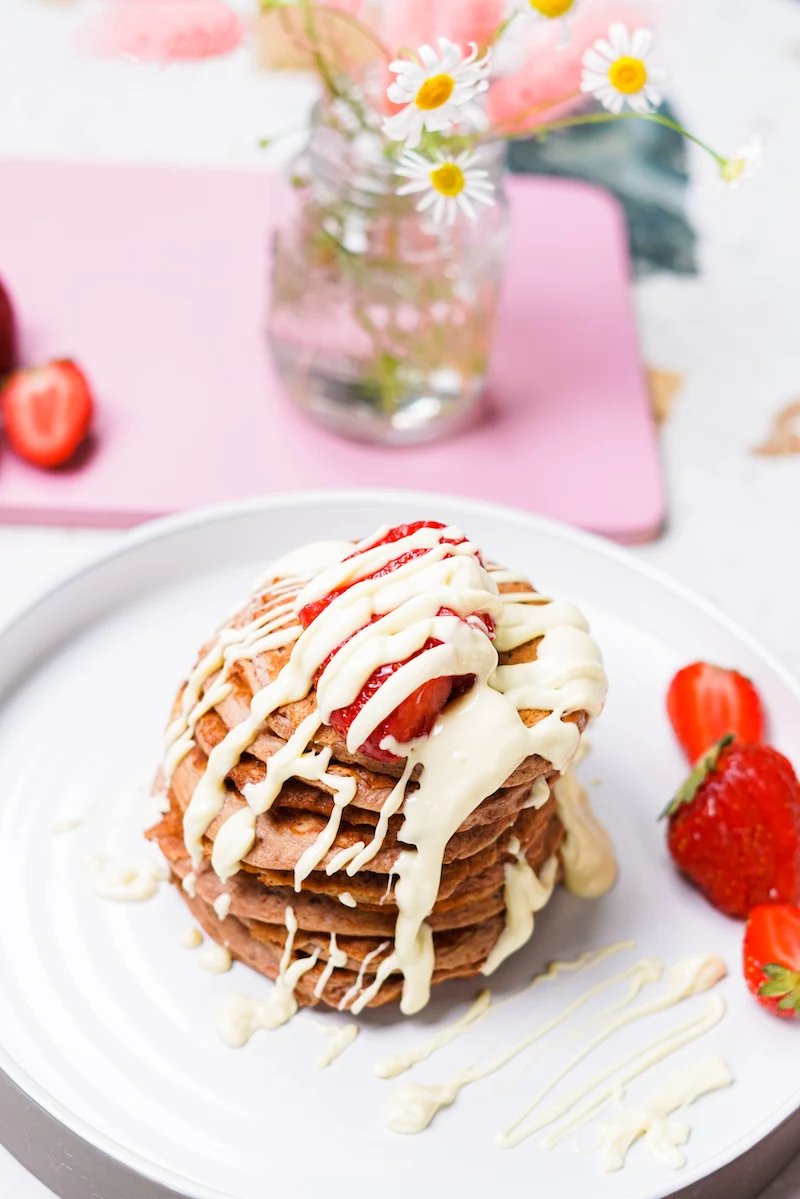
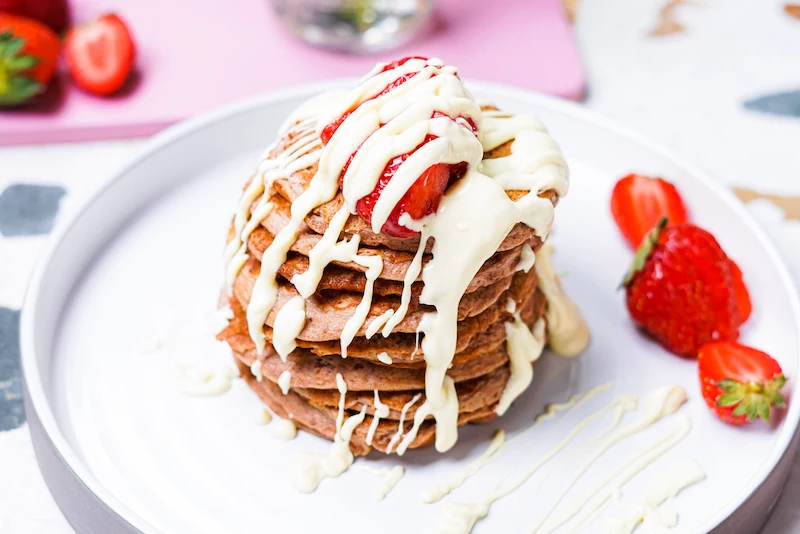
- Serve Hot: Transfer to a plate and serve immediately with all your favorite toppings. Enjoy!
Inspirational Gallery
Can these pancakes be made completely vegan?
Absolutely. The egg’s primary role here is binding, which can be easily replicated. For a fantastic plant-based version, create a ‘flax egg’ by mixing one tablespoon of finely ground flaxseed with three tablespoons of water. Let it sit for 5-10 minutes until it becomes gelatinous, then use it just as you would the regular egg. This switch not only makes the recipe vegan but also adds a boost of omega-3 fatty acids and extra fiber.
Oats contain a powerful soluble fiber called beta-glucan, which has been shown to help lower cholesterol levels.
What this means for your breakfast is that you’re not just making a flourless alternative; you’re building a heart-healthy meal. Each pancake becomes a small contribution to your daily fiber goals, helping you feel full longer and supporting stable blood sugar levels—a far cry from the sugar crash associated with traditional white flour pancakes.
The pan makes the pancake. For an even, golden-brown finish without sticking, a well-seasoned cast-iron skillet (like one from Lodge) is your best friend. Its superior heat retention means fewer hot spots. If you prefer non-stick, look for a quality ceramic pan. The key, regardless of the pan, is to preheat it over medium-low heat. Too hot, and the outside will burn before the inside is cooked through.
Once you’ve mastered the base recipe, the fun begins. Think of the batter as a blank canvas for flavor. Try these simple additions:
- Warm Spices: A half teaspoon of Ceylon cinnamon or a pinch of nutmeg elevates the cozy factor.
- Citrus Zest: The zest of half a lemon or orange adds a bright, fresh note that cuts through the richness.
- Extracts: A few drops of pure vanilla or almond extract can transform the entire flavor profile.
- Rich Cocoa: For a chocolatey version, mix in a tablespoon of unsweetened cocoa powder. You may need to add a splash more liquid to get the right consistency.
Date Paste: A naturally sweet, fiber-rich binder. Blend a few pitted Medjool dates with a splash of hot water.
Pure Maple Syrup: The classic choice, offering minerals like manganese. Choose a dark, robust grade for more flavor.
For the healthiest sweetness, date paste is the winner as it uses the whole fruit. However, for that authentic pancake experience, a drizzle of pure maple syrup is unbeatable.
Fact: The finer you blend your oats, the lighter and fluffier your pancakes will be.
The texture of your final pancake is directly tied to your blender. A high-speed blender like a Vitamix or Blendtec will pulverize the rolled oats into a fine, silky flour, yielding a result that’s incredibly close to a traditional pancake. A standard blender will work, but may leave a slightly more rustic, hearty texture with tiny oat flecks—which can also be delicious!
- Keep pancakes from getting soggy.
- Serve a crowd all at once with warm food.
- Make mornings feel less chaotic.
The secret? Your oven. As you cook the pancakes in batches, place the finished ones on a wire rack set over a baking sheet in an oven preheated to 200°F (95°C). The air circulation prevents them from steaming and keeps them perfectly warm and crisp until you’re ready to serve.


