Stop Making Soggy French Toast: Your Ultimate Guide to a Perfect Slice
I’ve made more French toast in my life than I can count, working in all sorts of kitchens from bustling brunch spots to cozy cafes. Early on, I was all about the fancy toppings. But a seasoned chef I worked with set me straight pretty quick. He took a slice I’d just plated, pressed it with his fork, and a little puddle of raw egg seeped out. “You can’t build a house on a swamp,” he told me. “Fix the foundation.”
In this article
Honestly, that lesson changed everything. Amazing French toast isn’t about hiding a sad, soggy slice under a mountain of sugar. It’s about making the toast itself so good that the toppings are just a bonus. So, this guide is all about that foundation. We’ll get into the pro techniques for toppings, sure, but more importantly, we’ll figure out why things work, so you can turn a simple breakfast into something truly incredible.
The Foundation: Custard and Bread
Before we even think about fruit or syrup, let’s nail the toast itself. The goal is simple: a creamy, custardy center with a perfectly crisp, golden-brown crust. Get this right, and you’re already 90% of the way there.
The Custard: It’s All in the Ratios
The liquid you soak your bread in is a basic custard, and its job is to add flavor and richness. The key is balance. Too much egg, and you’re basically eating a sweet omelet. Too little, and it’s just bland.
- The Magic Ratio: For about four thick slices of bread, my go-to is two large eggs to one cup of dairy. This makes the egg a binder, not the star of the show.
- Dairy Choices: The fat here really matters. Whole milk gives you a classic taste. Half-and-half makes it richer and more tender. And heavy cream? That’s for a super decadent, dessert-level treat. I usually land somewhere in the middle with whole milk and just a splash of cream.
- A Touch of Sweetness: One tablespoon of sugar per cup of liquid is plenty. It adds a little sweetness and helps the crust develop that beautiful brown color through the Maillard reaction. Heads up: too much sugar will cause the outside to burn before the inside even thinks about cooking.
- Flavor Boosters: A pinch of salt is a must—it makes every other flavor pop. A little vanilla extract and a dusting of cinnamon or nutmeg are the classic moves. Just be sure to whisk everything together until it’s perfectly smooth. Nobody wants rubbery bits of cooked egg white on their French toast.
Good to know: You can absolutely make the custard the night before! Just give it a good whisk before you use it the next morning. It’s a great little time-saver for a lazy weekend.
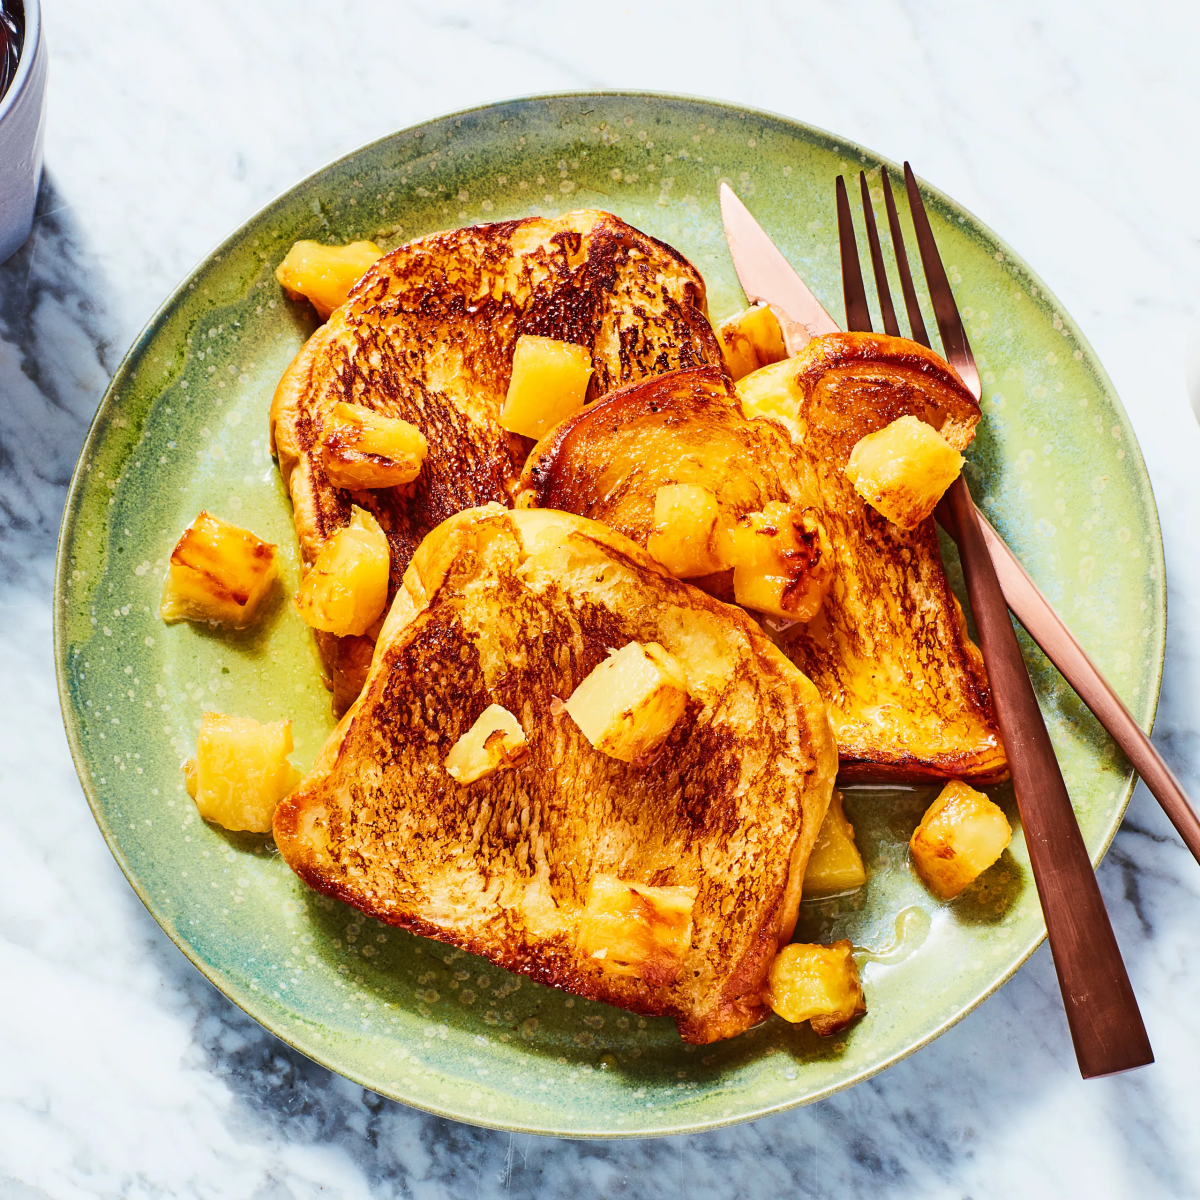
The Right Bread (and the Right Soak)
Your choice of bread is crucial. Please, step away from the thin, pre-sliced sandwich bread—it’ll just turn to mush. You need something with a bit of backbone.
- Brioche: This is the rich, buttery classic. It soaks up custard beautifully and makes for a tender, almost cake-like result.
- Challah: Another fantastic option, slightly less rich than brioche but wonderfully fluffy and absorbent.
- Sourdough or Country Loaf: If you prefer something a bit chewier with a tangy flavor, a day-old, thick-cut sourdough is amazing. The slightly stale bread is actually better because it soaks up the custard without falling apart.
- Budget-Friendly Pick: Don’t sleep on Texas toast! You can find it in the bread aisle for just a few bucks, and its thickness makes it a perfect, affordable vehicle for a great French toast.
The soaking time completely depends on the bread. For a one-inch-thick slice of brioche, a quick dip of 15-20 seconds per side is plenty. For a denser sourdough, you might need closer to 45 seconds per side. The goal is for the custard to soak about halfway through. You can check by gently pressing a corner; it should feel soft but not totally waterlogged.
The Perfect Sear: Where the Magic Happens
Okay, so your bread is soaked. Now what? This is the step that separates the pros from the amateurs. It’s all about heat management.
Grab a good pan. A non-stick skillet is easiest for beginners, but a well-seasoned cast-iron pan will give you an unbeatable crust. The key is to use medium-low heat. I can’t stress this enough.
Here’s a pro tip: use a combination of fats. Melt a tablespoon of butter (for that amazing flavor) with a teaspoon of a neutral oil like canola or vegetable oil. The oil has a higher smoke point, which helps prevent the butter from burning before your toast is cooked through.
Place the soaked slices in the hot pan, making sure not to crowd them. Let them cook for about 3-4 minutes per side, without poking or prodding them. You’re looking for a deep, even, golden-brown crust. Be patient!

Common Pitfalls & Quick Fixes
What if things go wrong? It happens. The most common problem is the dreaded soggy middle.
If your French toast is soggy inside but looks done on the outside, your heat was too high. The crust burned before the custard had time to set. The fix? Turn down the heat for the next batch. To save the current batch, you can place the slices on a wire rack set on a baking sheet and pop them into a 300°F (150°C) oven for 5-10 minutes. This will gently cook the center through without burning the outside.
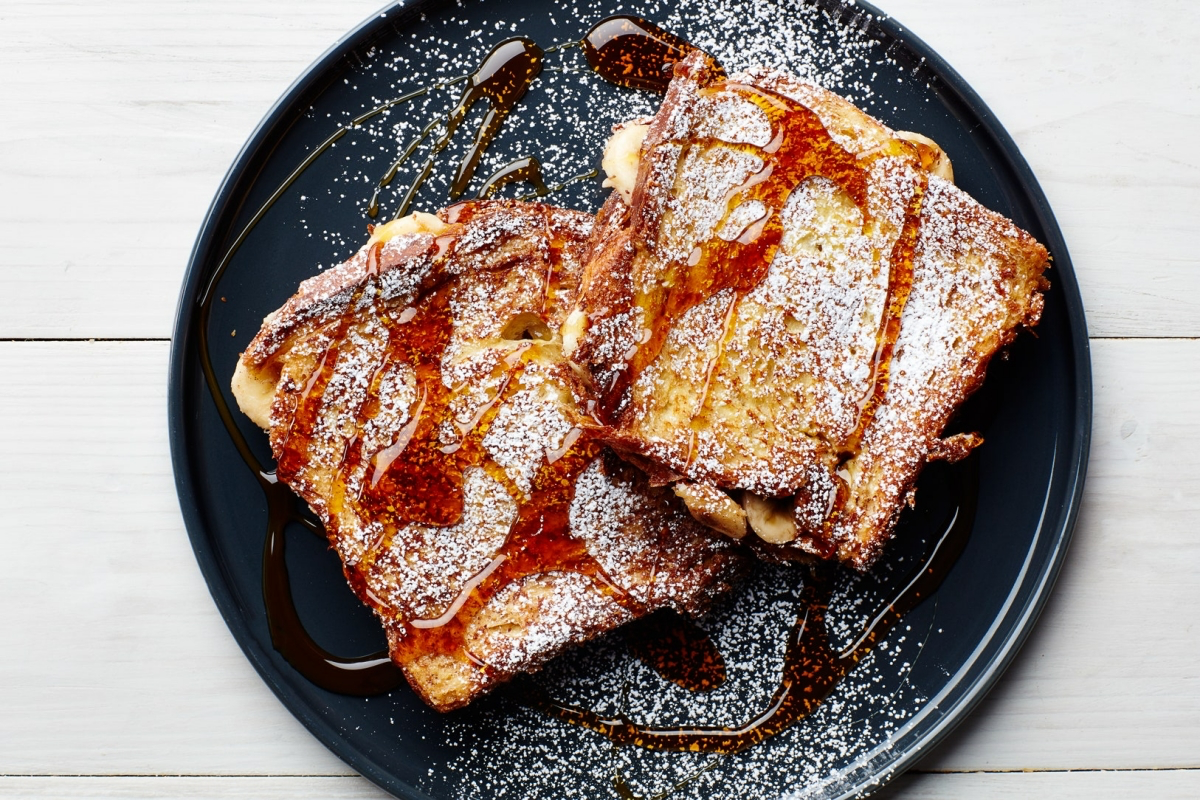
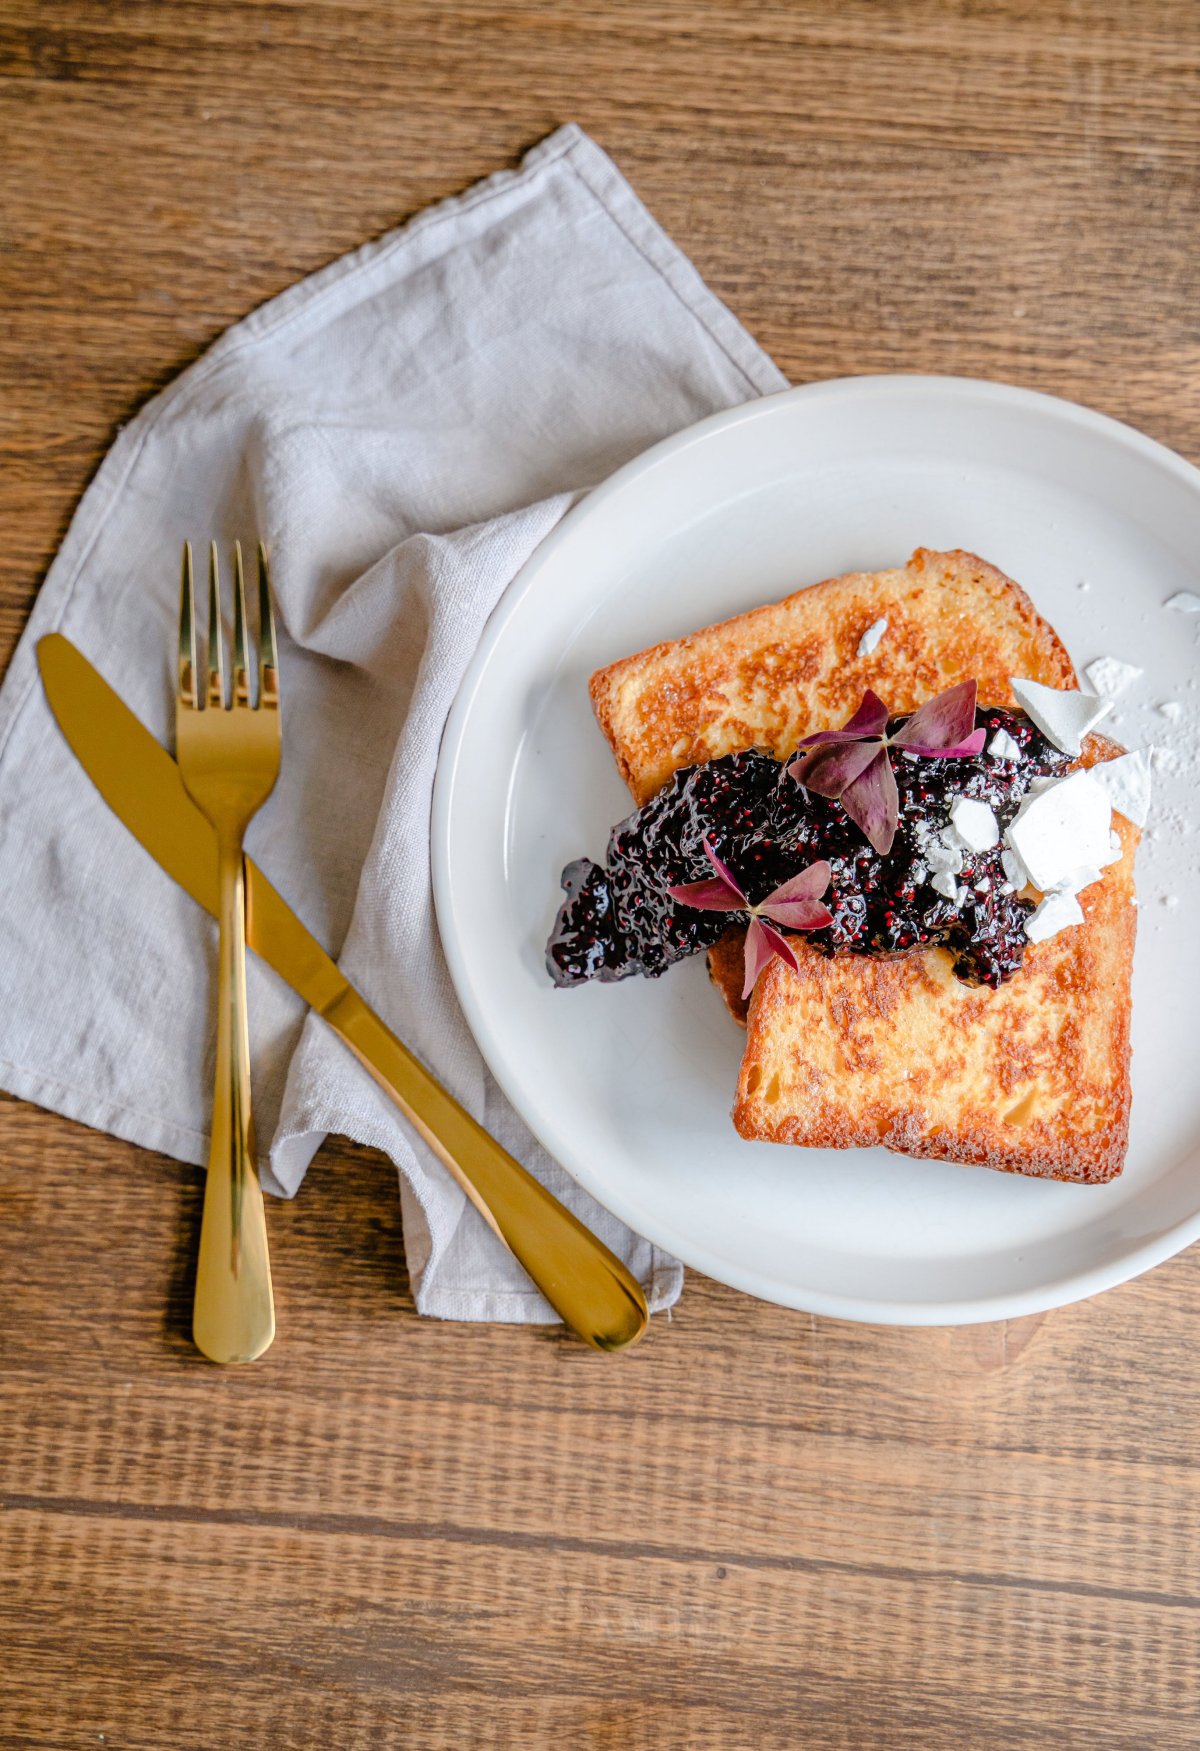
Mastering the Classic Toppings
Simple toppings demand that you get them right. When there are only a couple of things on the plate, every detail counts.
Maple Syrup: More Than Just Pouring
In North America, maple syrup is king. But there’s a difference between grades. The lighter, “Golden Delicate,” stuff is lovely but can get lost. The super dark, “Robust Taste,” syrup is intense and almost like molasses—better for baking. The sweet spot for French toast is usually the “Amber Rich” grade. It has that classic, balanced maple flavor that just works.

But the single most important tip? Always warm your maple syrup. Pouring cold syrup on your masterpiece instantly makes it cold. Just pour some into a small saucepan and warm it gently on the stove, or give it 20 seconds in the microwave. It’s a tiny step that makes a huge difference.
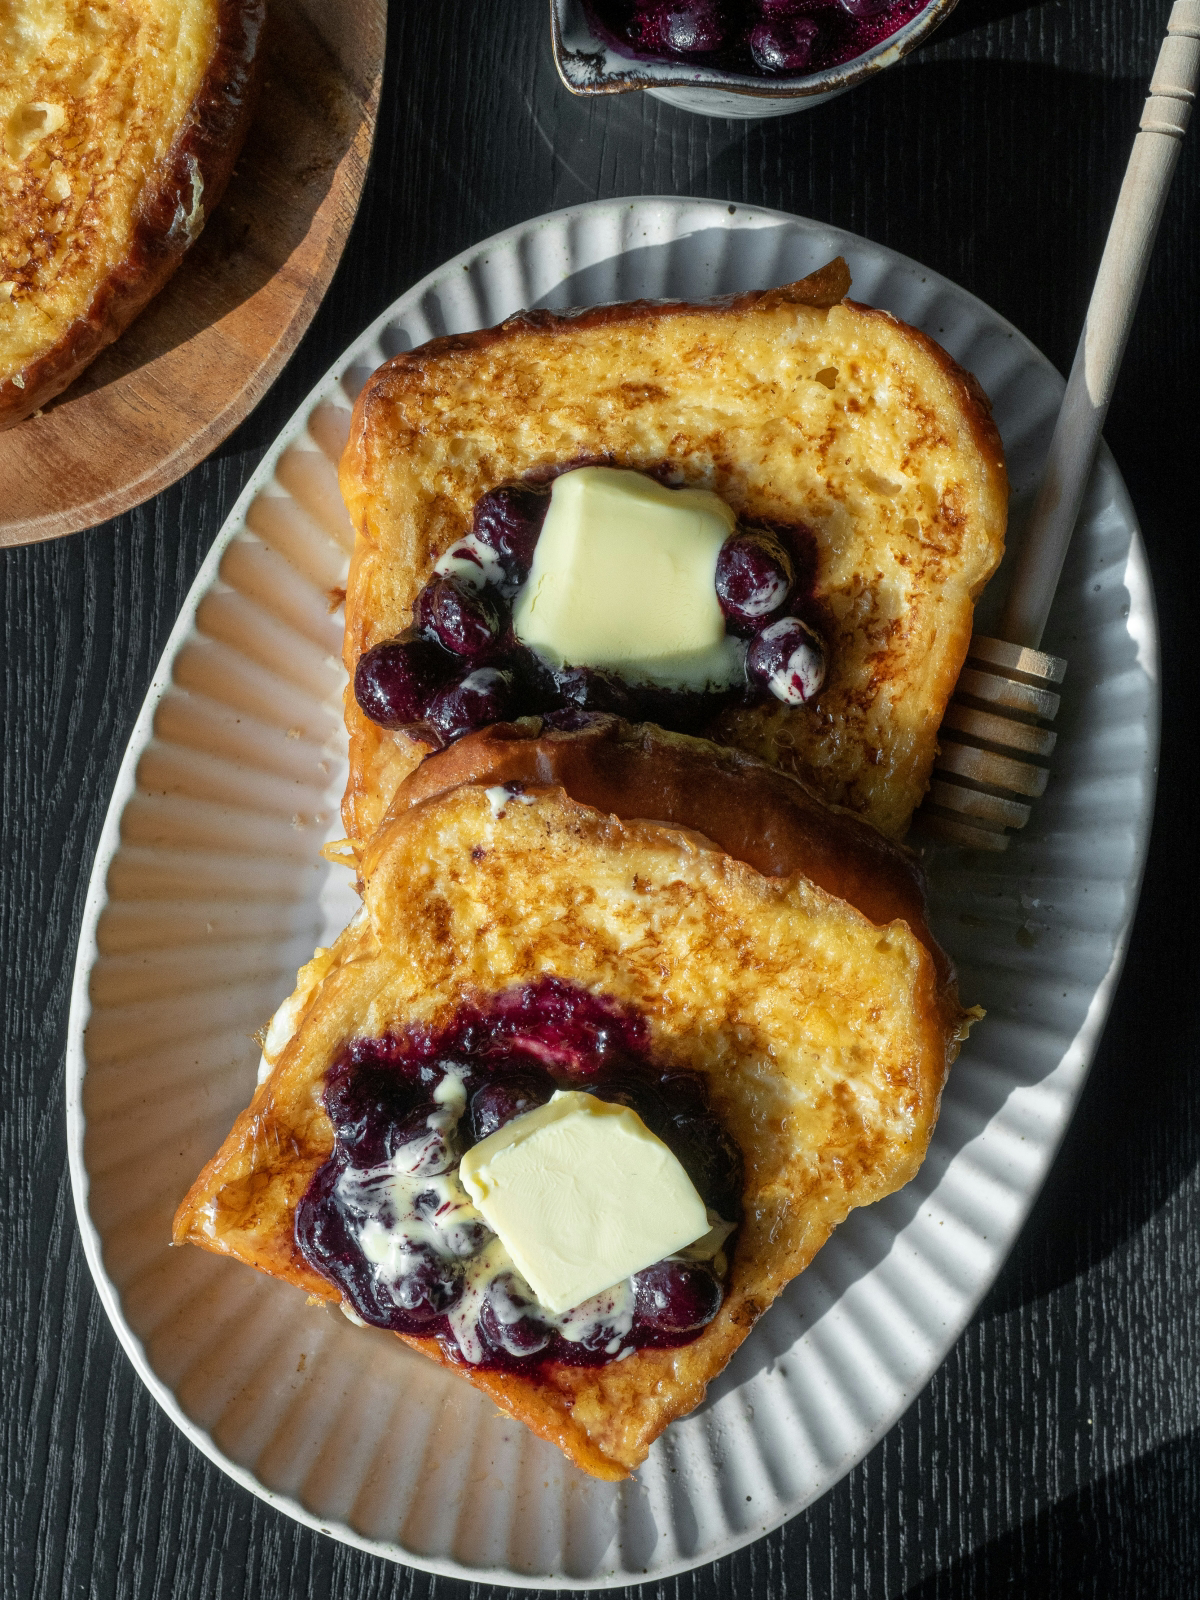
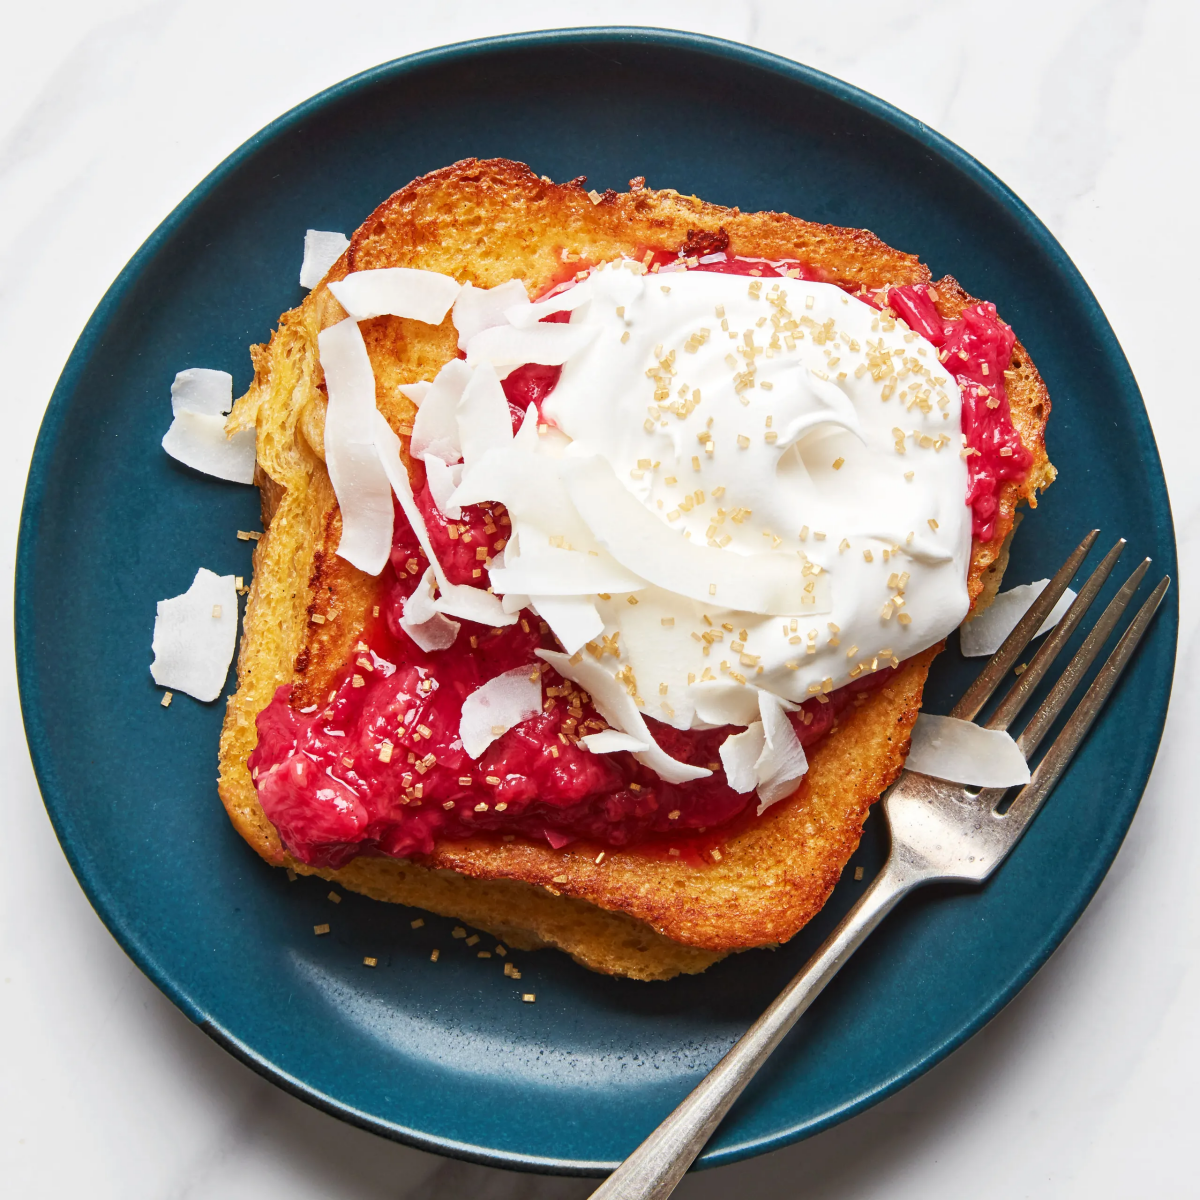
Fruit Compote: A 15-Minute Upgrade
A fruit compote sounds way fancier than it is. It’s just fruit cooked down with a bit of sugar. To make a simple berry compote, just combine 2 cups of berries (fresh or frozen work fine), 2 tablespoons of sugar, and a squeeze of lemon juice in a small pot. Simmer it over medium heat for 10-15 minutes until it thickens up. Done.
Time-saving hack: Make a big batch of this on a Sunday. It keeps in an airtight container in the fridge for at least 5 days and is amazing on yogurt, oatmeal, or ice cream all week long.

Whipped Cream: The Trick is Temperature
Homemade whipped cream is a world away from the canned stuff. The secret is simple: everything must be COLD. The heavy cream, the bowl, the whisk—I even stick my metal bowl in the freezer for 15 minutes beforehand.
You’ll need heavy cream or heavy whipping cream, which has at least 35% fat. Start whipping the cold cream on medium speed. When it starts to thicken (soft peaks), add a tablespoon of powdered sugar and a splash of vanilla. Keep whipping until stiff peaks form—that’s when a peak holds its shape when you lift the whisk. But stop right there! Another 30 seconds and you’ll have sweet, grainy butter.
Next-Level Combinations
Once you’ve got the basics down, it’s time to play. The key is balancing sweet, salty, creamy, and crunchy.
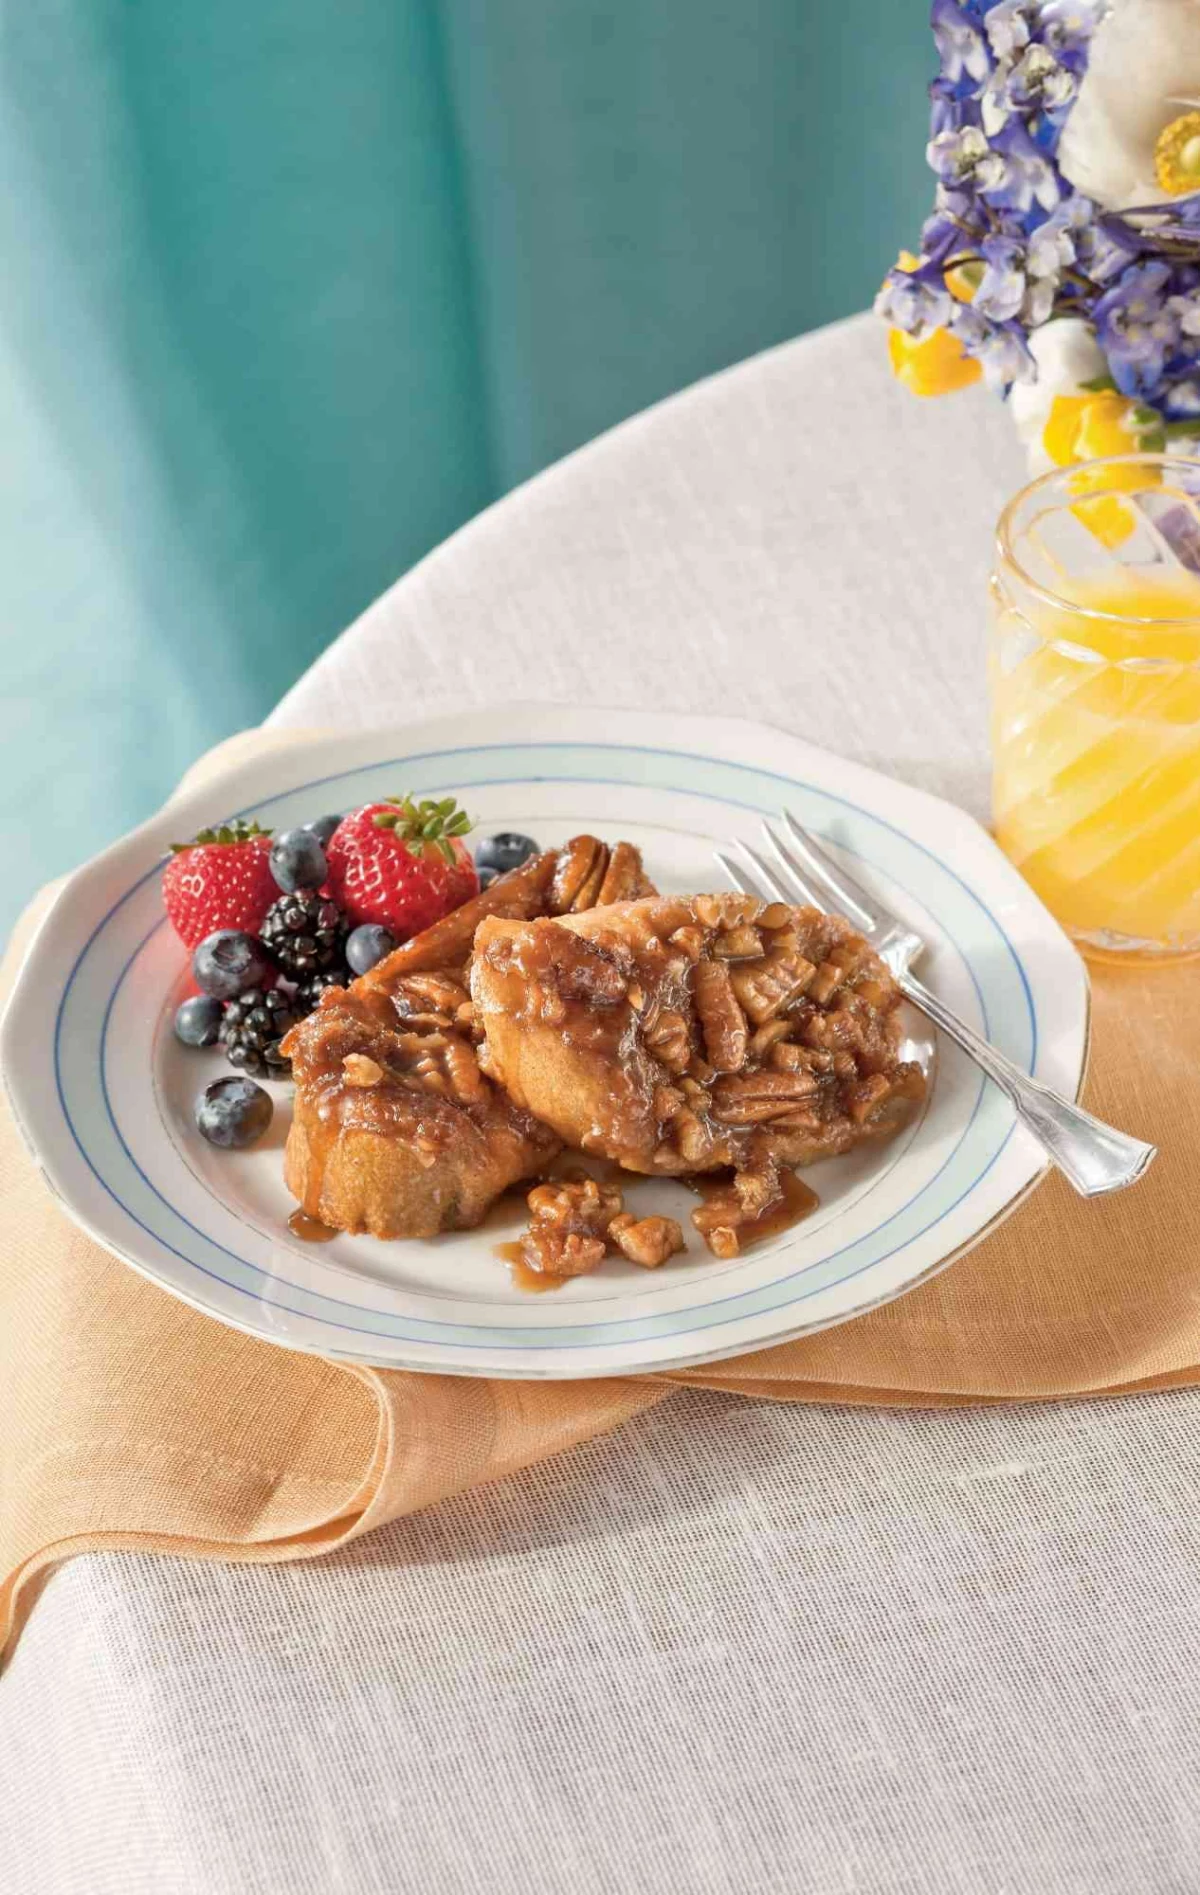
Caramelized Bananas and Toasted Pecans
This is a restaurant classic for a reason. To make it happen, you just need a couple of firm, ripe bananas, some brown sugar, butter, and a handful of pecans. The whole process takes less than 10 minutes, but you can’t walk away from it.
Heads up: Hot sugar is no joke. It gets incredibly hot and sticks to skin, so pay full attention. In a non-stick skillet over medium heat, melt 2 tablespoons of butter, then stir in 2 tablespoons of brown sugar until it dissolves. Place banana halves, cut-side down, in the pan and cook for about 90 seconds until a deep amber color forms. Flip, cook for another 30 seconds, and they’re done. For the pecans, just toast them in a dry skillet for a few minutes until you can smell them. Watch them like a hawk—they burn fast!
Chocolate Ganache and Macerated Strawberries
Forget that thin, sugary chocolate syrup. A real ganache is so much better and surprisingly easy. You just need a 1:1 ratio of good chocolate to heavy cream. By “good chocolate,” I mean something with at least 60% cacao. Brands like Ghirardelli or Guittard are great and available in most grocery stores for around $4-5 a bar.

Finely chop 4 ounces of the chocolate and place it in a bowl. Heat 4 ounces of heavy cream until it just simmers, then pour it over the chocolate. Let it sit for 5 minutes without touching it. Then, whisk slowly from the center outwards until it’s smooth and glossy. For the strawberries, just slice them, toss with a spoonful of sugar and a squeeze of lemon, and let them sit for 20 minutes. They’ll release their own beautiful, natural syrup.
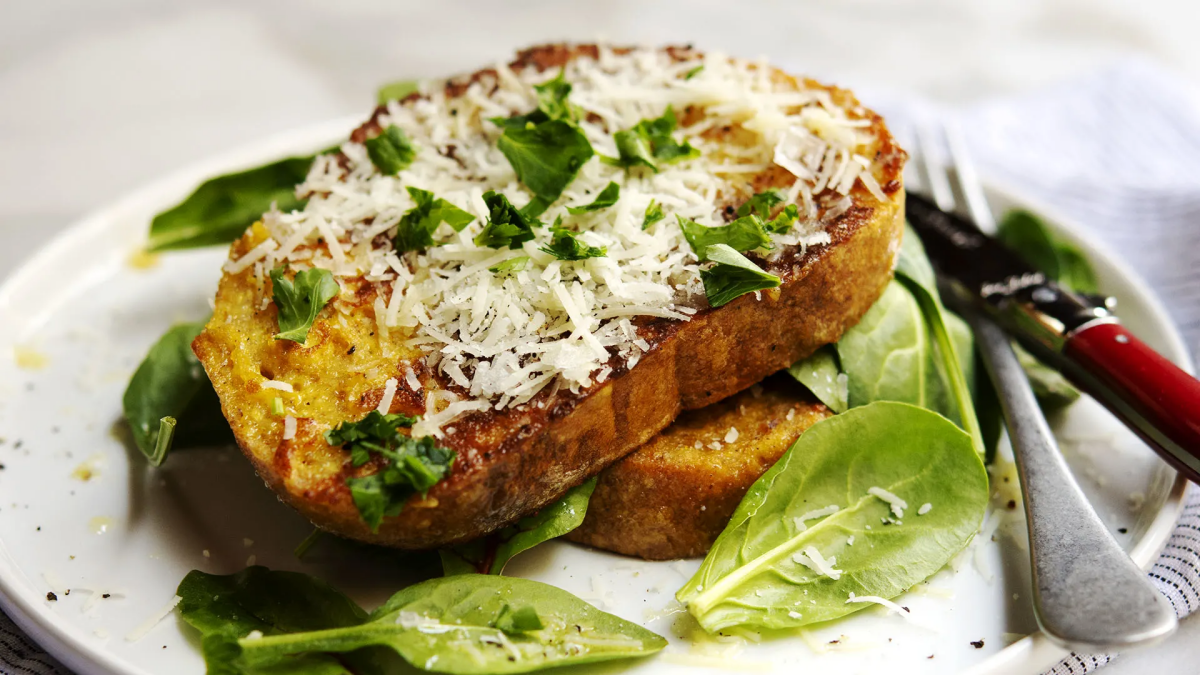
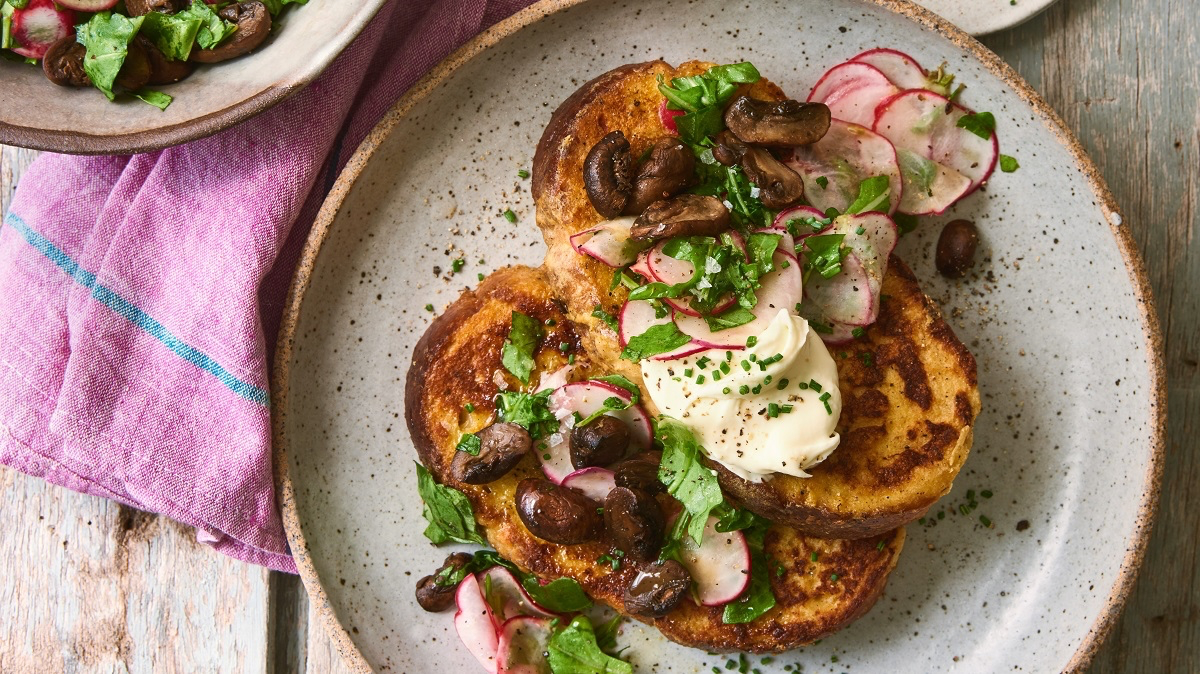
Don’t Forget Savory French Toast!
Who says French toast has to be sweet? It makes a fantastic base for a savory brunch. Just leave the sugar and vanilla out of your custard and add a pinch of black pepper, some cayenne, or finely chopped herbs like chives.
- The “Croque Monsieur” Style: Make your savory French toast, then top it with a slice of good ham and a handful of grated Gruyère or sharp white cheddar. Pop it under the broiler for 2-3 minutes until the cheese is melted and bubbly. It’s a game-changer.
- Smoked Salmon and Cream Cheese: This is a fun twist on a classic bagel. Spread a little whipped cream cheese on the warm toast, drape it with high-quality smoked salmon, and finish with capers, thin-sliced red onion, and fresh dill. A key principle from professional kitchens is to always handle ready-to-eat foods like salmon with care—use clean hands and a separate cutting board.
A Final Thought
After all this time, I still think back to that chef. A great dish starts with a solid foundation. Whether you’re just drizzling it with warm maple syrup or building a savory masterpiece, success begins with a perfectly cooked slice of toast. Pay attention to the details, use good ingredients, control your heat, and taste as you go. These aren’t rigid rules; they’re tools. Hopefully, they give you the confidence to get in the kitchen and build something amazing.
Galerie d’inspiration
The eternal question: What’s the best fat for frying? Butter burns, but oil lacks that essential flavor.
The professional’s choice is a combination. Start by melting a knob of high-fat, European-style butter, like Kerrygold or Lurpak, for its rich, nutty taste. Just as it begins to foam, add a splash of a neutral oil with a high smoke point, such as grapeseed or avocado oil. This simple trick raises the smoke point, allowing you to achieve a perfectly golden, crisp crust without the dreaded burnt-butter bitterness. You get the best of both worlds: superior flavor and a flawless, non-greasy finish.
The original French name for French toast is “pain perdu,” which literally translates to “lost bread.” It was a frugal recipe designed to use up stale, day-old bread that would have otherwise been thrown away.
Brioche: This butter-and-egg-rich bread creates a soft, almost dessert-like French toast that melts in your mouth. It soaks up custard quickly, so be brief.
Challah: A braided egg bread that’s slightly less rich than brioche. Its sturdy but plush texture makes it the ideal all-rounder, absorbing custard perfectly without falling apart.
Sourdough: For a more modern, chef-driven take, the tangy flavor of a thick-cut country sourdough provides a beautiful contrast to the sweet custard and toppings.
- A tangy counterpoint to the sweetness.
- Adds a luxurious, creamy texture without being heavy.
- Can be made ahead and stored in the fridge for up to three days.
The secret? A simple whipped topping of mascarpone cheese, a touch of powdered sugar, and the zest of one fresh lemon. It cuts through the richness and elevates your French toast instantly.
One mistake to avoid at all costs: Never press your French toast down with a spatula while it’s in the pan. It’s a common impulse, but doing so squeezes out the creamy custard center, ruining the texture and making the slice dense and dry. Let the heat do its work gently for a light, airy result.