The Real Reason Your Baked Zucchini is Soggy (And How to Fix It for Good)
So, you’ve tried making those crispy baked zucchini parmesan bites you see all over the internet, and they came out… a little sad and soggy. Sound familiar? Don’t worry, it’s not you, it’s the zucchini. After years working in professional kitchens, I can tell you that this vegetable has one big secret: it’s basically a pretty, green tube of water.
In this article
- First, Let’s Talk Ingredients (And What to Actually Buy)
- The Science of a Crispy Bite (It’s Easier Than It Sounds)
- The Professional Method: Step-by-Step
- Other Ways to Cook ‘Em: Air Fryer vs. Pan-Frying
- Troubleshooting: When Things Go Wrong
- Dipping Sauces and What to Do with Leftovers
- Inspirational Gallery
Seriously, zucchini is over 90% water. If you don’t get that moisture out before you bake, it turns to steam in the oven and soaks your beautiful breading from the inside out. Mush city. But the good news is, getting that perfect, golden-brown, crispy bite isn’t about some complicated recipe. It’s all about technique.
This isn’t just a recipe; it’s the pro method. We’re going to cover the simple science that makes it work, the exact ingredients to look for, and the little details that make all the difference. This little guide will make enough for an appetizer for 3-4 people, and you should plan on about an hour and fifteen minutes from start to finish (but a big chunk of that is just waiting time!).
First, Let’s Talk Ingredients (And What to Actually Buy)
A simple dish lives or dies by its ingredients. With so few items on the list, quality really matters. Here’s what to look for at the store.
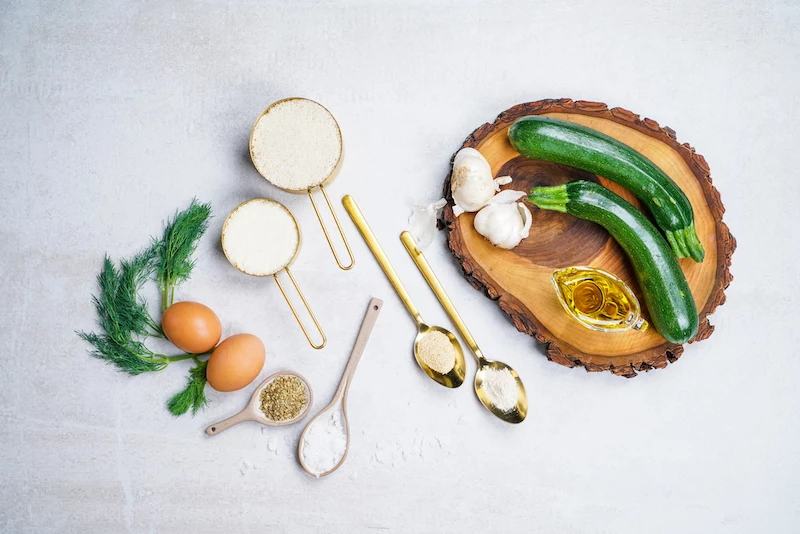
The Recipe Rundown (for 2 medium zucchini):
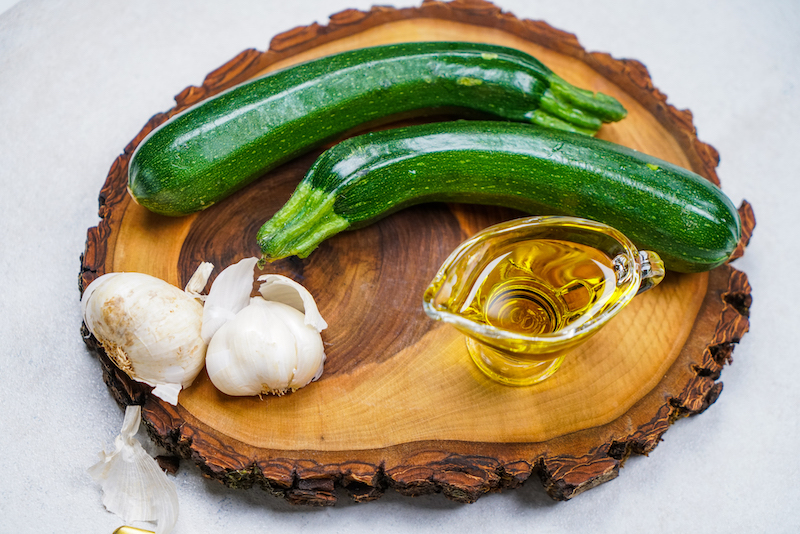
- Zucchini: 2 medium (about 6-8 inches long).
- Salt: About 1 teaspoon of Kosher or sea salt for drawing out water.
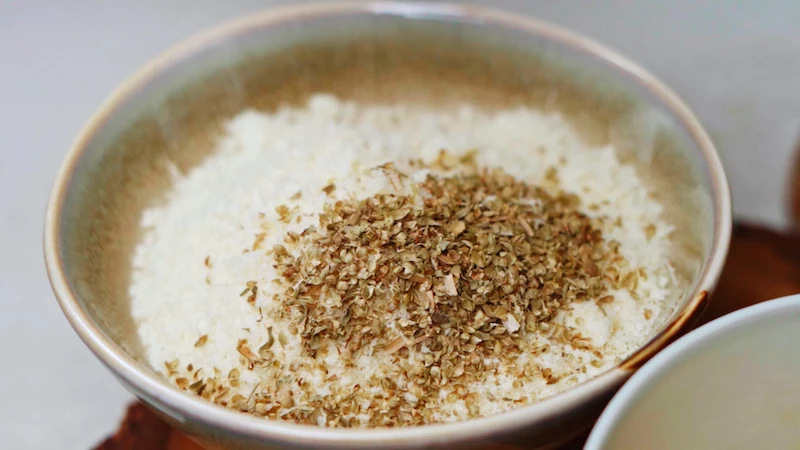
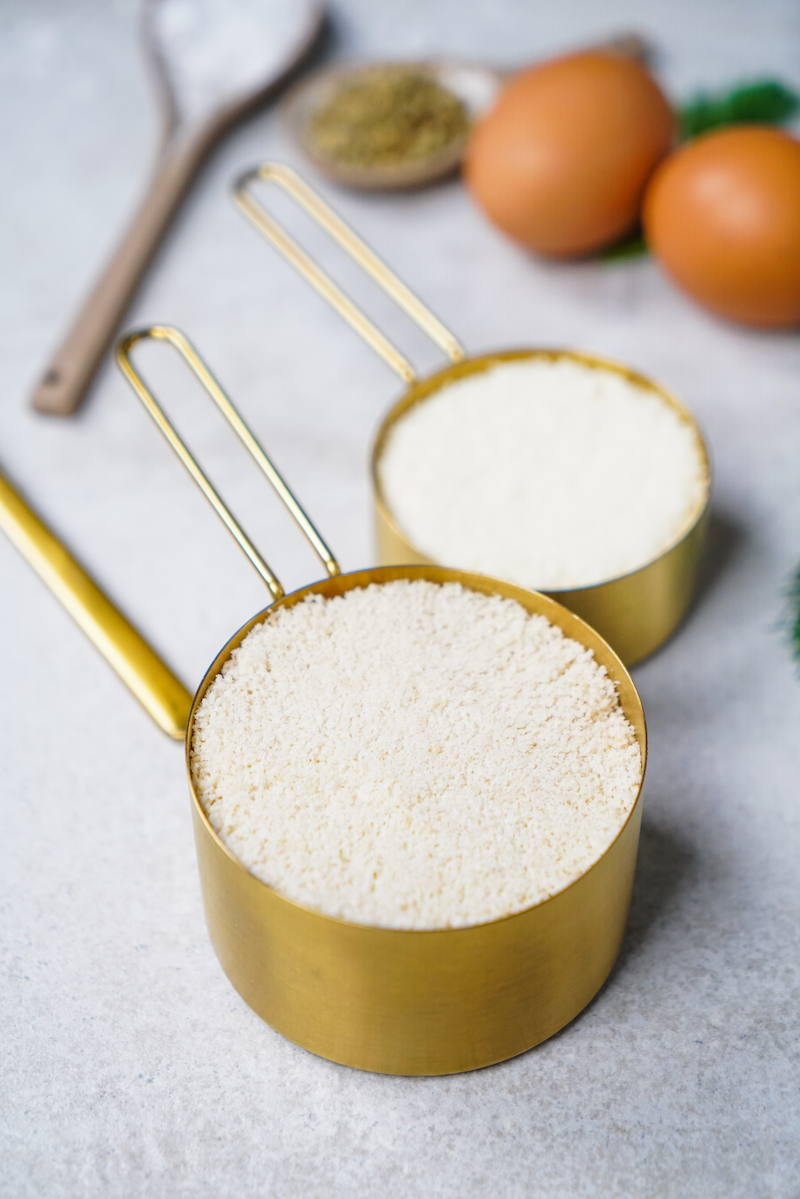
- The Coating: 3/4 cup almond flour (for a low-carb version) OR 1 cup of Panko breadcrumbs (for max crispiness).
- The Cheese: 1/2 cup finely grated Parmesan, plus a little extra for sprinkling.
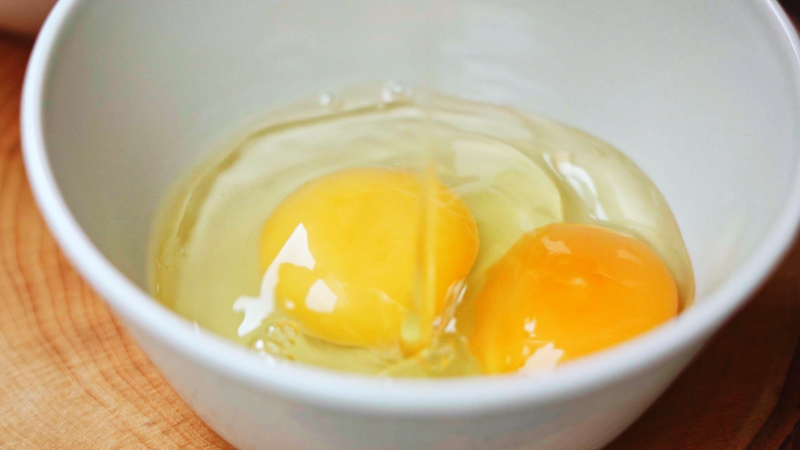
- The Binder: 2 large eggs.
- Seasoning: 1 teaspoon garlic powder, 1/2 teaspoon dried oregano, 1/4 teaspoon black pepper, and maybe a pinch of smoked paprika or red pepper flakes if you’re feeling spicy.
Choosing Your Zucchini and Cheese
When you’re at the grocery store, grab the smaller, firmer zucchini with dark, glossy skin. They should feel surprisingly heavy. Steer clear of those giant, overgrown ones—they’re watery, seedy, and tend to get mushy. As for the cheese, please do yourself a favor and buy a block of real Parmigiano-Reggiano. It might seem like a splurge at $10 to $15, but the flavor is on another planet compared to the pre-grated stuff, which often has anti-caking powders that mess with melting. Grate it yourself right before you use it.
Oh, and a quick tip: If you like a sharper, saltier kick, try using Pecorino Romano cheese instead, or even a 50/50 blend of Parmesan and Pecorino. It’s fantastic, but just be a little more careful with the salt you add elsewhere.
The Science of a Crispy Bite (It’s Easier Than It Sounds)
The whole game plan here is to fight the water and then master the heat. That’s it.
Step 1: The Salting Trick (This is Non-Negotiable)
This is the most important step, period. It’s a process called osmosis. When you salt the zucchini slices, the salt on the outside pulls the water from the inside. You’ll literally see little beads of water form on the surface.
Lay your zucchini slices on a layer of paper towels, sprinkle them evenly with about a 1/2 teaspoon of kosher salt per zucchini, and let them sit for at least 30 minutes. An hour is even better. Then, and this is key, you have to pat them completely dry with more paper towels. They should feel a little tacky, not wet.
Quick Win: If you’re short on time and can only do one thing right, make it this. The salting-and-drying step is responsible for like, 80% of your success. Don’t skip it!
Step 2: High, Dry Heat for That Golden-Brown Goodness
Once the water is gone, you need a hot oven to get that beautiful brown crust. We’re talking about the Maillard reaction—the amazing chemical process that makes things like seared steak and toasted bread so delicious. For that to happen, you need a hot, dry environment. That’s why we bake these at 400°F (200°C). Any lower, and you risk steaming them instead of browning them.
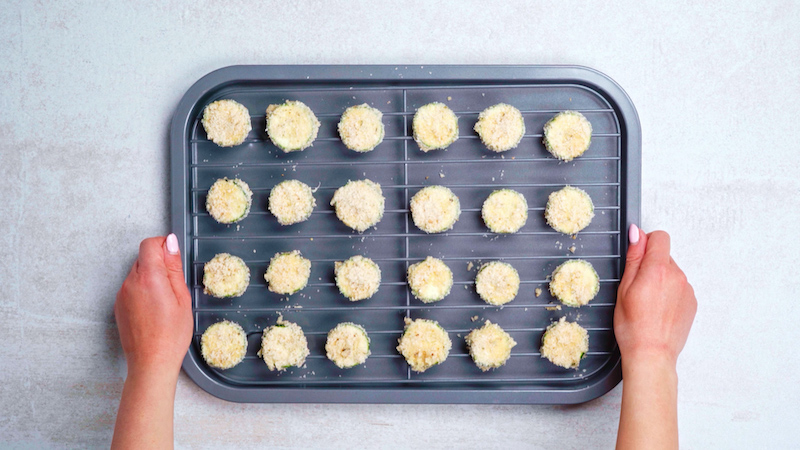
And you absolutely need a wire rack. Placing the zucchini on a solid baking sheet traps moisture underneath, steaming the bottom while the top bakes. A wire rack lets hot air circulate all the way around, getting every single bit of the surface crispy without any flipping.
The Professional Method: Step-by-Step
In a pro kitchen, we call this ‘mise en place’—getting everything ready before you start cooking. It makes the whole process way smoother and less chaotic.
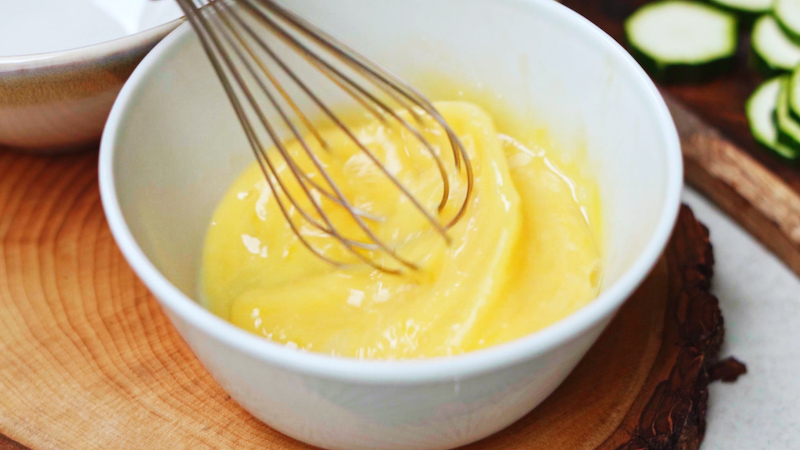
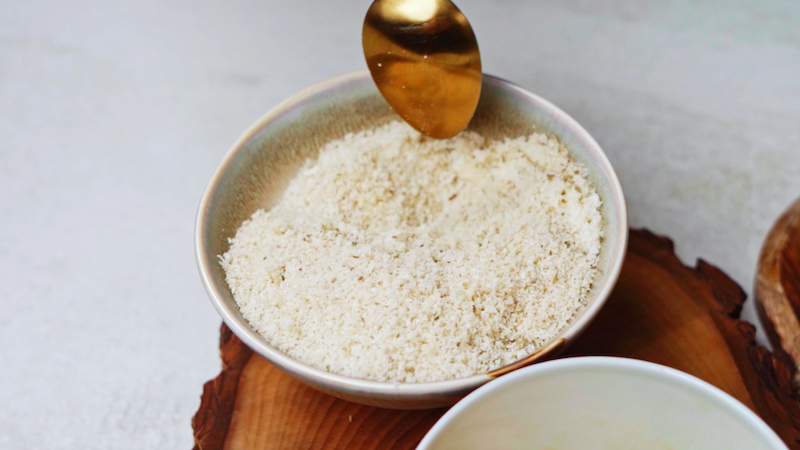
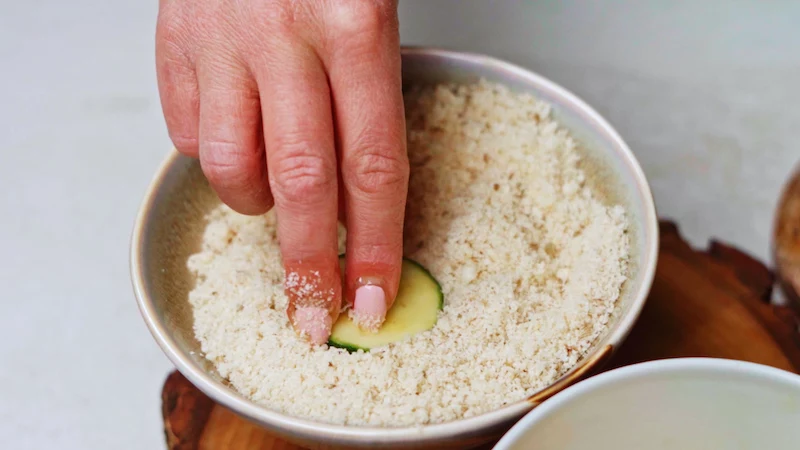
- Set Up Your Breading Station: Grab three shallow dishes. In the first, mix your almond flour (or panko) with the seasonings. In the second, whisk the two eggs until they’re uniform. In the third, put your freshly grated cheese. Line them up like an assembly line.
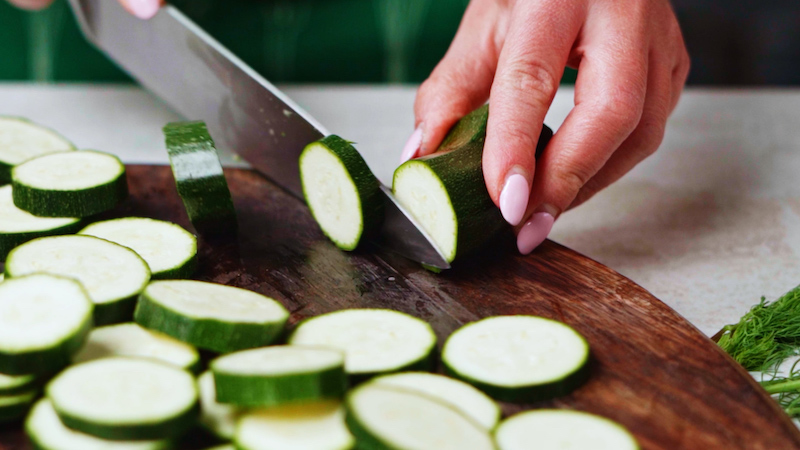
- Slice and Salt: Slice your zucchini into 1/4-inch thick rounds. A mandoline slicer is great for consistency, but be careful (more on that later!). Lay them on paper towels, salt them, and let them ‘sweat’ for at least 30 minutes. Then, pat them completely dry.
- The Breading Dance: To avoid getting what we call ‘club hand,’ use one hand for dry ingredients and one for wet. Take a dry zucchini slice with your ‘dry hand’ and dredge it in the flour mixture. Move it to the egg dish. Now, use your ‘wet hand’ to flip it in the egg. Let the excess drip off, then place it in the cheese. Switch back to your ‘dry hand’ to press the cheese on firmly.
- Arrange and Bake: Place each breaded round on your wire rack set inside a baking sheet. Make sure they aren’t touching! Give them some personal space so they can get crispy. Bake in a preheated 400°F (200°C) oven for 20-25 minutes, until they’re a deep golden brown and bubbly.
Other Ways to Cook ‘Em: Air Fryer vs. Pan-Frying
Baking is my favorite for a balance of health and ease, but you have other options, each with a different result.
- Air Fryer Method: If you want ultimate crispiness with less oil, the air fryer is your best friend. It’s like a super-powered convection oven. Prep the zucchini the exact same way, preheat your air fryer to 375°F (190°C), and cook in a single layer for about 10-12 minutes, flipping halfway. The only downside? You have to work in small batches, which can be a pain if you’re feeding a crowd.
- Classic Pan-Frying: This is the most decadent route. It gives you an incredibly rich flavor and a super crunchy crust, but it’s definitely messier and less healthy. For this, I’d use panko instead of almond flour. Heat a half-inch of neutral oil (like canola or avocado) in a skillet and fry for 2-3 minutes per side. The key is to keep the oil hot but not smoking.
Troubleshooting: When Things Go Wrong
“Help, they’re still soggy!”
This is almost always one of three things. Either you rushed the salting and drying step, you overcrowded the pan, or your oven wasn’t hot enough. By the way, your oven’s dial might be lying to you. Many home ovens are off by 25 degrees or more. It’s worth grabbing a cheap oven thermometer (they’re under $10 online or at Target) to see what temperature you’re really working with.
“The breading fell off!”
This happens when the zucchini surface is too wet before you start breading, so the coating just slides off. Really pat it dry! It also helps to gently but firmly press the coating onto the slice to make sure it adheres.
Dipping Sauces and What to Do with Leftovers
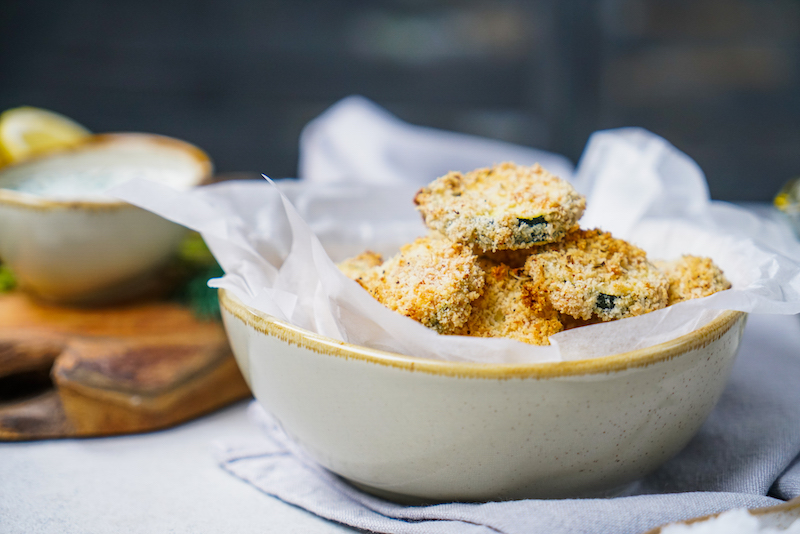
These are amazing on their own, but a cool, creamy sauce takes them over the top. A classic marinara is great—if you’re buying some, look for a quality brand like Rao’s or Victoria with a short ingredient list. My personal favorite, though, is a simple yogurt-garlic dip: mix 1 cup of plain Greek yogurt, 1 grated garlic clove, a squeeze of lemon juice, and some chopped fresh dill.

Make-Ahead & Freezing Tip: You can absolutely prep these ahead! Bread them, arrange them on the baking sheet, cover, and pop them in the fridge for up to 24 hours. Even better, you can freeze them for later. Just freeze them solid on the baking sheet, then transfer them to a freezer bag. Bake them straight from frozen, just add 10-15 minutes to the baking time. Perfect for a quick appetizer! To reheat leftovers, use the oven or air fryer. The microwave will just make them soggy again.
A Quick Safety Warning: If you use a mandoline, please, PLEASE use the safety guard it comes with. I’ve seen some horrifying kitchen accidents, and it’s just not worth risking your fingertips for a few extra slices. Be safe, take your time, and enjoy your perfectly crisp, golden, and delicious zucchini bites!
Inspirational Gallery
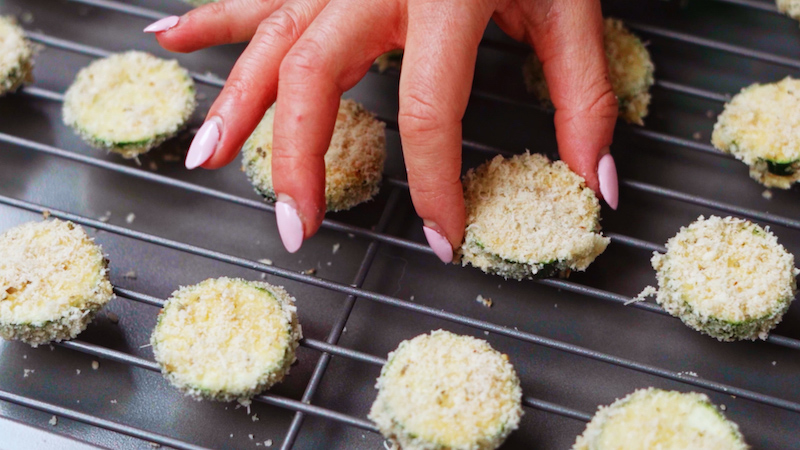
The unsung hero of crispiness: A baking rack is non-negotiable. Placing the zucchini directly on a baking sheet traps steam underneath, creating a soggy bottom no matter how well you salted them. By elevating the bites on a simple stainless steel wire rack, you allow hot air to circulate all around, ensuring a perfectly golden, crunchy exterior from every angle. It’s the single biggest upgrade you can make to your setup.
Wondering what to serve alongside for the perfect dipping experience?
The right sauce turns a great snack into an unforgettable one. For a classic, comforting pairing, a high-quality, warmed marinara sauce like Rao’s Homemade is a no-brainer. If you want a cooler, fresher contrast, whip up a quick lemon-dill yogurt dip: mix Greek yogurt with a squeeze of fresh lemon juice, chopped dill, a grated garlic clove, and a pinch of salt. The tang cuts through the richness of the cheese beautifully.

There are only two cheeses that can legally be called Parmesan: Grana Padano and Parmigiano-Reggiano.
That stamp on the rind of your Parmigiano-Reggiano isn’t just for show; it’s a guarantee of quality and origin. This Protected Designation of Origin (PDO) status means it’s made using centuries-old methods in a specific region of Italy. This process develops the complex, nutty, and salty notes that the pre-grated powders in a canister can never replicate, making it a key ingredient, not just a topping.
Don’t be afraid to leave Italy behind and explore new flavor profiles with your coating. Once you’ve mastered the technique, the breading is your playground.
- Smoky & Spicy: Add 1/2 tsp of smoked paprika and 1/4 tsp of chipotle powder to your Panko or almond flour for a Southwestern kick.
- Lemon & Herb: Mix in the zest of one lemon and a tablespoon of finely chopped fresh parsley for a bright, zesty bite.
- Everything Bagel: Simply add a tablespoon of Everything Bagel seasoning to the coating. It’s a game-changer.
These golden-brown bites are the perfect opening act for a relaxed dinner party. Picture them served warm on a rustic wooden board, a scattering of fresh parsley over the top, ready for guests to grab as they sip a chilled glass of Pinot Grigio. They set a casual, welcoming tone that says the host knows what they’re doing without trying too hard.
- They’ll stay impressively crisp.
- You’ll avoid that dreaded next-day sogginess.
- The flavor will be just as vibrant.
The secret to perfect leftovers? Ditch the microwave. To reheat, spread the zucchini bites in a single layer on a baking sheet or in your air fryer basket. A quick 5-7 minute blast in a 400°F (200°C) oven or air fryer will drive off any moisture they’ve reabsorbed and bring that glorious crunch right back.
For the Air Fryer Fanatics: Yes, you can absolutely use an air fryer, and the results are fantastic. Follow the recipe for prepping and coating the zucchini. Then, place them in a single layer in your air fryer basket—don’t overcrowd it! Cook at 375°F (190°C) for about 8-10 minutes, flipping halfway through, until they are deeply golden and crispy. You might even find they get a little crispier than the oven version!


