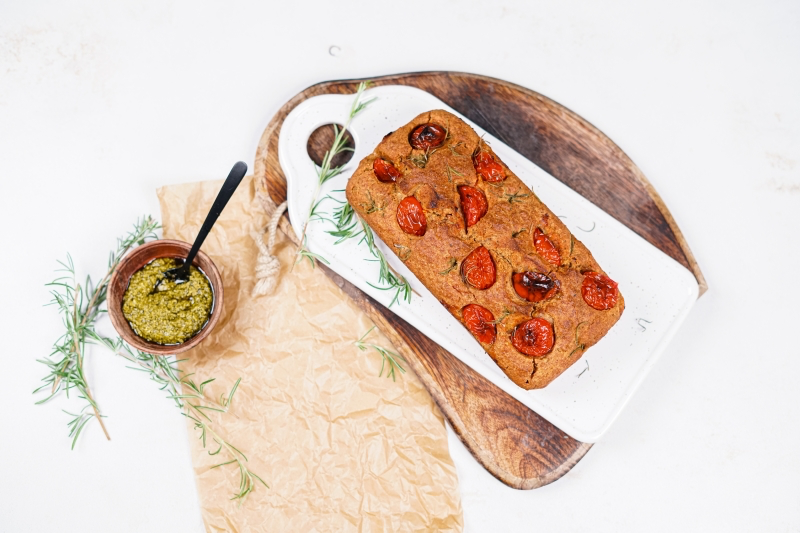
My Go-To Recipe for Hearty Yogurt & Herb Quick Bread (No Yeast!)
I’ve spent more hours in the kitchen than I can count, both in professional settings and just messing around at home, trying to get breads just right. And while I have a ton of respect for the slow, beautiful process of yeast doughs, let’s be honest—sometimes you just want amazing bread, and you want it now. That’s where quick breads come in, and this savory yogurt and herb version is a true workhorse in my recipe collection.
In this article
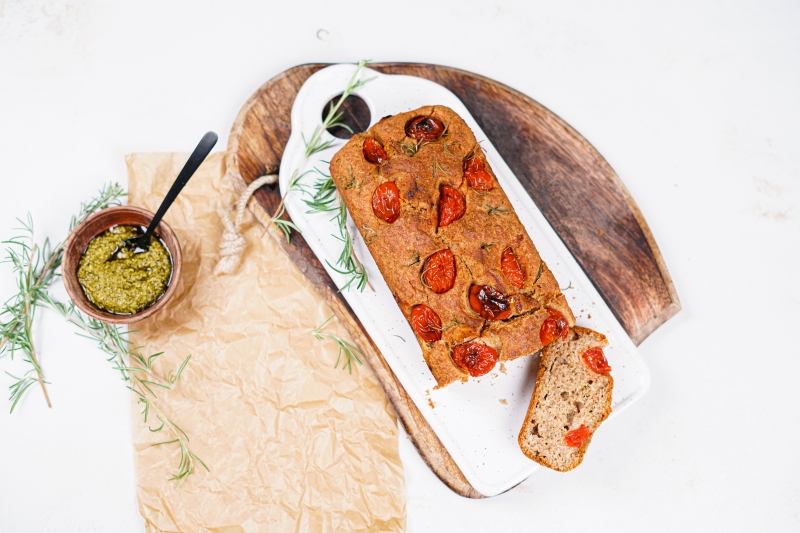
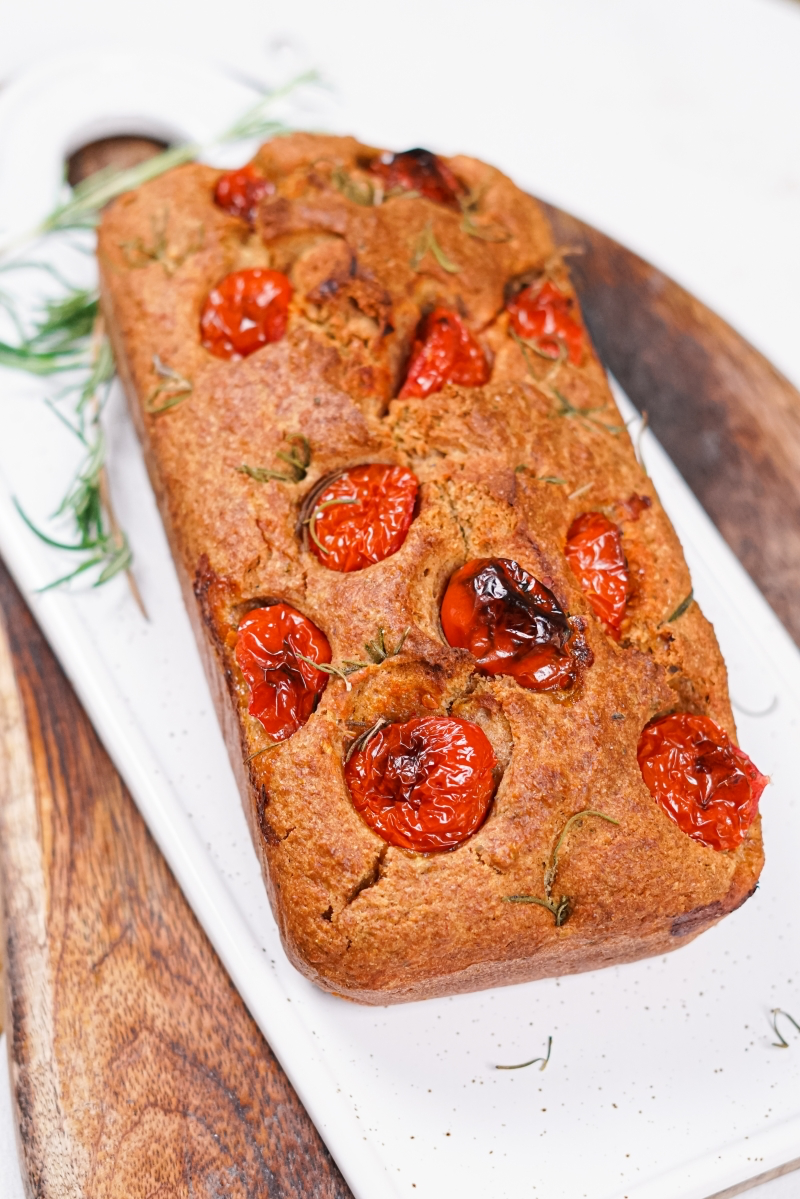
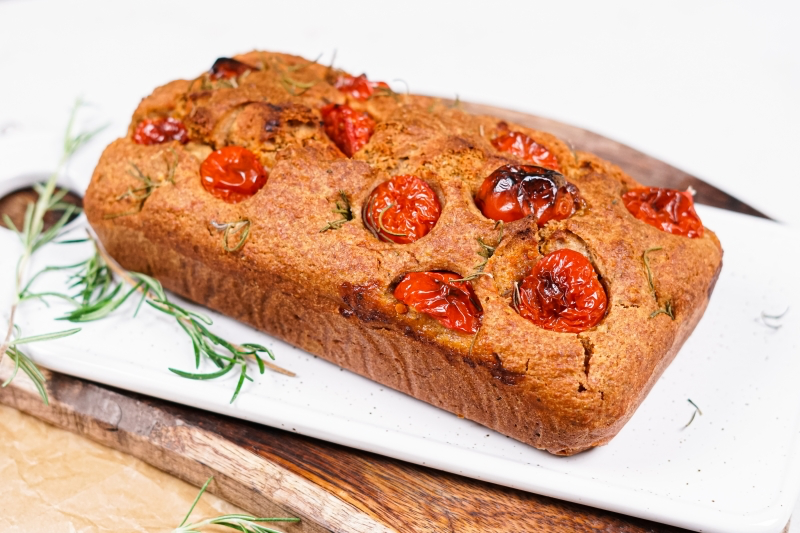
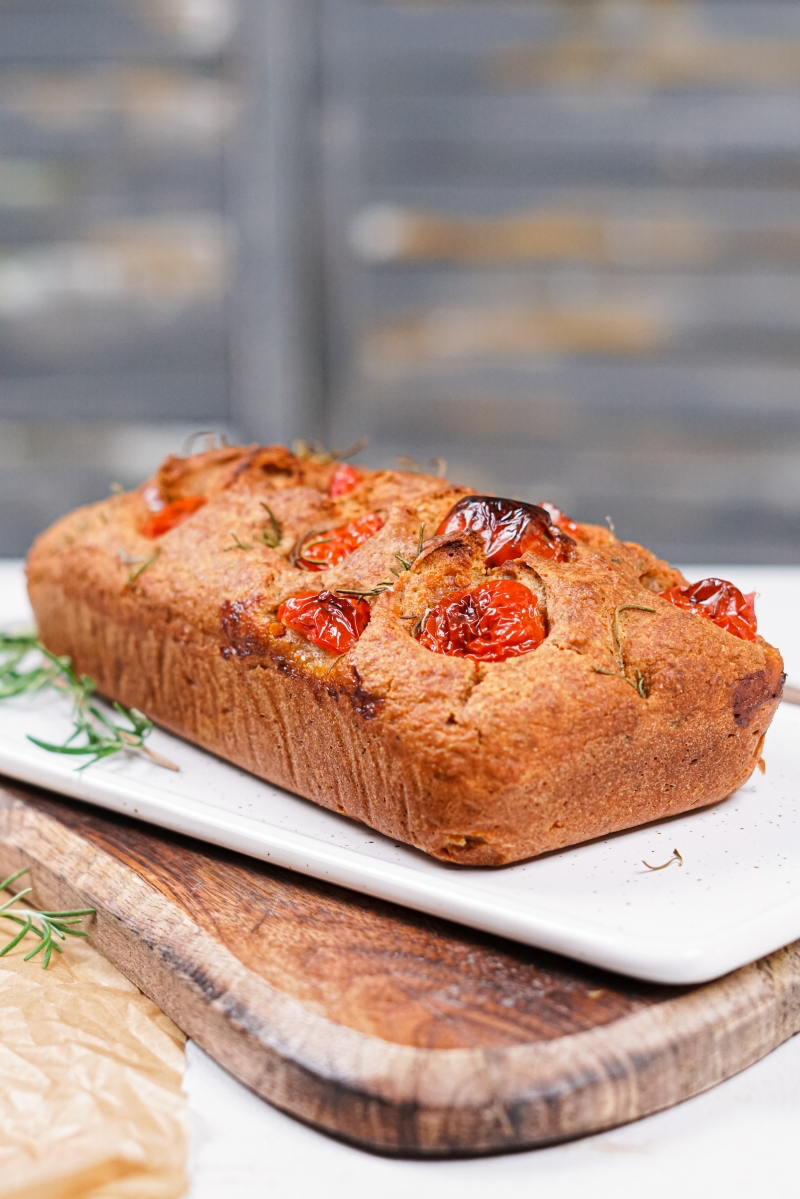
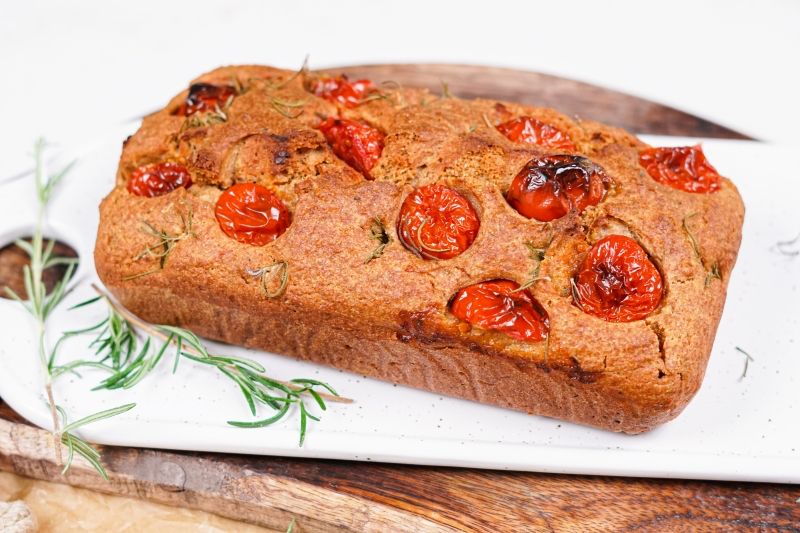
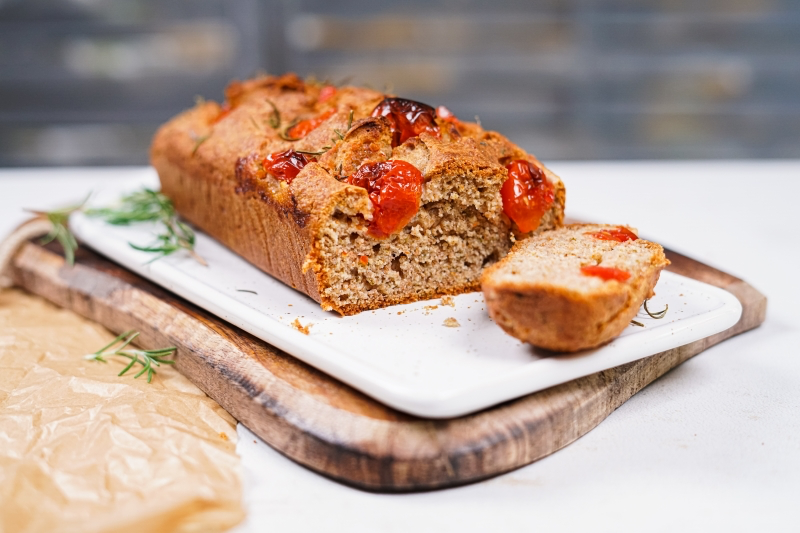
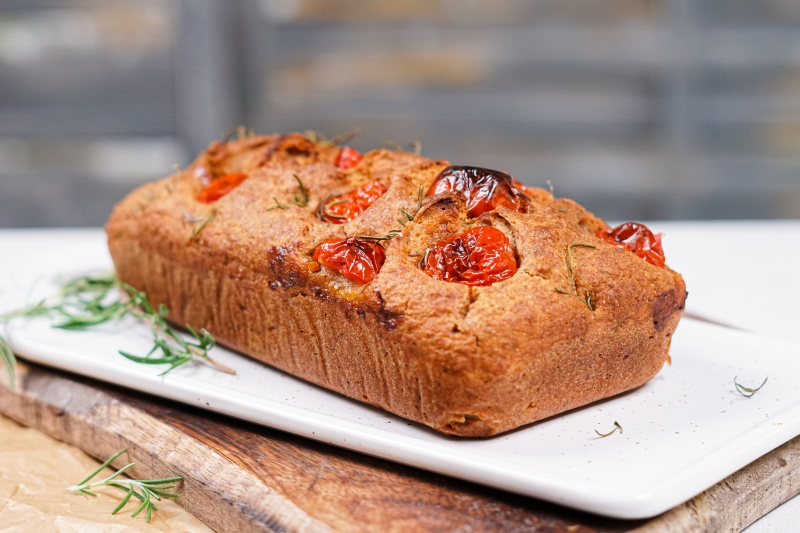
First, let’s set some expectations. This isn’t your fluffy, airy sandwich loaf. Not at all. This bread is dense, incredibly moist, and packed with flavor from whole wheat flour, tangy yogurt, and a punch of herbs and tomato. It’s the kind of bread you want sitting next to a big bowl of soup or toasted and slathered with sharp cheese. It’s a rustic, satisfying loaf that comes together in a flash.
The best part? Once you understand the simple science behind it, you can nail it every single time. And it’s surprisingly quick! You’re looking at about 15 minutes of prep and around 45-55 minutes of baking. You can have a fresh, warm loaf on your counter in just over an hour.
Why This Recipe Actually Works (The Fun Science Bit)
Before we jump in, let’s quickly talk about what’s making this bread rise. It’s not yeast; it’s a simple chemical reaction. Knowing this isn’t just trivia—it’s the key to getting a tender loaf instead of a tough brick.
Basically, we’re using baking soda, which is a base. On its own, it tastes soapy and does nothing. But when you mix it with an acid, it creates carbon dioxide gas… bubbles! Those bubbles are what lift the bread. In this recipe, the acid comes from two places: the lactic acid in the yogurt and a little splash of apple cider vinegar for insurance. I learned that trick the hard way after a batch made with a super mild yogurt tasted vaguely metallic. The vinegar ensures every last bit of baking soda is neutralized, so you only get lift, not a weird aftertaste.
Oh, and a quick interactive test for you. Go ahead, grab your box of baking soda. Drop a tiny pinch into a little vinegar. If it doesn’t fizz up like a science fair volcano, it’s dead. Time for a new box, which you can get for like, a dollar. I’ll wait.
The other big thing is gluten. With yeasted breads, you knead and knead to build up gluten for a chewy structure. Here, we want the exact opposite. We want a tender, almost cake-like crumb. So, the number one rule is: do not overmix. A few lumps in the batter are your friends! They’re a sign you did it right. Overmix, and you’ll get a tough, rubbery loaf. Seriously.
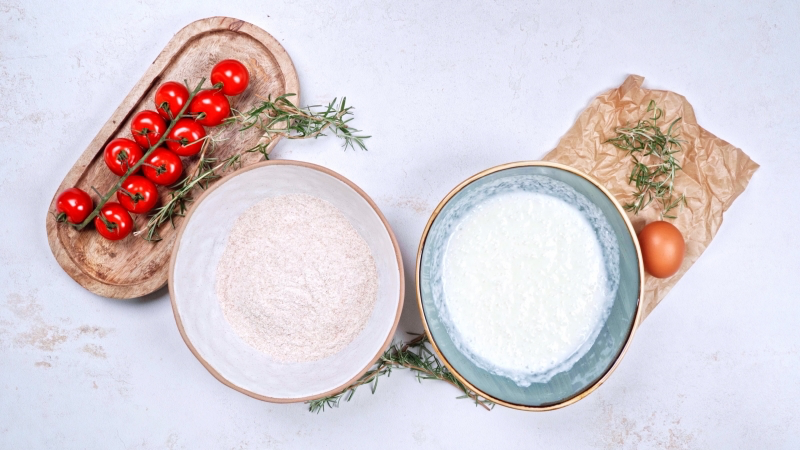
Gather Your Ingredients
The quality of your ingredients really matters here. This recipe is simple, so each component has a chance to shine. Here’s what you’ll need:
- Whole Wheat Flour: 2 cups (about 240g). I prefer a standard or stone-ground whole wheat for its nutty flavor. It’s also ‘thirstier’ than all-purpose, which is key to the texture.
- Baking Soda: 1 teaspoon. Make sure it’s fresh!
- Dried Oregano: 1 teaspoon. This adds a lovely background warmth.
- Salt: 1 teaspoon of fine sea salt.
- Full-Fat Greek Yogurt: 1 cup. The thick, full-fat kind gives the best results for a moist, tender crumb.
- Apple Cider Vinegar: 1 teaspoon. Our little insurance policy!
- A Large Egg: This helps bind everything together.
- Extra-Virgin Olive Oil: 3 tablespoons. Use one with a nice, peppery flavor you enjoy.
- Lukewarm Water: 1/4 cup (about 60ml). You might need a splash more or less depending on your flour and yogurt.
- Cherry or Grape Tomatoes: About 1/2 cup, halved.
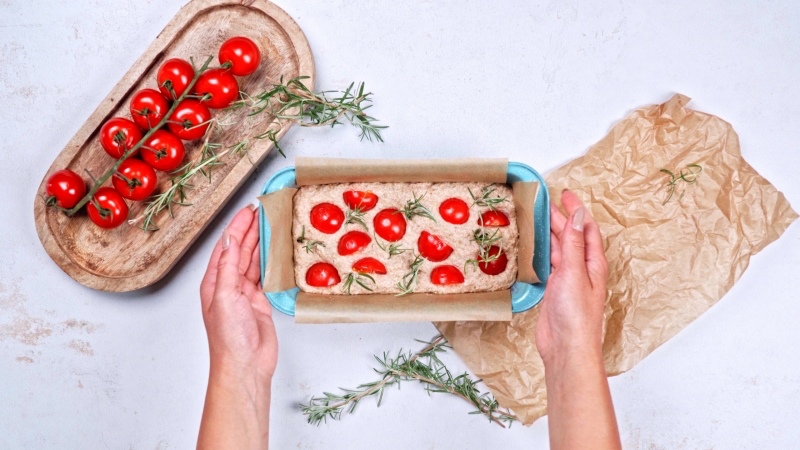
- Fresh Rosemary: 1 large sprig. Nothing beats the aroma of fresh rosemary. A bundle usually costs just a couple of dollars at the grocery store.
The Step-by-Step Method to a Perfect Loaf
In a pro kitchen, we call this ‘mise en place’—getting everything ready before you start mixing. For a time-sensitive quick bread, it’s not just a fancy term; it’s the secret to success.
Step 1: Get Your Kitchen Ready
First things first, get your oven rack in the center position and preheat to 400°F (200°C). We’ll start it hot to get a good ‘oven spring’—that initial puff-up when the batter hits the heat.
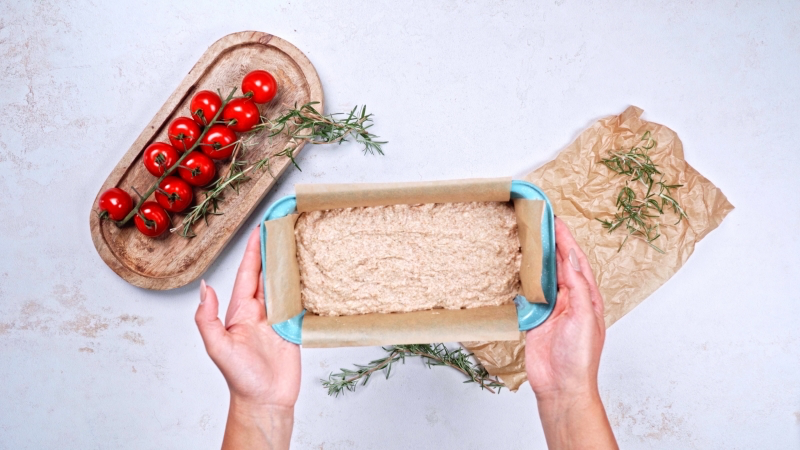
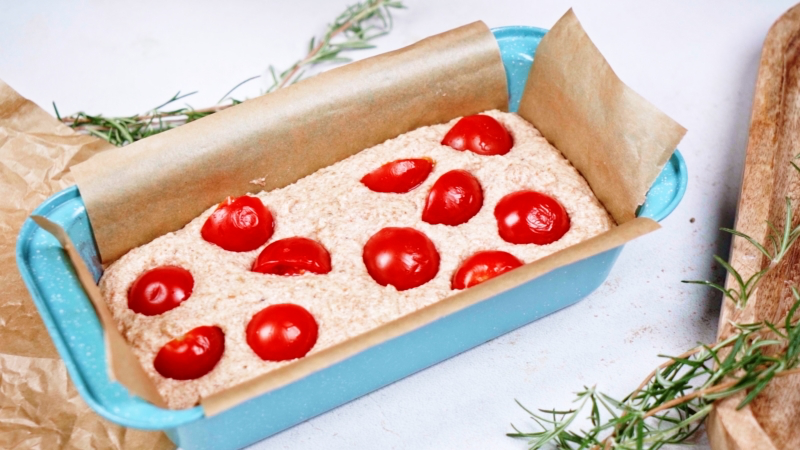
Next, prep your pan. A standard 9×5 inch loaf pan is perfect. Grease it lightly, then line it with parchment paper, leaving some overhang on the two long sides. This creates a little “sling” that lets you lift the hot bread right out without it sticking. It’s a game-changer.
Heads up! What if I don’t have a loaf pan? No worries. You can absolutely make these as muffins. Just line a muffin tin and fill the cups about three-quarters full. They’ll bake much faster, probably around 20-25 minutes. An 8-inch round cake pan will also work, though you may need to check for doneness a bit earlier, around the 35-40 minute mark.

Step 2: Time to Mix (Gently!)
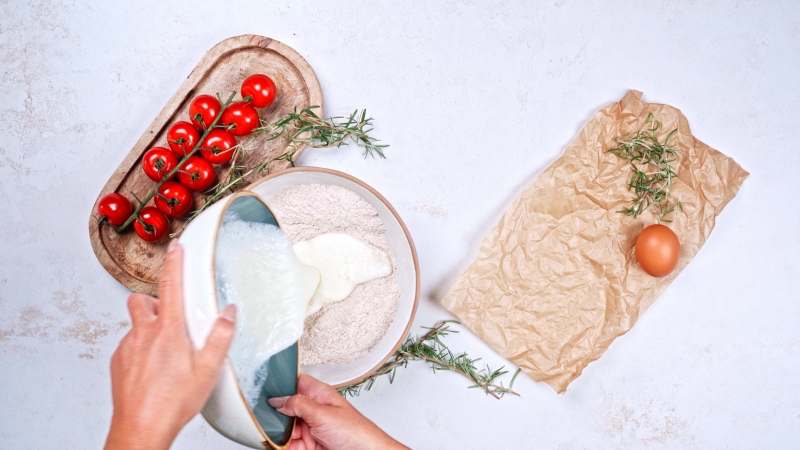
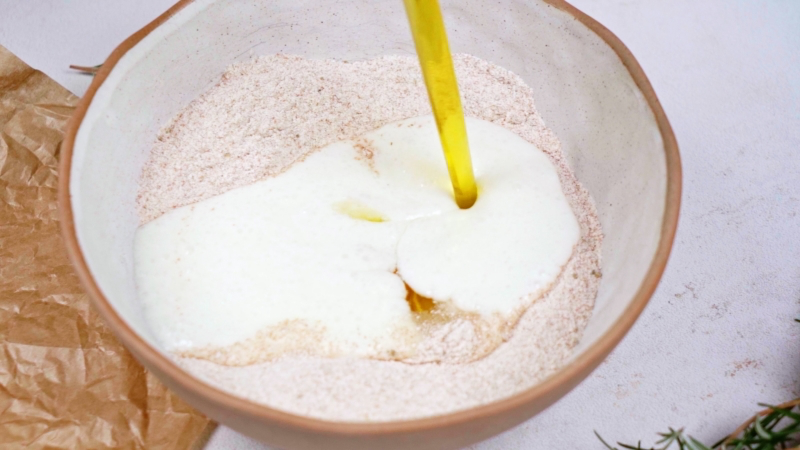
- In a large bowl, whisk together the Greek yogurt, baking soda, and apple cider vinegar. You should see it get a little bubbly and puffy. That’s the reaction starting!
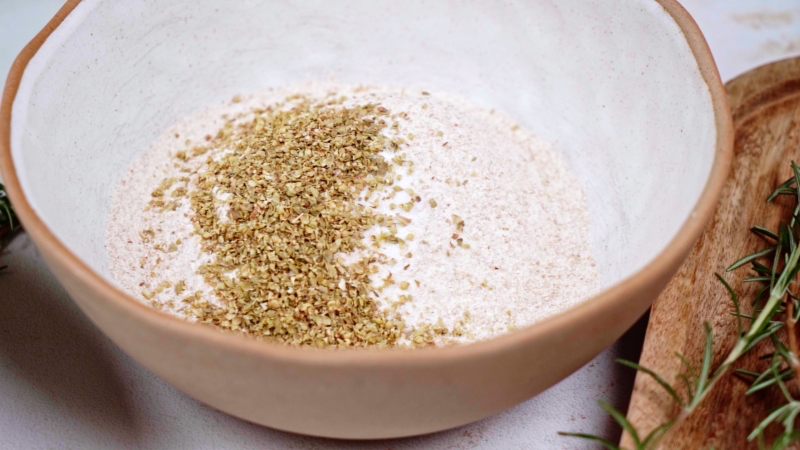
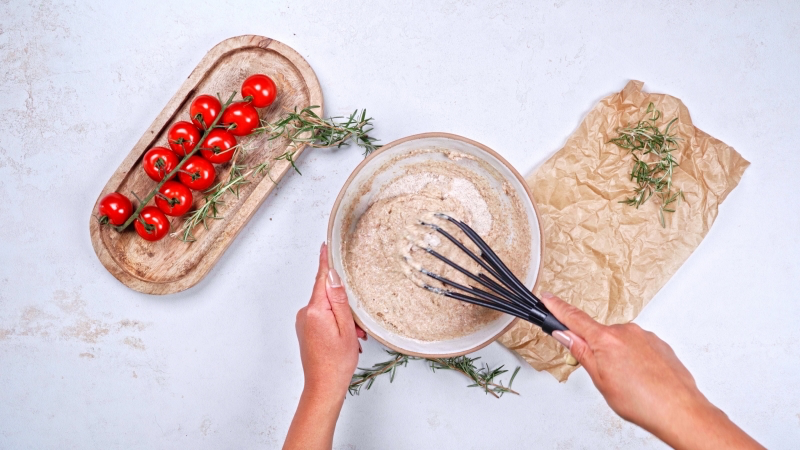
- In a separate, medium bowl, whisk the whole wheat flour, salt, and dried oregano together. Whisking is way better than stirring here because it aerates the flour and gets everything evenly distributed.
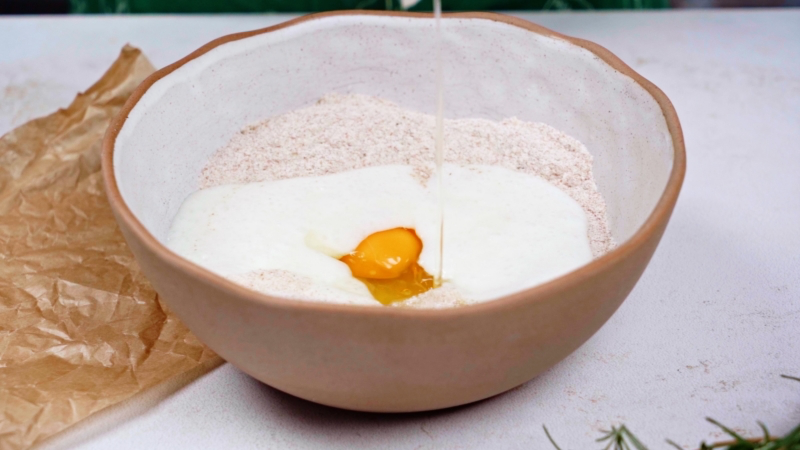
- Pour the yogurt mixture into the dry ingredients. Add the egg, olive oil, and lukewarm water. Now, grab a rubber spatula and gently fold it all together. Scrape the bottom and sides, but stop mixing the second you don’t see any more dry flour. Remember, lumpy is good!
Step 3: Panning and Baking
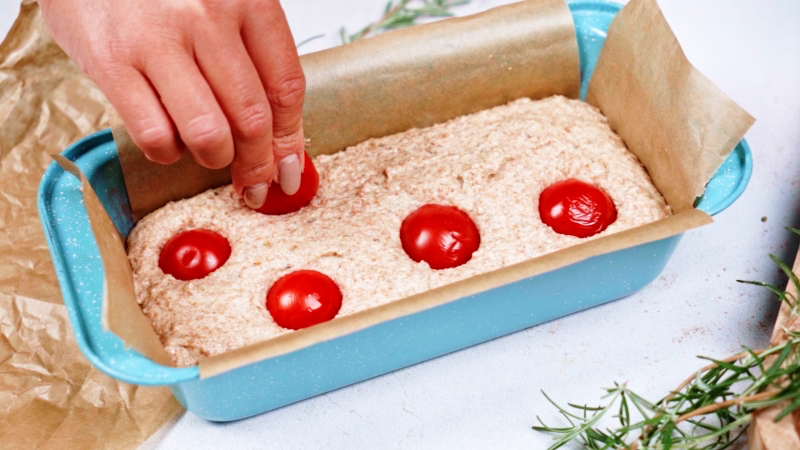
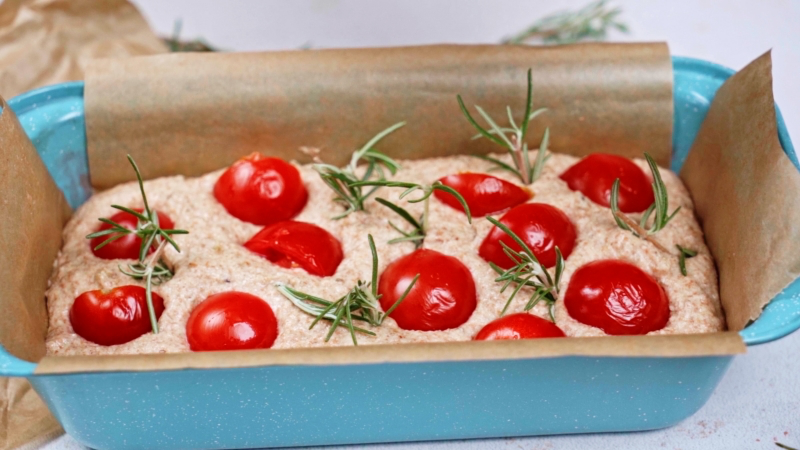
Work quickly! Scrape the thick batter into your prepared loaf pan and spread it evenly with your spatula. Arrange the halved cherry tomatoes on top, cut-side-up. This helps some of their excess moisture evaporate, concentrating the flavor. Strip the needles off your rosemary sprig and scatter them over the top.
Get that pan in the oven and immediately reduce the temperature to 350°F (180°C). This high-heat-then-lower-heat method gives you a great rise without burning the crust.
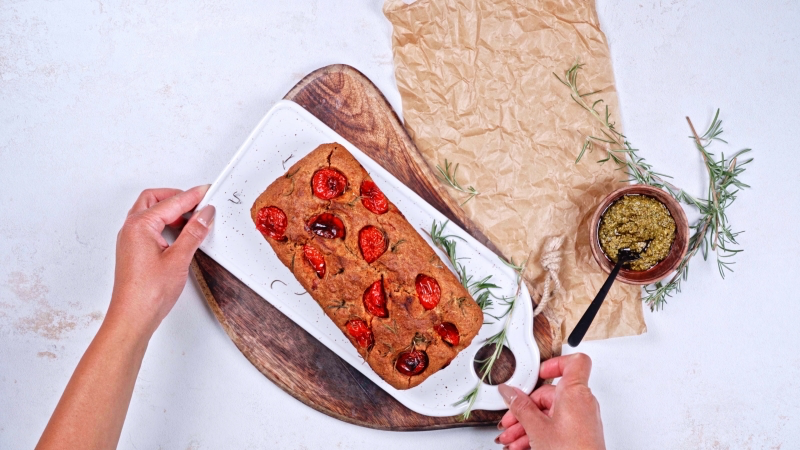
Bake for 45 to 55 minutes. Ovens can be weirdly different, so I’d start checking at the 45-minute mark. The bread is done when a toothpick or wooden skewer inserted into the center comes out with a few moist crumbs clinging to it. If you see wet batter, it needs more time.
Step 4: The Hardest Part—Patience
This step is just as important as the baking. Pull the pan from the oven and let it cool on a wire rack for a solid 15 minutes. The bread is still setting inside. If you slice it now, it’ll be gummy and might even collapse.
After 15 minutes, use your parchment sling to lift the loaf out of the pan and set it directly on the wire rack to finish cooling completely. This lets air circulate and prevents a soggy bottom. Seriously, wait at least another 30 minutes before slicing with a serrated bread knife for clean cuts.

Fun Variations and Pro Tips
Once you’ve got this basic method down, you can play with it. Just try to keep any chunky add-ins to about 3/4 to 1 cup total so you don’t weigh the bread down.
- Cheese & Chive: My personal favorite. Skip the tomato and rosemary. Instead, fold in 3/4 cup of shredded sharp cheddar (a good block runs about $5-7) and 3 tablespoons of finely chopped chives. So good.
- Mediterranean Vibe: Add 1/3 cup of chopped Kalamata olives and 2 tablespoons of chopped, oil-packed sun-dried tomatoes. Make sure to pat them both dry before adding!
- Quick Tip – Dietary Swaps: To be frank, I haven’t had great success with a gluten-free version, as this recipe really relies on the properties of whole wheat. For a dairy-free option, a thick, unsweetened plant-based yogurt (like a coconut or cashew-based Greek style) might work, but it will likely change the final texture and tang.
- Lesser-Known Trick – Make-Ahead Mix: For even faster bread, you can pre-mix the dry ingredients! Whisk together a big batch of the whole wheat flour, salt, and oregano. Store it in an airtight container. When you want to bake, just measure out 2 cups of the mix and add your wet ingredients.

Uh-Oh: Common Problems and How to Fix Them
Don’t worry, I’ve made all these mistakes so you don’t have to.
- The Problem: My bread is a dense, heavy brick.
- The Fix: You almost certainly overmixed it. Next time, be gentle! It could also be dead baking soda. (See? I told you to test it!)
- The Problem: It has a soapy or bitter aftertaste.
- The Fix: That’s the taste of unreacted baking soda. It means there wasn’t enough acid. Maybe your yogurt was very mild. This is exactly why we add that teaspoon of vinegar.
- The Problem: The outside is burnt but the inside is raw goo.
- The Fix: Your oven is too hot. The crust cooked way too fast. The best $10 you can spend as a baker is on an oven thermometer to see what temperature your oven actually is. To save a loaf that’s browning too fast, you can make a loose tent out of aluminum foil and cover the bread for the last 15-20 minutes of baking.
How to Store and Serve Your Masterpiece
Once the loaf is completely cool, wrap it tightly in plastic wrap or put it in an airtight container. It’ll stay fresh at room temperature for about three days. Whatever you do, do not put it in the fridge. The cold air makes bread go stale so much faster.
For longer storage, slice the cooled loaf, wrap it well, and freeze it for up to three months. You can toast the slices right from the freezer. It’s absolutely killer when toasted and served alongside a creamy tomato bisque or a hearty lentil stew. But honestly, a thick slice, still slightly warm, with a good smear of salted butter is pure perfection.
Inspiration:
Greek Yogurt vs. Regular Yogurt: For a denser, richer crumb, full-fat Greek yogurt like Fage or Chobani is your best friend. Its lower water content means a more concentrated flavor and a sturdier loaf.
Plain Yogurt: This will yield a slightly lighter, more tender bread. You might need to reduce other liquids by a tablespoon to compensate for its higher moisture content.
The choice depends entirely on the texture you’re after!
- A super moist, tender crumb.
- A deep, tangy flavor that complements savory herbs.
- A beautiful golden-brown crust.
The secret? Don’t skip the fat. Using a full-fat yogurt is non-negotiable for achieving that luxurious, satisfying texture that sets this quick bread apart from drier, crumbly versions.
Can I make this bread gluten-free?
Yes, but with a specific approach. Swap the regular flour for a high-quality 1-to-1 gluten-free baking blend, such as Bob’s Red Mill Gluten Free 1-to-1 Baking Flour. These blends already contain xanthan gum, which is crucial for providing the structure that gluten normally would. Expect a slightly denser loaf and let it cool completely before slicing to prevent it from crumbling.

The precursor to modern quick breads, soda bread, was developed in Ireland around the 1830s. It was a food of necessity, using the affordable chemical leavener sodium bicarbonate when yeast was scarce or too expensive.
To really wake up your flavors, try toasting whole spices like cumin or coriander seeds in a dry pan for a minute before grinding and adding them to your flour. For nuts or seeds like sunflower or pumpkin, a quick toast will deepen their nutty character and add a delightful crunch to the finished loaf.
Take your bread on a flavor journey! Instead of the classic rosemary and thyme, try these combinations:
- Mediterranean Sun: Chopped sun-dried tomatoes, Kalamata olives, and dried oregano.
- Spicy Southwest: A teaspoon of chipotle powder, roasted corn kernels, and chopped fresh cilantro.
- Cheesy Italian: Grated Parmesan or Pecorino Romano, fresh basil, and a clove of finely minced garlic.
The number one enemy of quick bread is overmixing. Once you combine the wet and dry ingredients, you’ve started the chemical reaction. Mix only until the flour streaks disappear. A few lumps are perfectly fine! Overworking the batter develops too much gluten, resulting in a tough, rubbery loaf instead of a tender one.
According to the Wheat Foods Council, whole wheat flour absorbs more moisture than all-purpose white flour.
What does this mean for your bread? If you’re swapping some or all of the white flour for whole wheat, your batter might seem thicker. This is normal. This absorbency is also what gives whole wheat bread its characteristic dense, moist, and satisfyingly hearty texture. For a good balance, start by replacing just one-third of the all-purpose flour with a brand like King Arthur Whole Wheat.
To get that perfect, rustic bakery look, don’t just dump the batter in the pan. Gently shape it and then use a sharp knife or a bread lame to make a single, decisive slash down the center, about half an inch deep. This ‘scoring’ not only looks beautiful but also controls where the bread expands, preventing it from cracking randomly on the sides.
How do I keep my yogurt bread from getting soggy?
The moisture that makes this bread so delicious can be its downfall in storage. Never wrap it in plastic while it’s still warm. Let it cool completely on a wire rack. For the first day, simply storing it cut-side down on a wooden board is enough. For longer storage, wrap it in a clean tea towel or place it in a paper bag. Avoid plastic wrap, which traps moisture and encourages a gummy crust.
This bread is a canvas for delicious toppings. Think beyond butter. Try it with:
- A generous schmear of whipped feta with a drizzle of honey.
- Spicy tomato jam or a classic onion chutney.
- Cream cheese mixed with chopped chives and black pepper.
- A simple, high-quality olive oil for dipping, like a grassy Arbequina.
Nothing quite fills a home with a sense of comfort and care like the smell of baking bread. It’s more than just a recipe; it’s an act of creation that engages all the senses—the feel of the dough, the sight of it rising and browning, and that final, glorious aroma that promises warmth and satisfaction.
Dark Metal Pan: The best choice for a deeply browned, crisp crust. Dark surfaces absorb more heat. A heavy-gauge aluminized steel pan, like those from USA Pan, distributes heat evenly for a consistent bake.
Glass or Ceramic Pan: These are insulators, so they heat up more slowly but retain heat longer. You may need to lower the oven temperature by 25°F (15°C) and bake a little longer to prevent the edges from over-baking before the center is done.
Don’t have yogurt or buttermilk? You can make a quick substitute. For every 1 cup of milk (whole milk works best), stir in 1 tablespoon of an acid—either lemon juice or white vinegar. Let it sit for 5-10 minutes. It will curdle slightly and thicken, creating a perfect acidic substitute to react with the baking soda.
A hearty, savory bread is the perfect partner for a simple, nourishing soup. It transforms a light meal into something truly substantial. Think about pairing a slice of this herb bread with:
- A creamy tomato and basil soup.
- A rustic lentil and vegetable stew.
- A silky butternut squash soup topped with toasted pumpkin seeds.


