The Real Secret to Silky, Restaurant-Quality Soups at Home
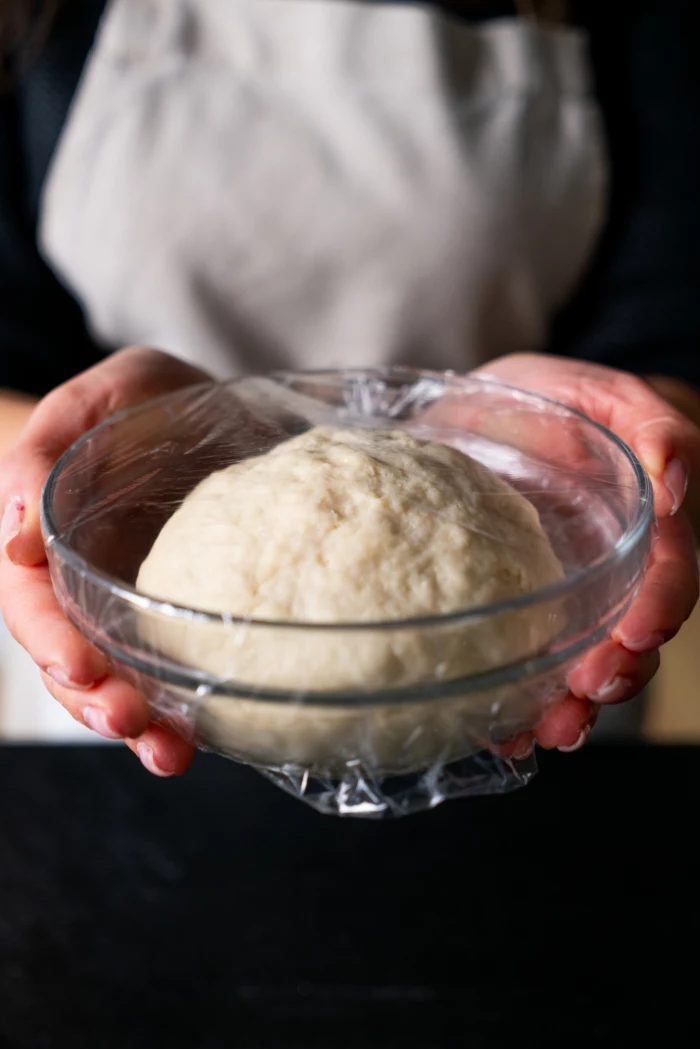
I spent my early years in professional kitchens where speed was king. We churned out gallons of soup daily, and it was decent, but it was purely functional. It wasn’t until I worked for a classically trained chef that I really got the difference between a simply thick soup and a truly creamy one. I’ll never forget him making me remake a potato leek soup three times in a row. Not for flavor, but for texture. He looked at me and said, “Anyone can blend vegetables. A real cook knows how to create silk.”
In this article
- So, What Actually Makes a Soup Creamy?
- How to Build Flavor Like a Pro
- The Blending Process: Your Guide to a Silky Finish
- Getting Pro-Level Creaminess Without Dairy
- Soup First-Aid: Quick Fixes for Common Problems
- Case Study 1: Roasted Butternut Squash Soup
- Case Study 2: Classic Leek and Potato Soup
- Case Study 3: The Ultimate Mushroom Soup
- Quick Win: 20-Minute Creamy Tomato Soup
- How to Store, Freeze, and Reheat Your Soup
- Inspiration Gallery
That lesson has been my guiding star. The magic of a memorable, velvety soup isn’t about one fancy ingredient. It’s about a series of small, intentional steps that build flavor and texture from the ground up. This isn’t just a recipe list; it’s a peek behind the curtain at the techniques we use in professional kitchens. Once you nail these, you can turn just about any vegetable into a masterpiece.

So, What Actually Makes a Soup Creamy?
Most people jump straight to thinking the answer is, well, cream. But honestly, that’s just the final touch. True, luxurious creaminess comes from a powerful trio of factors working in harmony. Getting this right is what separates a grainy, watery soup from one with a rich, satisfying body that coats the back of a spoon.
1. The Power of Starch
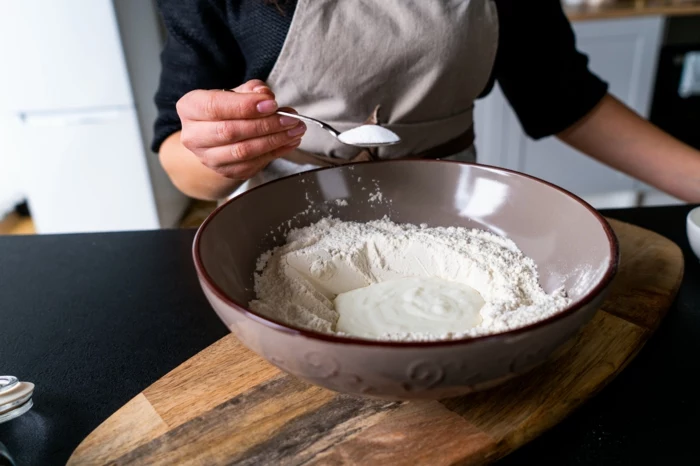
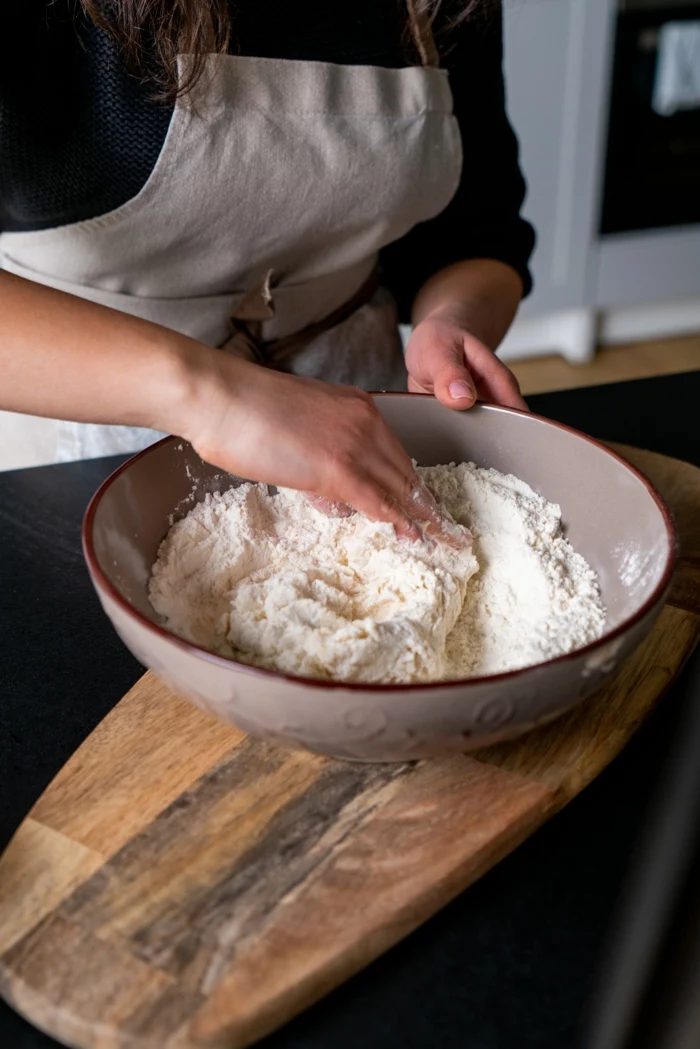
Starch is your best friend and primary thickener. When you heat starch in a liquid, its granules swell up and burst, releasing long molecules that create a web, thickening the liquid around them. It’s simple science, but where you get that starch from really matters.
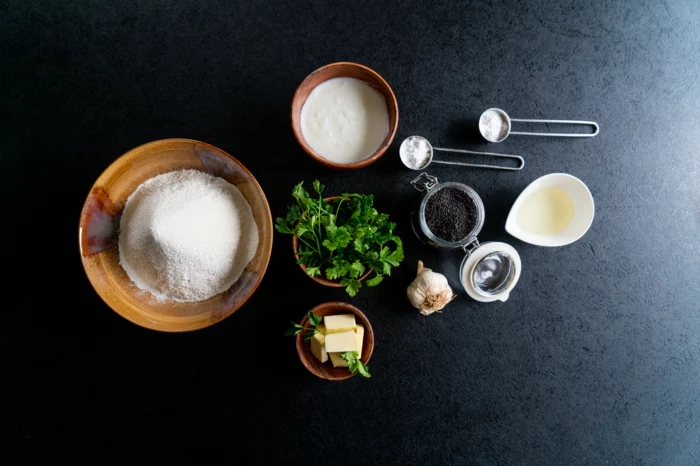
- Potatoes: The old-school classic for a reason. Starchy spuds like Russets or Idaho potatoes are your best bet. They break down completely, releasing tons of starch for a thick, super-smooth result. On the other hand, waxy potatoes like red or Yukon Golds are designed to hold their shape, making them great for stews but not ideal for purées.
- Grains & Bread: This is a fantastic pro trick. If you’re making a soup with low-starch veggies like broccoli or zucchini, adding a thickener is key. Try tossing in about 2-3 tablespoons of uncooked white rice per 6 cups of liquid, or even a thick, torn-up slice of stale, crusty bread. It’s a budget-friendly way to get that body without affecting the flavor much.
- The Veggies Themselves: Don’t forget that many vegetables have their own natural starches and sugars. Root vegetables like carrots, parsnips, and especially winter squash are packed with them, contributing beautifully to the final texture.

2. The Magic of Emulsification (aka Fat)
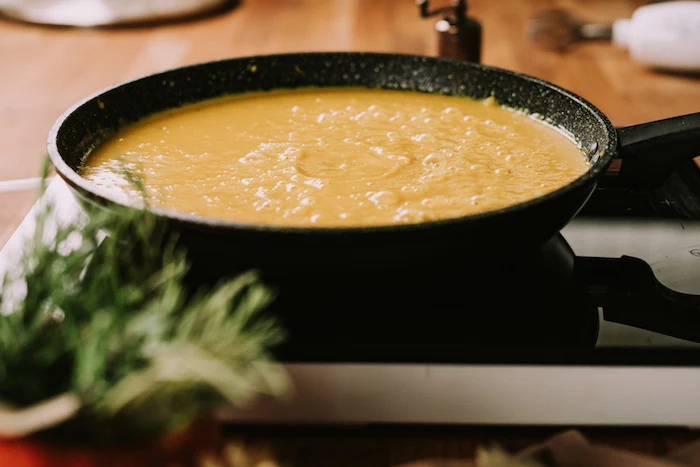
Fat isn’t just for flavor; it’s all about that luxurious mouthfeel. When you blitz a soup in a high-speed blender, you’re breaking down fats from butter, oil, or cream into microscopic droplets and suspending them evenly throughout the soup. This is called an emulsion—the same principle behind mayonnaise. This emulsion is what coats your tongue and gives the soup a rich, silky feeling that starch alone just can’t replicate.
3. The Mechanical Breakdown (The Purée)
This is the final, physical step of pulverizing all the tough plant fibers. The more completely you can obliterate these fibers, the smoother and more velvety your soup will be. The tool you choose for this job makes a huge difference, which we’ll get into now.
How to Build Flavor Like a Pro
A truly great soup is built in layers. You can’t just boil some veggies and hope for the best. Every single step is a chance to deepen the flavor.
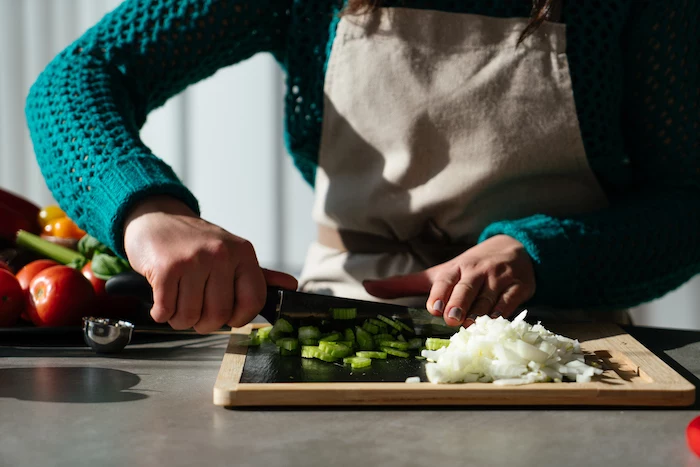
The Aromatic Base
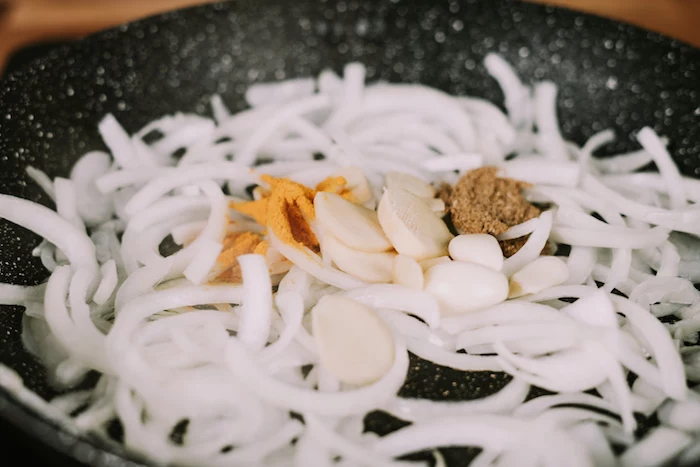
Almost every legendary soup begins with a base of aromatic vegetables. In traditional European cooking, this is the classic mirepoix: a simple mix of two parts onion, one part celery, and one part carrot, all diced up. These veggies are cooked slowly in fat to sweat out their moisture and release their natural sweetness, creating the foundational flavor of your soup.
You’ll see variations everywhere:
- The Italian soffritto often adds garlic, parsley, or fennel to the mix, usually cooked in olive oil.
- The Cajun “Holy Trinity” swaps the carrot for bell pepper, forming the base of dishes like gumbo.
The trick is to cook this base slowly. You want to sweat them, not brown them… unless you’re intentionally going for a roasted flavor.
Sweating vs. Sautéing: This Is CRUCIAL
This is one of the first things I teach any new cook. The temperature of your pan changes everything.
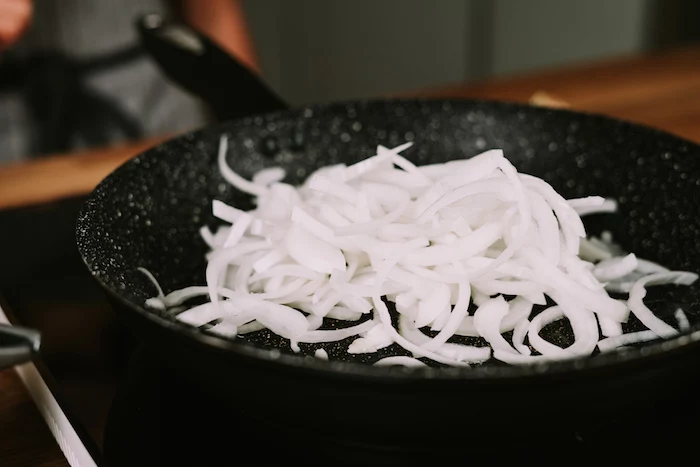
Sweating is when you cook over low to medium heat, sometimes with the lid of the pot left slightly ajar. The goal is to gently soften the vegetables, making them release their sweetness without getting any color. This is what you want for a delicate soup like potato leek or a vibrant spring pea soup. You’ll know it’s working when the onions look translucent, which can take a good 8 to 10 minutes. Patience is key!
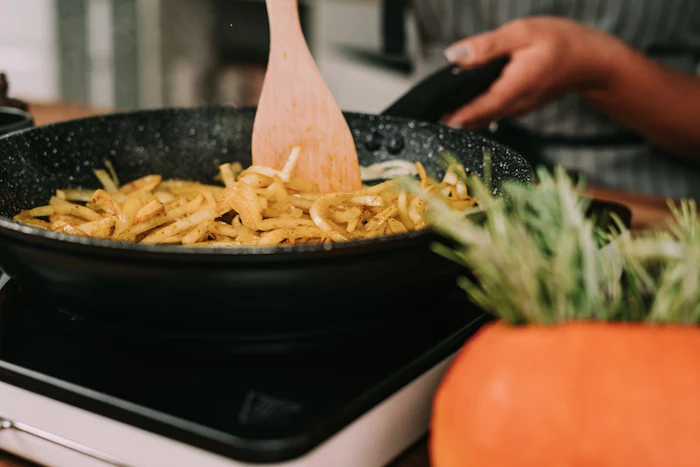
Sautéing, by contrast, uses higher heat to deliberately brown the vegetables. This browning process creates a chemical reaction that develops hundreds of new, complex flavor compounds. It’s perfect for soups where you want a deep, nutty, roasted flavor, like a butternut squash or mushroom soup.
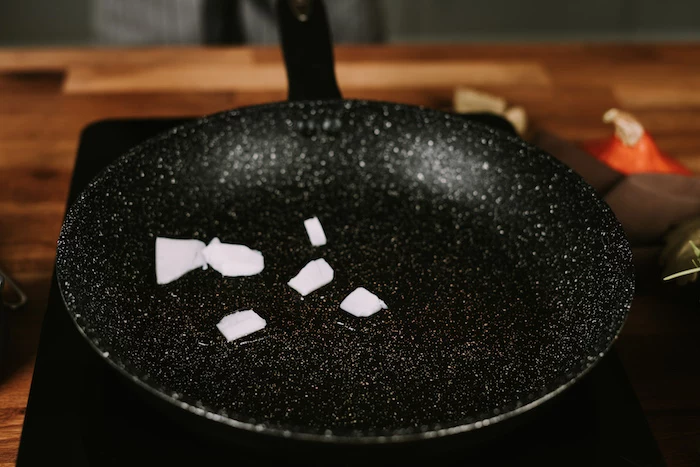
Don’t Waste Flavor: The Art of Deglazing
After you’ve sautéed your veggies, you’ll see delicious browned bits stuck to the bottom of the pot. In a restaurant, we call this the ‘fond’, and it is pure gold. A rookie mistake is to leave it there. To capture it, we deglaze the pan.
Just pour a little cool liquid—like wine, stock, or even water—into the hot pot. It will sizzle and steam like crazy. Use a wooden spoon to scrape the bottom of the pot, lifting all those flavorful bits into the liquid. You’ve just given your soup an instant, massive flavor boost. Seriously, don’t skip this.
The Blending Process: Your Guide to a Silky Finish
Here’s where the magic happens. Your choice of equipment and, more importantly, your attention to safety are paramount.
Choosing Your Weapon: Immersion vs. Stand Blender
There’s a time and a place for both, and knowing which to use is half the battle.
The Immersion Blender (or Stick Blender) is the workhorse of many pro kitchens because it’s so darn fast and convenient. You blend right in the pot, which means less to clean up. For home cooking, it’s a game-changer. However, let’s be honest: it rarely gives you a perfectly silky-smooth texture. You’ll usually end up with a slightly more rustic, but still delicious, result. Quick tip: To avoid splashing soup all over your kitchen, tilt the pot so the liquid pools to one side, making sure the blender head is fully submerged before you turn it on.
A High-Powered Stand Blender (like a Vitamix or Blendtec) is the undisputed champion for that ultra-velvety, five-star restaurant texture. It pulverizes fibers in a way an immersion blender just can’t dream of. But this power comes with a major safety warning…
A Serious Safety Warning: Blending Hot Liquids
Okay, let’s have a serious chat. I cannot stress this enough. Hot liquids expand like crazy when they’re agitated. The steam creates immense pressure inside a sealed blender, which can literally blow the lid off and spray scalding hot soup everywhere. I once saw an apprentice get a nasty burn this way. He never made that mistake again.
This is the ONLY safe way to blend hot soup in a stand blender:
- Let the soup cool down a bit first. It shouldn’t be ripping hot.
- Fill the blender no more than one-third full. Never, ever more than half. Work in batches if you have to.
- Remove the little plastic cap in the center of the lid. This small hole is essential for letting steam escape.
- Cover the lid with a folded kitchen towel and hold it down firmly with your hand. This blocks any splashes while still letting the steam vent.
- Start the blender on its lowest speed. Only after a stable vortex forms should you gradually ramp up the speed.
Trust me, these steps are not optional. They are non-negotiable for your safety.
The Final Polish: To Strain or Not to Strain?
If you’re aiming for that truly flawless, professional finish, you have to strain your soup after blending. This simple step removes any tiny, stubborn bits of fiber or skin the blender might have missed. For a regular weeknight meal? You can probably skip it. But for a special occasion, it elevates the soup to a whole new level.
Use a fine-mesh sieve. For the absolute best results, the pros use a cone-shaped strainer called a chinois. (By the way, the cone shape just gives it more surface area, which helps the liquid pass through more quickly). You can find them at specialty kitchen stores, but a great home alternative is a regular fine-mesh sieve, maybe lined with a layer of cheesecloth, which you can get for a few bucks at any grocery store.
Getting Pro-Level Creaminess Without Dairy
Heads up for my dairy-free and vegan friends! You can absolutely achieve incredible creaminess without a drop of milk or cream. The secret is using fats and starches from other sources.
My go-to is soaked cashews. They are a miracle worker. Just take about a half-cup of raw, unsalted cashews, cover them with very hot water, and let them soak for at least 30 minutes. Then, drain them and blend them with a splash of fresh water until you have a smooth, thick cream. Stir this into your soup at the end for an unbelievably rich texture.
Other great options include:
- Full-Fat Coconut Milk: Use the kind from a can, not the beverage in a carton. It’s fantastic in squash, carrot, or Thai-inspired soups.
- Silken Tofu: A block of silken tofu blended into a soup adds protein and a creamy body with almost no flavor.
- White Beans: A can of cannellini beans, rinsed and blended into the soup, adds a surprising amount of creamy thickness.
Soup First-Aid: Quick Fixes for Common Problems
Even the pros run into issues. Here’s a quick troubleshooting guide for when things don’t go exactly as planned.

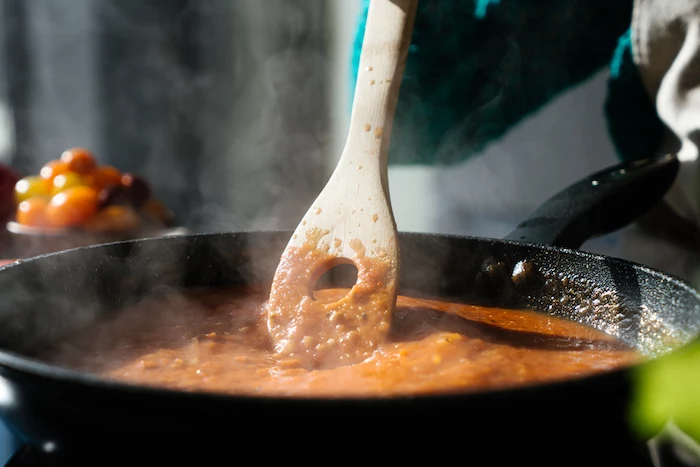
- My soup is too thin! No worries. You can simmer it for a while with the lid off to let it reduce and thicken naturally. The fastest fix? Make a “slurry.” Whisk a tablespoon of cornstarch or flour with a few tablespoons of cold water until smooth, then whisk that into your simmering soup. It’ll thicken up in a minute or two.
- My soup is way too thick! This is the easiest fix of all. Just whisk in more liquid—be it stock, broth, or even a splash of water—until it reaches the consistency you love.
- My soup tastes… flat. Nine times out of ten, it just needs more salt. But if you’ve already salted it well, it probably needs acid! A squeeze of fresh lemon juice or a tiny splash of vinegar right at the end can brighten all the flavors and make them pop. For rich, earthy soups, a dash of soy sauce or Worcestershire can also add a wonderful depth.
- My soup feels gritty. This usually means one of two things: you didn’t blend it long enough, or your blender isn’t quite powerful enough to break everything down. The only real fix after the fact is to pass it through a fine-mesh sieve. It’s an extra step, but it will save the texture.
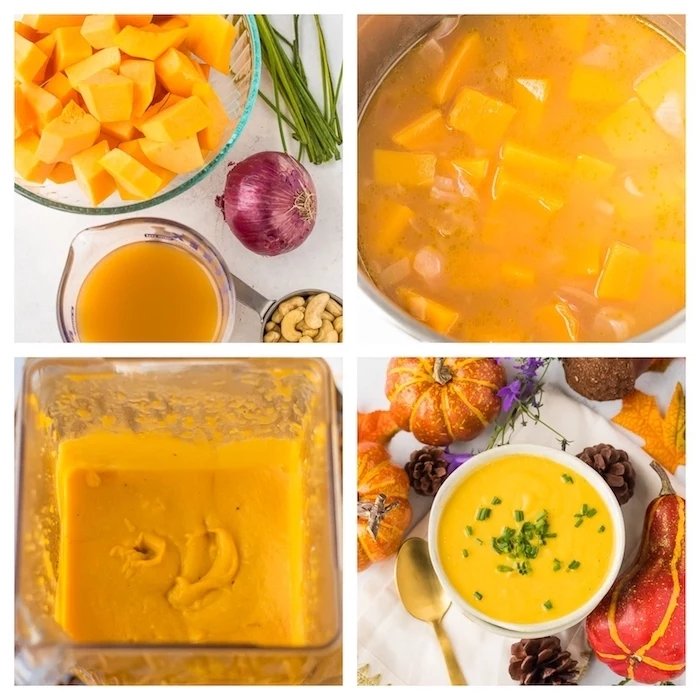
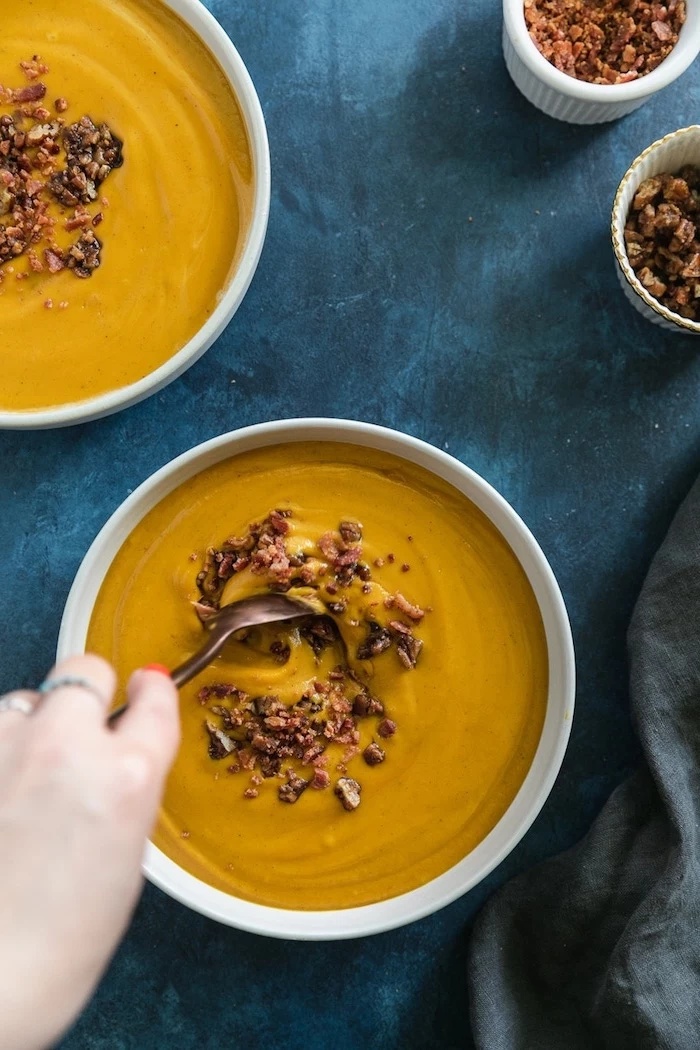
Case Study 1: Roasted Butternut Squash Soup
Total Time: Approx. 1 hour 15 minutes
This soup is all about deep, caramelized flavor. We achieve this by browning, not sweating.
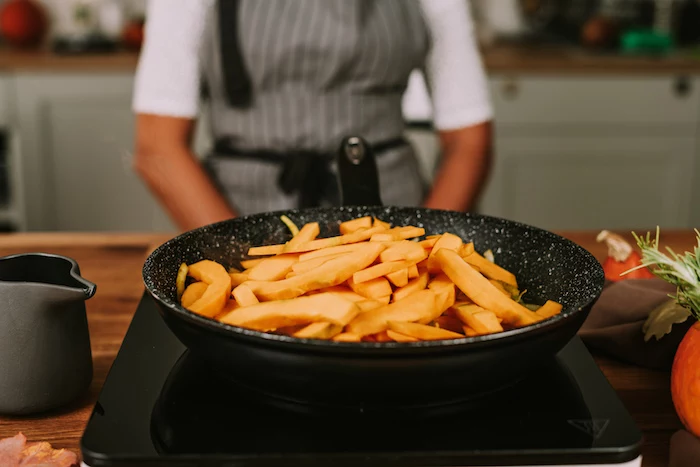
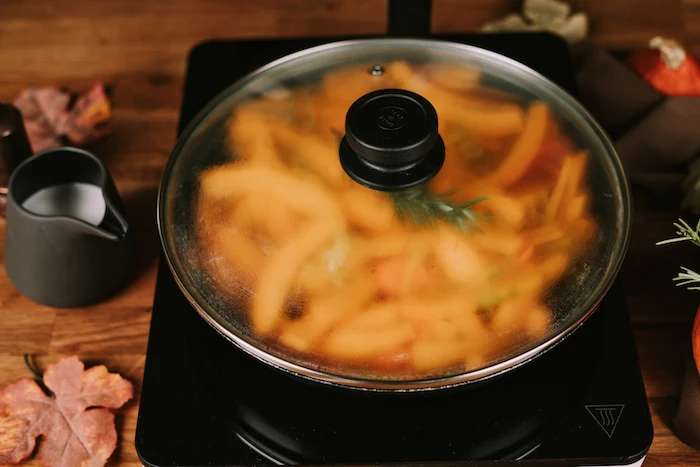
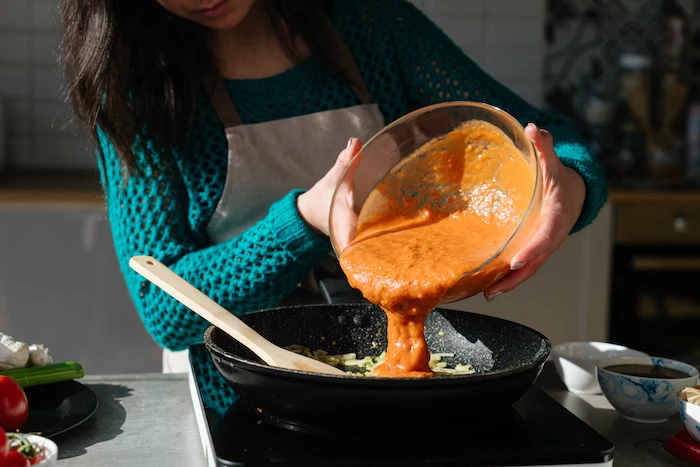
The Technique in Action: Start by roasting your squash. Cut a large butternut squash in half, scoop the seeds, and roast it cut-side down on a baking sheet at 400°F (200°C) for 40-50 minutes. While it roasts, sauté a diced onion and two carrots in a pot until they get some nice color. Add a diced apple and cook for a couple more minutes. Toss in your spices—cinnamon, nutmeg, a pinch of cayenne—and toast them for 30 seconds. Scoop in the roasted squash flesh, add about 6 cups of stock, and simmer for 15 minutes. Blend safely, return to the pot, and stir in a half-cup of heavy cream or canned coconut milk off the heat. If it tastes flat, add salt and a squeeze of lemon.
Case Study 2: Classic Leek and Potato Soup
Total Time: Approx. 50 minutes
Here, we want the opposite: a clean, delicate flavor and a pale color. No browning allowed!
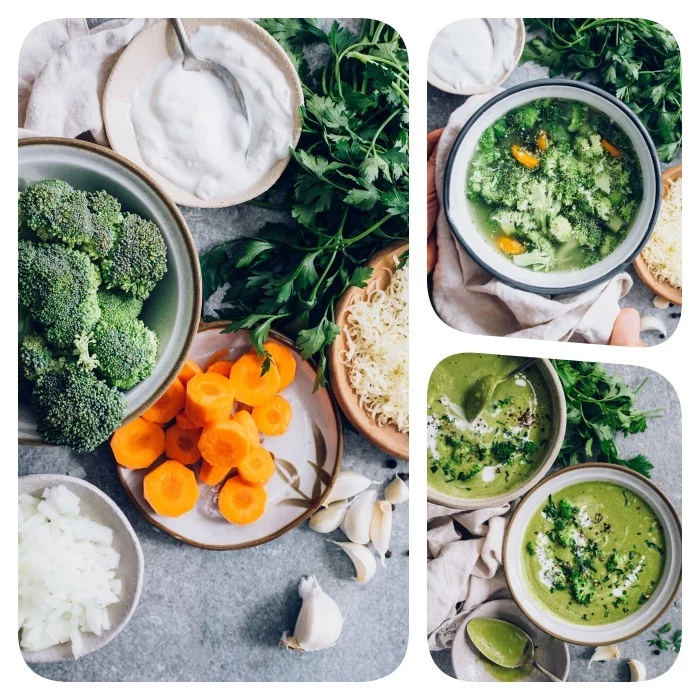
The Technique in Action: First, clean your leeks properly! They trap a ton of grit. The best way is to slice them first, then put the slices in a big bowl of cold water. Swish them around, then let them sit for a few minutes so the grit sinks. Lift the leeks out of the water with your hands or a strainer—don’t just pour the bowl through a colander, or you’ll pour all that grit right back on top! Now, sweat the leeks and an onion in butter over low heat for 10-12 minutes until soft and translucent, with zero color. Add your diced Russet potatoes and 6 cups of stock, simmer gently until the potatoes are tender, then blend until perfectly smooth. For an extra-silky feel, strain it. Return to the pot, stir in a cup of cream over low heat (don’t boil!), and season with salt and white pepper.

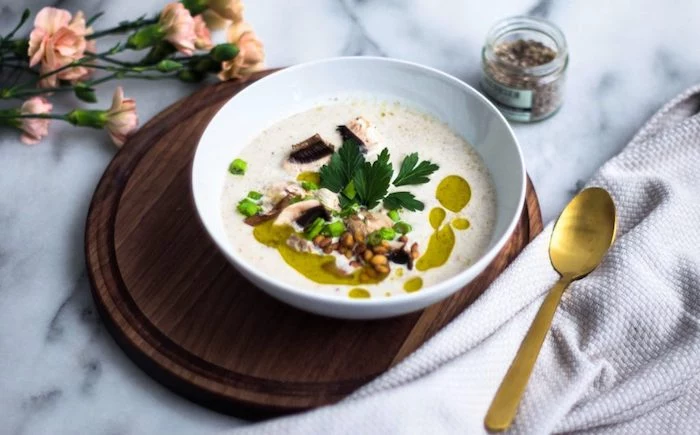
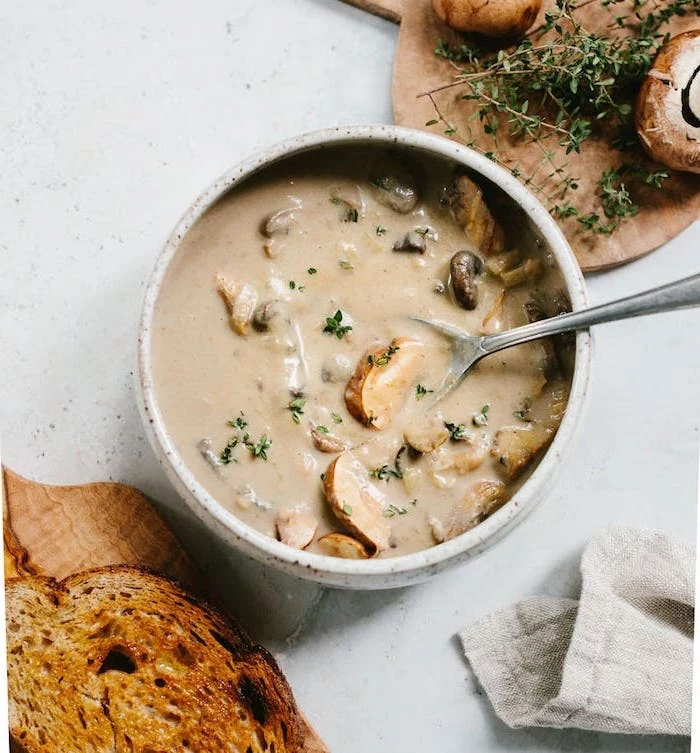
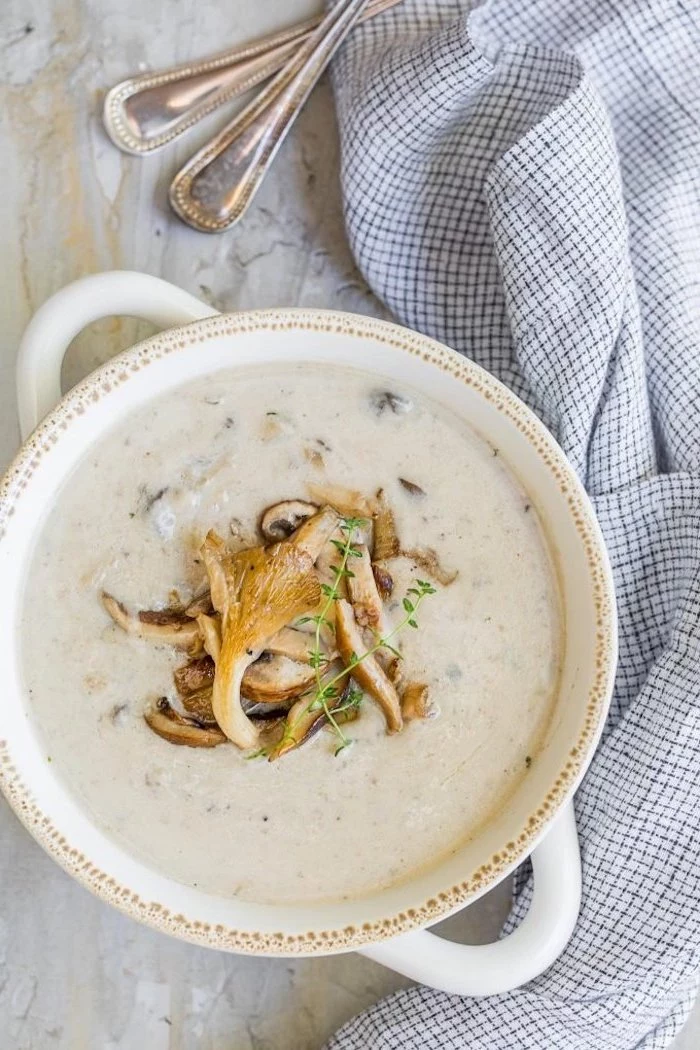
Case Study 3: The Ultimate Mushroom Soup
Total Time: Approx. 1 hour
This soup is all about creating intense, earthy umami flavor. The secret is layering mushroom preparations.
The Technique in Action: Start by making your garnish. Slice about a quarter of your mushrooms (a mix of cremini and shiitake is great) and sauté them in butter over high heat until they’re brown and crispy. Set them aside. In the same pot, add more butter and cook the rest of your mushrooms and some shallots over medium-high heat, letting them get deeply browned—this takes time, maybe 15-20 minutes, but it’s where all the flavor comes from. Add minced garlic, then deglaze the pan with a splash of dry sherry or white wine, scraping up all the brown bits. Add 6 cups of stock, simmer for 20 minutes, then blend. Return to the pot, stir in a half-cup of cream, and serve topped with those crispy mushrooms you made earlier.
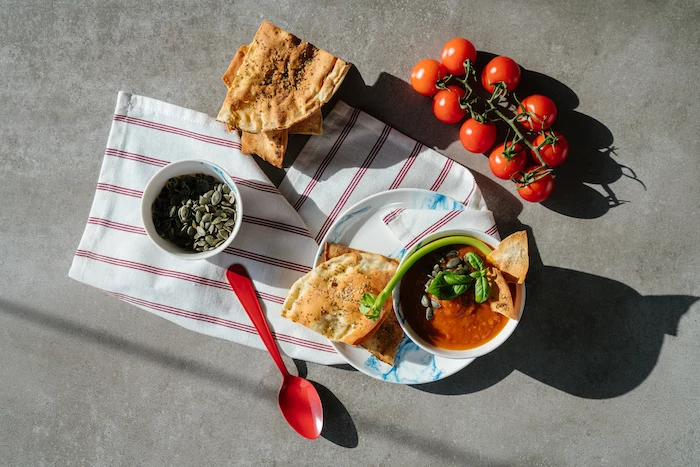
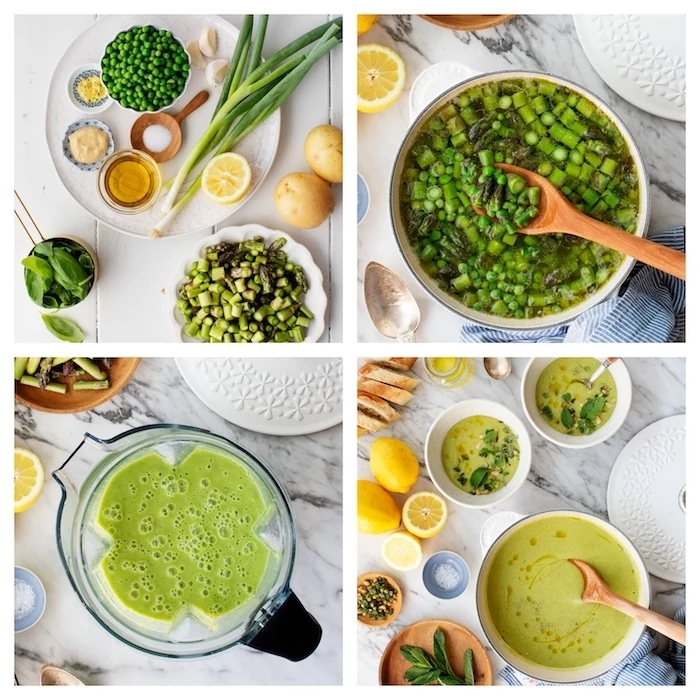
Quick Win: 20-Minute Creamy Tomato Soup
Total Time: Approx. 20 minutes
Need to feel successful right away? This recipe uses pantry staples to show you the principles in action, fast.
In a pot, sweat half a diced onion in olive oil for 5 minutes. Add two cloves of minced garlic and cook for another minute. Pour in one large (28-ounce) can of whole peeled tomatoes (with their juice) and a half-cup of stock or water. Add a slice of stale bread, torn into pieces. Let it all simmer for about 10 minutes, breaking up the tomatoes with your spoon. Blend it carefully until smooth. Return it to the pot, stir in a quarter-cup of heavy cream or a dollop of butter, season with salt and pepper, and you’re done! A delicious, creamy soup in 20 minutes.
How to Store, Freeze, and Reheat Your Soup
Okay, final pro tip: food safety. Never, ever put a giant, hot pot of soup straight into your fridge. It raises the temperature of the whole appliance into the ‘danger zone’ where bacteria thrive. Instead, you need to cool it down quickly.
The best way is with an ice bath. Place your pot in a clean sink, plug the drain, and fill the sink with ice and cold water around the pot. Stir the soup every few minutes, and it will cool down rapidly. You can also divide the soup into smaller, shallower containers to increase the surface area and help it cool faster.
And what about freezing? Puréed vegetable soups freeze beautifully for up to 3 months. But here’s the crucial part: if you plan to freeze your soup, hold back on the dairy. Cream and milk can separate and become grainy when they’re thawed. Your best bet is to freeze the soup base before you add the cream. Then, when you’re ready to eat, just thaw the soup, reheat it gently, and stir in your cream or milk at the end. Perfect every time.
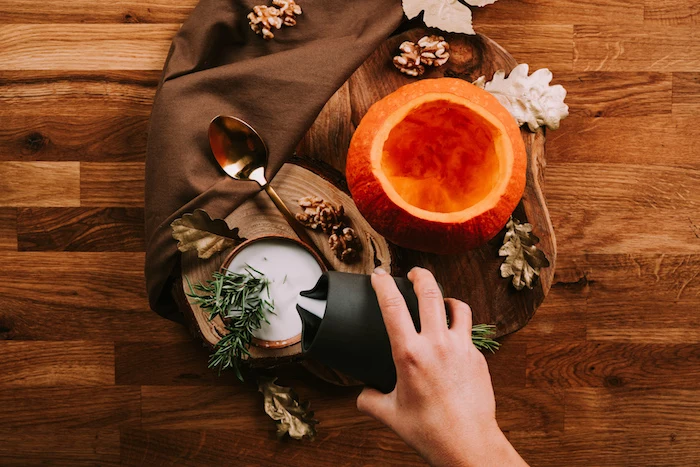
Inspiration Gallery

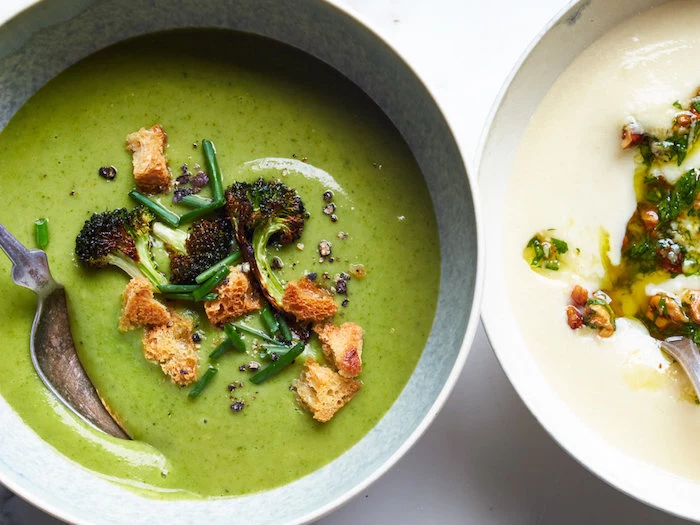
The Blender Showdown: Immersion vs. Countertop
Immersion (Stick) Blender: Perfect for convenience. You blend directly in the pot, minimizing cleanup. It’s ideal for rustic textures or when you’re in a hurry. Brands like Bamix are legendary for their power in a small package.
Countertop High-Speed Blender: This is the secret to an ethereal, truly silky-smooth texture. A machine like a Vitamix or Blendtec creates a powerful vortex that pulverizes fibers on a microscopic level, resulting in a soup that feels almost whipped. The trade-off is more washing up.

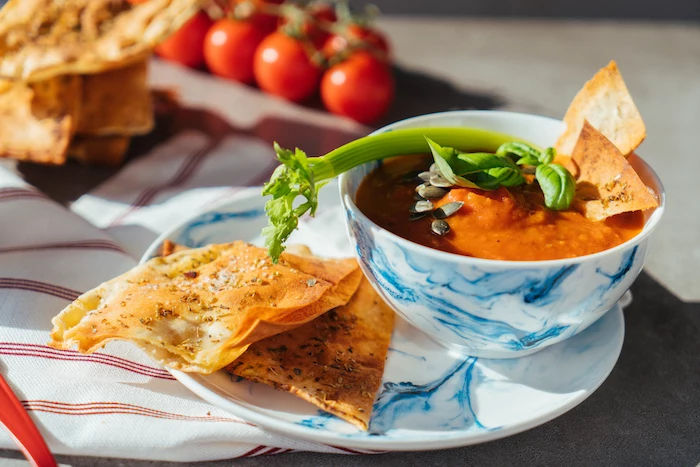
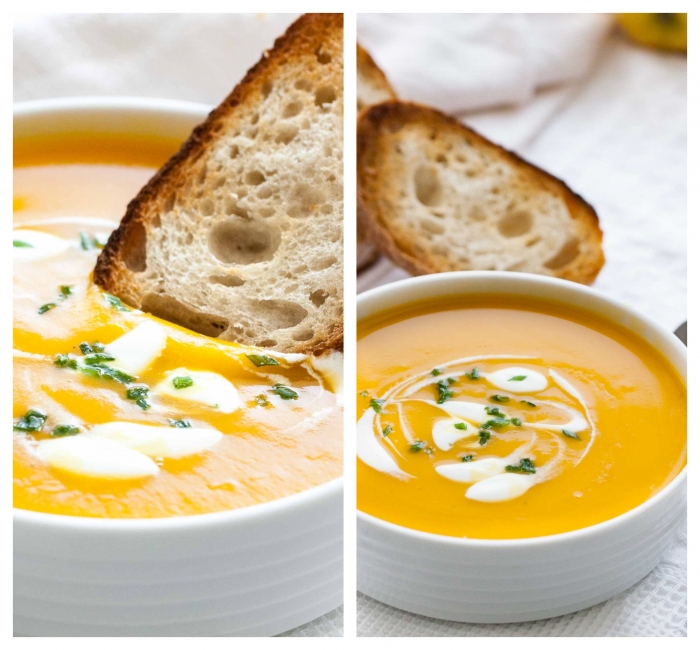
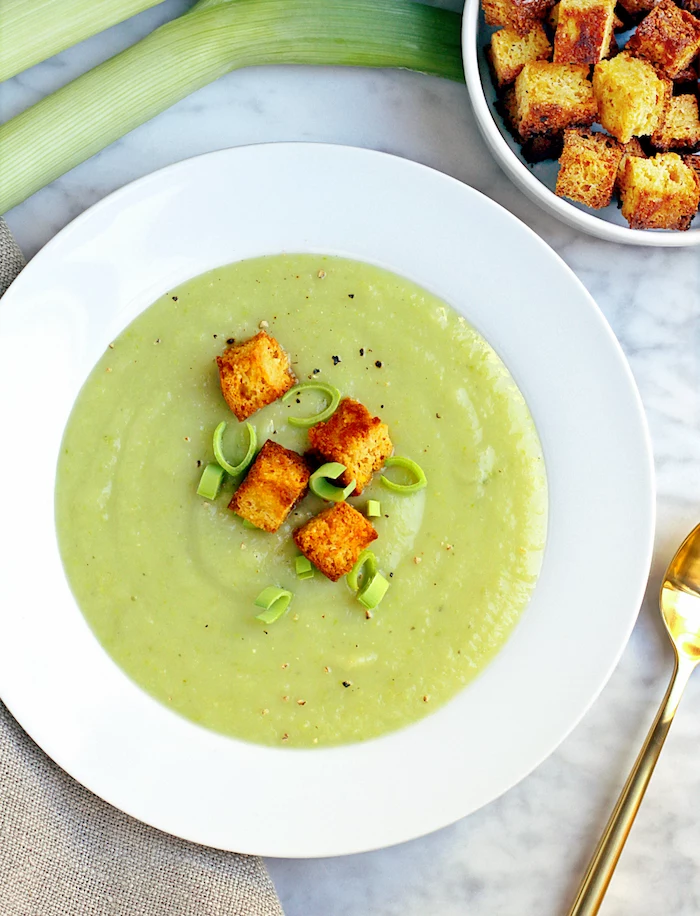
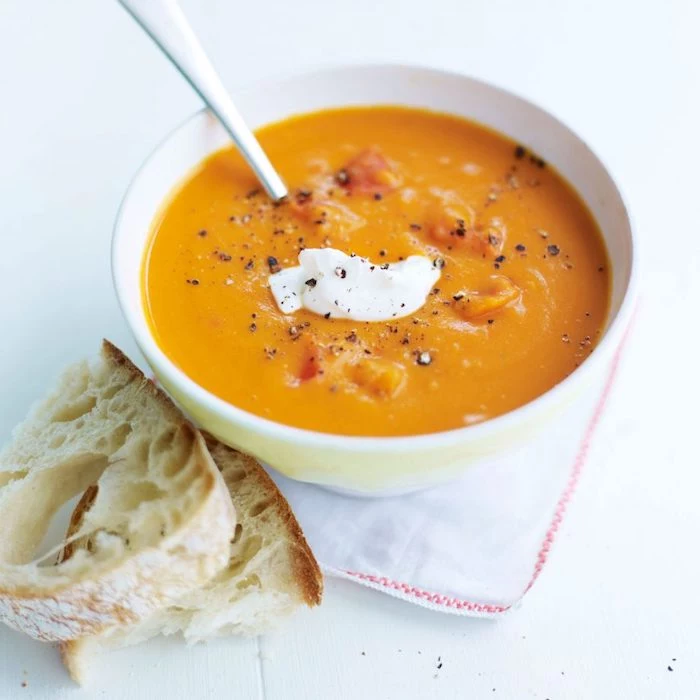
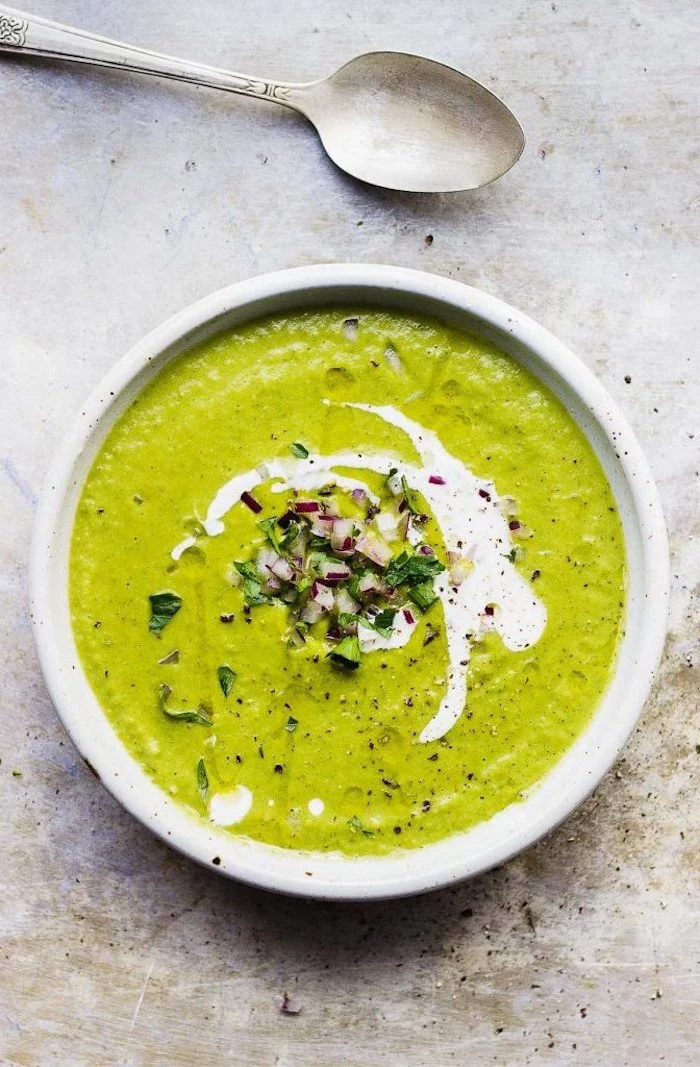
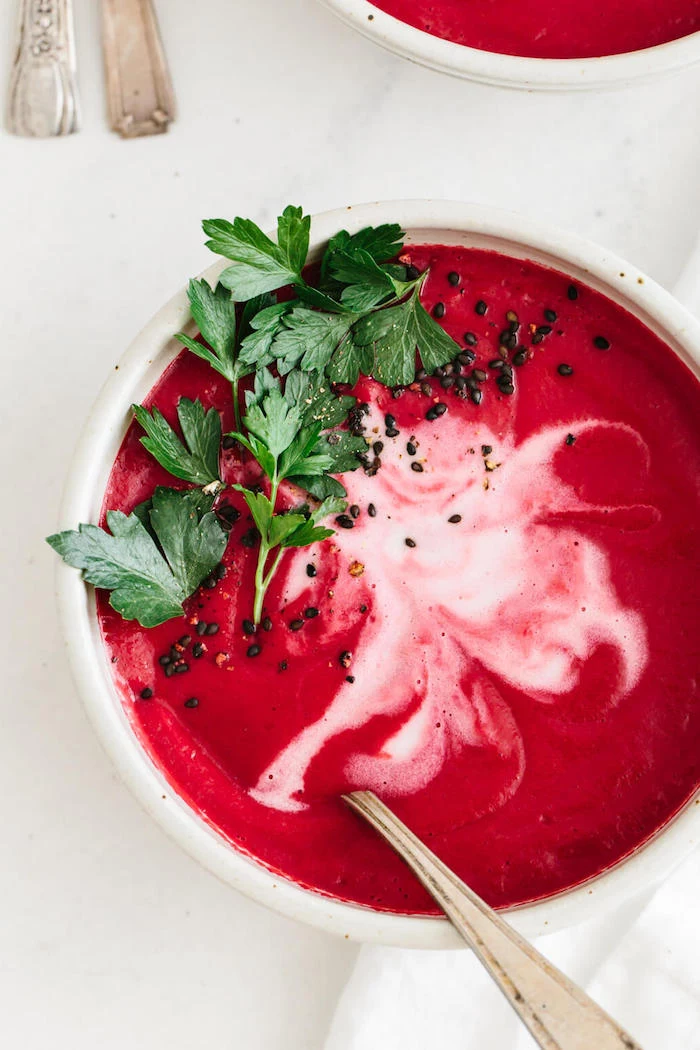
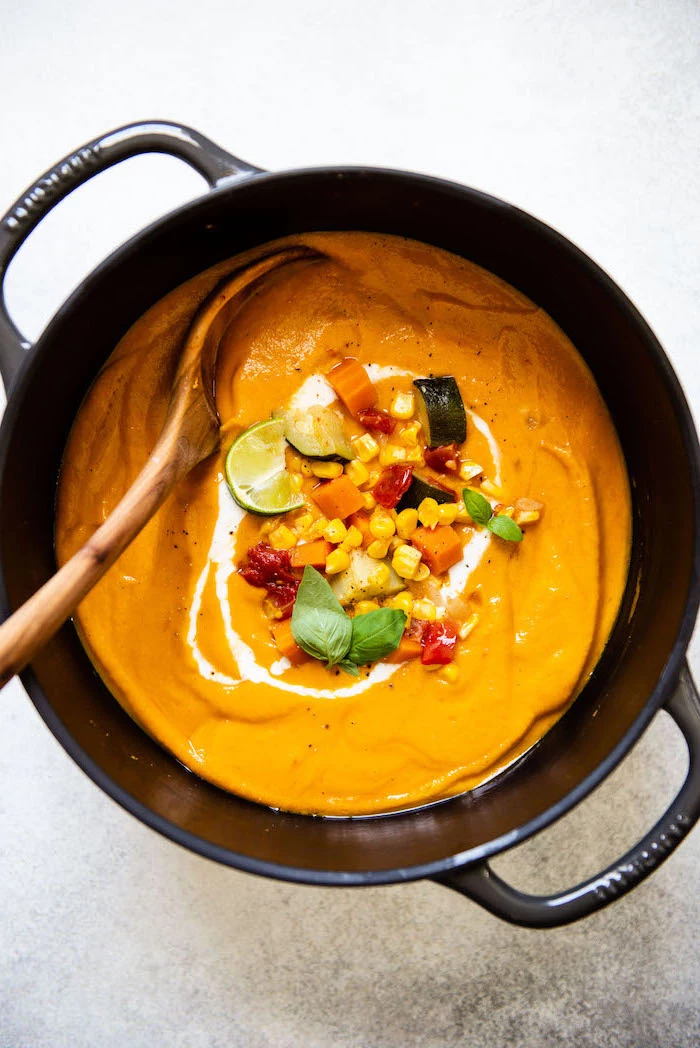
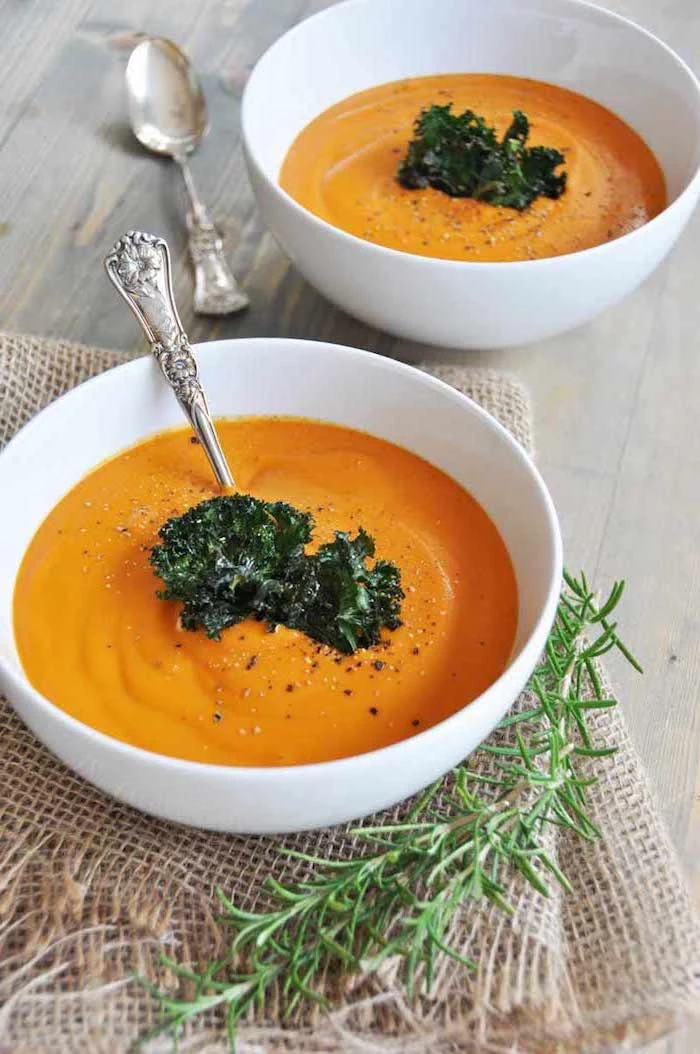
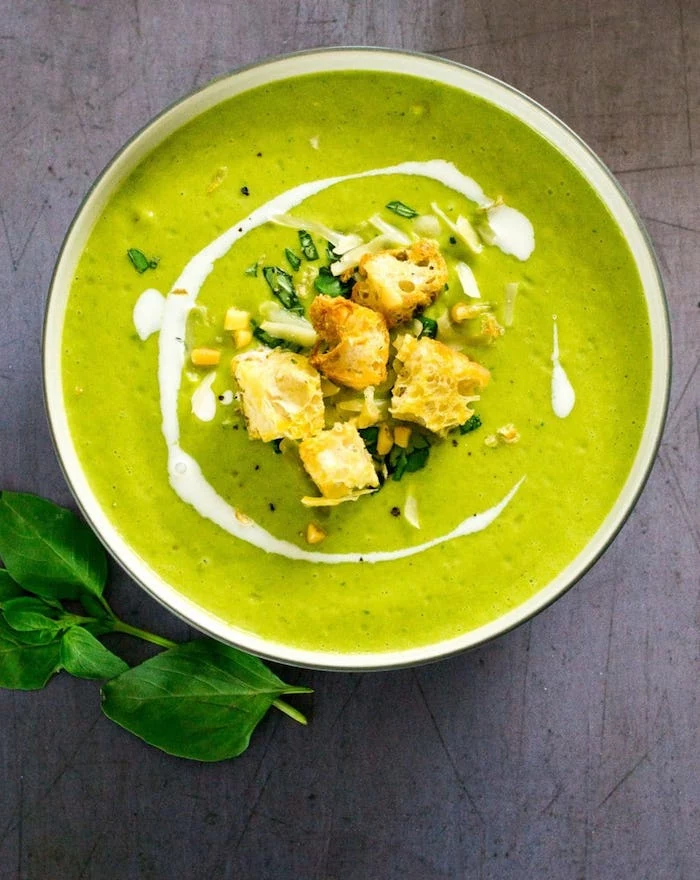
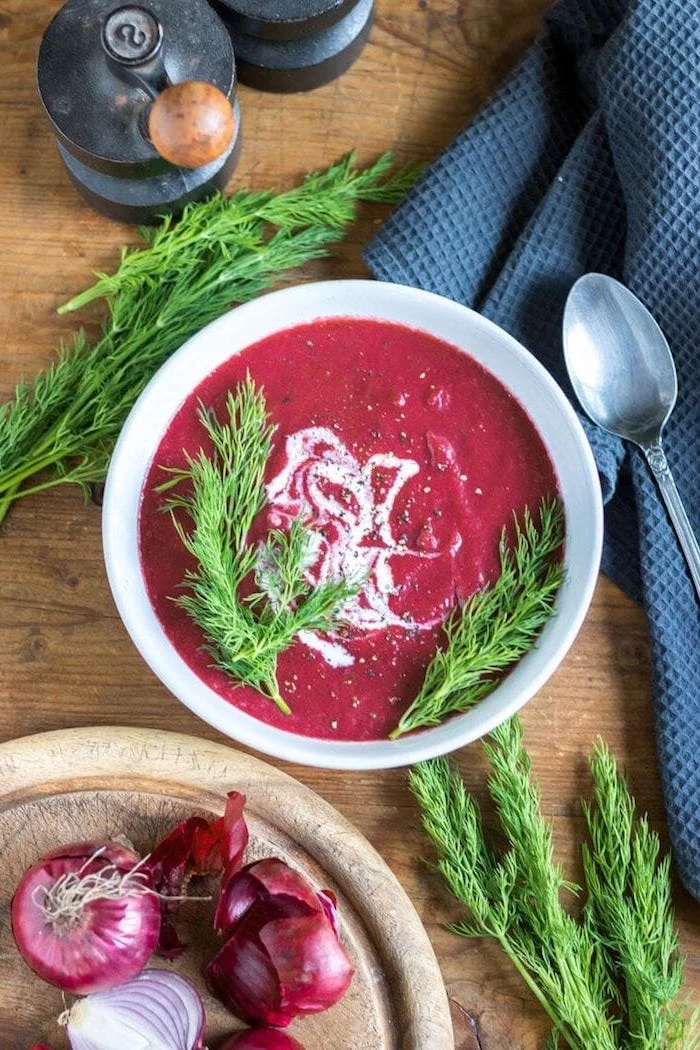
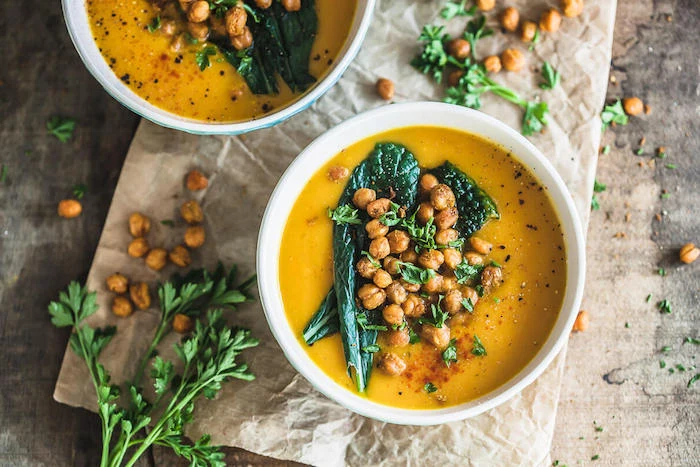
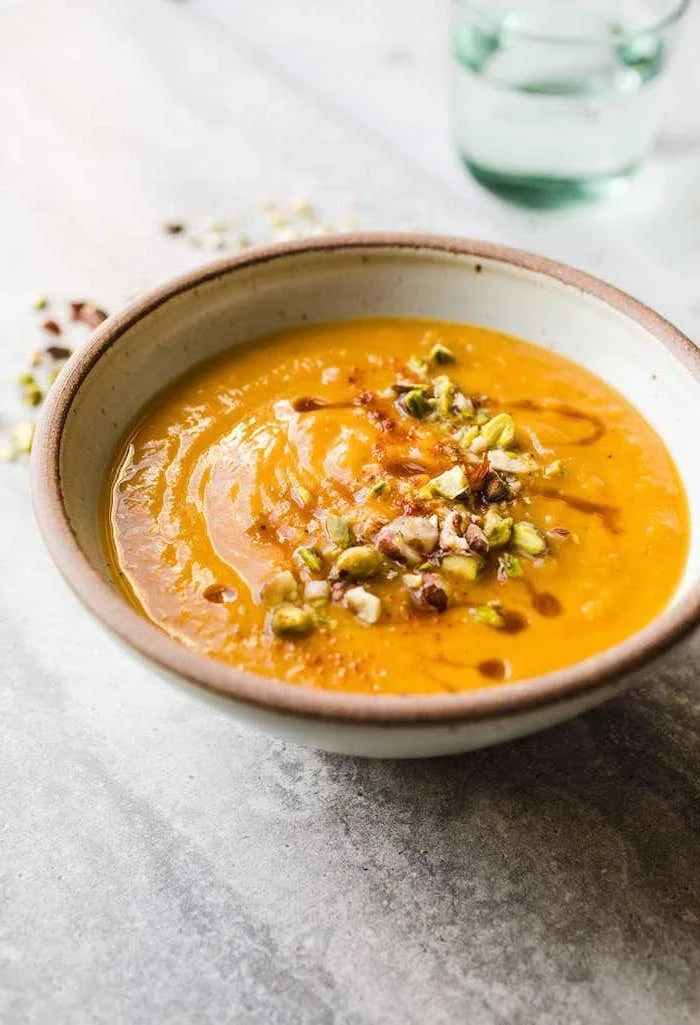
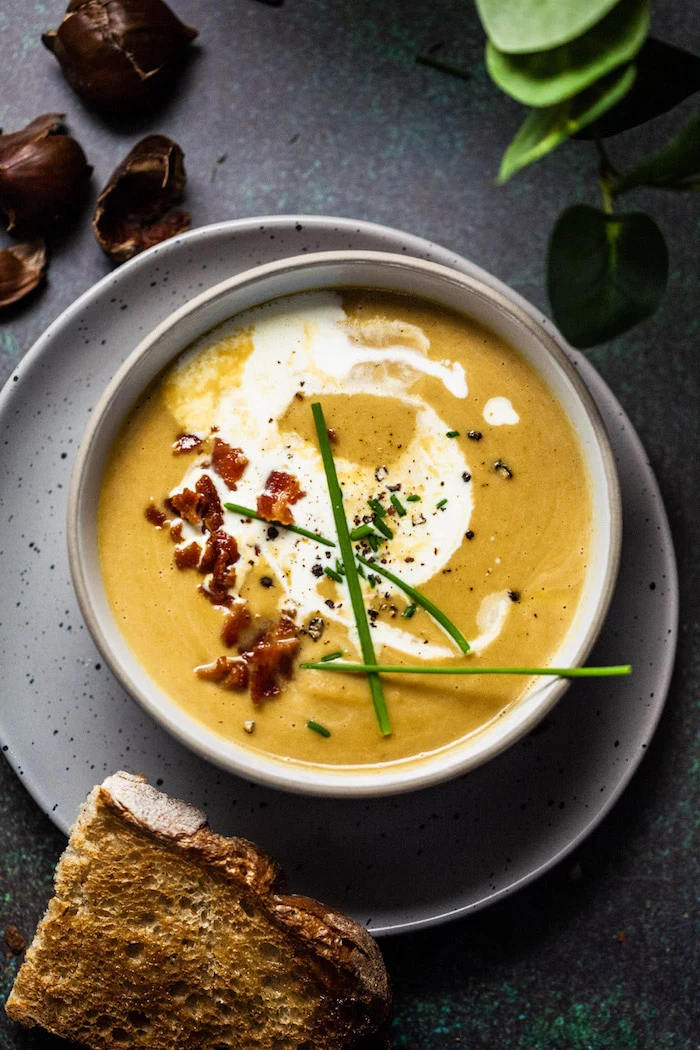
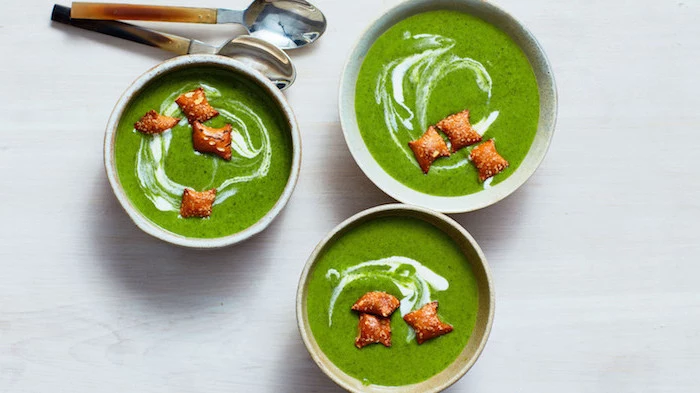
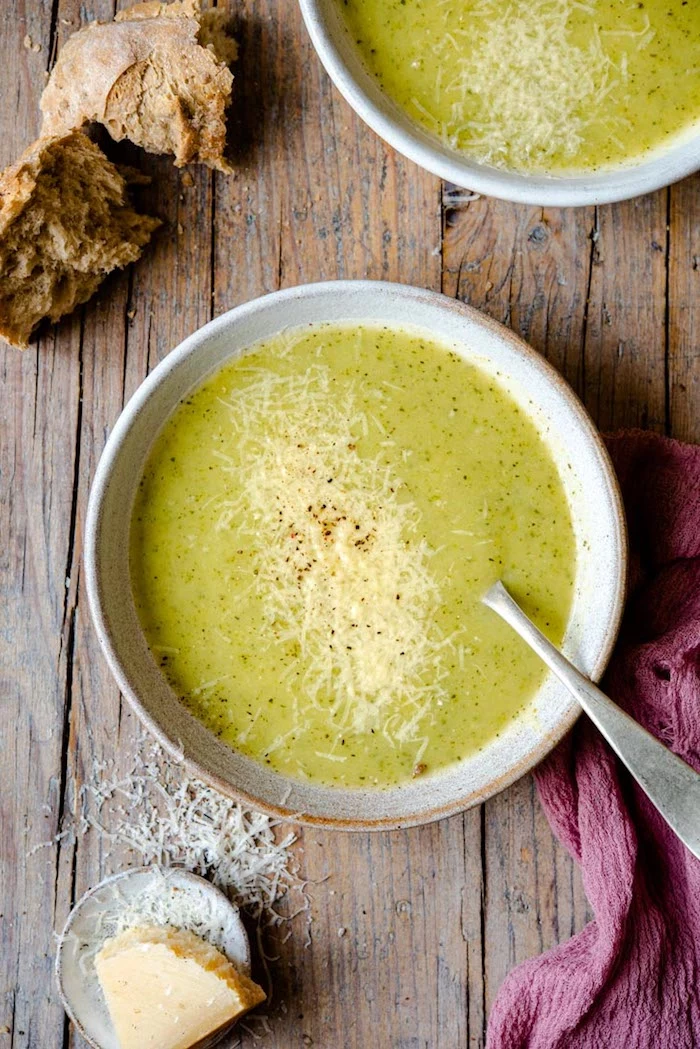
- A vibrant green herb oil swirled on top.
- Crunchy, roasted chickpeas seasoned with smoked paprika.
- Finely minced, quick-pickled red onion for a pop of acidity and color.
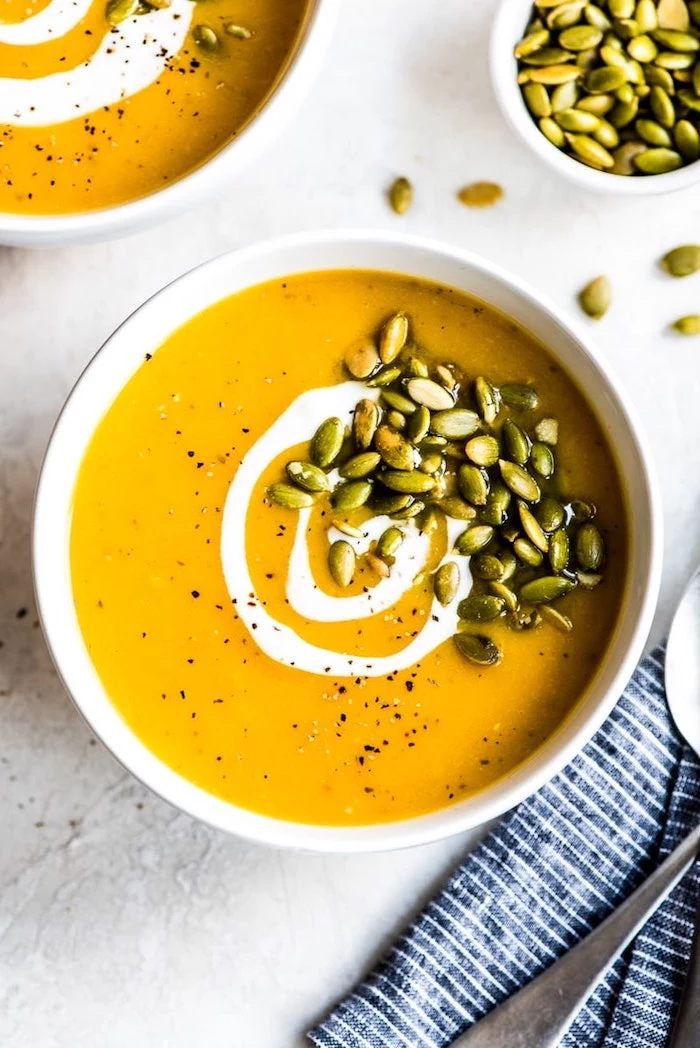
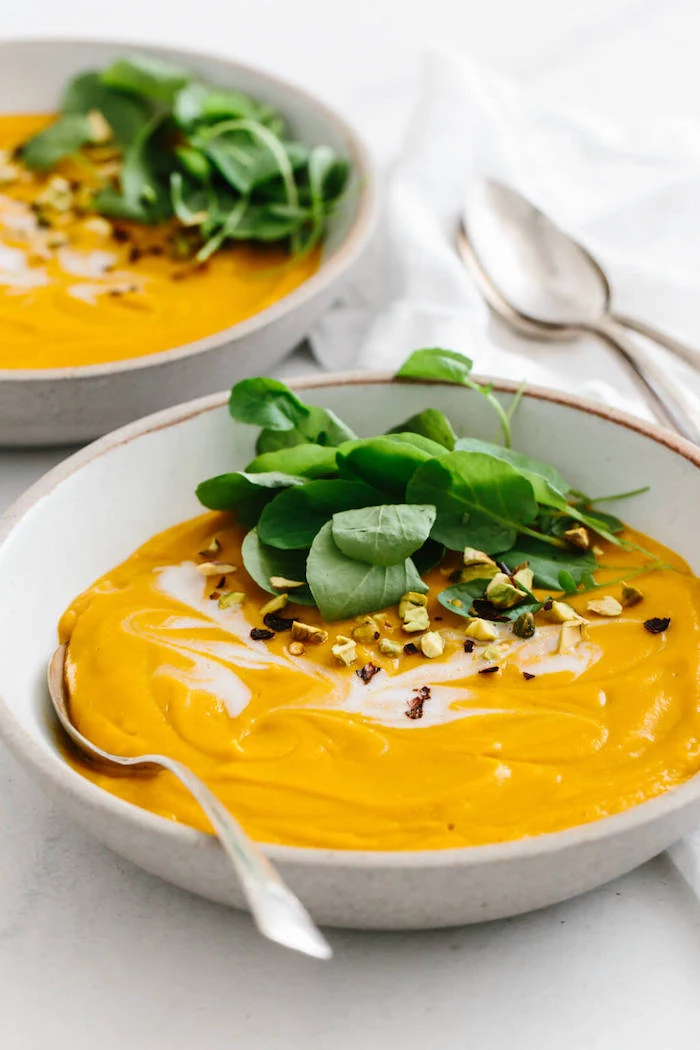
- Toasted seeds like pumpkin or sunflower for texture.
The finishing touch is more than just decoration; it’s a final layer of flavor and texture that elevates the entire bowl.

The legendary French chef Auguste Escoffier categorized soups into two main types: clear soups (consommés) and thick soups (potages). The velvety, puréed soups we love are a type of potage.
The forgotten step: For a truly professional-grade soup, pass it through a fine-mesh sieve or, even better, a chinois after blending. This final straining catches any lingering fibers from celery, leek greens, or tomato skins, guaranteeing an absolutely flawless, liquid-silk texture. It’s the one step most home cooks skip, and the one that makes all the difference.


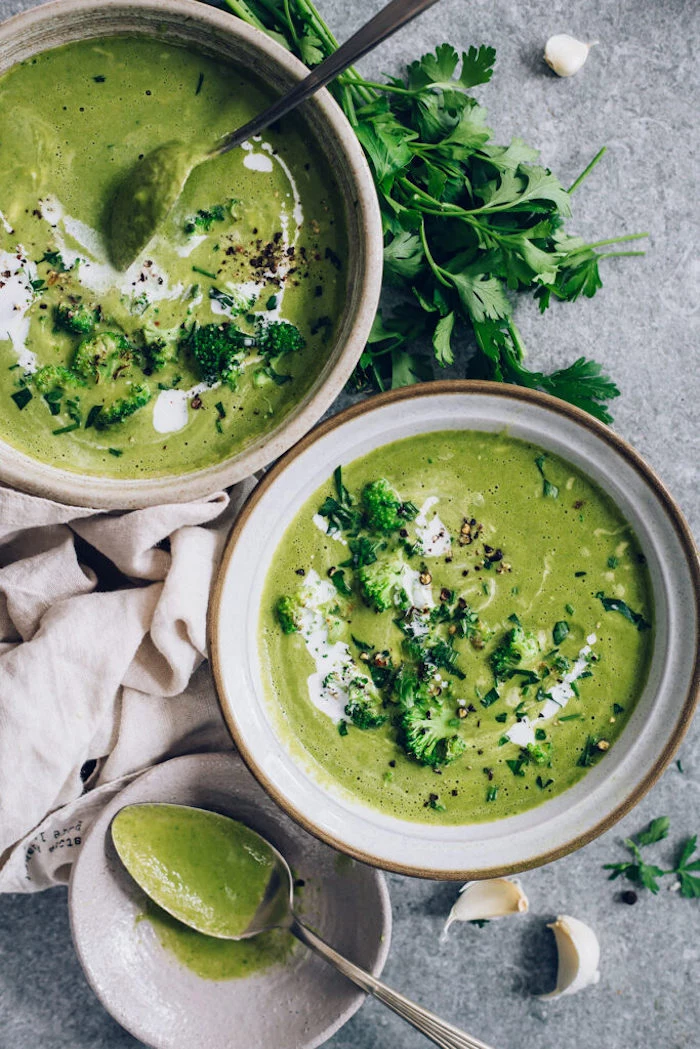
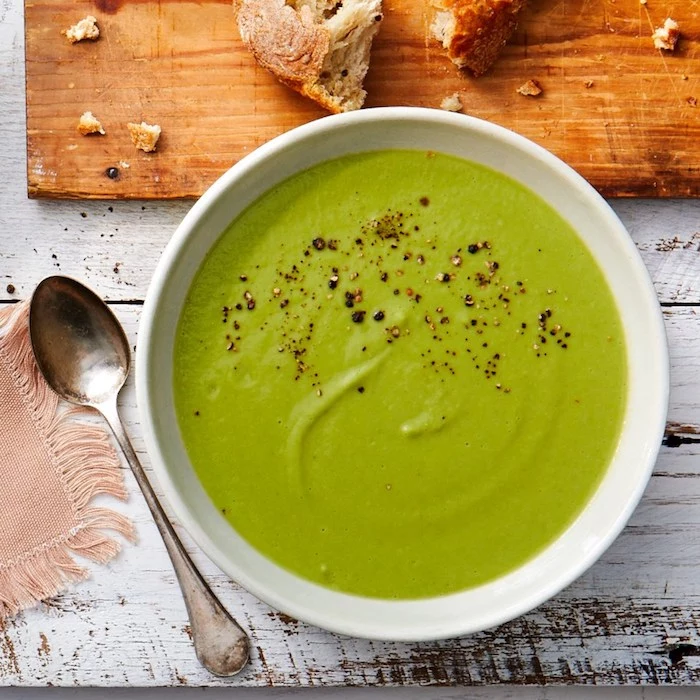
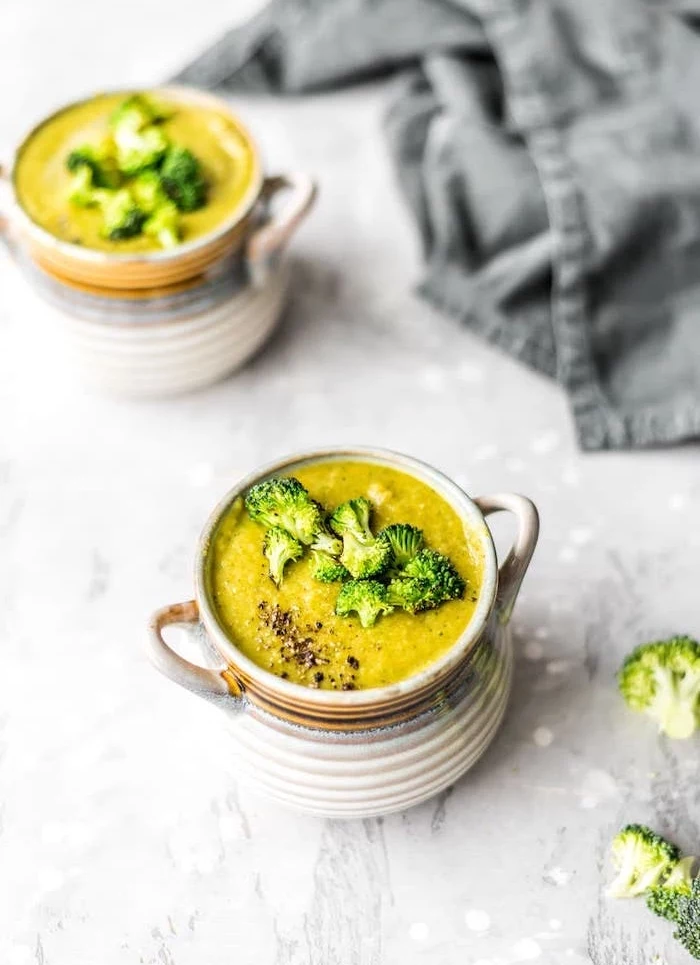
Why does my green soup—like broccoli or asparagus—sometimes turn a dull, olive color?
This often happens when green vegetables are cooked for too long. To preserve that vibrant, fresh green, try blanching them first: boil them for just 2-3 minutes until bright green, then immediately plunge them into an ice bath to stop the cooking process. Add them to your soup base only for the final few minutes of simmering, just before blending.


Unlock a world of creaminess without a drop of dairy. Soaking raw, unsalted cashews in hot water for 30 minutes, then blending them with a little fresh water creates a rich, neutral-flavored cream that can be stirred into any soup. It adds body and a luxurious feel, especially for vegan or dairy-free diners.

According to a study published in the American Journal of Clinical Nutrition, fats like olive oil or butter not only enhance the mouthfeel of food but are also essential for absorbing the fat-soluble vitamins (A, D, E, and K) present in your vegetables.
This means that initial step of sweating your aromatics in a good quality fat isn’t just for flavor—it’s actively making your soup more nutritious.


Think beyond salt and pepper for your final seasoning. A tiny squeeze of fresh lemon juice or a few drops of a quality sherry vinegar added right before serving can awaken and brighten every single flavor in the pot. It doesn’t make the soup taste sour; it makes the vegetables taste more of themselves.

A word of caution for potato soups: Be careful not to over-blend. The starches in potatoes, especially when processed at high speed in a blender for too long, can break down and turn gluey or gummy. Blend just until smooth and no more for the perfect velvety, not pasty, result.

- Creates a deeper, more concentrated vegetable flavor.
- Caramelizes natural sugars, adding a subtle sweetness.
- Achieves a beautiful, rich color without any artificial additives.
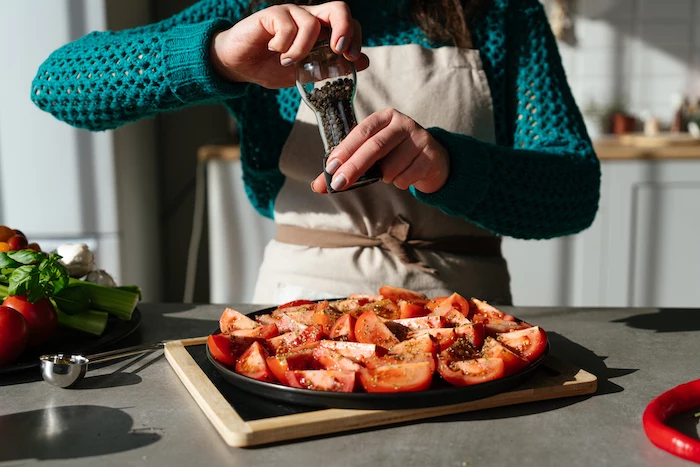
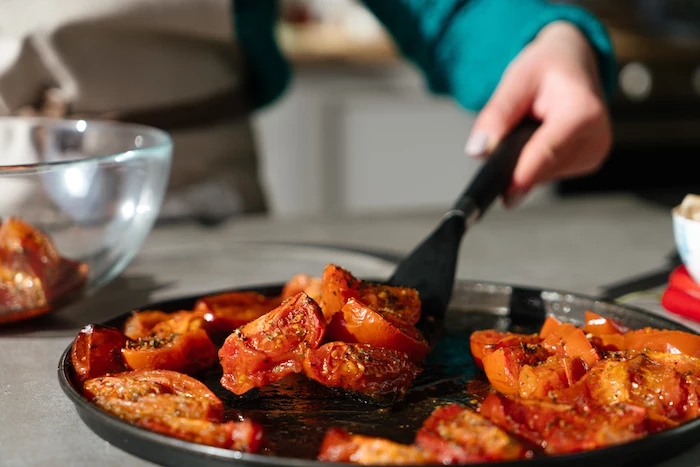
The secret? Roasting your vegetables. Before simmering them in stock, toss vegetables like carrots, squash, or the tomatoes shown in the gallery with olive oil and roast at 400°F (200°C) until tender and lightly browned.

The foundation of a great soup is often built on ‘sweating’ the aromatics—onions, leeks, celery—not sautéing them. This means cooking them gently in fat over low heat until they are soft and translucent, without browning. This slow process coaxes out their sweetness and builds a deep, mellow flavor base, unlike the sharper, more roasted flavor from high-heat sautéing.
Don’t throw away your vegetable scraps! Onion skins, carrot peels, celery ends, and herb stems can be collected in a bag in the freezer. Once you have enough, simmer them with water for an hour to create a flavorful, free vegetable stock. It’s a zero-waste trick that adds immense depth to your next soup.


The power of umami can transform a good soup into a great one. Consider these additions for a savory boost:
- A spoonful of white miso paste stirred in at the end.
- A dash of soy sauce or tamari.
- Adding a Parmesan rind to the pot while the soup simmers.
- A touch of tomato paste, caramelized with the initial aromatics.


A single Vitamix blender has enough horsepower to heat soup to serving temperature through friction alone in under 10 minutes.
While most recipes call for heating on the stove, this demonstrates the incredible power these machines have to break down fibers into the smoothest possible purée, a texture impossible to achieve with standard blenders.


What’s the difference between a French velouté and a simple cream soup?
A classic velouté is a ‘mother sauce’ based on a blond roux (flour and butter cooked together) and a light stock (like chicken or fish). It is this roux base that provides the signature velvety texture. A cream soup might use other thickeners like potatoes or rice, and is typically finished with cream, but a true velouté owes its body to the magic of the roux.


For soups destined for the freezer, it’s best to cool them completely first. Pour into freezer-safe containers, leaving an inch of headspace for expansion. To preserve the best texture, hold back on adding any dairy like cream or yogurt until you’ve reheated the soup to serve.


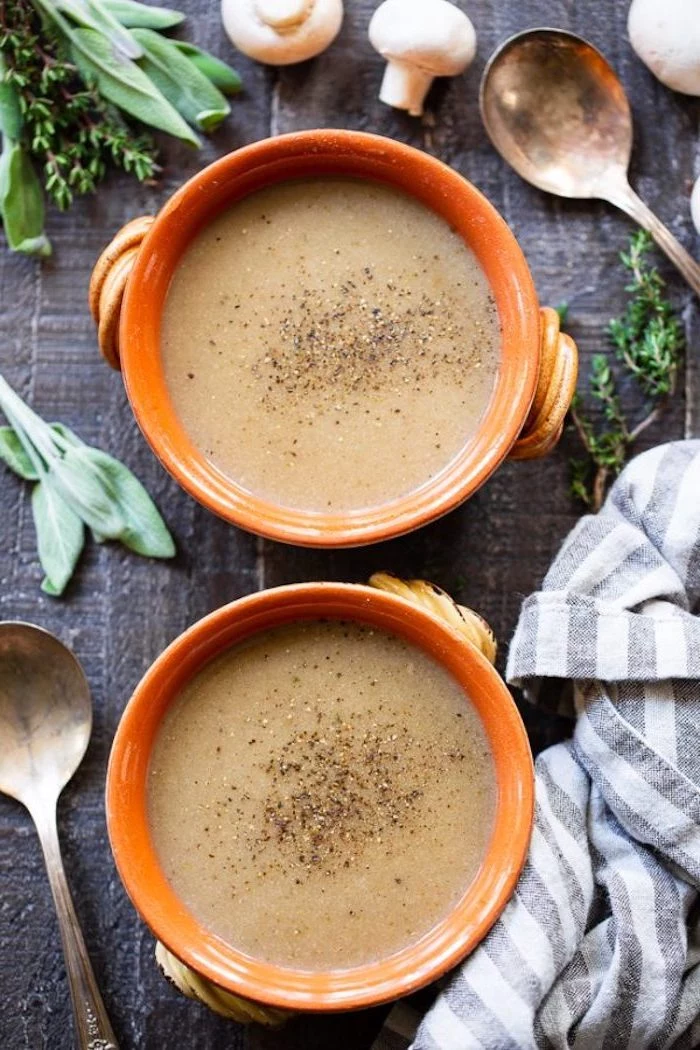
The vessel matters. A wide, shallow bowl, like a pasta bowl, provides a large surface area, perfect for showcasing elaborate garnishes like herb oil swirls, croutons, and seeds. A deep, narrow mug is better for a simple, comforting soup meant to be sipped and savored, trapping heat and aroma.

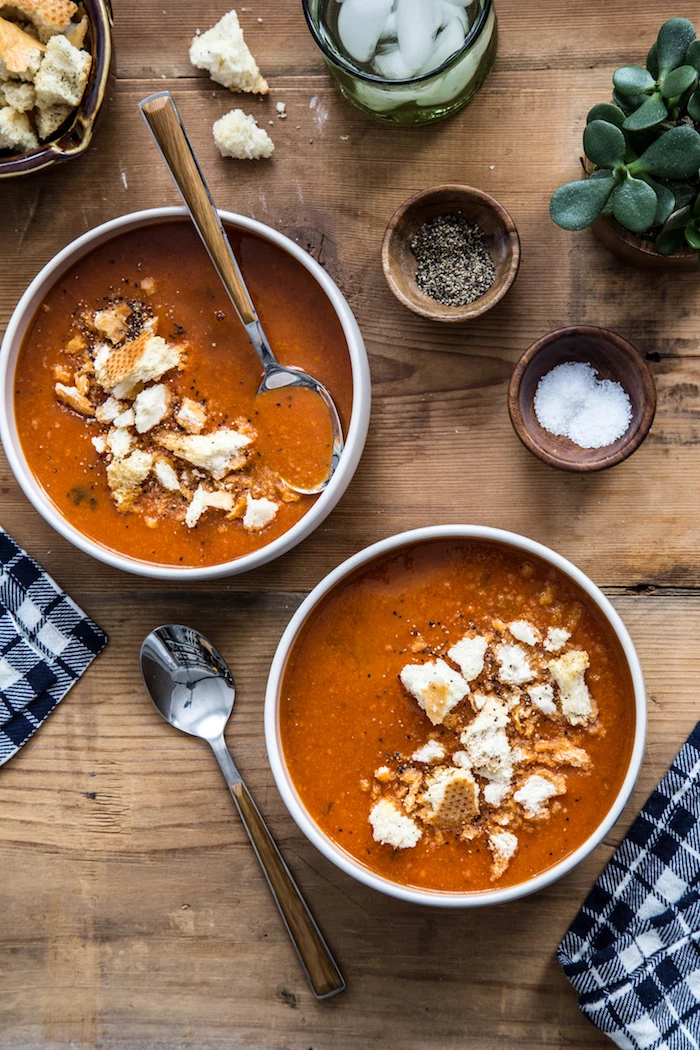
Thickener Choice: Stale Bread vs. White Rice
Stale Bread: A classic European trick. Adds a wonderfully rustic body and a subtle, pleasant yeasty flavor. Best for tomato or bean soups. Use a good quality, crusty white bread.
Uncooked White Rice: More neutral in flavor, it disappears completely into the soup. It provides a very clean, smooth texture. Excellent for delicate vegetable soups where you don’t want to interfere with the main flavor.

- A heavy-bottomed pot ensures even heat distribution, preventing scorching.
- Better heat retention means the pot stays hot, allowing for a steady, gentle simmer.
The secret? A quality Dutch oven. Enameled cast iron pots from brands like Le Creuset or Staub are the gold standard in professional and home kitchens for their superior heat control, which is essential for building flavor slowly and evenly.

Don’t be afraid to use water instead of stock. If you’ve used high-quality, flavorful vegetables and sweated your aromatics properly, sometimes water is the best choice. It results in a cleaner, purer soup that lets the star vegetable—be it asparagus, mushroom, or cauliflower—truly shine without competition from chicken or other flavors.


Creating a vibrant herb oil is simple. In a small blender, combine one cup of packed, tender herbs (like basil, parsley, or chives) with a half cup of good quality, neutral olive oil. Blend until smooth, then strain through a coffee filter or fine cloth. The resulting emerald-green oil is a stunning and delicious garnish.
A Common Mistake: Adding acidic ingredients like tomatoes or lemon juice too early if you plan to use milk or cream. The acid can cause the dairy to curdle or separate when heated. Always finish your soup and stabilize its texture first, then stir in dairy products gently over low heat at the very end.

Can I make great soup without a fancy blender?
Absolutely. If using a standard blender, the key is safety and patience. Never fill the blender more than halfway with hot liquid, and always remove the small plastic cap from the lid, covering the opening with a folded kitchen towel. This allows steam to escape and prevents the lid from blowing off. Blend in batches for the smoothest possible result.

To make restaurant-worthy croutons, tear stale bread into bite-sized pieces instead of cutting it. The ragged edges catch more olive oil and seasoning, and they toast up with an irresistible crunch. Toss with olive oil, salt, garlic powder, and herbs, then bake at 375°F (190°C) until golden brown and crispy.


