This No-Bake Peanut Butter Fudge Is Insanely Good (And So Easy)
I’ve spent more time in kitchens than I can count, messing with everything from fussy pastries to simple, hearty breads. But honestly, there’s a special place in my heart for fudge. Not the grainy, crumbly kind you have to boil with a candy thermometer, which is a whole other beast. This is different. This is the good stuff—a modern take that creates a dense, chewy, and ridiculously satisfying fudge without any of the drama.
In this article
The secret here isn’t about wrestling with sugar crystals. It’s about using the right fats to create an unbelievably smooth texture. I’ve tweaked this recipe over and over to get it just right, and now it’s basically foolproof. We’re not just going to follow steps; we’re going to get into the ‘why’ behind them. Once you get the technique, you can riff on this and make it your own. Oh, and by the way, it’s naturally dairy-free and gluten-free, so pretty much everyone can get in on this.

First, Let’s Talk Ingredients (They REALLY Matter)
The success of this fudge comes down to what you put in it. Each ingredient plays a specific role, so quality and type are key. For real consistency, I highly recommend using a kitchen scale. Scooping something sticky like peanut butter into a measuring cup is always a bit of a guess, but a scale never lies.
The Star of the Show: Peanut Butter
This is the heart and soul of your fudge, so your choice here is the most important one. For the most reliable results, go with a commercial “no-stir” peanut butter. You know the kind—the oil doesn’t separate. These have emulsifiers that make them super stable, giving you a perfectly smooth and dense fudge every single time.
Can you use the natural stuff? Absolutely. But you have to stir it like your life depends on it. If you don’t get that oil completely mixed back in, your fudge can end up greasy and weak. I’ve had batches turn into an oily mess because I got lazy with the stirring. A good rule of thumb: If you’re new to this recipe, start with a no-stir variety. If you like a bit of texture, crunchy peanut butter works great, too! The base won’t be quite as silky, but the little bits of peanut are a fantastic addition.
The Secret Weapon: Coconut Butter
Heads up! This is a critical ingredient, and it is NOT the same thing as coconut oil. Coconut butter (sometimes sold as coconut manna) is the pureed flesh of the coconut, so it has both fat and fiber. It’s what gives the fudge its firm, sliceable body when it’s chilled. You’ll find it in the health food aisle, usually near the nut butters, or online. A jar typically costs between $8 and $15.
And don’t worry, it won’t make your fudge taste like a tropical cocktail. Its flavor is surprisingly mild, nutty, and slightly sweet, so it complements the peanut butter instead of overpowering it. If you used coconut oil instead, you’d end up with a greasy, soft fudge that wouldn’t hold its shape. A quick tip: Coconut butter often separates in the jar. Just place the jar in a bowl of warm water for a few minutes and stir it until it’s smooth and creamy before you measure it out.
The Sweet Stuff: Maple Syrup
Pure maple syrup is what brings the sweetness and helps bind the fats together into a perfect emulsion. Its woody flavor is a natural fit for peanut butter. I always go for a darker, more robust grade for the best flavor. It might seem pricey (a good bottle can run $10 to $18), but it’s worth it. Please, whatever you do, don’t use pancake syrup—it’s mostly corn syrup and will completely change the flavor and texture. Other liquid sweeteners like agave can work in a pinch, but the taste will be different.
The Richness: Good Dark Chocolate
For the top layer, quality chocolate makes all the difference. To keep things dairy-free, you need a dark chocolate with no milk solids. Most bars with 60% cocoa or higher are safe, but I’ve learned to always, ALWAYS read the label and allergen warnings just in case. I personally think a 70% cocoa bar is the sweet spot; it has a deep flavor that beautifully balances the sweetness of the fudge base. Chocolate chips are okay, but they often have stabilizers that can make them melt a little weirdly. A good baking bar, chopped up, will always give you a smoother result.
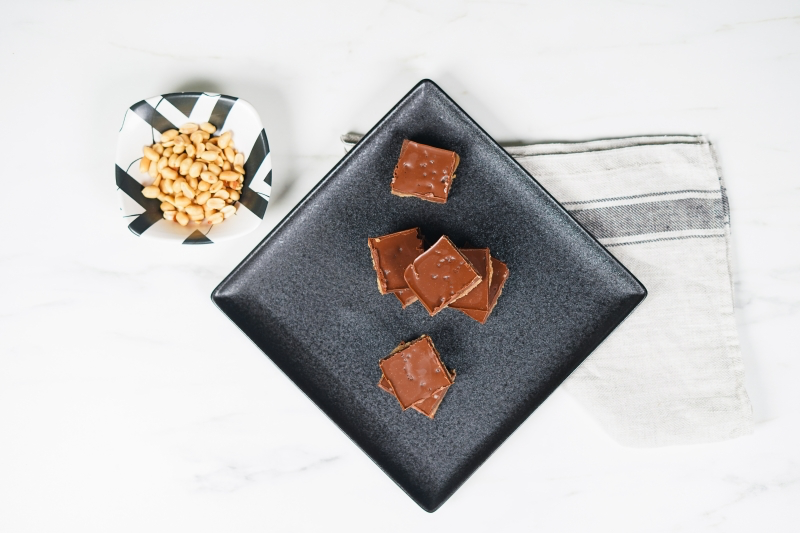
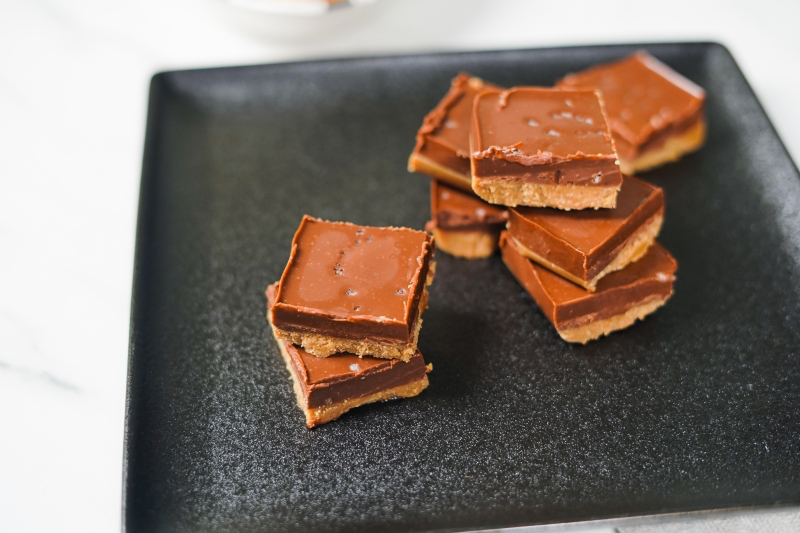
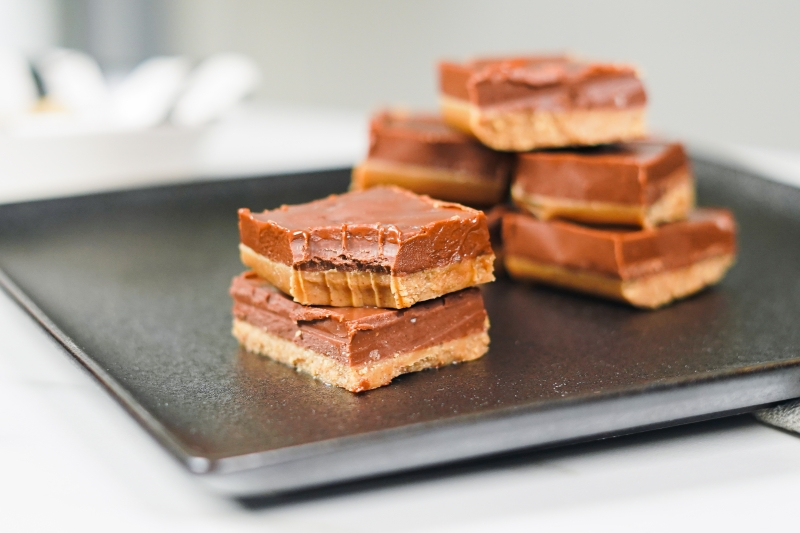
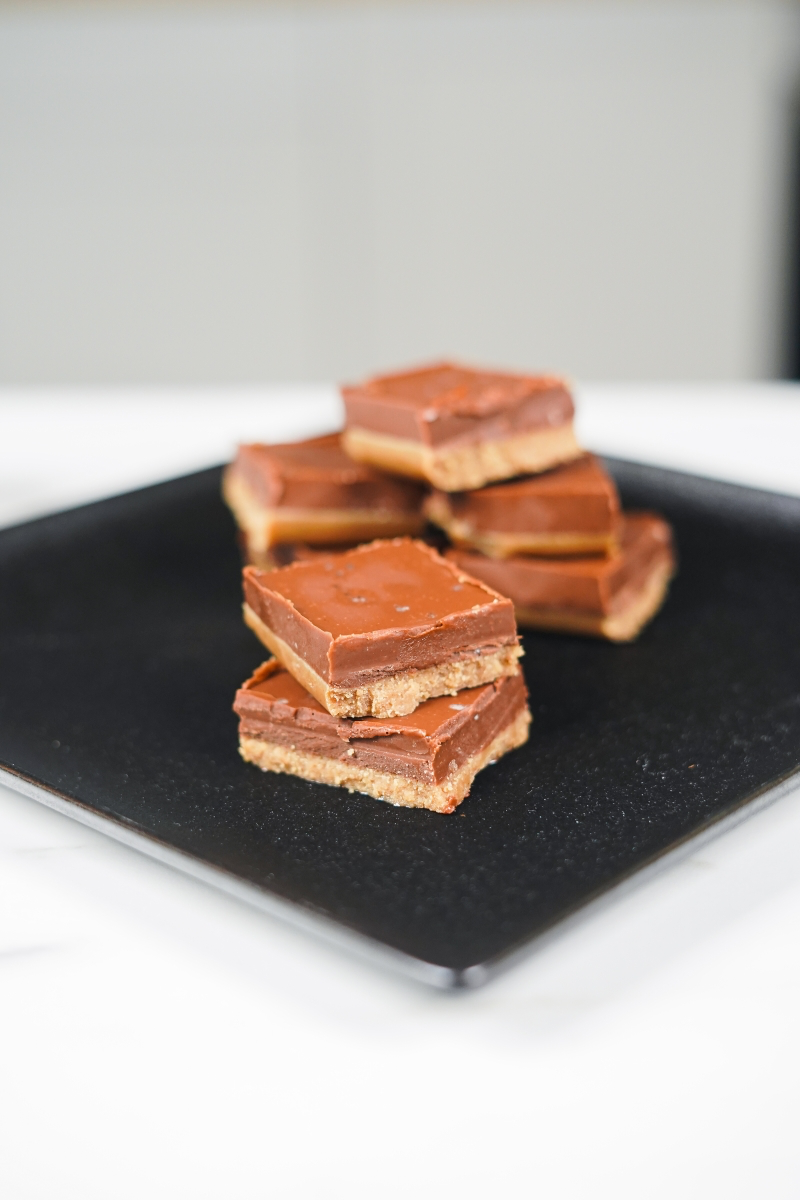
The Finishing Touch: Flaky Sea Salt
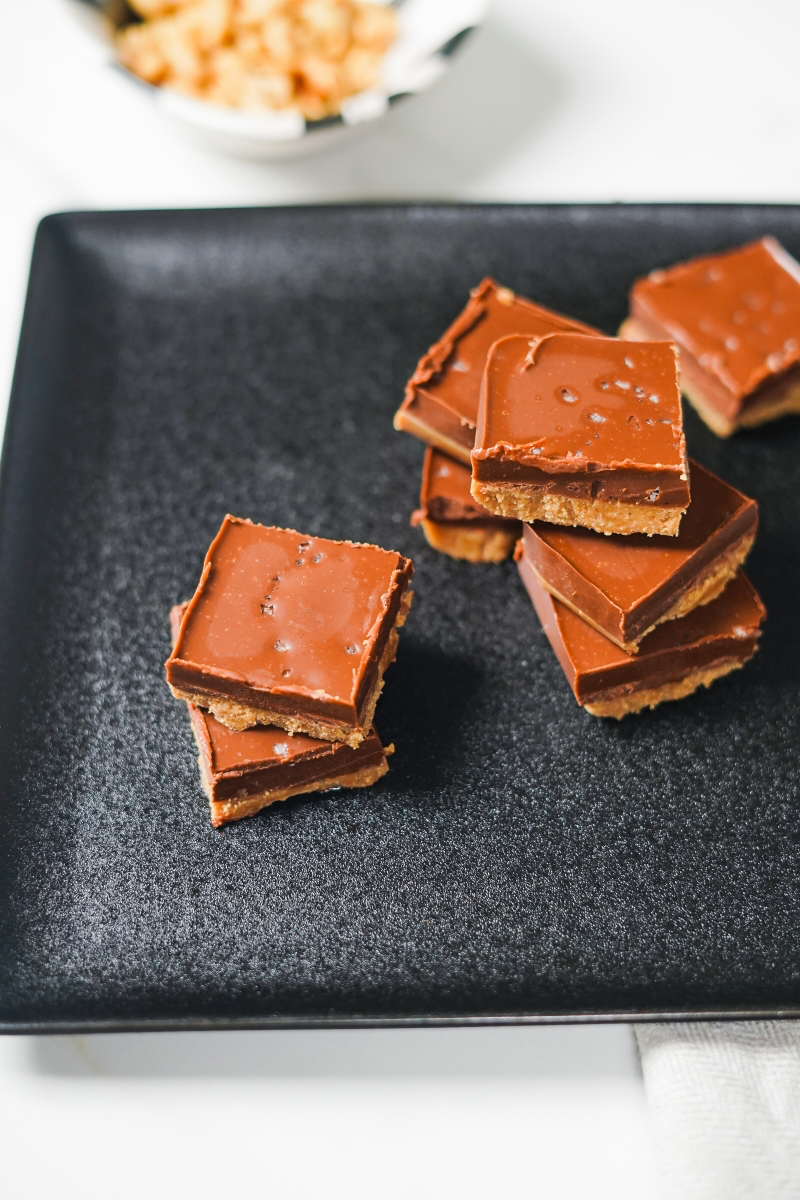
This isn’t just for looks. A sprinkle of flaky sea salt, like Maldon, adds a pop of flavor and a delightful crunch. Fine table salt would just dissolve and make the whole thing salty. These big crystals stay put, cutting through the richness and making the peanut and chocolate flavors explode. It’s what takes the fudge from good to great.
The Right Tools for an Easy Job
You don’t need anything fancy, but the right tools make the whole process smoother. Trust me, fighting with bad equipment is a waste of time and ingredients.
- A Heavy-Bottomed Saucepan: A thick base heats everything evenly, which is crucial for preventing the coconut butter from scorching. A thin, cheap pan will give you hot spots and a burnt taste. No good.
- Silicone Spatula: This is your best friend. It’s flexible enough to scrape every last bit from the pan, ensuring everything is mixed perfectly and nothing goes to waste.
- An 8×8 inch (20×20 cm) Pan: This size gives you a nice, thick fudge. But don’t stress if you don’t have one! A 9×9 pan works fine; your fudge will just be a bit thinner, so it might set faster. You could even use a 9×5 loaf pan for extra-thick, bar-shaped pieces.
- Parchment Paper: This is non-negotiable. Line the pan with a strip of parchment that covers the bottom and comes up two opposite sides, creating little “handles.” This lets you lift the whole block of fudge out effortlessly later. It’s a game-changer.
- Kitchen Scale: I’ll say it again—a scale is the key to perfect results every time. It takes all the guesswork out of measuring.
Let’s Make Some Fudge: The Step-by-Step
The process is simple, but moving with intention at each stage is what guarantees success.
Active Time: About 15 minutes
Setting Time: 2+ hours (but worth the wait!)
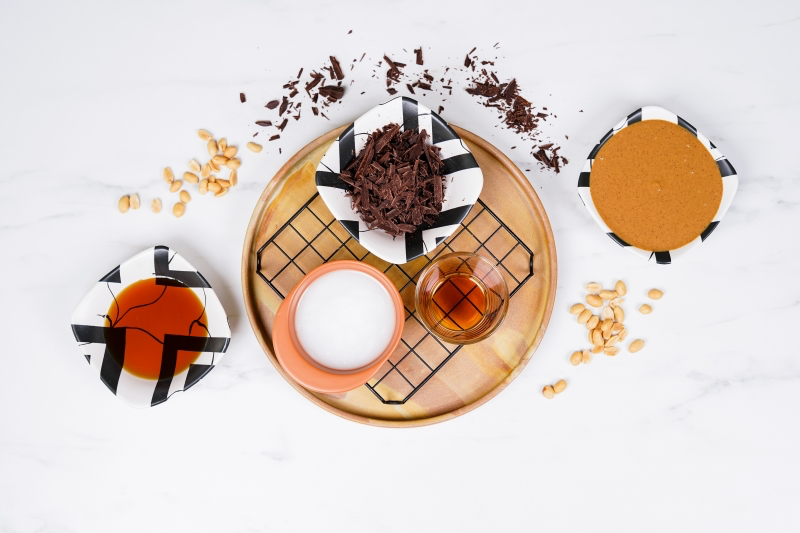
Here’s What You’ll Need:
- 115g (1/2 cup) Coconut Butter, well-stirred and smooth
- 60ml (1/4 cup) Pure Maple Syrup
- 5ml (1 tsp) Pure Vanilla Extract
- 180g (3/4 cup) Smooth, No-Stir Peanut Butter
- 120g (about 2/3 cup) Dairy-Free Dark Chocolate, chopped
- Flaky Sea Salt, for finishing
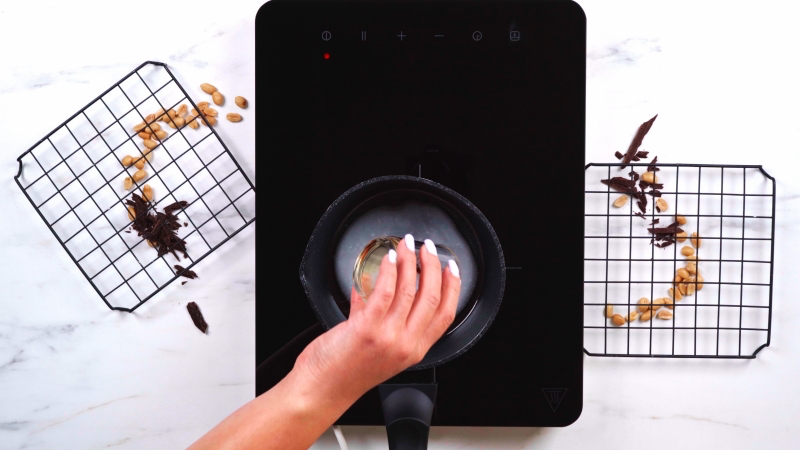
Step 1: Get Your Ducks in a Row
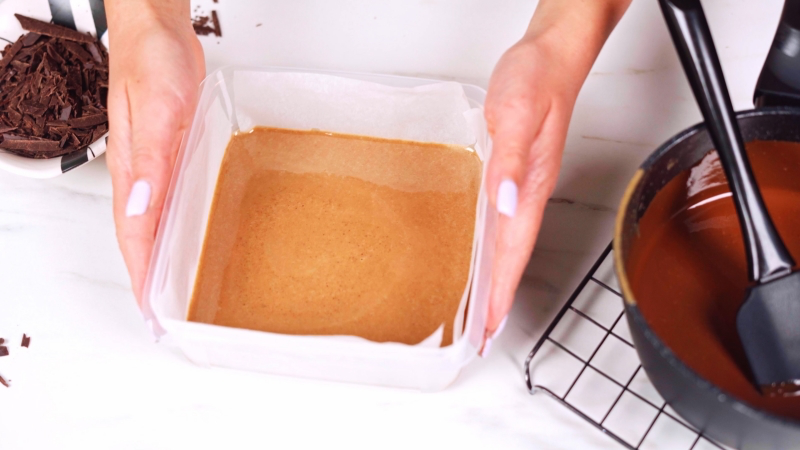
Before you even think about turning on the stove, get everything ready. Line your pan with parchment paper. Measure out all your ingredients. Chop your chocolate. This pro habit (called ‘mise en place’) prevents you from scrambling later.
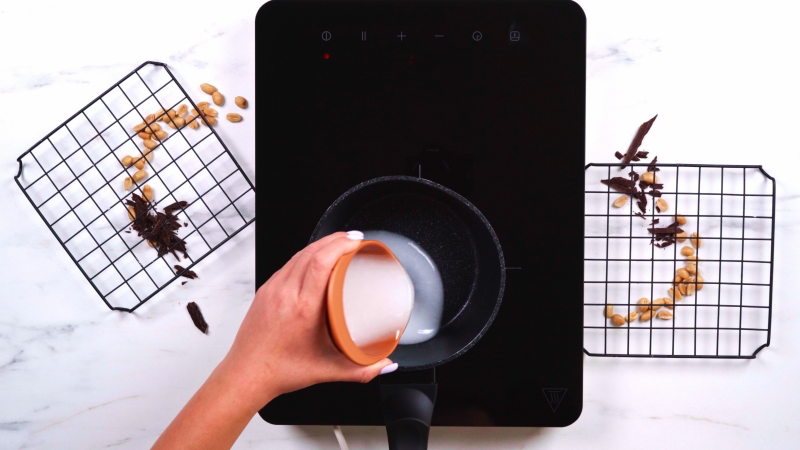
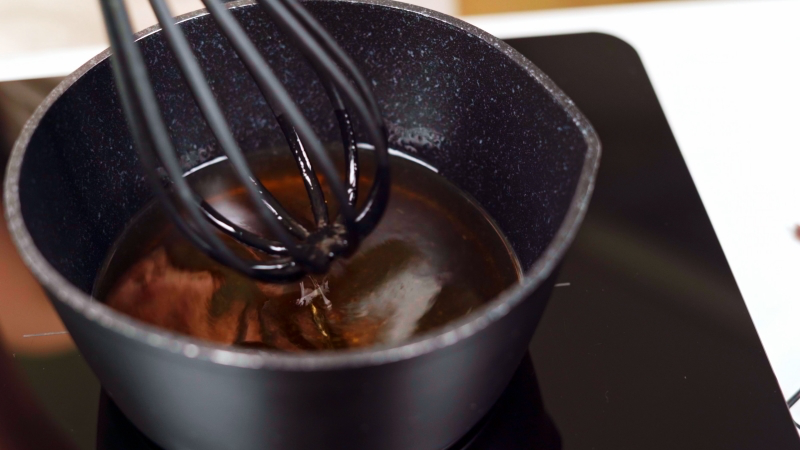
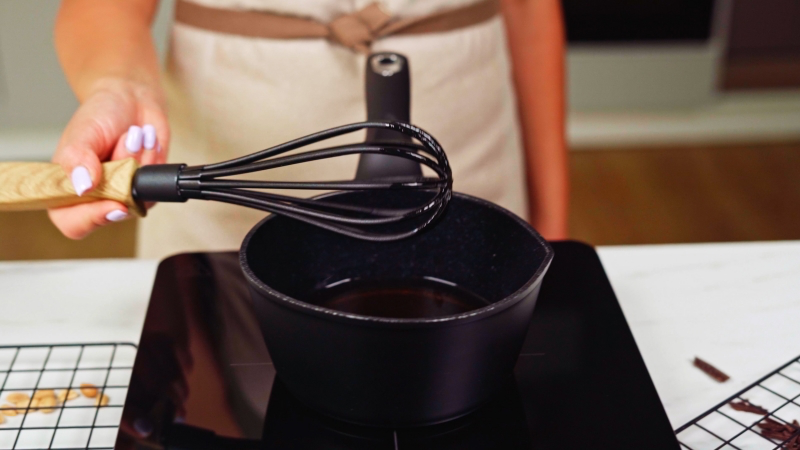
Step 2: Make the Fudge Base
In your saucepan, combine the coconut butter, maple syrup, and vanilla. Set it over low heat. The goal here is just to melt everything together gently—do NOT let it boil. Stir constantly with your spatula. After 2-3 minutes, it will transform into a smooth, glossy, and unified mixture. If you heat it too high, the fats can separate and turn greasy. Low and slow is the way to go.

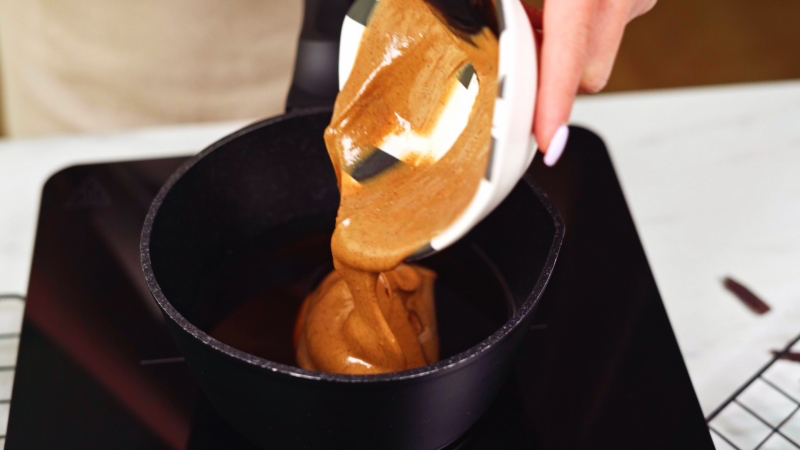
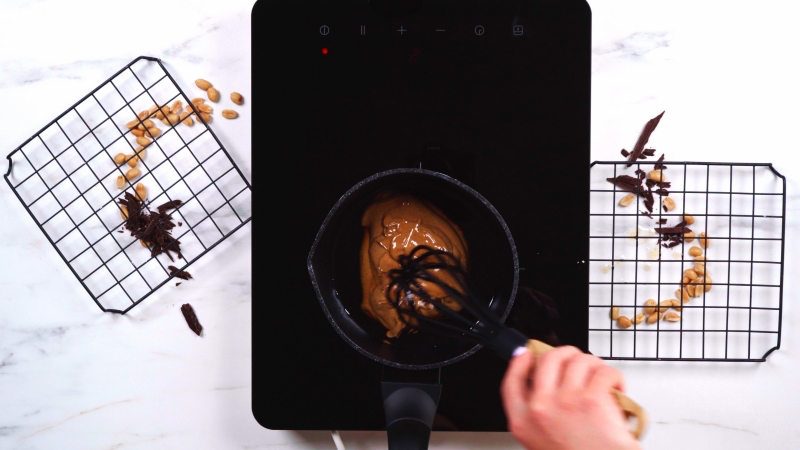
Step 3: Add the Peanut Butter
Take the pan completely off the heat. This is important! Adding the peanut butter to a scorching hot pan can make it oily. Dump in all the peanut butter and fold it in with your spatula until it’s fully combined and the mixture is thick, like a soft dough. You shouldn’t see any streaks.
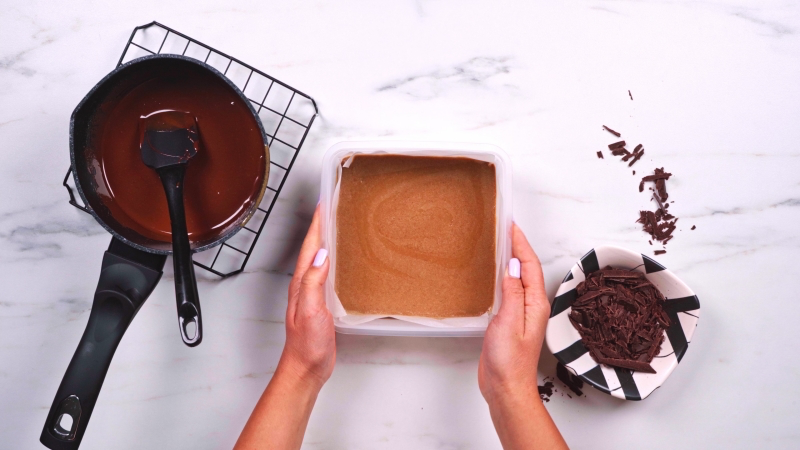
Step 4: Form the First Layer
Work fast here. Scoop about half of that peanut butter base into your prepared pan and press it down into an even layer. An offset spatula or the back of a spoon works well. Pop it in the fridge for 15-20 minutes to firm up. You want it set to the touch, which will create that clean, distinct line between your layers.
Step 5: Make the Chocolate Topping
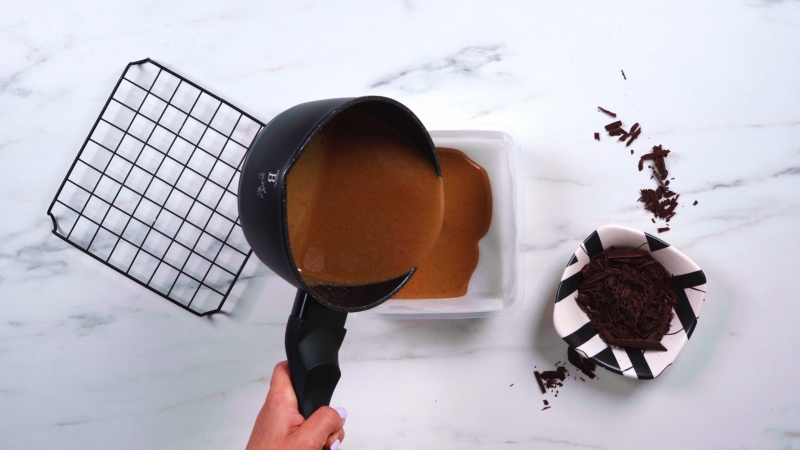
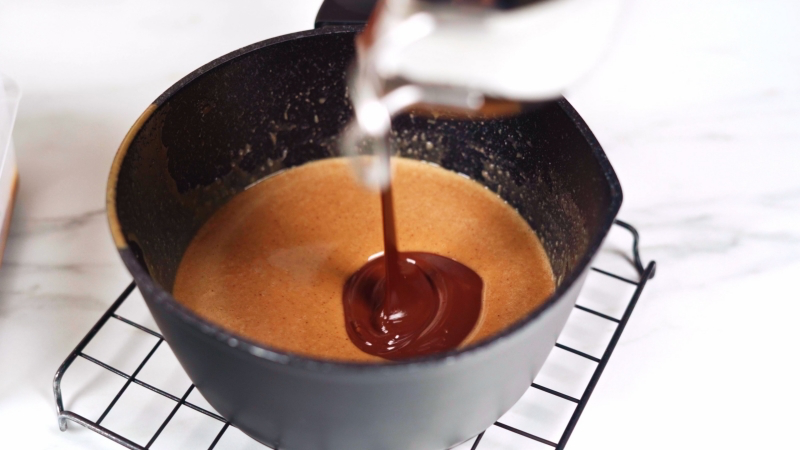
While the base is chilling, melt your chocolate. You can use a double boiler or just do it in the microwave. If you use a microwave, heat it in 20-second bursts, stirring well each time, to prevent it from burning. Once the chocolate is perfectly smooth, add it to the remaining peanut butter mixture in your saucepan and stir until you have a dark, glossy, chocolatey paste.
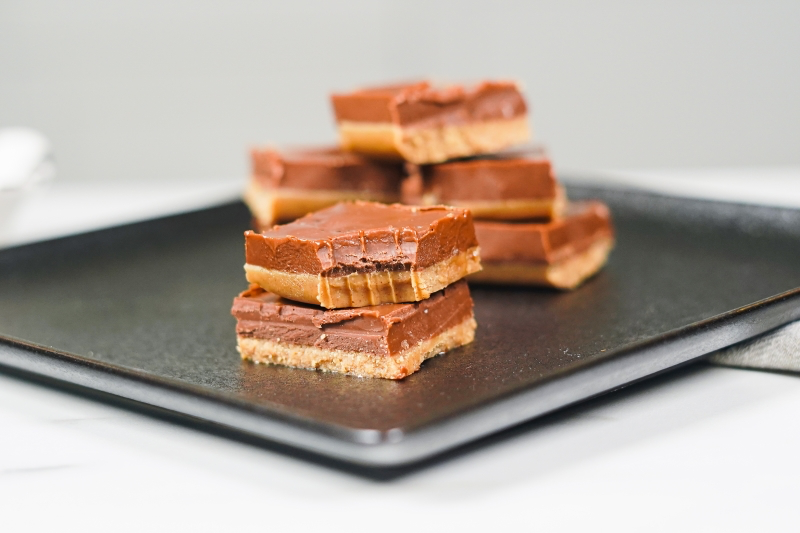
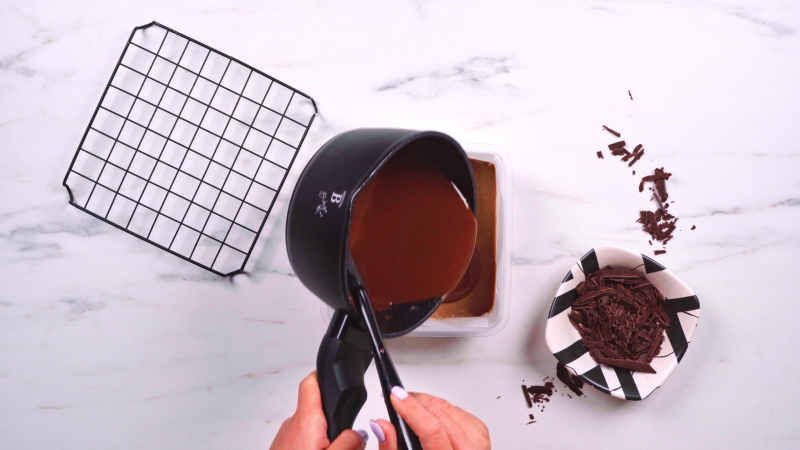
Step 6: Assemble, Salt, and Set
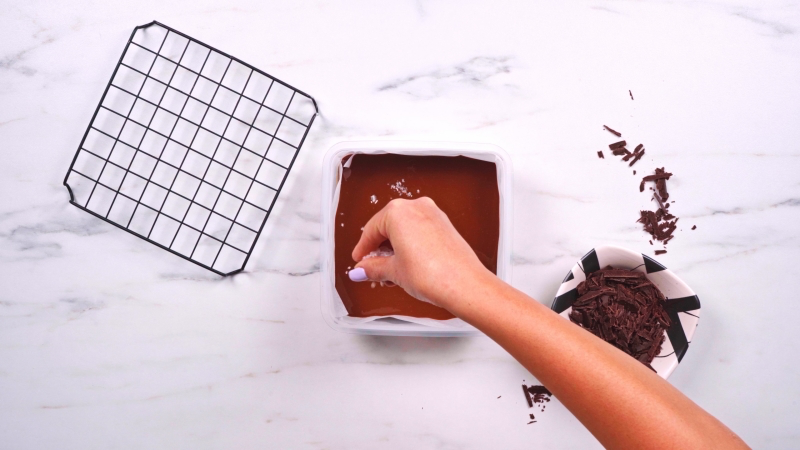
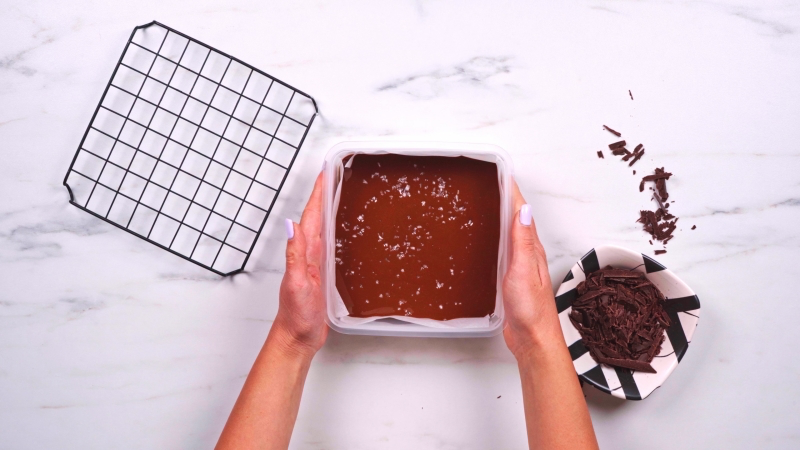
Pull the pan from the fridge. Pour the chocolate mixture over the chilled base and spread it evenly to the edges. Now, while the top is still wet and glossy, sprinkle it with flaky sea salt. I’d start with about 1/2 teaspoon; you want a pop of salt, not a salt slick! The wet chocolate will help it stick.
Now for the hard part… patience. Place the pan back in the fridge to set for at least 2 hours. Honestly, 4 hours is even better, and overnight is best. This gives you those perfectly clean, sharp cuts.
Time-Saving Hack: In a real rush? You can set the fudge in the freezer for about 45-60 minutes. Just don’t forget about it in there, or it will get rock hard!
Step 7: Cut and Store
Once it’s fully set, use the parchment handles to lift the fudge out onto a cutting board. The secret to pro-level squares? A long, sharp knife and hot water. Dip the knife in a tall glass of hot water, wipe it completely dry, and make one clean cut. Repeat this for every single cut. It prevents the chocolate from dragging and smearing.
Cut the fudge into small, 1.5-inch squares. This stuff is rich, so a little piece goes a long way. Store it in an airtight container in the fridge for up to 2 weeks. It also freezes beautifully for up to 3 months if you separate the layers with parchment paper.
Troubleshooting: When Things Go Sideways
Even simple recipes can have off days. Here are some common problems I’ve run into and how to fix them.
- My fudge is oily! This usually happens if the base got too hot or if you used natural peanut butter that wasn’t mixed well enough. To be frank, once it separates badly, it’s hard to fix. The best solution is prevention: use low heat and stir, stir, stir.
- It’s too soft and won’t set. You might have too much liquid (maple syrup) or you accidentally used coconut oil instead of coconut butter. Give it a few more hours in the fridge. If it’s still too soft, just call it ‘spoon fudge’ and enjoy it that way! For next time, try reducing the maple syrup a little.
- My layers all blended together. The bottom layer just wasn’t chilled long enough. It’s purely a visual thing—swirled fudge is just as delicious! Just give it more chill time on your next attempt.
- My fudge is rock-hard from the fridge. This is an easy one! Just let it sit out on the counter for 10-15 minutes before you try to cut or serve it. It will soften up perfectly.
- The chocolate seized into a gritty mess. Ugh, the worst. This happens if even a tiny drop of water gets into melting chocolate, or if it burns. Unfortunately, there’s no saving it. It’s a painful lesson, but always use a bone-dry bowl and spatula.
Now for the Fun Part: Making It Your Own
Once you nail the basic recipe, it becomes a playground for new ideas.
- Try Other Butters: Almond butter, cashew butter, and even tahini can work here. For a nut-free version, sunflower seed butter is a fantastic substitute. Just be aware that runnier butters might require a little less maple syrup to set up properly.
- Add Some Crunch: Fold things in right before pouring! Try adding 1/2 cup of crispy rice cereal to the bottom layer for a crunchy base, or mix chopped pretzels or toasted pecans into the top layer for a salty-sweet crunch.
- Create a Swirl: Instead of layering, pour the plain peanut butter base into the pan. Drop spoonfuls of the chocolate mixture on top, then drag a knife through it a few times to create a beautiful marble pattern. Don’t overdo it, or the colors will get muddy.
A Quick Note on Allergies & Storage
If you’re making this fudge for someone with a serious dairy or gluten allergy, be extra careful. Make sure all your tools and surfaces are squeaky clean to avoid any cross-contamination. Always read the labels on your ingredients, as hidden dairy or gluten can pop up in surprising places.
And remember, this is a fresh confection with no preservatives, so it belongs in the fridge. Don’t leave it sitting out for more than a couple of hours. Enjoy the process, take your time, and get ready to share something truly delicious.
Inspiration:
For that perfect chocolate layer: Not all chocolate is created equal for no-bake fudge. Look for a good quality dark chocolate with 60-70% cacao, like Ghirardelli or Lindt Excellence. These melt smoothly with a little coconut oil and set with a satisfying ‘snap,’ providing a beautiful contrast to the chewy peanut butter base.
My fudge is too soft and won’t set properly. What happened?
This usually points to a ratio issue. It could be that your natural peanut butter was too oily, or you added a bit too much liquid sweetener. Another culprit? Room temperature. This fudge relies on the fats (coconut butter/oil) solidifying when chilled. Make sure your fridge is cold enough and give it ample time—at least 4 hours, or even overnight for a perfectly firm slice.
Ready to customize? The smooth, dense texture of this fudge is a perfect canvas for add-ins. Just be sure to fold them in right at the end.
- For crunch: Try toasted pecans, pretzels, or even crispy rice cereal.
- For chewiness: Mini marshmallows or chopped dried cherries work wonders.
- For a salty kick: A generous sprinkle of flaky sea salt, like Maldon, on top before chilling is non-negotiable for many.
Peanut butter and chocolate is consistently ranked as one of the top flavor combinations in North America.
This craving is rooted in science! The phenomenon is known as ‘dynamic sensory contrast.’ The roasted, salty notes of peanut butter perfectly complement the rich, sweet, and slightly bitter notes of chocolate, creating a multi-layered taste experience that our brains are hardwired to love.
Picture this: a small, perfect square of this fudge next to your afternoon espresso. The intense, rich coffee cuts through the sweetness, highlighting the nutty flavor. It’s a simple, sophisticated ritual that elevates a humble treat into a moment of pure indulgence.
Maple Syrup: Offers a warm, caramel-like flavor that beautifully complements peanut butter. It’s the classic choice for a rich, nuanced sweetness.
Agave Nectar: More neutral in flavor, which lets the peanut and chocolate taste shine through more intensely. It’s slightly thinner, so use the exact amount specified.
For a deeper, more complex flavor profile, stick with pure maple syrup. For pure peanut-y goodness, agave is a great alternative.
- Perfectly uniform squares.
- Clean, sharp edges without crumbling.
- An elegant, professional-looking finish.
The secret? Use a hot, clean knife. Run a large, sharp knife under hot water, wipe it dry, and make one firm, decisive cut. Repeat for every single slice. It’s a game-changer!
For a show-stopping visual, try a raspberry jam swirl. After pressing the fudge mixture into your pan, dollop a few teaspoons of a high-quality, seedless raspberry jam (like Bonne Maman) on top. Use a toothpick or skewer to gently drag the jam through the fudge, creating elegant marbled patterns before you chill it.
- Store in an airtight container in the refrigerator for up to 2 weeks.
- Place parchment paper between layers to prevent sticking.
- Because it’s made with coconut-based fats, it will soften at room temperature. Always serve it chilled for the best texture.
Coconut butter solidifies at room temperature (around 76°F or 24°C).
This is precisely why it’s the ‘secret weapon’ in this recipe. Unlike regular butter, its high melting point helps the fudge set firmly in the fridge without being rock-hard, creating that signature dense, chewy bite.
Can I freeze this fudge for later?
Absolutely! This fudge freezes beautifully. For best results, slice it into individual squares first, then arrange them in a single layer on a parchment-lined baking sheet. Freeze until solid, then transfer the frozen squares to a zip-top freezer bag or airtight container. They’ll keep for up to 3 months. Just let them thaw in the fridge for an hour before serving.
Gifting this goodness? Presentation is everything. Line a small gift box or tin with festive parchment paper. Nestle the fudge squares inside, perhaps alternating between plain and chocolate-topped pieces. A simple ribbon and a handwritten tag listing the ingredients (especially helpful for those with allergies) turns this easy treat into a thoughtful, homemade gift.


