The Unbreakable Cookie: A Pro Baker’s Guide to Winning Your Holiday Swap
I’ve spent a huge chunk of my life in professional kitchens, from running my own little bakery to training new bakers. And let me tell you, the holidays are an intense time. But through all the chaos, my absolute favorite tradition was always the staff cookie swap. On the surface, it’s a friendly competition, but for us, it was a serious test of skill. Because a great swap cookie isn’t just tasty—it has to be a tank.
In this article
- What Makes a Cookie Swap-Proof?
- Choosing Your Adventure: The Recipes
- 1. The Structural Workhorse: Spiced Gingerbread Cut-Outs
- 2. The Reliable Drop Cookie: White Chocolate, Cranberry, and Orange Zest
- 3. The Classic Reimagined: Lemon Rosemary Shortbread
- The Swap Logistics: Don’t Mess It Up Now!
- Galerie d’inspiration
I’ll never forget the time my beautiful, delicate brown butter lace cookies turned into a single, sticky glob in their tin by the time they reached the party. A total disaster. That’s when I got serious about cookie engineering. The best swap cookie needs to taste amazing three days after baking and, most importantly, survive a bumpy ride in a crowded box. It’s a challenge of food science and, honestly, a bit of structural engineering.
This guide is built on all those years of trial and error. We’re not just going to follow recipes; we’re going to understand why they work, so you can bring a batch of cookies you’re genuinely proud of.
What Makes a Cookie Swap-Proof?
Before you even think about preheating your oven, let’s talk strategy. A swap cookie goes on a serious journey. It’s baked, cooled, packed, transported, laid out on a platter, then packed up again to be taken home. It might not even be eaten for a couple of days. So, what are we looking for?
1. It Can’t Fall Apart
This is the number one rule. A fragile cookie is a failed swap cookie, period. Good structure comes from the right balance of ingredients. For instance, cookies with a higher ratio of fat to flour, like a classic shortbread, are naturally sturdy. They have a dense, tight crumb that just doesn’t break easily. Chewy drop cookies also hold up well. You want to avoid anything super thin, airy, or delicate. They might look gorgeous on the baking sheet, but they’ll be a pile of crumbs by the end of the night.
2. It Gets Better with Age
A cookie for a swap needs a decent shelf life. The secret here is moisture. Ingredients that hang onto moisture are your best friends—think molasses, honey, and brown sugar. They keep cookies softer for longer. Fats also act as a barrier, slowing down moisture loss.
Flavor is a big deal, too. Some flavors actually get better over time. Spices like ginger, cinnamon, and cloves meld and deepen after a day or two. A gingerbread cookie, for example, often hits its flavor peak on day three. Lighter, more delicate flavors, on the other hand, can fade into the background.
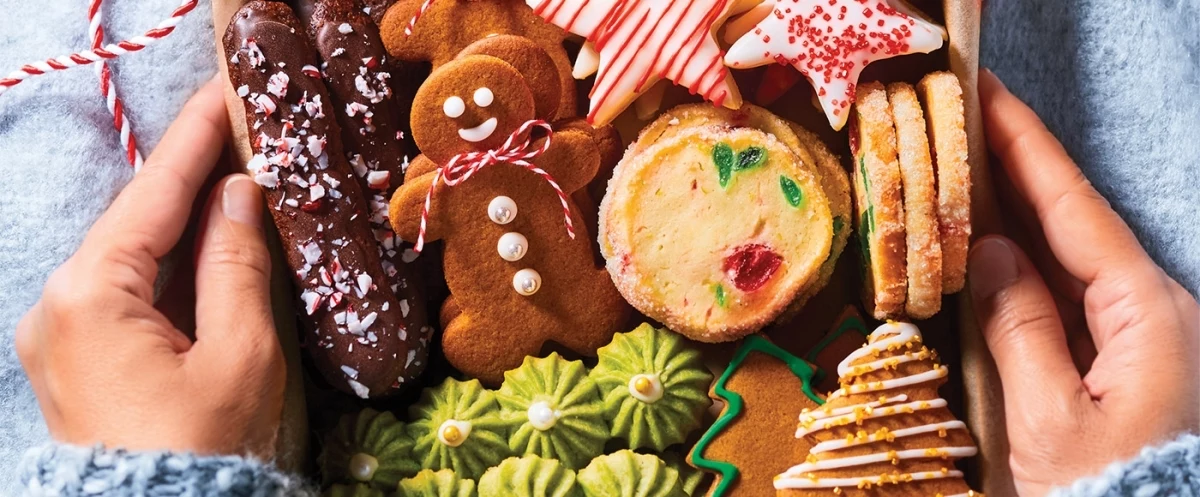
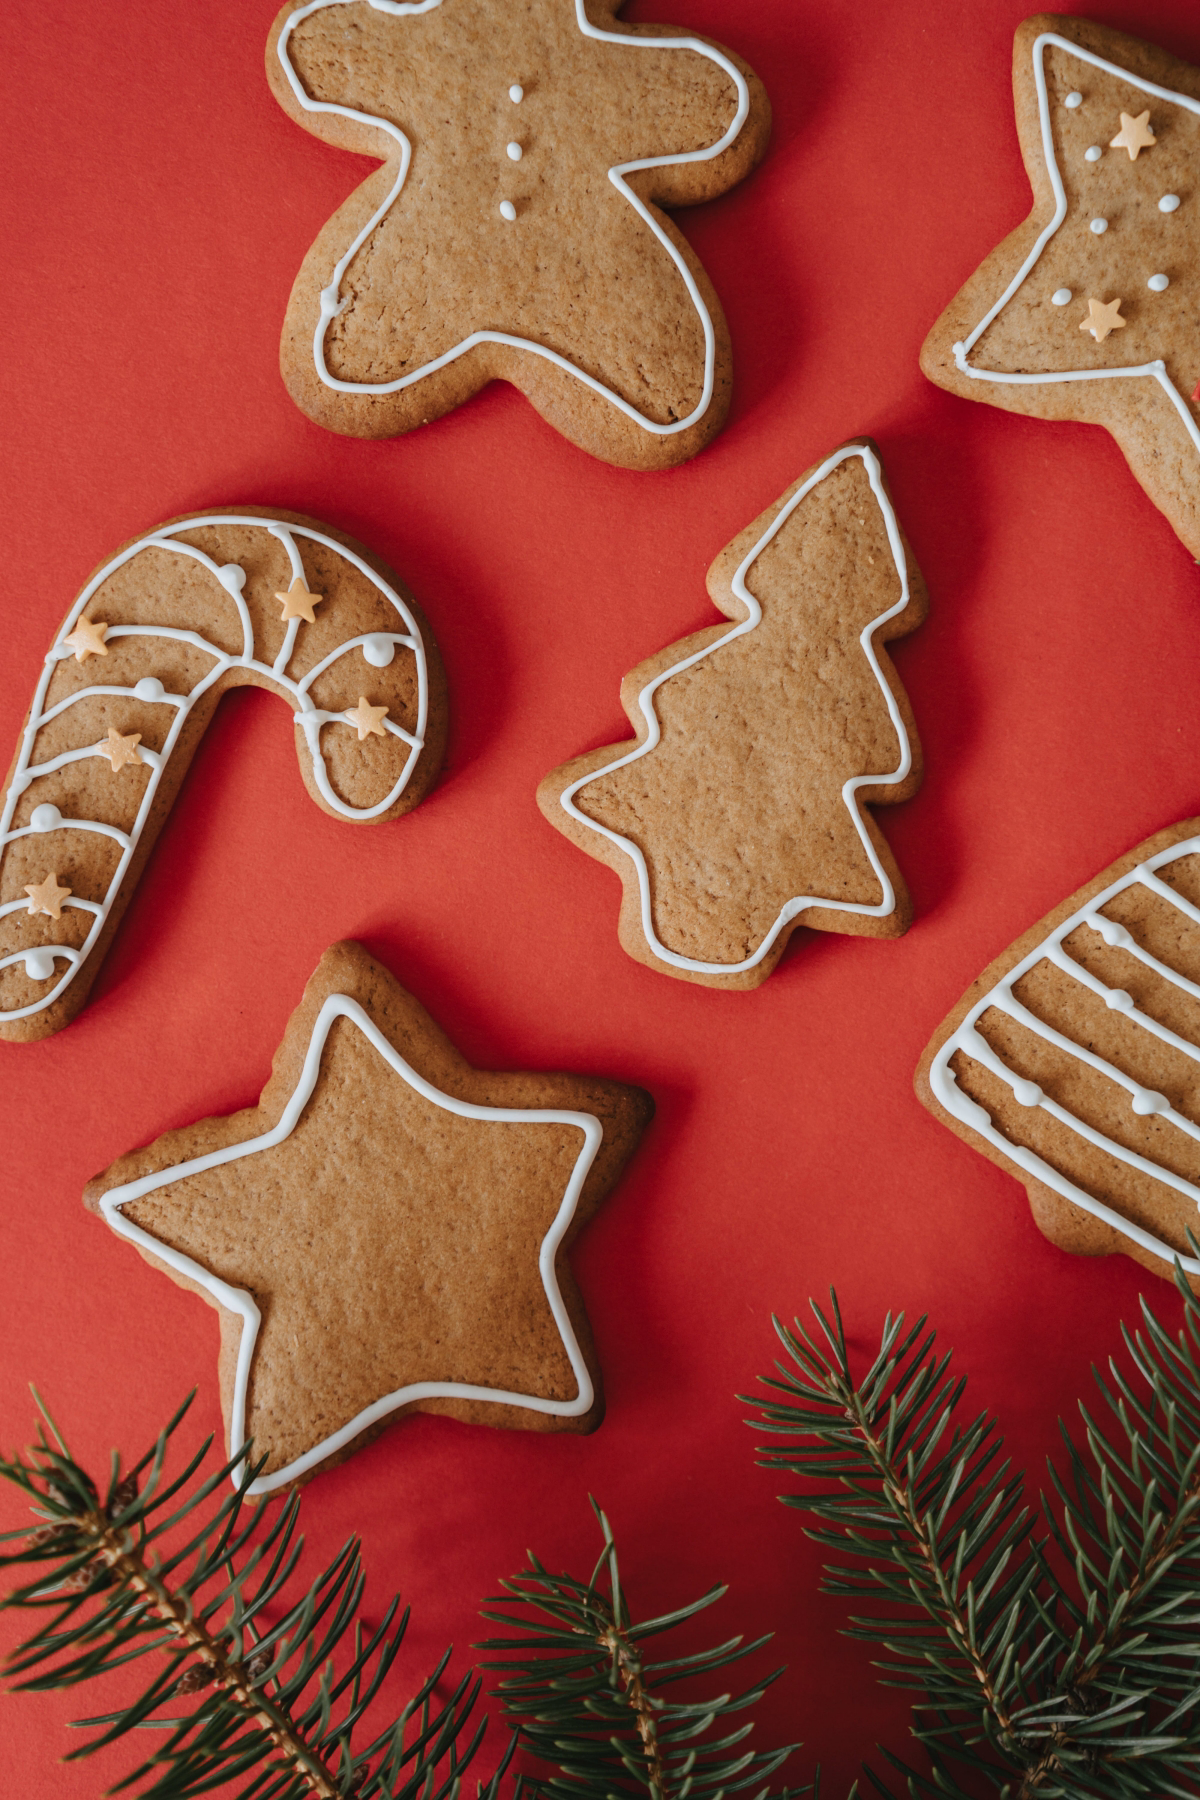
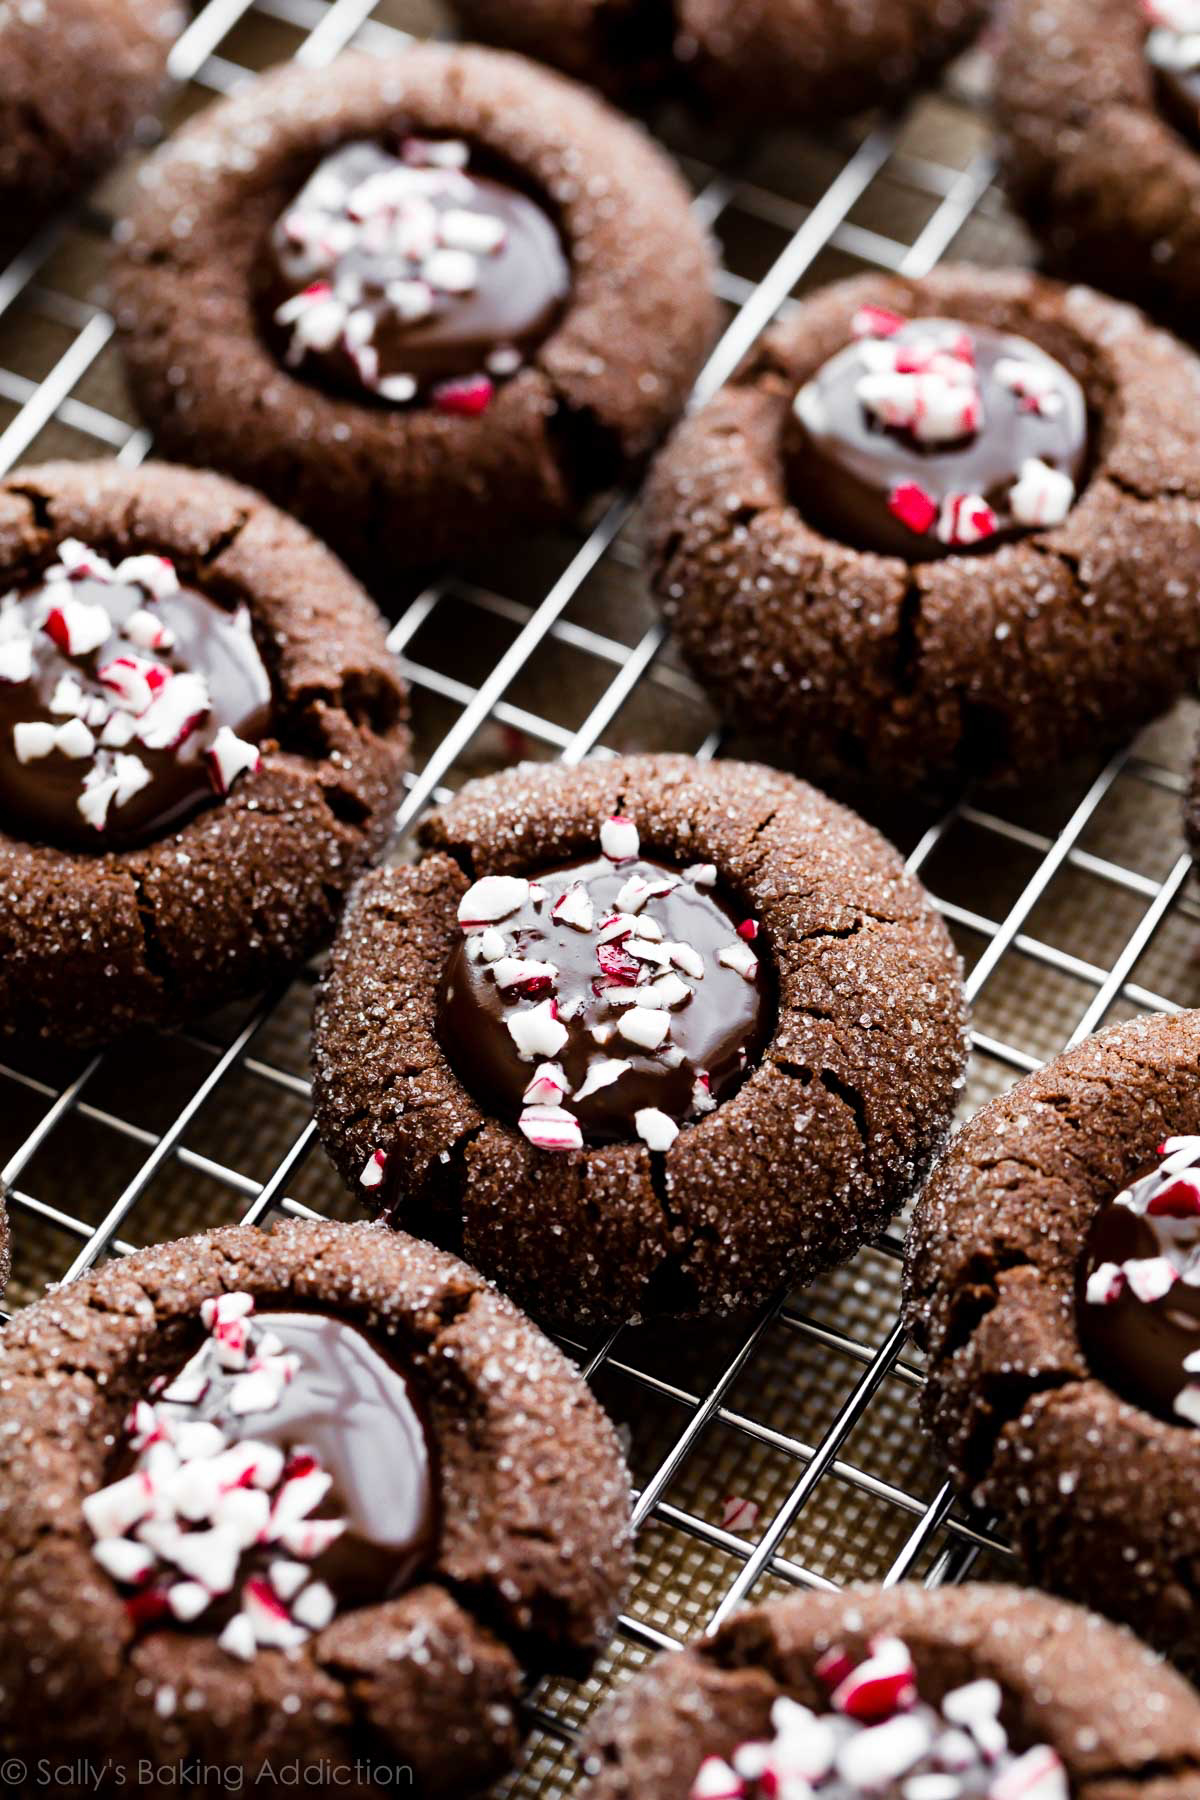
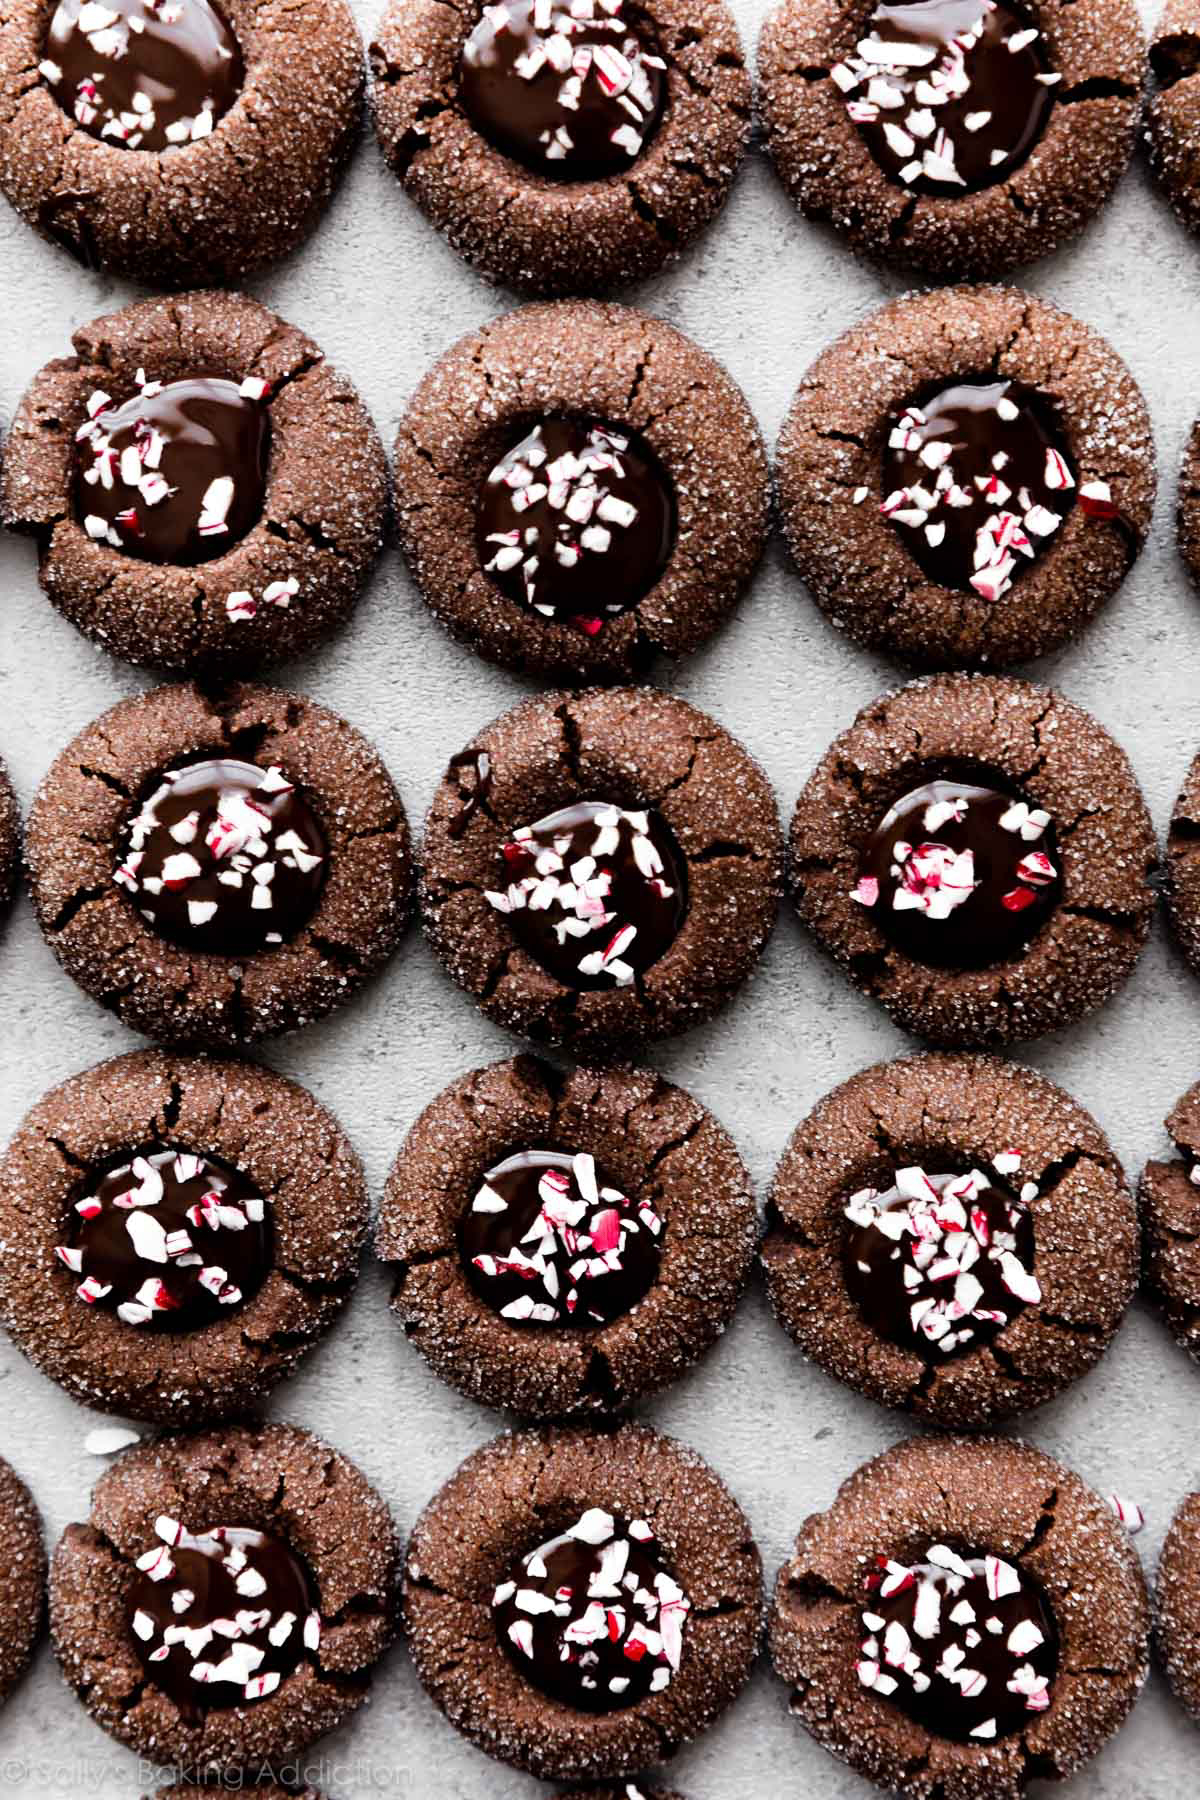
3. The Decorations are Built-In
Elaborate, fluffy frosting is a recipe for disaster. That beautiful swirl of buttercream will be a sad smudge inside a cookie tin. Instead, think about durable decorations. Rolling your cookie dough in coarse sugar before baking adds a fantastic sparkle and crunch that’s completely smash-proof. A simple glaze that dries rock-hard is a much safer bet than soft frosting. Honestly, the most secure option is to build the beauty right into the dough—like vibrant dried cranberries or finely chopped nuts.

Choosing Your Adventure: The Recipes
So, which cookie should you make? Here’s a quick rundown to help you decide.
• For the Traditionalist: The Spiced Gingerbread Cut-Outs are your go-to. They are the definition of sturdy, their flavor gets better with time, and they’re a blast to decorate with hard royal icing. They take a bit more time due to chilling, but the results are rock-solid. Difficulty is medium, but the payoff is huge.
• For the Crowd-Pleaser: Go with the White Chocolate, Cranberry, and Orange Zest Drop Cookies. These are chewy, festive, and absolutely delicious with zero extra decoration needed. They’re a bit easier and quicker than the gingerbread, even with the required chill time. Total win.
• For the Sophisticated Baker: The Lemon Rosemary Shortbread is an elegant, unexpected choice. It’s buttery, crumbly, and the flavor combination is incredible. Shortbread is famously sturdy, and this recipe is fairly straightforward, making it great for bakers of all levels who want to bring something unique.

By the way, all these recipes call for gram measurements. If you don’t own a kitchen scale (you can get a decent one for about $15 online), it’s the single best investment you can make for your baking. It guarantees perfect results every time. If you must use cups, be sure to measure your flour correctly: fluff it up in its container, use a spoon to scoop it into your measuring cup, and then level it off with a flat edge. Never pack it down!
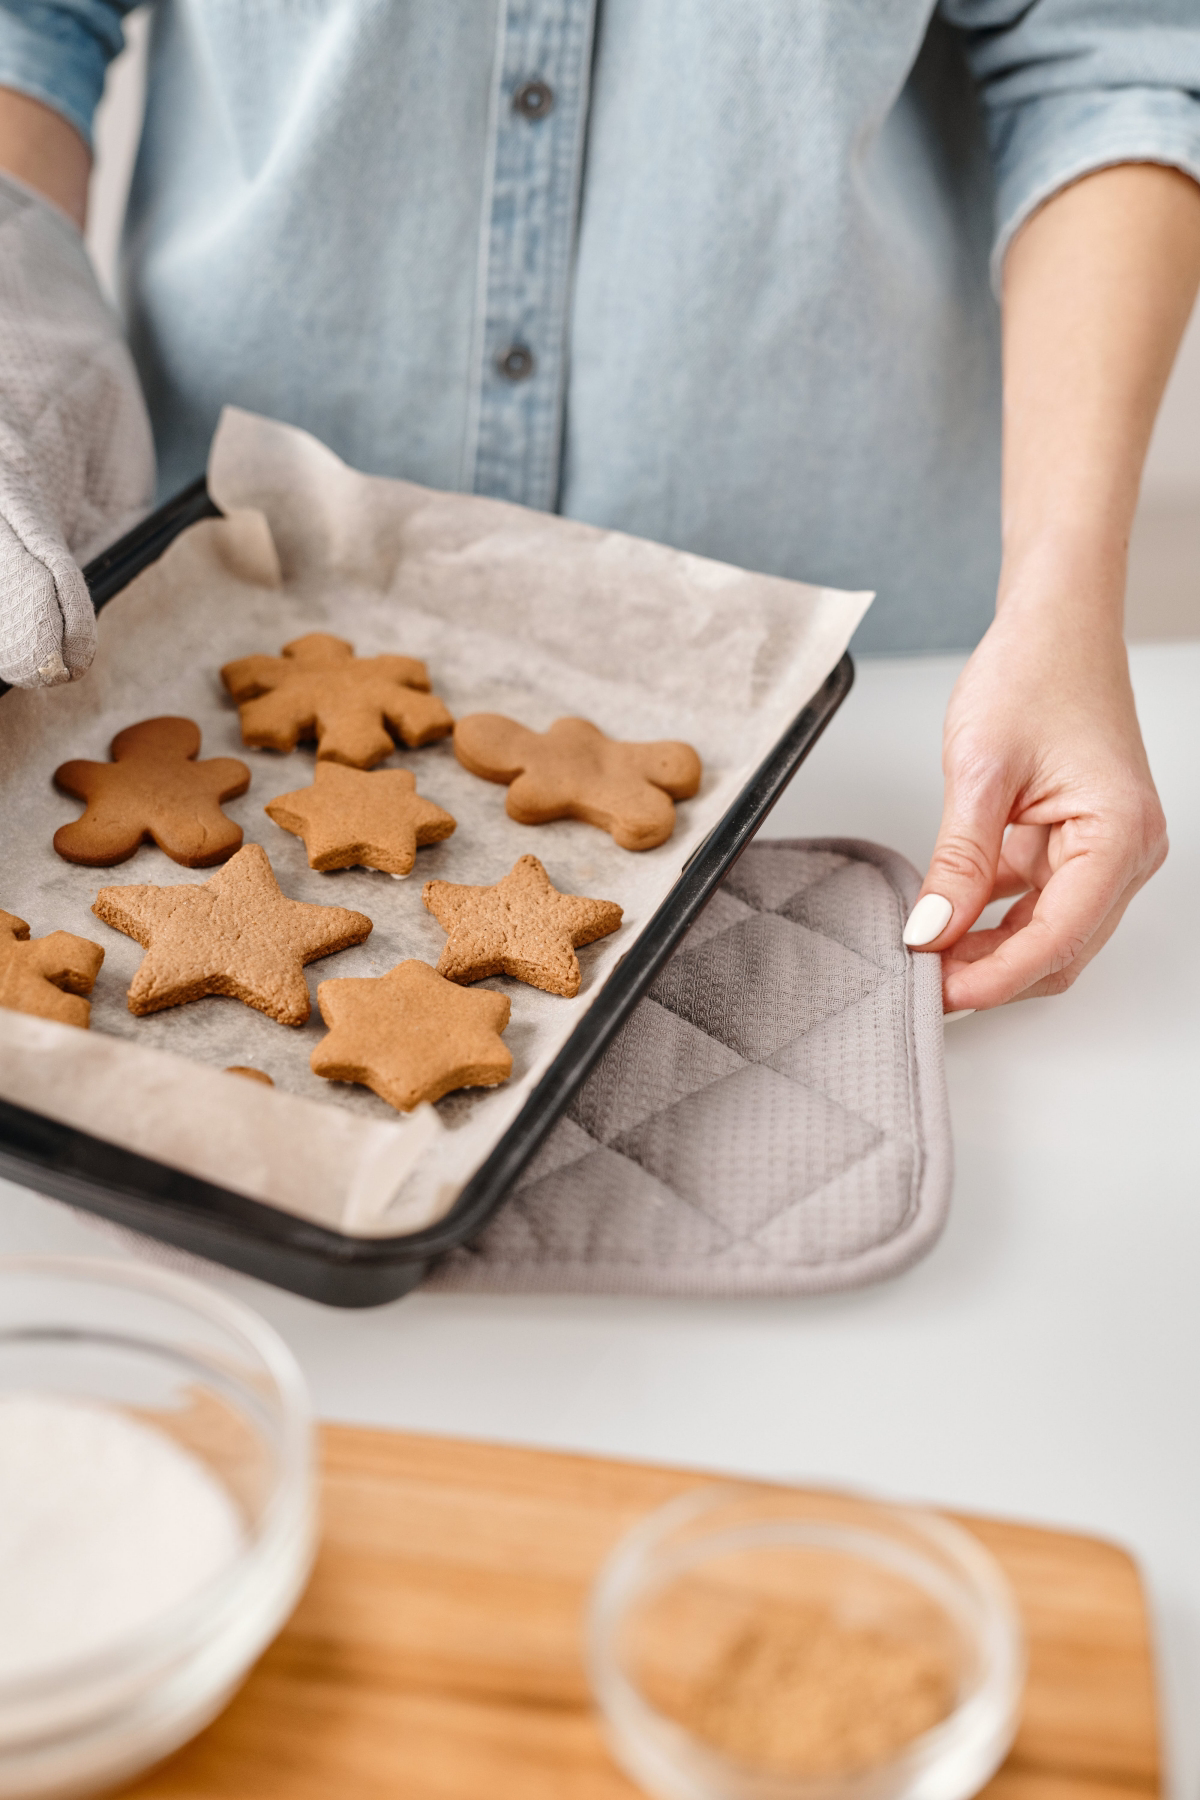
1. The Structural Workhorse: Spiced Gingerbread Cut-Outs
This isn’t your soft, cakey gingerbread. This is a firm, crisp cookie built for the long haul. It has a satisfying snap and a deep, spicy flavor that really shines a few days after baking. It’s perfect for cutting into sharp shapes that won’t spread into sad blobs in the oven.
Why it Works: Molasses is the key player here. It adds moisture for longevity and a touch of acid that tenderizes the dough just right. We use minimal leavening, so the cookies stay flat and keep their shape. And that long chill time? It’s not optional. It lets the flour hydrate and the flavors meld, making the dough a dream to work with.
Ingredients:
- 420g (3 1/2 cups) all-purpose flour
- 4g (1 teaspoon) baking soda
- 2g (1/2 teaspoon) salt
- 12g (2 tablespoons) ground ginger
- 6g (1 tablespoon) ground cinnamon
- 2g (1/2 teaspoon) ground cloves
- 1g (1/4 teaspoon) ground nutmeg
- 227g (1 cup) unsalted butter, softened
- 150g (3/4 cup) packed dark brown sugar
- 1 large egg, at room temperature
- 160g (1/2 cup) unsulphured molasses
The Pro Technique:
- Sift Your Dry Stuff: In a medium bowl, sift the flour, baking soda, salt, and all spices together. Seriously, don’t skip the sifting. It gets rid of clumps and makes sure you don’t get a bitter bite of baking soda.
- Cream Carefully: In a stand mixer with the paddle attachment, beat the butter and brown sugar for 2-3 minutes. You want it combined, not super fluffy. Too much air makes cookies spread. (Heads up! No stand mixer? A hand mixer works fine, or you can do it by hand with a wooden spoon and some elbow grease. Just make sure the butter is nice and soft.)
- Combine the Wet: Add the egg and molasses, mixing on low until just combined. Scrape the bowl down well.
- Mix the Dough: On the lowest speed, add the dry ingredients in three parts. Stop mixing the second you don’t see any more dry flour. Overmixing = tough cookies.
- Divide and Chill: The dough will be soft. Divide it in half, press into 1-inch thick disks, wrap in plastic, and chill for at least 4 hours. Overnight is even better.
- Roll and Cut: Preheat your oven to 350°F (175°C) and line baking sheets with parchment paper. I always roll dough between two sheets of parchment. It prevents sticking without adding extra flour, which can dry out the cookies. Roll to an even 1/4-inch thickness. You can buy rolling pin guides for about $10-15 online or at a kitchen store; they’re a game-changer for uniform cookies.
- Bake and Cool: Bake for 9-11 minutes, until the edges look set. Let them cool on the sheet for 5 minutes before moving to a wire rack. Don’t even think about packing them until they are 100% cool.
Make-Ahead & Freezing: These are perfect for making ahead! The baked cookies can be stored in an airtight tin for up to a week, and the flavor just gets better. To freeze, you can wrap the raw dough disks tightly and freeze them for up to 3 months. Just thaw in the fridge overnight before rolling.
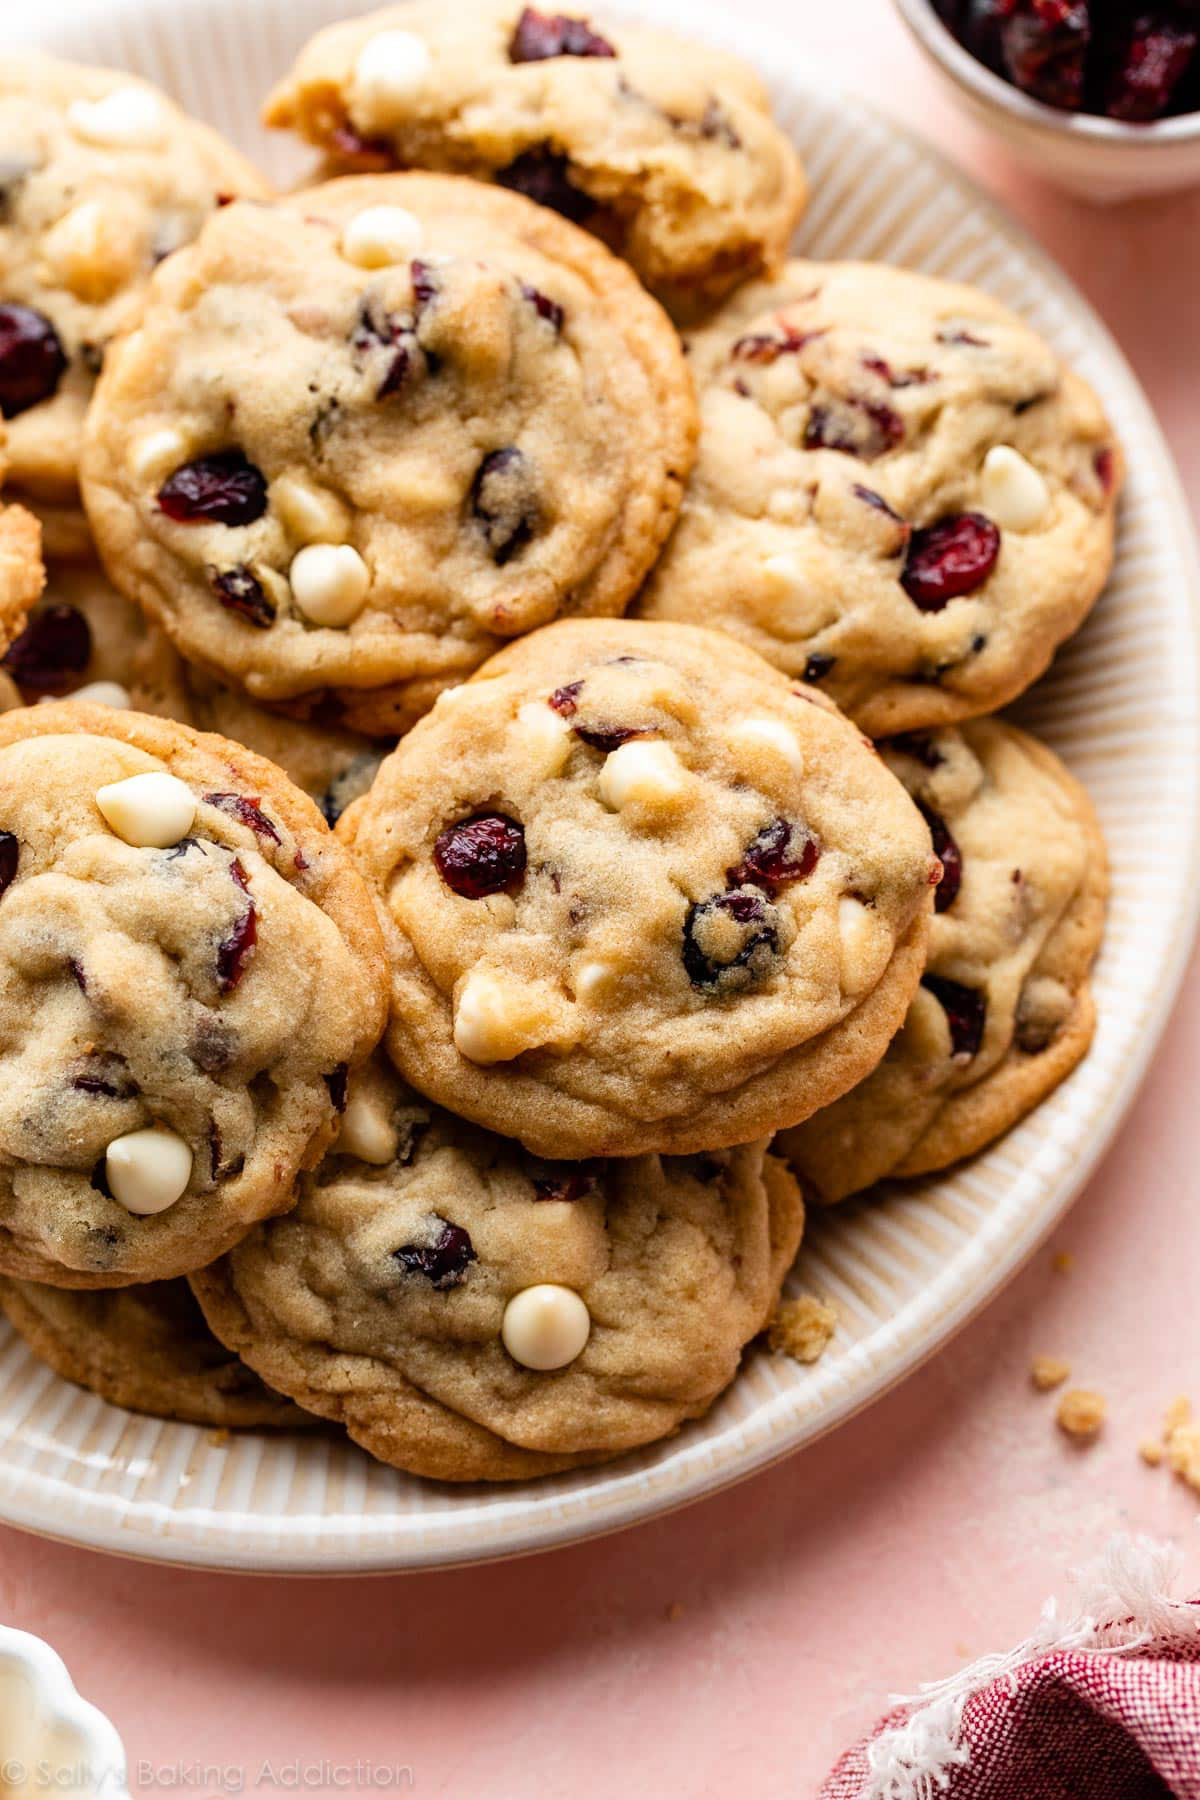
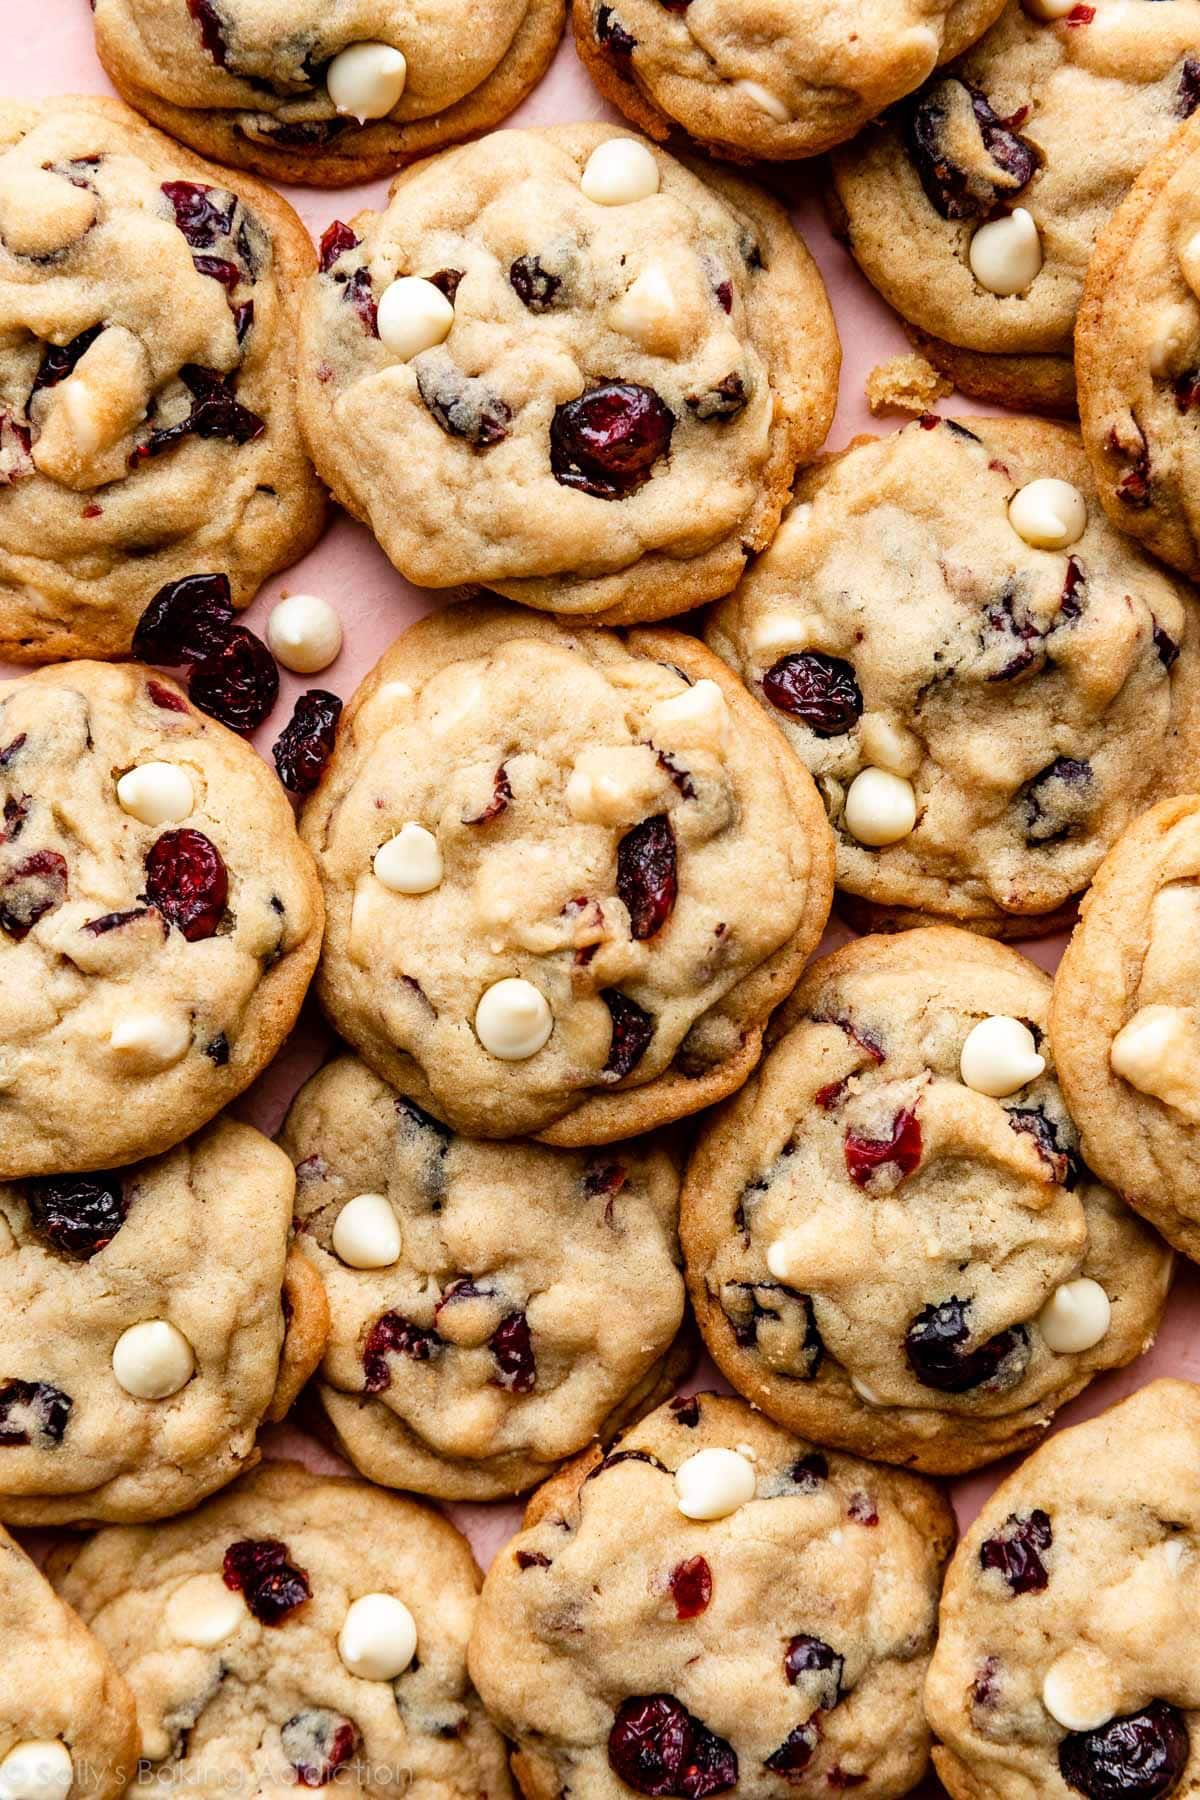
2. The Reliable Drop Cookie: White Chocolate, Cranberry, and Orange Zest
This cookie is a total rockstar. It’s chewy, packed with flavor, and looks gorgeous without any fussy decorating. The sweet-tart-bright combo is a holiday classic for a reason, and the cookie itself travels like a champ.
Why it Works: The chewiness comes from a high brown sugar content and the use of melted butter. The absolute non-negotiable step is chilling the dough. It solidifies the fat, so when the cookies bake, the butter melts more slowly. This means less spread and a thicker, chewier cookie. Plus, it gives the orange zest time to infuse its flavor into the dough. It’s so worth the wait.
Ingredients:
- 325g (2 1/2 cups) all-purpose flour
- 2g (1/2 teaspoon) baking soda
- 2g (1/2 teaspoon) salt
- 227g (1 cup) unsalted butter, melted and cooled a bit
- 200g (1 cup) packed light brown sugar
- 100g (1/2 cup) granulated sugar
- 1 large egg plus 1 egg yolk
- 10g (2 teaspoons) vanilla extract
- Zest of one large orange
- 255g (1 1/2 cups) high-quality white chocolate chips or chunks
- 170g (1 1/2 cups) dried cranberries
The Pro Technique:
- Mix It Up: Whisk your flour, baking soda, and salt in one bowl. In a larger bowl, whisk the melted butter and sugars. Then whisk in the egg, egg yolk, vanilla, and orange zest.
- Form the Dough: Stir the dry ingredients into the wet with a spatula until just combined. Fold in the white chocolate and cranberries. The dough will look soft and a little greasy—that’s totally normal.
- The Critical Chill: Cover the bowl and refrigerate for at least 3 hours, but honestly, up to 48 hours is fantastic. The longer it chills, the better the flavor.
- Portion and Bake: Preheat to 365°F (185°C). That slightly higher temp helps the edges set fast. Use a cookie scoop (about 1.5 tablespoons) to make uniform balls. This is key for even baking. Place them 2 inches apart on a parchment-lined sheet.
- Bake for Texture: Bake for 11-13 minutes, until the edges are golden brown but the centers still look a tad underdone. They’ll finish baking on the hot pan.
- Cool Completely: Let them cool on the baking sheet for 10 minutes before moving them to a wire rack.
A Note on Chocolate: Quality really matters here. Look for brands like Ghirardelli or Guittard where cocoa butter is a top ingredient. Cheaper chips often use palm oil and can taste waxy. It’s worth the extra couple of dollars.
Make-Ahead & Freezing: These cookies stay fresh and chewy in an airtight container for about 4-5 days. For a major time-saver, scoop the dough balls onto a baking sheet, freeze them solid, then toss them into a freezer bag. You can bake them straight from frozen for up to 3 months! Just add 2-3 minutes to the baking time.
3. The Classic Reimagined: Lemon Rosemary Shortbread
Shortbread is the undisputed king of sturdy cookies. Its high-fat, low-moisture dough creates a tender, crumbly cookie that is nearly indestructible. This version adds a sophisticated twist with bright lemon and savory rosemary that cuts through the buttery richness beautifully.
Why it Works: The ‘short’ in shortbread refers to its texture. The fat coats the flour, preventing long gluten strands from forming, which gives you that signature melt-in-your-mouth crumble. Using powdered sugar also helps create that delicate texture because it dissolves so easily.
Ingredients:
- 280g (2 1/3 cups) all-purpose flour
- 227g (1 cup) cold unsalted butter, cut into 1/2-inch cubes
- 100g (1 cup) powdered sugar, sifted
- 3g (1/2 teaspoon) salt
- Zest of one large lemon
- 4g (1 tablespoon) finely chopped fresh rosemary
The Pro Technique:
- Infuse the Flavor: In a small bowl, use your fingertips to rub the lemon zest and rosemary into the powdered sugar. This releases their essential oils for a much more potent flavor.
- Cut in the Butter: Combine the flour and salt, then add the cold butter cubes. Use a pastry blender or your fingertips to cut the butter into the flour until it looks like coarse crumbs with some pea-sized butter bits left. Work fast to keep it cold!
- Form the Dough: Add the infused sugar and mix gently until the dough just starts to come together. Don’t knead it. Tip the crumbly mix onto your counter and press it into a disk.
- Chill and Roll: Wrap the disk and chill for at least an hour. Roll the dough to a 1/3-inch thickness.
- Cut and Dock: Cut into simple shapes (squares or rounds are best). Place on a parchment-lined sheet and prick the tops with a fork. This ‘docking’ lets steam escape so they don’t puff up.
- Chill Again: For super sharp edges, pop the tray of cut cookies into the freezer for 15 minutes before baking. It’s a pro move that makes a big difference.
- Bake Low and Slow: Preheat oven to 325°F (165°C). Bake for 15-20 minutes, until the edges are just barely golden. Shortbread shouldn’t get dark. Cool on the baking sheets.
Make-Ahead & Freezing: Shortbread lasts forever. Baked cookies will keep in an airtight container for at least a week. The raw dough can be frozen as a disk (for 3 months), or you can freeze the cut-out, unbaked cookies on a tray, transfer to a bag, and bake from frozen (adding a few extra minutes).
The Swap Logistics: Don’t Mess It Up Now!
Okay, you’ve baked incredible, sturdy cookies. The final step is getting them there in one piece and being a good swap citizen.
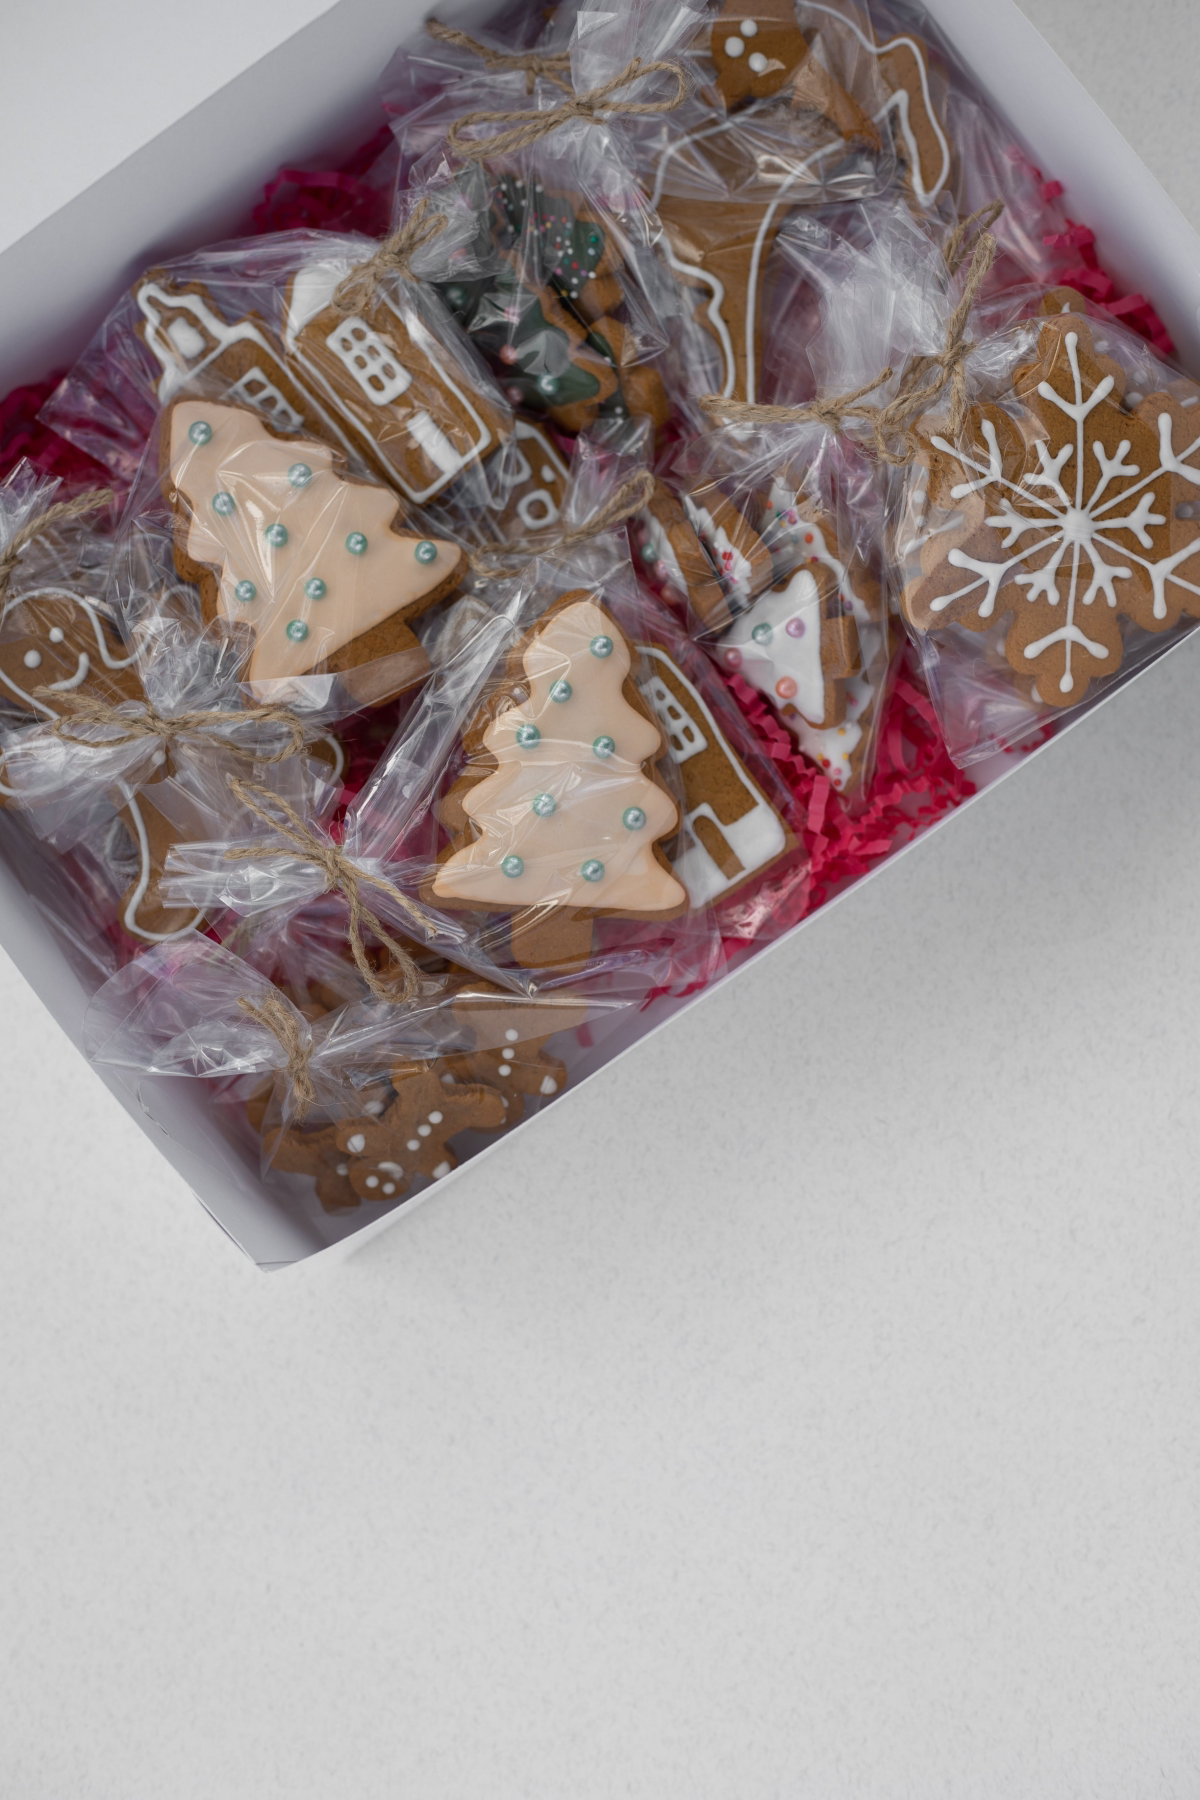
Packaging is Everything
Wait until your cookies are 100% cool. I mean it. This can take a few hours. Packing even slightly warm cookies creates steam, and that steam will ruin every single cookie in the container. Use a sturdy tin or airtight container. Line the bottom with parchment paper, arrange a single layer of cookies, then top with another sheet of parchment before adding the next layer. Don’t mix heavy gingerbread with lighter shortbread in the same layer.
Allergen Safety is Non-Negotiable
This is about respect and safety. You must bring a list of ingredients or, at the very least, a clearly written label for your container. People have serious allergies. A simple card is perfect:
White Chocolate Cranberry Cookies
CONTAINS: WHEAT, DAIRY, EGG
If you use nuts, you have to state it. And be honest about cross-contamination. If you bake with peanuts a lot, it’s good practice to mention that your kitchen is not nut-free. Better safe than sorry.
How Many to Bring?
The host usually sets the rules, but a good rule of thumb is one dozen cookies per participant, plus an extra dozen for sampling. If there are 8 people, you bring 8 dozen. It’s a lot of baking, so be realistic. It’s far better to bring one perfectly executed batch than three rushed ones.
Oh, and one last tip: when you get home with your haul, separate the cookies you received into different containers. Keep the crispy ones away from the soft ones, or the soft ones will make the crispy ones soggy. It’s a small thing that keeps everything tasting its best.
Have fun, bake with care, and share with pride. You got this.
Galerie d’inspiration
How do I make my cookies beautiful without using fragile icing that will just break?
The secret is to think “baked-in” beauty. Instead of delicate piped details, incorporate texture and color directly into the dough or as a pre-bake topping. Pressing coarse sanding sugar or colorful nonpareils onto the dough before it goes in the oven embeds them for a durable sparkle. For icing, a sturdy royal icing “flood” made with meringue powder (like Wilton’s) creates a hard, smooth shell that’s far more resilient than soft buttercream. Another great option is using ingredients with visual pop, like the jewel-toned red of dried cranberries in an oatmeal cookie.

A 2018 study on food packaging found that a multi-layer cushioning approach—like alternating cookies with waxed paper—can reduce breakage from impact by over 60%.
Don’t just toss your creations in a box. Think like a shipping expert. Line your container (a sturdy tin is always a winner) with crinkled parchment paper for a base cushion. Then, lay down your first layer of cookies, top with a sheet of waxed paper (it’s better than parchment for preventing sticking between layers), and repeat. For oddly shaped cookies, a gentle packing of plain, unbuttered popcorn can fill the gaps and provide surprisingly effective, edible protection.
Chocolate for Travel: For drizzles or dips, choose your chocolate wisely. A standard chocolate chip will melt easily and cause a mess. Opt for compound chocolate wafers (often sold as “melting wafers” by brands like Ghirardelli or Merckens) which contain vegetable oil. They set up much harder and are more stable at room temperature, ensuring your beautiful designs arrive crisp, not smeared.


