Forget Resolutions, Let’s Bake: A Pro’s Guide to Unforgettable New Year’s Cookies
For as long as I can remember, the last week of the year has had a very specific smell in my kitchen. It isn’t pine needles or the crisp bite of cold air. It’s the glorious scent of butter and sugar creaming in a mixer, the bright, sharp hit of citrus zest, and the deep, comforting aroma of chocolate melting over a gentle flame. After years running commercial bakeries and teaching others the craft, New Year’s for me isn’t just about the ball drop. It’s one final, sweet production—a chance to create something warm and hopeful to close one chapter and kick off the next.
In this article
- The Classic Canvas: Mastering the New Year’s Sugar Cookie
- A Taste of Fortune: The Homemade Fortune Cookie Challenge
- European Traditions: Chewy Cinnamon Stars (Zimtsterne)
- Modern Flavors: Infusions, Dips, and Double-Bakes
- Final Thoughts on Safety and Storage
- Galerie d’inspiration
A lot of folks see holiday baking as a casual tradition, which is wonderful! But for a professional, it’s a craft built on science and technique. It’s about knowing how to handle temperature and texture to get that perfect, consistent result every single time. These cookies are more than just sugary snacks; they’re little symbols of care and intention. When you share a really well-made cookie, you’re sharing a piece of your craft.
So, this guide is more than just a list of recipes. I want to pull back the curtain on the knowledge I’ve picked up over thousands of hours at the bench. We’ll dig into the fundamental science that makes a cookie go from ‘good’ to ‘great’. I’ll walk you through pro techniques for some classics and even a few more challenging bakes. The goal here is to arm you with the confidence to bake amazing cookies, whether you’re making a simple batch for your family or prepping dozens for a party.
We’ll cover a few different styles, so you can pick your own adventure:
- The Classic Sugar Cookie: Your go-to canvas. Relatively easy, but mastering it is a true sign of skill. Perfect for decorating and sharing.
- The Ambitious Fortune Cookie: A serious challenge! These are for bakers who love a project and want a truly unique, interactive treat for their guests.
- The Rustic Cinnamon Star (Zimtsterne): A taste of European tradition. These are naturally gluten-free, chewy, and intensely flavorful. A sophisticated and unique choice.
The Baker’s Foundation: It All Starts with the Dough
Before you even think about preheating the oven, you have to understand your ingredients. A recipe is just a map, but knowing the terrain—how fat, sugar, flour, and eggs work together—is what actually gets you to your destination without getting lost. Honestly, getting this part right is the single biggest step you can take towards professional-level results.
The Critical Role of Butter Temperature
Most recipes call for “softened butter,” but what does that even mean? For a pro, it’s specific: right around 65°F (18°C). The butter should be pliable and cool to the touch, not greasy or starting to melt. Why the fuss? Well, the whole point of creaming butter and sugar is to whip tiny air pockets into the fat. If your butter is too warm, it can’t hold that air; the sugar just dissolves, and you end up with dense, greasy cookies that spread into sad, thin discs on the baking sheet. I learned this the hard way one summer when the bakery’s A/C went out. Every single batch of dough spread into an oily mess. Lesson learned: control your butter temperature.
The Science of Creaming
When you cream butter and sugar, the sharp edges of the sugar crystals are literally cutting into the butter, creating thousands of microscopic air cells. Later, leaveners like baking powder will expand those little pockets in the oven’s heat, giving your cookie lift and a tender texture. On a stand mixer with the paddle attachment, give it a full 3 to 5 minutes on medium speed. With a good hand mixer, you might need to go for 6 to 8 minutes. The mixture should get visibly lighter in color and look fluffy, almost like frosting. Don’t rush this. It’s the foundation of the cookie’s entire structure.
Flour, Gluten, and the Gentle Touch
Flour provides the structure. For most cookies, regular all-purpose flour, with its 10-12% protein content, is perfect. When you mix flour with liquid, you develop gluten. A little gluten is necessary to hold the cookie together, but too much makes cookies tough and bready. This is why recipes always say to mix “until just combined.” Seriously, the moment you see the last streaks of flour disappear, STOP. For an extra-tender, melt-in-your-mouth texture, you can substitute a little bit of the all-purpose flour (about 1/4 cup for every 2 cups) with cake flour, which has less protein.
Chilling Your Dough: The Pro’s Non-Negotiable Step
Let’s be clear: chilling your cookie dough is not an optional step. It’s mandatory for great cookies. It does two critical things. First, it solidifies the butter. Cold fat melts much more slowly in the oven, which means your cookies spread less and hold their shape beautifully—a must for cut-outs. Second, chilling allows the flour to fully hydrate, absorbing the moisture in the dough. This concentrates the flavor and results in a chewier, more satisfying texture. An hour is good, but overnight is even better. The taste difference is real.
Make-Ahead Tip: This is your secret weapon for the holidays. You can wrap your dough disc tightly in plastic wrap, then pop it in a freezer bag. It will keep in the freezer for up to 3 months! Just thaw it in the fridge overnight before you’re ready to roll and bake.
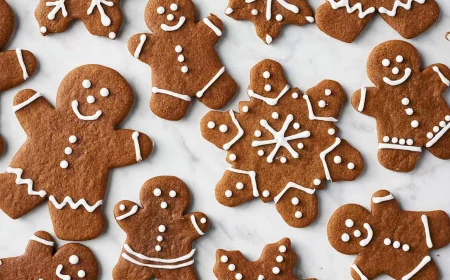
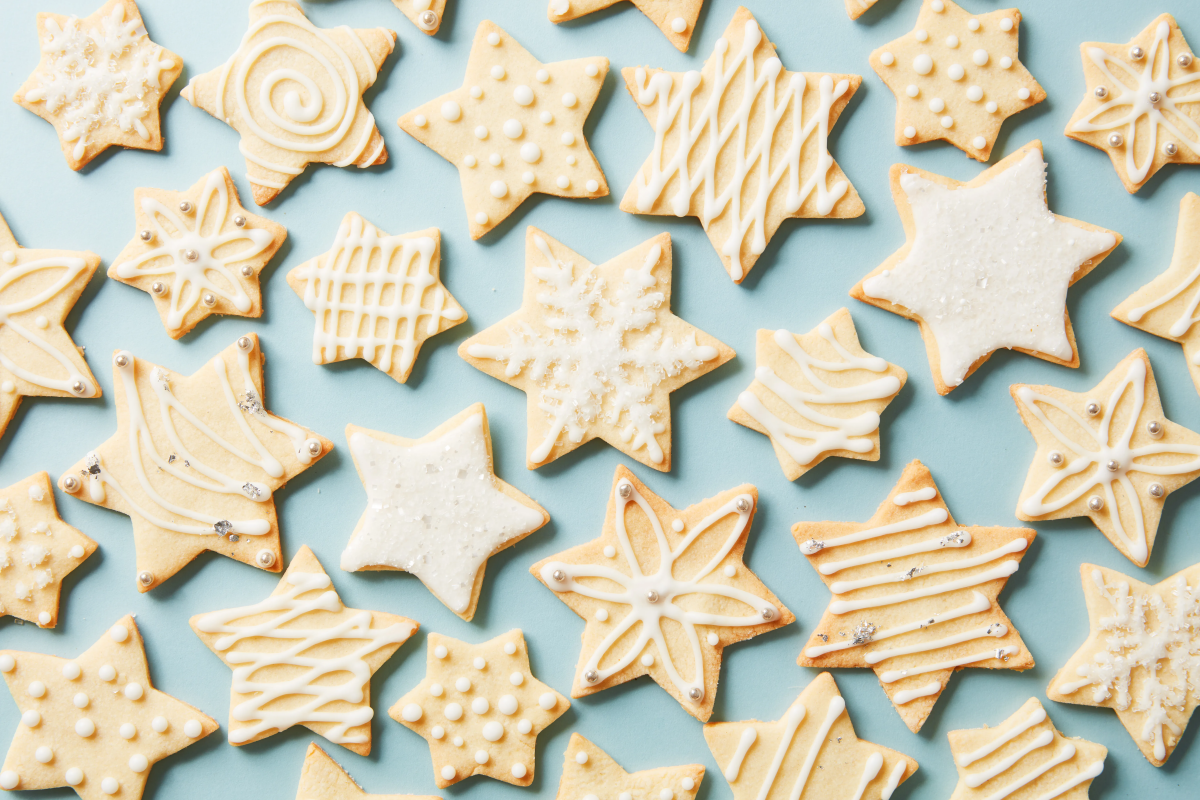
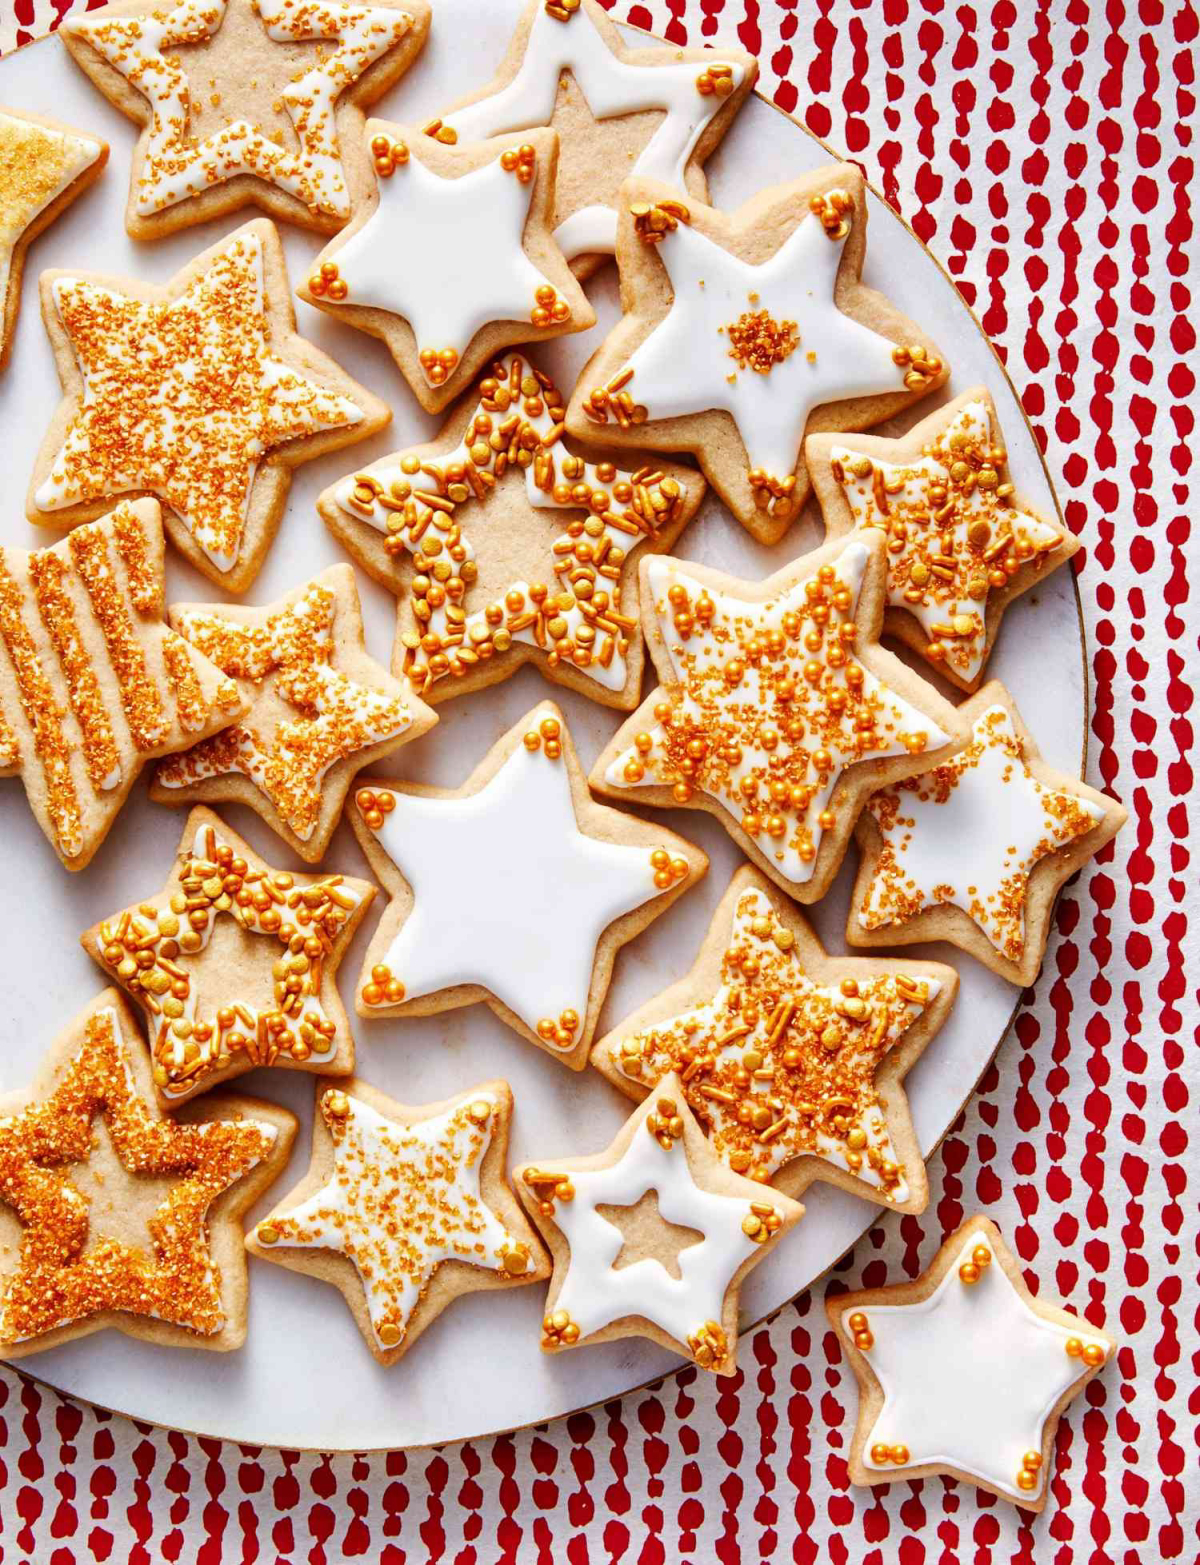
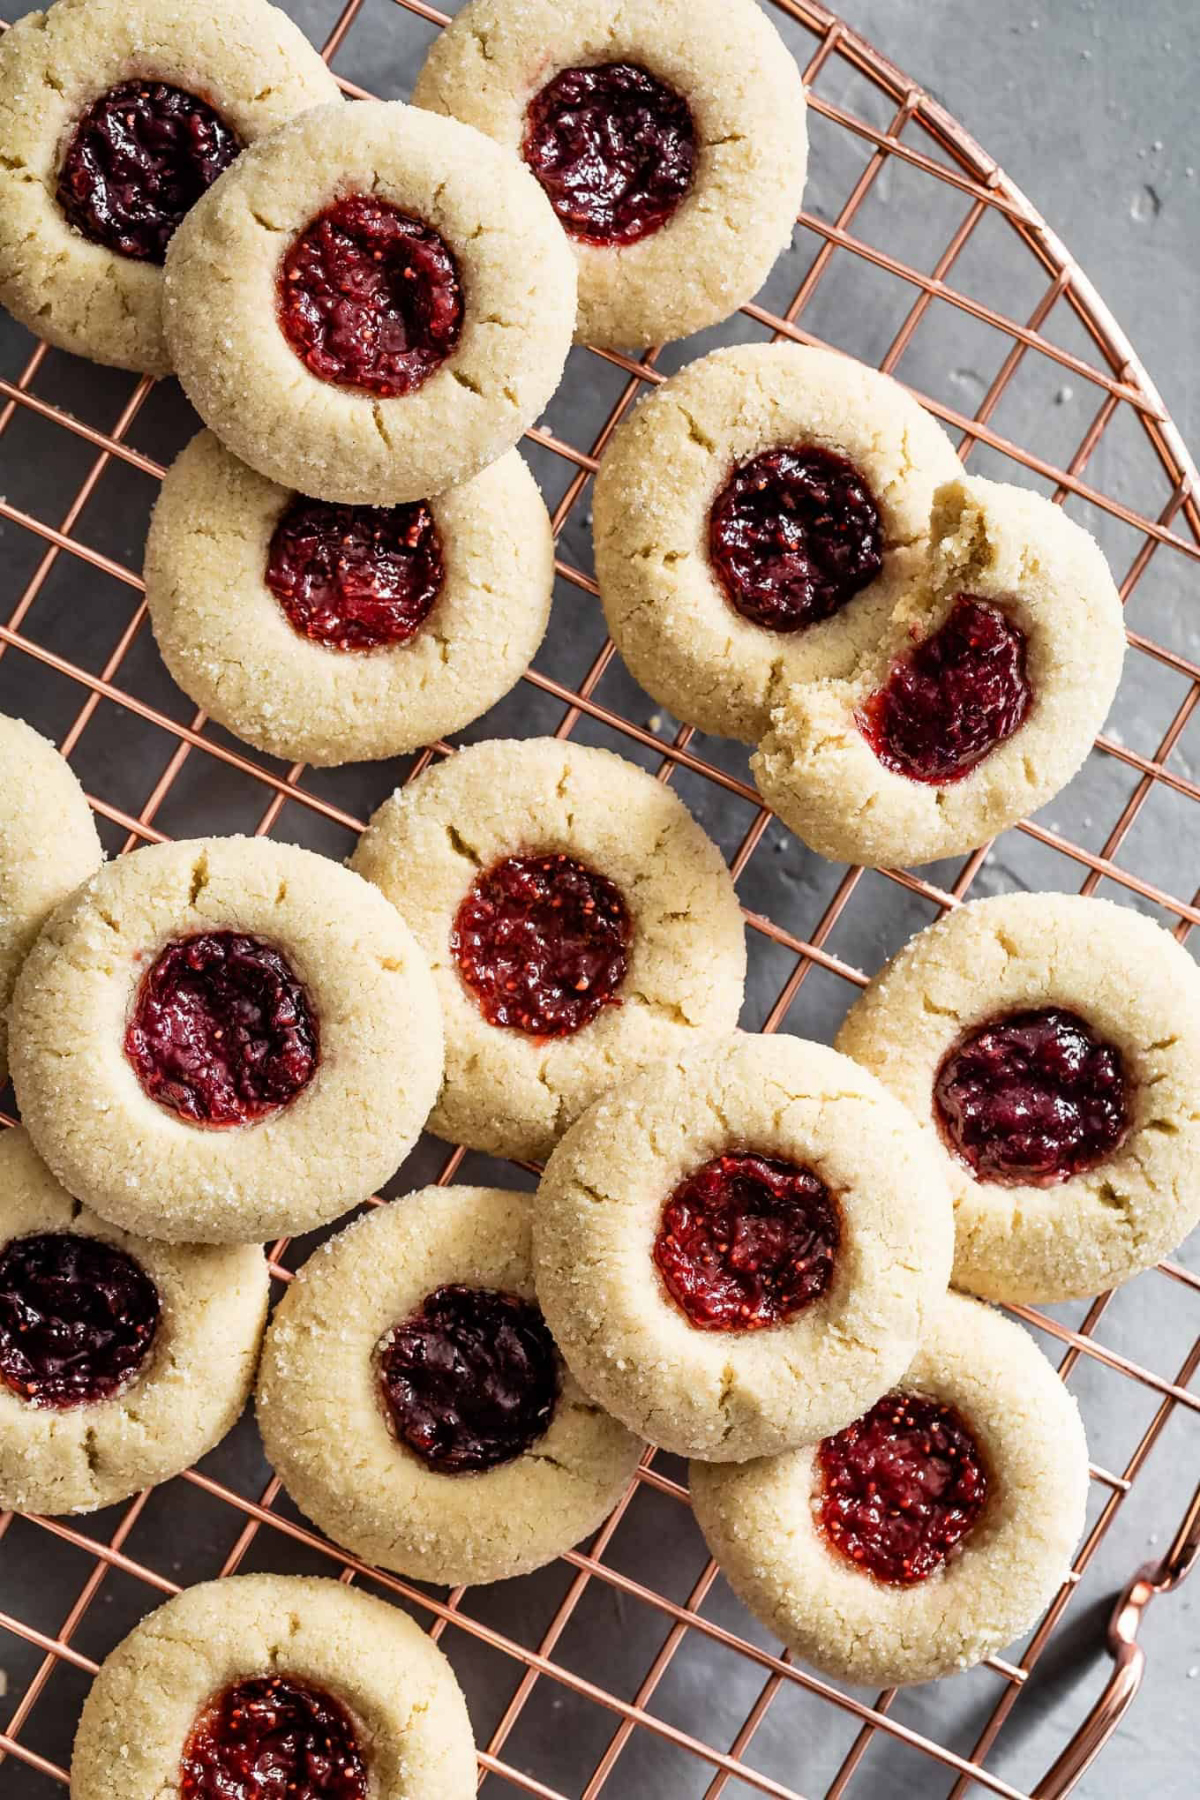
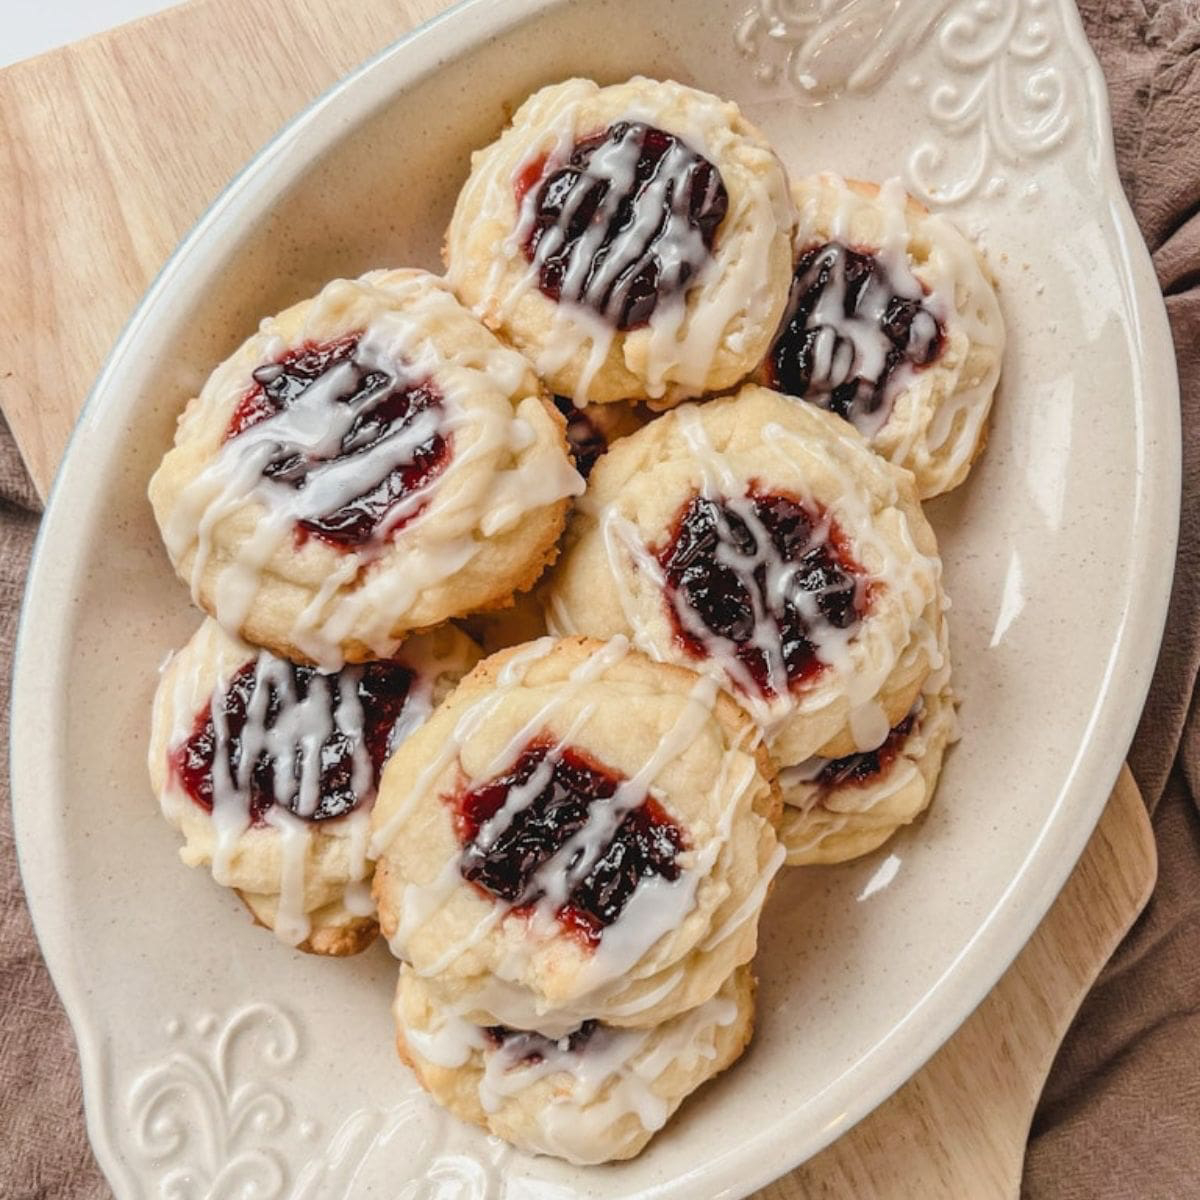
The Classic Canvas: Mastering the New Year’s Sugar Cookie
The sugar cookie is the quintessential holiday bake. It’s a simple formula, but that simplicity means there’s nowhere for mistakes to hide. Nailing this one is a true mark of a careful baker. We used to churn out thousands of these for custom orders, and consistency was everything. It all comes down to managing the dough at every single stage.
Heads up: These take about 45 minutes of active work, but you’ll need at least 2 hours for chilling (overnight is better!). Budget-wise, the main cost is your butter. Splurging on a high-fat, European-style butter like Plugrà or Kerrygold will run you a couple more dollars, maybe $6-8 a pound, but the flavor is noticeably richer and the texture is divine.
Professional Sugar Cookie Recipe
- 1 cup (227g) unsalted butter, at a cool 65°F (18°C)
- 3/4 cup (150g) granulated sugar
- 1/4 cup (30g) powdered sugar
- 1 large egg, room temperature
- 2 teaspoons vanilla extract
- 1/2 teaspoon almond extract (optional, but it adds a certain ‘bakery’ flavor)
- 3 cups (360g) all-purpose flour
- 1/2 teaspoon baking powder
- 1/2 teaspoon salt
The Method:
- Creaming: In a stand mixer with the paddle attachment, beat the butter and both sugars on medium speed for 3-5 minutes. Scrape down the bowl a couple of times. You’re looking for a very light and fluffy texture.
- Wet Ingredients: Add the room-temperature egg and extracts. (Quick tip: Forgot to take your egg out? No sweat. Just place it in a bowl of warm—not hot!—water for 5-10 minutes.) Mix on low speed until just combined, about 30 seconds. A cold egg can make the butter seize up, so this is important.
- Dry Ingredients: In a separate bowl, whisk the flour, baking powder, and salt. Add this to the wet ingredients in two batches, mixing on the lowest speed possible until the flour just disappears. Do. Not. Over-mix.
- Chilling: Divide the dough in half, shape each into a 1-inch thick disc, and wrap it tightly in plastic wrap. Chill for at least 2 hours, but preferably overnight.
- Rolling and Cutting: Preheat your oven to 350°F (175°C) and line baking sheets with parchment paper. Lightly flour your work surface and rolling pin. Roll one disc of dough to an even 1/4-inch thickness. A pro trick is to use rolling pin guides—simple strips of wood or silicone you can find online for under $10 that guarantee a perfectly even thickness. Cut your shapes and place them on the prepared sheets.
- The Second Chill: This is the secret step. Pop the entire baking sheet of cut-out cookies into the freezer for 10-15 minutes before baking. This hardens the butter one last time and guarantees super sharp edges.
- Baking: Bake for 9-11 minutes. The edges should be just starting to turn a pale golden brown, but the centers should still look soft. They’ll set up as they cool.
- Cooling: Let the cookies rest on the baking sheet for 5 minutes before carefully moving them to a wire rack to cool completely. They are fragile when hot!
Troubleshooting Your Sugar Cookies
- My cookies spread into blobs: Your butter was too warm, you didn’t chill the dough long enough, or you skipped that crucial pre-bake freeze. Another culprit can be dark-colored baking sheets, which absorb more heat. Stick to light-colored, heavy-gauge aluminum sheets.
- My cookies are tough: You almost certainly over-mixed the dough after adding the flour, which developed too much gluten. Next time, stop mixing the second the flour is incorporated.
- My cookies are dry and crumbly: You probably added too much flour. Using a kitchen scale to measure by weight is the best way to be accurate. Scooping flour with a measuring cup can accidentally add up to 25% more flour than the recipe calls for!
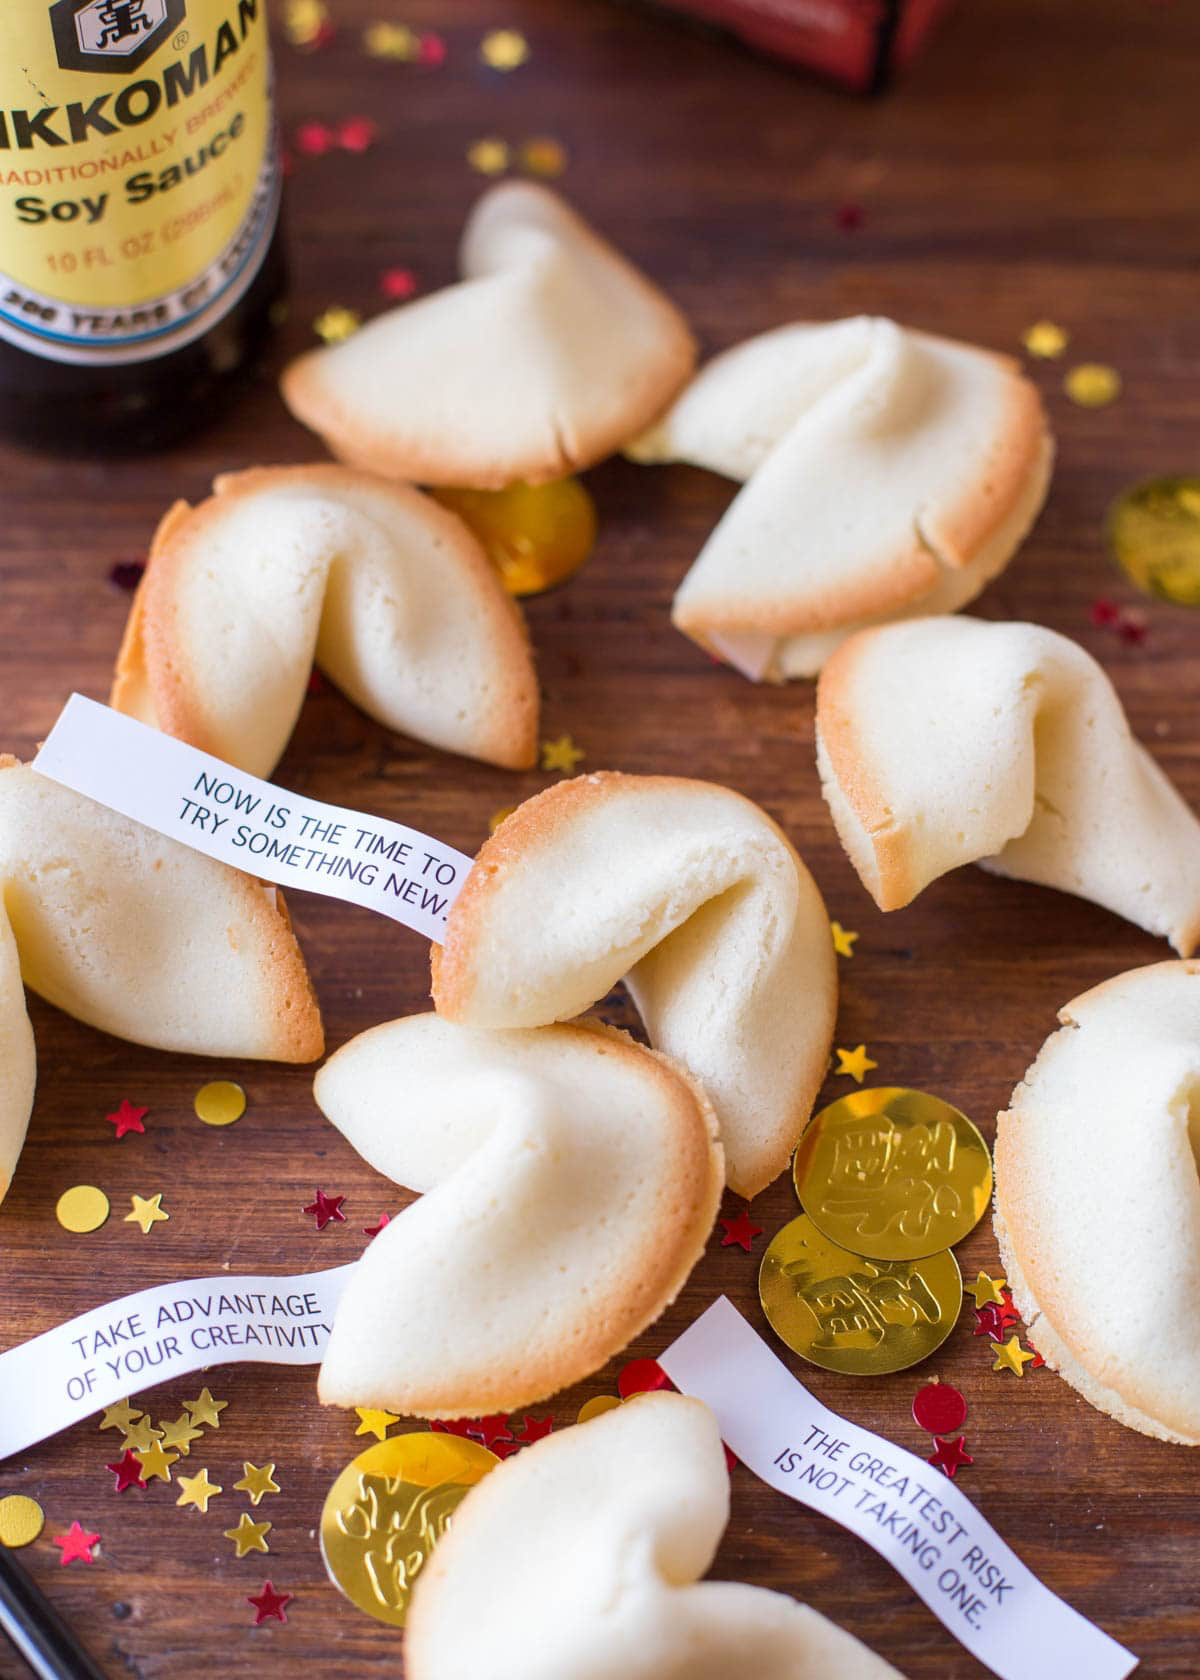
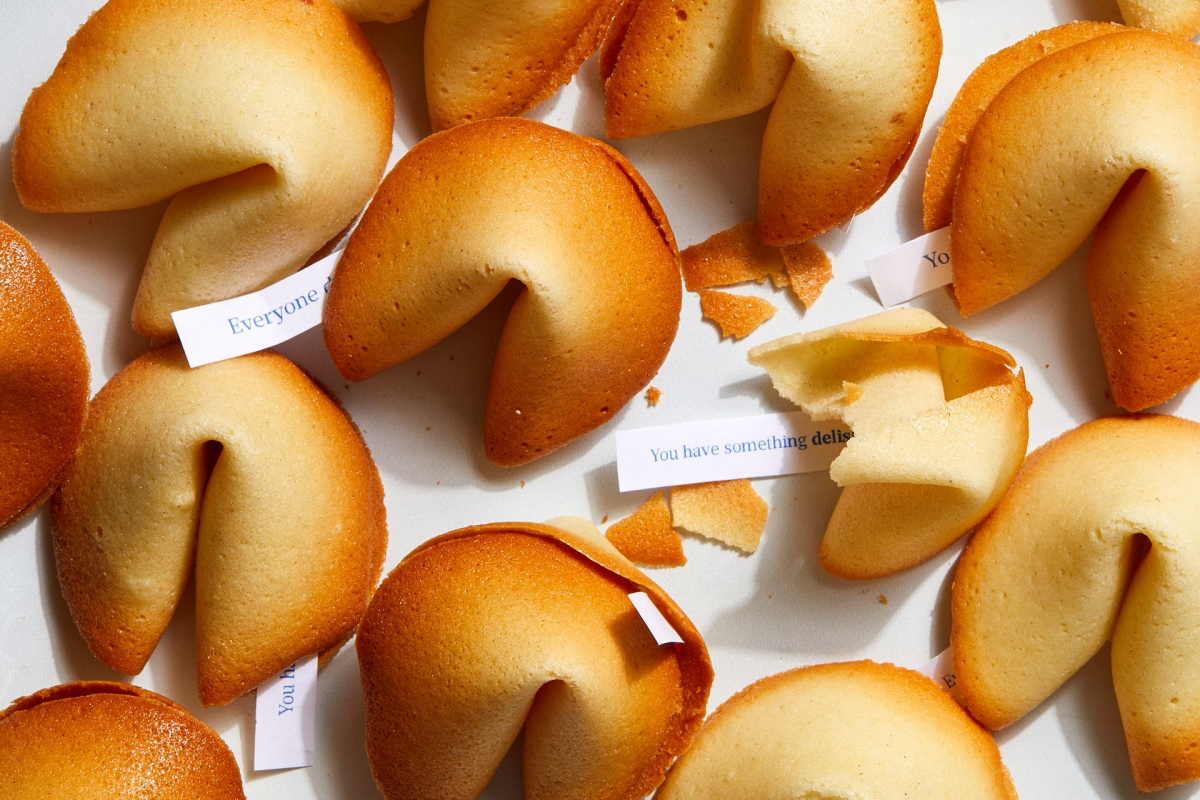
A Taste of Fortune: The Homemade Fortune Cookie Challenge
Okay, let me be totally upfront: these are not easy. They demand speed, dexterity, and a high tolerance for heat. Making them at home is a really fun project, but you have to be prepared. The biggest challenge is folding the cookies while they are still scorching hot and pliable. You have to work fast!

Safety First: Have a small bowl of ice water nearby just in case of a minor finger burn. I also highly recommend wearing a pair of thin, clean cotton bakers’ gloves—you can find them online for a few bucks. They provide a bit of a buffer from the heat without making you lose all your dexterity. Your best friend here will be an offset spatula for lifting the hot cookies.
Time & Budget: The first batch might take you an hour as you get the hang of it, but you’ll get faster. Budget-wise, these are incredibly cheap to make, using just a few pantry staples.
Fortune Cookie Technique
The batter is simple; the technique is everything. Only bake two or three at a time until you get the rhythm down.
- 3 large egg whites
- 1/2 cup (100g) granulated sugar
- 1/2 teaspoon vanilla extract
- 1/4 teaspoon almond extract
- 4 tablespoons (57g) unsalted butter, melted and cooled
- 1/2 cup (60g) all-purpose flour
- 1 tablespoon cornstarch
- Pinch of salt
- Your fortunes, written on small paper strips (about 2.5 x 0.5 inches)
The Method:
- Prep Station: Preheat oven to 375°F (190°C). Line a baking sheet with a silicone baking mat (a Silpat is perfect for this and a great $15-20 investment if you bake often). Have your fortunes, a muffin tin, and a coffee mug ready to go.
- The Batter: In a clean bowl, whisk the egg whites and sugar until they’re frothy, but not stiff like a meringue. Whisk in the extracts and the cooled melted butter. Sift the flour, cornstarch, and salt together, then whisk them into the wet ingredients until you have a smooth, thin batter, kind of like for crepes.
- Baking: Drop a tablespoon of batter onto your mat and use the back of the spoon to spread it into a very thin 3- to 4-inch circle. Bake just 2-3 at a time for 6-8 minutes, until the outer edge is golden brown but the center is still pale. This is your window of opportunity.
- The Fold (MOVE FAST!): Open the oven. Working one at a time, use your offset spatula to quickly lift a disc. Place a fortune in the middle. Fold it in half into a semicircle. Now, drape the folded edge over the rim of your coffee mug and pull the two corners down to create that classic shape.
- Cooling: Immediately place the shaped cookie into a muffin tin cup to hold its shape as it cools and crisps up. If a cookie hardens before you can fold it, it’s too late—it will just crack. This is a real race against the clock.
By the way, a fun piece of trivia: these cookies were actually inspired by a traditional Japanese cracker and first became popular in America! My first attempt at these was a lesson in humility; I probably threw out more than I kept. Success is all about finding that perfect bake time where the edges are set but the center is still flexible. It just takes a little practice.
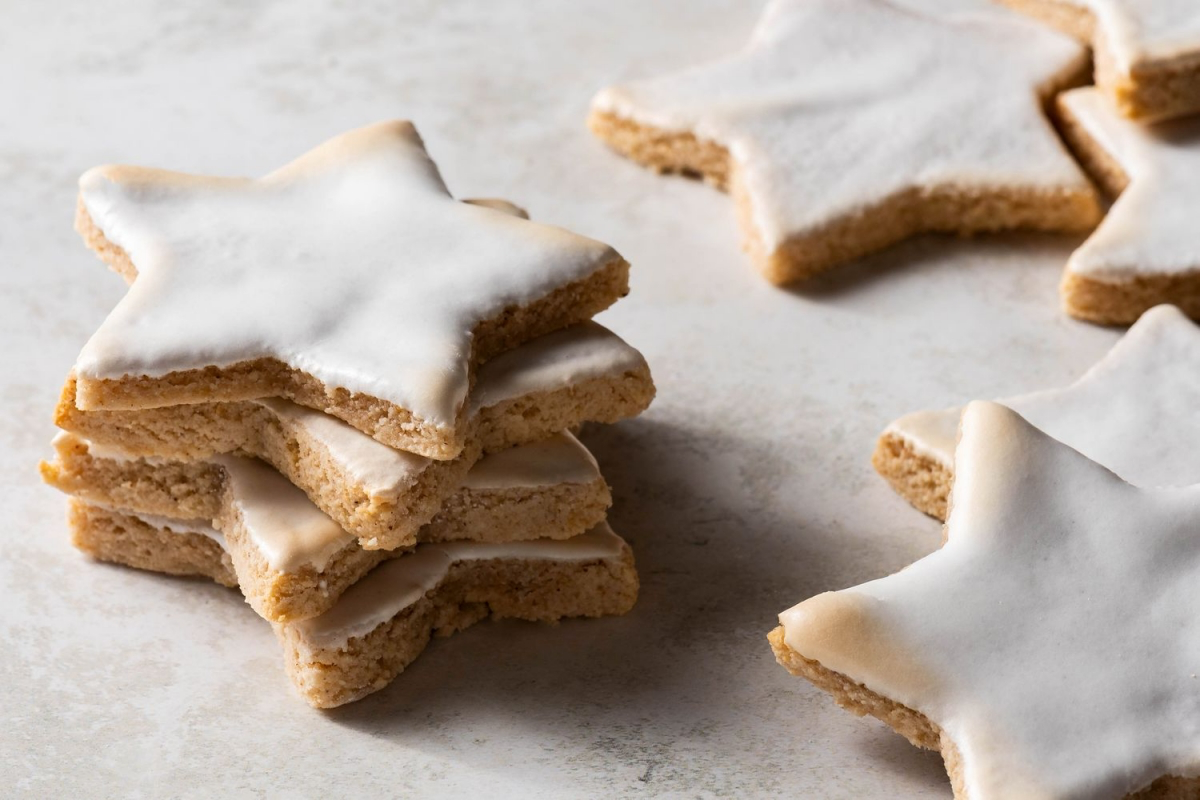
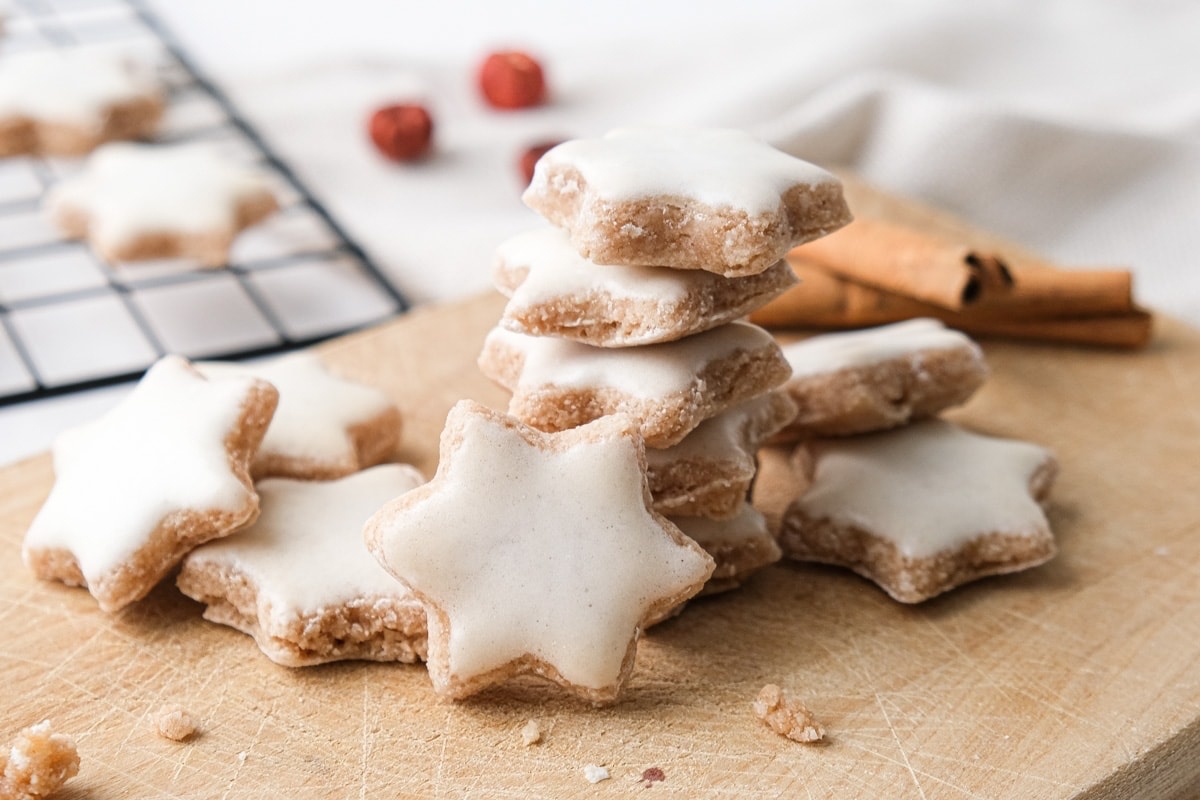
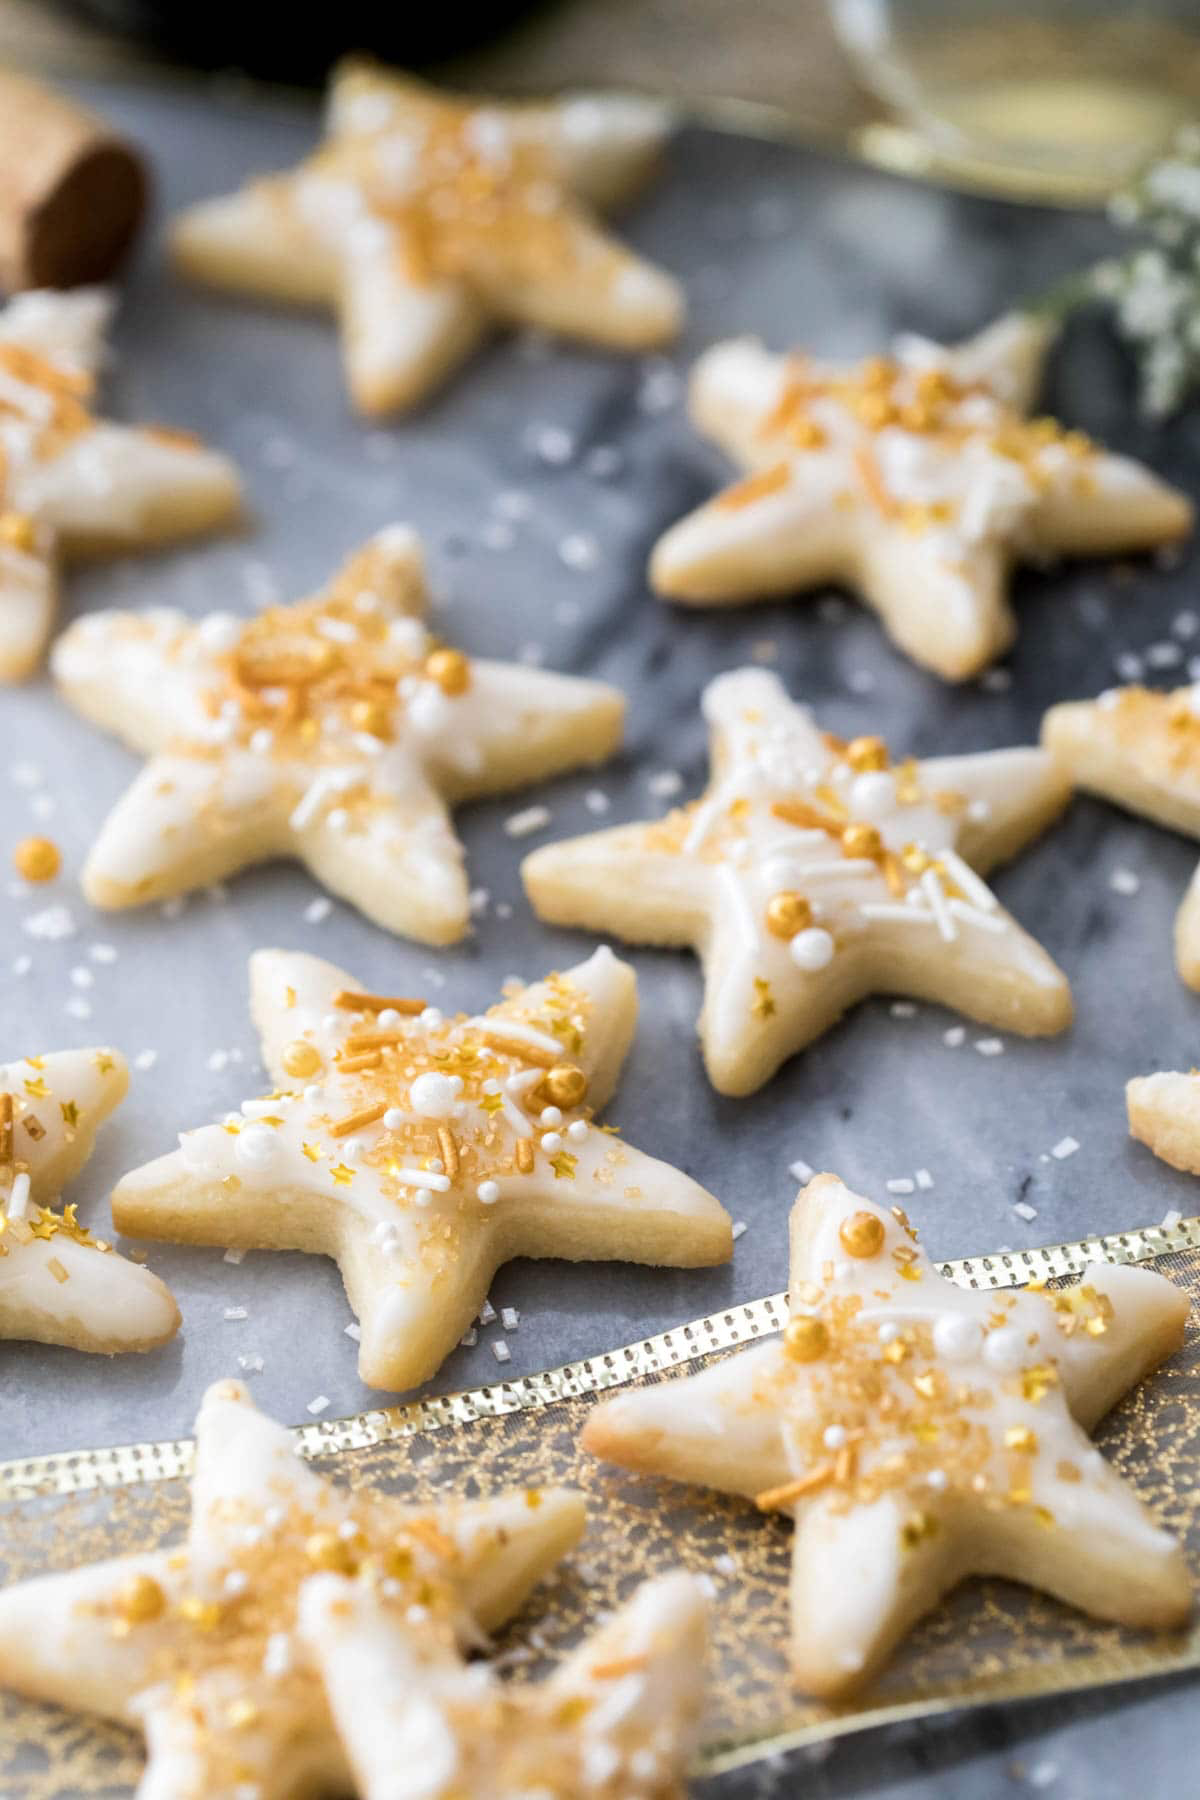
European Traditions: Chewy Cinnamon Stars (Zimtsterne)
During some time I spent learning from European pastry pros, I fell completely in love with Zimtsterne. They’re a traditional holiday cookie with a wonderfully chewy texture and an intense nutty, spiced flavor. They also happen to be naturally gluten-free! The preparation is unique—the “dough” is a nut-meringue paste, and they’re baked at a very low temperature to more or less dry them out.
Time & Budget: These are a bit of a project, taking about an hour of active time plus an hour to chill. The biggest cost is the almond flour, which usually runs about $8-12 a pound, but a little goes a long way.
Cinnamon Star Technique
The key here is a stable meringue. You make one big batch, then use part of it for the cookie base and reserve the rest for that iconic white icing.
- 3 large egg whites, room temperature
- 1/4 teaspoon cream of tartar
- 1 1/2 cups (180g) powdered sugar
- 1 teaspoon lemon juice
- 2 teaspoons ground cinnamon
- 3 cups (300g) almond flour (finely ground almonds)
The Method:
- Make the Meringue: In a spotless stand mixer bowl with the whisk attachment, beat the egg whites and cream of tartar on medium-high until soft peaks form. Slowly add the powdered sugar, a spoonful at a time, and keep beating until the meringue is stiff, glossy, and holds a sharp peak. This can take 7-10 minutes.
- Divide the Meringue: Scoop out about 1/2 cup of the finished meringue and set it aside in a small bowl. This is your topping.
- Form the Dough: To the meringue left in the mixer bowl, add the lemon juice, cinnamon, and almond flour. Switch to the paddle attachment and mix on low (or fold by hand) until a sticky, uniform dough forms. It will be very sticky.
- Chilling & Rolling: Scrape the dough onto a sheet of parchment paper that’s been heavily dusted with powdered sugar. Dust the top of the dough, add another sheet of parchment, and roll it to a 1/4-inch thickness. Transfer the whole parchment-dough sandwich to a baking sheet and chill for at least 1 hour to make it manageable.
- Cutting & Topping: Preheat oven to 300°F (150°C). Remove the top parchment. Get a small bowl of water and dip your star-shaped cookie cutter in it before each cut to prevent sticking. Place the stars on a parchment-lined sheet. Spread a thin layer of the reserved meringue over each star.
- Baking (Drying): Bake for 15-20 minutes. You want the meringue topping to be white and dry to the touch, and the bottoms barely colored. You’re really just drying them out. Over-baking will make them hard instead of chewy.
- Cooling: Let them cool completely on the pan. They’re fantastic make-ahead cookies, as the flavor deepens after a day or two.
Troubleshooting Tip: Is your meringue not getting stiff? The most common enemy is grease. Even a tiny, invisible speck of fat in your bowl or on your whisk can ruin it. A fantastic pro-tip is to wipe down your clean bowl and whisk with a paper towel dampened with a little white vinegar or lemon juice before you start. It works like magic.
Modern Flavors: Infusions, Dips, and Double-Bakes
While tradition is amazing, modern baking is all about playing with flavors. These techniques will help you add a sophisticated touch to your cookies.
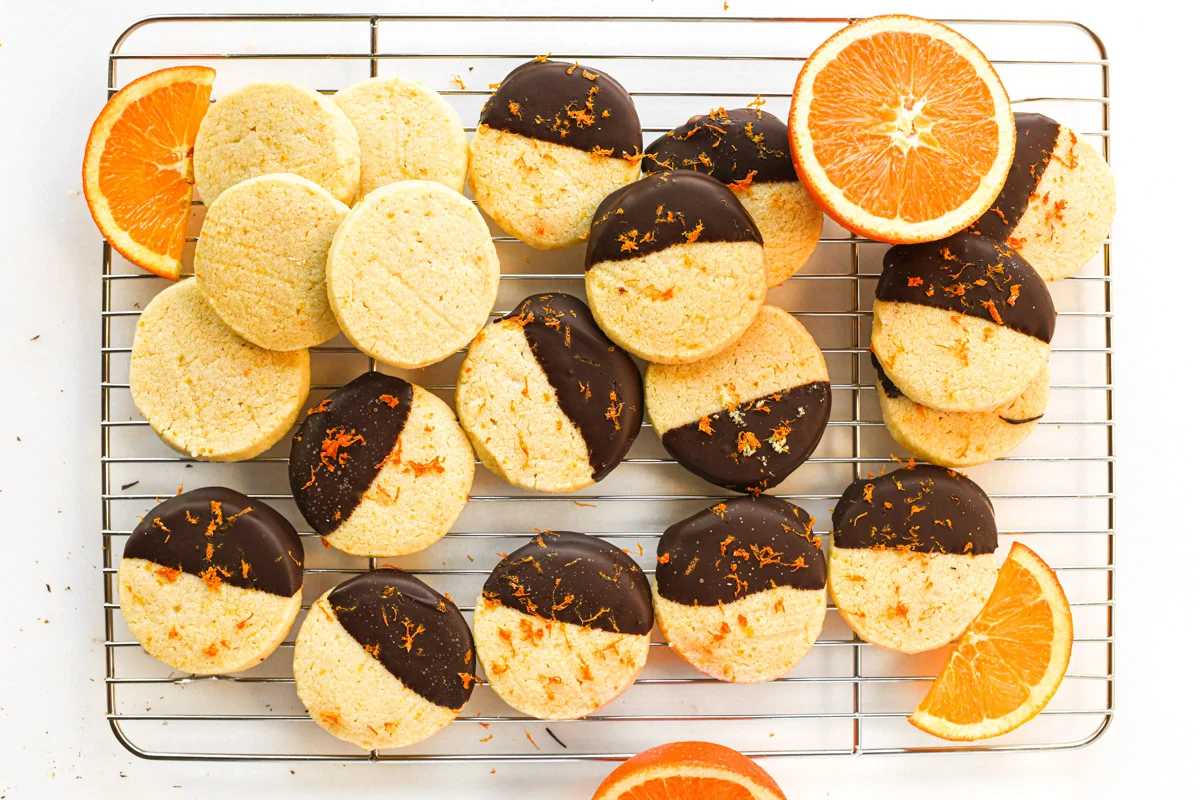
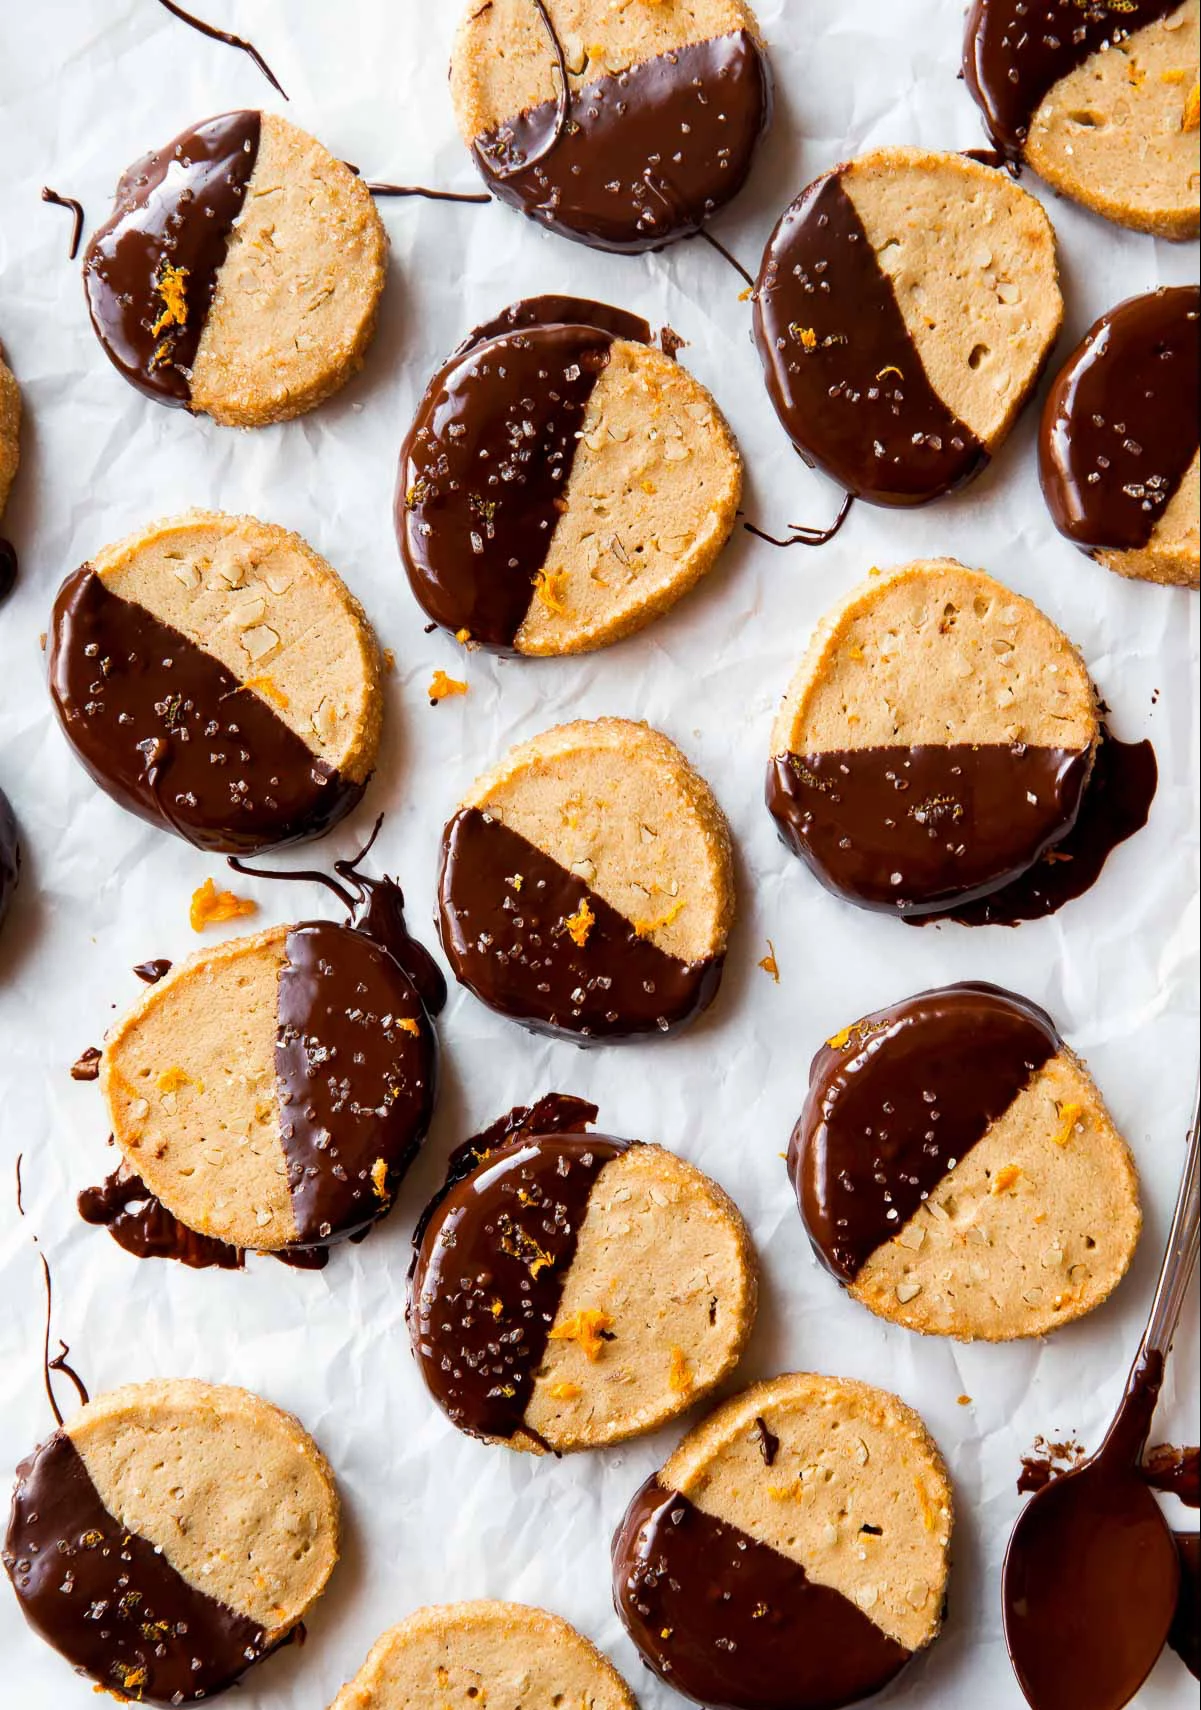
Technique: Chocolate-Dipped Orange Cookies
This is a classic pairing for a reason. To get a truly professional result, you want to infuse the dough with intense orange flavor and use properly tempered chocolate for a perfect snap.
- Pro Flavor Tip: Before you even start creaming, combine your granulated sugar and the orange zest in a bowl. Use your fingertips to rub the zest into the sugar until it’s incredibly fragrant and looks like damp, orange-flecked sand. This releases the essential oils from the zest directly into the sugar, creating a much deeper flavor throughout the cookie. Use this infused sugar in the classic sugar cookie recipe above, adding 1 tablespoon of fresh orange juice with the egg.
- The Chocolate Dip: For that professional, glossy finish, you need to temper your chocolate. For a simple home method, chop 8 ounces of good-quality dark chocolate (look for Ghirardelli or Lindt 70% bars, which you can find at most grocery stores for about $3-4). Gently melt about two-thirds of it over a double boiler or in the microwave in 20-second bursts. Then, remove it from the heat and stir in the remaining one-third of chopped chocolate (the “seed”). Keep stirring until it’s all melted and smooth. Dip half of each cooled cookie, let the excess drip off, and place them on parchment paper to set.
Quick Win: Don’t have time to bake today? Just make the infused sugar. Rub the zest of one orange into a cup of sugar and store it in an airtight jar. Use a spoonful in your coffee or tea tomorrow. It’s an instant flavor upgrade that shows you the power of infusions!
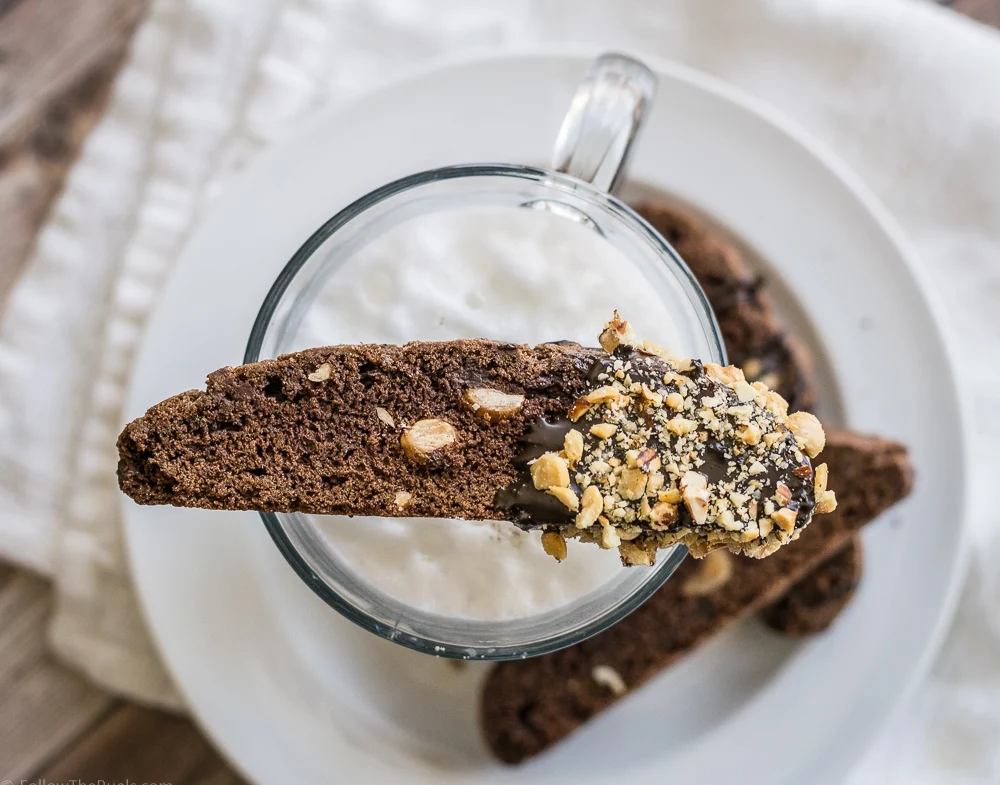
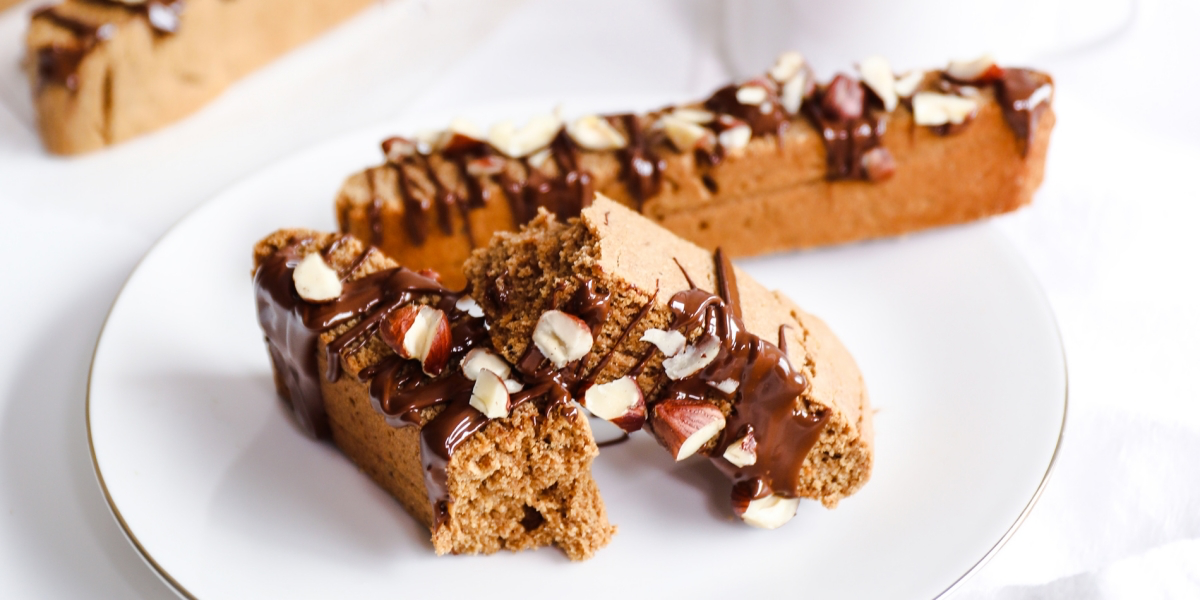
Technique: Hazelnut Espresso Biscotti
Biscotti are the workhorse of any café. They have an incredible shelf life and are perfect for making way in advance. The name literally means “twice-cooked.”
Time & Budget: The process takes about 1.5 hours from start to finish, but they keep for weeks in an airtight container. They’re pretty budget-friendly, especially if you buy nuts in bulk.
- 1 3/4 cups (210g) all-purpose flour
- 1/2 cup (65g) unsweetened cocoa powder
- 1 1/2 teaspoons baking powder
- 1/2 teaspoon salt
- 1/2 cup (113g) unsalted butter, softened
- 3/4 cup (150g) granulated sugar
- 2 large eggs
- 1 tablespoon instant espresso powder dissolved in 1 teaspoon hot water
- 1/2 cup (70g) toasted hazelnuts, roughly chopped
The Method:
- First Bake (The Log): Prepare the dough like a standard cookie (cream butter/sugar, add eggs/espresso, then dry ingredients and nuts). On a parchment-lined baking sheet, shape the stiff dough into two flat logs, about 10 inches long by 3 inches wide. Bake at 350°F (175°C) for 25-30 minutes, until firm.
- Cool and Slice: Let the logs cool on the sheet for at least 20 minutes. This is critical—if you slice them hot, they’ll crumble. Use a sharp, serrated knife to slice the logs on a diagonal into 1/2-inch thick pieces.
- Second Bake (The Crisp): Lay the slices cut-side down back on the baking sheet. Bake for another 10 minutes. Flip them over and bake for 10 more minutes on the other side. The goal is to dry them out completely. Cool on a wire rack. You can even freeze the fully baked logs for up to 3 months; just thaw, slice, and do the second bake for fresh biscotti on demand.
Final Thoughts on Safety and Storage
Baking for others is a joy, but it’s also a big responsibility. Always keep safety and quality top of mind.
- Allergen Awareness: Be mindful that these recipes contain common allergens like wheat, dairy, eggs, and nuts. If you’re gifting your cookies, always label them clearly. Cross-contamination is a serious issue, so if you’re baking for someone with a severe allergy, use meticulously cleaned and sanitized equipment.
- Storage Done Right: Soft cookies (like sugar cookies) should be in an airtight container at room temperature for up to 5 days. Crisp cookies (like biscotti and fortune cookies) need their own separate airtight container, or they’ll absorb moisture and go soft. They’ll last for several weeks.
- Quality In, Quality Out: With simple recipes, your ingredients are the star. Using high-fat European butter, pure vanilla extract (not imitation), and good chocolate will make a world of difference.
The act of baking for the New Year is pure optimism. It’s a way to create a small, perfect moment of sweetness and warmth to share. It connects us to age-old traditions and lets us practice a craft that brings people together. I hope these insights help you fill your own kitchen with those wonderful smells and share that warmth with the people who matter most to you.
Galerie d’inspiration
Standard Supermarket Butter: Often salted and with a higher water content (around 16-18%). The salt can throw off your recipe’s balance, and the extra water can make cookie dough tougher and less flaky.
European-Style Butter: Brands like Plugrà or Kerrygold boast a higher butterfat percentage (82% or more) and are typically unsalted. This translates to a richer flavor, a more tender, melt-in-your-mouth texture, and complete control over the seasoning. For a pro-level bake, it’s a non-negotiable upgrade.
More than 70% of a cookie’s final texture is determined by the temperature of the butter when it’s mixed.
This is why recipes insist on ‘room temperature’ butter. Too cold, and it won’t incorporate enough air when creamed with sugar, resulting in dense, heavy cookies. Too warm or melted, and the dough will spread excessively in the oven, creating thin, greasy wafers. The ideal is a cool 65-67°F (18-19°C), where the butter is pliable but not soft.