Secrets to the Perfect Heart-Shaped Cake (Even Without the Pan)
Over my years in professional kitchens, I’ve made more heart-shaped cakes than I can count. They’re a go-to for anniversaries, big birthdays, and of course, Valentine’s Day. But honestly? They look way easier than they are. A truly great heart-shaped cake is a real test of your baking fundamentals.
In this article
- First Things First: Your Pan and Prep
- The Science of a Stable, Tender Batter
- Which Cake Should You Bake?
- Recipe 1: A True Red Velvet Cake
- Recipe 2: A Robust Chocolate Fudge Cake
- The Frosting: Don’t Leave Your Cake Hanging
- The Art of a Pro-Level Finish
- Lesser-Known Trick: Making a Heart Without the Pan
- A Final Word on Safety
- Galerie d’inspiration
It’s about so much more than just pouring batter into a special pan. You have to understand how heat moves through a weird shape, how to build a cake that won’t fall apart, and how to finish it without a crumb in sight. I’ve seen so many home bakers get bummed out when their cakes have a burnt, pointy tip, a sunken middle, or a crumbly texture. They followed the recipe to the letter, but it still went wrong.
That’s because a recipe is just a map—it doesn’t teach you how to read the terrain. That’s what we’re going to get into today. We’re moving beyond just ingredients and bake times to cover the ‘why’ behind it all, the pro techniques I teach, and the quick fixes for when things inevitably go sideways.
First Things First: Your Pan and Prep
Believe it or not, the biggest mistake people make happens before they even touch a whisk. It all comes down to the cake pan. A heart pan’s unique shape, with that deep V-cut and sharp point, is a recipe for uneven baking. The point cooks way faster than the rounded lobes, which is how you end up with a dry tip and a raw center.
Choosing the Right Pan
In a pro kitchen, we pretty much exclusively use heavy-gauge, light-colored aluminum pans. Here’s the deal:
- Aluminum is a fantastic heat conductor. It heats up fast and, more importantly, cools down fast once it’s out of the oven. This stops the cake from over-baking from the residual heat.
- Heavy-gauge (meaning, thick) metal spreads heat more evenly. A cheap, flimsy pan will have hot spots that scorch the point of your heart long before the middle is set. You can find great pans from brands like Wilton or Nordic Ware at most craft stores or online for about $15-$25. It’s a worthy investment to avoid a burnt cake point!
- Light-colored pans are key. Dark pans absorb heat like crazy and can give your cake a tough, dark crust. A silver-colored pan reflects some of that heat, which encourages a much gentler, more even bake.
By the way, I’d steer clear of silicone pans for this kind of cake. They’re terrible at conducting heat, which can give you a pale, dense crust and a longer, less predictable bake time. Plus, they’re floppy, and trying to get a wobbly pan full of liquid batter into a hot oven is just asking for a mess.
The Foolproof Pan Prep Method
Want your cake to slide out perfectly every single time? This four-step method is non-negotiable in my book. It takes maybe three extra minutes but will save you the absolute heartbreak of a stuck cake.
- Grease: Start with solid vegetable shortening. Not butter, not oil. Shortening is pure fat and has no water or milk solids that can basically act like glue. Use a pastry brush or a paper towel to get a thin, even layer into every single nook and cranny.
- Parchment: This is your insurance policy. Place your pan on a sheet of parchment paper, trace the bottom, and cut out the heart shape. Press it firmly into the greased pan—the shortening will make it stick.
- Grease Again: Yep. Add another super-thin layer of shortening on top of the parchment paper and up the sides of the pan.
- Flour: Toss a tablespoon of all-purpose flour into the pan. Now tilt and tap the pan until the whole inside is coated in a fine dusting of flour. Make sure to tap out any excess over the sink. You want a coating, not clumps.
The Science of a Stable, Tender Batter
A great cake isn’t luck; it’s chemistry. For a heart-shaped cake, you need a batter that’s sturdy enough to hold its shape but still delivers a moist, tender crumb.
Ingredient Temperature Isn’t a Suggestion
When a recipe says “room temperature” for butter, eggs, or buttermilk, it’s a critical step. Properly softened butter (around 65°F or 18°C) is able to trap air. When you cream it with sugar, you’re creating thousands of little air pockets that give your cake its light texture. Cold butter won’t whip, and melted butter can’t hold air at all. It’s a disaster. Cold eggs will make your beautifully creamed butter seize up and curdle. A good batter looks smooth and creamy; a broken one looks grainy, and your cake will be dense.
Quick tip: Did you forget to take your eggs out? No sweat. Just pop them in a bowl of warm (not hot!) water for about 10 minutes. Good to go.
Mixing: The Fine Line Between Tender and Tough
When you mix flour with liquid, you develop gluten. A little gluten is good—it gives the cake structure. But too much gluten from overmixing makes a cake tough and rubbery. This is why recipes always say to mix the dry ingredients in “until just combined.”
Seriously, the second you don’t see any more streaks of flour, STOP. A few little lumps are totally fine and are way better than an overmixed, tough cake.
Which Cake Should You Bake?
Before you grab a bowl, let’s figure out what you’re in the mood for. These two recipes are classics for a reason and hold up beautifully in a heart shape.
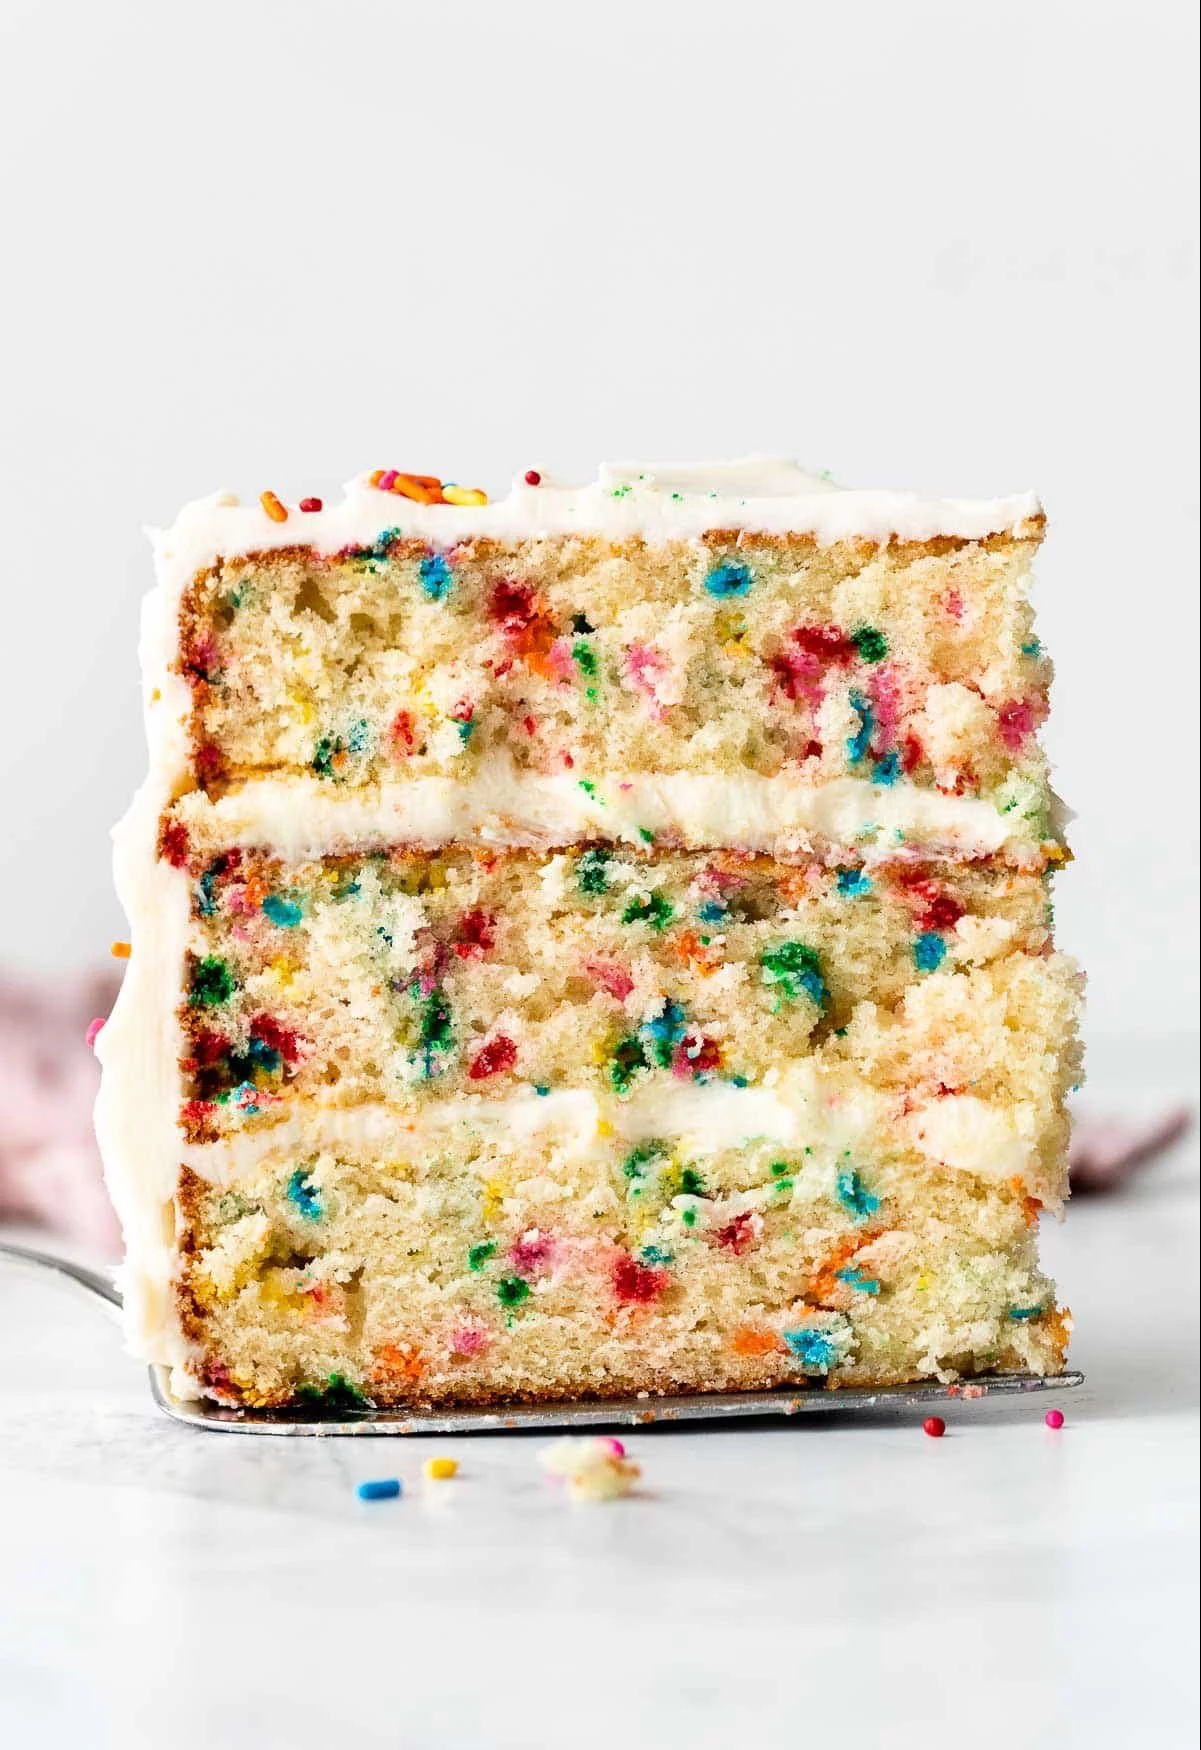
Go for the Red Velvet if… you want a cake with a truly unique, velvety texture and a subtle, complex flavor. It’s not just a vanilla cake with red dye! It has a slight tang from the buttermilk and a hint of chocolate. It’s a bit more of a science experiment, but the result is a showstopper with a super-fine, tender crumb that’s incredibly moist. It’s the perfect choice for a classic celebration.
Go for the Chocolate Fudge if… you are a serious, unapologetic chocolate lover. This cake is deep, dark, and intensely chocolatey. The texture is firm yet incredibly moist, making it sturdy enough to handle a rich, heavy frosting. The secret here is using boiling water or coffee, which “blooms” the cocoa powder for a flavor that’s out of this world. If rich and decadent is your goal, this is your cake.
Recipe 1: A True Red Velvet Cake
This isn’t one of those modern red velvet cakes that’s just a vanilla cake dyed red. This is the real deal, with a complex flavor and a fine, velvety crumb from the chemical reaction of its ingredients.
Ingredients:
- 2 1/2 cups (300g) all-purpose flour
- 1 1/2 cups (300g) granulated sugar
- 1 tsp baking soda
- 1 tsp fine sea salt
- 1 tbsp natural unsweetened cocoa powder (NOT Dutch-processed)
- 1 1/2 cups (360ml) neutral oil (like canola or grapeseed)
- 1 cup (240ml) full-fat buttermilk, room temperature
- 2 large eggs, room temperature
- 1 tbsp red gel food coloring (gel is way more concentrated than liquid)
- 1 tsp pure vanilla extract
- 1 tsp white distilled vinegar
Method:
- Preheat your oven to 350°F (175°C) with a rack in the center. Prep your 9-inch heart pan using the foolproof method from above.
- In a big bowl, whisk together the flour, sugar, baking soda, salt, and cocoa powder for about 30 seconds. This is basically sifting without a sifter.
- In a separate bowl, whisk the oil, buttermilk, eggs, red gel coloring, and vanilla until the color is totally uniform.
- Pour the wet ingredients into the dry ingredients. Mix with a whisk or on low speed with an electric mixer until just combined. Seriously, stop when you see the last streak of flour disappear.
- Right at the very end, stir in the vinegar. You might see a little fizz—that’s the vinegar giving the baking soda a final kick. Mix for 10 more seconds, tops.
- Immediately pour the batter into your pan and smooth the top. Tap the pan on the counter a couple of times to pop any big air bubbles.
- Bake for 40-50 minutes. Ovens can be quirky, so start checking at the 40-minute mark. A toothpick inserted into the center should come out with a few moist crumbs, but no wet batter.
- Let the cake cool in the pan on a wire rack for exactly 15 minutes. Not 10, not 20. After 15 minutes, flip the cake out onto the rack, peel off the parchment, and let it cool completely. This will take 2-3 hours. Do not, I repeat, do NOT try to frost a warm cake.
Serves: Approx. 10-12 people
Make-Ahead Tip: You can bake the cake layers, let them cool completely, then wrap them tightly in two layers of plastic wrap and a layer of foil. They’ll keep in the freezer for up to a month. Just thaw at room temperature before you frost.
Recipe 2: A Robust Chocolate Fudge Cake
This one is for the true chocoholics. It’s got a deep, rich flavor and a sturdy crumb that’s perfect for a thick layer of frosting.
Ingredients:
- 2 cups (240g) all-purpose flour
- 2 cups (400g) granulated sugar
- 3/4 cup (75g) high-quality Dutch-processed cocoa powder
- 2 tsp baking soda
- 1 tsp baking powder
- 1 tsp fine sea salt
- 1 cup (240ml) buttermilk, room temperature
- 1/2 cup (120ml) neutral oil
- 2 large eggs, room temperature
- 1 tsp pure vanilla extract
- 1 cup (240ml) boiling water (or very hot, strong coffee for an even deeper flavor)
Method:
- Preheat your oven to 350°F (175°C) and prep your 9-inch heart pan.
- In a large bowl, whisk together the flour, sugar, cocoa powder, baking soda, baking powder, and salt. Get all those cocoa lumps out.
- In another bowl, whisk the buttermilk, oil, eggs, and vanilla.
- Add the wet to the dry and mix on low until just combined. The batter will be super thick, don’t panic.
- Now for the magic. With the mixer still on low, carefully and slowly stream in the boiling water (or coffee). The hot liquid “blooms” the cocoa, making the flavor incredibly deep. The batter will become very thin, almost like soup. This is totally normal!
- Pour the thin batter into your pan and bake for 35-45 minutes, until a skewer comes out clean.
- Cool in the pan for 15 minutes before flipping it onto a wire rack to cool completely. This cake is extra moist, so handle it gently.
Serves: Approx. 10-12 people
Make-Ahead Tip: This cake also freezes beautifully! Wrap the cooled, unfrosted layers tightly and freeze for up to a month. Thaw on the counter before decorating.
The Frosting: Don’t Leave Your Cake Hanging
A great cake deserves a great frosting. For the red velvet, nothing beats a classic cream cheese frosting. For the chocolate fudge, a rich chocolate buttercream is the way to go.
Classic Cream Cheese Frosting
This frosting is the perfect tangy counterpoint to the red velvet cake. The key is to use full-fat, block-style cream cheese, not the stuff from a tub.
You’ll Need:
- 8 oz (226g) full-fat block cream cheese, softened
- 1/2 cup (113g) unsalted butter, softened
- 4 cups (480g) powdered sugar, sifted
- 1 tsp pure vanilla extract
- Pinch of salt
In a large bowl, beat the softened cream cheese and butter with an electric mixer until smooth and creamy. Scrape down the bowl, then gradually add the sifted powdered sugar on low speed until it’s incorporated. Add the vanilla and salt, then turn the mixer up to medium-high and beat for 2-3 minutes until it’s light and fluffy.
Rich Chocolate Buttercream
This is a sturdy, decadent frosting that pipes beautifully and tastes like pure chocolate heaven.
You’ll Need:
- 1 cup (226g) unsalted butter, softened
- 3/4 cup (75g) Dutch-processed cocoa powder, sifted
- 4 cups (480g) powdered sugar, sifted
- 1/3 cup (80ml) heavy cream or whole milk
- 2 tsp pure vanilla extract
- 1/4 tsp salt
Beat the softened butter until it’s creamy. Add the sifted cocoa powder and mix on low until combined. Alternately add the powdered sugar and the cream, starting and ending with the sugar. Once it’s all in, add the vanilla and salt. Scrape the bowl, then whip on medium-high for 3-4 minutes until it’s light, fluffy, and spreadable.
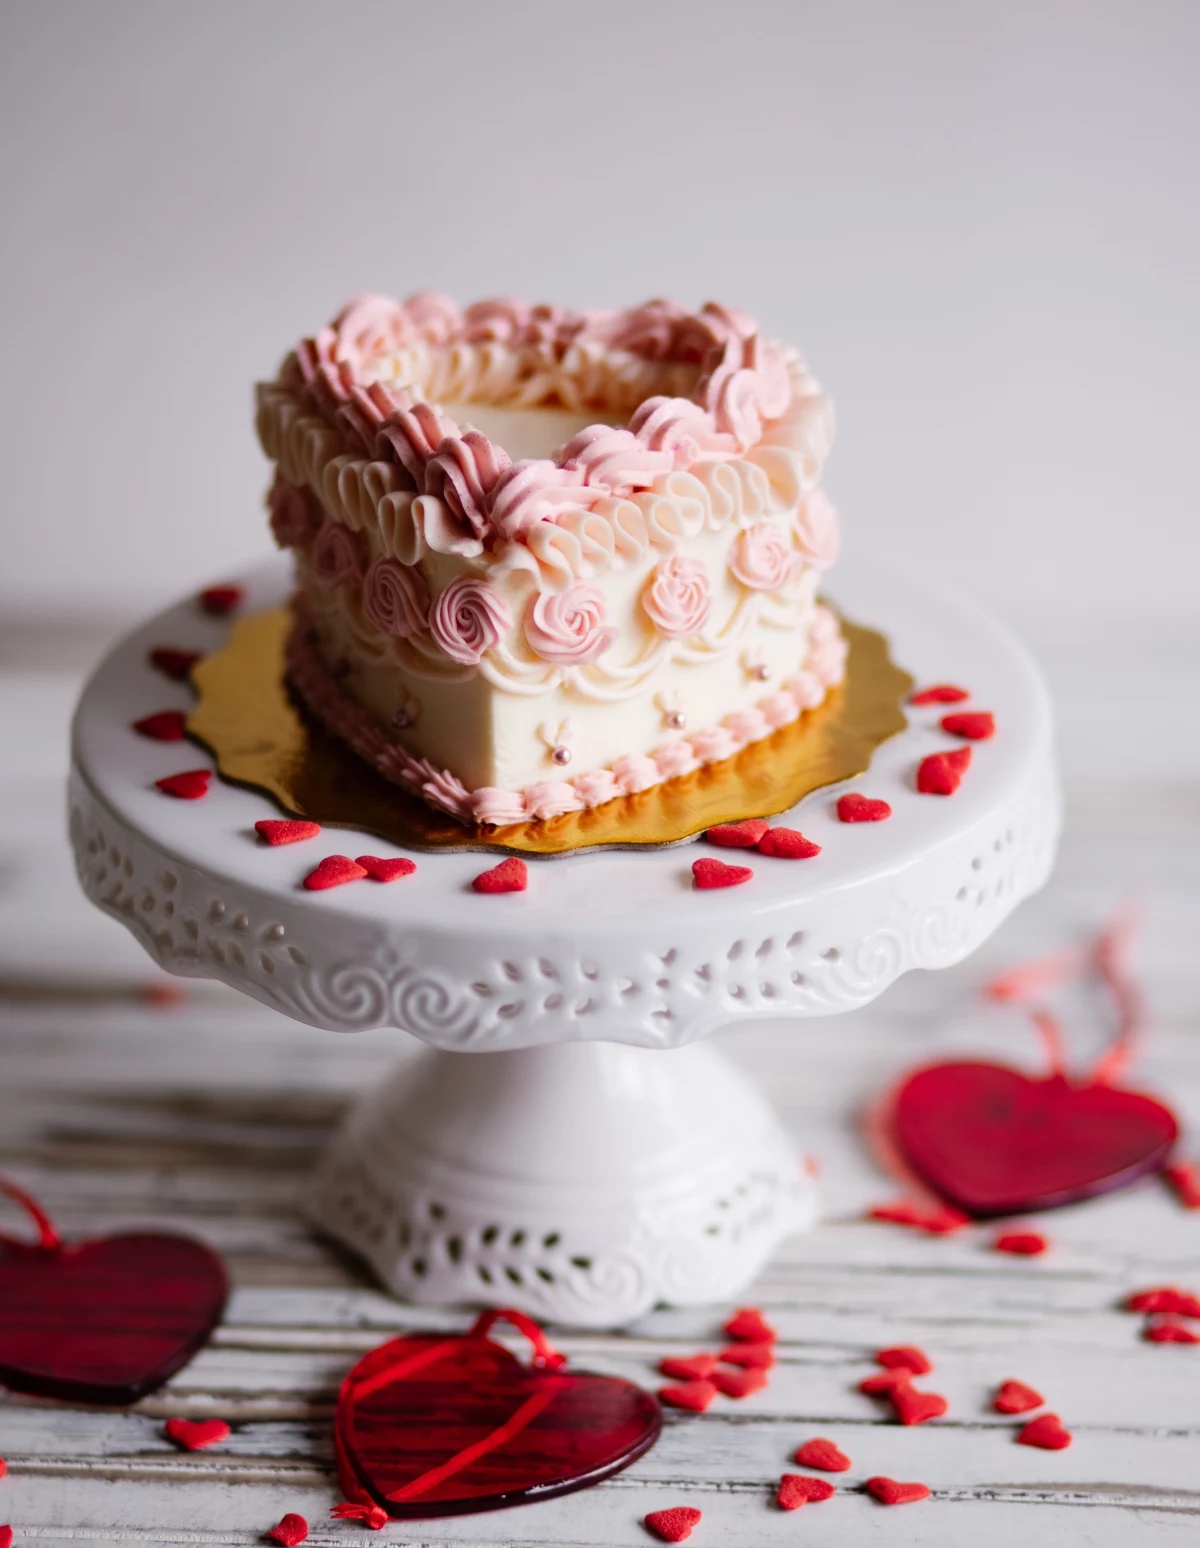
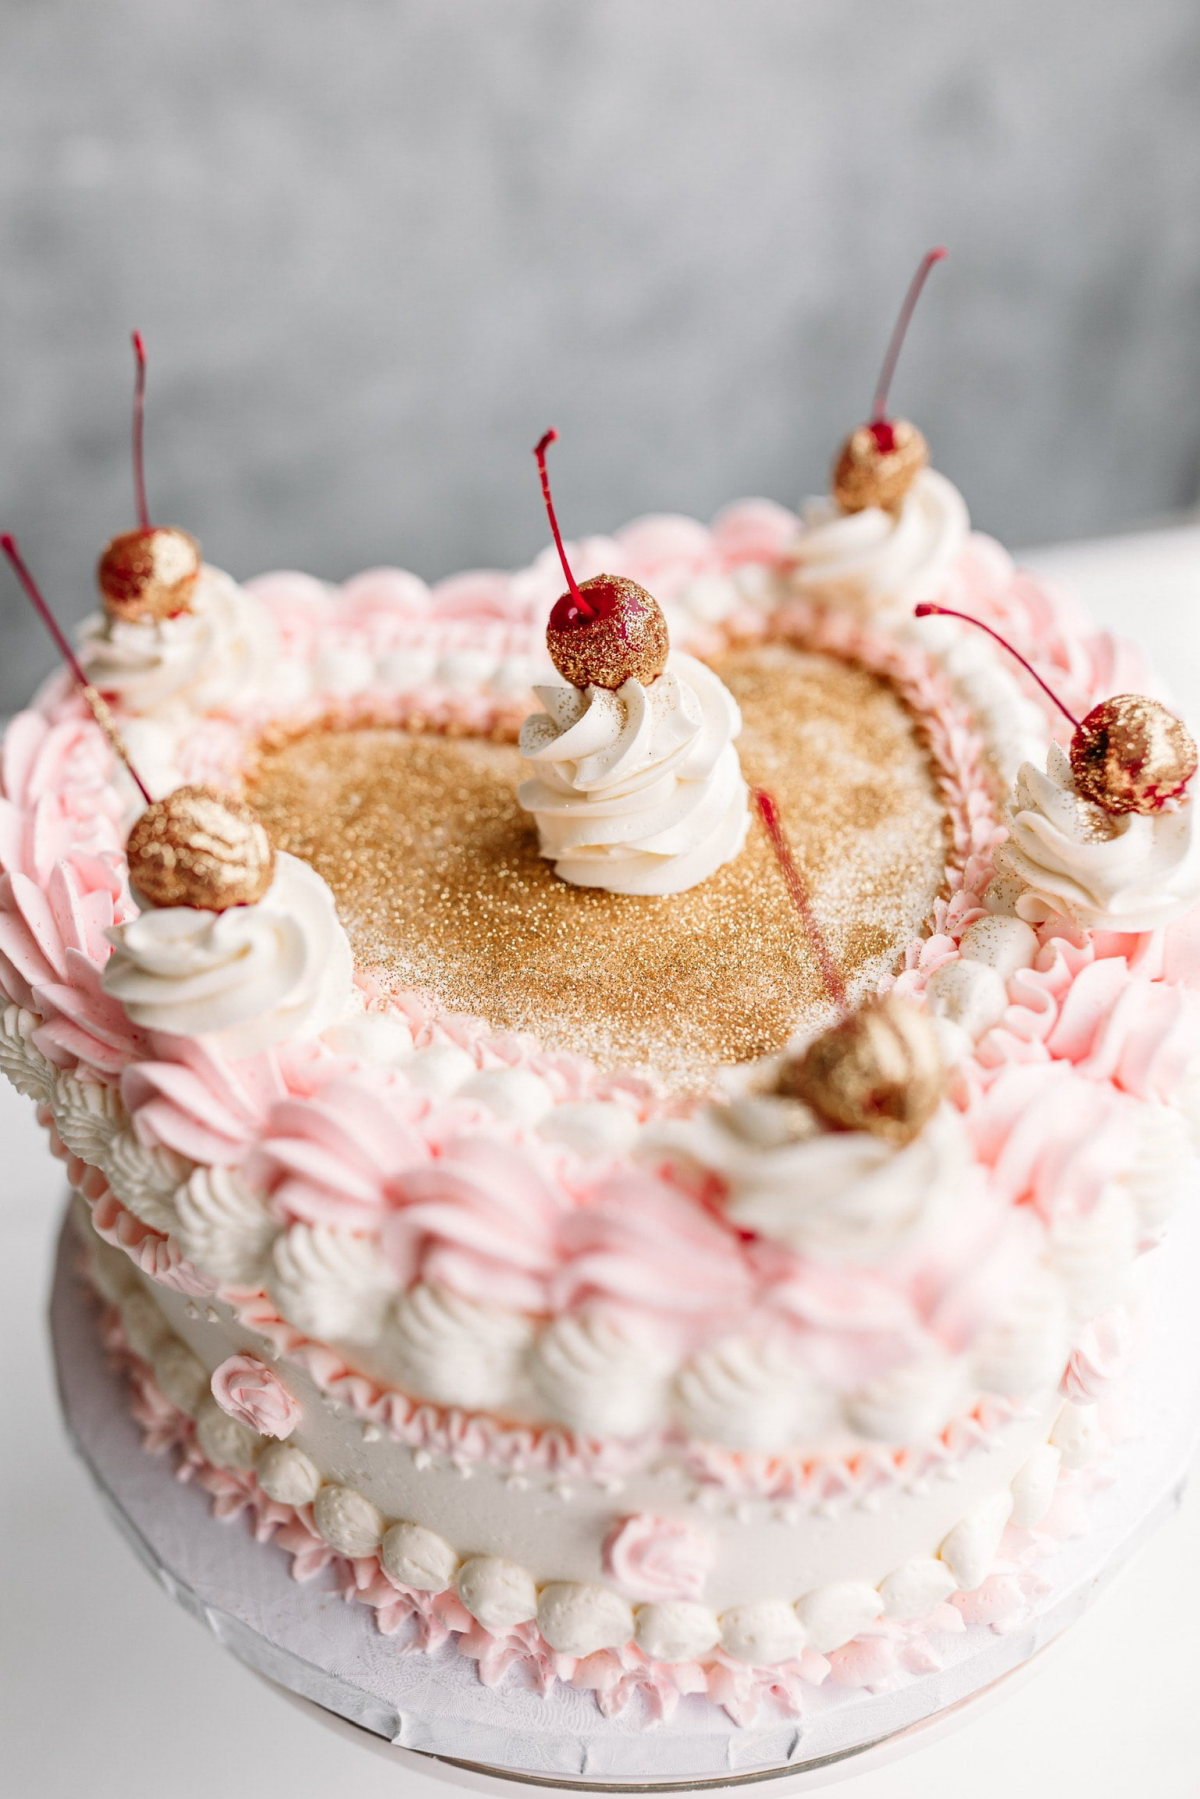
The Art of a Pro-Level Finish
A beautifully baked cake can be totally let down by a messy finish. Patience and a few key tools are everything here.
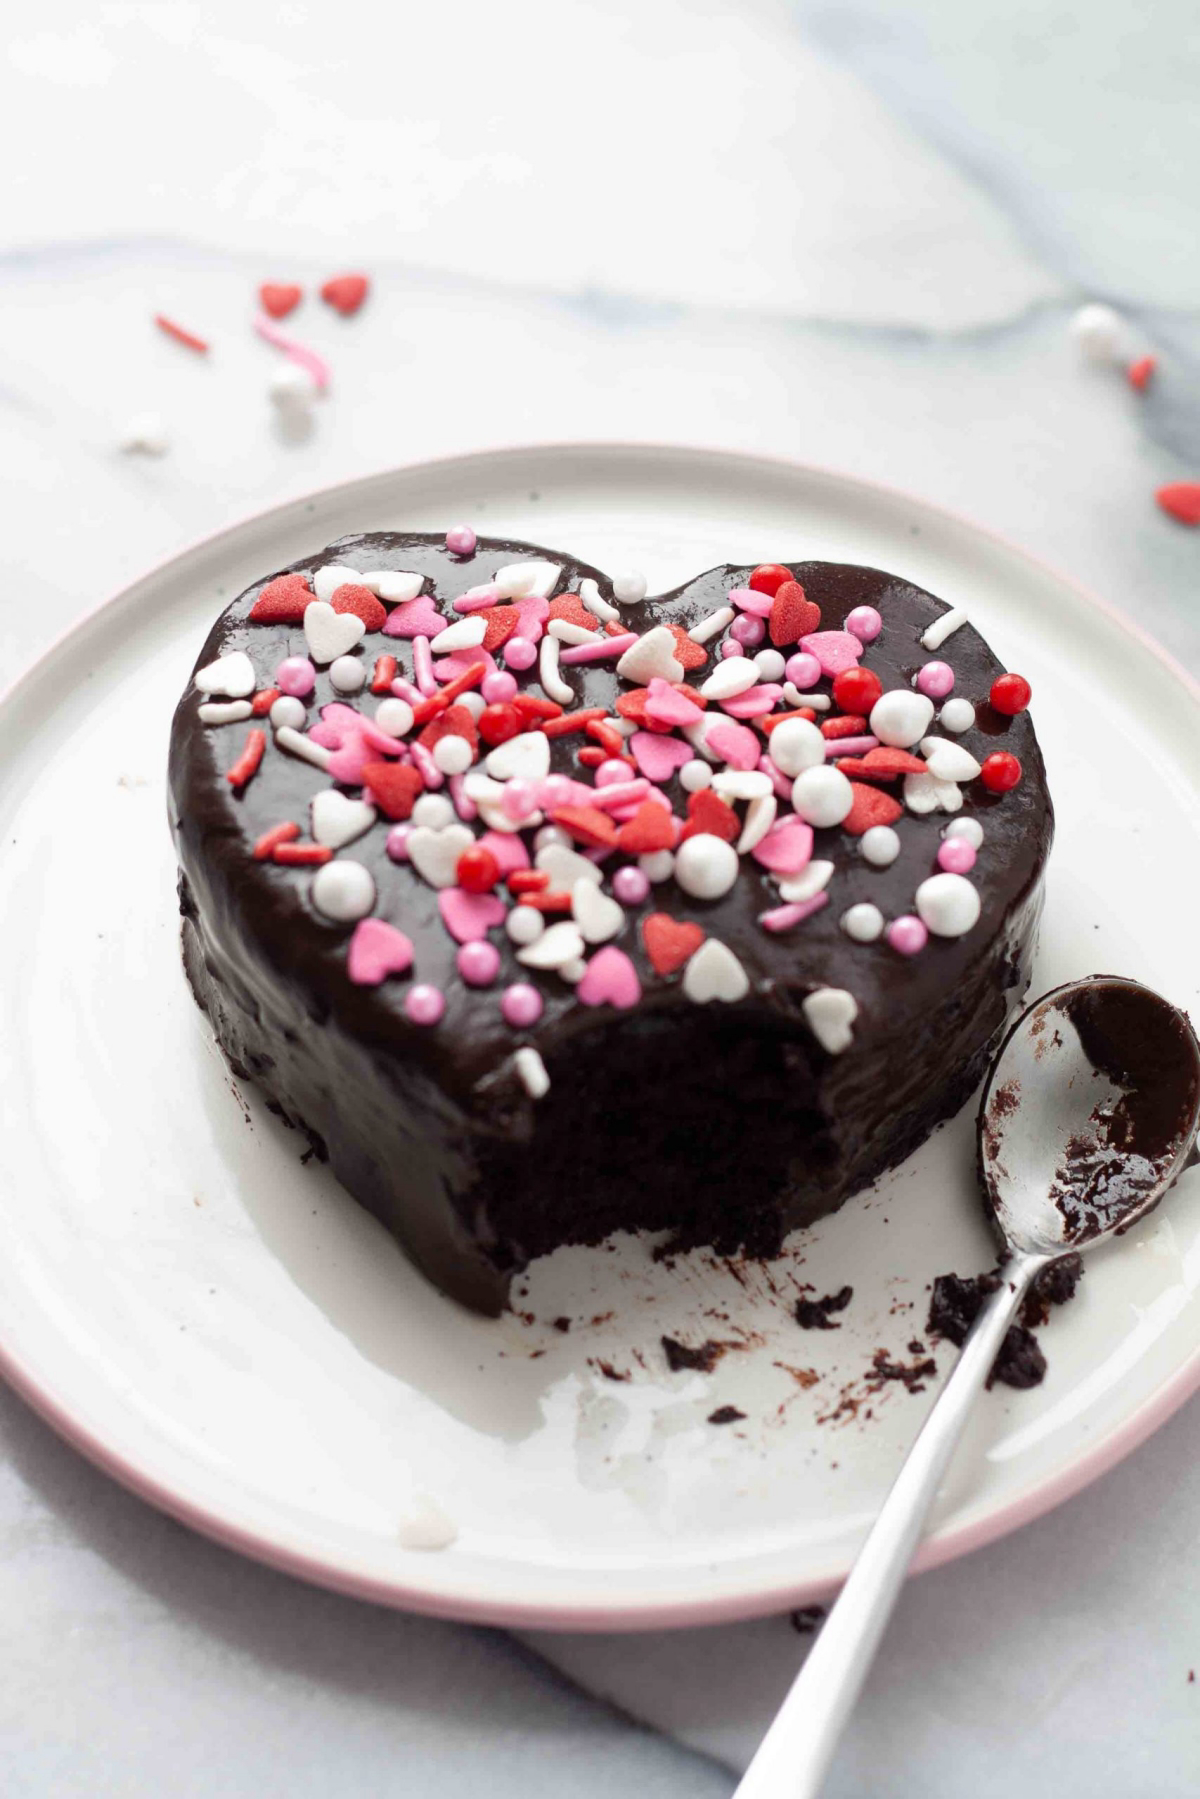
Leveling and the Crumb Coat
First, your cake needs to be completely, 100% cool. Then, use a long, serrated bread knife to gently saw off the domed top. Now for the most important step: the crumb coat. This is a super-thin layer of frosting that traps all the loose crumbs.
Apply a thin, almost see-through layer of frosting all over the cake. It doesn’t have to be pretty! Then, pop the cake in the fridge for at least 30 minutes until the frosting is firm. This locks in all the crumbs so your final coat of frosting stays perfectly clean.
I learned this lesson the hard way. I once rushed to frost a slightly-still-warm cake for a party and ended up with a melty, soupy mess that slid right off the sides. It was a disaster. That’s why I am now absolutely militant about the 2-3 hour cooling time and a chilled crumb coat. Trust me on this.
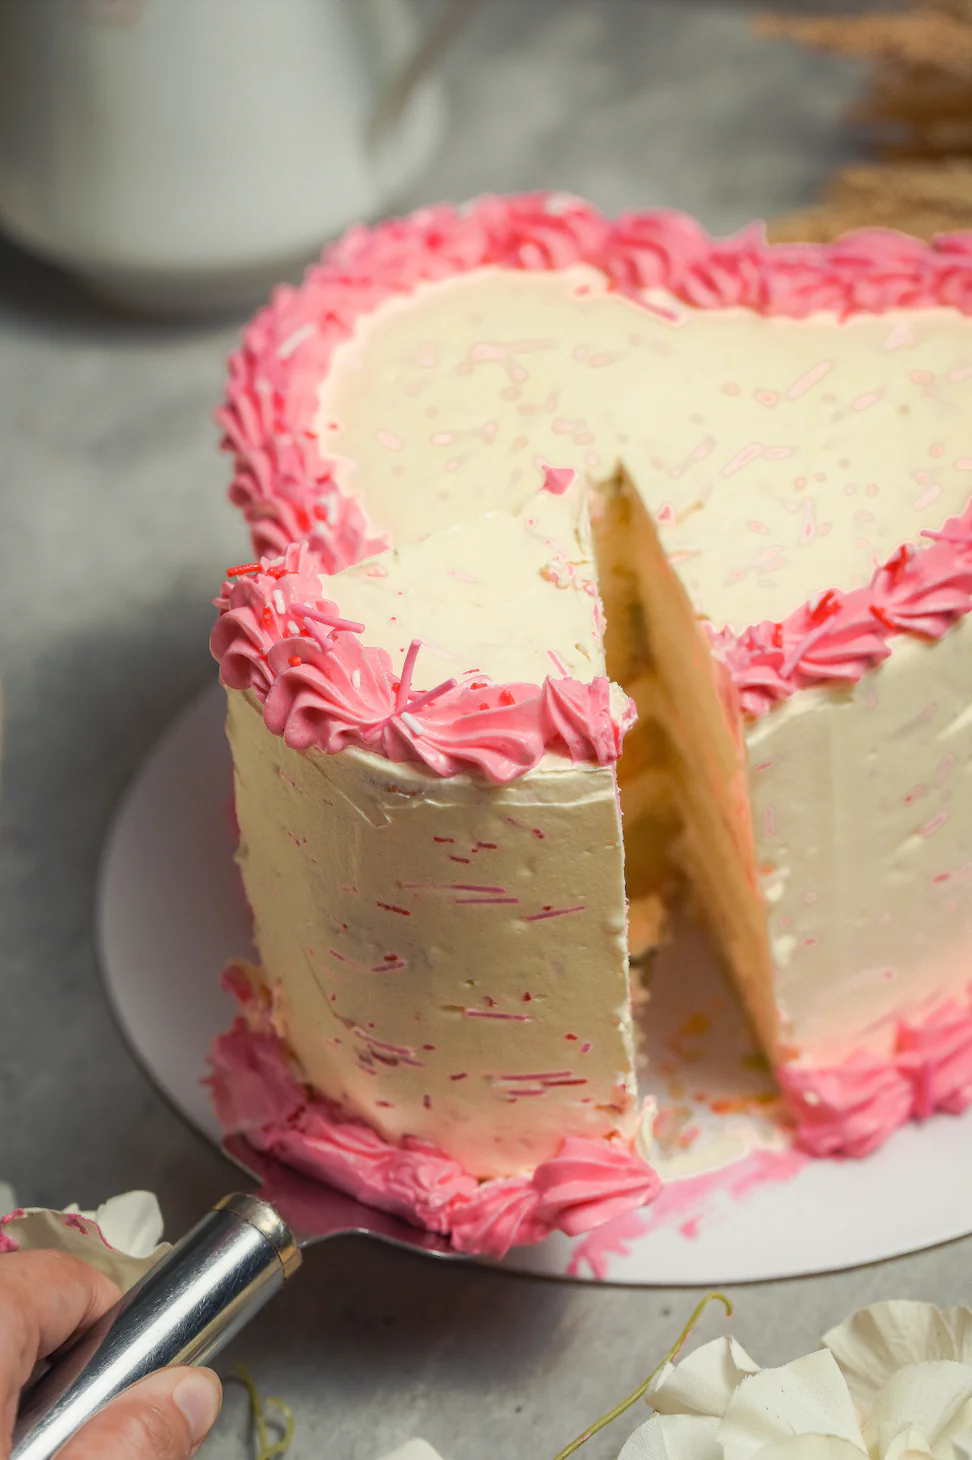
The Final Coat
Once your crumb coat is chilled and solid, you can apply your final, generous layer of frosting. For a super-smooth finish, an offset spatula (about $10 and a total game-changer) and a bench scraper are your best friends. To get those razor-sharp sides, run your metal bench scraper under hot water, dry it quickly, and glide it around the cake. For a more rustic look, just use the back of a spoon to create pretty swirls.
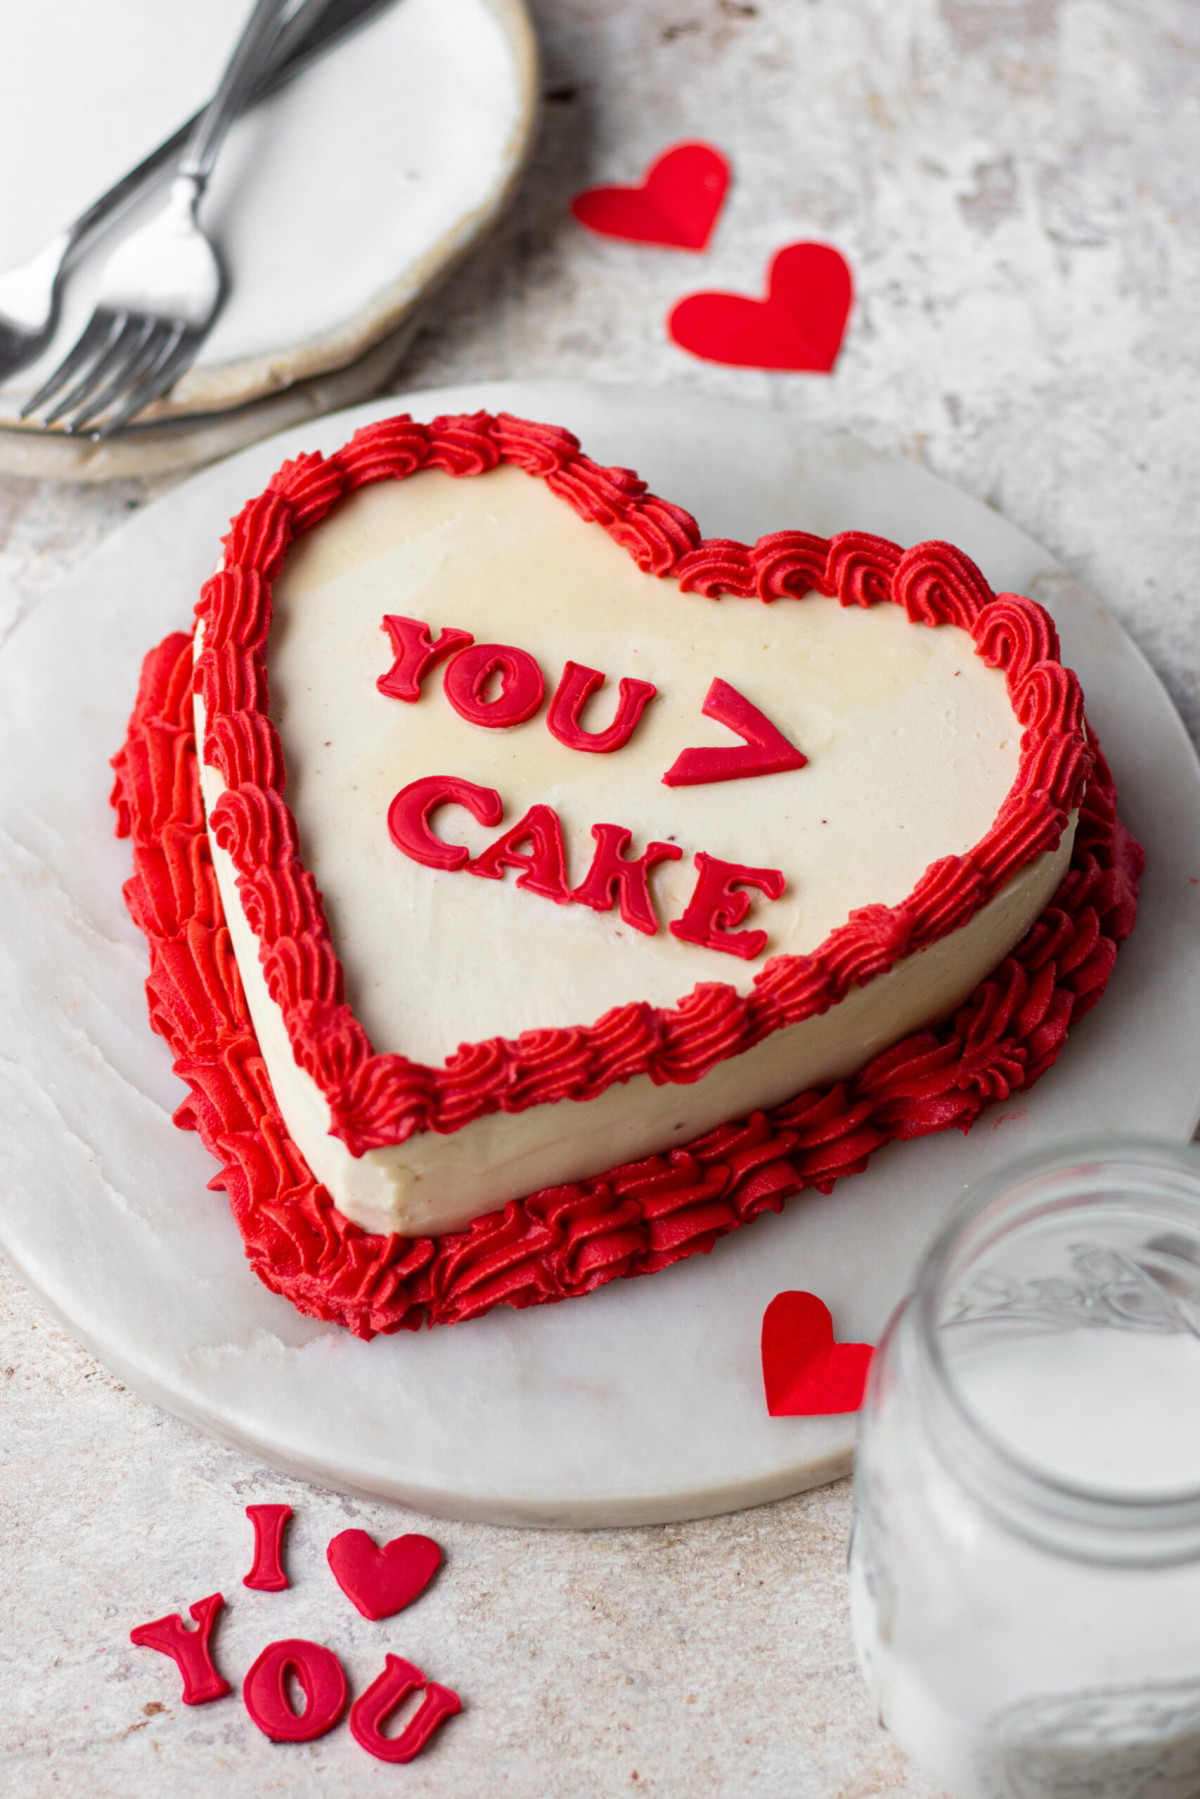
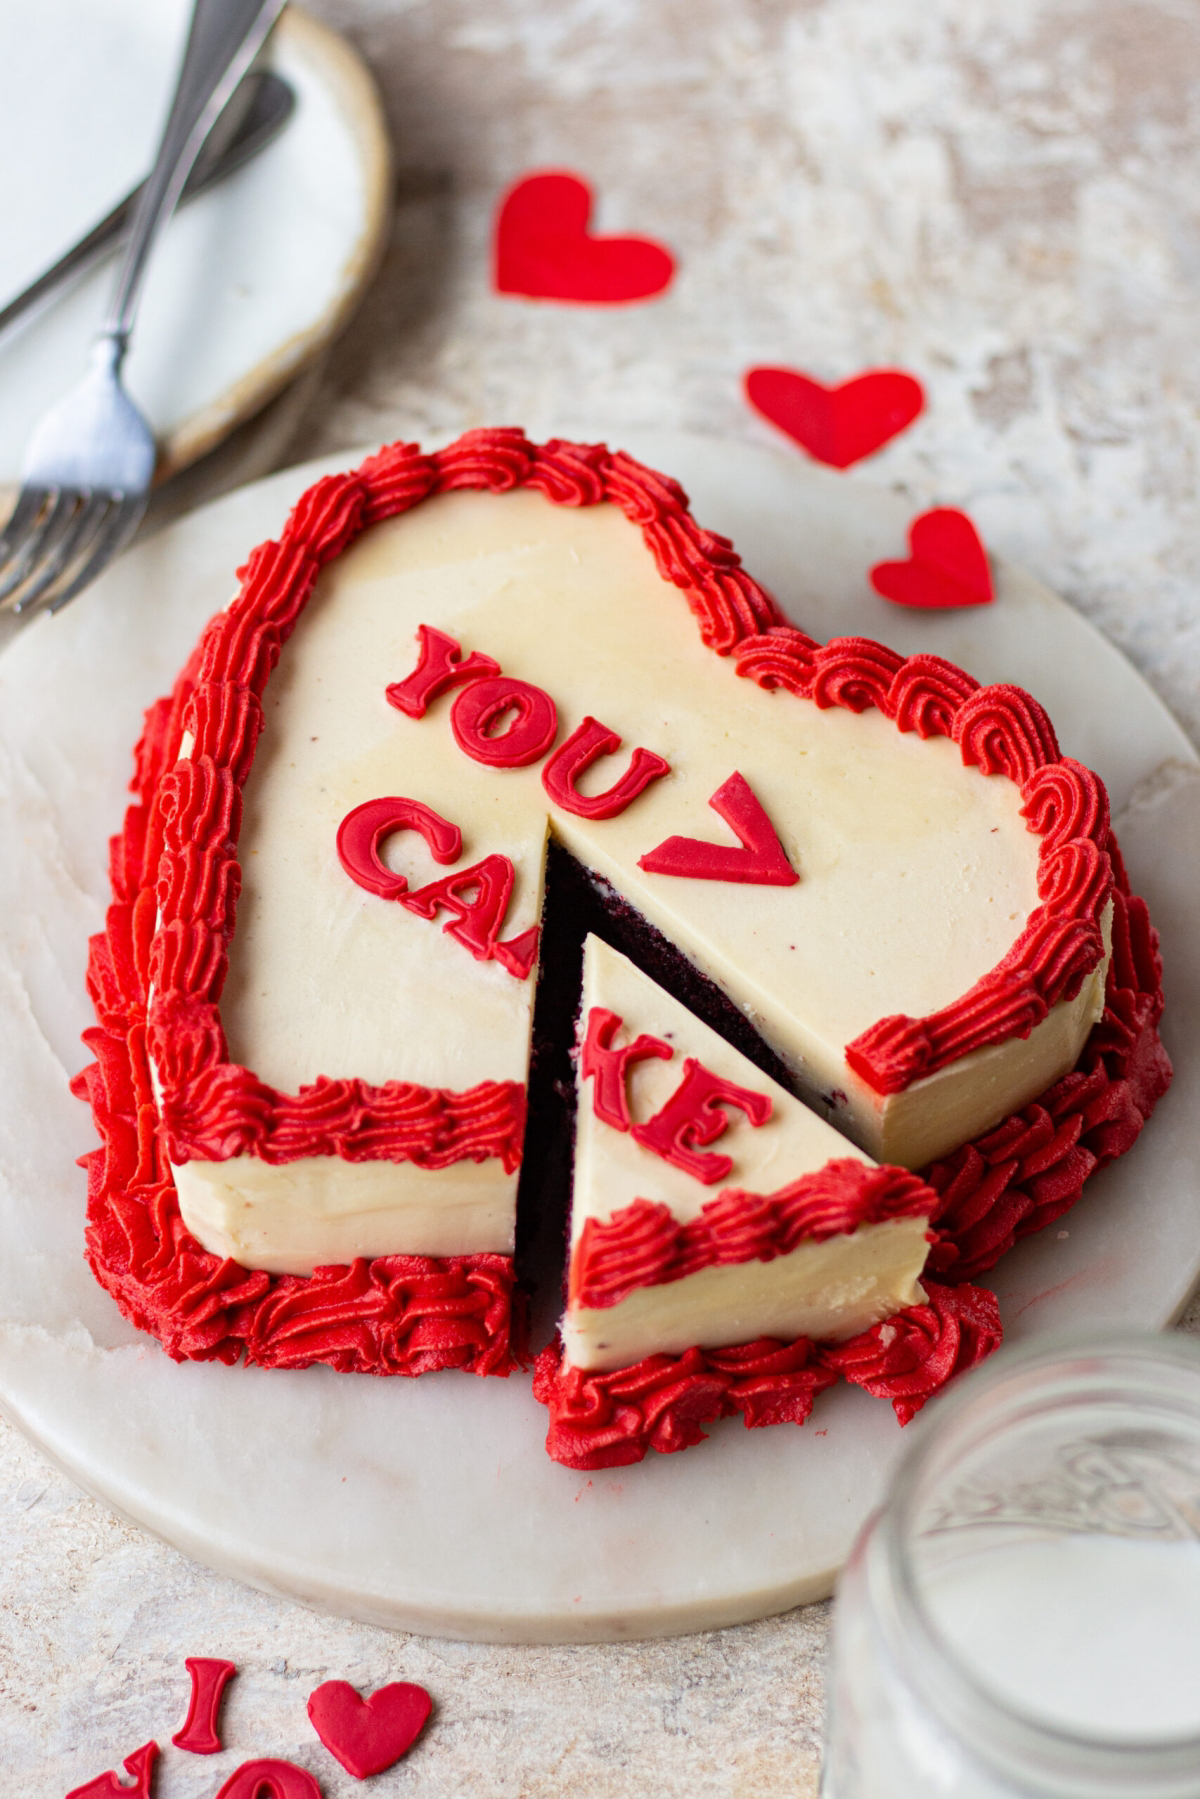
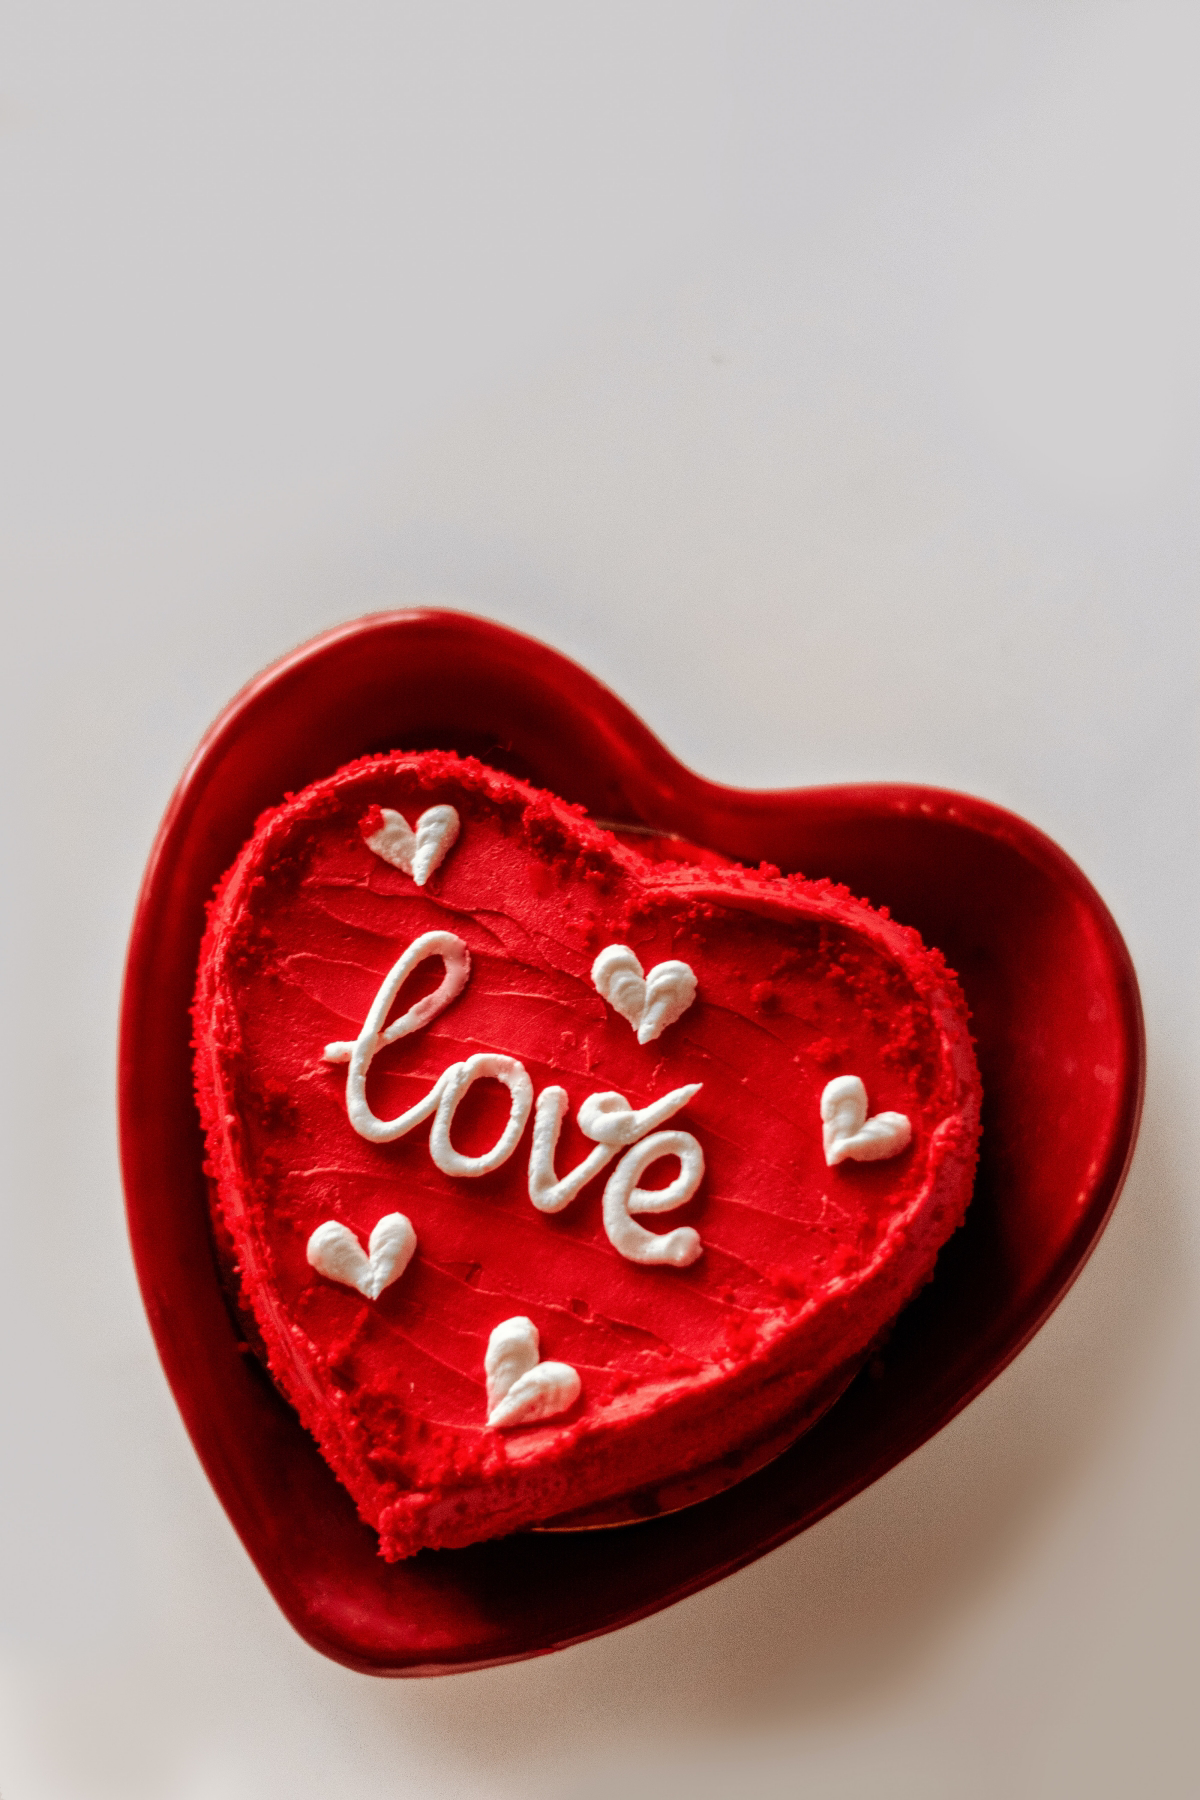
Lesser-Known Trick: Making a Heart Without the Pan
Okay, what if you don’t have a heart pan? Don’t worry, this is a classic baker’s trick. All you need is one 8-inch square cake and one 8-inch round cake, baked from the same batch of batter.
- Once the cakes are cooled and leveled, cut the round cake exactly in half. You now have two semi-circles.
- Place the square cake on your serving plate, but turn it so it looks like a diamond.
- Now, take one of your semi-circles and place its flat, cut edge against the top-left slanted side of the diamond.
- Do the same with the other semi-circle, placing its flat edge against the top-right slanted side of the diamond.
And just like that, you have a perfect heart shape! Use a little bit of frosting as “glue” to stick the pieces together before you do your crumb coat, and no one will ever know the seams were there.
A Final Word on Safety
A kitchen demands respect. Always use dry oven mitts—a damp one will steam your hand instantly. And when you’re pouring boiling water for that chocolate cake, pour slowly and away from your body.
Heads up on food safety: Any frosting made with cream cheese or cream needs to stay refrigerated. According to standard food safety guidelines, a cake with cream cheese frosting shouldn’t sit at room temperature for more than two hours. It’s a strict rule for a reason!
Baking a heart-shaped cake is a fantastic way to show someone you care. The real beauty is in the details—the feel of a perfectly emulsified batter, the smell of blooming cocoa, and the patience of a good crumb coat. These are the little things that take a cake from just a recipe to something truly memorable.
Galerie d’inspiration
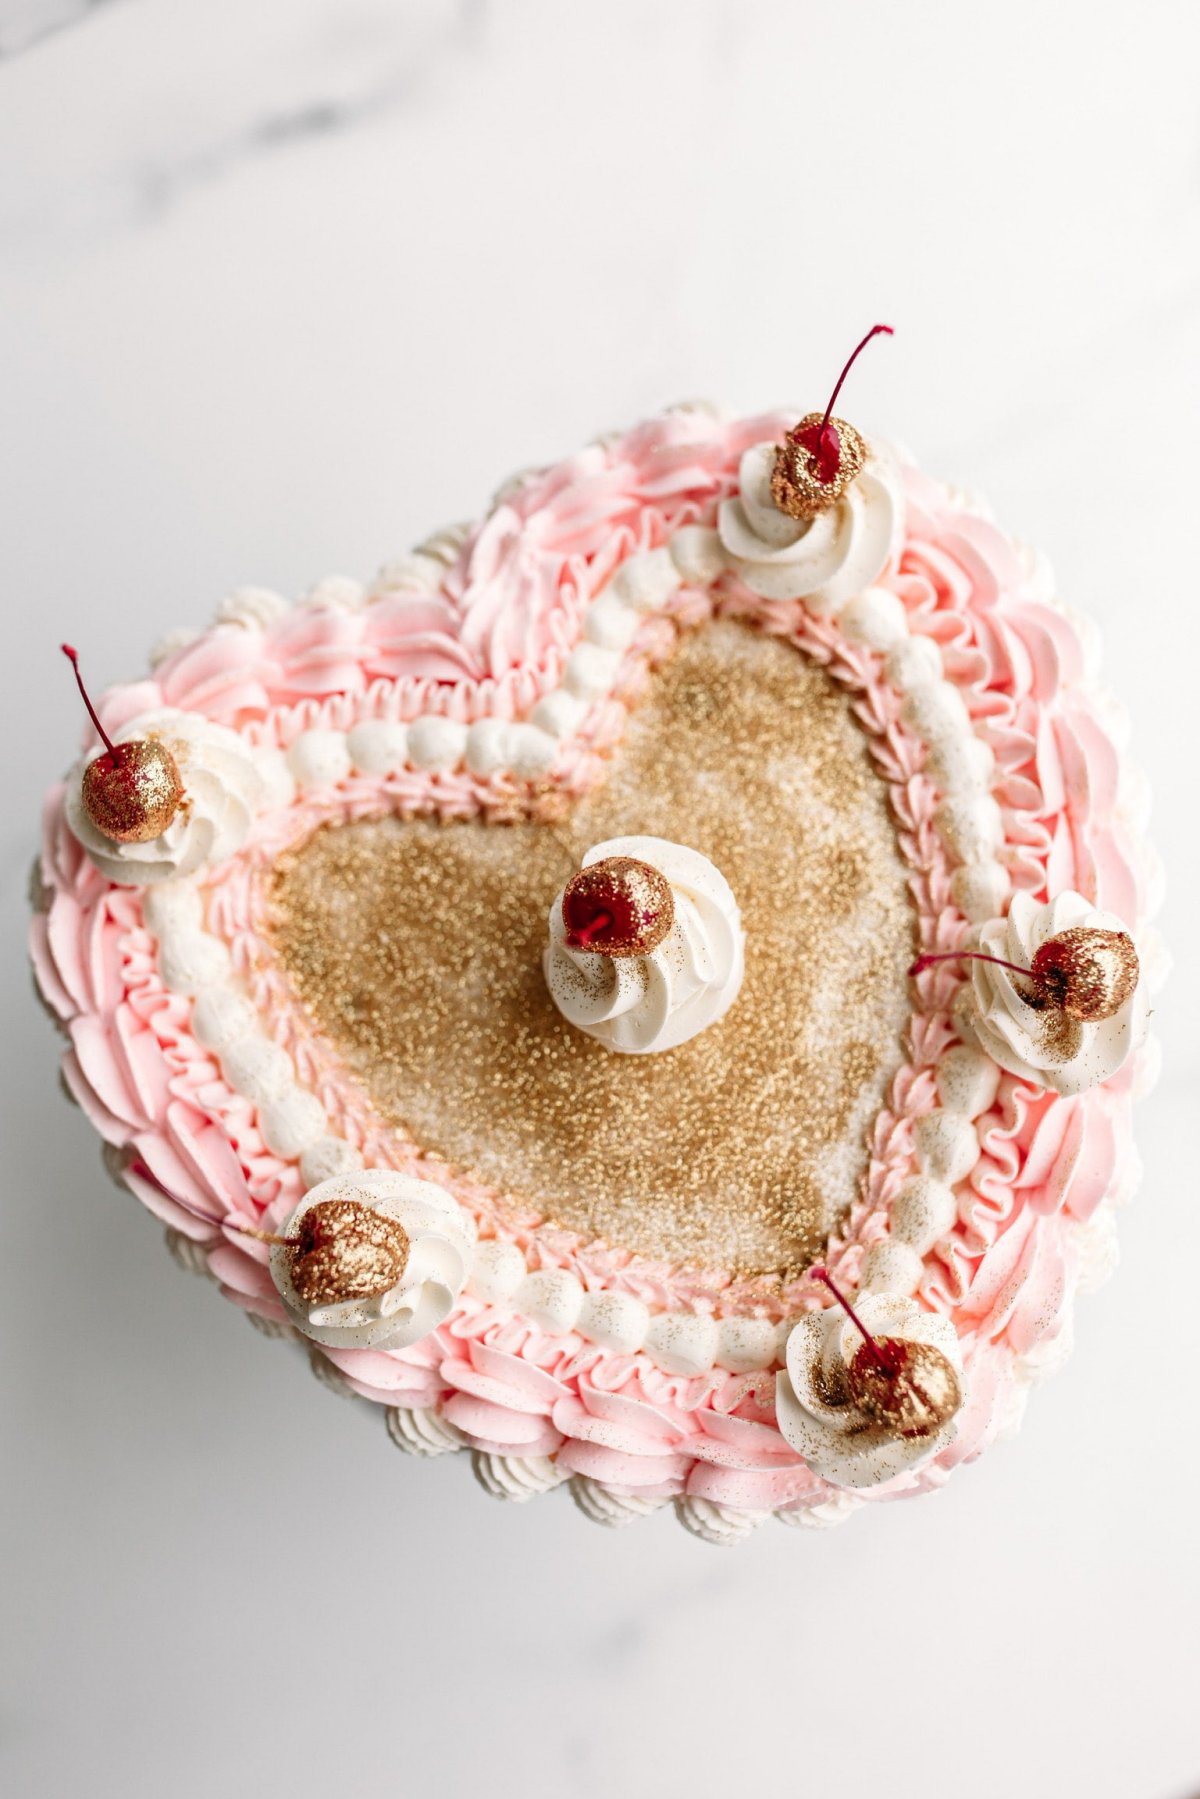
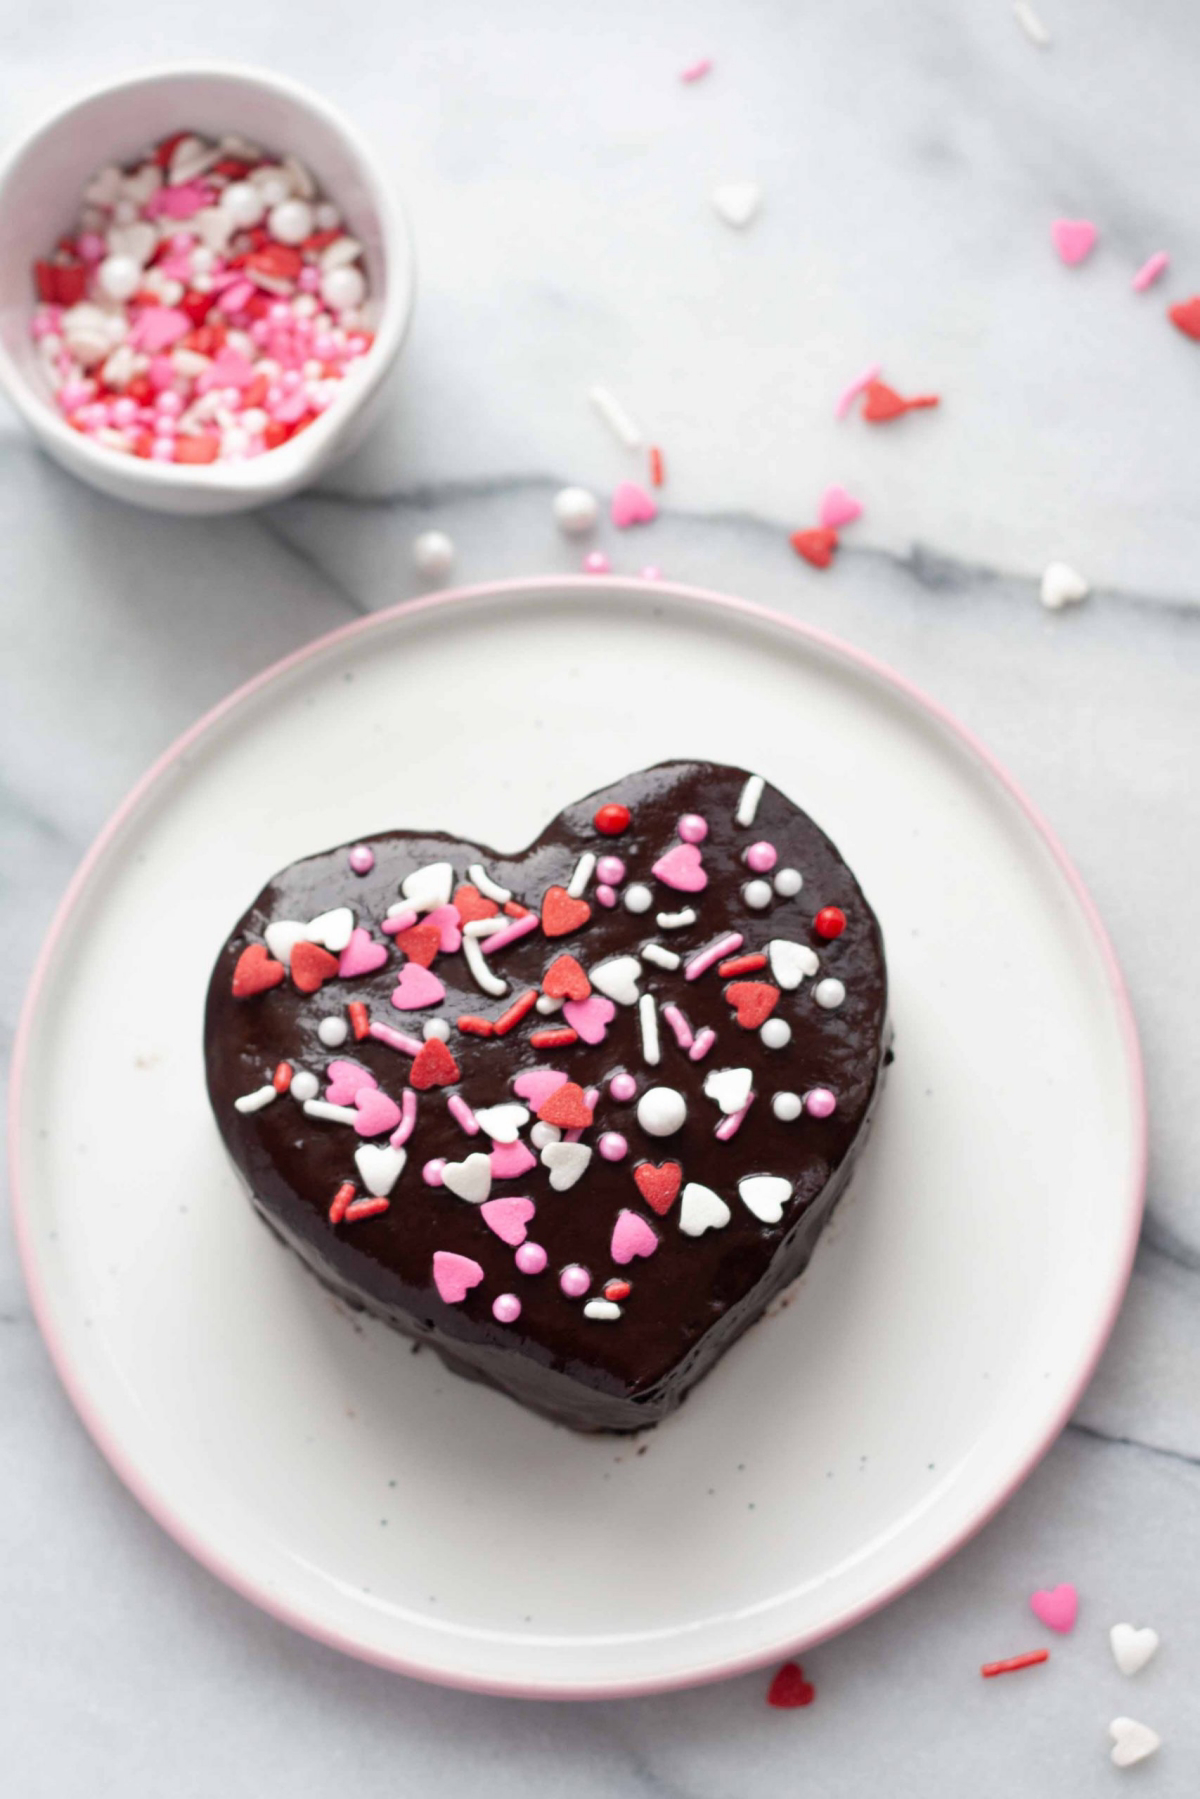
How do professional bakers get that perfectly sharp “V” in the center of a heart cake?
The secret is a two-step chill and the right tools. After applying a thin crumb coat (a messy first layer of frosting to trap crumbs), chill the cake for at least 20 minutes until firm. For the final coat, use a small offset spatula to carefully apply frosting into the corner. Then, take a metal bench scraper, hold it vertically against one side, and pull it towards you in one smooth motion to create a flat surface. Repeat on the other side, allowing the excess frosting to build up in the very center. Finally, use the tip of your clean spatula to gently scoop away that tiny ridge of excess, leaving a perfectly sharp valley.
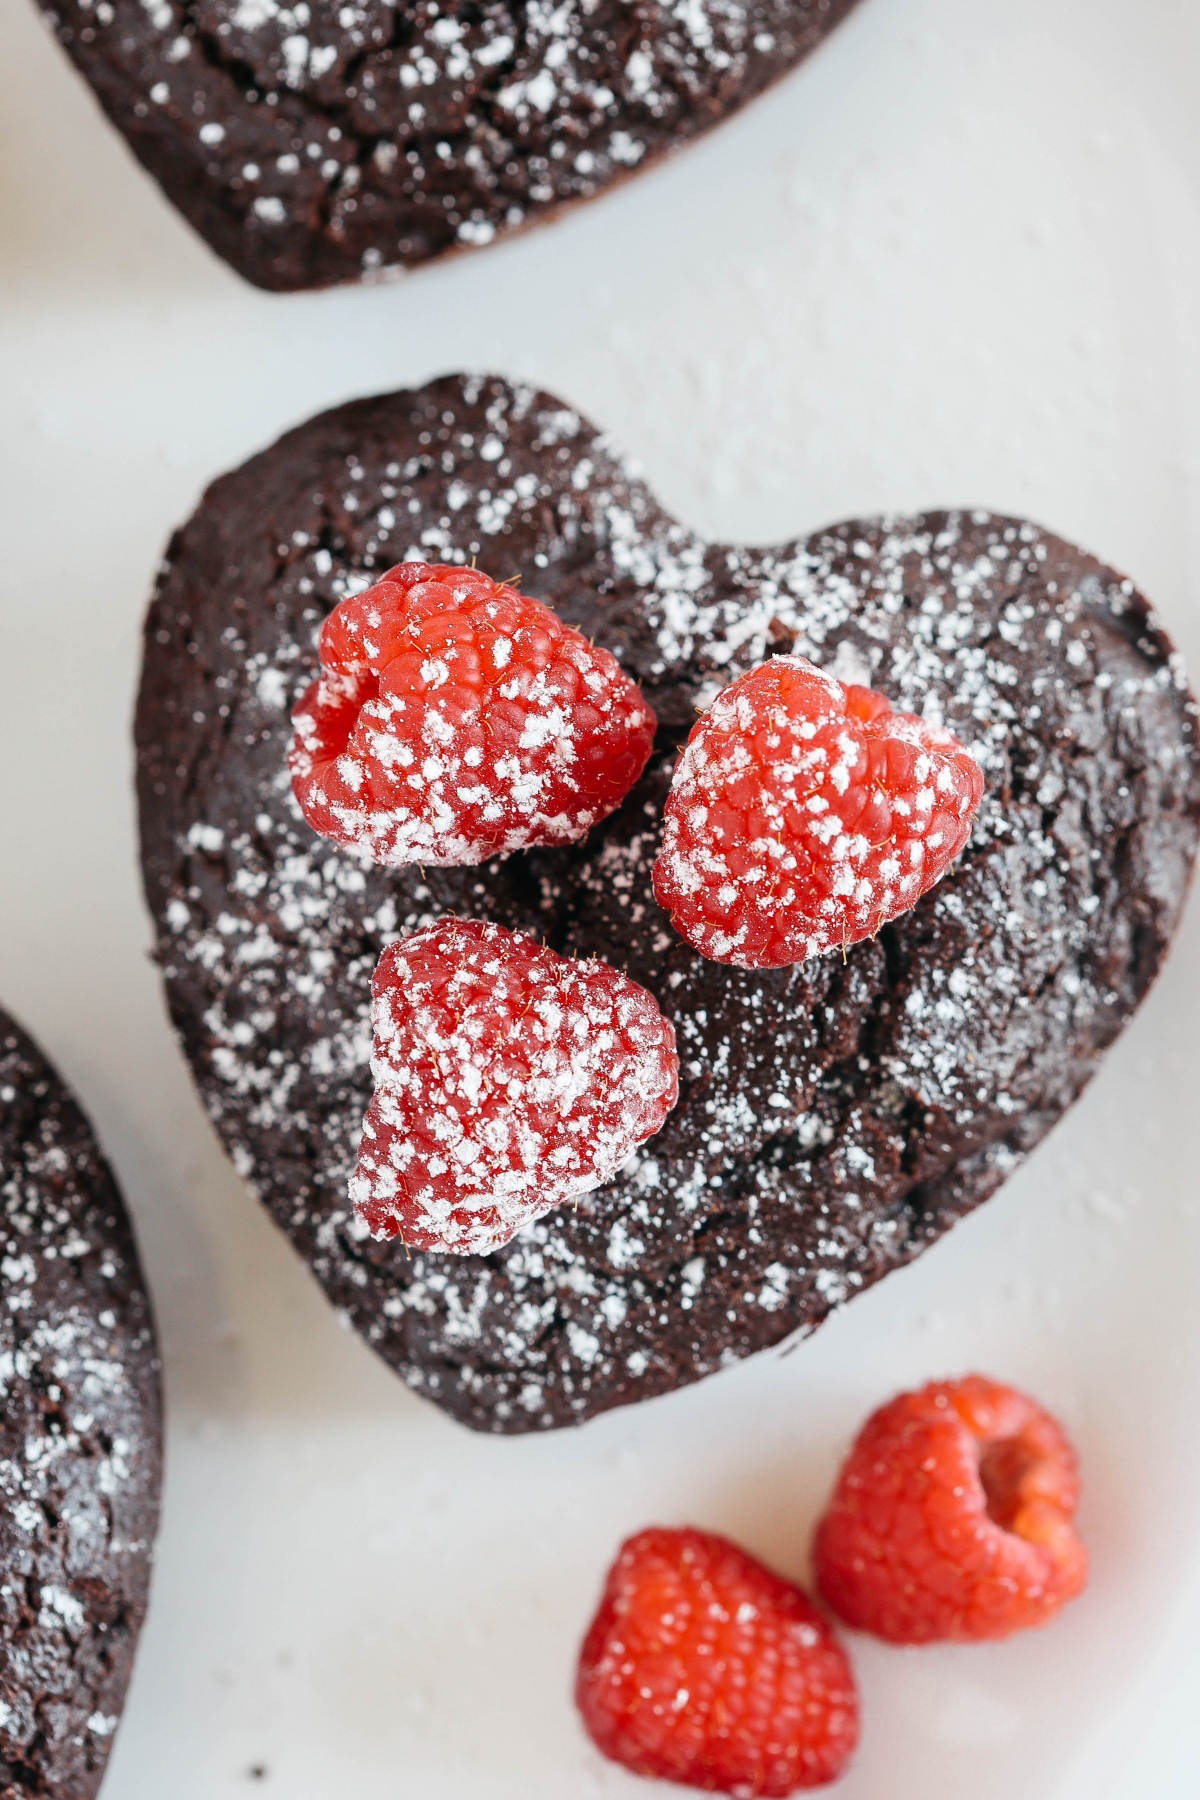
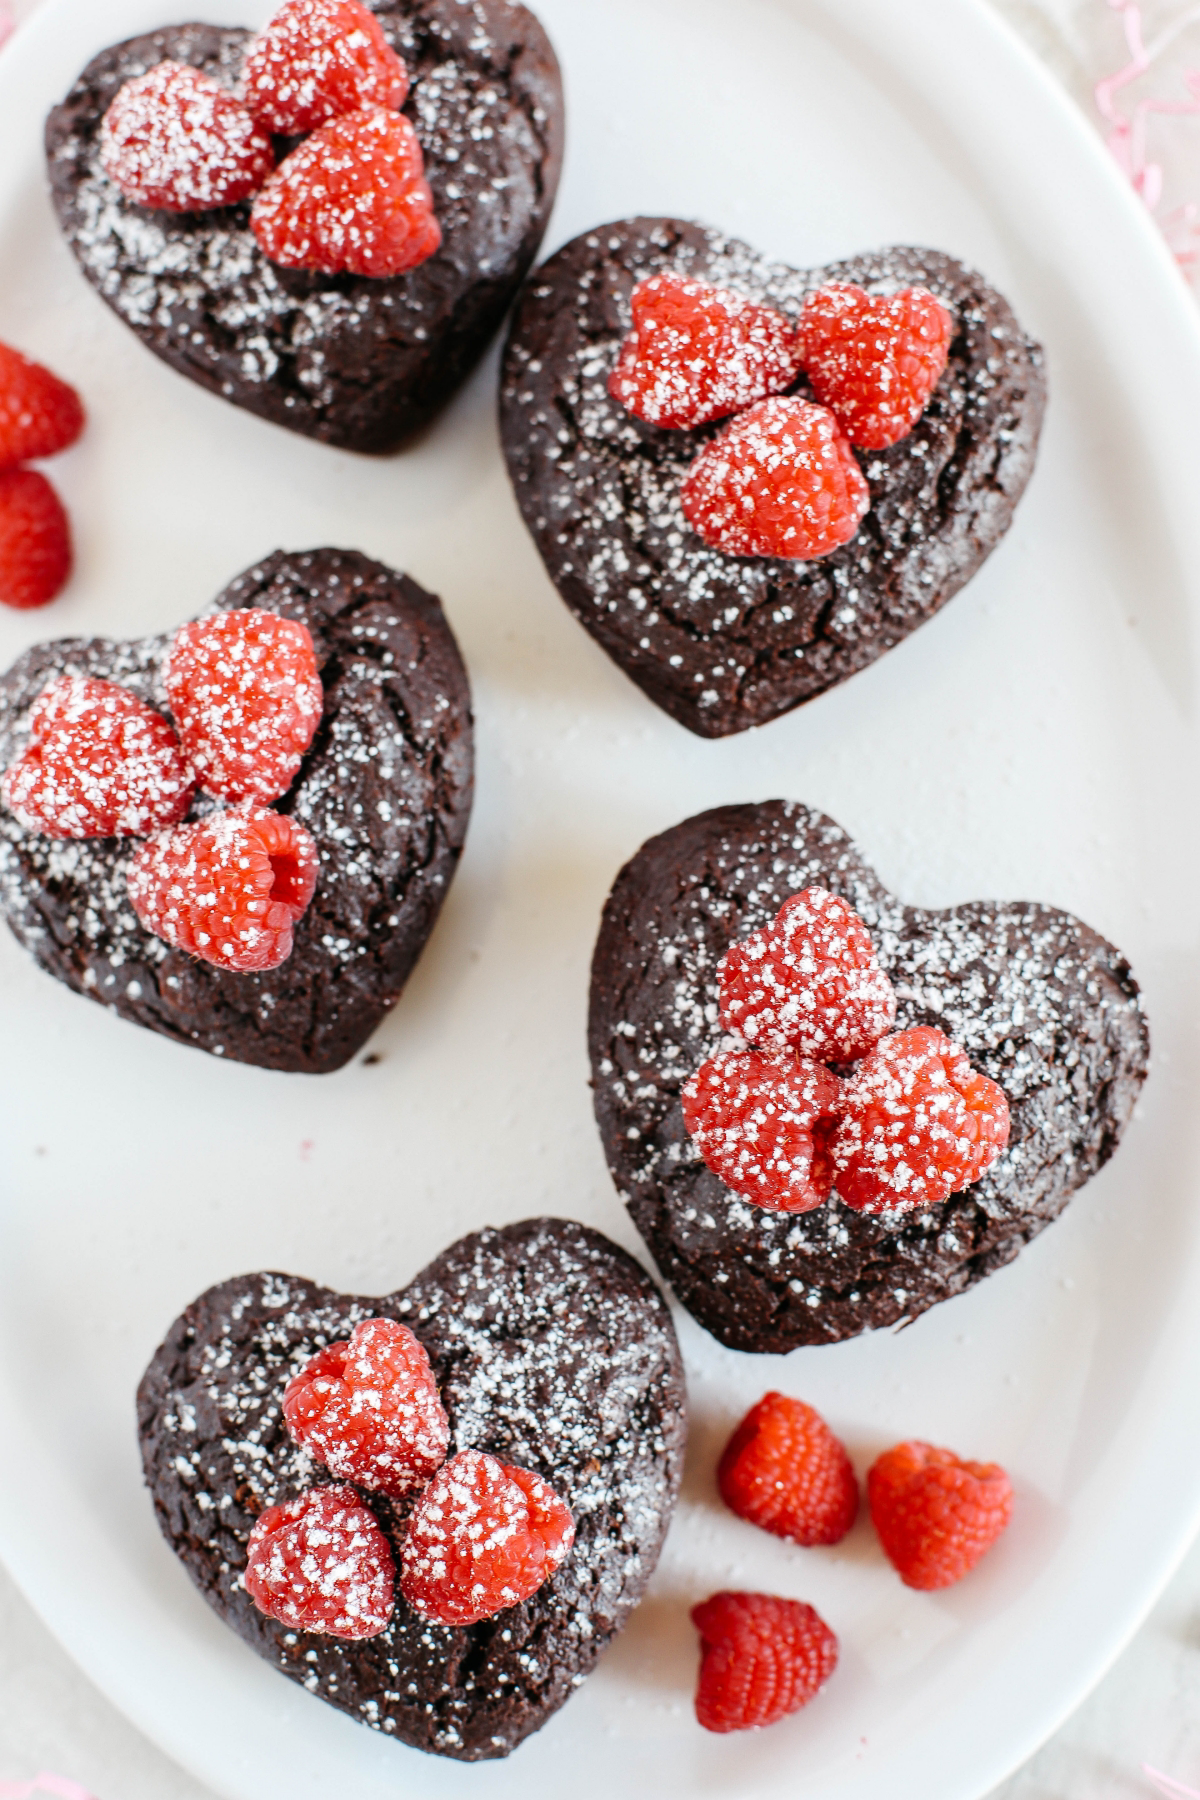
Classic Dark Chocolate & Raspberry: Deep and passionate. The bitterness of a quality dark chocolate ganache, made with something like Valrhona or Callebaut, is perfectly cut by the tartness of a fresh raspberry coulis swirled between the layers. It’s a timeless pairing that feels both decadent and sophisticated.
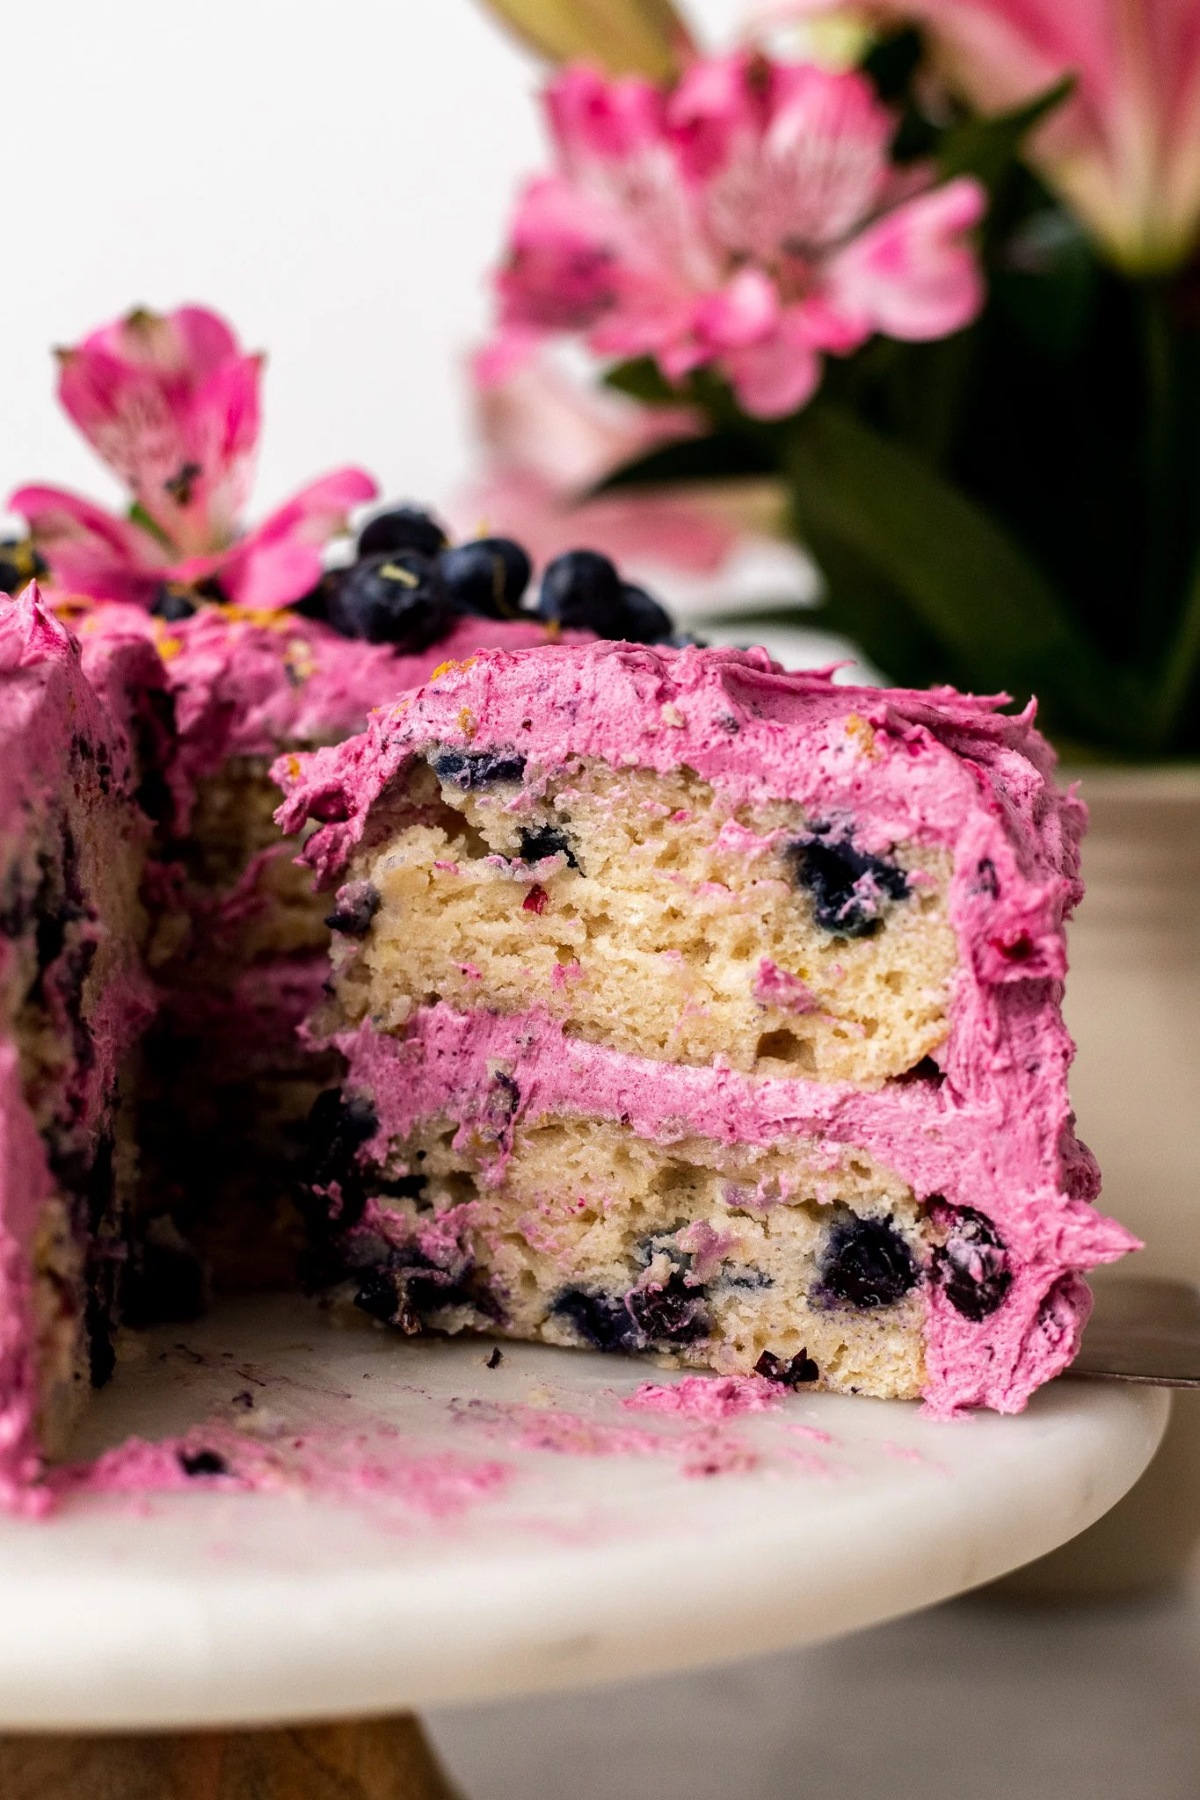
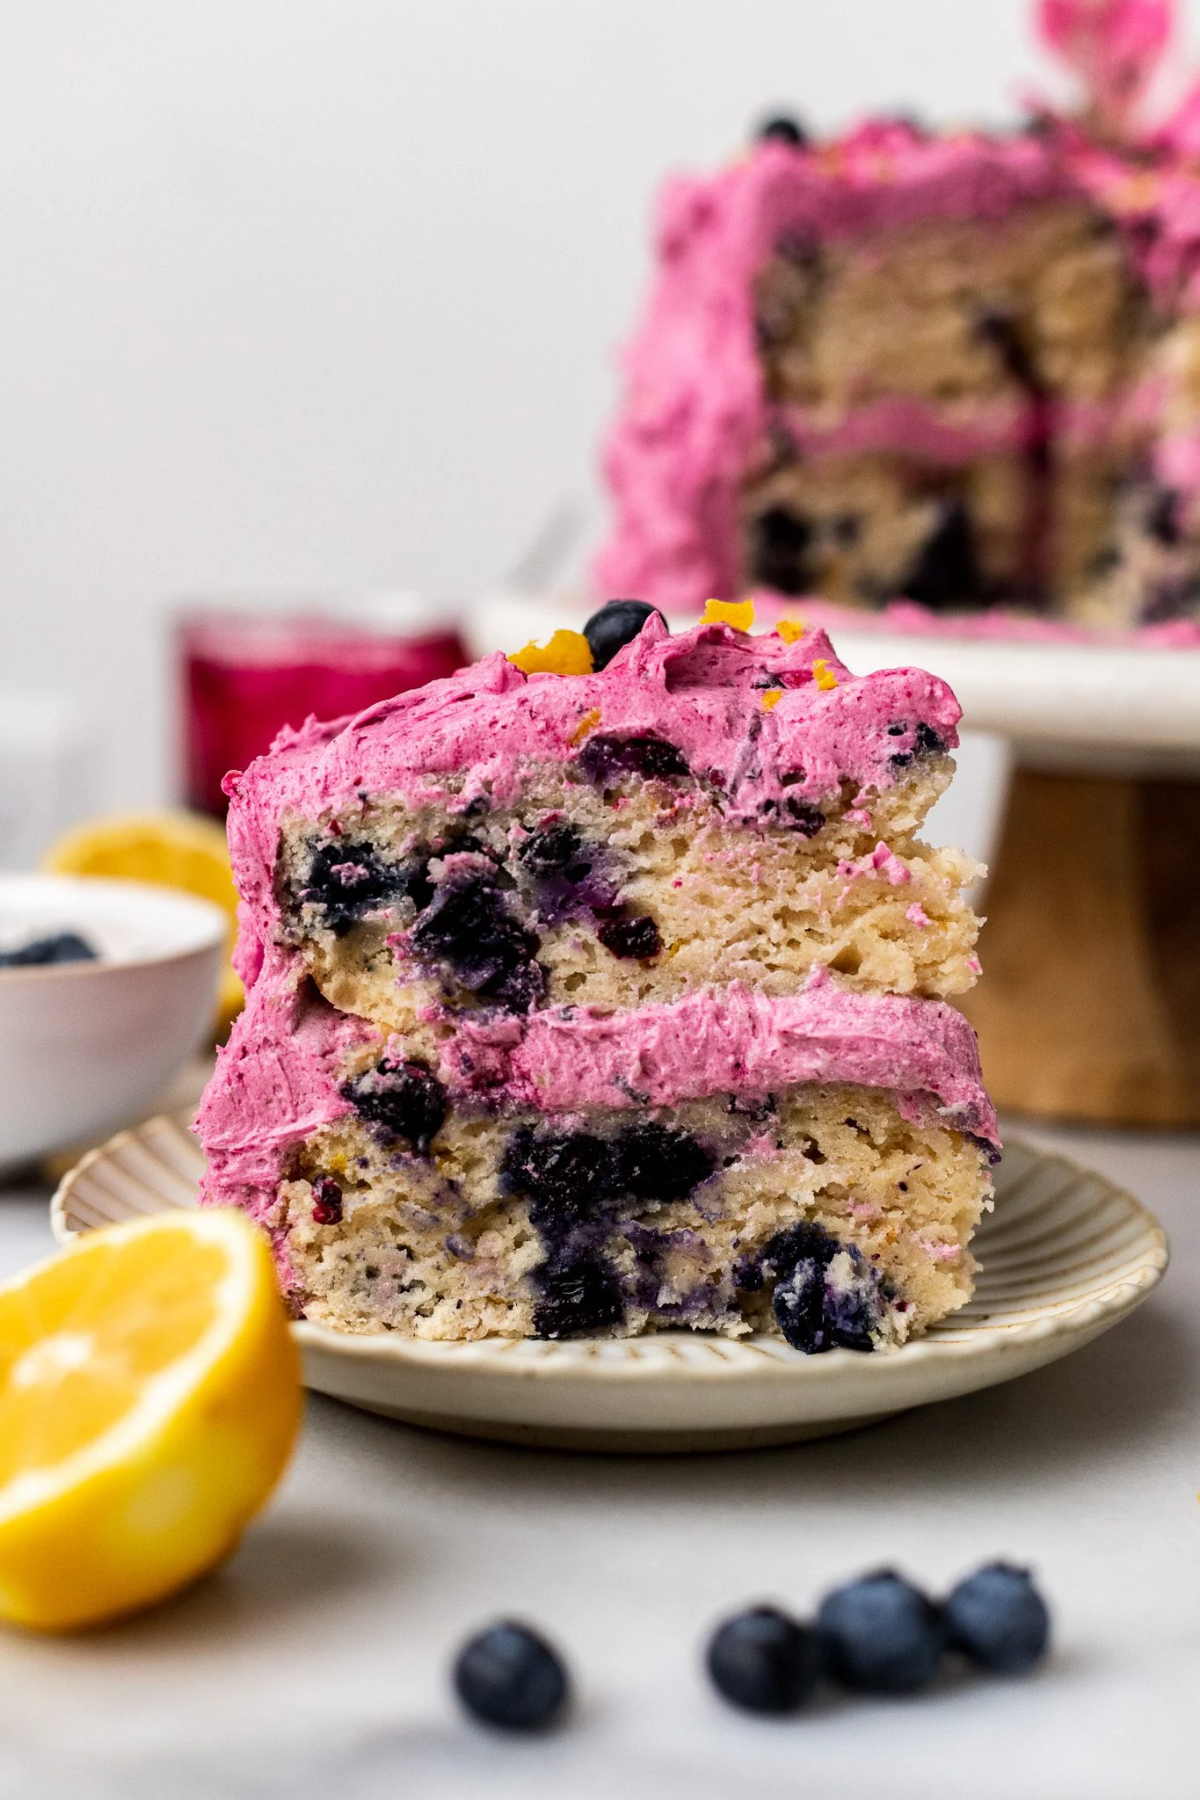
Bright Lemon & Elderflower: Light and celebratory. A moist lemon zest sponge, soaked in a delicate elderflower syrup (a dash of St-Germain liqueur is a great touch), and filled with a tangy lemon curd. This modern combination is fresh, floral, and wonderfully unexpected.