From Porch to Plate: How to Actually Cook a Real Pumpkin
I’ve spent a lifetime in kitchens, and every single autumn, it’s the same story: a flood of beautiful pumpkins. But here’s the thing—most people see them as decorations, destined for the front porch and then the trash. To me, that just feels wrong. Wasting good food is one of the biggest mistakes you can make, and a pumpkin is packed with amazing flavor just waiting to be used.
In this article
This isn’t just a list of recipes. It’s the full game plan I’ve honed over the years. We’re going to walk through choosing the right pumpkin, breaking it down without losing a finger, and using every single part of it. These are the tried-and-true methods that will give you delicious, consistent results every time.
First Things First: Not All Pumpkins Are Created Equal
Okay, let’s get the most important thing out of the way immediately. Those giant pumpkins sold for carving—often called field pumpkins—are NOT the ones you want for cooking. They’re bred for their size and have a thin shell that’s easy to cut. The downside? Their flesh is watery, stringy, and honestly, pretty bland.

And here’s a major heads up: Never, ever cook a jack-o’-lantern that’s been sitting outside. Even after just a few hours, it becomes a playground for bacteria. It’s a serious food safety risk, so just don’t do it.
For cooking, you need to grab what the pros use: culinary pumpkins. Look for smaller, dense varieties labeled as “sugar pumpkins” or “pie pumpkins.” These have been developed specifically for their sweet, smooth, and flavorful flesh. They’re your ticket to amazing pies and soups.
By the way, you can also branch out! Here’s a quick rundown of some great choices:
- Sugar or Pie Pumpkins: This is your classic go-to. It has that traditional sweet pumpkin flavor and a super smooth texture. It’s perfect for making purée, pies, and pancakes.
- Kabocha Squash: Technically a Japanese pumpkin, this one is a flavor powerhouse. It’s incredibly sweet with a nutty taste and a firm, almost dry flesh. It’s fantastic for roasting into wedges or making a really rich, thick soup.
- Cinderella or Jarrahdale Pumpkins: These are those beautiful, often blue-gray or deep orange, flatter pumpkins. They’re also great for cooking, with a sweet flavor that works well in most recipes.
Choosing the right ingredient from the start is half the battle. A great dish always begins with great produce.
Part 1: The Foundation – Making Perfect Pumpkin Purée
Before you can make anything else, you have to turn that hard gourd into smooth, usable purée. Canned pumpkin is fine in a pinch (no shame in that game!), but making your own gives you incredible flavor and texture you just can’t get from a can.
Total Project Time: About 1.5 hours (20 mins prep, 50-60 mins roasting & cooling, 10 mins blending)
So, is it worth the effort? A 4-pound sugar pumpkin will run you about $3-$6 at a farmers’ market or grocery store. It yields around 4-5 cups of purée. A single can (about 2 cups) costs $2.50-$4.00. So, you’re not saving a ton of money, but you’re paying for a massive upgrade in flavor. For me, it’s a no-brainer.
Roasting vs. Steaming: The Only Method That Matters
Lots of recipes might tell you to boil or steam your pumpkin. I’m telling you now, please don’t. Pumpkin already holds a lot of water, and boiling just adds more, giving you a bland, diluted purée that will make your pies and breads soggy.
Roasting, on the other hand, is a dry-heat method that works magic. It concentrates the pumpkin’s natural sugars and deepens its flavor. It also kicks off the Maillard reaction—that’s the beautiful browning process that creates complex, nutty, caramelized notes. It’s the secret weapon for flavor.
The Pro Technique: Roasting a Pumpkin for Purée
This is simple, but the little details make a big difference. Grab your pumpkin, a good knife, and a baking sheet.
What You’ll Need:
- 1 (4-lb) sugar pumpkin
- A sturdy chef’s knife and a large metal spoon
- A baking sheet
- Parchment paper (a real lifesaver for cleanup)
- Freezer-safe bags if you plan on storing it
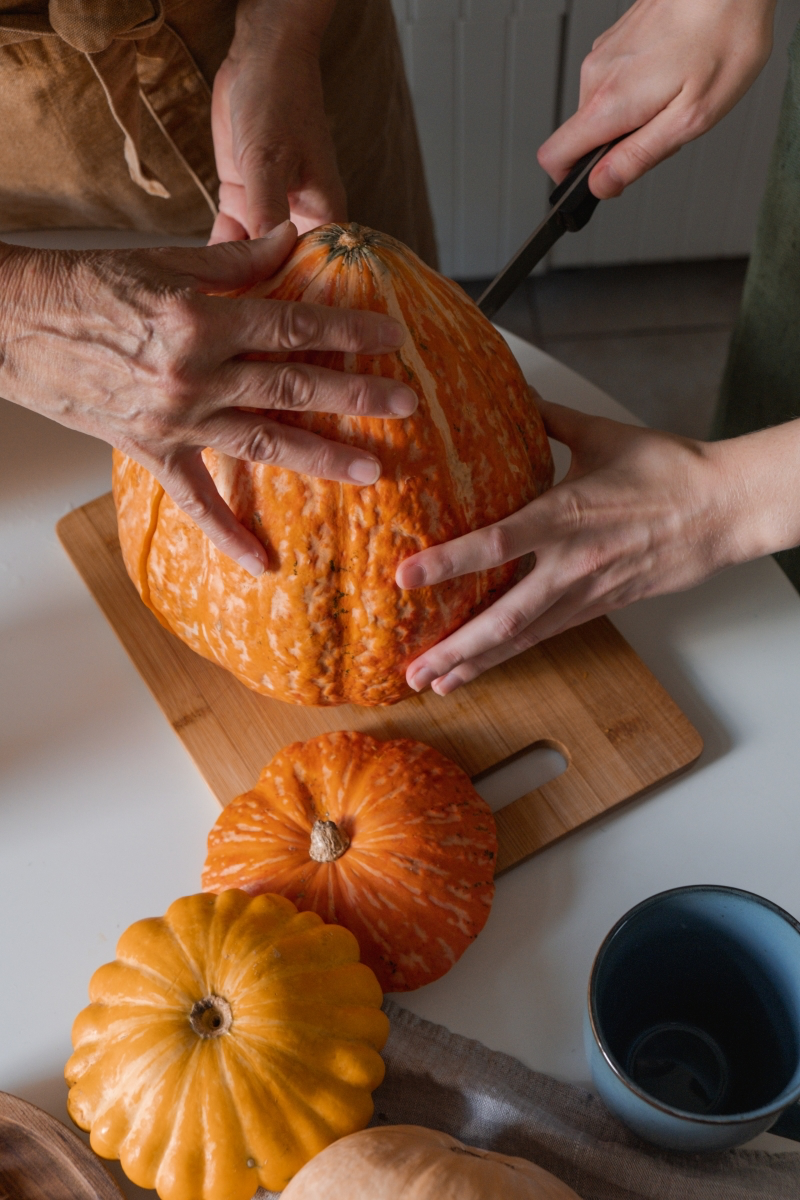
1. Safely Cut the Pumpkin: A round, hard pumpkin can be tricky. To keep your cutting board from slipping, place a damp kitchen towel underneath it. First, snap off the stem. Then, instead of trying to hack it in half, insert the tip of your knife near the top and press down firmly. Rock the knife down and around, turning the pumpkin as you go for more control.
Quick Tip: If the pumpkin is rock-solid, pop it in the microwave for 2-3 minutes. This softens the rind just enough to make that first cut way easier and safer.
2. Scoop the Guts: Use a strong metal spoon to scrape out all the seeds and stringy bits. But don’t you dare throw them out! We’ll get to those later. Scrape the inside walls clean to ensure your final purée is perfectly smooth.
3. The Roasting: Preheat your oven to 400°F (200°C). Place the pumpkin halves cut-side down on your parchment-lined baking sheet. No oil, no seasoning. We want pure pumpkin flavor. A 4-pounder will take about 40 to 60 minutes. You’ll know it’s done when a fork pierces the skin and flesh with zero resistance.
4. Cool and Peel: Let it cool on the tray for at least 20 minutes, or until you can handle it. The skin should peel away easily. If any bits are stubborn, just scoop the flesh out with a spoon.
5. Create the Purée: You’ve got perfectly roasted pumpkin! A food processor will give you the smoothest result. A high-powered blender works too, but you might need a splash of water to get it going. If you don’t have either, a food mill or a potato masher works for a more rustic texture. Blend until it’s velvety smooth.
And here’s the answer to the big question: a 4-pound sugar pumpkin like this will typically give you about 4 to 5 cups of purée, which is perfect for my soup recipe below and leaves you with a bit extra for pancakes!
Storing Your Liquid Gold
Let the purée cool completely. It’ll last in an airtight container in the fridge for about 5 days. To freeze it, measure it into 1-cup or 2-cup portions in freezer bags. Squeeze out all the air, lay them flat, and they’ll keep for at least 6 months. Oh yeah, good to know: label the bags with the date and amount!
Troubleshooting: What If It Goes Wrong?
Even the pros have off days. Here are a couple of common issues and how to fix them.
- Help! My purée is watery. This can happen if your pumpkin had a higher-than-usual water content. No worries! Pour the purée into a wide saucepan and simmer it over medium-low heat, stirring often, until it has thickened up. You’re just cooking off the extra water.
- Why are my roasted seeds chewy, not crispy? Two likely culprits. First, you didn’t get them dry enough before roasting. Pat them VERY dry with a towel. Second, your oven might have been too hot. Try roasting them lower and slower, around 325°F (160°C), to dry them out before they burn.
Part 2: Three Recipes to Show Off Your Skills
Now for the fun part. Let’s use that beautiful purée. These recipes are autumn staples, elevated with a few simple techniques.
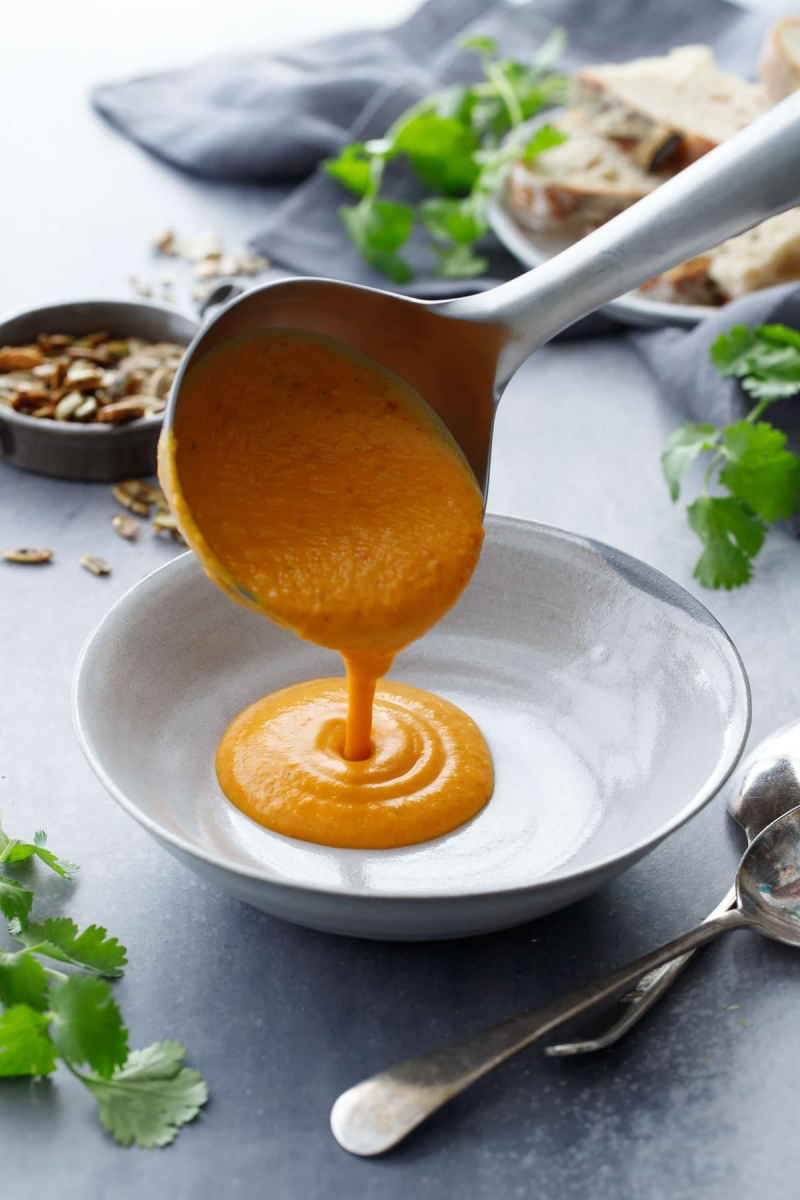
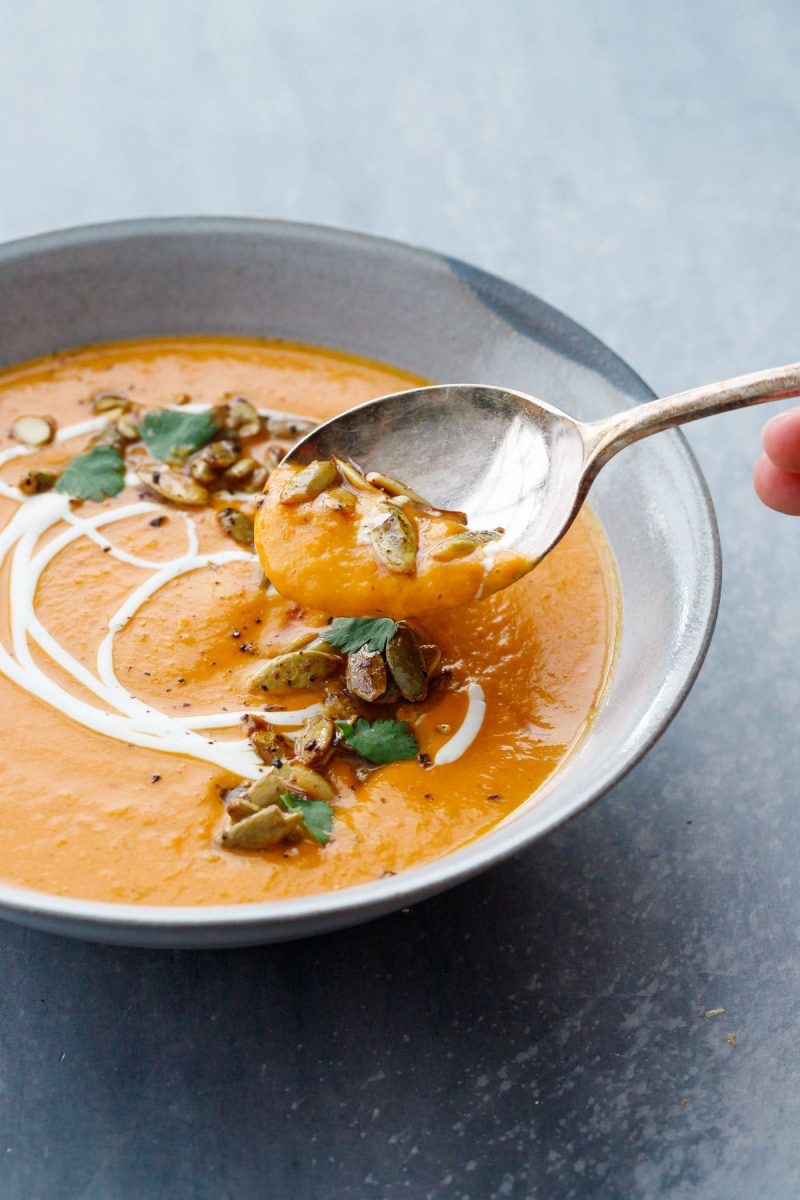
Recipe 1: Velvety Pumpkin Soup with a Global Twist
A good pumpkin soup is creamy and balanced. This version uses harissa and orange to create a complex, warming dish that’s a world away from the usual cinnamon-and-nutmeg routine. I learned this flavor profile from a chef who specialized in North African cuisine, and it was a total game-changer.
Ingredients:
- 2 tbsp olive oil
- 1 large yellow onion, chopped
- 2 cloves garlic, minced
- 1 tbsp fresh ginger, grated
- 4 cups homemade pumpkin purée
- 4 cups vegetable or chicken broth
- 1-2 tbsp harissa paste (your call on the spice level)
- Large pinch of saffron threads
- Zest and juice of 1 orange
- 1 cup heavy cream or full-fat coconut milk
- Salt and freshly ground black pepper
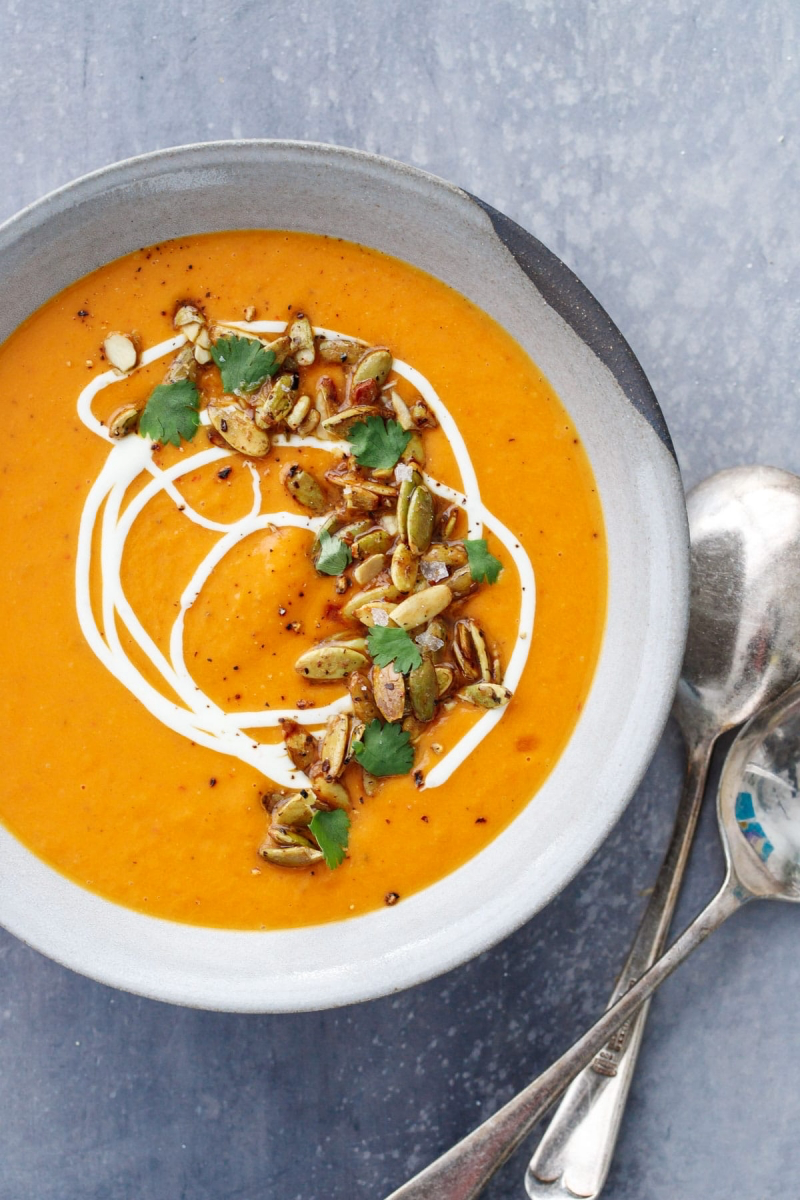
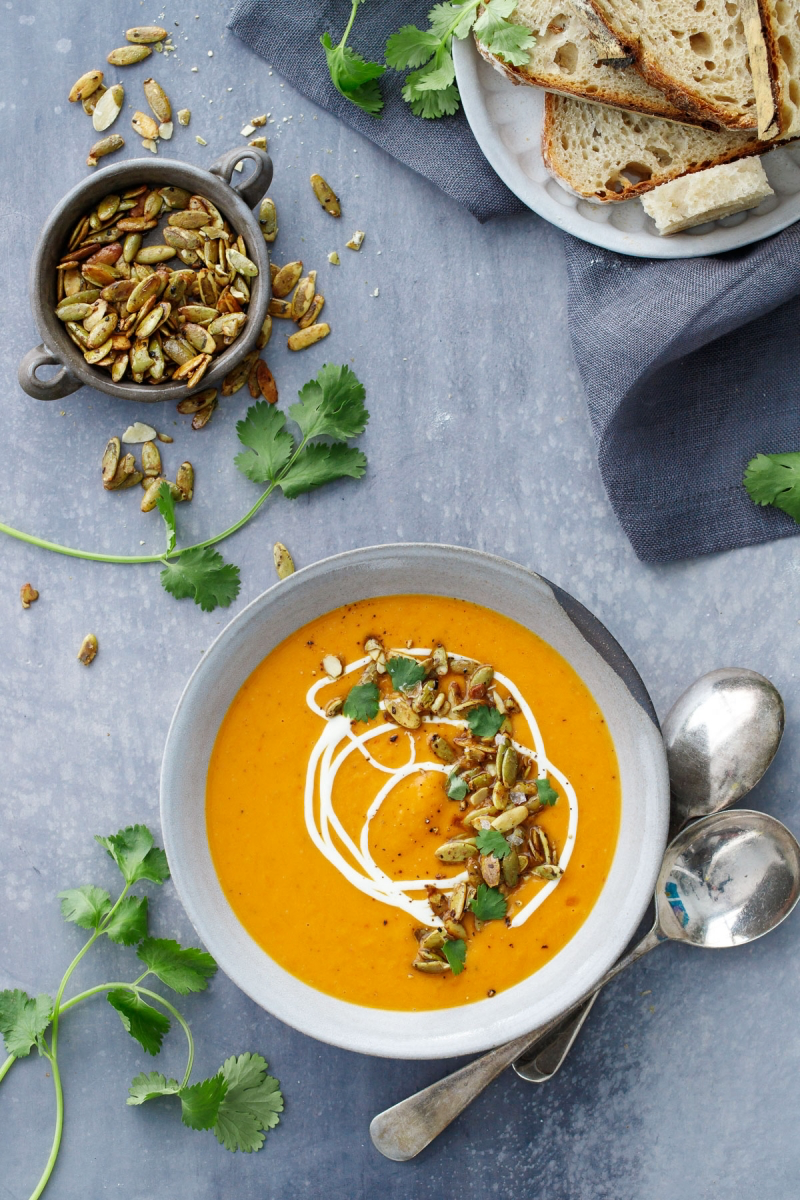
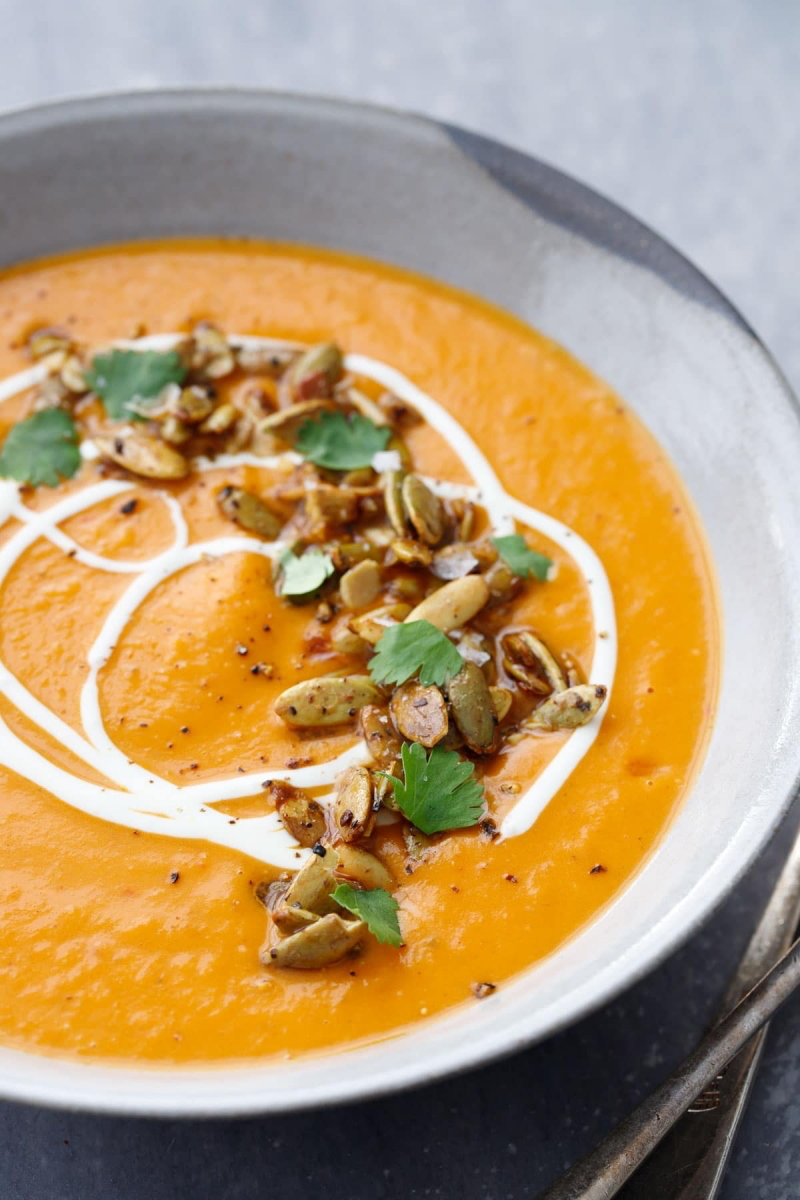
- For garnish: Toasted pumpkin seeds, crème fraîche, fresh cilantro
Pro Techniques:
1. Build the Base: In a large pot, heat the oil over medium heat. Add the onion and a pinch of salt (this draws out moisture and helps it sweeten without browning). Cook for 8-10 minutes until soft, then add the garlic and ginger for another minute. This layering builds deep flavor.
2. Bloom the Spices: Push the onions aside and add the harissa to the hot spot in the pan for about 30 seconds. This toasting, or ‘blooming,’ deepens its flavor before you stir it all together.
3. Simmer and Meld: Add the purée and broth. Crumble the saffron into the orange juice for a minute before adding it to the pot—this helps release its color. Bring to a GENTLE simmer (don’t boil!) and cook for 15-20 minutes for the flavors to marry.
4. Blend Safely: An immersion blender is your best friend here. If using a regular blender, BE CAREFUL. Never fill it more than halfway with hot liquid. Work in batches and remove the little plastic cap on the lid, covering the hole with a folded towel to let steam escape.
5. The Finish: Return the soup to the pot, stir in the orange zest and cream, and heat gently. Taste it and season generously with salt and pepper. You’re looking for that perfect balance of sweet, spicy, earthy, and bright.
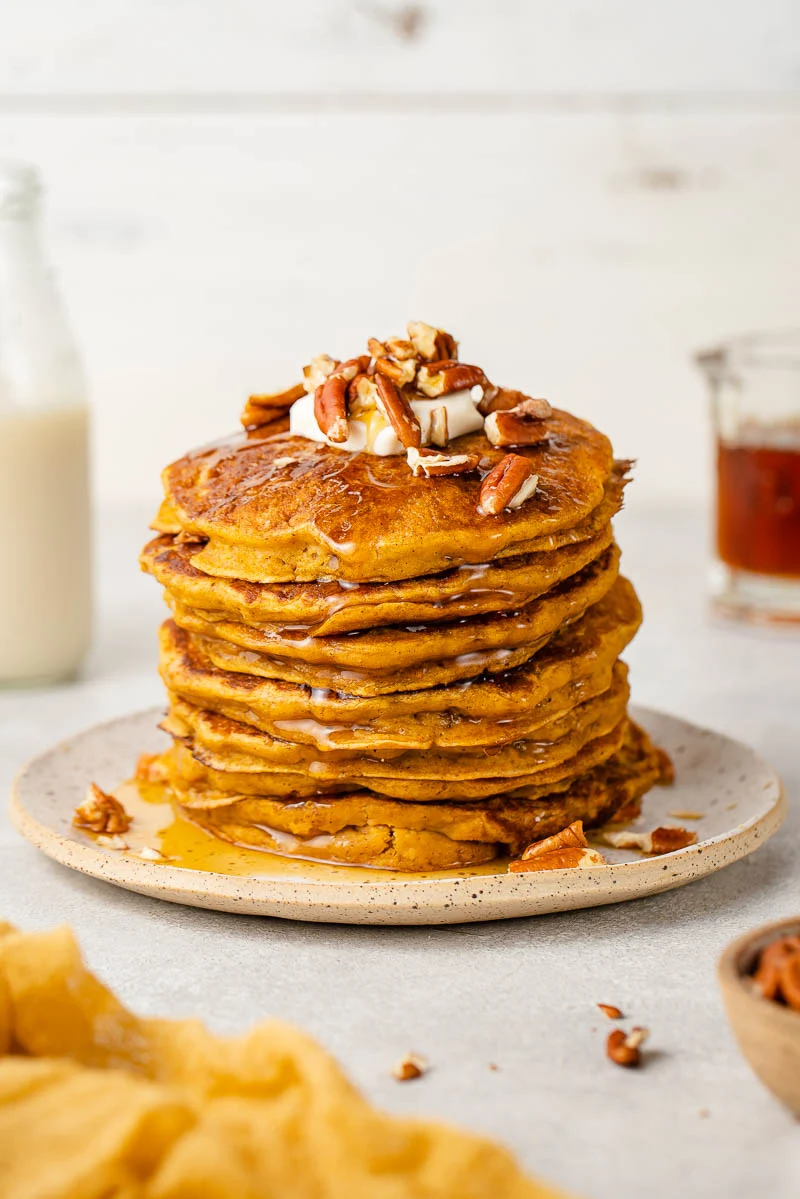
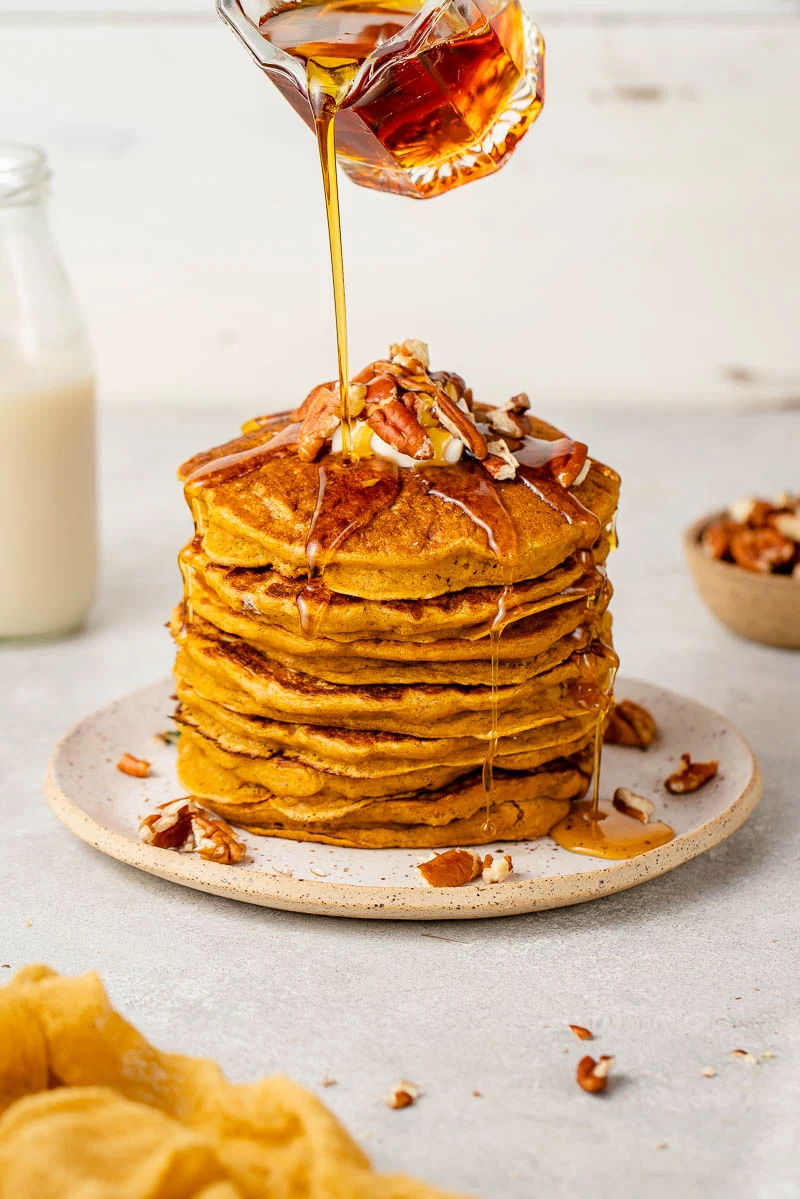
Recipe 2: The Fluffiest Pumpkin Pancakes
Pumpkin pancakes are often dense and sad. The problem? Too much wet purée and overmixing the batter. This method guarantees a light, fluffy stack every time.
Ingredients:
- 1 ½ cups all-purpose flour
- 2 tbsp brown sugar
- 2 tsp baking powder
- ½ tsp baking soda
- ½ tsp salt
- 1 tsp ground cinnamon, ½ tsp ground ginger, ¼ tsp ground nutmeg
- 1 cup homemade pumpkin purée
- 1 cup buttermilk
- 2 large eggs, separated
- 2 tbsp unsalted butter, melted and cooled
Pro Techniques:
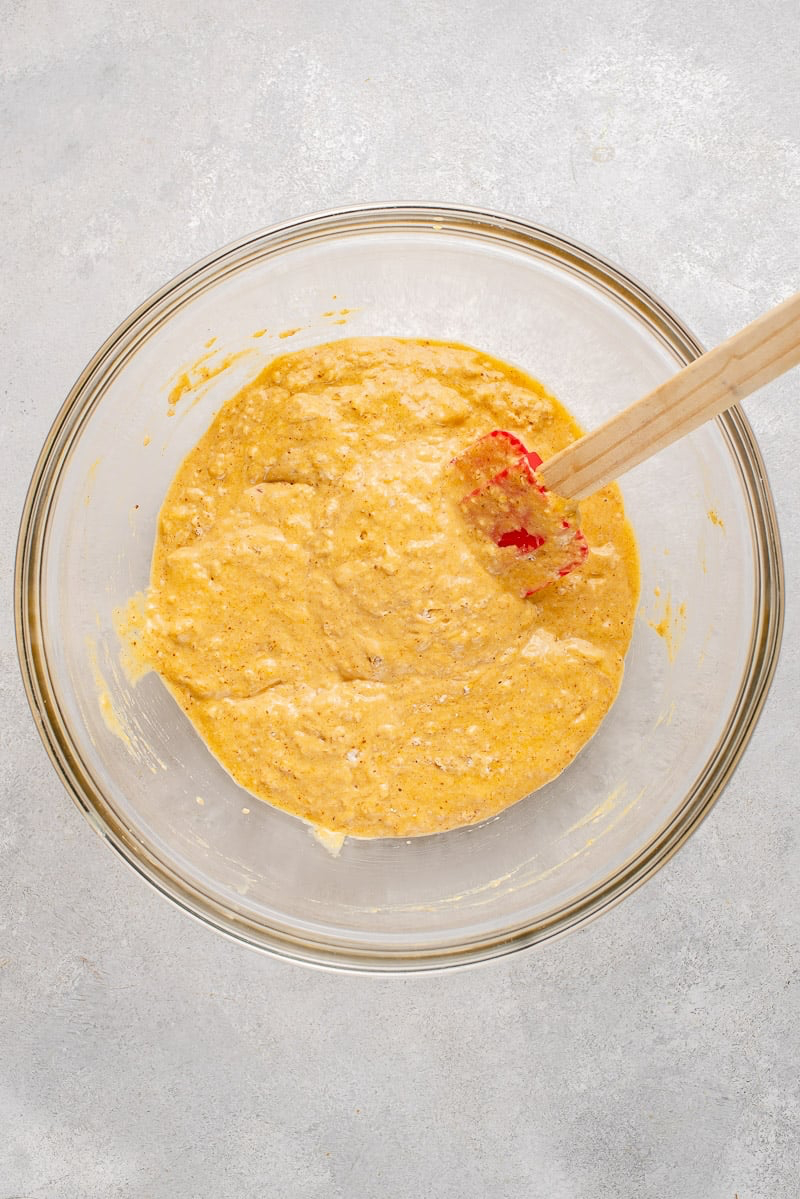
1. Dry vs. Wet: Whisk all your dry ingredients in one bowl. In another, whisk the pumpkin, buttermilk, and egg YOLKS. Stir in the melted butter.
2. The Secret to Fluffiness: Here it is. In a separate, super-clean bowl, beat the egg whites until they hold stiff peaks. This is a classic pastry trick that folds air into the batter, making the pancakes incredibly light.
3. Don’t Overmix!: Pour the wet into the dry and mix with a spatula until just combined. Lumps are okay! Overmixing develops gluten and makes pancakes tough. This is the #1 mistake people make.
4. Fold, Don’t Stir: Gently fold the beaten egg whites into the batter in two batches. This preserves all that air you just created.
5. The Perfect Sizzle: Heat a griddle over medium heat. Drop ¼ cup of batter for each pancake. Cook until you see bubbles on top, then flip ONCE. Cook for another minute or two. Multiple flips will just deflate them.
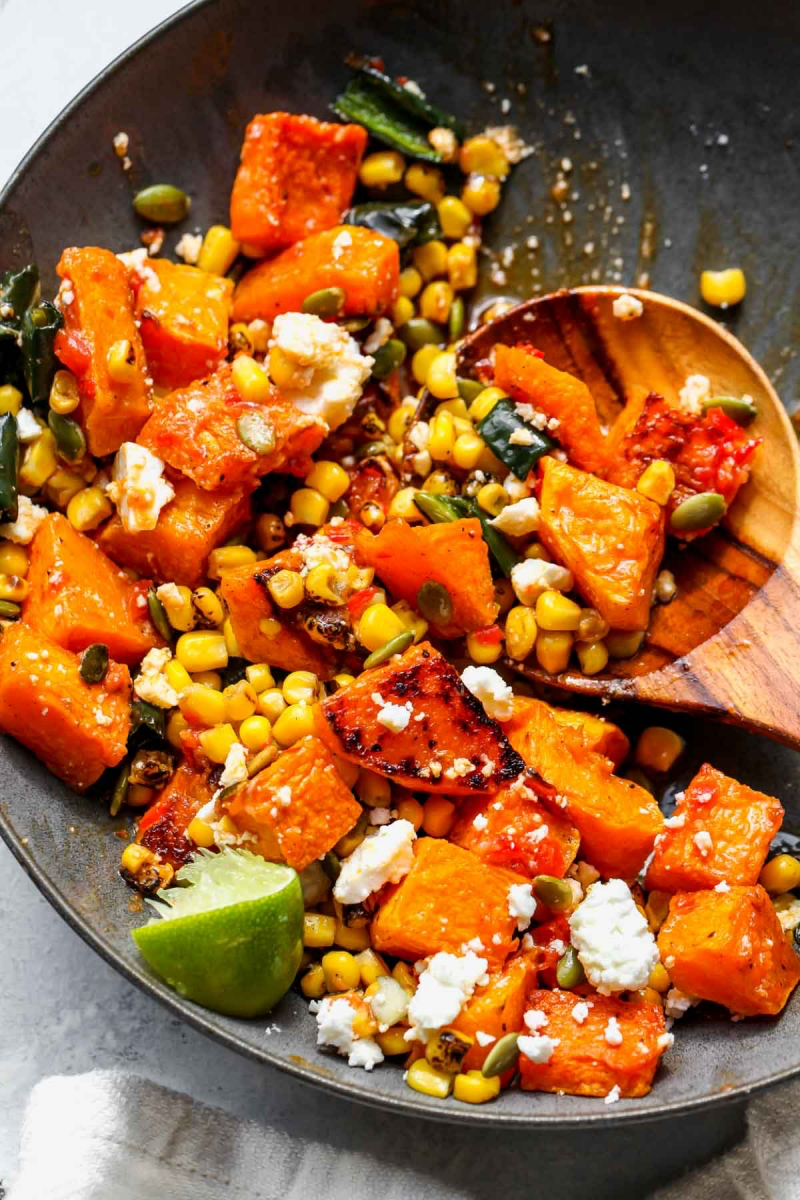
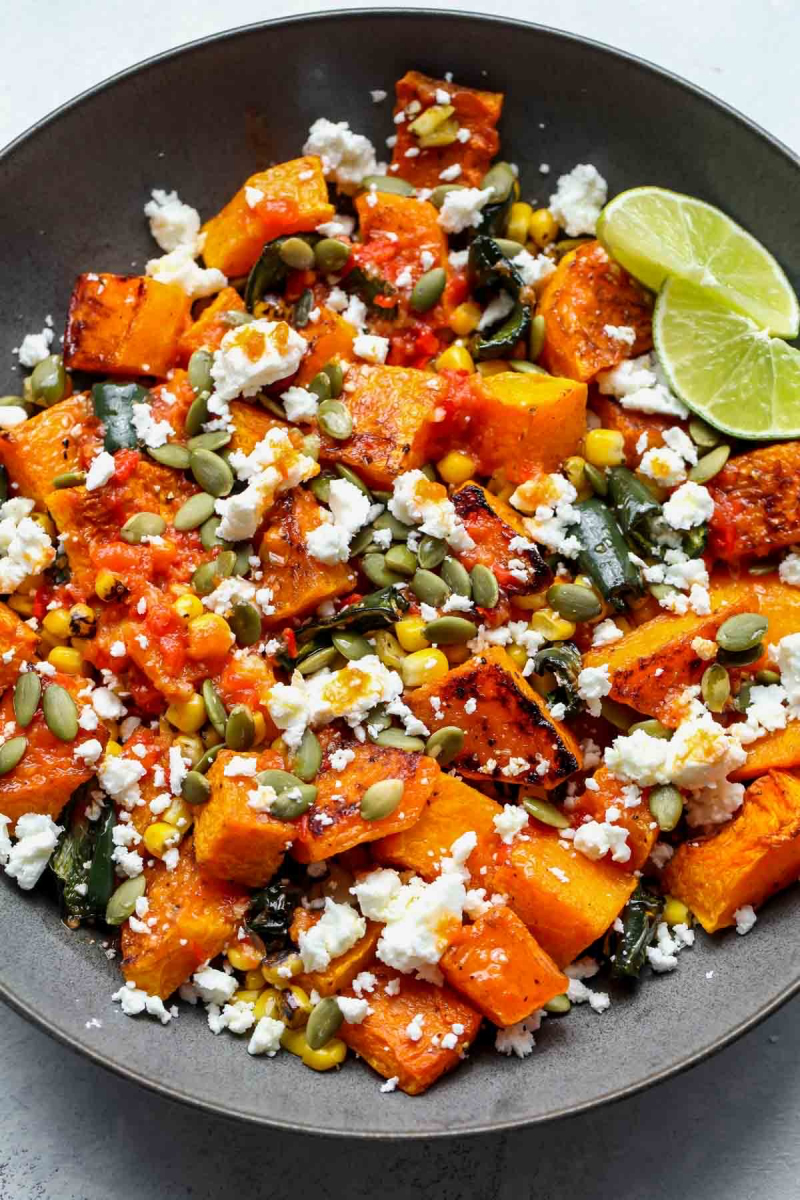
Recipe 3: Roasted Pumpkin Wedges with Corn Salsa and Feta
This dish is all about contrast—sweet roasted pumpkin, zesty salsa, salty cheese, and crunchy seeds. It’s a stunning side dish or a light main course.
Ingredients:
- 1 small sugar pumpkin (about 3 pounds)
- 2 tbsp olive oil
- Salt and pepper
- 2 ears of corn, grilled
- 1 red chili, finely diced
- ½ red onion, finely diced
- 1 cup cilantro, chopped
- Juice of 2 limes
- ½ cup crumbled feta cheese
- ⅓ cup toasted pumpkin seeds
Pro Techniques:
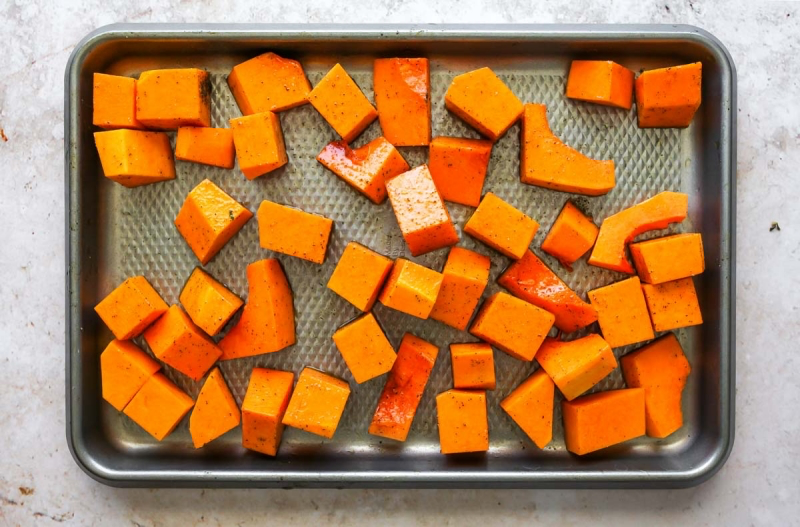
1. Roast for Caramelization: Preheat oven to a hot 425°F (220°C). Cut the pumpkin into 1-inch wedges (leave the skin on, it gets tender!). Toss with oil, salt, and pepper and arrange in a single layer on a baking sheet. Don’t crowd the pan, or they’ll steam instead of roast. Roast for 20-30 minutes, until tender and browned.
2. Build a Better Salsa: A great salsa is balanced. Combine the grilled corn, chili, onion, cilantro, and lime juice. Let it sit for 15 minutes to let the flavors meld. Then taste it. Does it need more salt? More lime? Adjusting is key.
3. Assemble for Texture and Temperature: Arrange the warm pumpkin wedges on a platter. Spoon the cool salsa over them. That mix of warm and cool is fantastic. Finish by sprinkling on the salty feta and crunchy pumpkin seeds for those final layers of flavor and texture.
Part 3: The No-Waste Approach
True cooking is about respecting your ingredients. That means using everything you can.
Quick Win: Just Want a Snack? Make Perfect Roasted Seeds.
Don’t buy them, make them! Separate the seeds from the pulp. A common mistake is rinsing them—that pumpkin goo actually helps the seasoning stick. Just pat them very dry with a towel. Toss with a little oil, salt, and maybe some smoked paprika. Spread in a single layer and roast at 325°F (160°C) for 15-25 minutes, until golden and crunchy. Listen for them to start popping!
Pumpkin Gut Stock
This is a trick from my early, lean days as a line cook. Put the stringy guts and even the peels in a pot. Cover with water, add an onion, carrot, and some peppercorns. Simmer for an hour, then strain. You’ve just made a light, flavorful stock that’s an incredible base for your pumpkin soup.
Final Thoughts
Working with fresh pumpkin connects you to the season in a way that opening a can never will. Yes, it’s a little more effort, but the payoff in flavor is huge. Remember to start with the right pumpkin, roast it to bring out its sweetness, and have fun with it. You’ll gain a new appreciation for this autumn icon and a set of skills that will make you a better cook. Happy cooking!
Inspirational Gallery with Photos
- A rich, nutty flavor that deepens any dish.
- A creamier, less watery texture in your final purée.
- A beautiful golden-brown color that looks as good as it tastes.
The secret? Roast your pumpkin chunks before you boil or steam them. A little time in a hot oven caramelizes the natural sugars, transforming the flavor from simple to sublime through the Maillard reaction.
My pumpkin purée tastes a little flat. What’s the fix?
This is a common issue! Pumpkin has a gentle, earthy sweetness that needs a little help to truly shine. The key is balance. Before you add more sugar, try adding a pinch of freshly grated nutmeg and a bit of warm spice like cinnamon or allspice. Most importantly, add a small splash of acid—a teaspoon of apple cider vinegar or lemon juice can brighten the entire batch, making the pumpkin flavor pop without tasting sour.
Pumpkins are not vegetables. Botanically speaking, they are a fruit—specifically, a type of berry known as a pepo.
Roasting: Drizzling pumpkin halves or chunks with oil and baking them concentrates the sugars, creating a deep, caramelized flavor. This method results in a thicker, drier purée, which is ideal for pies and baked goods where excess moisture can ruin the texture.
Steaming/Boiling: This is the faster method. It yields a lighter, more delicate flavor and a wetter purée. This consistency is perfect for silky soups, sauces, or adding moisture to pancake and waffle batters.
For maximum flavor, roasting is almost always the superior choice.
Go beyond the classic American pie and explore how the world uses pumpkin. In Northern Italy, especially Mantua, tortelli di zucca are a staple: delicate pasta parcels filled with a surprisingly sweet mixture of roasted pumpkin, crushed amaretti cookies, and a hint of mustard-spiced fruit (mostarda). It’s a stunning example of balancing sweet, savory, and spicy in one perfect bite.
The single most important tip: Do not throw away the seeds! Once separated from the stringy pulp, rinse and dry them thoroughly. Toss them with a little olive oil, salt, and your favorite spices—smoked paprika, cumin, and garlic powder are a fantastic combination—and roast at 350°F (175°C) until golden and crispy. They are a perfect snack or crunchy topping for soups and salads.
Once you’ve made a big batch of beautiful, homemade pumpkin purée, storing it properly is key to enjoying it for months. Here’s how to do it right:
- For the fridge: Place the purée in an airtight container. It will stay fresh for up to one week, ready for quick additions to oatmeal, yogurt, or smoothies.
- For the freezer: For long-term storage, portion the purée into freezer-safe bags, pressing them flat to save space. Alternatively, freeze it in ice cube trays—like those from OXO Good Grips—for perfectly portioned amounts to drop into sauces or single-serving recipes.
A 2020 study by the food waste charity Hubbub revealed that of the millions of pumpkins bought for Halloween carving in the UK, over half were not eaten.
This highlights a huge opportunity for home cooks. While carving pumpkins aren’t ideal, the principle applies to all food. By choosing culinary varieties like Kabocha or Crown Prince from the start, we can create dishes where pumpkin is the star, moving it from a temporary decoration to a valued, delicious ingredient in our kitchens.
Don’t be intimidated by the tough exterior. The right tools make breaking down a pumpkin safe and simple. You don’t need fancy gadgets, just a few kitchen workhorses.
- A sharp, sturdy chef’s knife: This is for splitting the pumpkin open. Don’t use a flimsy blade.
- A rubber mallet: A cook’s secret weapon. If a knife gets stuck, a gentle tap on the spine of the blade with the mallet will safely drive it through the pumpkin.
- A metal ice cream scoop: The thin, sharp edge is far more effective than a regular spoon for scraping out the stringy pulp and seeds cleanly.
- A Y-peeler: For smaller sugar pumpkins, a sharp Y-peeler, like the classic from Kuhn Rikon, can make quick work of the skin once the pumpkin is cut into manageable wedges.
Ready to get creative? Make a pumpkin spice simple syrup for coffee or cocktails. Gently simmer one cup of water with one cup of sugar, a half cup of pumpkin purée, and a cinnamon stick for 10 minutes. Let it cool completely, then strain it through a fine-mesh sieve or cheesecloth. The result is a fragrant, amber-colored syrup that’s incredible in a homemade latte or used to create an autumn-themed Old Fashioned.


