The Smart Gardener’s Secret: How to Stop Weeding and Let Plants Do the Work
I’ve spent more years gardening than I care to admit, and a lot of my early days were spent on my hands and knees, pulling what felt like an infinite number of weeds on huge properties. My back always hurt, and my hands were permanently stained. But I noticed something about the old-timers, the truly seasoned gardeners. They barely ever weeded. Their secret wasn’t some magic potion or a fancy tool; it was simple. They had learned to work with nature by using dense plantings of low-growing plants to create a ‘living mulch’.
In this article
Honestly, this approach is so much more than just a pretty carpet of green. It’s about building a garden bed that’s stable and practically self-sufficient. When you have a thick mat of groundcover, there’s simply no open real estate for weeds to crash the party. It shades the soil, so weed seeds don’t get the sunlight they need to sprout. Plus, it holds in moisture and prevents erosion. Instead of waging a constant, frustrating war, you create a garden that mostly takes care of itself. It takes a bit of planning upfront, but believe me, it pays you back with countless hours of saved labor.
So, let’s walk through how to do it right. We’ll cover how it works, getting your site ready, and picking the perfect plants. I’ll also share a few pro techniques for planting and care that I’ve picked up over the years—from both my successes and, yes, a few spectacular failures.
So, How Does This Actually Work?
Understanding the ‘why’ behind this method helps you make smarter choices. It’s not magic; it’s just basic biology. All plants are in a constant competition for resources. By planting a dense groundcover, you’re basically rigging the game in your favor. They suppress weeds in a couple of key ways.
Winning the Battle for Light, Water, and Space
This is the most obvious part of the strategy. Most weed seeds are opportunistic—they need a little bit of sunlight to get going. A thick canopy of groundcover leaves acts like a natural, living shade cloth, blocking the sun from ever reaching the soil. I’ve seen it a million times: a freshly prepped bed can be covered in tiny weed seedlings in a week, while the established bed of groundcover right next to it stays perfectly clean.
And it’s not just what’s happening on top. Below the surface, the roots of these groundcovers are weaving a dense web, soaking up all the available water and nutrients. Any weed seed that does manage to sprout finds itself in a really tough neighborhood with no light, no water, and no food. It’s survival of the fittest, and you’ve stacked the deck.
A Plant’s Secret Weapon: Chemical Warfare
Some plants are even more clever. They use a fascinating trick called allelopathy, which is basically a form of natural chemical warfare. These plants release subtle chemicals from their roots or leaves that stop other seeds from sprouting or slow the growth of anything nearby. It’s not a dramatic, toxic effect, but it gives them an extra competitive edge. Certain types of Juniper and Artemisia (like the popular ‘Silver Mound’) are known to have these properties. It’s just one more reason why some groundcovers seem almost miraculously good at keeping an area weed-free.
Getting It Right From the Start: Site Prep is Everything
I cannot say this loudly enough: you have to prepare your site properly. Trying to plant a groundcover over a patch of existing weeds is a total waste of time and money. You’re just giving the weeds a head start and a nice trellis to climb. I once had a client who did this, scattering expensive plants among dandelions and crabgrass. A year later, they called me to fix the tangled, weedy disaster. We had to rip everything out and start from scratch. Please, do it right the first time.
Step 1: Get Rid of Every Last Weed
You need a completely clean slate. This is the hardest part of the job, but it’s non-negotiable.
By Hand: For smaller areas, this is your best bet. Quick tip: always weed after a good rain when the soil is soft. It lets you get the entire root out. If you just snap the top off a thistle, it’ll come back with a vengeance. A good garden fork or a hori-hori knife is your best friend here.
Sheet Mulching (My Favorite): For large, weedy messes, this is the way to go. It’s a chemical-free method that smothers everything. First, mow or knock down the tall weeds. Then, lay down a layer of plain brown cardboard (ask for it at appliance stores—it’s free!) or 6-8 sheets of newspaper, overlapping the edges by at least six inches. Water it down, then pile on 4-6 inches of compost and 2-3 inches of wood chips. You can plant right into it by cutting an ‘X’ through the layers. The cardboard breaks down over a season, enriching the soil as it kills the weeds. To give you a budget idea, a bag of good compost is usually around $8 and covers about 6 square feet. A bag of mulch is about $4.
Solarization: This technique uses the sun’s heat to cook weeds and their seeds. It’s only effective in a spot that gets full, blazing sun during the hottest part of summer. Water the area deeply, then cover it tightly with a sheet of clear plastic (2-4 mil thick). Bury the edges in the soil to trap the heat and leave it for 6-8 weeks. It’s super effective but does mean that bed is out of commission for a while.
Step 2: Feed Your Soil
Once the weeds are gone, it’s time to improve the soil. Most groundcovers are tough, but they’ll establish so much faster in good soil. For most gardens, adding a 2-4 inch layer of quality compost is the single best thing you can do. It improves everything: drainage, water retention, and nutrition. For a larger bed, it’s often cheaper to get a yard of compost delivered from a local landscape supply company for around $40-$60 than to buy dozens of bags.
Picking the Right Plant for the Right Place
Okay, this is where the real art of gardening comes in. The toughest plant in the world will fail if you put it in the wrong spot. Before you even think about buying plants, you have to be brutally honest about your site conditions. I always make notes on these key factors.
- Sunlight: How many hours of direct sun does the spot get? Is it gentle morning sun or the scorching afternoon kind? Full sun is 6+ hours, part shade is 3-6, and full shade is less than 3.
- Soil & Drainage: Is your soil heavy clay or fast-draining sand? Dig a one-foot hole, fill it with water, and see how long it takes to drain. If it’s gone in a few hours, you’re good. If it’s still there tomorrow, you have a drainage issue.
- Moisture: Is the area consistently damp or is it bone dry? Is it near a downspout or on a slope?
- Hardiness Zone: You absolutely must know your USDA Plant Hardiness Zone. This tells you if a plant can survive your winters. It’s non-negotiable. You can find this by searching online for a USDA Zone map.
- Foot Traffic: Will people or pets walk on this area? Be realistic.
Once you have these answers, you can choose with confidence. Here are a few of my go-to choices.
For Full Sun and Drier Areas
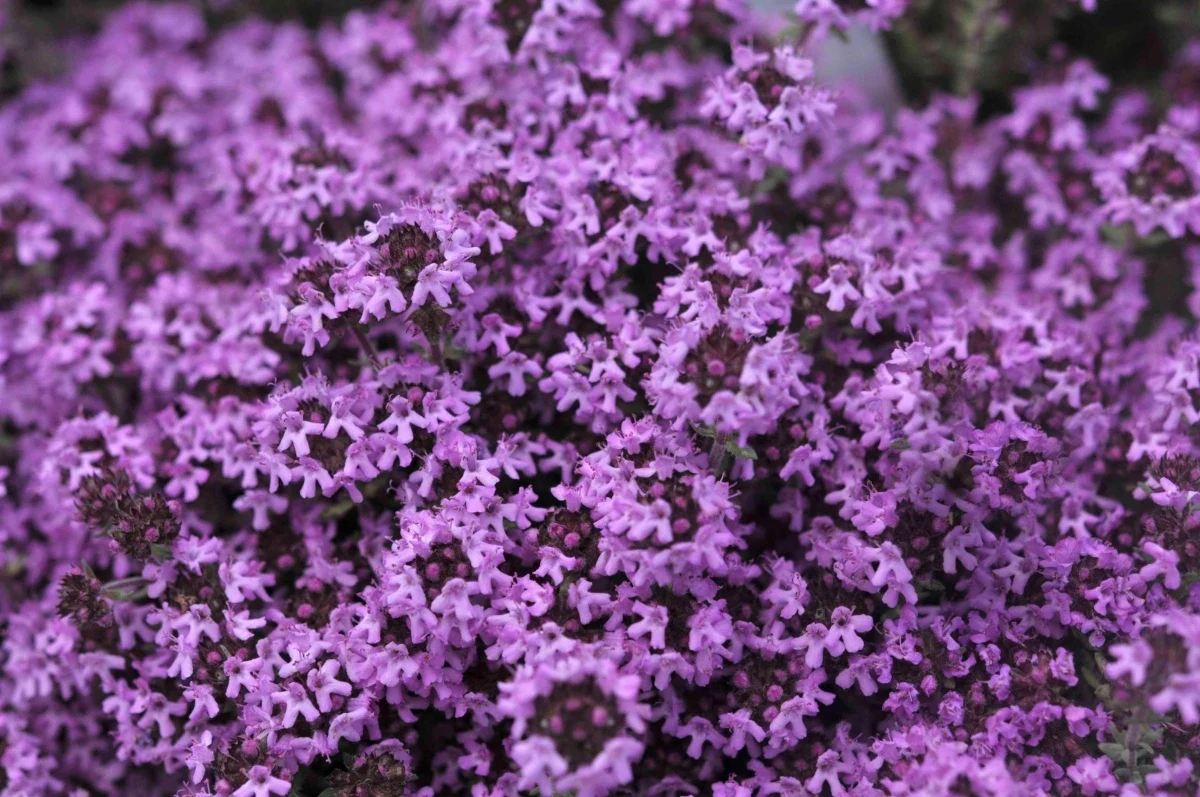
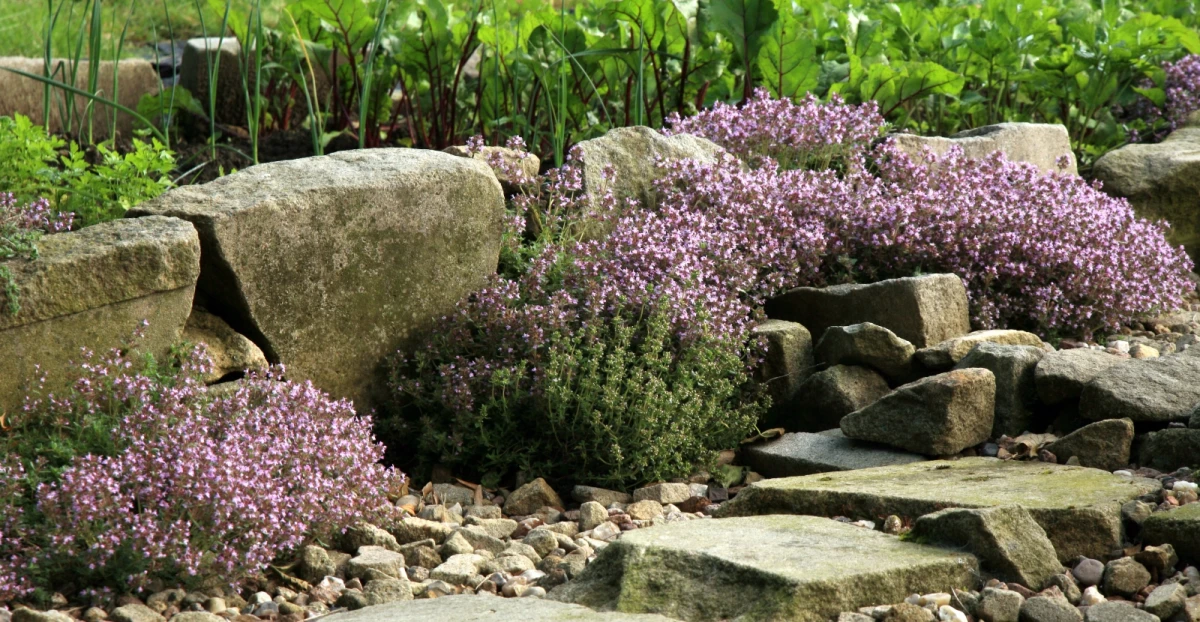
Creeping Thyme: A true classic for hot, sunny spots. It forms a dense, walkable mat that releases a lovely spicy scent when you step on it. It’s perfect between paving stones but absolutely requires good drainage to prevent rot.
– Good to know: Tolerates light to moderate foot traffic. Spreads at a moderate pace. A small plug will cost you about $3-$5.
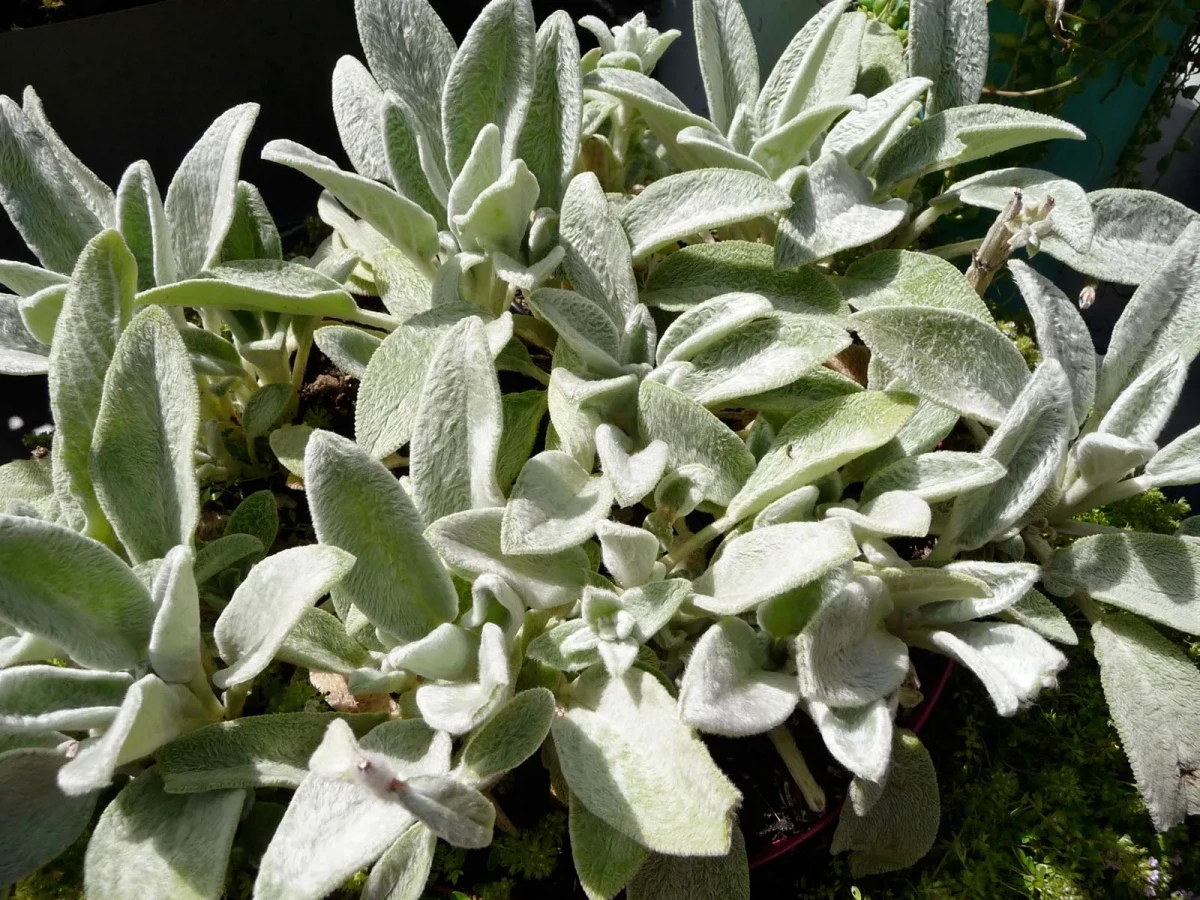
Lamb’s Ear: Kids adore this plant for its fuzzy, silvery leaves that feel just like a lamb’s ear. It’s incredibly drought-tolerant. A word of caution, though: in humid climates or wet soil, those fuzzy leaves can trap moisture and rot. The ‘Big Ears’ variety is a pro favorite because it rarely flowers, giving you a cleaner look.
– Good to know: Low foot traffic—the leaves bruise easily. Spreads steadily to form clumps. Expect to pay $5-$8 for a decent-sized plant.
Creeping Sedum: These are the superheroes of the plant world. Their succulent leaves make them nearly indestructible in heat and drought. They come in amazing colors, from the chartreuse ‘Angelina’ to the deep red ‘Dragon’s Blood’. Their only weakness is soggy soil.
– Good to know: Tolerates very light foot traffic. Spreads quickly. One of the most budget-friendly options, often around $4-$6 per plant.
For Part Shade with Average Moisture
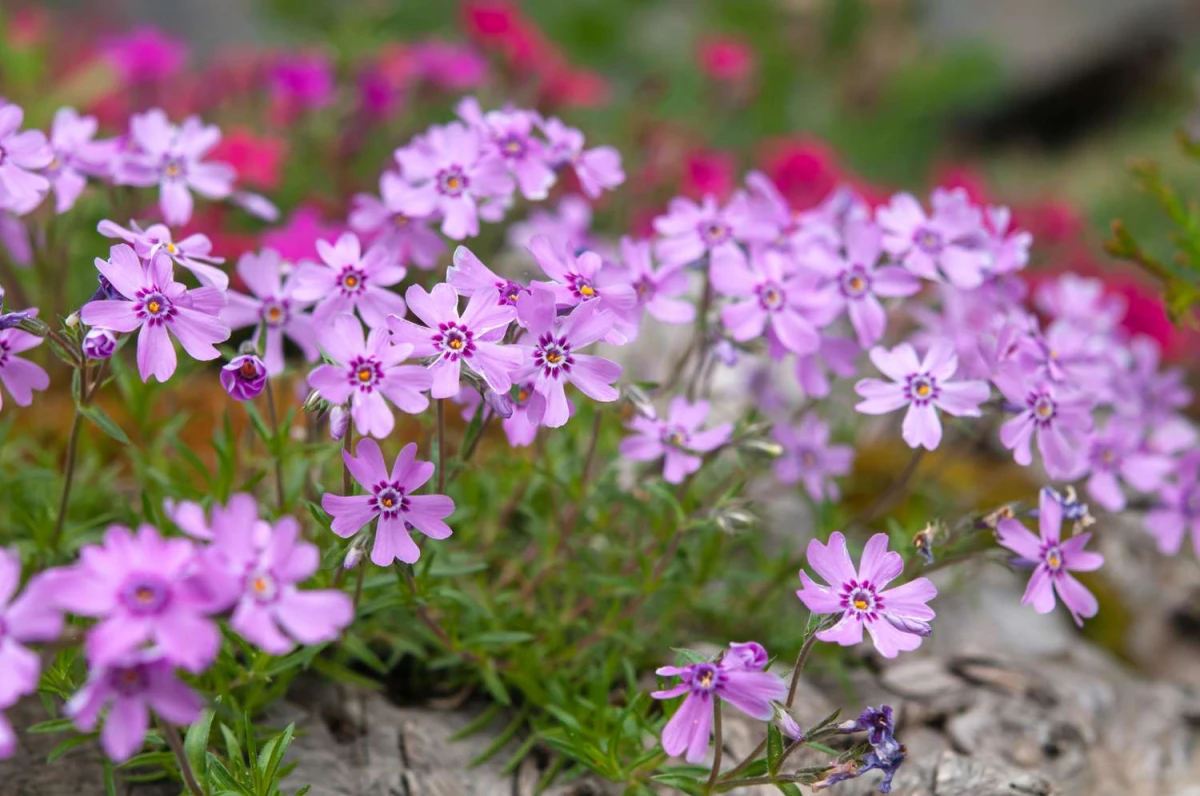
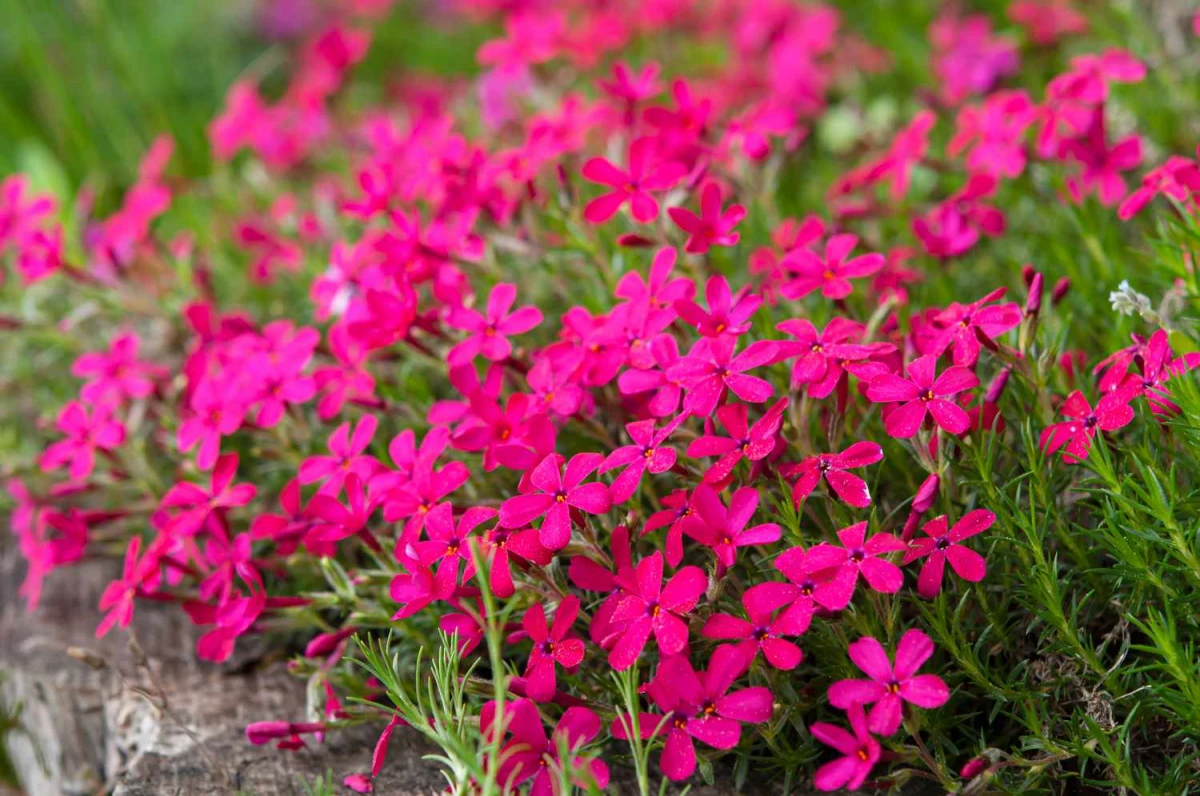
Woodland Phlox: This is what you want for part shade. It spreads by runners to form a lovely semi-evergreen mat, sending up beautiful clusters of blue or purple flowers in the spring. If the patch thins out after a few years, just dig it up, divide it, and replant to keep it vigorous.
– Good to know: No foot traffic, please. Spreads at a moderate pace. Costs around $6-$9 per plant.
Sweet Woodruff: One of my personal favorites for shady spots. It has delicate, bright green leaves and covers itself in tiny white, star-shaped flowers. The leaves smell like sweet hay when dried. Heads up! In perfect conditions (moist, rich soil), it can be a very enthusiastic spreader. Use it where a sidewalk or foundation will keep it contained.
– Good to know: Best to avoid walking on it. A fast spreader in happy conditions. A budget-friendly choice at about $4-$6.
Ajuga / Bugleweed: This one is a weed-choking machine, known for its deep bronze or near-black foliage. However, it’s so good at its job that it’s considered invasive in some regions. Before you plant it, please check with your local native plant society or extension office. A great native alternative is Golden Ragwort.
– Good to know: Tolerates some light foot traffic. A very fast spreader (use with caution!). Price is typically $5-$7.
For Shady, Moist Areas
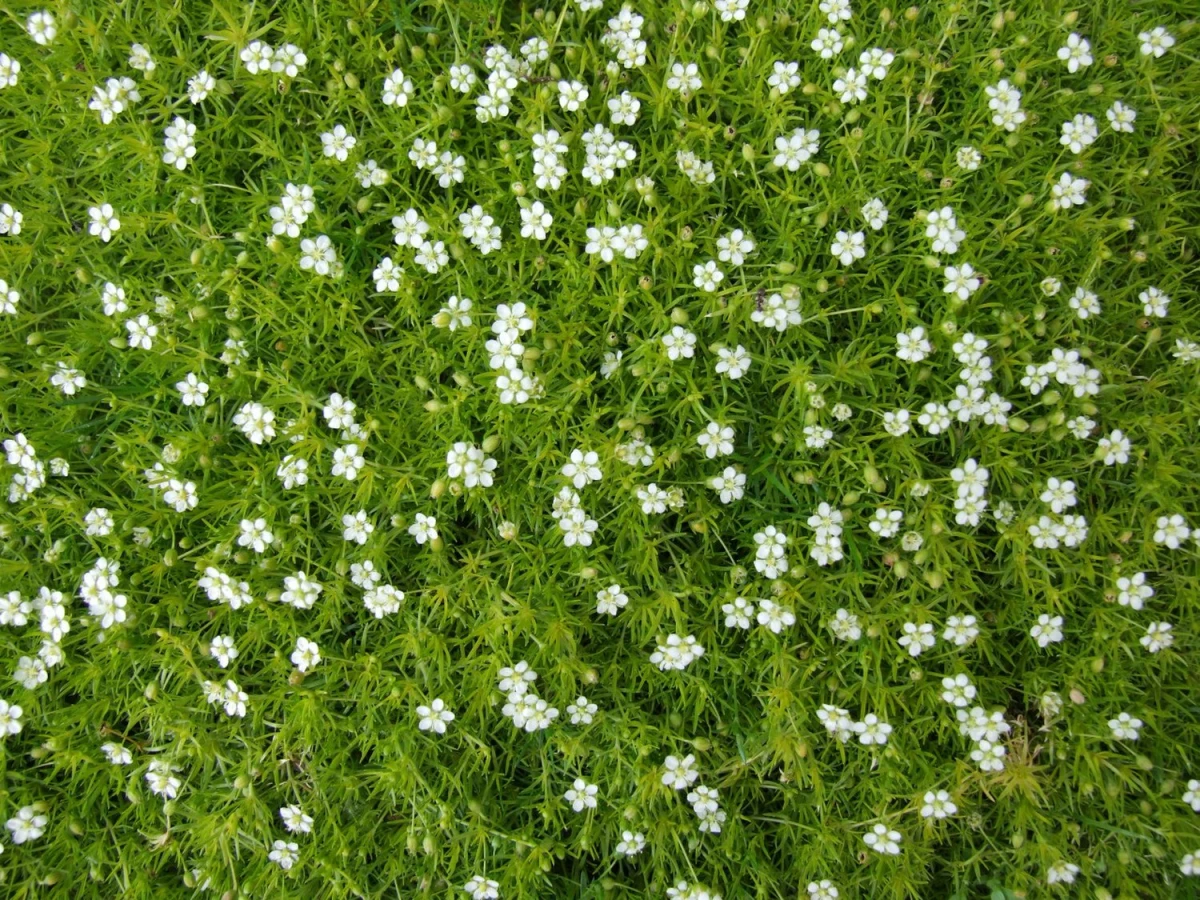
Irish Moss: This isn’t actually moss, but it sure looks like it! It forms a lush, green carpet that’s surprisingly soft to walk on. It absolutely needs consistent moisture and can scorch in hot sun. If you see brown patches, it probably dried out.
– Good to know: Tolerates moderate foot traffic, making it great for pathways. A slow to moderate spreader. A bit pricier, often $5-$8 for a small plug.
Pachysandra: This is the ultimate problem-solver for deep shade, forming a dense, glossy, evergreen mat. The traditional variety can be extremely aggressive and escape gardens. I strongly recommend seeking out the native alternative, Allegheny Spurge. It’s better behaved, a bit slower to establish, but a much more responsible choice for the environment.
– Good to know: No foot traffic. A moderate to fast spreader (especially the non-native type). Costs around $6-$10 per plant.
Pro Tips for Planting and Long-Term Success
Your work isn’t over once you pick the plants. How you plant and care for them in the first year makes all the difference.
Planting Density is the Secret
The spacing on a plant tag is for a single plant to grow in a garden bed. You can ignore that. For a groundcover, the goal is fast coverage. I usually plant at half the recommended distance. For example, let’s say you have a 100 sq. ft. area (a 10×10 patch). Standard 18-inch spacing might require about 45 plants. To get that solid, weed-proof mat in a single season, I’d use 12-inch spacing, which means you’d need 100 plants. Yes, it costs more upfront—that could be an extra $200-$300 in plants—but you’re literally buying back two years of your life that you won’t spend weeding. It’s a trade-off between time and money.
To figure out your own project, just measure your area’s square footage (length x width), decide on your spacing (12 inches is a great starting point), and then use an online plant spacing calculator to find the exact number of plants you need. It takes all the guesswork out of it.
Mulch Between the Plants
After planting, always add a 1-2 inch layer of fine mulch (like shredded leaves or pine fines) in the gaps. This holds in moisture for the new roots and, crucially, stops weeds from sprouting before your groundcover fills in. This one step will save you so much work in the first year.
What If a Tough Weed Gets Through?
Even in a dense, established mat, a stubborn weed like a thistle or a dandelion might occasionally push its way through. Don’t panic! The trick is to not just yank it. You’ll leave the root behind and disturb your groundcover. Instead, gently part the groundcover leaves around the weed’s base. Use a narrow tool, like a hori-hori knife or even an old screwdriver, to plunge into the soil right next to the root and loosen it deep down. Then you can pull the entire weed out, root and all. Gently pat your groundcover back into place, and you’re done.
Finally, a quick but serious note on safety. Before you start digging any new bed, please call 811. It’s a free service that marks underground utility lines, and it can prevent a dangerous and very expensive accident. Being a good gardener isn’t just about plants; it’s about being smart and respectful of your environment. Give this living mulch strategy a try—I promise your back will thank you for it.
Inspirational Gallery
For Sun-Drenched Spots: Try Stonecrop (Sedum). Varieties like ‘Angelina’ or ‘Dragon’s Blood’ are practically indestructible, storing water in their fleshy leaves. They thrive in heat and poor soil where other plants fail, forming a dense, colorful mat that chokes out weeds effortlessly.
For Shady Corners: Japanese Pachysandra (Pachysandra terminalis) is a classic for a reason. It creates a lush, evergreen carpet under trees, tolerating deep shade and preventing soil erosion on slopes. A perfect, low-effort solution for those tricky dark areas.
A single square foot of healthy, undisturbed garden soil can contain several miles of fungal hyphae.
These thread-like networks, known as mycorrhizae, are the garden’s hidden internet. A living mulch of groundcover protects and feeds this ecosystem, helping your feature plants access water and nutrients more efficiently than they could alone.
Don’t think of groundcover as just a green carpet. Use it as a design element to create flow and contrast in your garden beds. Weave a river of blue-flowered Creeping Veronica through taller perennials, or use the silvery leaves of Lamb’s Ear (Stachys byzantina) to soften the hard edge of a stone path. The effect is cohesive, intentional, and beautiful.
Wondering how to handle aggressive spreaders?
Some groundcovers, like Bishop’s Weed (Aegopodium podagraria), are notorious thugs. The trick is containment. Use them in beds enclosed by sidewalks or driveways where they can’t escape. For a more elegant solution, install a deep root barrier (at least 8-10 inches) around the planting area before you begin. This lets you enjoy their vigorous growth without the garden takeover.
- A surprise burst of color in early spring before other plants wake up.
- Layered visual interest throughout the seasons.
- Effortless beauty that returns year after year.
The secret? Interplanting bulbs. Before your groundcover fully knits together, plant drifts of crocuses, grape hyacinths (Muscari), or species tulips. They will pop up through the foliage each spring, then their leaves will fade away, hidden by the groundcover as it takes center stage for summer.
The most common mistake: Planting too sparsely. It’s tempting to buy just a few plants to save money, but this leaves large gaps of bare soil that are a perfect invitation for weeds. This defeats the whole purpose! For fast results, follow the spacing recommendations on the plant tag, or even plant slightly closer. The initial investment pays off with years of saved weeding time.
The concept of a ‘green manure’ or living mulch isn’t new. For centuries, farmers have used cover crops like clover and vetch to suppress weeds, prevent erosion, and enrich the soil between main harvests. Applying this agricultural wisdom to our home gardens connects us to a long tradition of working with nature’s cycles, not fighting them.
To give your new groundcover plugs a head start, a little preparation goes a long way. When planting, mix a small amount of slow-release fertilizer, like Osmocote Plus, into each planting hole. This provides a steady stream of nutrients for the first few months, encouraging strong root development and faster spreading.
- Creeping Thyme (Thymus serpyllum): Releases a wonderful fragrance when you walk on it, perfect for planting between stepping stones. Plus, it’s drought-tolerant and bee-friendly.
- Sweet Woodruff (Galium odoratum): In shady, moist spots, its delicate white flowers brighten the gloom, and the leaves have a lovely scent of fresh hay when dried.
- Corsican Mint (Mentha requienii): The tiniest mint, forming a moss-like mat that releases a powerful crème de menthe scent when touched. Ideal for sheltered, lightly trafficked areas.
Did you know that many groundcovers are edible or medicinal? Wild Ginger (Asarum canadense) has a root that can be used as a spice, while the leaves of Wintergreen (Gaultheria procumbens) can be chewed for a fresh, minty flavor or used to make tea. Always be 100% sure of your plant identification before consuming.


