Don’t Fear the Freeze: A Pro’s Guide to a Flawless Winter Move
I’ve been in the moving business for what feels like a lifetime, handling everything from sweaty summer moves in the South to brutally cold ones up north. And let me tell you, a winter move is a whole different ball game. It’s not just about feeling the chill. It’s about understanding how that biting cold messes with everything—from the finish on your dining table to the plastic on your storage bins, and most importantly, the safety of everyone doing the heavy lifting.
In this article
A lot of folks dread the idea of moving when it’s freezing outside. They have nightmares of slipping on an icy driveway with a box of fragile heirlooms or watching their favorite armchair get soaked by slush. And honestly? Those are real risks. But they are completely manageable.
With the right prep and a slightly different mindset, a cold-weather move can be just as smooth as any other. This isn’t just a random list of tips; this is the playbook we pros use. We’re going to cover why the cold is so sneaky, how to pack things to actually protect them, and the safety rules that are absolutely non-negotiable.

Why Cold Weather is Your Furniture’s Worst Enemy
To pull off a successful winter move, you have to respect the cold. It’s not just an inconvenience; it’s a force of nature that can do some serious damage if you’re not prepared. It all comes down to some basic physics.
The Sneaky Threat of Condensation
You know, the most common damage we see in winter isn’t from dropping things—it’s from water. When your belongings go from your warm, cozy house into a freezing metal moving truck, any moisture in the air instantly condenses into water droplets on the cold surfaces. It’s the same thing that happens to a glass of iced tea on a hot day.
That condensation can drip onto cardboard, making boxes so weak they collapse when you try to lift them. It can seep into your sofa and leave water stains on wood. Over a long-distance move, this can even lead to mildew. It’s a silent, sneaky threat.
When Materials Get Brittle
Cold temperatures make a lot of materials stiff and fragile. Think about how a plastic garden hose feels in the winter—one wrong move and it could crack. The same thing happens to your stuff:
- Plastics: Those clear plastic storage tubs are famous for this. When they get super cold, even a small bump can shatter them, spilling everything all over a wet, dirty truck. We always make sure to support them from the bottom, never just by the handles.
- Wood: Wood shrinks in the cold. While this is usually fine, it makes older, drier pieces more likely to crack under the stress of being moved.
- Electronics: The delicate parts inside your TV or computer can be seriously stressed by big temperature swings. It’s less about cracking and more about internal damage, which we’ll get to in a bit.
Temperature Shock: The Finish-Killer
Okay, pay attention, because this is critical for anyone with nice wood furniture, artwork, or musical instruments. Temperature shock happens when you bring something from a very cold place to a very warm one too quickly. Imagine taking a beautiful wood table from a 10°F truck directly into your 70°F living room.
The surface of the wood warms up and expands almost instantly, but the core is still cold and contracted. This war between the surface and the core creates an incredible amount of stress. On furniture with a lacquer or varnish finish, this stress causes a spiderweb of fine cracks to appear. It’s called “finish crazing,” and it’s permanent damage without a costly professional refinishing job. I once saw a client’s heirloom dining table ruined this way. They were just so excited to set up their new home that they unwrapped it right next to a heating vent. It was heartbreaking.
Your Pre-Move Winter Checklist
A successful winter move is all about the prep work you do the week before the truck even shows up. Rushing this part is the biggest mistake you can make.
One Week Before Moving Day
- Become a Weather Geek: Don’t just glance at the forecast. Look at the detailed, hour-by-hour predictions. Check for snowfall amounts, wind chill, and especially any chance of freezing rain. An inch of fluffy snow is one thing; a half-inch of ice is a totally different, dangerous beast that might mean you have to reschedule.
- Confirm Utilities at the New Place: This is the absolute most important step. Call the power and gas companies to make sure the heat and lights will be on at your new address at least 24 hours before you arrive. Pro-tip: Set the heat in the new house to a steady 70°F (21°C). The goal is to create a stable, warm environment, not just a “not-freezing” one.
- Arrange for Snow & Ice Removal: Make sure the driveway, walkways, and a clear path from the street to the door are totally clear at both your old home and your new one. This is a safety and liability issue. If it’s a long-distance move, you might need to hire a local service at your destination to handle this for you.
The Day Before the Move
- Treat All Icy Surfaces: Shoveling is just the first step. You need to apply a de-icing agent. But choose wisely! Standard rock salt is cheap but can damage concrete and wood floors if tracked inside. A better choice is calcium chloride. It costs more (think $20-$30 for a big bag at a hardware store), but it works in much colder temperatures and is less corrosive. For pure grip, you can’t beat plain old sand. A mix of sand and calcium chloride is what the pros often use.
- Protect Your Floors: You’re going to track in a ton of slush, salt, and sand. It’s unavoidable. Lay down protective coverings at both houses. Professionals use heavy-duty cardboard runners or special sticky-backed plastic film (you can find rolls of “carpet protection film” for about $50 at places like Home Depot). In a pinch, old cardboard boxes work, but they get soggy and slippery. A word of warning: never use plastic tarps on hard floors—they become a serious slip-and-slide hazard when wet.

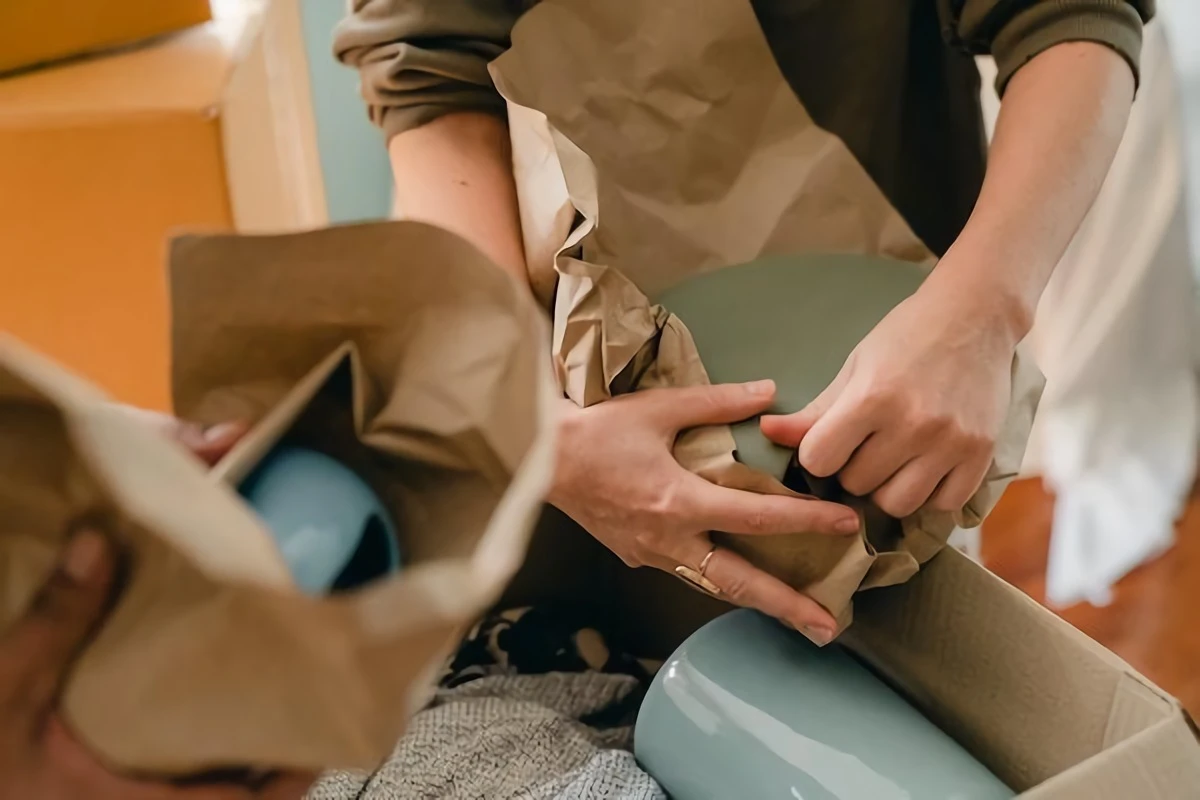
Winter-Proof Packing: It’s All About Insulation
Packing for a winter move requires a different strategy. You’re fighting moisture and cold, not just bumps and drops.
Electronics and Media
Whatever you do, don’t wrap your electronics directly in plastic wrap. That’s a surefire way to trap condensation right against the sensitive parts. If you have the original boxes, use them! If not, wrap the item in a thick moving blanket, then put it in a sturdy box. Make sure these are the last things loaded onto the truck so they can be the first things off. Once you get them to the new house, let them sit in their boxes for at least 4-6 hours to acclimate to room temperature before plugging them in. Turning on a cold electronic device is a great way to short-circuit it.
Wood and Upholstered Furniture
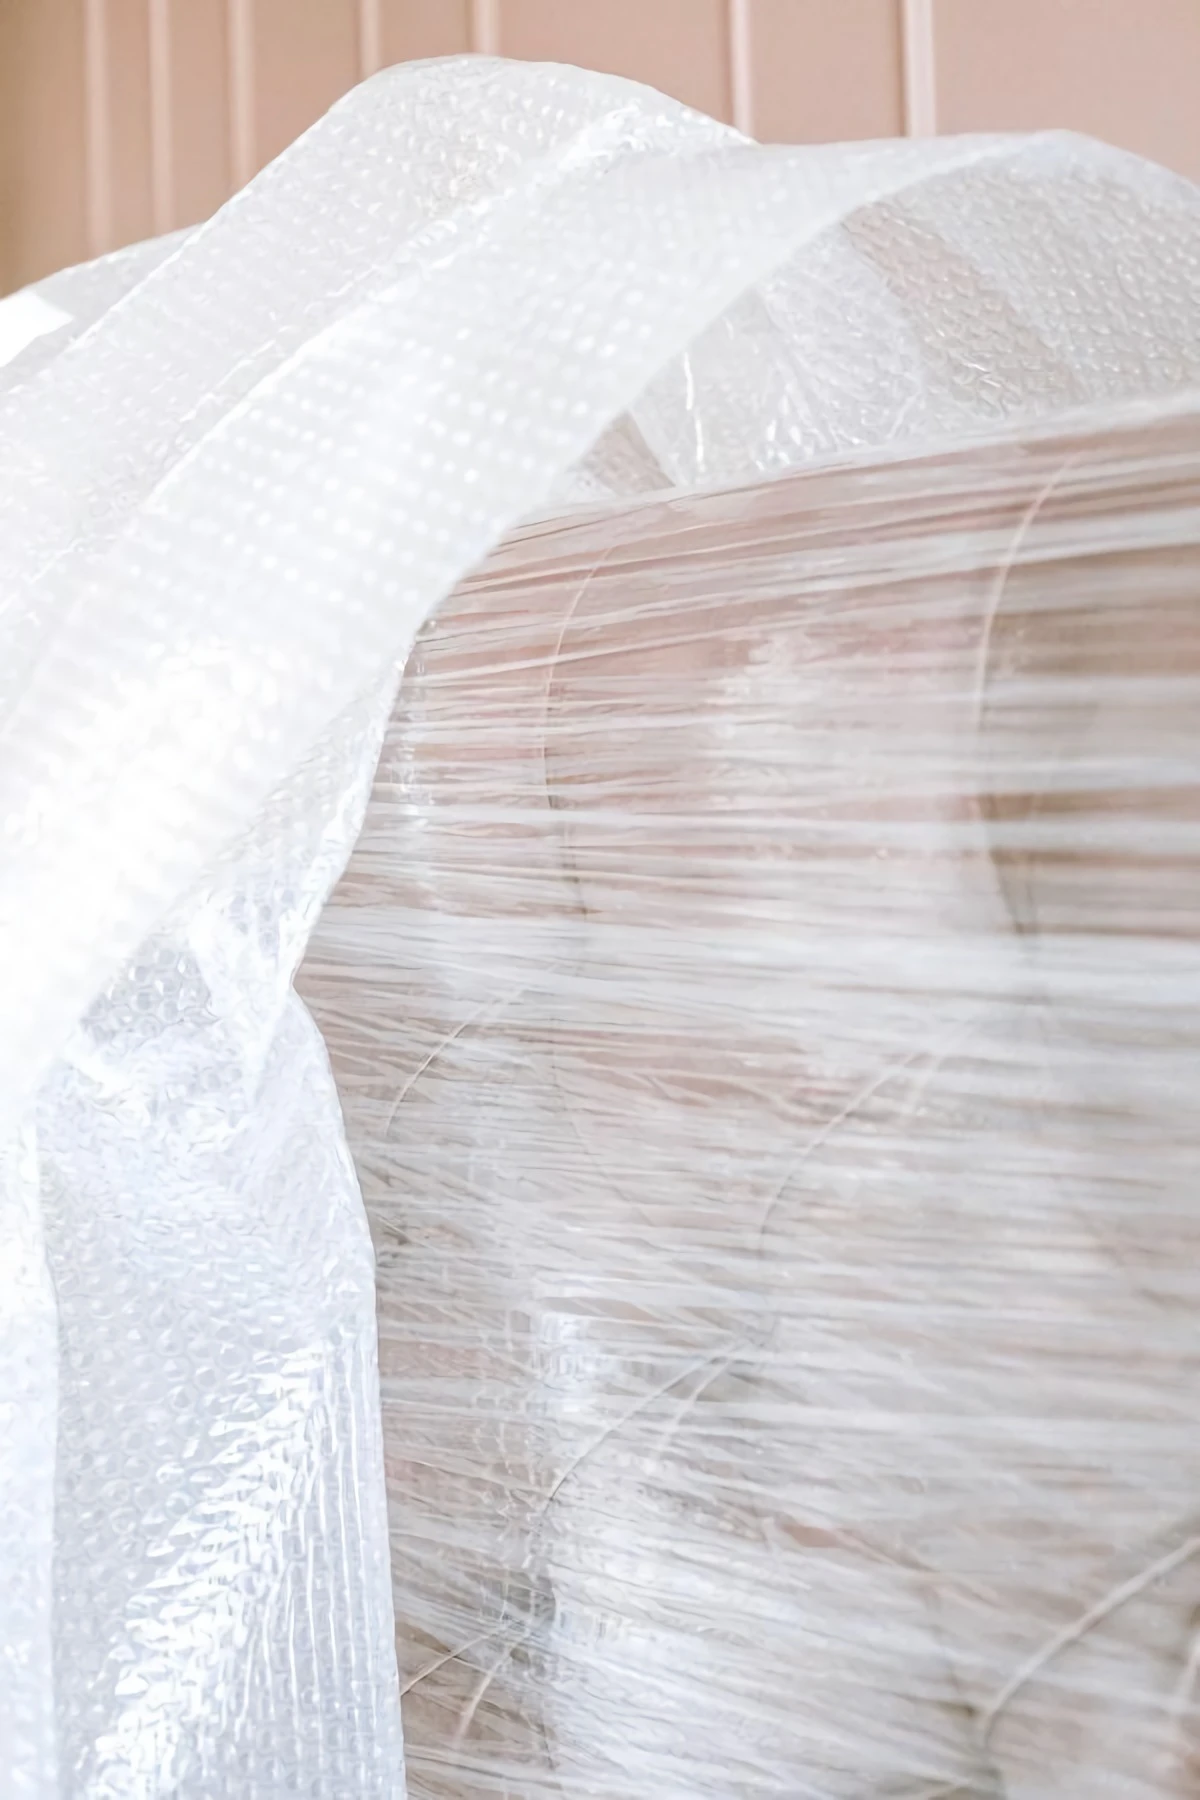
For wood furniture, thick, padded moving blankets are non-negotiable. You can rent them for a few bucks a day from a moving supply store or buy them for around $15-$30 each. They provide insulation, slowing down temperature changes and preventing that dreaded finish crazing. For sofas and mattresses, get special-purpose plastic bags. These create a waterproof barrier to protect the fabric from wet snow and slush.

Liquids, Plants, and Canned Goods
People always forget this one. Canned goods, sodas, wine, and cleaning supplies can freeze, expand, and burst in a cold truck. I once had a case of soda explode and spray sticky syrup over a dozen boxes. It was a complete nightmare. If you can, transport all liquids in your personal car. If they have to go on the truck, pack them in sealed plastic bins and mark them clearly.
By the way, what about your houseplants? They CANNOT go in the moving truck—it’s a guaranteed death sentence. The day before the move, water them lightly. Then, transport them all together in your warm car. For bigger plants, wrap the pot in a trash bag to keep dirt contained and loosely drape an old sheet over the leaves to protect them from drafts as you carry them into the new house.
The Ultimate Winter “Go-Bag”
Every move needs an essentials box, but for a winter move, think of it as a survival kit. Keep this with you in your car, not on the truck. Here’s a quick checklist of what to pack:
- A thermos of something hot (coffee, soup, tea)
- Bottled water and high-energy snacks
- A full change of WARM socks for everyone
- Extra gloves, hats, and scarves
- A small bag of sand or calcium chloride for surprise ice patches
- A snow shovel and an ice scraper
- A basic first-aid kit
- Phone chargers and a portable power bank
- Any important documents and medications
Moving Day: Slow and Steady Wins the Race
On the day of the move, rushing is your worst enemy. Just accept it: a winter move is going to take longer. I usually budget an extra 20-30% of time, depending on how bad the weather is. Safety first, always.
Everyone involved, whether it’s pros or your buddies, needs to be dressed for the part. That means waterproof boots with great traction, layers of clothing (avoid cotton!), and good gloves. Numb fingers can’t grip a heavy box. Plan for frequent breaks to go inside and warm up. Having hot drinks ready is a huge morale booster.

When it comes to loading, try to minimize how long the doors to the house and truck are open. We often stage items in a garage or on a covered porch, then load that whole group onto the truck in one efficient go. This keeps your house from turning into an icebox.
Arrival: The All-Important Acclimation Process
You made it! The heat is on at the new place. Now for the most delicate part of the entire move: letting your stuff adjust.
If you have a garage, it’s your best friend right now. It’s the perfect “halfway house” for your temperature-sensitive items. Unload all your wood furniture, musical instruments, and big electronics into the garage first. This is where you need to be patient.
I can’t stress this enough. Follow this simple process:
- Step 1: The Garage Cooldown. Unload your sensitive items into the garage but LEAVE THEM WRAPPED in their blankets. Let them sit there for at least 4-6 hours. For a very valuable antique or a piano, I’d even suggest overnight.
- Step 2: The Indoor Adjustment. After they’ve had their garage time, move the still-wrapped items into the main house. Let them sit for another couple of hours.
- Step 3: The Grand Unveiling. Now, and only now, can you finally unwrap them. I know it’s tempting to rush, but this slow, multi-stage process is the single best way to prevent temperature shock. A little patience here can save you thousands in refinishing costs.
While the sensitive stuff is acclimating, you can bring in everything else—boxes of clothes, kitchenware, bedding—straight into the house. Keep a few old towels by the door to wipe down anything that got wet on the way in.

A Quick Word on When to DIY vs. Hiring a Pro
Look, I’m a professional mover, but even I’ll admit you don’t always need to hire a company. A winter move, however, really raises the stakes.
Going the DIY route might be fine if you’re moving a small apartment across town, have a crew of strong, properly equipped friends, and the forecast is clear. But you should seriously consider hiring professionals if you’re moving long-distance, have a large home, or own anything fragile and valuable like a piano or fine art. If you’re looking at a severe weather forecast, it’s almost always worth the money for the pros’ experience and insurance.
Heads up: If you live in a mountainous area, be aware that a big long-haul truck might not be able to get up your steep or winding driveway. This often requires a smaller “shuttle truck” to ferry your belongings, which can add anywhere from $300 to $800+ to your total cost. Ask your moving company about this upfront!
If you do hire a company, ask them specifically about their winter moving procedures. A reputable mover with solid credentials will have confident answers. A winter move is a challenge, for sure, but with the right planning, it’s a challenge you can absolutely conquer.
Inspirational Gallery with Photos
Your Winter Moving Day Go-Bag: While the movers handle the big stuff, keep a box or two of essentials with you in your car. This isn’t just snacks and documents; think winter-specific. Your kit should include a thermos of a hot beverage, high-energy snacks, extra pairs of warm gloves and socks, a phone power bank (cold drains batteries faster!), and a small bag of pet-safe ice melt or rock salt just in case the new property’s paths are slicker than expected.
According to industry data, moving between October and April can be significantly less expensive than during the peak summer season, sometimes by as much as 20-30%.
This
What’s the best way to protect my houseplants from the cold shock?
Your green friends are highly susceptible to sudden temperature drops. A few days before the move, stop watering them to prevent the soil from freezing. On moving day, wrap each pot and foliage gently in layers of newspaper or an old blanket to create an insulated pocket of air. Most importantly, transport them in a heated vehicle—your own car is ideal—and make them the very last thing out of your old home and the very first thing into your new one.
- Keep your most delicate wood furniture safe from warping.
- Prevent moisture from creating water stains or mildew on upholstery.
- Give electronics a buffer against damaging internal condensation.
The secret? Specialized moving blankets. While standard cotton-blend pads offer good bump protection, consider renting or buying a few wool or thick synthetic blankets for your most vulnerable items. Wool naturally wicks moisture away and provides superior insulation against the cold during transit.
Important Point: Let Your Electronics Acclimate. Your television, computer, and speakers have just spent hours in a freezing truck. If you plug them in immediately upon arrival in your warm new home, condensation can form on the cold internal circuitry, potentially causing a short circuit. The professional rule is to give all electronics at least 12-24 hours to slowly reach room temperature before plugging them in and powering them on.
Don’t overlook the final walkthrough at your old place. In winter, this means more than just checking for forgotten items. Check that all windows are securely latched to prevent snow or freezing rain from getting in, and ensure the thermostat is set to a low, but not off, temperature (around 55°F / 13°C) to prevent pipes from bursting, a costly mistake you could be liable for until the new owners take possession.
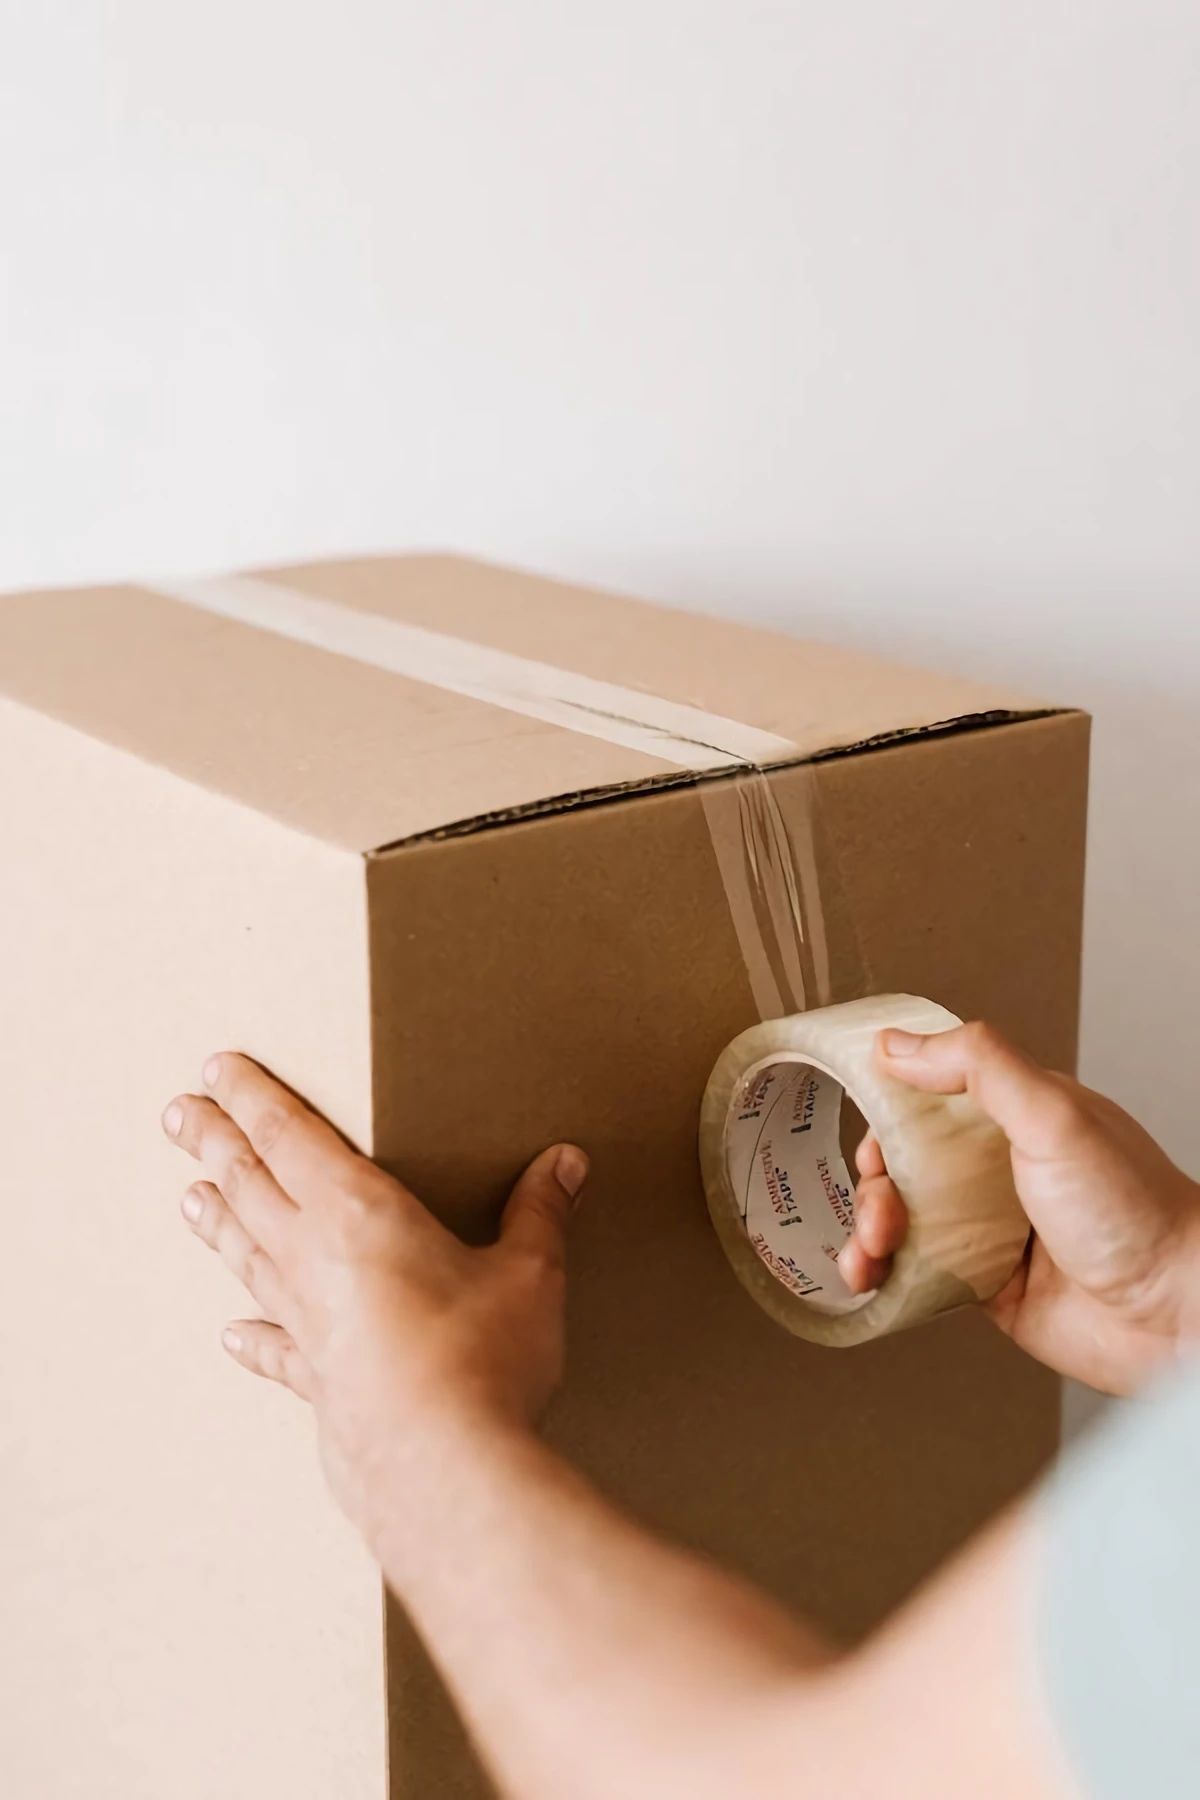
Did you know that standard packing tape can lose its adhesion in freezing temperatures? Many common acrylic-based tapes become brittle and fail below 32°F (0°C).
To avoid boxes unexpectedly bursting open on an icy driveway, switch to a cold-weather specific tape for your move. Brands like Duck Brand offer
One of the biggest oversights in a winter move isn’t at the house you’re leaving, but the one you’re arriving at. It’s crucial to ensure the heat and electricity are officially turned on *the day before* you move in. Arriving with a truck full of belongings to a dark, frigid house is not only demoralizing but also dangerous, increasing the risk of slips and making the entire unloading process miserable. A quick confirmation call to the utility companies is a non-negotiable prep step.
Climate-Controlled Pods: For a less frantic move, portable storage containers from services like PODS or 1-800-PACK-RAT can be a winter lifesaver. You can pack the container over several days, and they will store it in a climate-controlled facility, protecting your belongings from the extreme temperature fluctuations that cause condensation and brittleness.
Traditional Movers: Best for speed and efficiency. A professional crew can empty a house in hours, minimizing the time your items are exposed to the elements. Ideal for direct, same-day moves.
The best choice depends on your timeline and sensitivity of your items.


