How to Make Seriously Good Pickles (From Super-Crisp Dills to Old-School Sours)
I still remember the pickles from my childhood. They were kept in a huge ceramic crock in a cool, dark cellar, and they had this deep, complex sourness and a crunch you could hear across the kitchen. When I first tried making my own, honestly, they were a disaster—mushy, bland, and just sad. It took a lot of trial and error to figure out what really makes a pickle great.
In this article
- Vinegar vs. Fermented: What’s the Difference, Really?
- The Secret to a Perfectly Crisp Pickle
- Choosing Your Ingredients (This Matters More Than You Think)
- Method 1: Quick & Easy Refrigerator Pickles
- Method 2: Traditional Fermented Sour Pickles
- A Quick Word on Canning for the Pantry
- Troubleshooting: When Good Pickles Go Bad
- Inspirational Gallery with Photos
And here’s the secret: it’s not magic. It’s about a few key techniques. Once you get the hang of it, you can control everything—the spice level, the sourness, the crunch. You can whip up a quick jar of refrigerator pickles for this week’s sandwiches or start a batch of deeply fermented sours that will blow any store-bought pickle out of the water.
So let’s break it all down. We’ll get into the science, the right ingredients, and the step-by-step methods so you can skip the disappointment and go straight to pickle perfection.
Vinegar vs. Fermented: What’s the Difference, Really?
At its heart, pickling is all about preservation. You’re basically creating an environment where bad bacteria can’t survive. There are two main roads you can take to get there.
The first method is using vinegar. This is the fast track to pickle town. You create a brine with vinegar, which is highly acidic, and pour it over your cucumbers. For this to be safe, especially for canning, the final pH has to be 4.6 or lower. Most store-bought vinegar is 5% acetic acid, which easily gets you there. This method is quick, reliable, and gives you that classic, tangy pickle flavor. Think refrigerator pickles or most of the jars you see on the grocery store shelf. You can have pickles ready in 24 hours.
The second route is the old-school way: fermentation. Instead of adding acid, you let good bacteria create it for you. You start with a simple saltwater brine. This brine is just salty enough to kill off the nasty microbes but perfect for a specific type of beneficial bacteria called Lactobacillus to flourish. These little guys eat the natural sugars in the cucumbers and produce lactic acid as a byproduct. This acid is what preserves the pickles and gives them an incredibly complex, zesty, and deeply sour flavor that you just can’t replicate with vinegar. It takes more time—weeks, not days—but the flavor is absolutely worth the wait.
The Secret to a Perfectly Crisp Pickle
Let’s be real, nobody wants a limp, mushy pickle. It’s the most common problem, and it usually happens when enzymes break down the pectin that keeps a cucumber’s cell walls firm. Here’s how you fight back.
- Use Fresh, Fresh, FRESH Cucumbers. I can’t stress this enough. Try to pickle your cucumbers the same day you buy or pick them. The longer they sit, the softer they’ll get.
- Trim the Blossom End. Okay, so which end is that? It’s the one opposite from where the stem was attached, and it usually looks a little rough or pokey. This end contains enzymes that cause mushiness. Just slice off a tiny sliver, about 1/16 of an inch, and you’re good to go.
- Bring in the Tannins. This is an old-timer’s trick that absolutely works. Tannins help keep the pectin firm. Just toss a few fresh grape leaves, oak leaves, or even a black tea bag into your jar. For a quart jar, 2-3 clean grape leaves is perfect.
- The Modern Solution: Calcium Chloride. You can find this stuff sold as “Pickle Crisp” or “Xtra Crisp” at most stores with canning supplies or online. It’s a food-safe salt that works wonders for texture without changing the flavor. A little goes a long way—use about 1/8 teaspoon per pint jar or 1/4 teaspoon per quart jar.
- Don’t Cook Your Cukes. If you’re making refrigerator pickles, you only need to heat the brine enough to dissolve the salt and sugar. A rolling boil will start to cook the cucumbers, making them soft. For fermented pickles, a cool, stable temperature (around 65-70°F) is your best friend.
Choosing Your Ingredients (This Matters More Than You Think)
Your finished product is only as good as what you start with. A little bit of thought here goes a long way.
1. The Cucumbers
First off, step away from the standard slicing cucumbers you see in salads. They’re too watery and have thick skins, which leads to soft pickles. You want to look for specific pickling varieties like Kirby, Boston Pickling, or National Pickling. They’re shorter, bumpier, and born to be crunchy. Look for firm, unwaxed cucumbers with no yellow spots. That wax they put on slicing cucumbers will block your brine from soaking in properly.
2. The Salt
This is critical. Never, ever use regular table salt. It has iodine that can darken your pickles and anti-caking agents that will make your brine look like a cloudy mess. You need pure, non-iodized salt. Pickling & Canning Salt is your best bet—it’s fine-grained and dissolves easily. Kosher salt works too, but be aware that different brands have different flake sizes, so measuring by weight is always more accurate than by volume. Pure, finely ground sea salt without additives is another solid option.
3. The Vinegar
For quick pickles, the vinegar is the star. Make sure you use one with at least 5% acidity, which should be right on the label. White distilled vinegar is the workhorse—it’s cheap, clean, and lets your spices shine. Apple cider vinegar gives a fruitier, slightly sweeter taste that’s great for bread-and-butter pickles, though it can darken them a bit. I often use a 50/50 mix of the two to get the best of both worlds.
4. The Water
Tap water can be your enemy, especially for fermentation. The chlorine in it can kill off the good bacteria you’re trying to cultivate. I always recommend using filtered or distilled water for the cleanest results. If you have to use tap water, just let it sit out on the counter for 24 hours to let the chlorine evaporate.
Method 1: Quick & Easy Refrigerator Pickles
Want a quick win? You can do this tonight. Seriously, if you have 20 minutes, you can have a jar of pickles chilling in the fridge before bed. These aren’t shelf-stable, but they’ll stay crisp and delicious in the fridge for about a month, sometimes even longer.
What You’ll Need:
- A 32-ounce (1-quart) glass jar with a lid
- A small saucepan
- About 1.5 lbs of pickling cucumbers
- 1 cup of 5% acidity vinegar (white or cider)
- 1 cup of filtered water
- 1.5 tablespoons of pickling salt
- 1 tablespoon of sugar (optional, but it balances the tang)
- For classic dill flavor: 2-3 smashed garlic cloves, 1 big head of fresh dill (or 1 tbsp dill seed), 1 tsp black peppercorns, and 1 tsp mustard seeds.
The Steps:
- Prep Everything: Wash your jar and cucumbers well. Trim the blossom end off each cucumber, then slice them into spears or rounds (chips).
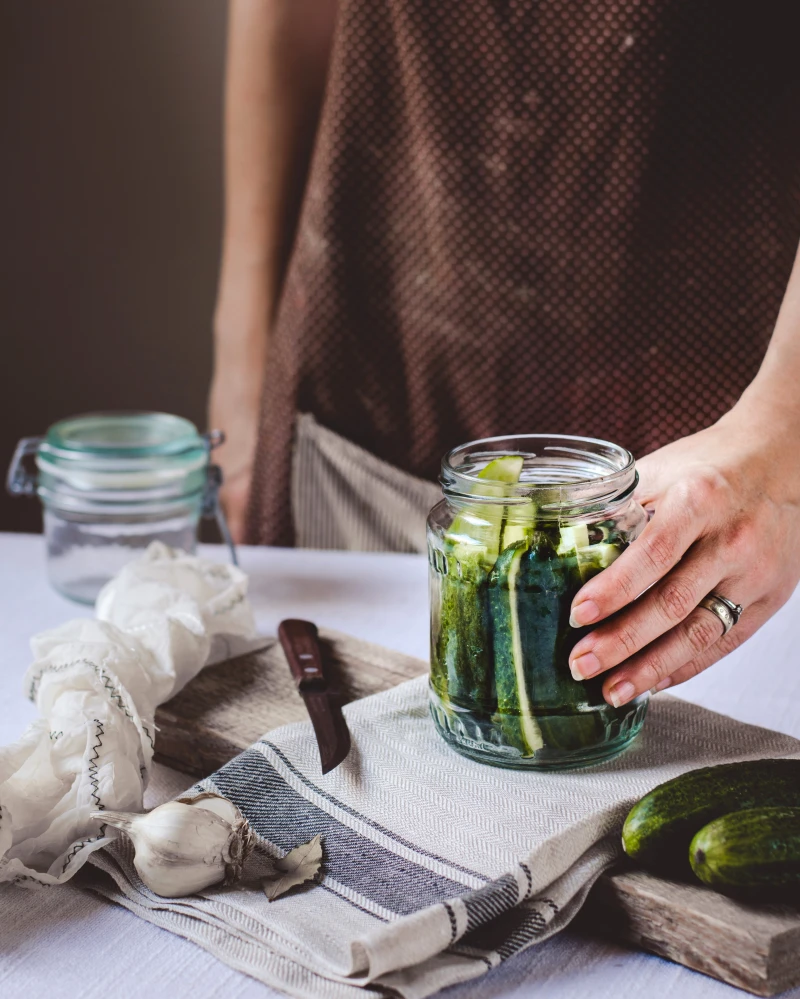
- Pack the Jar: Drop your flavorings (garlic, dill, spices) into the bottom of the jar. Now, pack the cucumbers in there tightly. You want them snug so they don’t float.
- Make the Brine: In your saucepan, combine the vinegar, water, salt, and sugar. Heat it over medium, stirring just until everything dissolves. Don’t let it boil furiously.
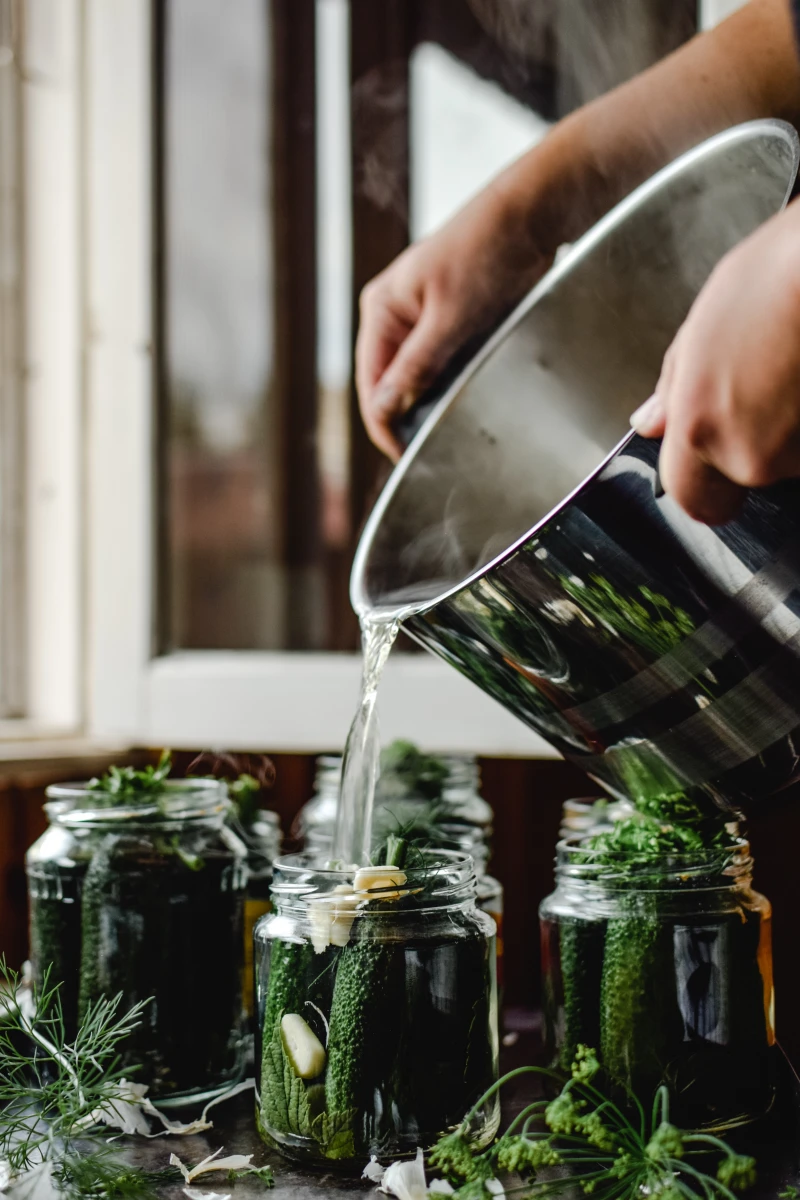
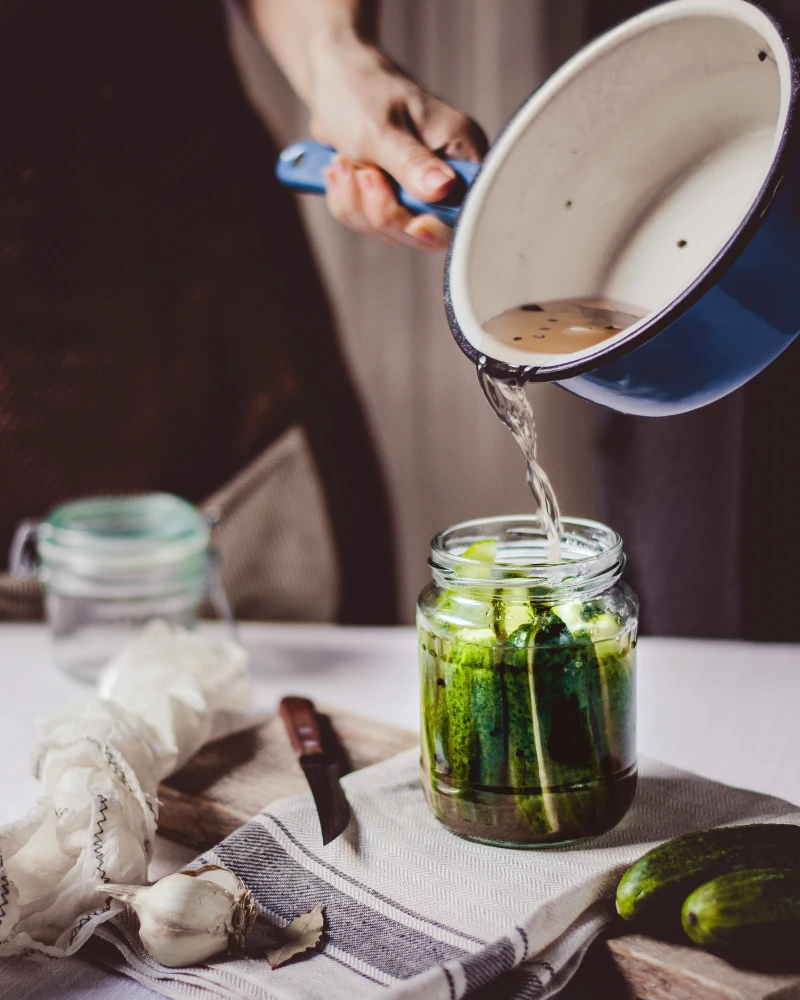
- Fill ‘er Up: Carefully pour the hot brine over the cucumbers, making sure they’re completely covered. Leave about a half-inch of space at the top.
- Cool and Chill: Let the jar cool down on the counter. Once it’s at room temperature, screw on the lid and stick it in the fridge.
They’ll be tasty in 24 hours, but they get really good after about 3-5 days. And a common question I get: can you reuse the brine? I wouldn’t. It gets diluted by the water from the cucumbers, so your next batch won’t be as crisp or flavorful.
Method 2: Traditional Fermented Sour Pickles
This is a project, but a deeply rewarding one. It requires patience and attention to detail, but the flavor is out of this world. This is where a simple kitchen scale, which you can get for $10-$15, becomes your best friend.
The All-Important Brine: For fermentation, the salt-to-water ratio is everything. We measure by weight to be precise. A 3.5% brine is the sweet spot. To do this, you weigh your water and cucumbers together, then calculate 3.5% of that total to find out how much salt you need. (Example: 2000g water + 1000g cucumbers = 3000g total. So, 3000 x 0.035 = 105 grams of salt.)
Quick Tip: No scale? It’s less precise, but you can get close by using about 3 tablespoons of Morton Kosher Salt per 4 cups (1 quart) of water. But honestly, a cheap scale makes you a fermentation pro overnight.
The Steps:
- Prep the Vessel: Clean your large glass jar or crock very, very well.
- Pack the Jar: Place a layer of aromatics on the bottom—I like garlic, fresh dill, and a few grape leaves. Pack your washed and trimmed cucumbers in tightly.
- Submerge Everything: Pour your room-temperature saltwater brine over the cucumbers until they are completely covered. Now, you have to weigh them down so nothing floats. This is the MOST important step. Anything exposed to air will mold.
- Keep it Weighed Down: You can use a special fermentation weight, but a small plate that fits inside the jar works great. My favorite trick? Fill a small Ziploc bag with a bit of leftover brine (not plain water), seal it, and place it on top of the cucumbers. It perfectly fills the space and keeps everything submerged.
- Cover and Wait: Cover the jar with a clean cloth and place it in a cool spot (65-70°F) out of direct sun. After a few days, you’ll see bubbles and the water will get cloudy—that’s the magic happening!
- Monitor and Taste: Check on it every day. A white film on the surface (kahm yeast) is harmless; just skim it off. But if you see fuzzy, colorful mold (black, green, pink), something floated to the top. The batch is contaminated and has to be tossed. Start tasting after a week. When they’re as sour as you like (1-3 weeks), move them to the fridge to slow the fermentation way down.
A Quick Word on Canning for the Pantry
If you want to make shelf-stable pickles, you’ll need to do a water bath canning process. This is an amazing skill to have, but food safety is absolutely non-negotiable here. Botulism is no joke.
Heads up! For canning, you MUST use a recipe that has been lab-tested for safety. Do not make up your own brine ratios or processing times. The best place to find these are on university extension websites—just search for “home food preservation guides” from any major state university. They provide scientifically-backed recipes that ensure your pickles are safe to eat.
Troubleshooting: When Good Pickles Go Bad
- Problem: My pickles are soft.
Solution: 99% of the time it’s because the cucumbers weren’t fresh, you didn’t trim the blossom end, or you didn’t add tannins (grape leaves) or Pickle Crisp. Start with the absolute freshest cukes you can find. - Problem: My pickles are hollow inside.
Solution: This is usually an issue with the cucumber itself, often from inconsistent watering as it grew. Not much you can do after the fact, but it’s another reason to use high-quality, fresh pickling cukes. - Problem: My fermented pickles are slimy.
Solution: I’ve been there. It’s heartbreaking. Sliminess usually means your salt concentration was too low or the temperature was too warm, allowing the wrong kind of bacteria to take over. I once lost a whole beautiful gallon because I got lazy with my salt measurement. Unfortunately, there’s no saving a slimy batch. Toss it, sanitize everything, and be precise with your salt next time.
By the way, making your own pickles is also pretty budget-friendly. A big jar of premium, craft pickles at the store can set you back $8-$12. You can make a quart of even better-tasting pickles at home for about $5-$7, depending on where you get your cucumbers.
Once you nail the basic technique, the sky’s the limit. Add a couple of dried arbol chilies for a spicy kick. Try a sweet-and-spicy bread-and-butter style with cider vinegar, turmeric, and onions. The real joy is in the process—the crisp snap of a perfect homemade pickle is a reward that never gets old.
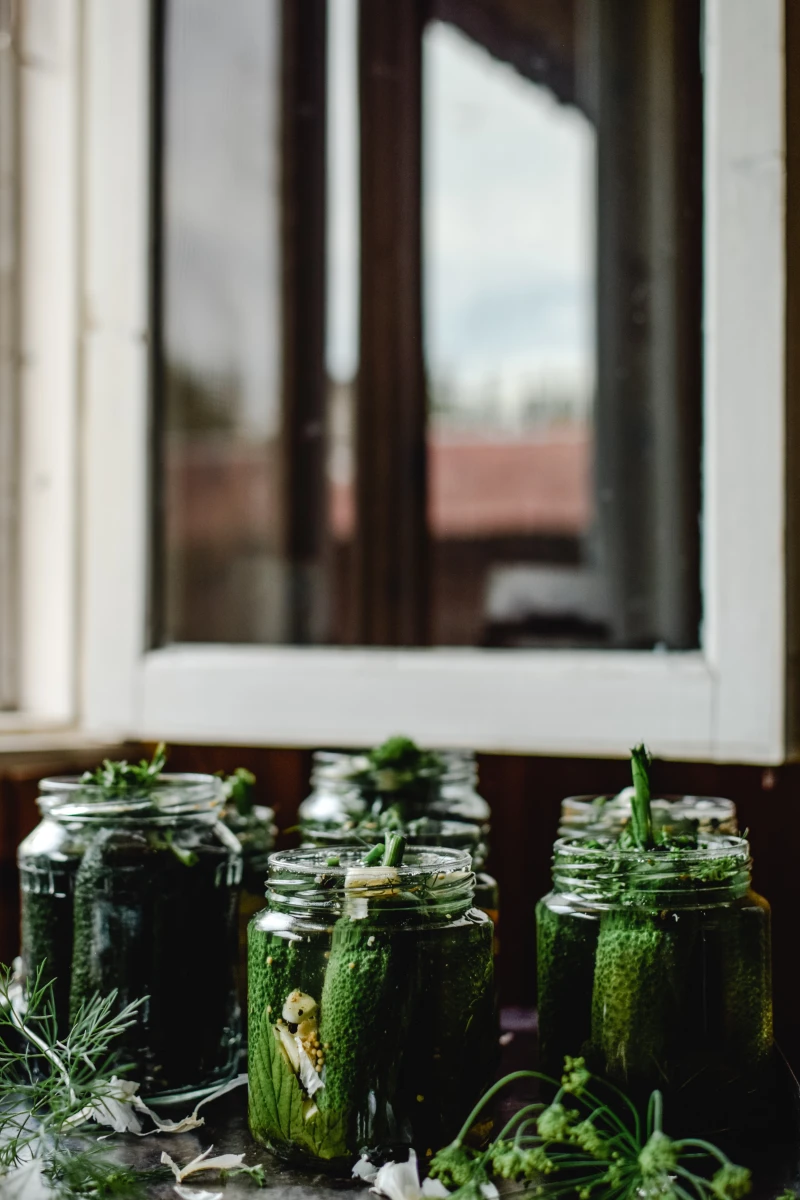
Inspirational Gallery with Photos
The Unsung Hero of the Pickle Jar: Salt. Not all salt is created equal in the world of pickling. Your table salt, with its iodine and anti-caking agents, can cloud your brine and negatively affect fermentation. Always reach for a pure, additive-free salt. Kosher salt, like Diamond Crystal or Morton, is the go-to for most picklers due to its clean flavor and predictable salinity. Sea salt works beautifully too, but be mindful that its crystal size can vary, impacting measurements.
- They add a surprising, unbreakable crunch.
- They impart a subtle, almost undetectable earthy note.
- They help preserve the vibrant green color of your cucumbers.
The secret? A single grape leaf, oak leaf, or even a black tea bag added to your jar. These all contain tannins, natural compounds that inhibit the enzymes that cause mushiness.
What’s that weird white film on top of my fermenting pickles?
Don’t panic! If it’s a flat, slightly wrinkly white layer, you’re likely looking at kahm yeast. It’s a harmless wild yeast that can form when the ferment is exposed to air. While it can impart a slightly off-flavor if left too long, you can simply skim it off the surface and continue fermenting. The real enemy is mold—fuzzy, hairy, and often blue, green, or black. If you see mold, the batch is unfortunately compromised and must be thrown out.
Did you know that trimming about 1/16th of an inch off the blossom end of a cucumber can be the single most important step for a crisp pickle?
This end contains enzymes that can cause softening during the pickling process. It’s a tiny detail that separates good pickles from great ones. The stem end is fine to leave as is, but never skip the blossom end trim!
Go beyond the classic dill and garlic combination to create your signature pickle. Think of your spice blend as a flavor profile you can customize endlessly.
- For warmth and depth: Add whole allspice berries, cloves, or a cinnamon stick.
- For a brighter, citrusy note: Try coriander seeds and bay leaves.
- For a spicy kick: A few dried chiles de árbol or a teaspoon of red pepper flakes will do the trick.
- For an earthy, complex flavor: Black mustard seeds and celery seeds are essential.
Don’t you dare pour that leftover pickle brine down the drain! This “liquid gold” is packed with flavor and has dozens of uses in the kitchen. Use it to brine chicken before frying for incredibly moist meat, whisk it into vinaigrettes for a tangy punch, or add a splash to potato salad to brighten it up. Some people even drink it straight as a post-workout electrolyte boost.
Mason Jars: The affordable, all-American classic. Their two-part lid system is designed to create a vacuum seal, making them ideal for traditional water bath canning.
Fido or Le Parfait Jars: These European-style jars feature a wire bail and a rubber gasket. They are fantastic for fermentation because the gasket allows CO2 to escape under pressure (self-burping) while keeping oxygen out, reducing the risk of mold.
For quick refrigerator pickles, either works. For long-term fermentation, a Fido-style jar can make the process a little easier.
Pickling isn’t just a trend; it’s an ancient tradition. Archeologists have traced the practice back to Mesopotamia in 2400 B.C. Cleopatra herself attributed her renowned beauty in part to a diet rich in pickles.
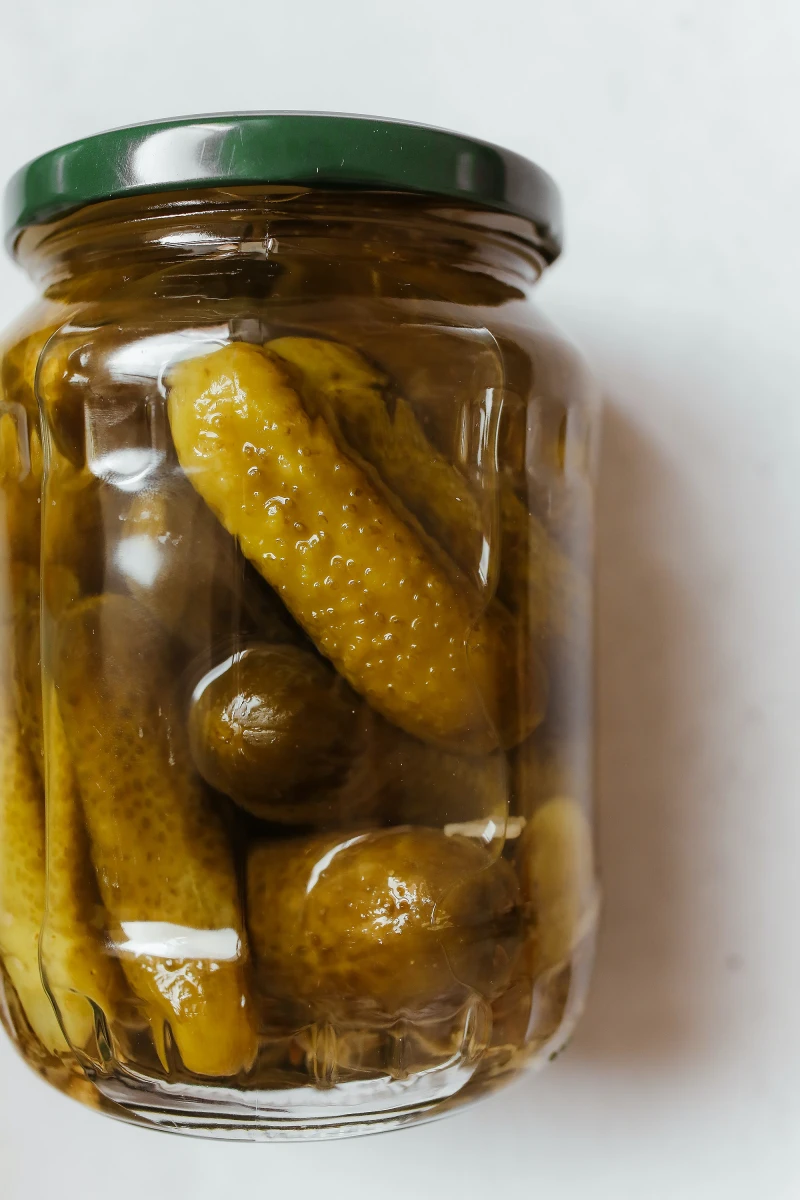
To get that iconic pickle-aisle look, how you pack the jar matters. For spears, stand them vertically, alternating them top-to-bottom to fit as many as possible. For whole cukes or chips, start by adding your spices to the bottom of the empty jar. This ensures they don’t all float to the top. Then, pack your cucumbers in as tightly as you can without bruising them. A well-packed jar not only looks better but also prevents the pickles from floating up out of the brine.
The cucumber is just the beginning. The same principles you’re learning can be applied to a whole world of vegetables. Try pickling crisp green beans with dill (dilly beans), cauliflower florets with turmeric and coriander, or thin slivers of red onion for a perfect taco topping. Each vegetable brings its own texture and flavor, opening up a universe of possibilities from a single jar of brine.


