Your Guide to Facial Gua Sha: Ditching the Hype for Real Results
I’ve been in the treatment room for years, and I’ve seen countless beauty trends explode and then fade away. But some things, like facial Gua Sha, aren’t just trends. They have deep roots and, when you understand them, they command some serious respect. Honestly, when I first started using it in my practice, it wasn’t because it was all over social media. It was because I was studying advanced lymphatic techniques and saw how this simple stone could deliver incredible results—if you know what you’re doing.
In this article
So many people come in thinking it’s about aggressively scraping your face to carve out cheekbones. Let’s clear that up right now. Facial Gua Sha is the exact opposite. It’s a gentle, intentional conversation with your skin, the tissue beneath it, and your body’s natural drainage system.
This isn’t a magic wand, and it’s definitely not a replacement for medical procedures. Think of it as a practice, a ritual. When you get the principles behind it, you stop just blindly following a diagram and start feeling what your skin actually needs. My goal here is to share what I’ve learned from countless hours of hands-on work and continuing education, so you can do this correctly, safely, and effectively for genuinely healthy skin.
The Real Science Behind the Stone (The “Why” Matters!)
To use a Gua Sha tool the right way, you have to understand what you’re actually trying to influence under the skin. The real magic isn’t on the surface; it’s in the systems working deep within your tissue. Before my apprentices even touch a tool, we spend the first week just on theory. Trust me, knowing the “why” is what turns a mindless routine into a powerful ritual.
Your Lymphatic System: The Body’s Unsung Hero
Picture your lymphatic system as your body’s personal waste disposal network. It’s a quiet, background system of vessels and nodes that clears out cellular gunk, excess fluid, and other junk. But here’s the catch: unlike your circulatory system, which has the heart pumping away, your lymphatic system is passive. It needs you to move—through muscle contractions or manual manipulation—to get going.
When it gets sluggish, you see it right on your face: puffiness (especially under the eyes), dull skin, and just a general blah look. I often describe it to clients as a slow-moving river. If debris piles up, the water gets murky. Facial Gua Sha acts like a gentle current, encouraging that flow and helping the system drain properly down toward the major ducts in your neck and collarbone area. This is why every good Gua Sha routine ends with downward strokes on the neck—you’re showing the waste the way out!
Circulation and the “Glow” Factor
In traditional bodywork, Gua Sha is sometimes used more vigorously to create little red dots on the skin. This is called “Sha,” and it’s basically stagnant fluid being brought to the surface for the body to clear away. Heads up: for the face, our goal is completely different and MUCH gentler. We are not trying to create Sha.
Instead, we’re looking for a temporary, healthy flush. That pinkness is a beautiful sign of increased microcirculation. You’re bringing fresh, oxygen-rich blood to your skin cells, packed with nutrients that support collagen, help with repair, and boost radiance. That “glow” everyone talks about? It’s not a cosmetic trick; it’s the look of well-fed, happy, and healthy tissue.
Releasing That Hidden Tension in Your Fascia
Right beneath your skin is a web of connective tissue called fascia. It wraps around every single muscle. Things like daily stress, squinting at your screen, or even grinding your teeth at night can make this fascia tight and restricted. In the treatment room, this is what I feel as a “gritty” or bumpy texture when I glide the tool over the skin. These tight spots can limit blood flow and even contribute to expression lines. The slow, steady pressure from a Gua Sha tool helps to iron out and release this tension. It’s a unique form of facial massage that smooths out the underlying foundation, which in turn can help soften the look of fine lines. It’s the reason your jaw feels less clenched and your brow less furrowed after a session.
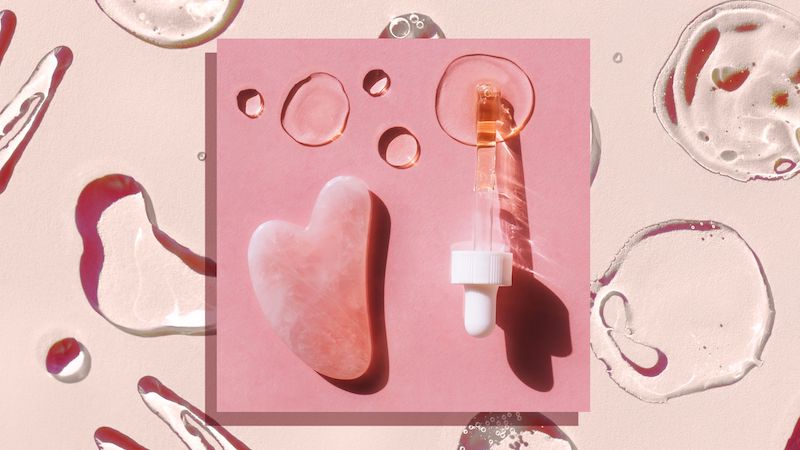
How to Choose a Tool That’s Actually Worth Your Money
Let’s be frank, the market is flooded with Gua Sha tools, and a lot of them are junk. The material, shape, and finish aren’t just for looks—they directly impact how safe and effective your practice will be. I’m incredibly picky about the tools I use and recommend.
Material Matters More Than You Think
While different stones have their own traditional vibes, my focus as a pro is on their physical traits and, most importantly, safety.
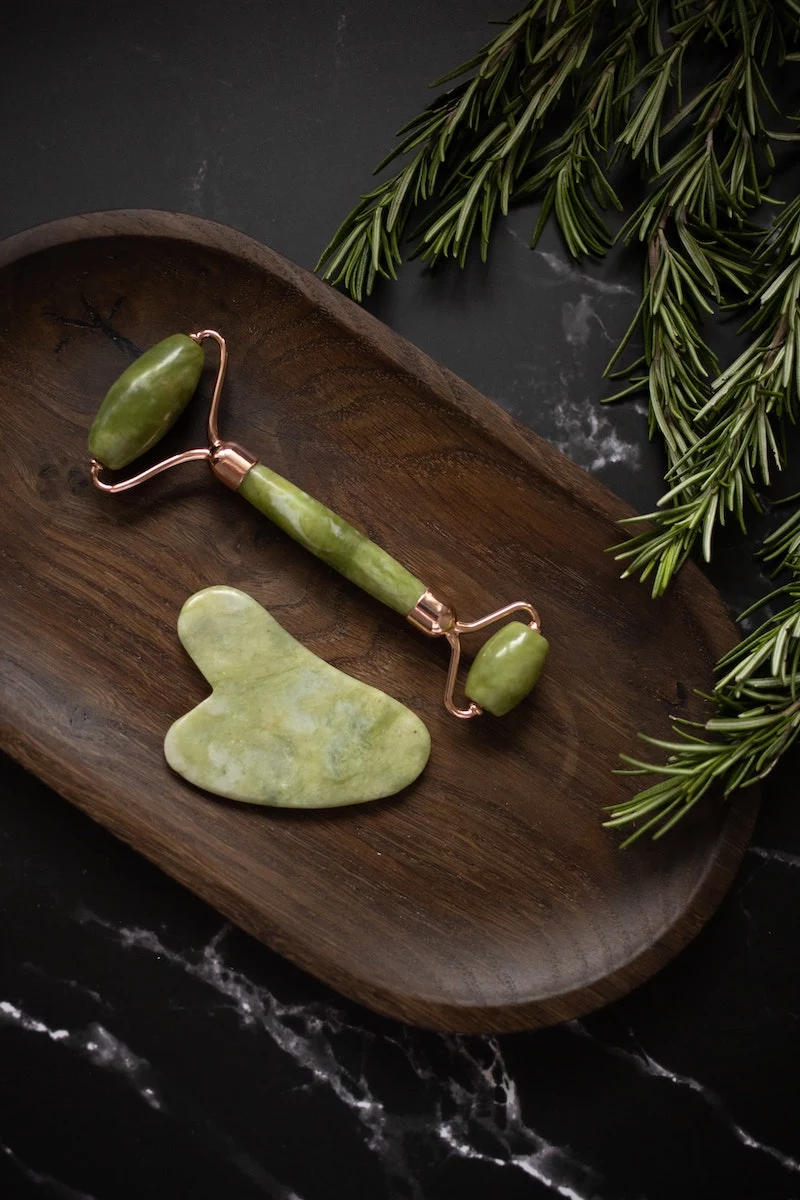
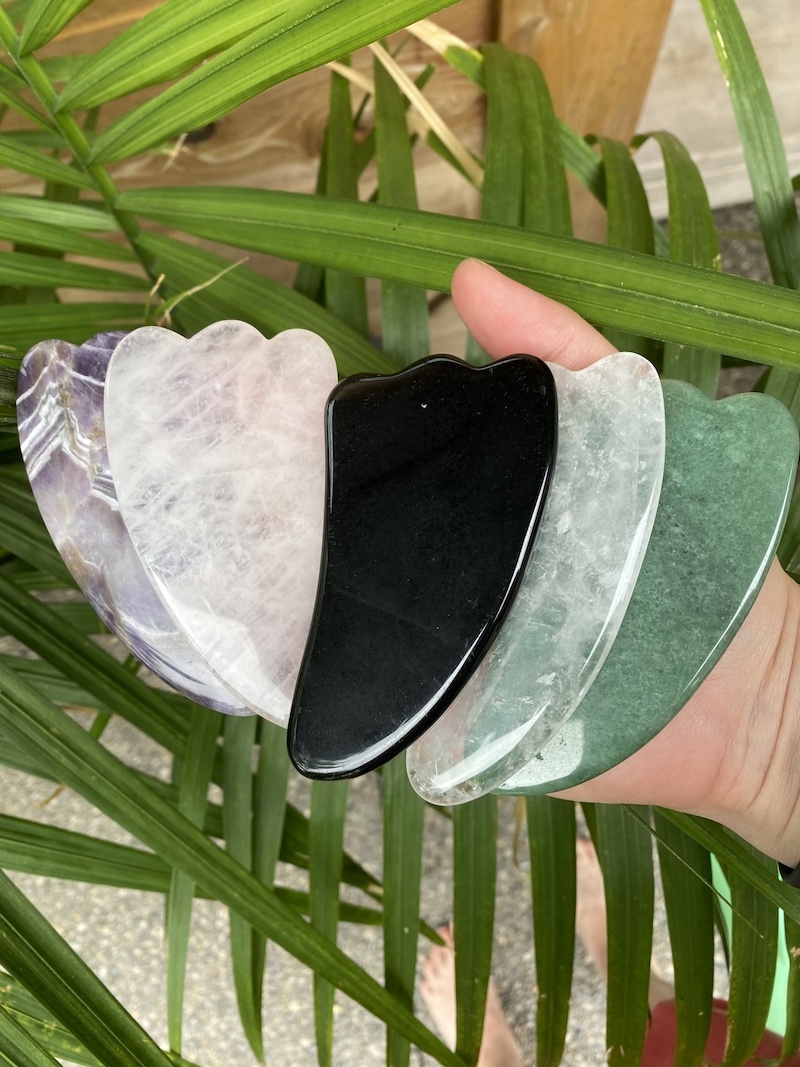
- Nephrite Jade: This is the traditional go-to, and for good reason. Real nephrite jade is dense, heavy, and naturally cool to the touch. It’s also tough and non-porous when polished correctly, which makes it hygienic. But be careful—a lot of cheap, light-green stones sold as ‘jade’ are actually serpentine or even dyed marble, which can be porous and trap bacteria. A good one will set you back between $25 and $45. If you see one for $10, it’s almost certainly not the real deal.
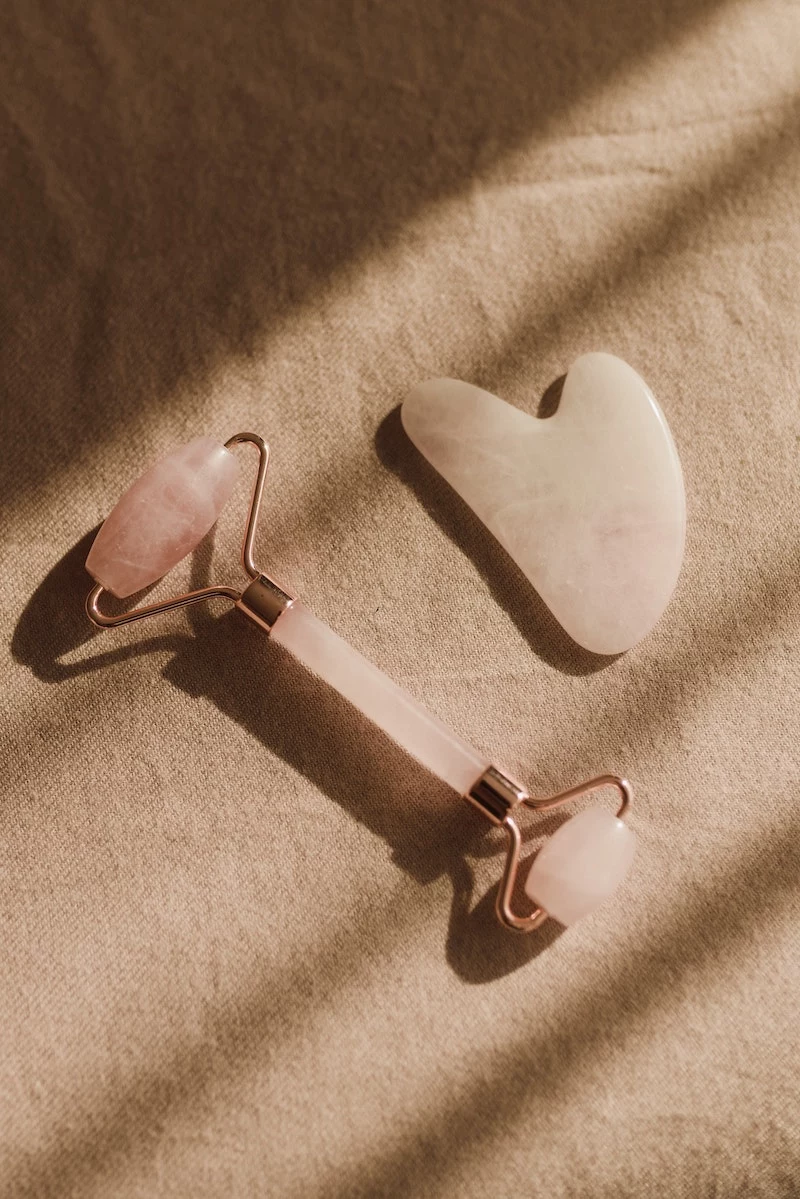
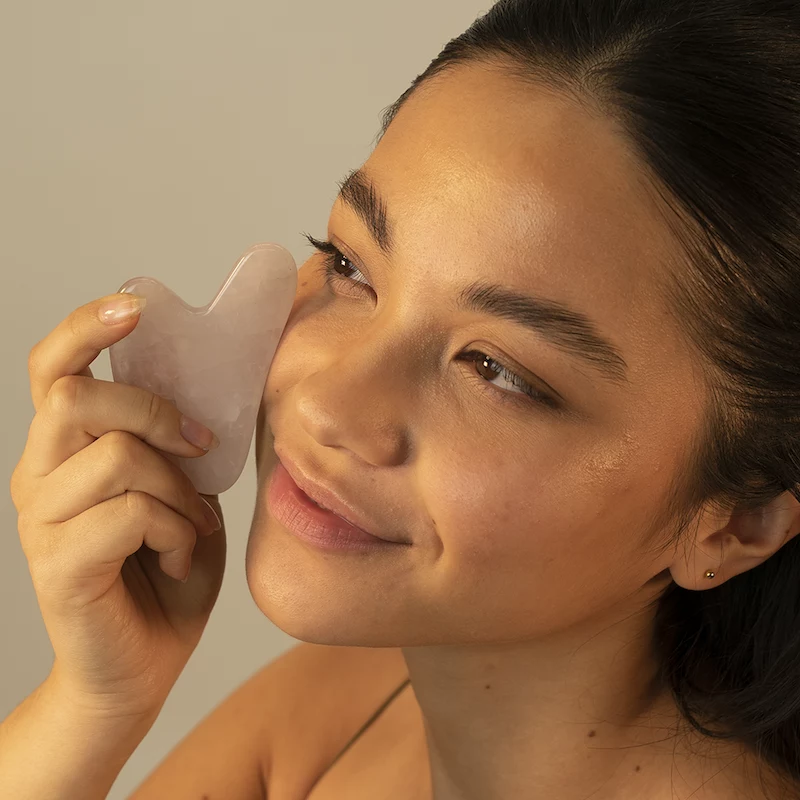
- Rose Quartz: It’s beautiful and holds its temperature really well, especially if you pop it in the fridge. The downside? It’s more crystalline and brittle than jade. I’ve had clients drop them, and a chipped or fractured tool is a major hazard. It can create tiny scratches on your skin and has to be thrown away immediately.
- Stainless Steel: Okay, this is my top recommendation for most people at home. Why? It’s completely non-porous, making it a breeze to sanitize. It’s also virtually indestructible, so you don’t have to worry about dropping it. Plus, it has amazing thermal conductivity—it gets ice-cold in the fridge and stays that way, which is a game-changer for reducing puffiness and inflammation. It might lack the ‘traditional’ feel, but for hygiene and durability, it’s unmatched. Expect to pay around $30 to $50 for a quality steel tool from a reputable source, like a brand that supplies estheticians.
- Bian Stone: This is a more specialized material, often with a slightly textured, velvety feel. It’s known for generating a gentle warmth as you work it over the skin. It’s an fantastic choice if your main goal is releasing deep muscle tension, but it often comes with a higher price tag.
Shape Is All About Function
Those different curves and points on your tool? They’re all designed for specific parts of your face. Understanding them turns your tool into a multi-purpose instrument.
- The Long Concave Edge: This is your workhorse. It’s perfect for the larger areas of your face, like your cheeks and forehead.
- The Cleft or Notch: This little divot is perfectly shaped to hug your jawline. It’s amazing for contouring and releasing that tight TMJ tension.
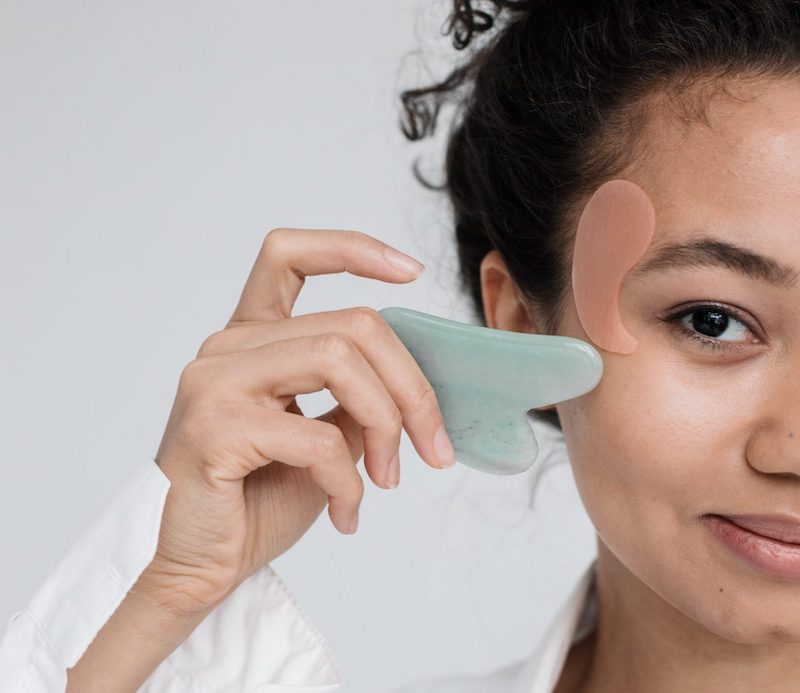
- The Short Convex Edge: The smaller curve is designed to fit snugly under your eye area and over your brow bone with precision.
- The Corners: These are not for scraping! They’re for gentle, targeted pressure on acupressure points. For instance, a little press on the point right next to your nostril can do wonders for sinus pressure.
A serious note on quality: Whatever material you choose, run your finger along every single edge. It must be perfectly smooth and rounded. If you feel any nicks, burrs, or weird spots, DO NOT put it on your face. I once had a client who bought a cheap tool online that had a microscopic flaw. It left a long, fine scratch on her cheek that took weeks to heal. Quality is a non-negotiable safety issue.
The Pro Technique: How to Do It Right
Okay, this is where most people go wrong. It’s all in how you hold the tool and move it. Too much pressure, wrong angle, wrong direction. Here is the exact method I teach.
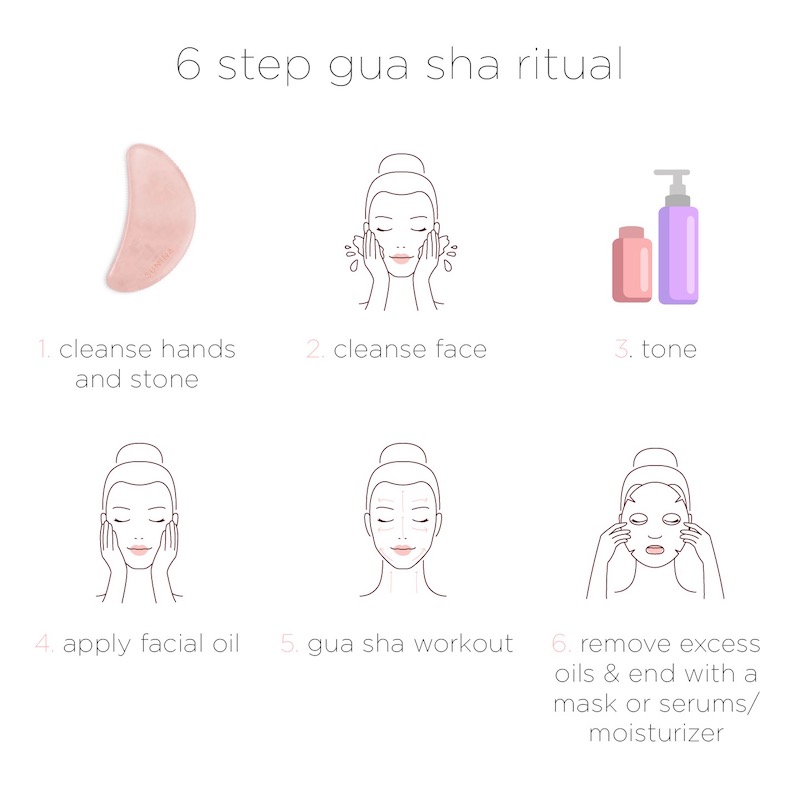
The Prep Ritual (Don’t Skip This!)
- Clean Everything: Start with a clean face, clean hands, and a clean tool. Wash your Gua Sha with gentle soap and water before every single use. This is non-negotiable. Using a dirty tool is a one-way ticket to breakouts.
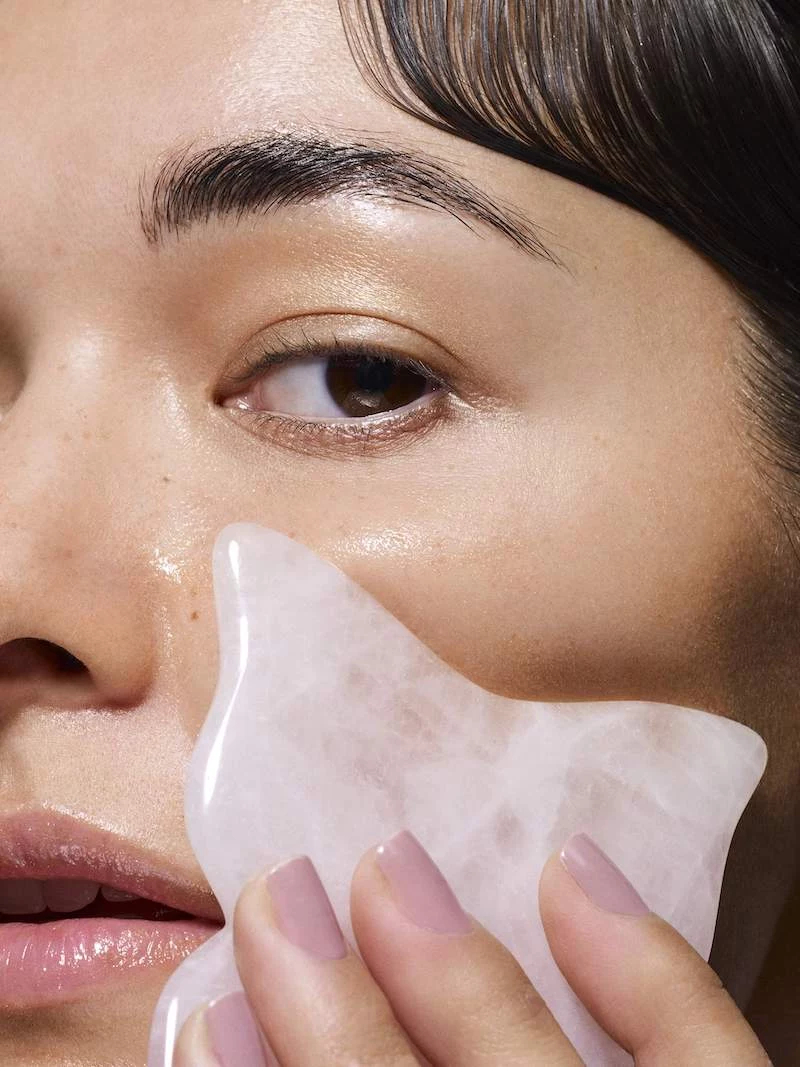
- Get Your Slip On: Never, ever use a Gua Sha on dry skin. You’ll just cause friction and irritation. You need a facial oil to create “slip” so the tool can glide. I love squalane, jojoba, or rosehip seed oil. Apply about a quarter-sized amount—your face should look shiny and feel slippery, with absolutely no drag from the tool.
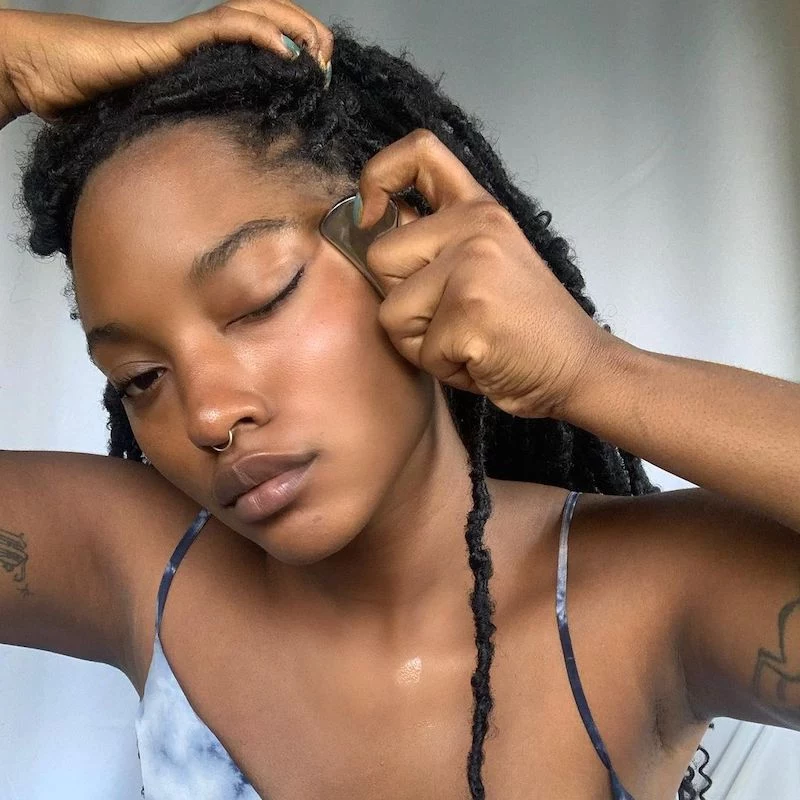
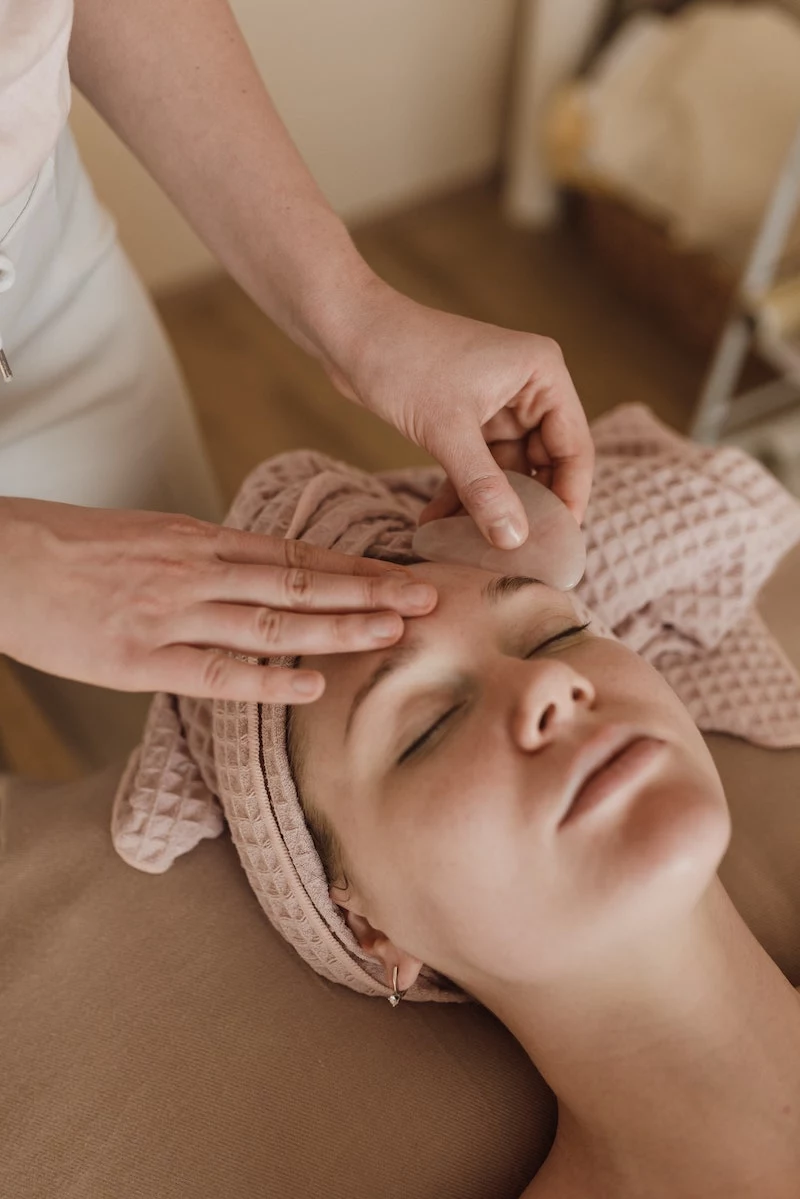
- Use an Anchor Hand: This is the pro secret that changes everything. Use your free hand to gently hold the skin taut behind where the tool is moving. For example, if you’re working on your cheek, place the fingers of your other hand near your nose. Try it now: Place your fingers by your nose and gently hold the skin. Now imagine sliding the tool away. See how that stops your skin from pulling? That’s the feeling you’re after. It stabilizes the skin and helps the tool work on the fascia more effectively.

The Movement: Pressure, Angle, and Direction
- Pressure: Super light. On a scale of 1 to 10, you should be at a 2 or 3. It should feel like a gentle caress, never painful. The only place you might go a tiny bit firmer is on the neck and shoulders. If you see redness or bruising on your face, you are being way too aggressive.
- Angle: This is critical. Hold the tool almost flat against your skin, at about a 15-degree angle. Don’t hold it at a 90-degree angle like you’re scraping ice off a windshield. The flat angle is what engages the tissue underneath instead of just scraping the top layer of skin.
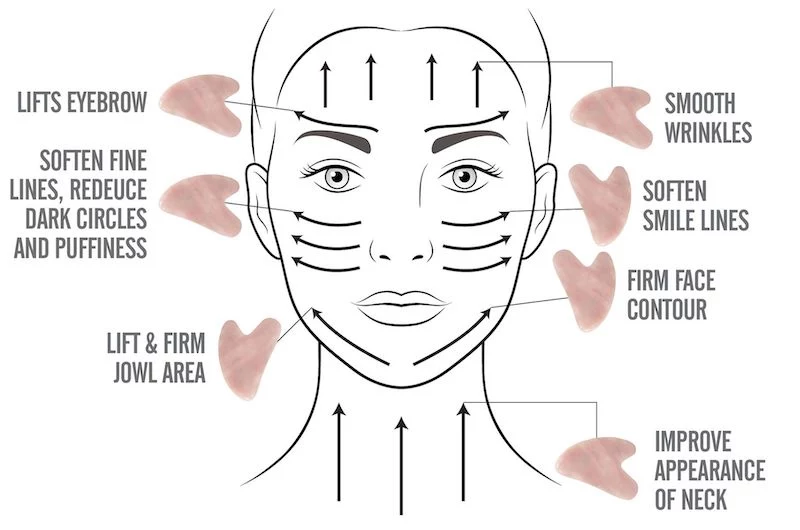
- Direction: The general rule is to move from the center of the face outwards, and from the bottom up. We do this to guide fluid toward the lymph nodes at the edge of the face. The one exception is the very last step, which is always draining down the neck.
A Simple, Step-by-Step Routine
Once you get the hang of this, the whole thing should only take 5-10 minutes. Perform each stroke 3-5 times on each side before moving on. Go slow!
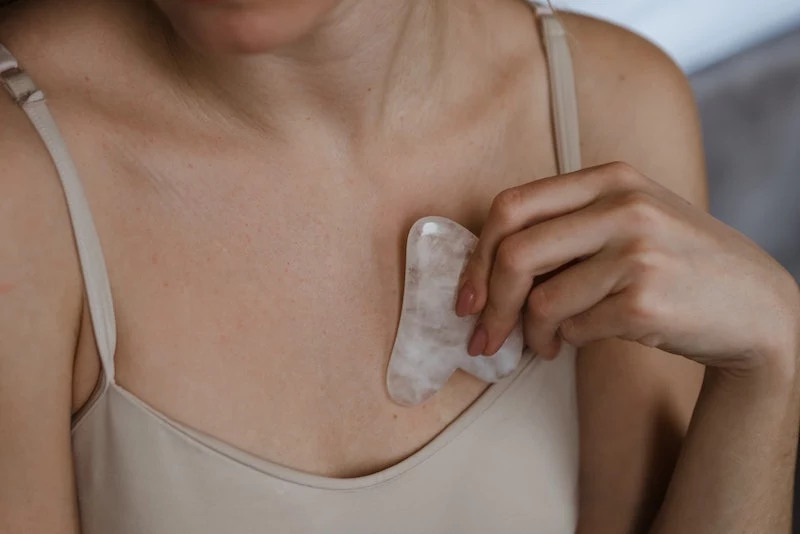
- Open the Drains: Before touching your face, gently press the tool flat against the hollows above your collarbone 3-5 times. This signals to your lymphatic system that it’s time to get moving.
- The Neck: Use the long edge and glide from under your ear down to your collarbone. Do the sides and back of your neck. For the front, be extremely gentle, stroking downwards from your jaw.
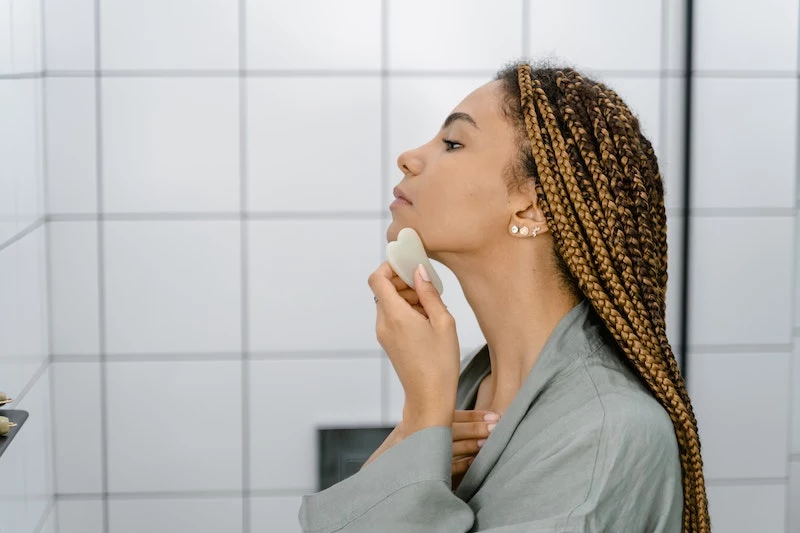
- The Jawline: Use the notched edge. Start at your chin and glide up along the jawbone, ending right below your ear. Give it a gentle wiggle here to massage the muscle.
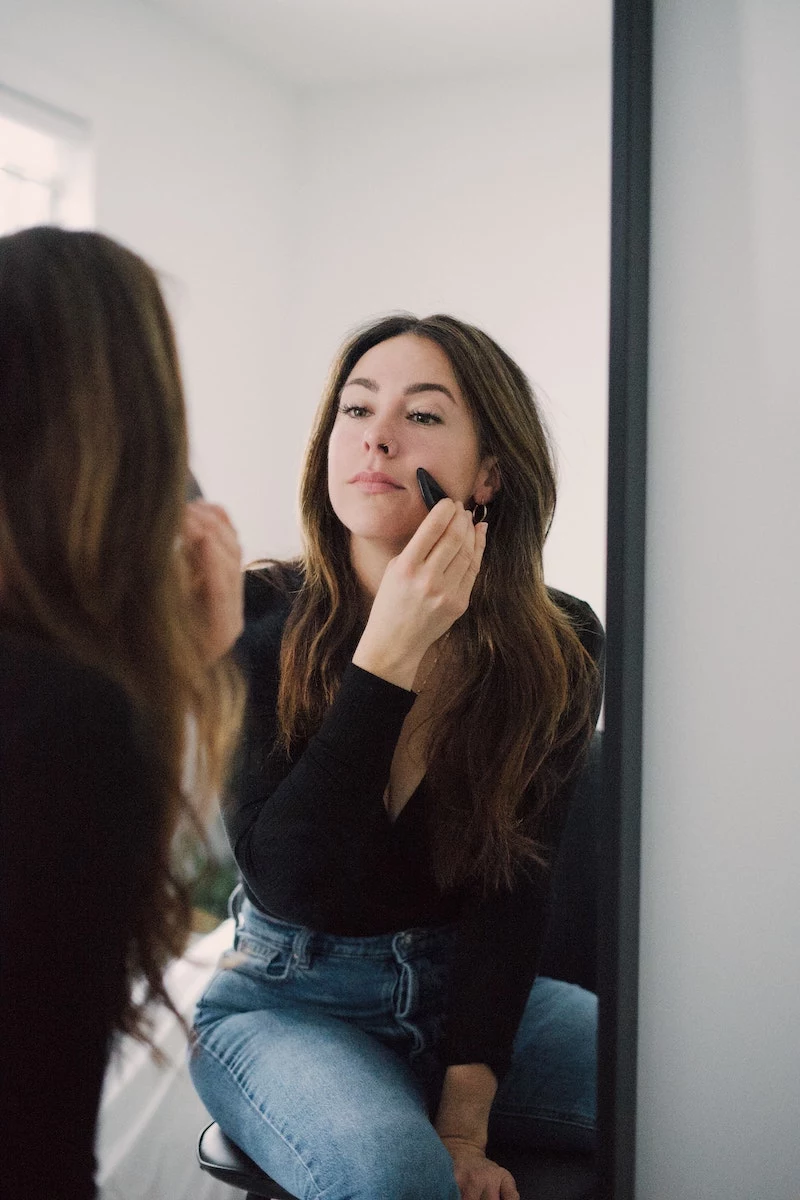
- The Cheeks: Use the long edge. Start next to your nose and sweep outwards and slightly up over your cheekbone toward your hairline.
- The Under-Eye: Be extra delicate here. Use a corner or the small edge with feather-light pressure. Start at the inner corner and glide outwards toward your temple. No pulling!
- The Brow Bone: Use the short edge and glide from the inside of your brow out along the bone. This feels heavenly for tension headaches.
- The Forehead: Use the long edge. Start in the middle, just above your brows, and pull upwards to your hairline. Work across your forehead in sections.
- The Final Drain: To finish, take the long edge and make a few big, gentle sweeping motions. Start at the center of your forehead, sweep out to your temple, and then turn the corner and glide all the way down the side of your neck to your collarbone. This moves everything you just worked on toward the exit.
Quick Tips for Real Life & What to Actually Expect
Part of my job is being honest about results. Gua Sha is wonderful, but let’s manage expectations.
Time-Saver Routine: In a rush? Just do two things. First, the neck drainage (Step 2). Then, the final drain (Step 8), sweeping from forehead to collarbone. It takes less than 2 minutes and still works wonders for morning puffiness!
Oops, I Got a Red Spot! What Now? Don’t panic! It just means you used a bit too much pressure or held the tool at too steep of an angle. It’s not the goal, but it happens. Just let the area rest for a day or two until it fades completely. Next time, remember to lighten up—think 2 out of 10 on the pressure scale!
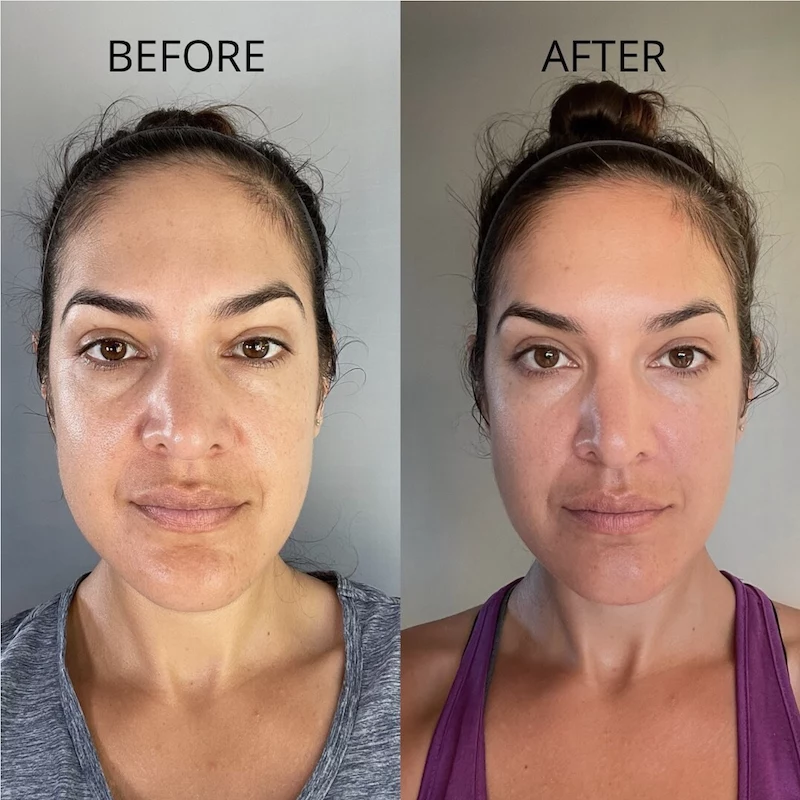
Immediate vs. Long-Term Benefits
Immediately, you’ll notice less puffiness, especially in the morning. Your skin will have a healthy, rosy glow, and you’ll feel a satisfying release of tension in your jaw and brow. These effects are real, but they are temporary.
Long-term, with consistent practice (think 2 to 4 times a week), you may see a softening of fine lines, a more sculpted look along the jaw, and generally brighter skin. These results are subtle and build up over time. This won’t give you a facelift, so it’s important to be realistic. This is a wellness practice with some fantastic aesthetic perks.
Crucial Safety Warnings: When NOT to Gua Sha
Safety first, always. Using a Gua Sha tool incorrectly or on the wrong skin condition can cause real harm.
Do NOT Use Gua Sha:
- Over Active Acne or Rosacea: Never glide the tool over active breakouts, cysts, or inflamed rosacea. You’ll spread bacteria and make the inflammation worse. You can, however, work gently around the areas to help with drainage.
- On Broken Skin: This means no cuts, scrapes, sunburns, or open wounds. That’s just asking for an infection.
- After Injections: If you get Botox or fillers, you need to wait. The pressure can make the product move to where it shouldn’t be. I tell my clients to wait a full four weeks and get the all-clear from their injector first.
- If You Have Certain Medical Conditions: If you have blood clotting issues or are on blood-thinning medication, please talk to your doctor before starting.
A home practice is amazing for maintenance. But if you have a complex skin condition or just feel unsure, I highly recommend booking at least one session with a licensed esthetician who specializes in this. We can teach you the right technique for your specific face shape and help you build the confidence to create a safe and effective ritual at home.
Inspirational Gallery
Rose Quartz: Famous for its cooling touch and often associated with soothing energy, it’s a great choice for sensitive or inflamed skin. Its smooth, glassy surface offers an effortless glide.
Jade: The traditional choice, naturally cool to the touch. In Chinese medicine, it’s prized for its balancing and purifying properties, making it ideal for contouring and lifting.
Bian Stone: A practitioner’s favorite. This stone is said to emit ultrasound pulsations and contain over 40 trace minerals. It often has a slightly more textured feel, believed to enhance its therapeutic effects on circulation.
Ultimately, the best stone is the one you’ll use consistently, but for a step up in therapeutic potential, Bian stone is worth exploring.
Gua Sha (刮痧) literally translates to “scrape sand.” The name refers to the transitory therapeutic petechiae (small red or purple spots) that appear after a traditional body treatment, signifying the release of stagnation. On the face, the pressure is far too light to cause this effect.

- Using the tool at a 90-degree angle. The stone should be held almost flat against your skin (about 15 degrees) to sweep fluid, not dig into muscle.
- Skipping the facial oil. A dry tool will pull and tug at your skin’s delicate surface. A few drops of a quality, non-comedogenic oil like squalane or jojoba is non-negotiable for a proper glide.
- Applying too much pressure. Remember, the lymphatic system is just beneath the skin. Light, gentle pressure is more effective than aggressive scraping.
- Forgetting the neck. All facial drainage pathways lead down. Always start your ritual by opening the channels on your neck and clavicle area.
Beyond the glow, can Gua Sha actually help with my jaw clenching and tension headaches?
Absolutely. The magic here is twofold: lymphatic drainage and myofascial release. By using a curved edge of your tool to gently work along the masseter muscle (your main jaw muscle) and up toward the temples, you can manually release stored tension. This can provide immense relief for TMJ discomfort and tension headaches originating from facial strain. The key is slow, intentional strokes with gentle but firm pressure.
Your Gua Sha tool is a personal skincare item that needs care. After each session, wash it with a gentle soap (your face cleanser works perfectly) and warm water to remove any oil and bacteria. Dry it thoroughly with a soft cloth before storing it. To go a step further into the ritual, some users like to energetically cleanse their stone once a week by placing it in moonlight overnight or smudging it with sage.
A 2007 study at the University of Duisburg-Essen in Germany found that Gua Sha treatment increased surface microcirculation by 400% in the treated area.
This dramatic increase in blood flow is what brings fresh oxygen and nutrients to the skin cells, giving you that immediate, post-treatment radiance and plumpness. It’s scientific proof of the “glow” and shows how the practice supports long-term skin health from deep within, far beyond just moving fluid.
The most overlooked step: Anchoring the skin. Before you glide the tool up a section of your face, use the fingers of your free hand to hold the skin taut at the base of where you are starting the stroke. This provides a stable surface, prevents unintentional skin pulling, and allows the tool to more effectively move the fluid beneath without stressing the epidermis. It’s a small detail that makes a huge difference in results and long-term skin elasticity.


