No Whisk, No Problem: 5 Easy Ways to Make Great Matcha at Home
I’ve spent a long, long time in the world of tea, from sourcing trips in the rolling green hills of Japan to training baristas who had never seen a tea leaf up close. My first real taste of matcha wasn’t some trendy latte; it was a simple bowl prepared by a seasoned expert. The way they worked wasn’t about magic tools, but about a deep understanding of the process. It made me realize something important: the beautiful bamboo whisk, or chasen, is just one way to get the job done.
In this article
- First, Why Matcha Can Be a Little Fussy (And How to Tame It)
- Method 1: The Mason Jar or Shaker Bottle
- Method 2: The Electric Milk Frother
- Method 3: The Immersion (Stick) Blender
- Method 4: The Countertop Blender
- Method 5: The Plain Old Kitchen Whisk
- So, Which Method Is Right for You?
- The Golden Rules for Great Matcha (No Matter the Method)
- Inspirational Gallery
So many people are curious about matcha but get scared off by the traditional gear. They see the whisk, the special bowl, and the bamboo scoop and think it’s an exclusive club. It’s not. Honestly, you can make a fantastic, frothy, and delicious cup of matcha with things you probably already have in your kitchen. This guide is all about that—using everyday tools to nail the principles of good matcha. We’re going to focus on what really matters: getting the texture, temperature, and taste just right.

First, Why Matcha Can Be a Little Fussy (And How to Tame It)
Before you grab a single tool, let’s get one thing straight. Understanding what you’re working with is the secret sauce. This is the ‘why’ behind every step, and it’s what separates a clumpy, frustrating mess from a smooth, creamy dream.
It Suspends, It Doesn’t Dissolve
This is the big one. Matcha is a super-finely ground tea leaf, not a powder that dissolves like sugar or instant coffee. Think of it more like flour in water. If you just dump it in and give it a lazy stir, you get lumps. The goal of whisking, shaking, or blending is to create a suspension, getting those tiny tea particles to hang evenly in the water. By the way, this suspension is temporary. If you let your matcha sit for a few minutes, you’ll see a fine green sediment at the bottom. That’s totally normal!
The Real Enemies: Clumps & Static
High-quality matcha powder is incredibly fine, which is great for texture but also makes it prone to static electricity. This static makes the particles cling together, forming tiny clumps. Trying to break those up once they’re in water is a nightmare. This is why sifting is a non-negotiable first step, no matter what method you use. A small, fine-mesh sieve is your most important tool here, even more so than whatever you use to mix.
What’s the Deal with Foam?
That pretty layer of foam isn’t just for looks. Aerating the tea does two amazing things. First, it creates a creamy, soft texture that completely changes the mouthfeel, mellowing out any bitterness. Second, it releases all those wonderful, sweet, grassy aromas. Our goal with every method below is to create some of that beautiful foam.
Temperature is Everything
The flavor of matcha is a delicate dance between sweet, savory amino acids and slightly astringent catechins. Water that’s too hot—anything over 175°F (80°C)—basically scorches the tea, extracting way too many of the bitter compounds. I’ve seen people ruin pricey ceremonial matcha with boiling water straight from the kettle. It’s a tragedy! The sweet spot is between 165-175°F (74-80°C). If you don’t have a fancy variable-temp kettle, just boil your water and let it sit for about 3 to 5 minutes to cool down.
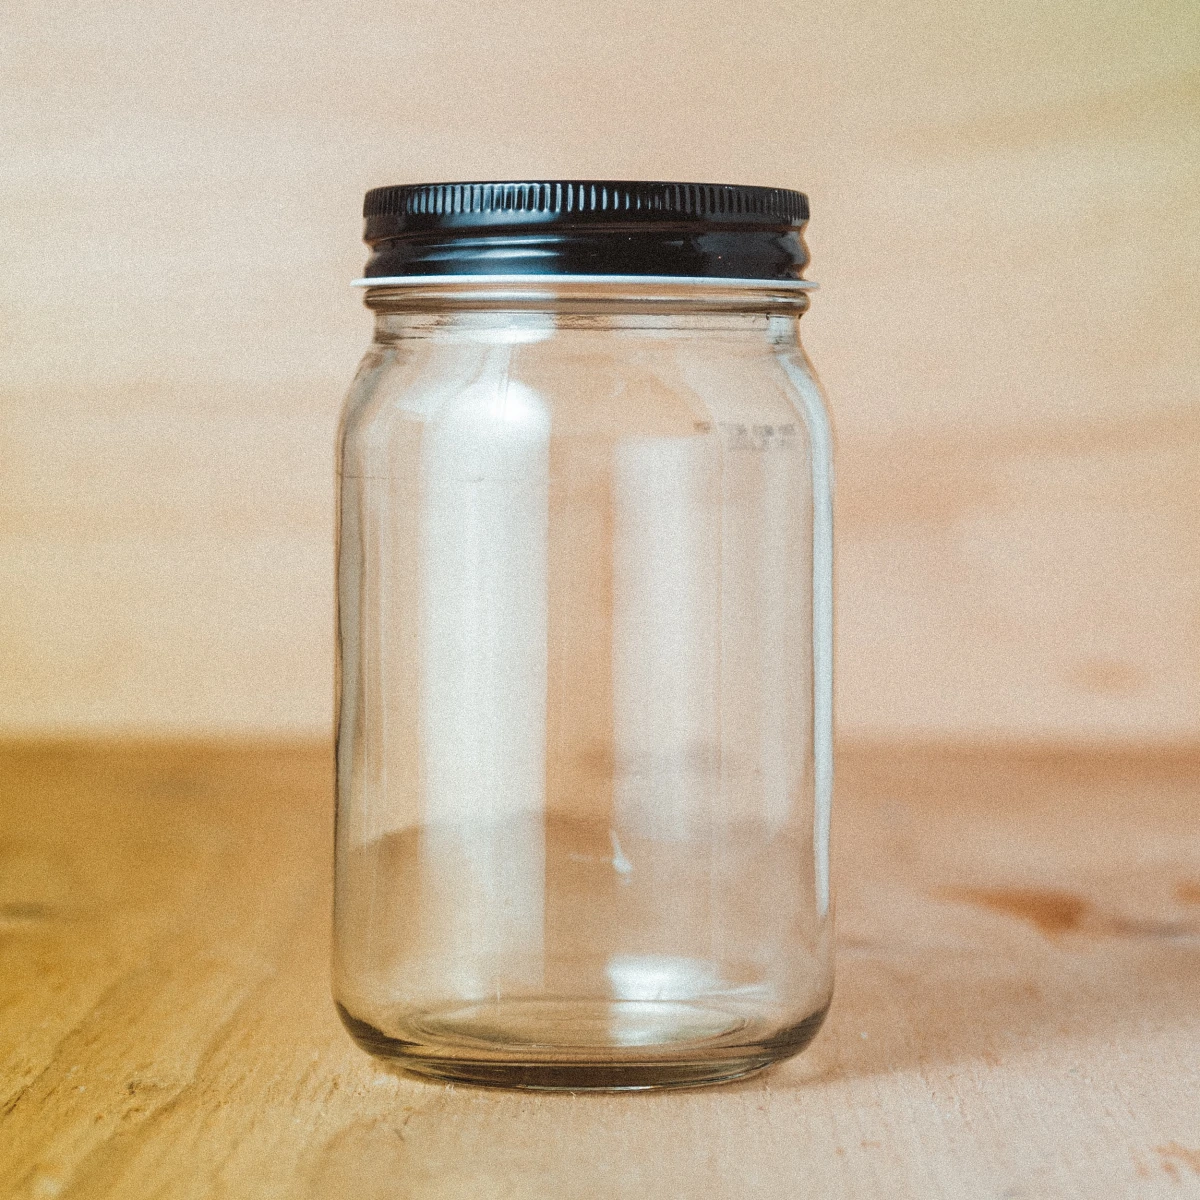
Method 1: The Mason Jar or Shaker Bottle
This is my go-to when I’m traveling or just want a quick iced matcha. It’s incredibly simple and uses pure physics to get a smooth mix. Super effective.
Here’s How You Do It:
- Pick Your Shaker: A small mason jar with a good seal is perfect. A protein shaker bottle with one of those wire whisk balls inside is even better. In a pinch, any clean, leak-proof water bottle will do.
- Sift, Always Sift: Place a small sieve over the jar’s opening. Measure 1 to 2 teaspoons of matcha into the sieve and gently tap it until all the powder falls through. You’ll see the little clumps left behind—that’s the enemy you just defeated.
- Add a Splash of Liquid: Pour in just 2-3 ounces (about 60-90 ml) of cool or cold water. Starting with less liquid helps create a concentrated slurry where the matcha can hydrate fully without clumping.
- Shake It! Seal the lid tightly and shake it like you mean it for a solid 30 seconds. You want sharp, vigorous shakes. You’ll even hear the sound change from a watery slosh to a softer, foamier sound.
- Check and Serve: Open it up. You should see a nice layer of foam and no clumps. Now you can top it off with more cold water and ice, or pour it over your milk of choice for a perfect iced latte.
Heads Up! A Critical Safety Warning: Never, ever use hot water with this method. Shaking hot liquid in a sealed container creates a dangerous buildup of steam pressure. It can literally explode or spray scalding water everywhere when you open it. I saw someone get a nasty burn this way once. It’s a mistake you only make once. This technique is for cold prep ONLY.
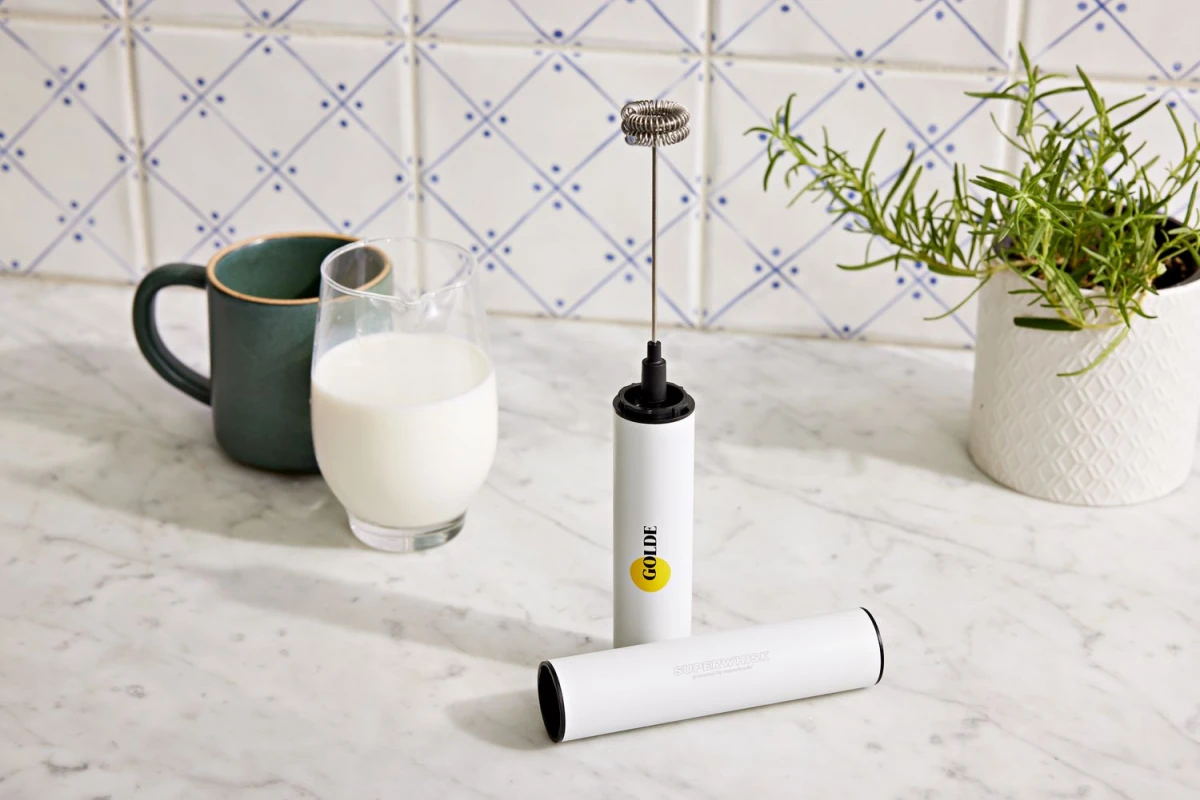
Method 2: The Electric Milk Frother
This is probably the most popular and effective whisk-free method, and for good reason. A handheld electric milk frother is cheap and does an amazing job. Honestly, the results are surprisingly close to the real deal, making this my top recommendation.
Here’s the Trick:
- Grab a Mug: A taller, narrower mug works best to prevent splashing. A standard coffee mug is fine, just be prepared for a tiny bit of cleanup.
- Sift and Make a Paste: Sift 1-2 teaspoons of matcha into your mug. Add about an ounce (30 ml) of hot (not boiling!) water. Before turning the frother on, use its head to stir this into a thick, smooth paste. This is a pro-tip that guarantees a lump-free result.
- Get Frothing: Add another 2-3 ounces of hot water. Submerge the frother head just below the surface and then turn it on. Move it up and down gently and tilt the cup a bit to create a vortex. This motion builds a really fine, stable foam. After about 20-30 seconds, you’re done.
- Serve Right Away: Drink it straight from the mug, or pour your steamed milk in for a cafe-quality latte. The foam is usually strong enough for some simple latte art, too!
Quick Tip: You can grab one of these frothers for about $10-$20 on Amazon or at places like Target. For the price, it’s an absolute workhorse in the kitchen.
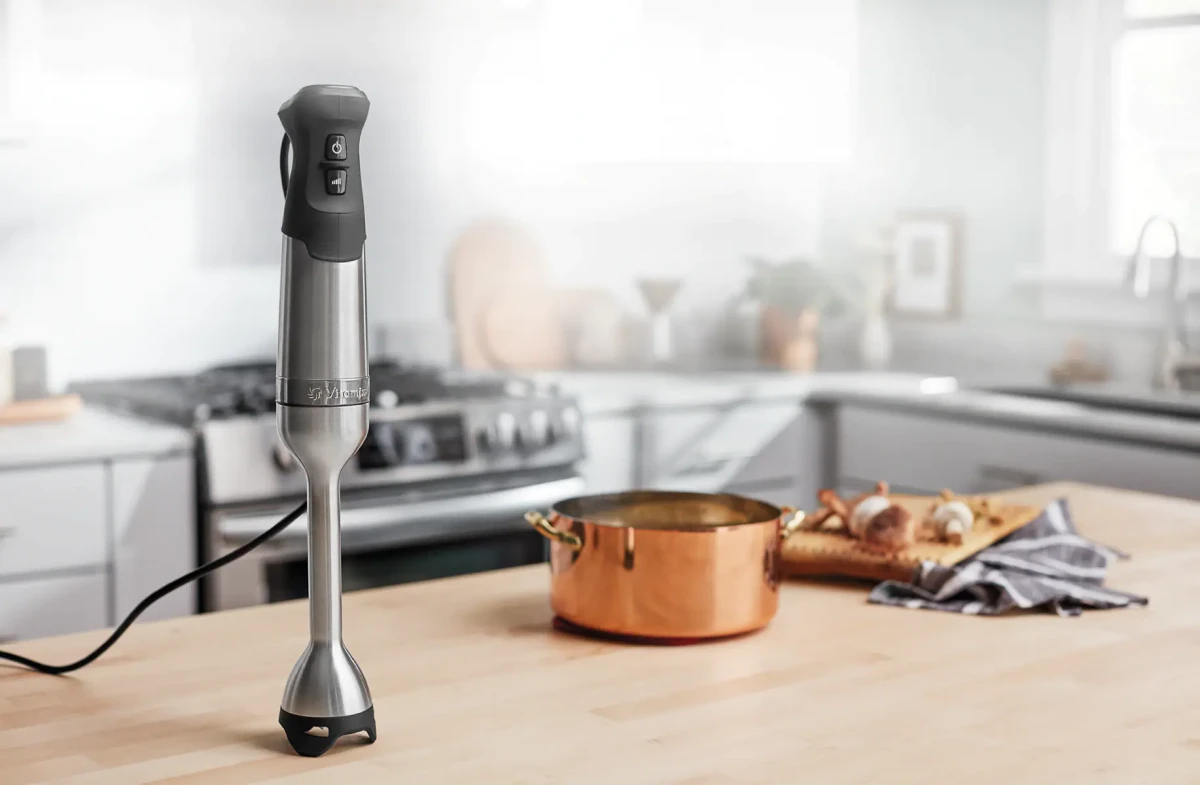
Method 3: The Immersion (Stick) Blender
Think of the stick blender as the milk frother’s super-powered older sibling. It’s a bit much for a single cup, but if you’re making matcha for two or three people, it’s a fantastic tool that guarantees zero lumps.
How to Wield the Power:
- Use the Right Container: That tall plastic beaker that comes with most immersion blenders is your best friend here. It’s deep enough to stop a green Jackson Pollock from appearing on your kitchen walls.
- Sift and Add: Sift 3-4 teaspoons of matcha into the beaker, then add about 8-10 ounces of your hot water or milk.
- Blend with Care: Put the blender head at the very bottom of the beaker before you turn it on. Start with short bursts on the lowest speed to get everything mixed without a huge splash. Then, you can blend steadily for 15-20 seconds.
- Pour and Enjoy: This method creates a very thick, frothy mixture. Just pour it into your mugs and serve immediately.
Oh yeah, and be careful with those blades—unplug it before you even think about cleaning it!
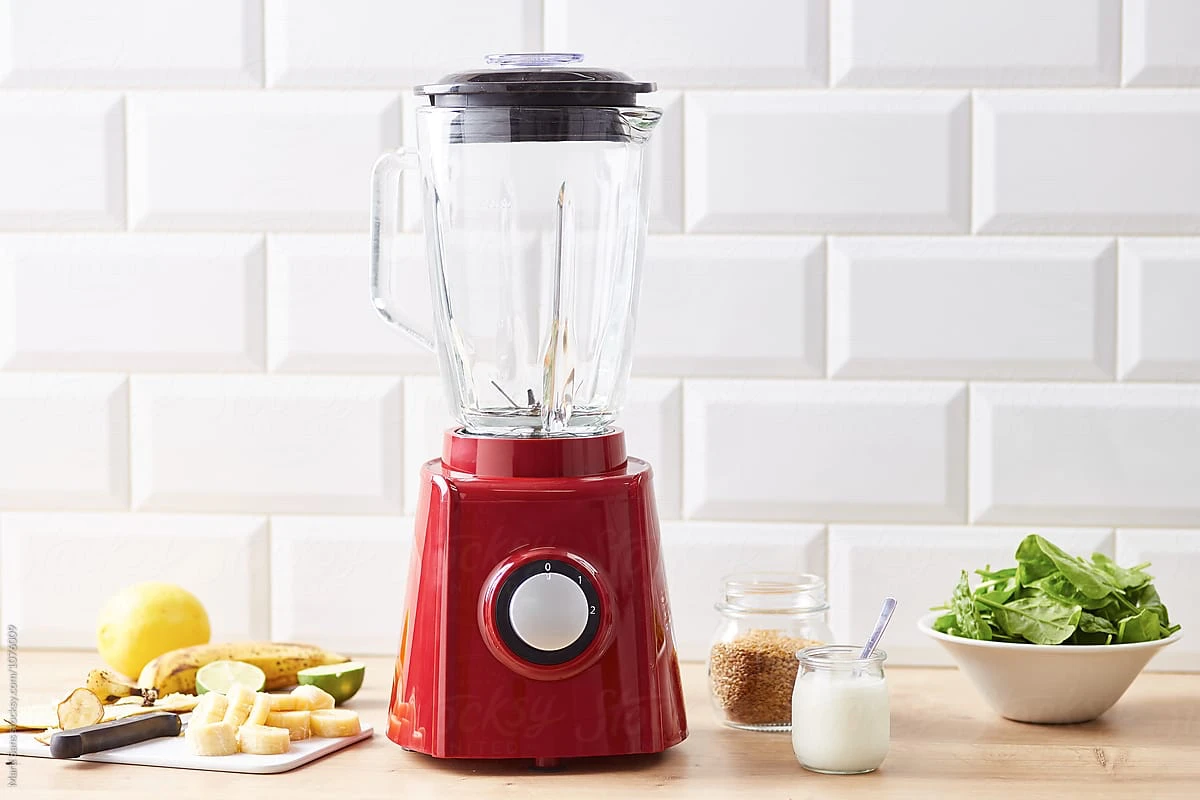
Method 4: The Countertop Blender
The countertop blender is the heavy machinery of the matcha world. I’ll be honest, the cleanup is not worth it for a single cup of tea. But it’s the absolute best for two things: making big batches and mixing in fats (like for a keto or ‘bulletproof’ matcha).
When to Bring Out the Big Guns:
- Measure & Sift: To make a liter of matcha concentrate (great for meal preppers!), sift about 8-10 teaspoons of matcha directly into the blender jar.
- Add Liquid: Pour in a liter of cool water. Using cool water lets you store the concentrate in the fridge for 3-4 days.
- Blend Smart: Secure the lid, start on the lowest speed to get it mixed, then ramp up to medium-high for 30-45 seconds.
- Store or Serve: Pour it into a sealed bottle for the fridge. Remember, it will settle, so give it a good shake before you use it. For a single latte, I usually mix about 2-3 oz of the cold concentrate with 6-8 oz of hot or cold milk.
To be frank, this method is more about convenience and scale than finesse. The high-speed blending can heat the liquid slightly from friction and introduces a ton of air, which can subtly change the taste. It’s my last resort for a single, quiet cup.
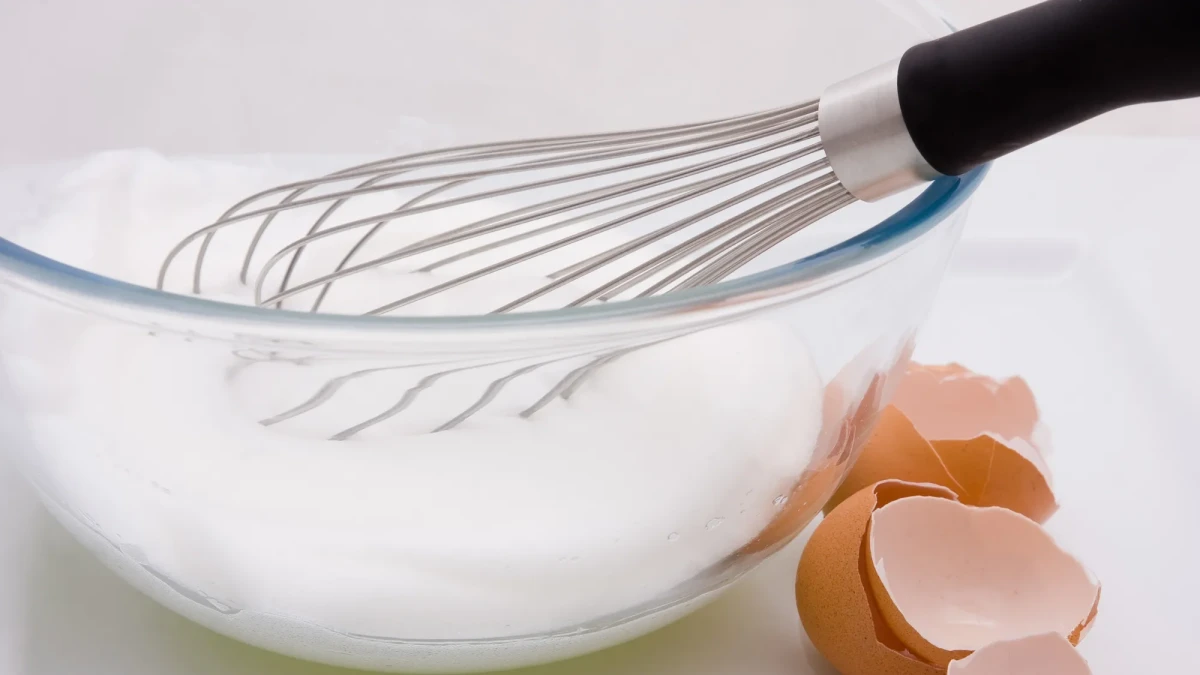
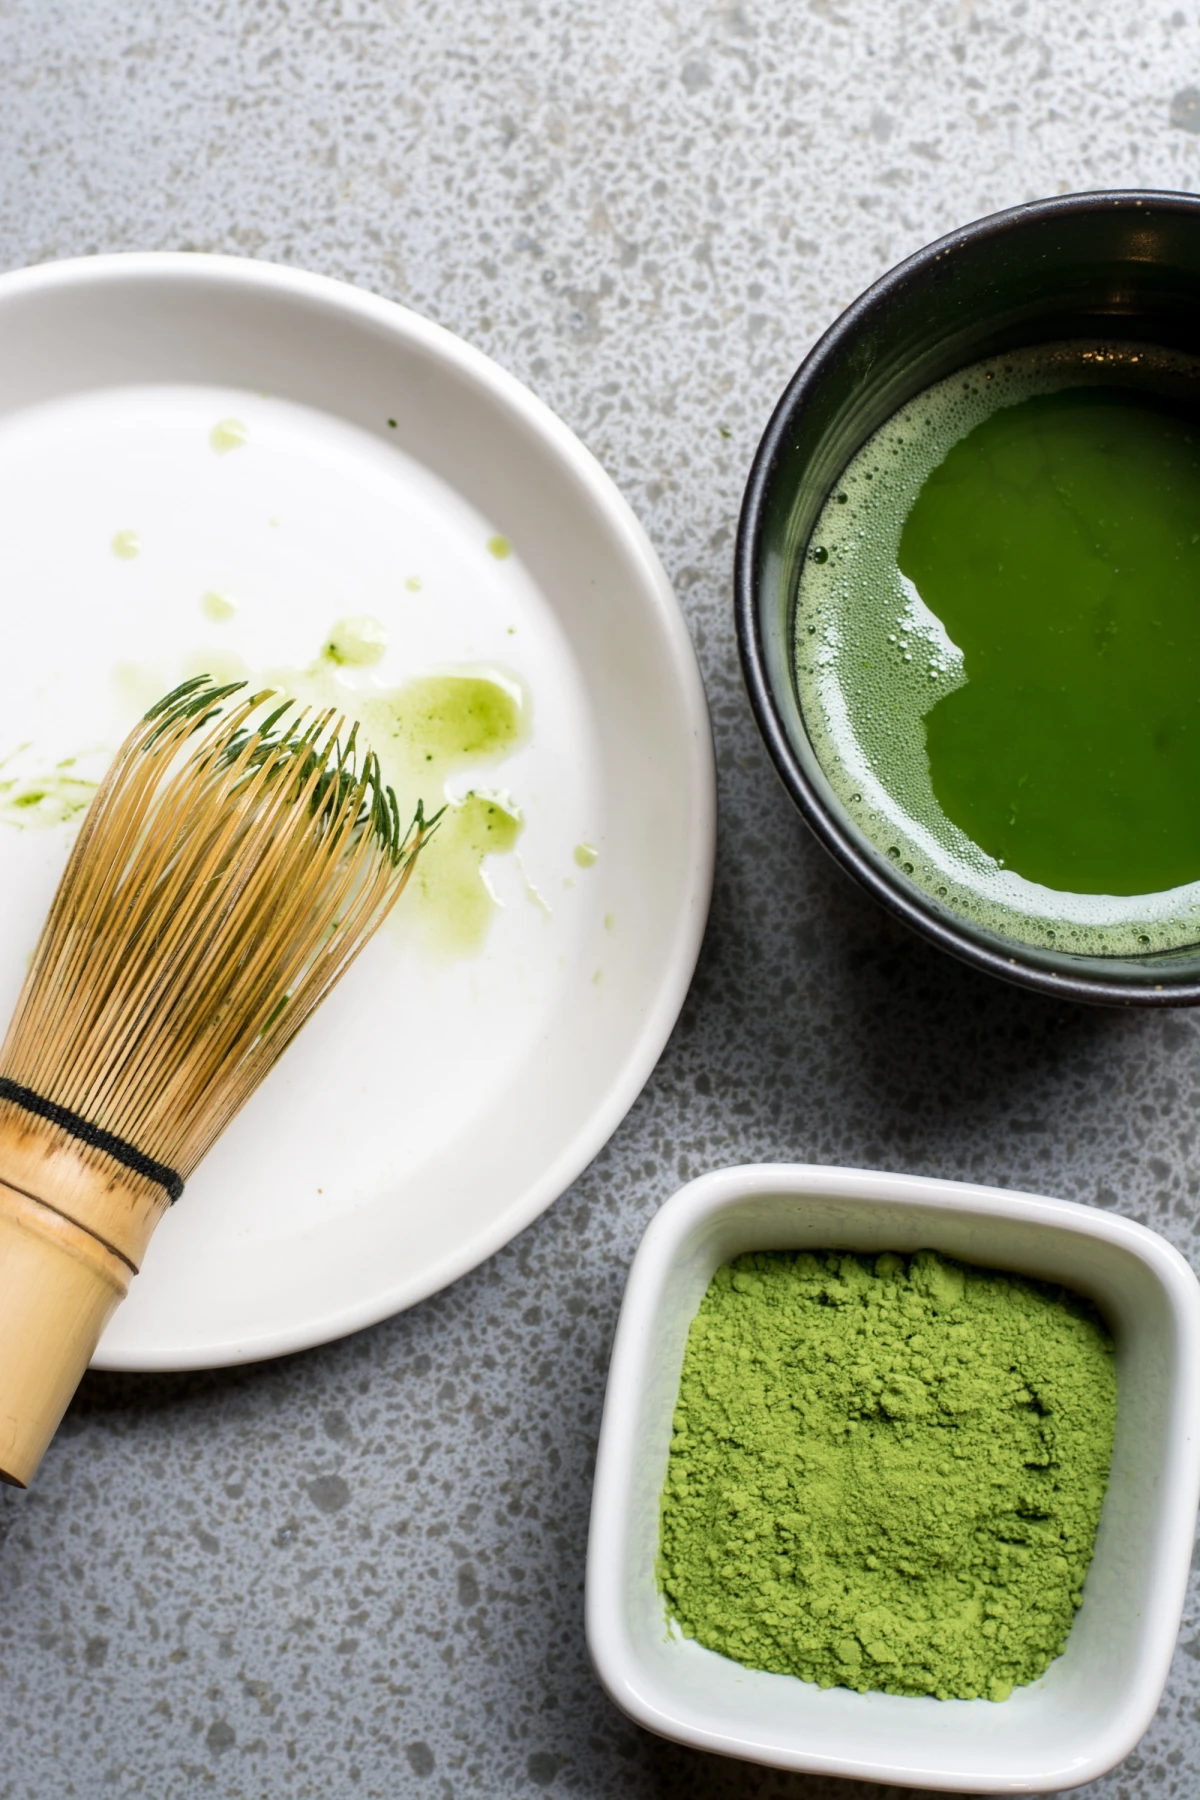
Method 5: The Plain Old Kitchen Whisk
What if all you have is a regular metal balloon whisk? It’s the most work, but it’s doable. The key is to understand why it’s hard.
A bamboo chasen has over 80 fine, flexible tines. Your metal whisk has maybe 10 thick, rigid wires. You have to make up for the tool’s design with pure elbow grease.
Technique for the Determined:
- Use a Wide Bowl: A shallow soup bowl gives you the room you need to move.
- Make That Paste: Sifting and making a paste is more critical here than anywhere else. Sift your matcha, add a tiny splash of hot water, and use the whisk to work it into a perfectly smooth slurry.
- Add Water and Whisk Hard: Add the rest of your hot water (3-4 oz). Now, whisk like crazy. You need a fast back-and-forth or “W” motion, not circles. It’s all in the wrist. Keep it up for at least a minute. Yes, your arm will get tired.
And please, whatever you do, don’t try this with a fork. It’s like trying to paint a wall with a toothpick. You’ll just get frustrated and end up with lumpy, sad tea.
So, Which Method Is Right for You?
Feeling a little overwhelmed? Let’s break it down real quick.
If you crave that creamy, thick foam and want something close to the traditional experience, the electric milk frother is your hands-down winner. It’s cheap, fast, and gives amazing results.
For speed and convenience, especially for iced drinks, the shaker jar is unbeatable. It’s practically zero cleanup and perfect for on-the-go.
If you’re making matcha for a crowd or meal-prepping concentrate, the countertop blender is your workhorse. It’s the most powerful option but also the biggest pain to clean.
And if you’re in a pinch with basic kitchen tools, the hand whisk will get you a lump-free cup, but don’t expect a lot of foam. It’s a workout!
The Golden Rules for Great Matcha (No Matter the Method)
No matter which tool you pick, these three things will make or break your cup. Get these right, and you’re 90% of the way there.
1. Start with Good Matcha. You can’t make good tea from bad ingredients. You’ll see two main grades: Ceremonial and Culinary. Ceremonial is for drinking with just water. It’s made from the youngest leaves and has a sweet, vibrant taste. Culinary is for lattes, smoothies, and baking. It’s a bit more robust and bitter.
Heads up on cost: A 30g tin of good ceremonial grade matcha will probably run you $25-$40, while a bigger bag of culinary grade might be $15-$25. If you’re drinking it straight, the good stuff is worth every penny.
2. A Quick Quality Check. Good matcha should have a vibrant, almost electric green color. When you open the tin, it should smell sweet, fresh, and grassy. If it looks dull, yellowish, or smells like old hay, it’s either low-quality or stale. Skip it.
3. Sift. Always. If you take away only one thing from this guide, let it be this. Sifting your matcha through a fine-mesh sieve takes 20 seconds and solves almost all texture problems. Just do it.
4. Watch Your Water Temp. Remember the rule: 175°F (80°C) is your limit. Hotter water makes bitter tea. It’s a simple law of chemistry you can’t argue with. Respect it, and your matcha will taste amazing.
The traditional tea ceremony is beautiful, but the joy of a good cup of matcha shouldn’t be locked behind a specific set of tools. By understanding what’s actually happening in the bowl, you can get creative and find a method that works for you. So experiment, have fun, and enjoy your delicious, homemade matcha.
Inspirational Gallery
Handheld Frother: An electric milk frother (like those from Zulay or Aerolatte) is your best friend for creating a rich, uniform microfoam in seconds. It’s the closest you’ll get to the texture from a traditional whisk.
A Simple Jar: The
Did you know? The vibrant green color of high-quality matcha comes from its high concentration of chlorophyll. The tea plants are shade-grown for about three weeks before harvest, which boosts chlorophyll production and results in a sweeter, less bitter flavor.
So, when you’re shopping, look for an electric, almost neon green powder. A dull, yellowish, or brownish hue often indicates a lower-grade product or that the matcha is old and has oxidized, losing its delicate flavor profile.
Ceremonial or Culinary Grade: What’s the real difference?
It all comes down to how you plan to use it. Ceremonial grade, from brands like Ippodo or Marukyu Koyamaen, is made from the youngest, most tender tea leaves and is ground to an exceptionally fine powder. It has a smooth, delicate, and naturally sweet flavor, perfect for drinking on its own with just water. Culinary grade is harvested from older leaves, giving it a more robust, slightly more bitter flavor profile that is designed to stand up to other ingredients. It’s the ideal choice for lattes, smoothies, and baking.
- Creates a thick, creamy foam.
- Keeps the flavor pure and umami-rich.
- Preserves the rich antioxidant content.
The secret? Using water that is hot, not boiling. Boiling water (100°C / 212°F) will scorch the delicate tea powder, resulting in a bitter, unpleasant taste. The ideal temperature is between 70-80°C (160-175°F). If you don’t have a temperature-controlled kettle, just boil the water and let it cool for a couple of minutes before mixing.
The vessel you drink from can transform the experience. While a traditional chawan (tea bowl) is wide to allow for whisking, you can capture its spirit with modern choices. A wide ceramic mug allows the rich aroma to greet you with every sip. A clear glass tumbler is fantastic for appreciating the beautiful, cloudy suspension of the tea particles you worked so hard to create. Choose a cup that feels good in your hands and elevates your daily ritual.
Matcha was originally prepared by Zen Buddhist monks in Japan as a form of meditation aid. The ritual of preparing and drinking the tea was a way to foster mindfulness, presence, and a calm state of mind before their meditation sessions.
To protect your matcha’s flavor and vibrant color, proper storage is key. Think of it like a fine spice. Once opened, keep it in an airtight container—the tin it came in is often perfect. Store it in a cool, dark place to shield it from light, heat, and humidity. For ultimate freshness, many experts recommend storing your opened matcha in the refrigerator.
The biggest mistake: Using boiling water. It scalds the delicate powder, creating a harsh, bitter flavor that ruins the entire cup. Always aim for water around 80°C (175°F) to coax out the matcha’s naturally sweet, umami notes.
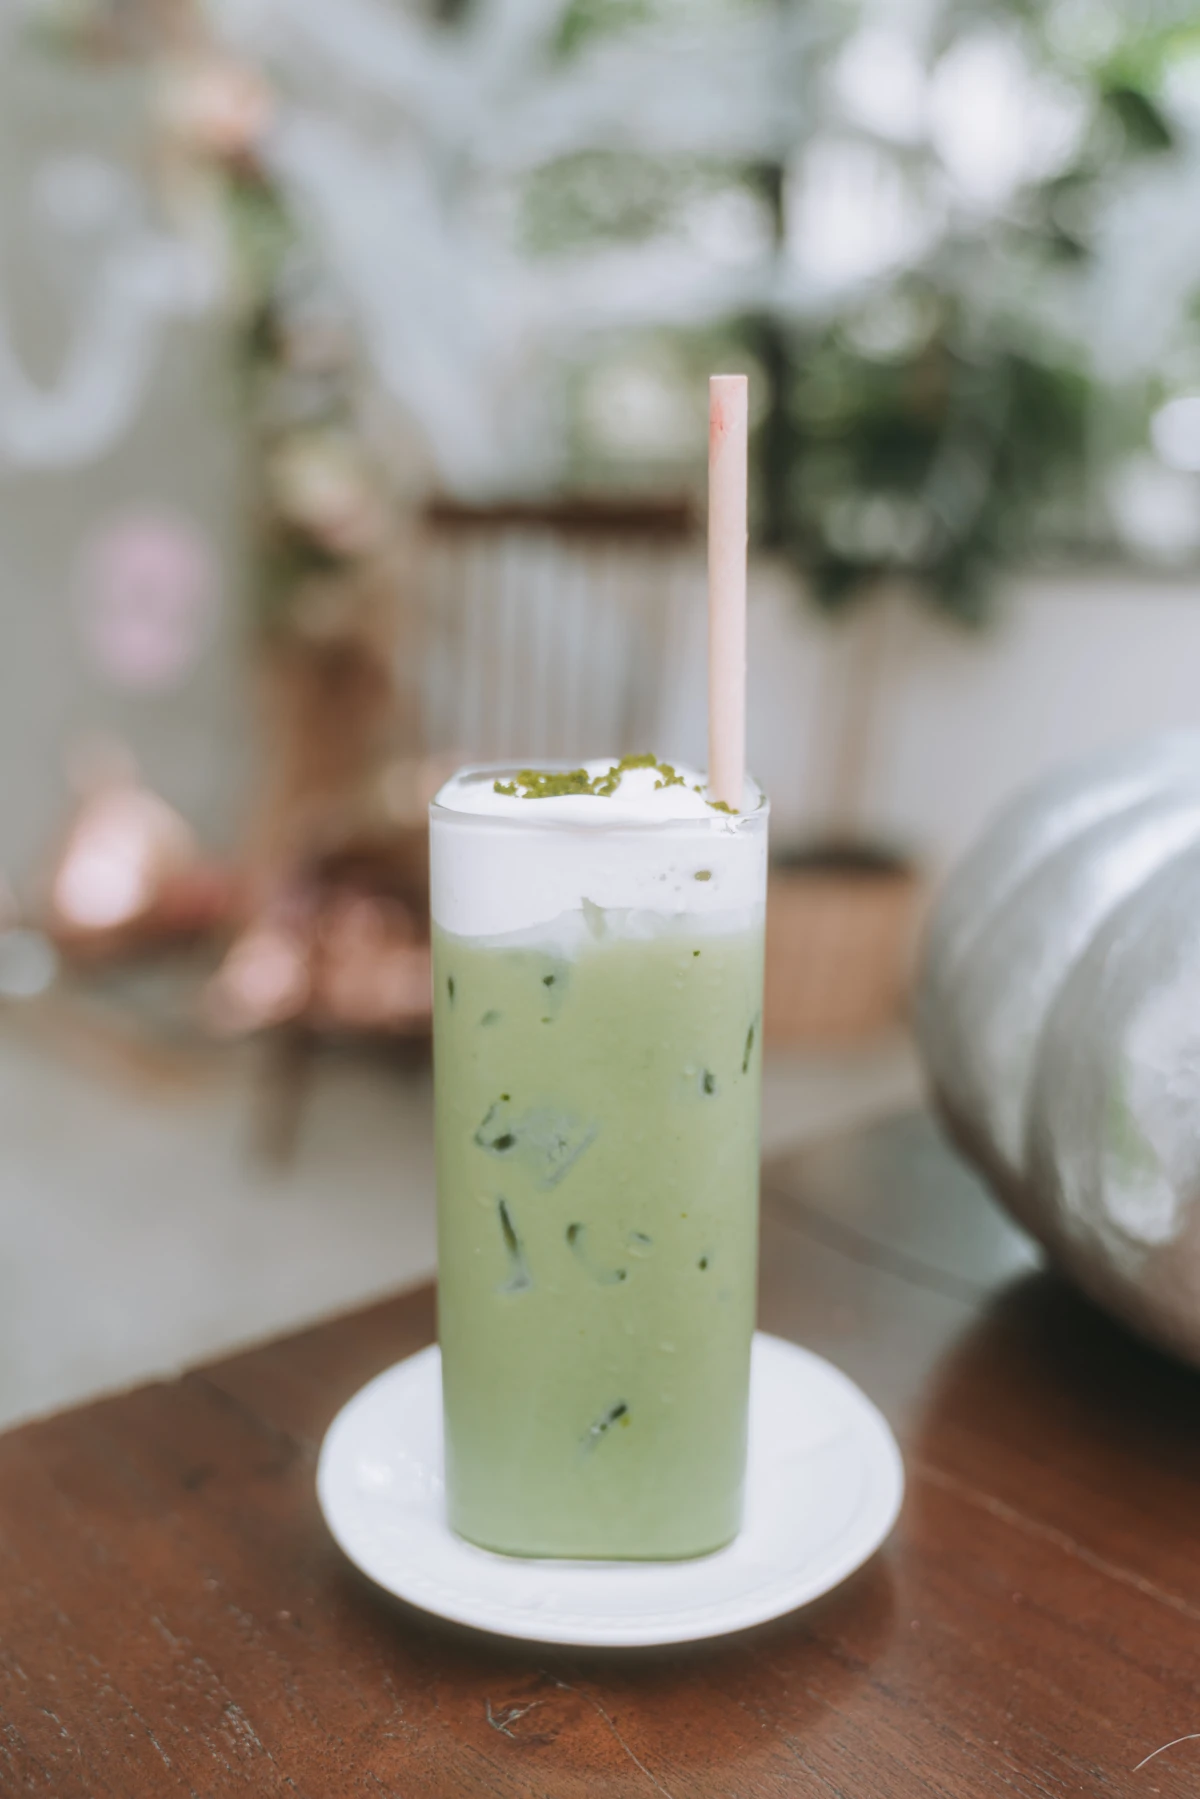
Move beyond the morning latte and try a Sparkling Matcha. Prepare a concentrated shot of matcha using one of the whisk-free methods, then pour it over ice. Top with sparkling water—San Pellegrino or Perrier work beautifully—and add a squeeze of fresh lime or a sprig of mint. It’s a sophisticated, refreshing, and surprisingly simple way to enjoy tea’s green energy boost.


