Forget the Store: How to Make REAL Apple Cider Vinegar at Home
I’ve spent more time than I can count in my kitchen, figuring out how to turn fresh harvests into something that lasts. There’s a certain feel to a good apple, and a special kind of patience you learn from watching something ferment slowly in a cool, dark corner. People always ask me how to make real apple cider vinegar—the good stuff, the living, potent liquid that’s worlds away from what you find in most stores. Honestly, it’s a simple process that connects you to your food and is a fantastic way to eliminate waste.
In this article
Making vinegar isn’t just about following a recipe; it’s more like a partnership with nature. You’re just guiding a beautiful, natural transformation. In this guide, I’m going to walk you through the whole thing, from chopping apples to bottling the final product. We’ll cover the ‘why’ behind the magic, the tools you’ll need, and every single step. This is how you make amazing, safe, and high-quality apple cider vinegar right in your own kitchen.
What You’ll Need to Get Started
Before you run to the store, let’s get organized. You don’t need a bunch of fancy, expensive equipment, but getting the right tools makes all the difference. Here’s a quick shopping list:
- A Big Glass Jar: A one-gallon glass jar is perfect. You can usually find them for about $15 at places like Target, Walmart, or a local hardware store. Food-grade ceramic crocks work too, but whatever you do, never use metal. The acid in the vinegar will eat away at it.
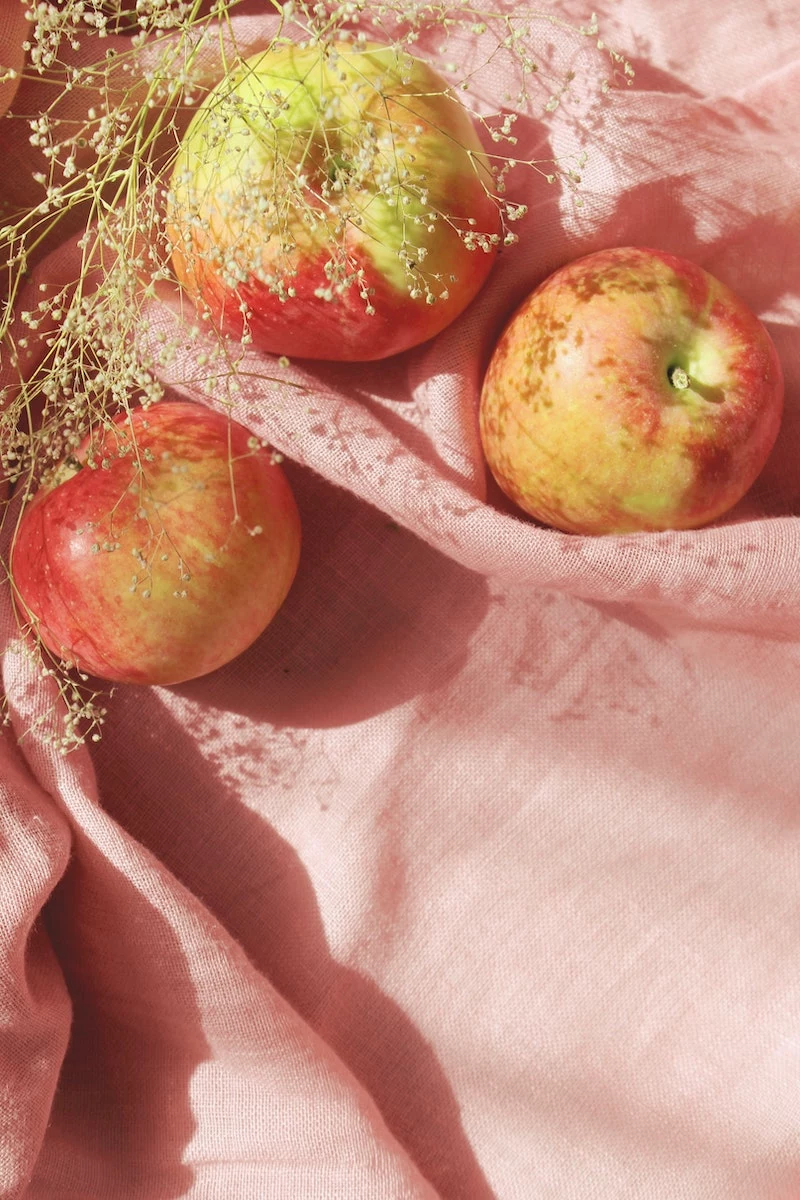
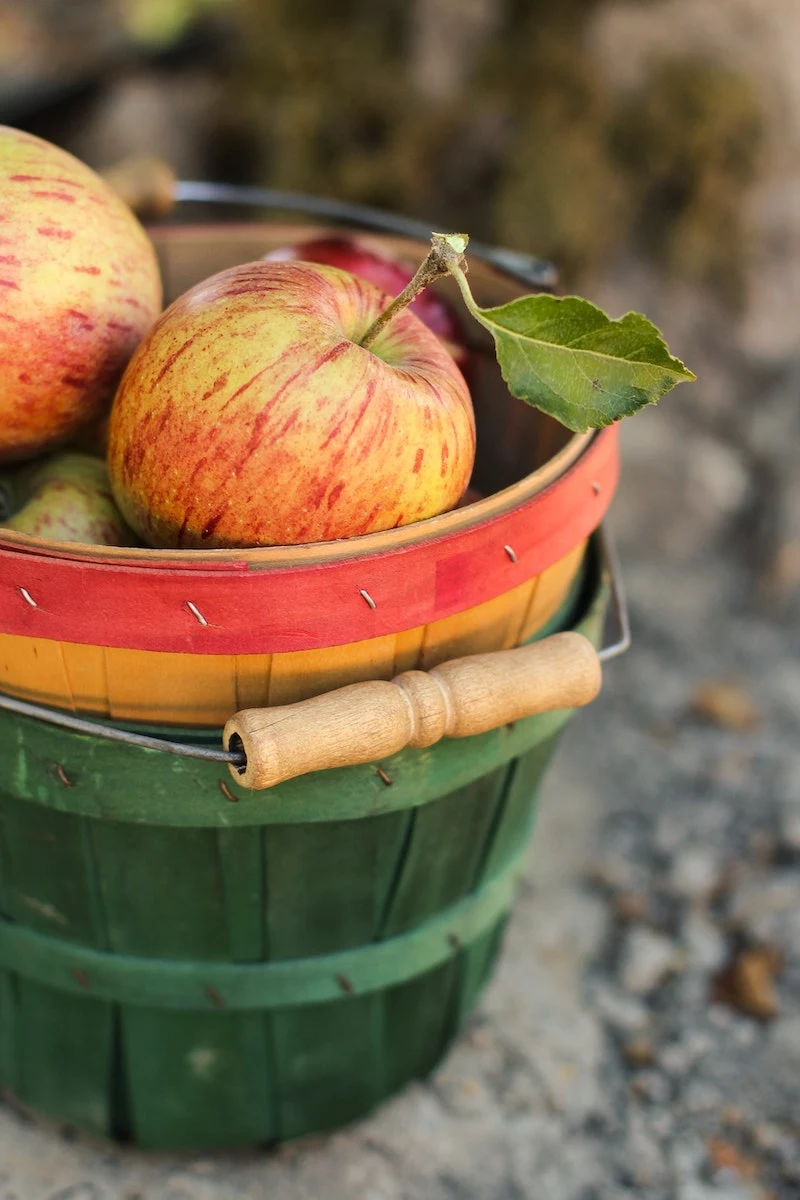
- Apples: About 4-5 pounds of them. This can be a mix of whole apples or just the peels and cores left over from making a pie. More on this in a bit!
- Sugar: Plain white sugar is your best bet for reliability. A standard bag costs just a few bucks and will last you many batches.
- Water: Filtered or spring water is ideal. If you’re using tap water, just let it sit out on the counter for 24 hours to let the chlorine evaporate.
- A Breathable Cover: A few layers of cheesecloth, a clean tea towel, or even a coffee filter works great. You’ll also need a sturdy rubber band or some string to secure it.
- A Long Spoon: A wooden or stainless steel spoon is what you want for stirring.
First, A Quick Peek Under the Hood
Before we start, it helps to understand what’s actually happening in that jar. Knowing the science behind it turns you from someone just following steps into a true ‘maker’ who can troubleshoot on the fly. It’s a two-act play.
Act One: The Boozy Part
This first stage is all about yeast. Tiny, wild yeasts are already hanging out on apple skins and floating in the air. When you mix your apples with sugar and water, these yeasts get to work, eating up all that sugar. As a thank you, they release alcohol and carbon dioxide. You’ll see this as little bubbles rising to the surface. It’s basically turning your apple juice into hard cider. This stage doesn’t need much oxygen, which is why we stir it daily but keep it covered.
Act Two: The Vinegar Transformation
Once the yeast has converted most of the sugar into alcohol, a new crew of microbes called Acetobacter shows up. These little guys are the superstars of vinegar making. They need oxygen to thrive, which is why we use a breathable cloth cover. They consume the alcohol from Act One and turn it into acetic acid—that’s the stuff that gives vinegar its signature sharp, tangy bite. You might see a slimy-looking film form on the surface during this stage. Don’t panic! That’s the ‘mother,’ and it’s a great sign that everything is going according to plan.
Let’s Make Some Vinegar: The Step-by-Step Method
Ready to get your hands dirty? We’ll aim for a one-gallon batch, which is a perfect starting size. Expect to bottle about a half-gallon of finished vinegar from this.
Step 1: Prep Your Apples & Jar (Day 1)
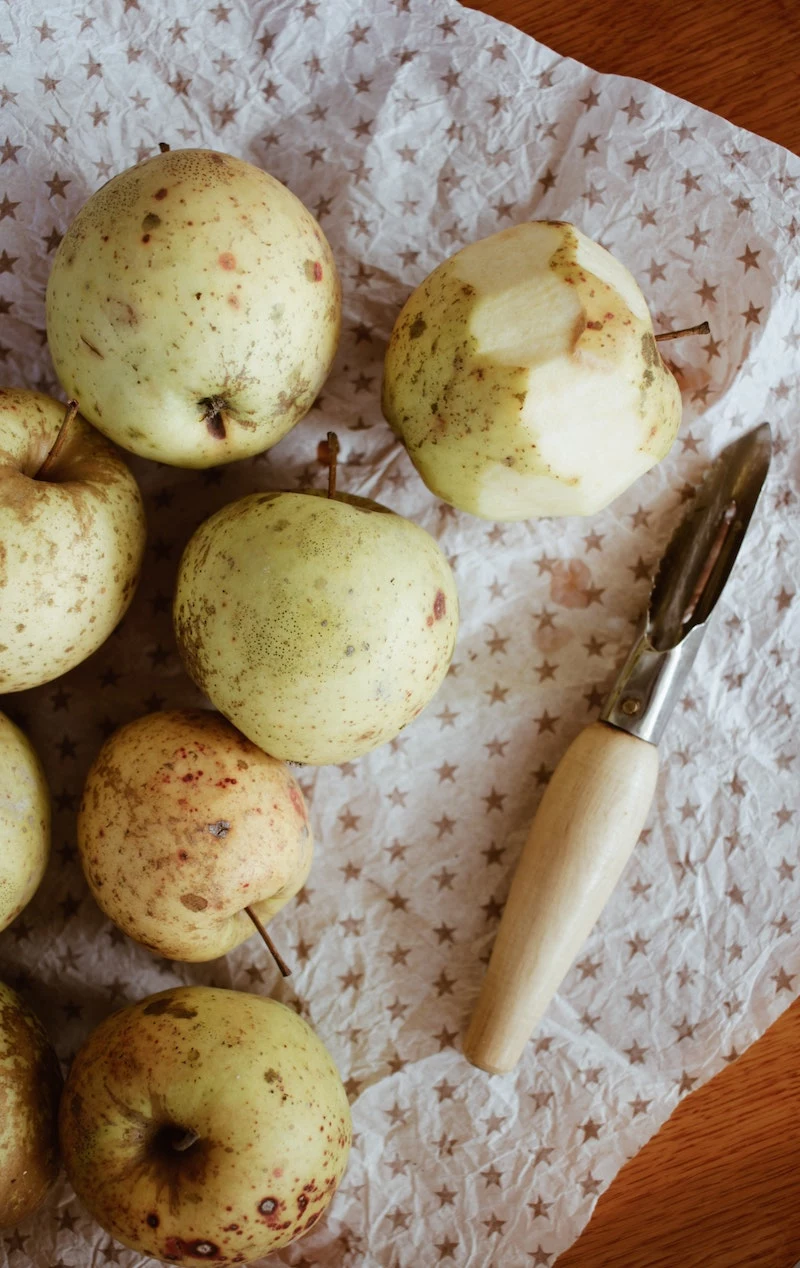
First things first, get everything super clean. I like to sanitize my jar and spoon with a bit of boiling water and let them air dry completely. This helps kill off any unwanted bacteria that could spoil your batch.
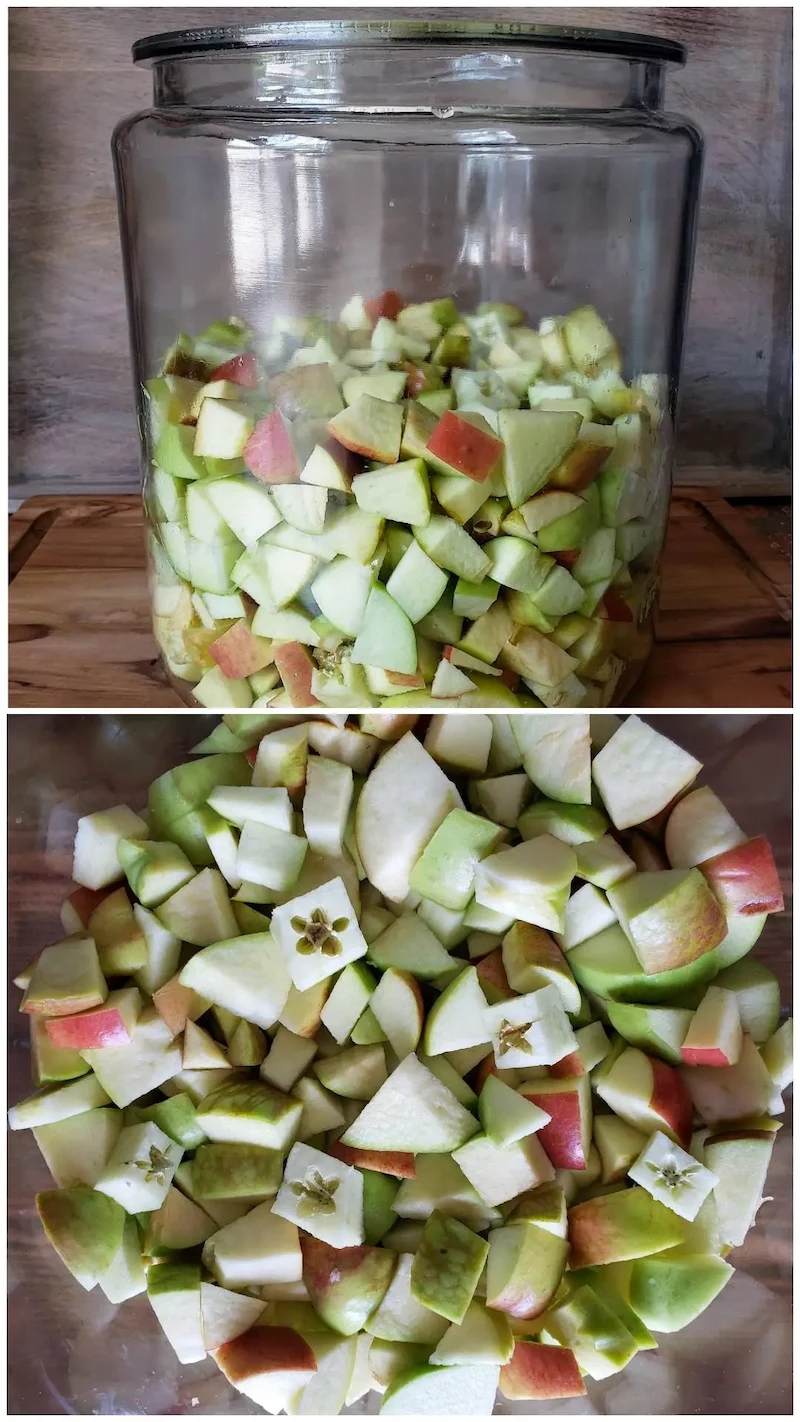
Next, wash your apples well. Chop them into rough one-inch cubes. You can leave the peels and cores in—that’s where a lot of the good stuff is. If you’re using leftover scraps, fantastic! Just be sure to cut away any seriously bruised, soft brown spots. A quick tip: bruised is okay, but moldy is not. Never use moldy apples; it’s a surefire way to ruin your vinegar.
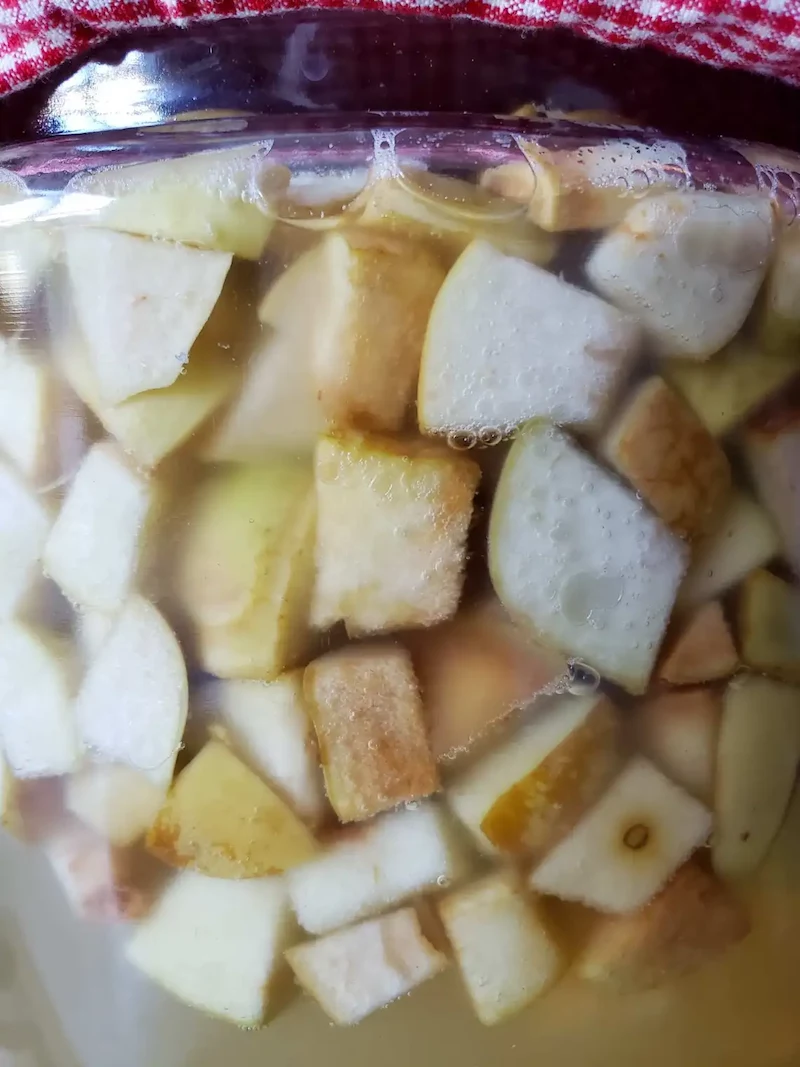
Now, fill your one-gallon jar about halfway to three-quarters full with your apple pieces. Don’t cram them in there; they need some room to breathe.
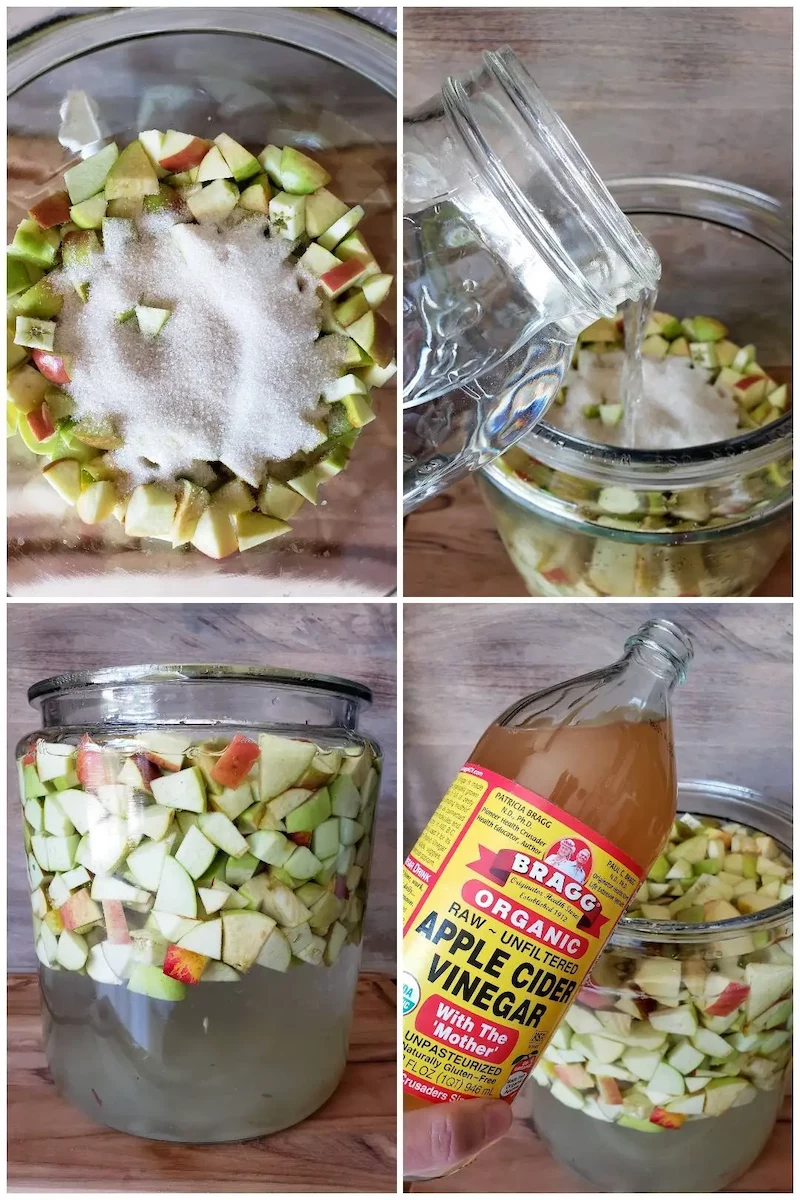
Step 2: Mix the Magic Solution (Day 1)
In a separate pitcher, make your sugar water. A good, safe ratio to start with is 1/4 cup of sugar for every 1 quart (4 cups) of water. For a one-gallon jar, you’ll probably use around 2 quarts of water, so that’s 1/2 cup of sugar. Stir until the sugar is completely dissolved, then pour it over the apples. Add a bit more plain water if needed to make sure the apples are fully submerged, leaving at least 3-4 inches of empty space at the top of the jar.
Heads up: The apples will float. That’s totally normal. We’ll deal with that in the next step.
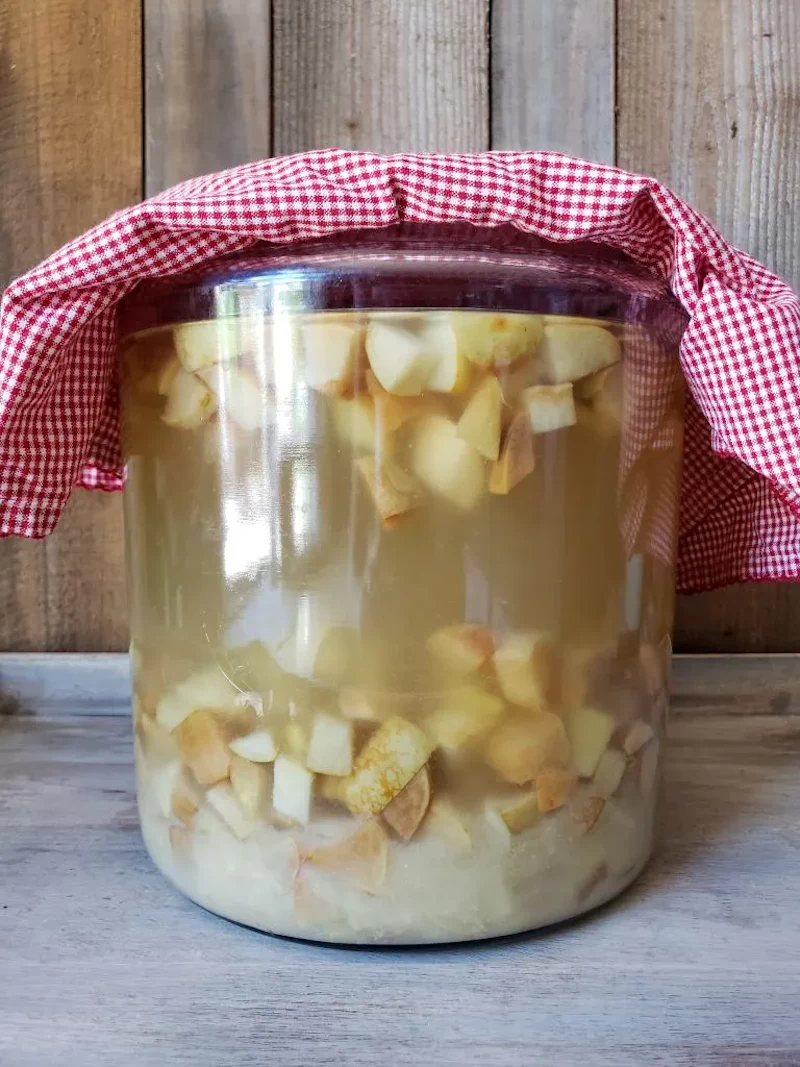
Step 3: The First Ferment (The First 1-2 Weeks)
Cover the jar with your cheesecloth and secure it tightly with a rubber band. Now, find it a home in a warm, dark place—a kitchen cabinet or pantry is perfect. The sweet spot for temperature is between 70-80°F (21-27°C). If your house is a bit chilly, try stashing the jar on top of your refrigerator or near another appliance that gives off a little warmth.
Here’s the most important part of this stage: You have to stir it once a day. Use your long spoon to push the floating apples back down into the liquid. This does two things: it prevents mold from growing on the exposed apples and it helps distribute the yeast. After a few days, you should notice a sweet, slightly boozy smell and see bubbles when you stir. This part usually takes 1 to 2 weeks.
Step 4: Strain & Separate (After 1-2 Weeks)
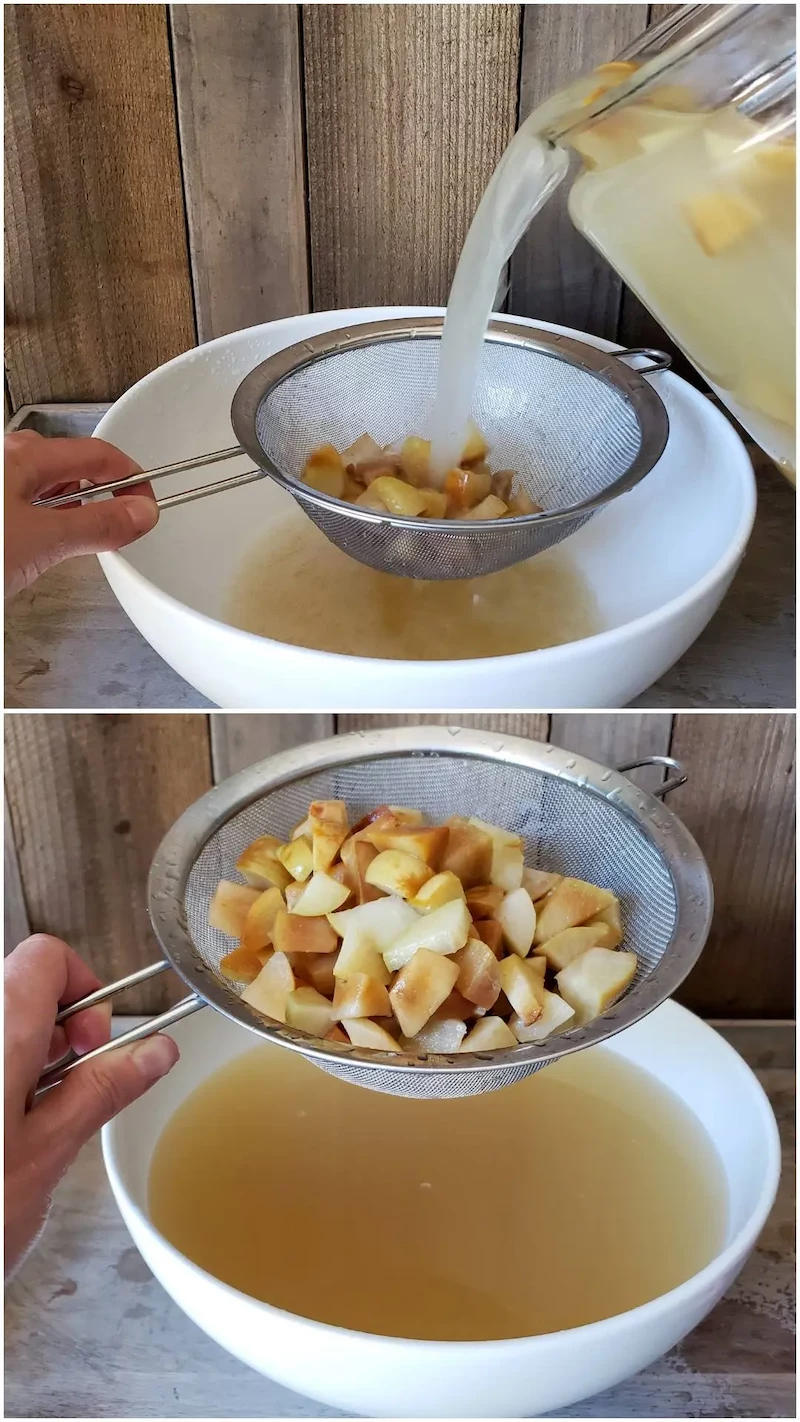
Once the bubbling has died down and the mixture smells more like weak apple cider, it’s time to strain. Place a fine-mesh strainer (lined with cheesecloth for extra clarity) over a big bowl and pour everything through it. Really press down on the apple pulp to squeeze out every last drop of that precious liquid. The leftover pulp is a fantastic addition to your compost pile.
Step 5: The Second Ferment (3-6 Weeks or More)
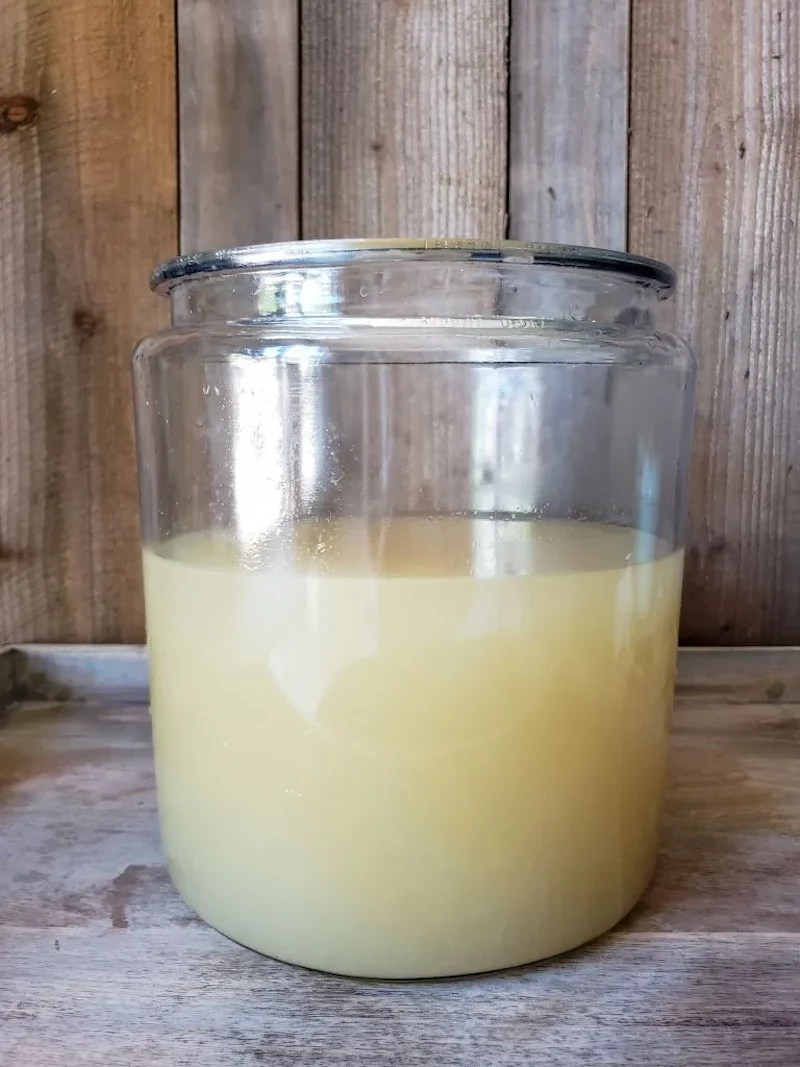
Pour your strained liquid back into a clean glass jar. You can just rinse and reuse the one you started with. This time, you want lots of surface area for oxygen, so make sure the jar isn’t more than three-quarters full. Cover it with the cloth again and put it back in its warm, dark spot.
And now, we wait. The most important rule from here on out is: do not stir it. You want to let the Acetobacter work its magic undisturbed. After a week or two, you might see that gelatinous film I mentioned—the mother. By the way, don’t be scared if it looks weird and alien-like! A healthy mother can be anything from a thin, clear sheet to a lumpy, ugly blob. It’s all good!
This stage can take anywhere from 3 weeks to a couple of months, depending on the temperature. The only real way to know when it’s ready is to taste it.
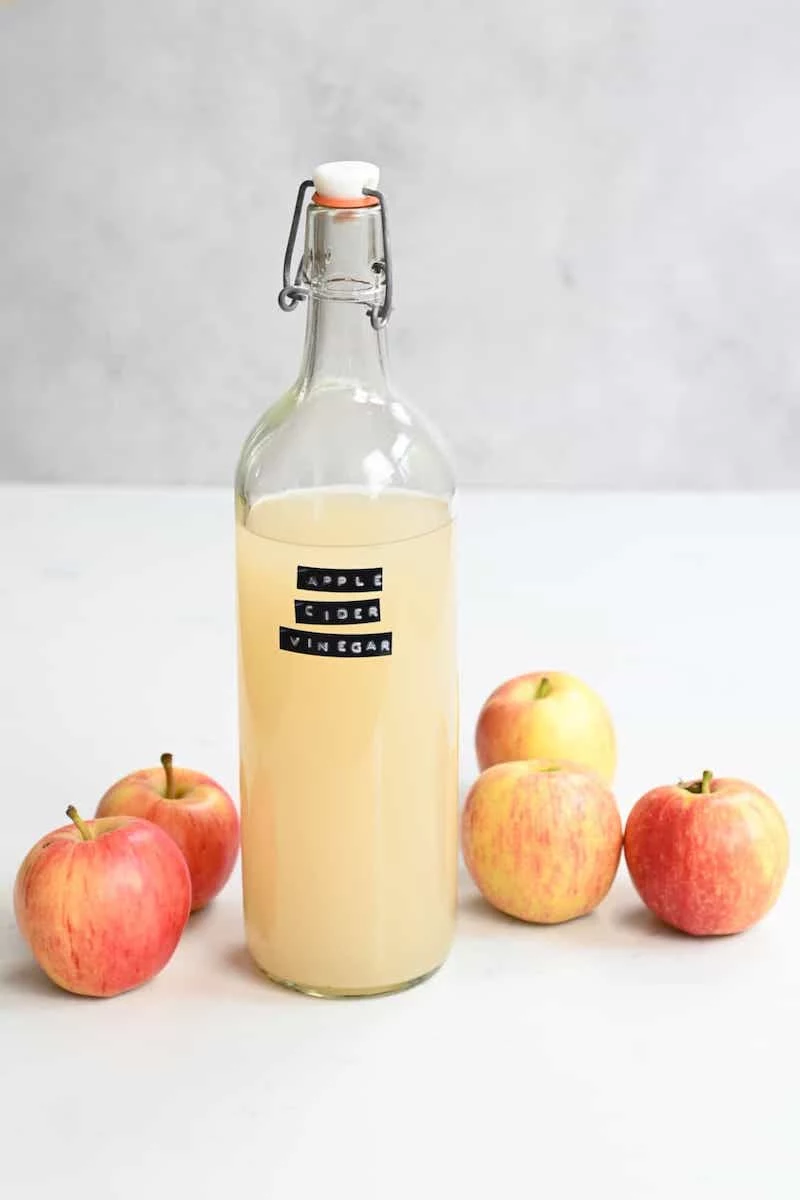
Step 6: Bottle Your Liquid Gold!
After about three weeks, start tasting your vinegar every few days. Use a clean spoon or a straw to sneak a sample from below the surface without disturbing the mother. When it’s got a tangy, sharp flavor that you like (and doesn’t taste sweet or alcoholic anymore), it’s done!
For a more scientific approach, you can grab some food-grade pH strips online for about $10. It’s the only way to be absolutely sure your vinegar is safe for shelf storage. You’re aiming for a pH of 4.0 or lower.
When you’re ready to bottle, carefully remove the mother (you can save it in a small jar with some finished vinegar to kickstart your next batch) and pour the vinegar into glass bottles. Make sure to use non-metal lids—plastic screw caps or corks are perfect. Store it in a cool, dark cupboard, and enjoy. The flavor will only get better with time.
Troubleshooting 101: When Things Go Wrong
So, what happens if things don’t go perfectly? Don’t worry, it happens to everyone. Here are a few common issues and how to handle them.
- Problem: There’s fuzzy black, green, or white mold!
Solution: I hate to say it, but you have to toss the batch. This is non-negotiable. It usually happens if apples weren’t fully submerged or you forgot to stir daily in the first stage. I learned this the hard way years ago with a batch I neglected. Don’t risk it. - Problem: It’s been days and nothing is bubbling.
Solution: It’s probably too cold. Try moving the jar to a warmer spot. If it’s still dead after another 48 hours, you can add a tiny pinch (like 1/8 of a teaspoon) of regular baker’s yeast to give it a kickstart. - Problem: It smells like nail polish remover.
Solution: This acetone smell can happen when the fermentation gets a little out of whack, often from too much oxygen too early. Usually, if you just leave it alone, the smell will dissipate as the vinegar matures and the acetic acid takes over. Give it a few more weeks. - Problem: Fruit flies!
Solution: This means your cover isn’t secure enough. Make sure you’re using a tight-weave cloth (like a tea towel) and that your rubber band is strong. Double up the cloth if you need to. They are drawn to the smell, but you have to keep them out.
Making your own apple cider vinegar is one of the most rewarding kitchen projects you can tackle. It takes a bit of patience, but the result is something you can be truly proud of. Happy fermenting!
Inspirational Gallery
What is that cloudy, gelatinous layer forming in my jar?
Don’t panic—that’s the
Sweet Apples (like Gala or Fuji): These will produce a milder, more rounded vinegar. The higher natural sugar content can sometimes speed up the initial alcohol fermentation, resulting in a smooth, less aggressive final product perfect for drinking shrubs.
Tart Apples (like Granny Smith or Braeburn): Expect a sharper, more intensely flavored vinegar with a classic
Did you know? The ideal temperature for acetic acid fermentation—the step that turns hard cider into vinegar—is between 75-85°F (24-29°C).
If your kitchen is on the cooler side, your fermentation will still work, it will just take significantly longer. Finding a consistently warm spot, like on top of the refrigerator or near a water heater, can help your friendly bacteria work more efficiently and deliver that tangy result sooner.


